Viking Use & Care Manual
Viking Range Corporation
111 Front Street
Greenwood, Mississippi 38930 USA (662)
For product information
call
Freestanding Dual Fuel
Viking Use & Care Manual
Viking Range Corporation
111 Front Street
Greenwood, Mississippi 38930 USA (662)
For product information
call
Freestanding Dual Fuel

Congratulations . . .
Your purchase of this product attests to the importance you place upon the quality and performance of the major appliances you use. With minimal care, as outlined in this guide, this product is designed to provide you with years of dependable service. Please take the few minutes necessary to learn the proper and efficient use and care of this quality product.
We appreciate your choosing a Viking Range Corporation product, and hope that you will again select our products for your other major appliance needs.
Table of Contents
Warnings . . . . . . . . . . . . . . . . . . . . . . . . . . . . . . . . . . . . . . . . . 3 Important Safety Instructions . . . . . . . . . . . . . . . . . . . . . . . . . 4 Cooking Utensils . . . . . . . . . . . . . . . . . . . . . . . . . . . . . . . . . . . 6 Before Your Use Your New Range . . . . . . . . . . . . . . . . . . . . . 6 Using Your Range . . . . . . . . . . . . . . . . . . . . . . . . . . . . . . . . . . 9 Basic Functions of Your Oven . . . . . . . . . . . . . . . . . . . . . . . . .14 Cleaning and Maintenance . . . . . . . . . . . . . . . . . . . . . . . . . .29
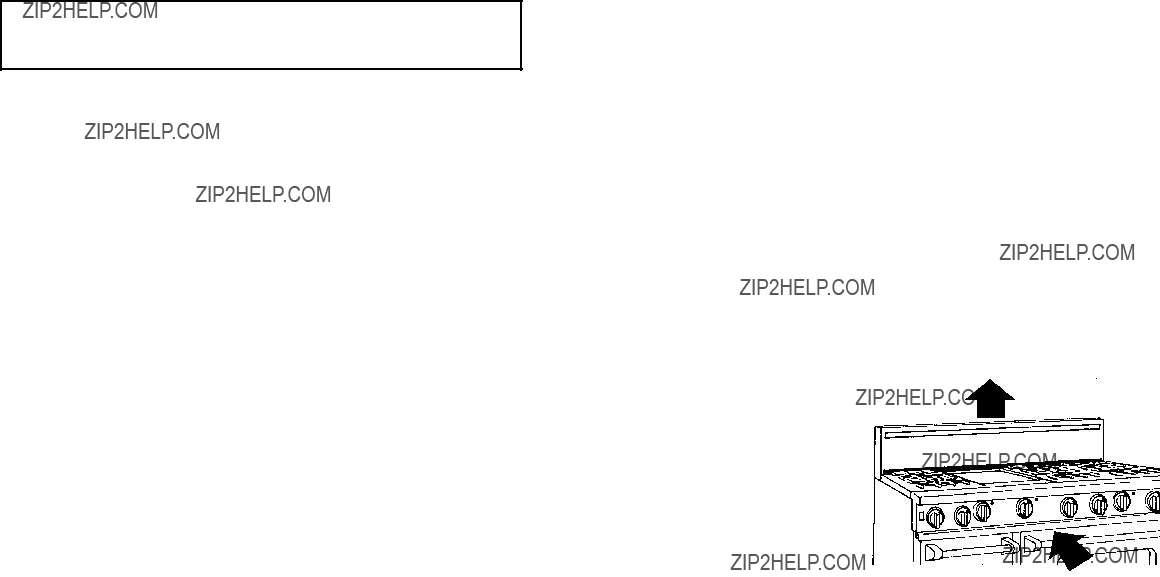
WARNING
???THIS RANGE
 CAN TIP
???INJURY TO PERSONS COULD RESULT
???INSTALL 
 PACED
PACED
WITH RANGE

???SEE
 INSTALLATION INSTRUCTIONS
WARNING
If the information in this manual is not followed exactly, a fire or explosion may result causing property damage, personal injury or death.
 in the vicinity of this or any other appliance.
WHAT TO DO IF YOU SMELL GAS
 any appliance
WARNING
1.Read all instructions before using the product.
2.Install
 or locate
 the product only in accordance with the provided Installation Instructions.
WARNING
NEVER use this appliance as a space heater to heat or warm the room. Doing so may result in carbon monoxide poisioning and overheating of the oven. This warning is based on safety considerations
WARNING
Never cover any slots, holes or passages in the oven bottom or cover an entire rack with materials such as aluminum foil. Doing so blocks air flow through the oven and may cause carbon monoxide poisoning. Aluminum foil linings may also trap heat, causing a fire hazard. This warning is based on safety considerations.
Important Safety Instructions
WARNING
To reduce the risk of fire, electrical shock, injury to persons, or damage when using the oven, follow basic precautions, including the following:
1.Your unit should be installed by a qualified technician. The appliance must be installed and electrically grounded according to local codes. Have this technician show the the location of the gas
2.Do not attempt to repair or replace an part of this appliance unless specifically recommended in this manual. All servicing should be referred to a qualified technician. Warranty service must be performed by an authorized service agency.
3.The
4.GREASE is flammable and should be handled carefully. Do not use water on grease fires. Never pick up a flaming pan. Smother flaming pan by covering utensil completely with
5.Never leave the surface area unattended at high heat setting. Boil- overs cause smoking and greasy
6.If you are ???flaming??? liquor or other spirits under an exhaust, TURN THE FAN OFF. The draft could cause the flames to spread out of control.
7.Wear proper apparel.
8.Never use your oven for storage. This is based on safety considerations.
9.Use proper pan size. Select utensils having flat bottoms large enough to cover the burner. Using undersized utensils allows the flame to come up the side of the utensil, scorching the outside of the utensil and making cleanup harder.
10.Keep area clean and free from combustible material, gasoline, and other flammable liquids.
4
11.The flame of the
12.Use dry pot holders. Moist or damp pot holders on hot surfaces may result in burns from steam. Do not let potholder touch hot surface areas. Do not use a towel or other bulky cloth.
13.To reduce the risk of burns, ignition of flammable materials, and spillage due to unintentional contact with the utensil, the handle of a utensil should be positioned so that it is turned inward toward the center of the range, and so that it does not extend over adjacent burners.
14.Surface areas near burners may become hot enough to cause burns. During and after use, do not touch areas near burners until they have had sufficient time to cool.
15.Once the unit is installed as outlined in the Installation Instructions, it is important that the fresh air supply is not obstructed. The use of a gas cooking appliance results in the production of heat and moisture in the room in which it is installed. Ensure that the kitchen is well- ventilated. Keep natural venting holes open or install a mechanical ventilation device.
Prolonged or intensive use of the appliance may call for additional (such as opening a window) or more effective ventilation (such as increasing the level of a mechanical ventilation if present).
16.The flueway must also remain clear.
17.Storage cabinet area above the unit must be 36??? (91.4 cm) and cannot project more than 13??? (33.0 cm) outward from the rear wall. Beware of potential hazards associated with retrieving items from such cabinets when the unit is in operation.
18.Do not attempt to operate the appliance during power failure.
19.Do not heat unopened food containers; buildup of pressure may cause the container to explode and result in injury.
20.Never sit, step, stand, or lean on any part of the oven, or injury may result.
21.Use care when opening oven door. Let hot air or steam escape before removing or replacing food.
5
22.This appliance is not connected to a combustion products evacuation device. It shall be installed and connected in accordance with current installation regulations giving particular attention to the relevant requirements regarding ventilation.
23.A risk of
24.Do not clean door gasket. It is essential for a good, tight seal. Care should be taken not to rub, damage, or move the gasket.
25.No commercial oven cleaner or oven liner protective coating of any kind should be used in or around any part of the oven.
26.Before
27.WARNING: When
Cooking Utensils
Each cook has his or her own preference for the particular cooking utensils that are most appropriate for the type cooking being done. Any and all cooking utensils are suitable for use in the range and it is not necessary to replace your present domestic utensils with commercial cookware. This a matter of personal choice. As with any cookware, yours should be in good condition and free from excessive dents on the bottom to provide maximum performance and convenience.
NOTE: WHEN USING BIG POTS AND/OR HIGH FLAMES, IT IS
RECOMMENDED TO USE THE FRONT BURNERS. THERE IS MORE
ROOM IN THE FRONT AND POTENTIAL CLEANUP OF REAR OF
APPLIANCE DUE TO STAINING OR DISCOLORATION WILL BE
MINIMIZED.
Before You Use Your New Range
All products are wiped clean with solvents at the factory to remove any visible signs of dirt, oil, and grease which may have remained from the manufacturing process. Before starting to cook, clean the range thoroughly with hot, soapy water
Oven
Before first use, wipe interior with soapy water and dry thoroughly.
6
Steel Griddle/Simmer Plate (if applicable)
The griddle is a
Grill (If applicable)
The grates should be removed and washed in hot soapy water, rinsed and then replaced prior to use. Other grill parts should be removed, dusted, and replaced, making sure that no flammable materials have ben accidentally placed in the grill.
Drip Tray/Pan (If applicable - Griddle or Grill Models only)
The drip tray should be pulled out and checked for flammable materials. Make sure to unwrap the drip pan and replace it in its proper place under the griddle or grill.
Using Your Range
Lighting the Burners
All burners are ignited by electric ignition. There are no open- flame, ???standing??? pilots.
Surface
To light the surface burners, turn the appropriate control knob counter clockwise to any position. This control is both a gas valve and an electric switch. Burners will ignite at any ???on??? position with the automatic reignition system. If the flame goes out for any reason, the burners will automatically reignite if the gas is still flowing. When gas is permitted to flow to the burners, the electric igniters start sparking. On all surface igniters you should hear a ???clicking??? sound. If you do not, turn off the control and check that the unit is plugged in and that the fuse or circuit breaker is not blown or tripped.
Within a few moments, enough gas will have traveled to the burner to be able to light. When the burner lights, turn the burner control to any position to adjust the flame size.
Setting the proper height for the desired cooking process and selected utensil will result in superior cooking performance, while also saving time and energy.
7

Surface Cooking Tips
???Use low or medium flame heights when cooking in utensils that are poor conductors of heat, such as glass, ceramic, and
???Reduce the flame if it is extending beyond the bottom of the utensil. A flame that extends along the sides of the utensil is potentially dangerous, heats the utensil handle and kitchen instead of the food, and wastes energy.
???Reduce the flame height to the minimum level necessary to perform the desired cooking process. Remember that food cooks just as quickly at a gentle boil as it does at a rolling boil. Maintaining a higher boil than is necessary wastes energy, cooks away moisture, and causes a loss in food flavor and nutrient level.
???The minimum utensil diameter recommended is 6???(15 cm). Utensils as small as 4???(10 cm) is possible but not recommended.
TEMPERATURE SETTING GUIDELINES*
*NOTE: The above information is given as guide only. You may need to vary the heat settings to suit your personal requirements.
8
Griddle/Simmer Plate
Turning the thermostat counter clockwise to any ???on??? position activates a
Griddle/Simmer Plate Operation
???Turn the griddle control knob to desired temperature setting. Wait until light cycles off for indication that the desired temperature has been reached.
???Always turn off when not in use, or lower the heat between cooking loads.
Cooking Tips
???Wait until light cycles off for indication that the desired temperature has been reached.
???Use liquid cooking oil, cooking sprays, or butter for eggs, pancakes, French toast, fish and sandwiches. This will help reduce sticking. Meats usually have enough natural oils.
???Remove food particles with a metal spatula during cooking to make the cleanup easier and to avoid including those particles in the food.
???Do not overheat the griddle. Turn it off when not in use, or lower heat between cooking loads.
???After using and cleaning the griddle, the surface should be wiped with a light film of cooking oil to protect the finish from rust and corrosion.
Griddle Cooking Chart
9

Grill Operation
???Turn on kitchen ventilation product. ???Turn grill control knob to HI. ???Preheat on HI for 5 to 10 minutes. ???Place food on grill, cook as desired.
Grill Cooking Tips
???When grilling chicken, roasts, well done steaks or chops and thick pieces of meat, sear on HI. Then, reduce the heat setting to prevent excessive
???After steaks, chops, or hamburgers have been allowed to sear for approximately 1 minute, you may slide a spatula under the meat and turn it approximately 900 so that a waffle pattern will be seared onto the food.
???Use a metal spatula instead of tongs or a fork to turn the meat. A spatula will not puncture the meat allowing juices to escape.
???Turn the meat over only once. Juices are lost when steaks, chops or hamburgers are turned several times. The best time to turn the meat is after the juices have begun to bubble to the surface.
???To test for doneness, make a small slash in the center of the meat, not the edge. This will prevent loss of juices.
???Occasionally there may be
Grill Cooking Chart

Grill Cooking Chart
Cooking Substitute Charts
In many cases, a recipe requires an ingredient which is not readily available or calls for a unit of measure that is not easily recognized. The following charts have been provided as useful guides in these situations.
*Rounded for easier measuring
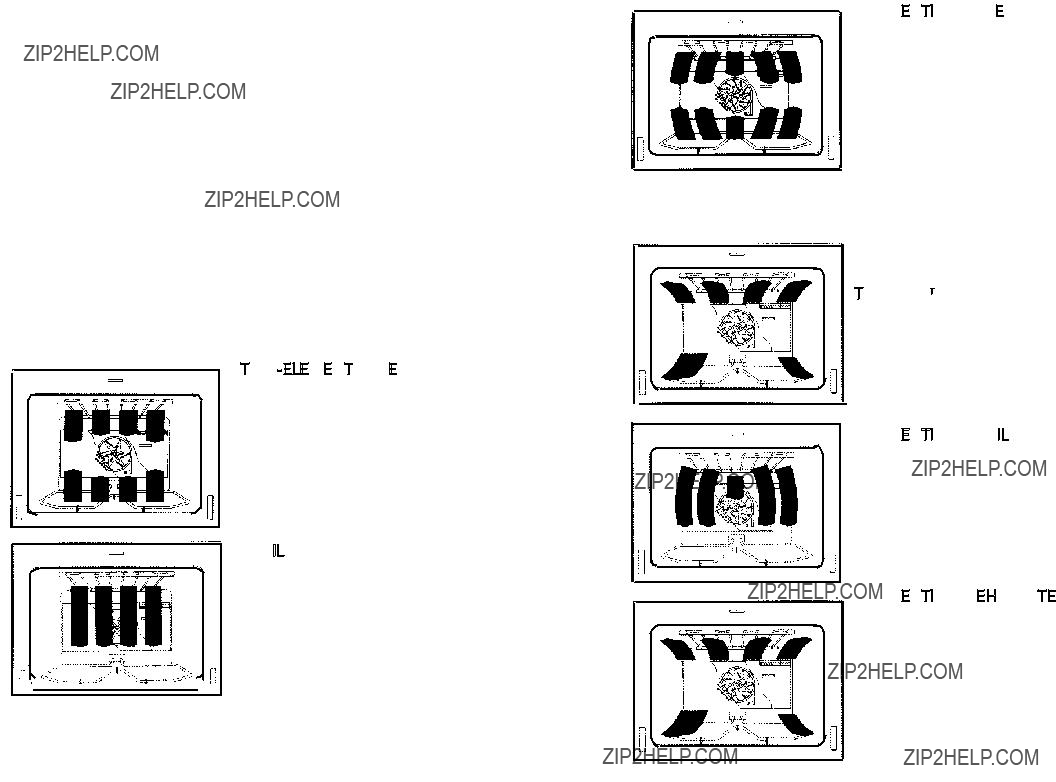
Basic Functions of Your Oven


Full power heat is radiated from the bake element in the bottom of the oven cavity and partial power is radiated from the broil element in the top. Air is circulated with natural airflow. This is the traditional bake setting
BROIL
In
14
CONVECTION BAKE

Full power heat is radiated from the bake element in the bottom of the oven cavity and partial power is radiated from the broil element. Air is circulated by the motorized fan in the rear of the oven. It provides more even heat distribution throughout the oven cavity for all uses. Multiple rack use is possible for the largest baking job. When roasting, cool air is quickly replaced - searing meats on the outside and retaining more juices and natural flavor on the inside with less shrinkage.
TruConvecTM
The rear element only operates at full power. Air is circulated by the fan for even heating. Use this setting for foods which require gentle cooking such as pastries and souffles.
CONVECTION BROIL
Exactly the same as regular broiling with the additional benefit of air circulation by the motorized fan in the rear of the oven. The cool air is quickly
CONVECTION DEHYDRATE

With the temperature control on 1750F (79.4 0C), warm air is radiated from the bake element in the bottom of the oven cavity and is circulated by a motorized fan in the rear of the oven. Over a period of time, the water is removed from the food by evaporation. Removal of water inhibits growth of microorganisms and retards the activity of enzymes. It is important to remember that dehydration does not improve the quality , so only fresh, top- quality foods should be used.
15
CONVECTION DEFROST
With temperature control off, air is circulated by a motorized fan in the rear of the oven. The fan accelerates natural defrosting of the food without heat. To avoid sickness and food waste, do not allow defrosted food to remain in the oven for more than two hours.
 -CLEAN
This range features an automatic pyrolytic
Temperature Controls
Each oven has a temperature control dial. The control can be used be set at any temperature from 1750F (79.40C) to 5500F (2880C), broil, or
Preheating
Preheating the oven is not necessary when using temperatures below 2500F (1210C). For best results, it is extremely important that you preheat the oven when baking cakes and other items that have critical baking temperatures. After the temperature control has been set, the Oven Indicator light goes out when the oven reaches that temperature.
This conventional baking/roasting is particularly suitable for dishes which require a high temperature. Many cookbooks contain recipes to be cooked in the conventional manner. This bake setting is only recommended for
Proofing
This setting is designed for allowing yeast dough to rise at a temperature between 850F (290C) and 1000F ( 380C). Yeast doughs rise or ???proof??? best when the temperature is between 850F (290C) and 1000F (380C). To make sure the dough is warm enough, cover the bowl loosely with plastic wrap and/or cloth towel. Turn the oven function selector to ???PROOF???. Do not turn the temperature control. Place the bowl on the center rack of the oven and close the door. When you think the dough has doubled in size, lightly poke 2 fingers about 1/2??? (1.3cm) into the dough. If the indentation remains, the dough has risen enough.
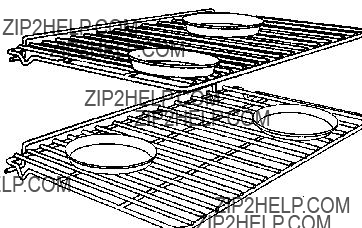
Rack Positions
Each convection oven is equipped with three
Position 6
Position 5
Position 4
Position 3
Position 2
Position 1
Convection Baking
Convection baking is the process of cooking food with a flow of heated air circulating throughout the oven cavity. The even circulating of this air equalizes the temperature throughout the oven cavity and eliminates the hot and cold spots found in conventional ovens. This feature can make a significant difference in foods prepared in the oven.
A major benefit of convection baking is the ability to prepare food in quantity. The uniform air circulation makes this possible . . . a feature not possible in a standard oven. With this heating system, the air is distributed evenly throughout the oven by the hot air fan. The heat therefore reaches the food to be baked or roasted more quickly. With this heating method, foods can be baked and roasted at the same time with minimal taste transfer, even when different dishes are involved, such as cakes, fish, or meat. The hot air system is especially economical when thawing frozen food.
Pan Placement Tips
???When using large (15??? x 13??? [38 cm x 33 cm]) flat pans or trays that cover most of the rack, rack positions 2 or 3 produce the best results.
???Stagger pans in opposite directions when two racks and several pans are used. No pan should be directly above
another. ???Allow 1 1/2??? to 2???
(3.8 cm to 5.1 cm) of air space around all sides of each pan for even air circulation.
???When baking on more than one rack, it is recommended to use the 3rd and 5th position for more consistent even baking.
18
To Bake:
1.Arrange the oven racks in the desired position BEFORE heating the oven. If cooking on two racks at the same time, use rack positions 3 and 5.
2.Turn the Oven Function selector to desired function. Set the
Temperature Control to the desired temperature. Cooking starts immediately. Cooking stops when the Oven Function selector is turned to OFF.
4. Place the food in the oven after the Oven Indicator light goes out.
Baking Tips
???As a general rule, to convert conventional recipes to convection recipes, reduce the temperature by 250F (140C) and the cooking time by approximately 10 to 15%.
???Some recipes, especially those that are homemade, may require adjustment and testing when converting from standard to convection modes. If unsure how to convert a recipe, begin by preparing the recipe in conventional bake. After achieving acceptable results, follow the convection guidelines listed for the similar food type. If the food is not prepared to your satisfaction during the first convection trial, adjust only one recipe variable at a time (cooking time, rack position, or temperature) and repeat the convection test. Continue adjusting one recipe variable at a time until satisfactory results are achieved.
???Make sure the oven racks are in the desired positions before you turn the oven on and for best results, always preheat the oven.
???Do not open the oven door frequently during baking. If you must open the door, the best time is during the last quarter of the baking time.
???Bake to shortest time suggested and check for doneness before adding more time. For baked goods, a stainless steel knife placed in the center of the product should come clean when done.
???Use good quality baking pans and sizes recommended in the recipe; warped, dented, or burned pans should not be used.
???Shiny metal pans are preferred for baking items such as cakes, cookies, and muffins because they produce light, golden crusts due to
heat being reflected by the metal.
???Glass pans may also be used for cake baking. Reduce the oven temperature by 250F (140C) when using a glass pan, but bake for the same amount of time called for in the recipe.
???Pies are best baked in pans which absorb and hold heat. Glass, enamel,
19
Conventional Baking Chart
*NOTE: The above information is given as guide only. You may need to vary the heat settings to suit your personal requirements.
Convection Baking Chart
*NOTE: The above information is given as guide only. You may need to vary the heat settings to suit your personal requirements.
Solving Baking Problems
Baking problems can occur for many reasons. Check the chart for the causes and remedies for the most common problems. It is important to remember that the temperature setting and cooking times you are accustomed to using with your previous oven may vary slightly from those required with this oven. If you find this to be true, adjust your recipes and cooking times accordingly.
Conventional/Convection Roasting Tips
Always use the broiler pan and grid supplied with each oven. The hot air must be allowed to circulate around the item being roasted. Do not cover what is being roasted. Convection roasting seals in juices quickly for a moist, tender product. Poultry will have a light, crispy skin, and meats will be browned, not dry or burned. Cook meats and poultry directly from the refrigerator. There is no need for meat or poultry to stand at room temperature.
???Always roast meats fat side up. No basting is required when the fat side is up. Do not add water to the pan, as this will cause a steamed effect. Roasting is a
???Poultry should be placed breast side up on the grid in the broiler pan. Brush poultry with melted butter, margarine, or oil before and during roasting.
???For convection roasting, do not use pans with tall sides, as this will interfere with the circulation of heated air over the food.
???If using a cooking bag, foil tent, or other cover, use conventional baking rather than convection.
???When using a meat thermometer, insert the probe halfway into the center of the thickest portion of the meat. (For poultry, insert the thermometer probe between the body and leg into the thickest part of the inner thigh.) The tip of the probe should not touch bone, fat, or gristle to ensure an accurate reading. Check the meat thermometer 2/3 of the way through the recommended roasting time. After reading the thermometer once, insert it 1/2??? (1.3 cm) further into the meat, then take a second reading. If the second reading registers below the first, continue cooking the meat.
???Roasting times always vary according to the size, shape, and quality of meats and poultry. Less tender cuts of meat are best prepared in the conventional bake setting and may require moist cooking techniques. Remove roasted meats from the oven when the thermometer registers 50F to 100F (2.80C to 5.50C) lower than the desired doneness. The meat will continue to cook after removal from the oven. Allow roasts to stand 15 to 20 minutes after roasting to make carving easier.
Conventional Roasting Chart
Convection Roasting Chart
Conventional Broiling
Broiling is a
Convection Broiling
Convection broiling has the advantage of broiling food slightly quicker than conventional. Convection broiling of meats produces better results especially for extra thick cuts. The meat sears on the outside and retains more juices and natural flavor inside with less shrinkage.
Rack Positions:
The broiler uses heat rays to help cook the food. Because these rays can travel only in straight lines, the effective cooking area of the broiler is reduced when using the higher rack positions. At high rack positions, the rays cannot reach all corners of the broiler grid, so larger pieces of meat might
not broil sufficiently at the outer edges. Position 6 is the closest to the broiler and position 1 is the closest to the oven bottom. The effective cooking areas on the broiler grid for each rack position are as follows:
To use the
1.Arrange the oven racks in the desired position.
2.Center food on cold broiler pan and grid supplied with your oven. Place broiler pan in oven and close the door.
3.Set the Oven Function selector to either
4.Set the Temperature Control dial to BROIL.
5.Either open the door to an open position approximately seven to eight inches or close the door. With
Broiling Tips
???Always use a broiler pan and grid for broiling. They are designed to provide drainage of excess liquid and fat away from the cooking surface to help prevent spatter, smoke and fire.
???Place broiler pan with food in recommended rack position. ???To keep meat from curling, slit fatty edge.
???Brush chicken and fish with butter several times as they broil to prevent drying out. To prevent sticking, lightly grease broiler grid.
???Broil on first side for slightly more than half the recommended time, season and turn. Season second side just before removing.
???Always pull rack out to stop position before turning or removing food. ???Use tongs or a spatula to turn meats. Never pierce meat with a fork
as this allows the juices to escape.
???Remove the broiler pan from the oven when you remove the food. Drippings will bake onto the pan if it is left in the heated oven after broiling. While pan is hot, place damp paper towel over grid. Drizzle with liquid dishwashing detergent and pour water over grid. This will make cleaning of the pan easier, or the broiler pan can be lined with aluminum foil to make cleaning easier. Be sure the foil extends up the side of the pan. Although it is not recommended, the grid can also be covered with foil. Be sure to slit openings to conform with the openings in the grid so melted fat can drain through to prevent spattering, smoking or possibility of grease fire.

Conventional/Convection Broiling Chart
Proofing (48??? W. Ranges only)
This setting is designed for allowing yeast dough to rise at a temperature between 850F (290C) and 1000F ( 380C). Yeast doughs rise or ???proof??? best when the temperature is between 850F (290C) and 1000F (380C). To make sure the dough is warm enough, cover the bowl loosely with plastic wrap and/or cloth towel. Turn the oven function selector to ???PROOF???. Do not turn the temperature control. Place the bowl on the center rack of the oven and close the door. When you think the dough has doubled in size, lightly poke 2 fingers about 1/2??? (1.3cm) into the dough. If the indentation remains, the dough has risen enough.
Convection Dehydration
This oven is designed not only to cook, but also to dehydrate fruits and vegetables.
???Prepare the food as recommended.
???Arrange the food on drying racks. (Not included with oven; contact a local store handling specialty cooking utensils.)
???Set the appropriate ???low??? temperature and turn the Oven Function selector to CONV BAKE.
Convection Defrosting
???Place the frozen food on a baking sheet. ???Set Temperature Control ???OFF???.*
???Turn Oven Function selector to CONV BAKE.
*IMPORTANT: Do not turn the Temperature Control on. Turning the convection fan on will accelerate the natural defrosting of the food without the heat.
*WARNING: To avoid sickness and food waste, do not allow defrosted food to remain in the oven for more than two hours.
Cleaning and Maintenance
Any piece of equipment works better and lasts longer when maintained properly and kept clean. Cooking equipment is no exception. Your range must be kept clean and maintained properly. Make sure all controls are in the ???off??? position. Disconnect power if you are going to clean thoroughly with water.
Surface Burners
Wipe up
1.Allow the burner and grate to cool to a safe temperature level.
2.Lift off the burner grates, burner bowls (openburners only), and grate support (open burners only). Wash in warm soapy water.
3.Remove the burner cap and clean per instructions belwo .
4.Wipe up any spills which remains on the sealed top surface.
5.Open burners only, remove drip pan and wash with warm soapy water
6.Replace burner cap, burner bowls, grate supports, (if applicable) and grates.
If ports on the burners are clogged, clean with a straight pin. Do not enlarge or distort the ports. Do not use a toothpick to clean the ports. When replacing burner caps, carefully align the tabs underneath the cap with the outside edge of burner. Make sure burner cap is level. Occasionally check the burner for proper size and shape. If flames lift off ports, are yellow, or are noisy when turned on, you may need to clean the burners or call a qualified technician for adjustment.
Burner Caps
The surface burner caps should be routinely removed and cleaned. Always clean the burner caps after a spill over. Keeping the burner caps clean will prevent improper ignition and uneven flames. To clean, pull burner cap straight up from the burner base. Wipe off surface burner caps with warm, soapy water and a soft cloth after each use. Use a a
Aluminum Base
The aluminum base should be wiped regularly with hot soapy water at the end of each cooling period. Do not use steel wool, abrasive cloths, cleanser, or powders. To remove encrusted materials, soak the area with a hot towel to loosen the material, then use a wooden or nylon spatula. Do not use a metal knife, spatula, or any other material tool to scrape the aluminum base.
NOTE: For stubborn stains, use a
30
Griddle/Simmer Plate
1.After using the griddle, always remove the drip pan located below it by pulling the drip pan toward you. The drip pan needs to be cleaned after each use of the griddle.
2.Rub the surface of a hot griddle with unsalted solid shortening, vegetable oil or spray it with a
3.Stubborn spots may be removed by rubbing the surface with a rough grained nylon scrubbing pad with cooking oil. If necessary, flush the surface of a warm griddle (2000F/930C) with club soda and wipe over entire surface with a paper towel. Coat lightly with cooking oil.
4.Special griddle cleaners are commercially available which may be used to remove heavy soil
5.Using hot soapy water to clean the griddle will remove the cooked- in seasoning and will require
6.Never flood a hot griddle with cold water! This promotes griddle warping and can cause the griddle plate to crack if continued over a period of time.
NOTE: For cleaning, a Griddle Cleaning Kit can be purchased using a consumer order form (supplied in the same envelope that contained this use and care manual), or by calling Viking Range Corporation at (662)
31

Grill
The grill grate may be cleaned immediately after cooking is complete and before turning off the flame. Wearing a barbecue mitt to protect your hand from heat, use a soft bristle barbecue brush to scrub the grill grate. Dip the brush frequently in a bowl of water. Steam is created as the water contacts the hot grate. The steam assists the cleaning process by softening the food particles. For thorough cleaning of the grill grate, soak 15 to 30 minutes in a hot water and detergent solution. After soaking, scrub with a soft scotch brite pad. DO NOT USE a steel wool pad or abrasive cleaners as they could damage the porcelain finish.
After using the grill, always remove the drip pan located below it by pulling the drip pan toward you. The drip pan needs to be cleaned after each use of the griddle.
Clean greasy parts with a household grease solvent such as household ammonia and water. If necessary, a
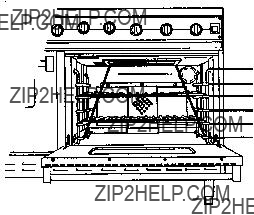
To disassemble for thorough cleaning, remove parts after they have cooled in the following order:
Control Panel
DO NOT USE any cleaners containing ammonia or abrasives. They could remove the graphics from the control panel. Use hot, soapy water and a soft clean cloth.
Oven Surfaces
Several different finishes have been used in your
WOOL PADS, ABRASIVE CLOTHS, ABRASIVE CLEANERS, CAUSTIC
OVEN CLEANERS, OR ABRASIVE POWDERS. THEY CAN
PERMANENTLY DAMAGE YOUR OVEN.
Stainless Steel Parts
All stainless steel parts should be wiped regularly with hot, soapy water at the end of each cooling period and with liquid stainless steel cleaner when soapy water will not do the job. Do not use steel wool, abrasive cloths, abrasive cleaners, or powders. If necessary to scrape stainless steel to remove encrusted materials, soak the area with hot towels to loosen the material, then use a wooden or nylon spatula or scraper. Do not use a metal knife, spatula, or any other metal tool to scrape stainless steel. For occasional heavy cleaning use, a cleaner such as Liquid ZudTM can be used according to package directions. Do not permit citrus or tomato juice to remain on stainless steel surface, as citric acid will permanently discolor stainless steel. Wipe up any spills immediately.
Glass Surface
Clean with detergent and warm water. Glass cleaner can be used to remove fingerprints. If using glass cleaner ammonia, make sure that it
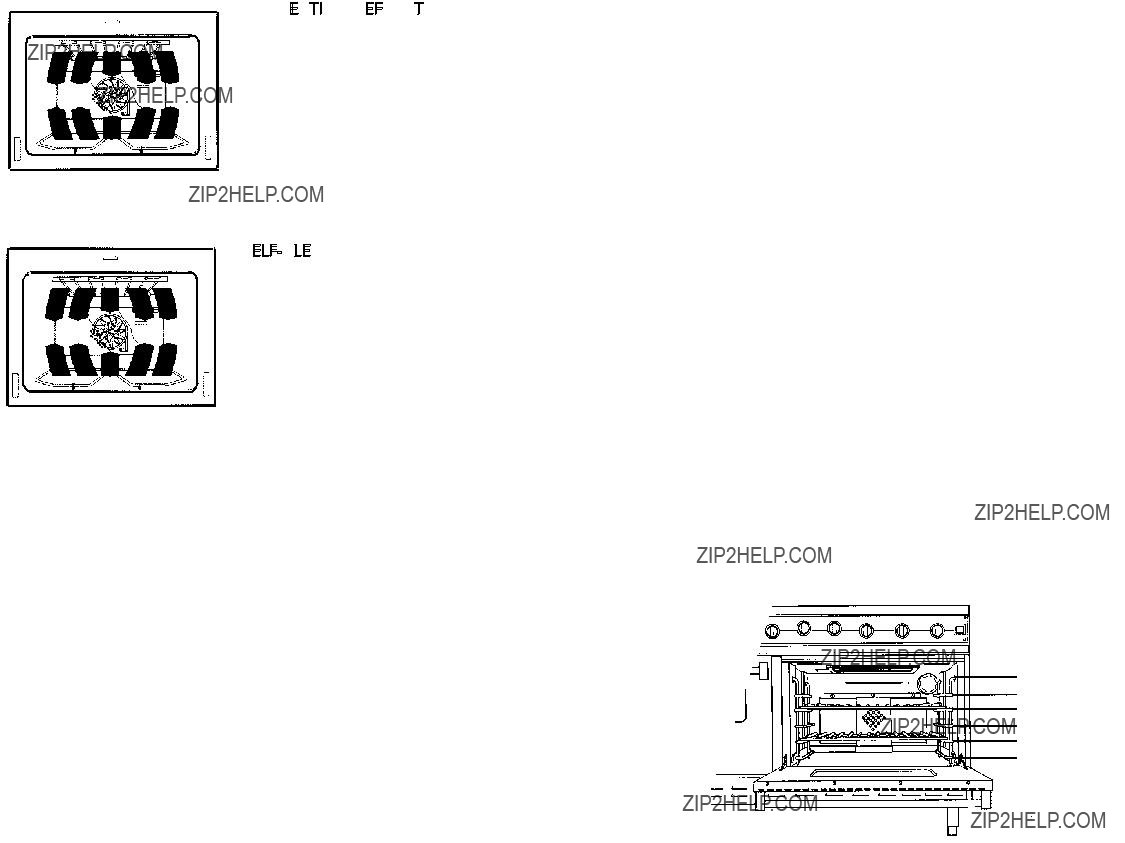
1.Grill Grates
2.Flavor Generator plates
3.Heat Deflector
4.Grill Frame
5.Grill Burner Sheild (Do not remove from burner)
6.Burner
(Do not remove)
1
2
3
4
5
6
does not run down on exterior door surface.
Brass Parts
CAUTION: All brass special ordered parts are coated with an epoxy coating. DO NOT USE BRASS OR ABRASIVE CLEANERS ON THE BRASS OPTION PARTS. All brass parts should be wiped regularly with hot soapy water.
Oven Racks
Clean with detergent and hot water. Stubborn spots can be scoured with a
RACKS OR RACK SUPPORTS USING THE
They could sustain damage due to the extreme heat of the
33

Control Knobs
MAKE SURE THE CONTROL KNOBS POINT TO THE OFF POSITION BEFORE REMOVING. Pull the knobs straight off. Wash in detergent and warm water. Do not soak knobs. Dry completely and replace by pushing firmly onto stem. DO NOT USE any cleaners containing ammonia or abrasives. They could remove the graphics from the knob.
CAUTION:
Do not touch the exterior portions of the oven after
During the first few times the
KEEP THE KITCHEN
CYCLE.
WARNING:
BURN OR ELECTRICAL SHOCK HAZARD
Make sure all controls are OFF and oven is COOL before cleaning. Failure to do so can result in burns or electrical shock.
IMPORTANT
Do not clean, move, wet, or bend door gasket. Poor cleaning and baking may result.
This range features an automatic pyrolytic
WARNING: Do not use commercial oven cleaners inside the oven. Use of these cleaners can produce hazardous fumes or can damage the porcelain finishes. Do not line the oven with aluminum foil or other materials. These items can melt or burn during a
34
Before starting the
1.Remove the oven racks, rack supports, and any other items/utensils from the oven. The high heat generated during the cleaning cycle can discolor, warp, and damage these items. Do not use foil or liners in the oven. During the
2.Wipe off any large spills from the oven bottom and sides. Never use oven cleaners inside a
3.Some areas of the oven must be cleaned by hand before the cycle begins. Soil in these areas will be baked on and very difficult to clean if not removed first. Clean the door up to the gasket, the door frame, and up to two inches inside the frame with detergent and hot water. Rinse thoroughly and dry.
To start the
1.Close the oven door completely.
2.Turn the Oven Function selector knob clockwise to the
3.Turn the Temperature Control knob past the clean setting until the knob stops. At this time, the temperature indicator light will come on and within 30 seconds, the automatic door latch engages. The temperature indicator light will remain on until the oven reaches the
4.The cleaning cycle will last approximately 3 1/2 hours with an additional 30 minutes needed for the oven to cool down enough for the door latch to disengage.
5.When the cycle is completed, turn both the Oven Function selector and the Temperature Control knob to ???OFF??? At this time the clean indicator light will go off.
6.When the oven has completely cooled, open door and remove any ash from the oven surfaces with a damp cloth.
To stop the
To cancel or interrupt the
35

Replacing Interior Oven Lights
CAUTION: DISCONNECT THE ELECTRIC POWER AT THE MAIN
FUSE OR CIRCUIT BREAKER BEFORE REPLACING BULB.
1.Unscrew glass light cover.
2.Use an oven mitt during bulb removal to protect your hand in case the bulb breaks.
3.Replace the bulb with a 120 volt,
4.Replace the light cover
5.Reconnect power at the main fuse or circuit breaker.
Power Failure
If power failure occurs, the electric ignitors will not work. The range surface burners can still be used, but only when the burners are lit manually with a match. The griddle cannot be used at all. Do not attempt to operate the oven. Make sure the oven control is in the ???OFF??? position.
Due to safety considerations and the possibility of personal injury in attempting to light and extinguish the burner, the grill should, not under any circumstances, be used during a power failure. The grill burner control should always remain in the ???OFF??? position during a power failure.
Momentary power failure can occur unnoticed. The range is affected only when the power is interrupted. When it comes back on, the range will function properly without any adjustments. A
If the range is in the
36
Troubleshooting Guide
37
Service Information
If service is required after checking the troubleshooting guide:
1.Call your dealer or authorized service agency. The name of the authorized service agency can be obtained from the dealer or distributor in your area.
2.Have the following information readily available: Model Number
Serial Number Date of Purchase
Name of dealer from whom purchased
3.Clearly describe the problem that you are having.
If you are unable to obtain the name of an authorized service agency, or if you continue to have service problems, contact Viking Range Corporation at (888)
VIKING RANGE
 CORPORATION
PREFERRED SERVICE

111 Front Street
Greenwood, Mississippi 38930 USA
Model Number and Serial Number
Record the following information indicated below. You will need it if service is ever required. The serial number and model number for your range is located on the rear left side of the burner box.
If service requires installation of parts, use only authorized parts.
Please retain the manual for future reference
PROFESSIONAL SERIES
FREESTANDING DUAL FUEL RANGES WARRANTY
ONE YEAR FULL WARRANTY
Freestanding dual fuel ranges and all of their component parts and accessories, except as detailed below*, are warranted to be free from defective materials or workmanship in normal household use for a period of twelve (12) months from the date of original retail purchase. Viking Range Corporation, warrantor, agrees to repair or replace, at its option, any part which fails or is found to be defective during the warranty period.
*Glass (including light bulbs), painted and decorative items are warranted to be free from defective materials or workmanship for a period of ninety (90) days from the date of original retail purchase. ANY DEFECTS MUST BE
REPORTED TO THE SELLING DEALER WITHIN NINETY (90) DAYS FROM DATE OF ORIGINAL RETAIL PURCHASE.
FIVE YEAR LIMITED WARRANTY
Any surface burner, griddle burner, grill burner, bake element, broil element, or convection cook element which fails due to defective materials or workmanship in normal household use during the second through fifth year from the date of original retail purchase will be repaired or replaced, free of charge for the part itself, with the owner paying all other costs, including labor.
TEN YEAR LIMITED
 WARRANTY
Any porcelain oven or porcelain inner door panel which rusts through due to defective materials or workmanship in normal household use during the second through the tenth year from the date of original retail purchase will be repaired or replaced, free of charge for the part itself, with the owner paying all other costs, including labor.
NINETY (90) DAY RESIDENTIAL PLUS WARRANTY This warranty applies to applications where use of the product extends beyond normal residential use. Examples are, but not limited to, bed and breakfasts, fire stations, private clubs, churches, etc. This warranty excludes all commercial locations such as restaurants, food service locations and institutional food service locations.
This warranty extends to the original purchaser of the product warranted hereunder and to each transferee owner of the product during the term of the warranty.
This warranty shall apply to products purchased and located in the United States and Canada. Products must be purchased in the country where service is requested. Warranty labor shall be performed by an authorized Viking Range Corporation service agency or representative. Warranty shall not apply to damage resulting from abuse, accident, natural disaster, loss of electrical power to the product for any reason, alteration, outdoor use, improper installation, improper operation, or repair or service of the product by anyone other than an authorized Viking Range Corporation service agency or representative. This warranty does not apply to commercial usage. Warrantor is not responsible for consequential or incidental damage whether arising out of breach of warranty, breach of contract, or otherwise. Some jurisdictions do not allow the exclusion or limitation of incidental of consequential damages, so the above limitation or exclusion may not apply to you.
Owner shall be responsible for proper installation, providing normal care and maintenance, providing proof of purchase upon request, and making the appliance reasonably accessible for service. If the product or one of its component parts contains a defect or malfunction during the warranty period, after a reasonable number of attempts by the warrantor to remedy the defects or malfunctions, the owner is entitled to either a refund or replacement of the product or its component part or parts. Warrantor???s liability on any claim of any kind, with respect to the goods or services covered hereunder, shall in no case exceed the price of the goods or service or part thereof which gives rise to the claim.
WARRANTY SERVICE: Under the terms of this warranty, service must be performed by a factory authorized Viking Range Corporation service agent or representative. Service will be provided during normal business hours, and labor performed at overtime or premium rates shall not be covered by this warranty. To obtain warranty service, contact the dealer from whom the product was purchased, an authorized Viking Range Corporation service agent, or Viking Range Corporation. Provide model and serial number and date of original purchase. For the name of your nearest authorized Viking Range Corporation service agency, call the dealer from whom the product was purchased or Viking Range Corporation. IMPORTANT: Retain proof of original purchase to establish warranty period.
The return of the Owner Registration Card is not a condition of warranty coverage. You should, however, return the Owner Registration Card so that Viking Range Corporation can contact you should any question of safety arise which could affect you.
Any implied warranties of merchantability and fitness applicable to the above described surface burner, griddle burner, grill burner, bake element, broil element, convection cook element, porcelain oven, or porcelain inner door panel are limited in duration to the period of coverage of the applicable express written limited warranties set forth above. Some jurisdictions do not allow limitations on how long an implied warranty lasts, so the above limitation may not apply to you. This warranty gives you specific legal rights, and you may also have other rights which may vary from jurisdiction to jurisdiction.
Specifications subject to change without notice