DSS3405
ADDITIONAL HANDSET
OWNER'S MANUAL
OWNER'S MANUAL
DSS3405
ADDITIONAL HANDSET
OWNER'S MANUAL
OWNER'S MANUAL

Welcome
Congratulations on your purchase of the Uniden DSS3405 accessory handset and charger. You can place this fully featured cordless handset anywhere your home has AC power.
Note: Illustrations in this manual are used for explanation purposes. Some illustrations may differ from the actual unit.
Caution: The earcap of this telephone may attract and retain small metallic objects
Important!
The DSS3405 accessory handset will not operate until it is registered to a Uniden main base. This manual describes how to set up your new handset; for more detailed instructions on operating your new handset, please refer to the manual supplied with your base.
Terminology Used in this Manual
Compatible Bases
This handset is compatible with Uniden's 2.4 GHz Digital Expandable phone system: the DSS3415, DSS3455 and DSS3435 series. Visit www.uniden.com.au (Australian model) or www.uniden.co.nz (New Zealand model) for the most
Installing the Accessory Handset
Checking the Package Contents
Make sure your package contains the following items. If any items are missing or damaged, contact your place of purchase.
???Cordless Handset
???AC Adapter, model
Output: 9V DC 210 mA
???Belt Clip
???Charging Cradle
???Rechargeable NiMH Battery Pack, model
???Printed Material
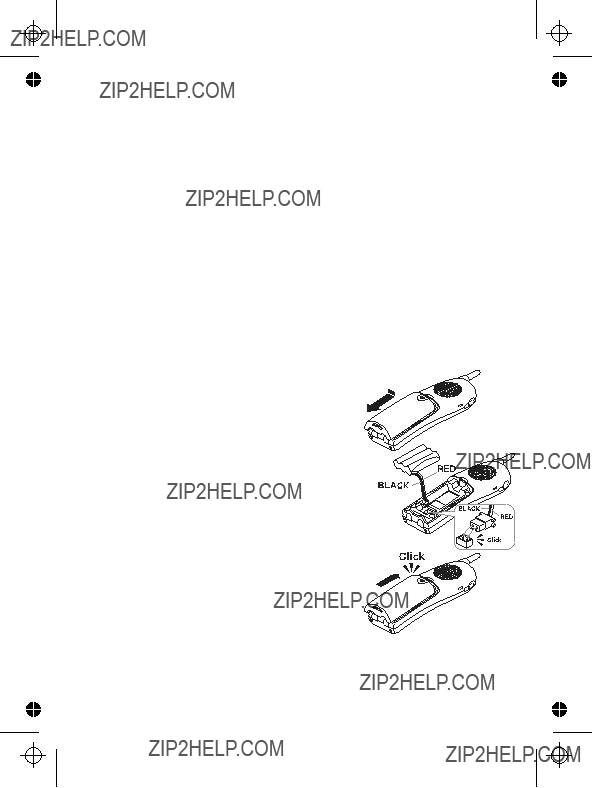
Installing the Battery
Follow the steps below to install the rechargeable battery pack.
1. Using the finger indentation, press in on
the battery case cover and slide it down to remove it.
2. Plug the battery connector into the battery compartment jack. Be sure to match the red and black wires to the label
near the jack.
3. Gently pull on the battery wires. If the
battery connector comes loose, try connecting it again.
4. Replace the battery case cover and slide it up until it clicks into place.
Note: Use only the Uniden
(2)

Installing the Belt Clip
Line up the tabs with the holes on each side of the handset. Press the belt clip down until both tabs click into place. To remove the belt clip, pull both sides of the clip to release the tabs from the holes.
Installing the Optional Headset
Your phone may be used with an optional headset. To use a headset, insert the headset plug into the headset jack. Headsets may be purchased by contacting Uniden. See warranty on inside back cover for contact information.
Charging the Accessory Handset
The handset is powered by a rechargeable battery pack that automatically recharges when the handset is placed in the charger. 
1. Connect the AC adapter to the DC IN 9V jack and to a 240V AC outlet that is not controlled by a wall switch.
Caution: Use only the
Uniden 
2. Set the charger on a desk or tabletop, and place the handset in
the charger with the keypad facing forward.
3.Make sure that the charge LED illuminates. If the LED does not illuminate, check to see that the AC adapter is plugged in and the handset makes good contact with the charging contacts on the charging cradle.
4.Charge the handset battery pack for at least
(3)

Registering the Handset
You must register the handset to the base before you can use it. Only one handset can be registered at a time. (If an accessory handset has ever been registered to a base, you must reset the handset before you can register it to a new base).
For DSS34 Series Bases
(DSS3415, DSS3455, DSS3435)
To register to a DSS34 series base, place the accessory handset in the base. While the handset is registering, HANDSET REGISTERING appears in the LCD. When REGISTRATION COMPLETE is displayed, the handset has been registered to the base.
If REGISTRATION FAILED appears, remove the handset from the base and try again.
(4)

Resetting the Handset
If you want to register the handset to a different base or replace a handset with another one, you must first clear the registration information from the base and the handset.
Resetting the Handset Without the Base
(5)

Using the Interface
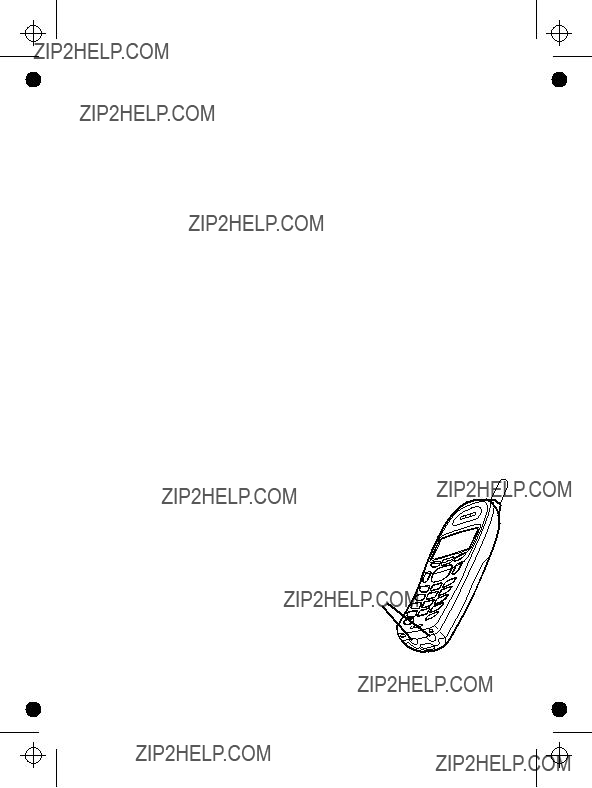
Parts of the Handset

Reading the Display
The handset display uses icons to tell you the status of your phone. The table below lists the icons and what they mean.
The Standby Screen
When the phone is in standby, the display shows the following:
Using the
Your handset has a
most commonly used features at the touch of a button. Press the left side of the key to open the phonebook. Press
the right side to open the Caller ID list.
(7)

To use this
Using the Handset Menus
To open the menu, press [menu/clear]. Select the option you want by pressing the
Activate the selected option by pressing [select/ ]. Pressing [menu/clear] again will go back to the previous menu. To exit the menu and return to standby, press [
 ].
].
If you do not press a key within 30 seconds, the phone will time out and exit the menu. When setting the day and time, the
Making and Receiving Calls
*If AutoTalk is on, the phone answers when you remove the handset from the charging cradle. **If Any Key Answer is on, you can press any key in the
Using Caller ID and Call Waiting
If you subscribe to Caller ID, you can store up to 100 Caller ID records. Your phone shares memory between your phonebook and Caller ID entries. If you have 100 phonebook entries, Caller ID records won't be saved (but will display when the call comes in). Press [  ] to open the Caller ID record list. The first thing you will see is the summary screen. From the summary screen, you have the following options:
(8)

Using Call Waiting
If you subscribe to call waiting, a tone sounds if a call comes in when you are on the phone. If you subscribe to Caller ID on
call waiting, the Caller ID information of the waiting call appears on the display. For Australian model: Press [ /flash] and then 2 on the handset to switch between callers.
For New Zealand model: Press [ /flash] on the handset to switch between callers.
Redialing a Number
To redial one of the last 3 numbers dialed on the handset, press [redial/pause] when the phone is in standby. This opens the redial list. Use [redial/pause] repeatedly or [ ] and [ ] to find the number you want to dial, and then press [ /flash] or [ ] . (You can also press [ /flash ] or [ ], and then [redial/pause] to redial the last number dialed.)
Using the Phonebook
Press [ ] to enter the phonebook. Once in the phonebook, you have the following options:
(10)

Hold, Conference, Transfer, and Intercom
Muting the Ringer (One Call Only)
While the handset is ringing, press [ ] to mute the ringer for this call. The phone will ring again on the next call. (The handset must be off the cradle to mute the ringer.)
(11)

Muting the Microphone
To mute the microphone so the caller can't hear you, press [menu/clear ]. Move the cursor to select MUTE and then press [select/  ]. MUTE ON and appear in the display. Repeat the procedure to cancel muting.
Privacy Mode
To prevent other stations from interrupting a call, press [menu/clear ]. Move the cursor to select PRIVACY MODE and then press [select/ ]. PRIVACY MODE ON and P appear in the display. Repeat the procedure to turn off privacy mode.
Adjusting the Audio Tone
If you aren't satisfied with your phone's audio quality, you can adjust the Audio Tone of the earpiece. While on a call, press [select/ ] to cycle through the three audio tone options: low, natural and high. (The default setting, Natural Tone, is recommended for hearing aid users.) When the desired option appears on the display, stop. After two seconds, the displayed audio tone is set, and the display returns to normal.
Using the Clarity Boost Feature
If you encounter interference while you are on a call, you can manually improve the sound by turning on the clarity boost feature. Press [menu/clear ], move the cursor to select CLARITY BOOST, and then press [select/ ]. BOOST ON and B appear in the display.
Use the same procedure to turn off clarity boost feature, BOOST OFF appears.
Accessing Your Answering Machine
If your base has an answering machine, you can use your handset to get your messages and change your answering machine setup. To access the answering machine, press [select/ ]. The answering machine announces the number of new and old messages and then wait for your next command. You have the following options:
(12)

Screening Calls
If your base has an answering machine, you can listen to callers as they leave a message. Press [select/ ] when the system is answering to listen to the caller without answering the phone.
Accessing Voice Mail
(13)

4. Enter your access number (up to 20 digits).If you need the phone to wait before sending the next digits, press [redial/pause ] to insert a
5. Press [select/ ] when you are finished.
Once you program your access number, press [select/  ] to dial your voice mail service. For NZ model the Telecom Voice Mail
Access number is  ] and speed dial location 4.
Keypad Lock
Use Keypad Lock to disable key response.
You can still answer calls, receive page and receive copy phonebook locations - keylock will reactivate after these operations.
To lock the keypad
Press and hold [*/tone/<] until you hear a confirmation tone. KEYPAD LOCKED appears.
If any key is pressed when keypad is locked,
TO UNLOCK KEYPAD PRESS & HOLD *KEY appears.
To unlock the keypad
Press and hold [*/tone/<] again. KEYPAD UNLOCKED appears.
Maintenance
Battery Life
With average use, your battery talk time will be approximately 8 hours and standby time will be approximately 7 days. For optimum performance, be sure to return the handset to the cradle after each call. If the handset is left off of the charging cradle, the actual talk time duration will be reduced respective to the amount of time the handset is off the cradle.
Note:
Do not place the power cord where it creates a trip hazard or where it could become chafed and create a fire or electrical hazard.
(14)
Low Battery Alert
When the battery pack is very low, the display shows LOW BATTERY and the empty battery icon. If the phone is in standby, none of the keys will operate. If you are on a call, complete your conversation as quickly as possible, and return the handset to the charging cradle.
Battery Replacement and Handling
With normal usage, your battery should last about one year. If the talk time becomes short even after the battery is recharged, please replace the battery by contacting Uniden.
See warranty on inside back cover for contact information.
Warning
To avoid the risk of personal injury or property damage from fire or electrical shock, use only the
Caution:
- This equipment contains a rechargeable
- Do not remove the batteries to charge them.
- Never throw the battery in a fire or disassemble or heat it. - Do not remove or damage the battery casing.
- Do not
- Do not charge the battery used in this equipment in any charger other than the one designed to charge this battery as specified in the owner's manual. Using another charger may damage the battery or cause the battery to explode.
- Rechargeable batteries must be recycled or disposed of properly.
Clean the Battery Contacts
To maintain a good charge, clean the charging contacts on the handset once a month. Dampen a
cloth with plain water. Gently rub the damp cloth over the charging contacts until all visible dirt is removed. Dry the contacts thoroughly 


before returning the handset to the
charging cradle.
Caution: Do not use any chemical products (benzene, alcohol, paint thinner, etc.), or you may discolor the surface and damage the finish.
(15)

MEMO
(16)

MEMO
(17)

Warranty
UNIDEN DSS3405 Cordless Phone
Limited One Year Warranty
Note: Please keep your sales docket as it provides evidence of warranty.
Warrantor: Uniden Australia Pty Limited ABN 58 001 865 498 Uniden New Zealand Limited
Warranty only available in original country of purchase
Elements of Warranty: Uniden warrants to the original retail owner for the duration of this warranty, its DSS3405 Cordless Phone (hereinafter referred to as the Product) to be free from defects in materials and craftsmanship with only the limitations or exclusions set out below.
Warranty Duration: This warranty to the original retail owner only, shall terminate and be of no further effect ONE (1) Year after the date of original retail sale. This warranty will be deemed invalid if the product is; (A) Damaged or not maintained as reasonable and necessary, (B) Modified, altered or used as part of any conversion kits, subassemblies, or any configurations not sold by Uniden, (C) Improperly installed, (D) Repaired by someone other than an authorized Uniden Repair Agent for a defect or malfunction covered by this warranty, (E) Used in conjunction with any equipment or parts or as part of a system not manufactured by Uniden, (F) Installed, programmed or serviced by anyone other than an authorized Uniden Repair Agent, or (G) Where the Serial Number label of the product has been removed or damaged beyond recognition.
Parts Covered: This warranty covers for 1 year, the Handset and Charge Unit only.
Accessories: Batteries, AC adaptor etc are covered for 90 days.
Statement of Remedy: In the event that the product does not conform to this warranty at any time while this warranty is in effect, the warrantor at its discretion, will repair the defect or replace the product and return it to you without charge for parts and service.
THIS WARRANTY DOES NOT COVER OR PROVIDE FOR THE REIMBURSEMENT
OR PAYMENT OF INCIDENTAL OR CONSEQUENTIAL DAMAGES. THIS
GUARANTEE IS IN ADDITION TO AND DOES NOT AFFECT YOUR RIGHTS UNDER
THE CONSUMER GUARANTEES ACT.
Procedure for obtaining performance or warranty: In the event that the Product does not conform to this warranty, the Product should be shipped or delivered, freight prepaid, with evidence of original purchase, (eg. a copy of the sales docket), to the warrantor at:
(18)

??2006 Uniden Australia Pty Limited, Uniden New Zealand Limited. Printed in China.
UUZZ01474BZ(0)