Limited Warranty
Digital Satellite Receivers
SONY ELECTRONICS INC. (???SONY???) warrants this Product (including any accessories) against defects in material or workmanship as follows:
1LABOR. For a period of 90 days from the original date of purchase, if the Product is determined to be defective, SONY will repair or replace the Product at no charge. After this 90 day period, you must pay for all labor charges.
2PARTS. For a period of one (1) year from the original date of purchase, SONY will supply, at no charge, new or rebuilt replacements in exchange for defective parts. Any replacements will be warranted for the remainder of the original warranty period or ninety (90) days from installation by SONY???s authorized facility, whichever is longer.
3ACCESSORIES. Parts and labor for all accessories are for one
(1) year.
4IN-HOME. For a period of one (1) year from installation date, if the unit was professionally installed by a SONY authorized Digital Satellite Receiver Installer and the LNB (Electronic Antenna Element) fails to function properly, SONY will repair or replace the LNB with a new or rebuilt part. Labor to repair or replace the LNB (after 90 days from purchase) will be at your expense. If no problem is found, or any other item fails, it will be your responsibility to pay the installer their regular rate for an in-home service call.
To obtain warranty service, you must take the Product, or deliver the Product freight prepaid, in either its original packaging or packaging affording an equal degree of protection, to a SONY authorized Digital Satellite Receiver service facility. Please see the telephone number at the end of this section for a number to call to locate the closest facility.
This warranty does not cover customer instruction, installation, setup adjustments or signal reception problems.
This warranty does not cover cosmetic damage or damage due to acts of God, accident, misuse, abuse, negligence, commercial use, or modification of, or to any part of the Product, including the antenna. This warranty does not cover improper installation (if self-installed), loss of use of the product, or wasted programming charges due to product malfunction. This warranty does not cover damage due to improper operation or maintenance, connection to improper voltage supply, or attempted repair by anyone other than a facility authorized by SONY to service the Product. This warranty does not cover Products sold AS IS or WITH ALL FAULTS. This warranty is valid only in the United States.
Proof of purchase in the form of a bill of sale or receipted invoice which is evidence that the unit is within the Warranty period must be presented to obtain warranty service.
REPAIR OR REPLACEMENT AS PROVIDED UNDER THIS
WARRANTY IS THE EXCLUSIVE REMEDY OF THE
CONSUMER. SONY SHALL NOT BE LIABLE FOR ANY
INCIDENTAL OR CONSEQUENTIAL DAMAGES FOR
BREACH OF ANY EXPRESS OR IMPLIED WARRANTY ON
THIS PRODUCT. IN NO EVENT SHALL SONY BE LIABLE
FOR ANY INCIDENTAL OR CONSEQUENTIAL DAMAGES
WHATSOEVER ARISING OUT OF THE USE OR INABILITY
TO USE THE PRODUCT. UNDER NO CIRCUMSTANCES
SHALL SONY???S LIABILITY, IF ANY, EXCEED THE
PURCHASE PRICE PAID FOR THE PRODUCT. EXCEPT TO
THE EXTENT PROHIBITED BY APPLICABLE LAW, ANY
IMPLIED WARRANTY OR MERCHANTABILITY OR
FITNESS FOR A PARTICULAR PURPOSE ON THIS
PRODUCT IS LIMITED IN DURATION TO THE DURATION
OF THIS WARRANTY.
This warranty is invalid if the factory applied serial number has been altered or removed from the Product.
Some states do not allow the exclusion or limitation of incidental or consequential damages, or allow limitations on how long an implied warranty lasts, so the above limitations or exclusions may not apply to you. In addition, if you enter into a service contract with the SONY Partnership within 90 days of the date of sale, the limitation on how long an implied warranty lasts does not apply to you. This warranty gives you specific legal rights, and you may have other rights which vary from state to state.
For your convenience, SONY ELECTRONICS INC. has established telephone numbers for frequently asked questions. To locate the servicer or dealer nearest you, for assistance or resolution of a service problem, or for product information or operation, call:
SONY SATELLITE SYSTEM INFORMATION CENTER 1-800-838-7669 (Sony)
For an accessory or part not available from your authorized dealer, call:
1-800-488-7669
About Sony Customer Support
Every DIRECTV System manufactured by Sony comes with Sony???s Express Support at no charge to you. In the event of a system failure, our Express Support Program can have a replacement receiver on its way to you via overnight Federal Express (for calls Monday-Friday until 7:30 pm Eastern Time; Saturday delivery depends upon zip code). All it takes is a valid credit card to cover a security deposit, and Sony will pay freight in both directions. Our Express Support continues with our 800 number, staffed by dedicated technical representatives who can answer questions on dealer locations, system operation, installation, hookup, accessories, and how to get the most out of your home entertainment system. Sony???s Express Support program: another expression of our commitment to excellence in customer service.


 0
0 


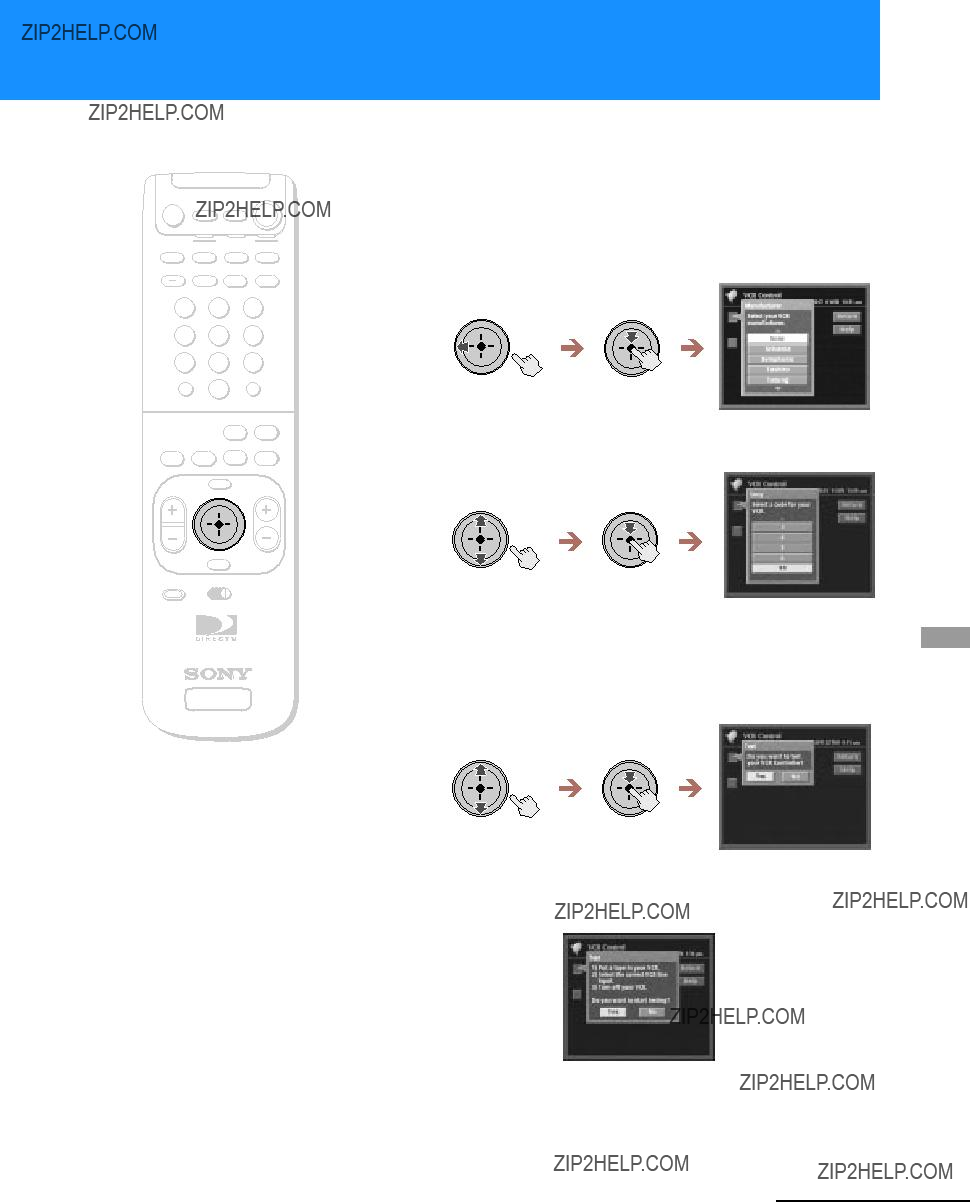
 buttons

 button selects the highlighted item.


 button.

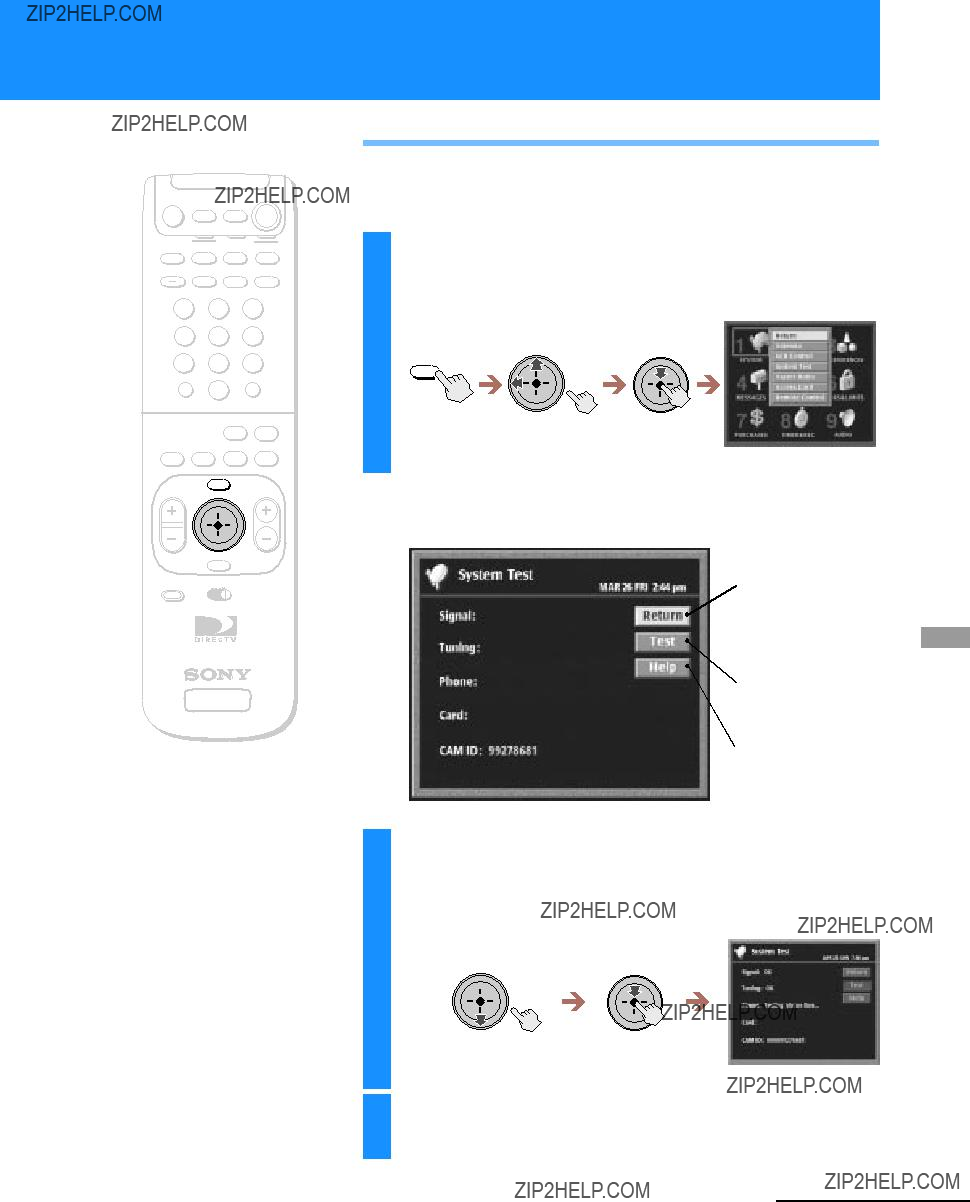
 button to select the item.


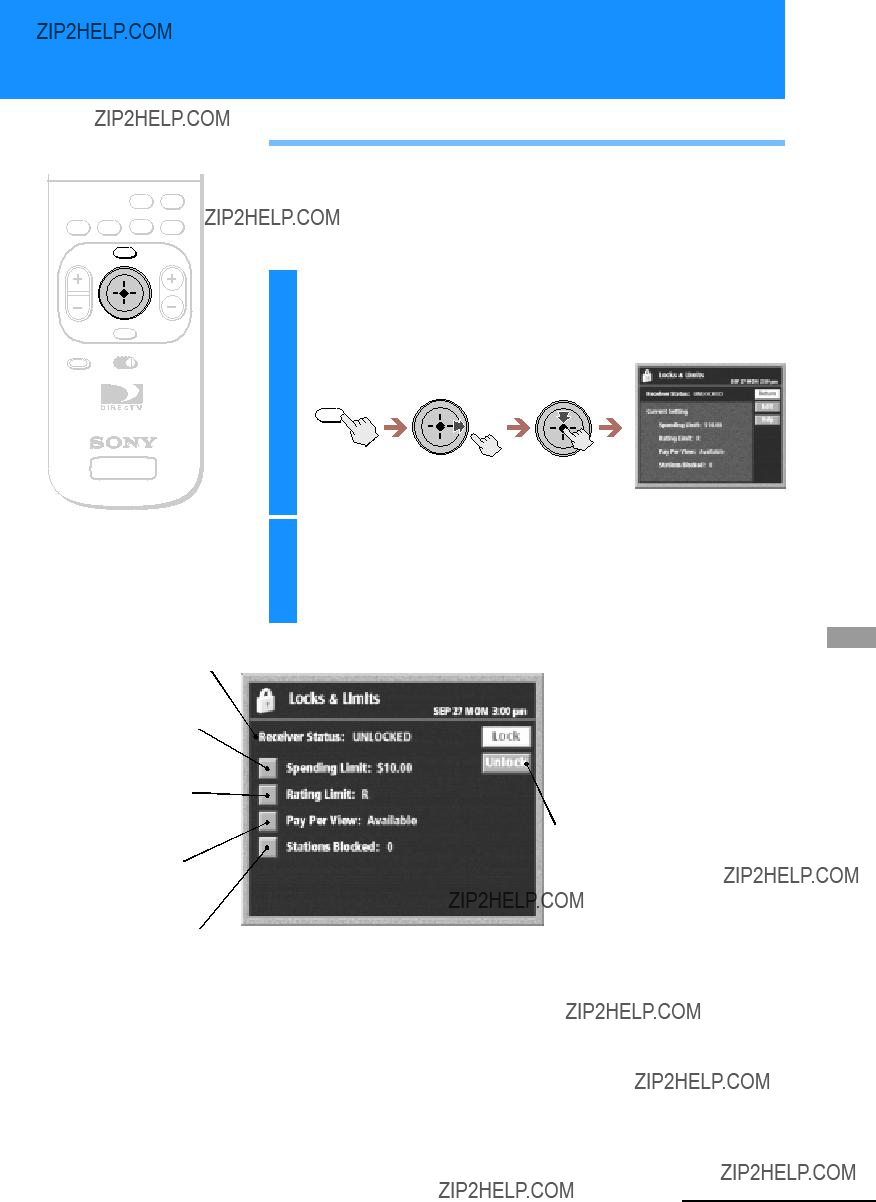
 Block stations and pay per view
 satellite and helps you get the


 Starts the Access Card


 FUNCTION
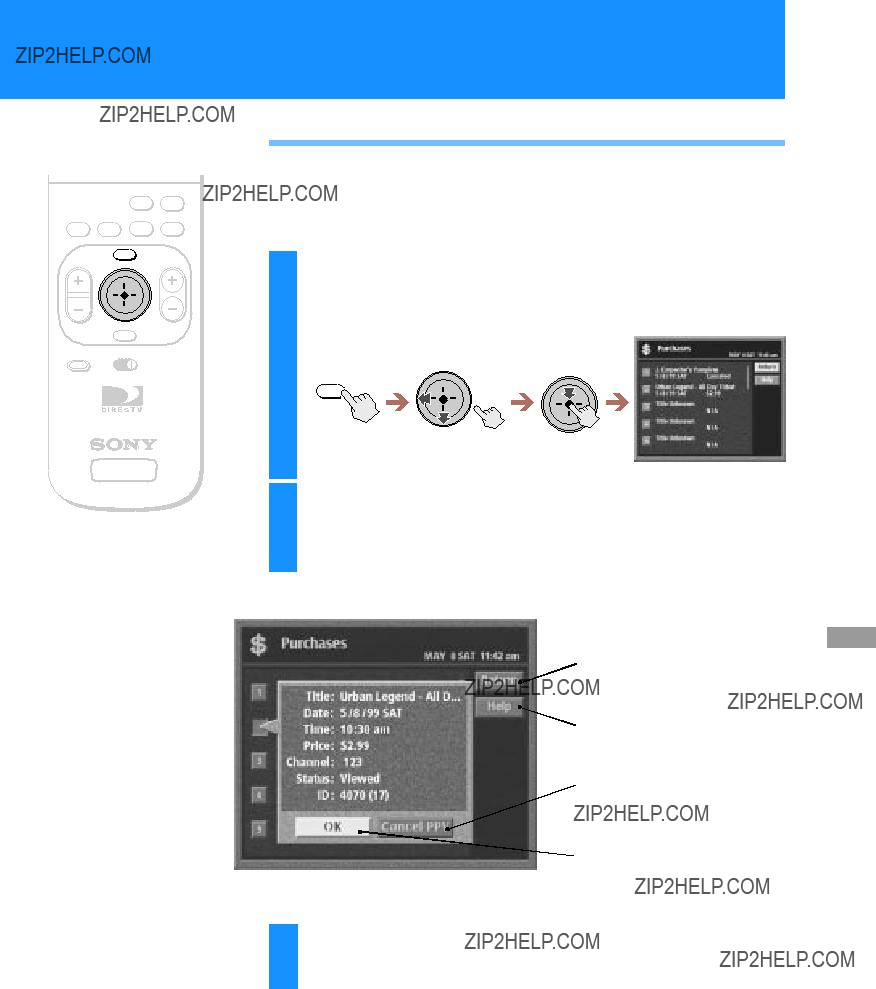
 stations and shows program information for up to three days in advance
  Opens your custom list of stations as a grid of station logos

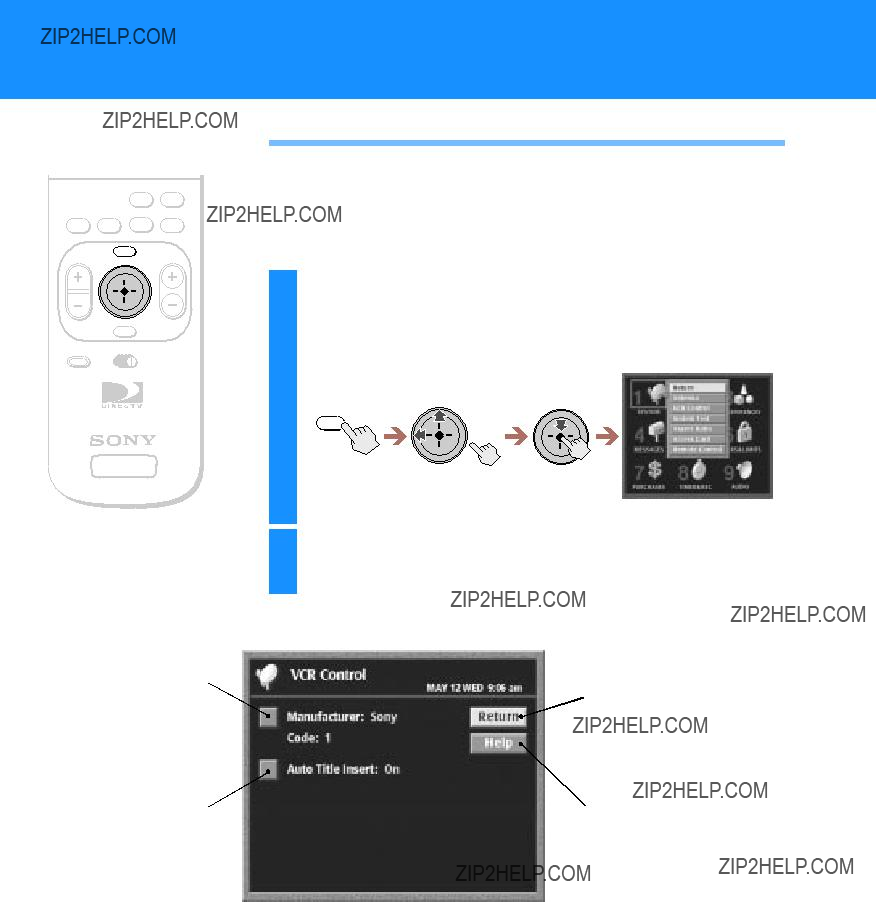
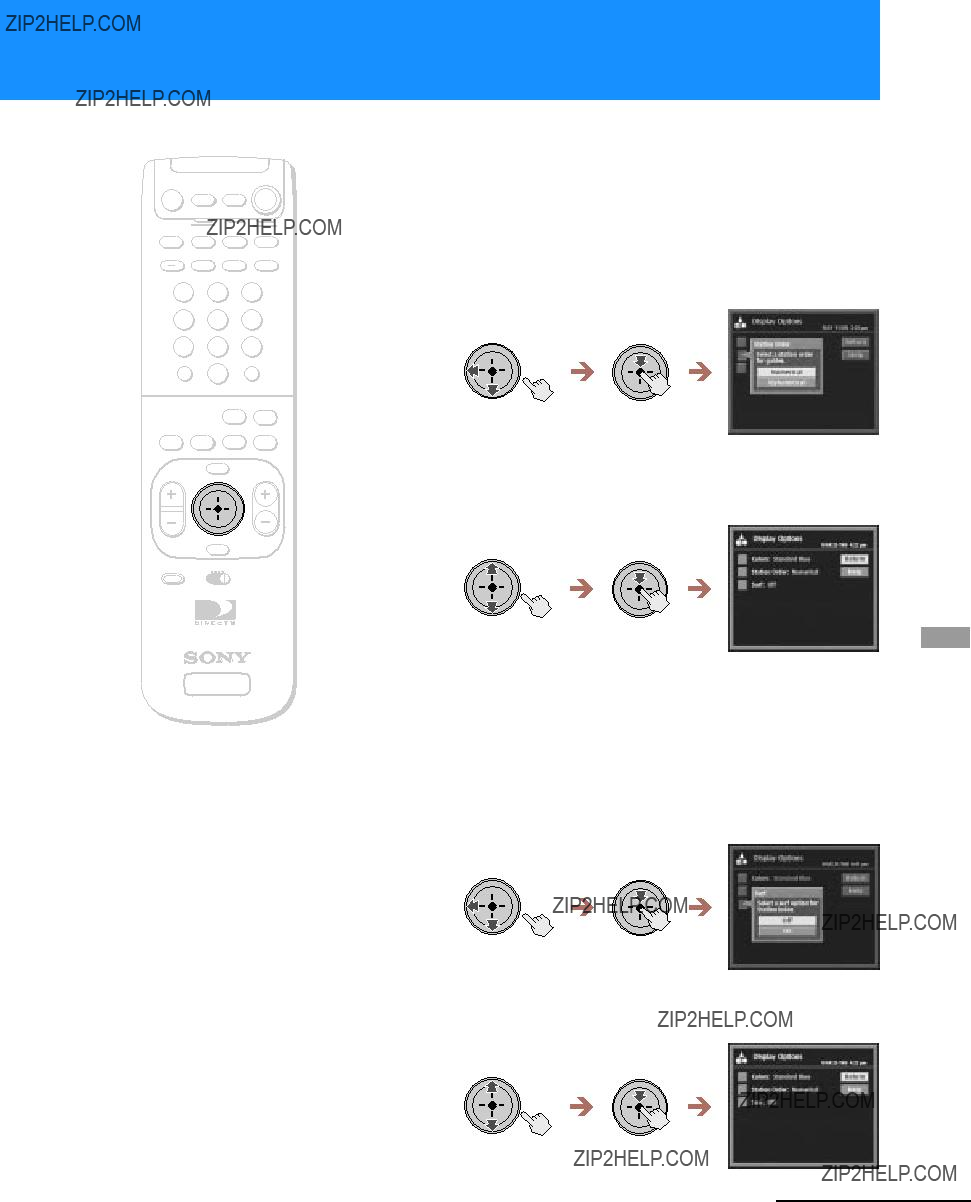
 Information Area
 List Area


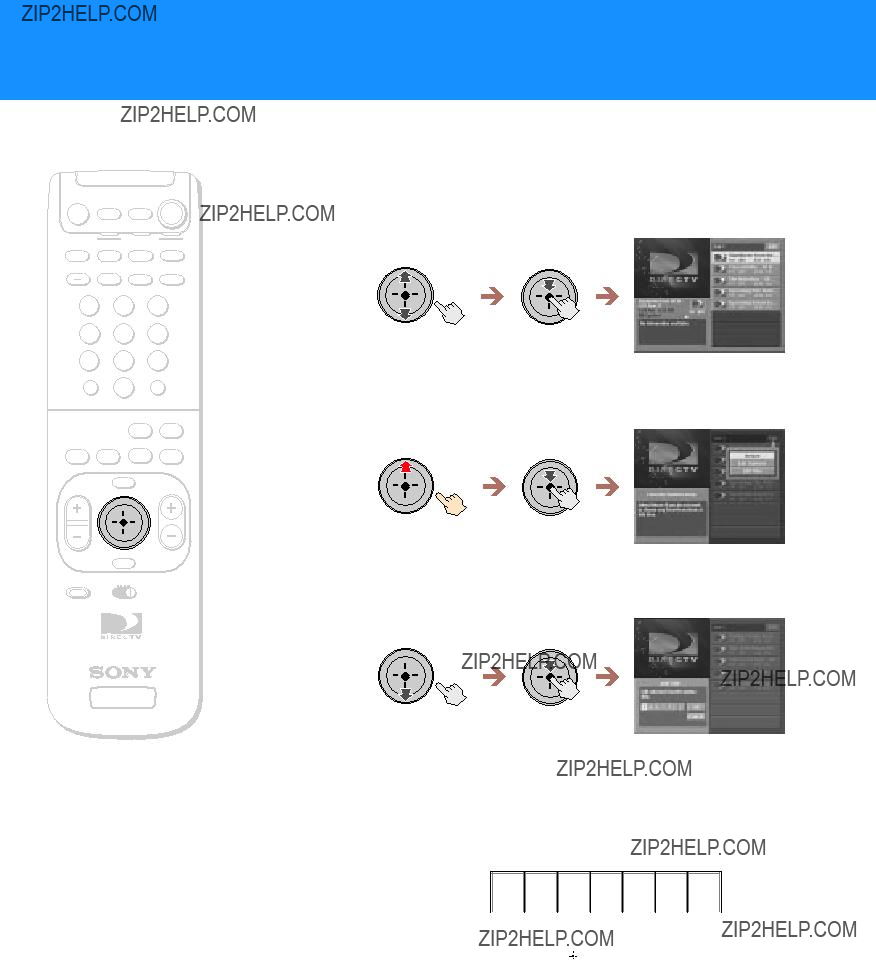
 Move the joystick left or right to


 screen displays
  Closes the Display Options display to show the Main Menu.
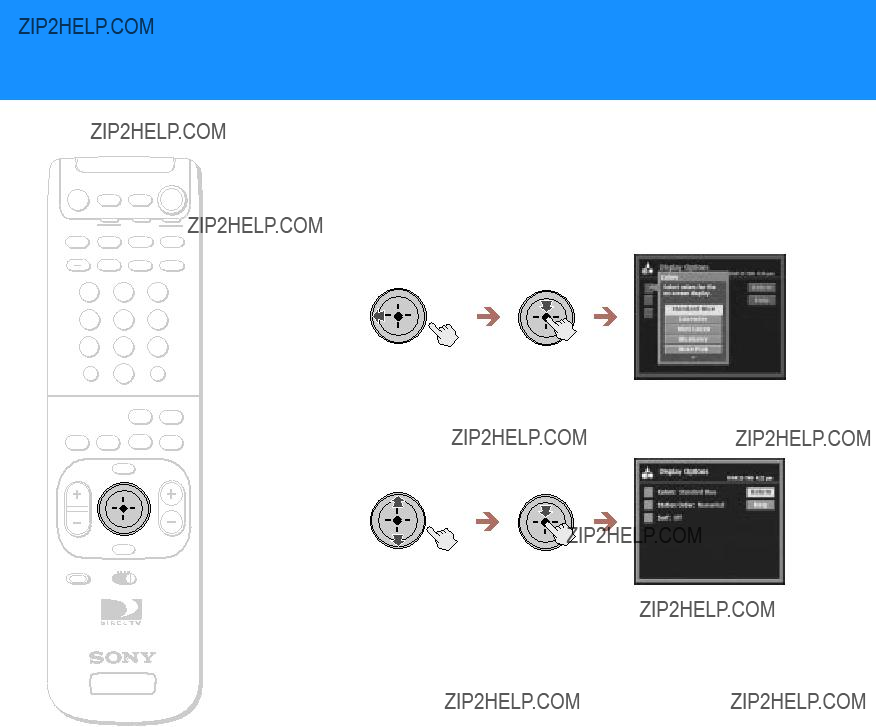


 Opens the passcode


 .
.

 .
.

 or
or 

 or
or 
 Closes the edit
 Closes the Audio display to show the Main Menu.
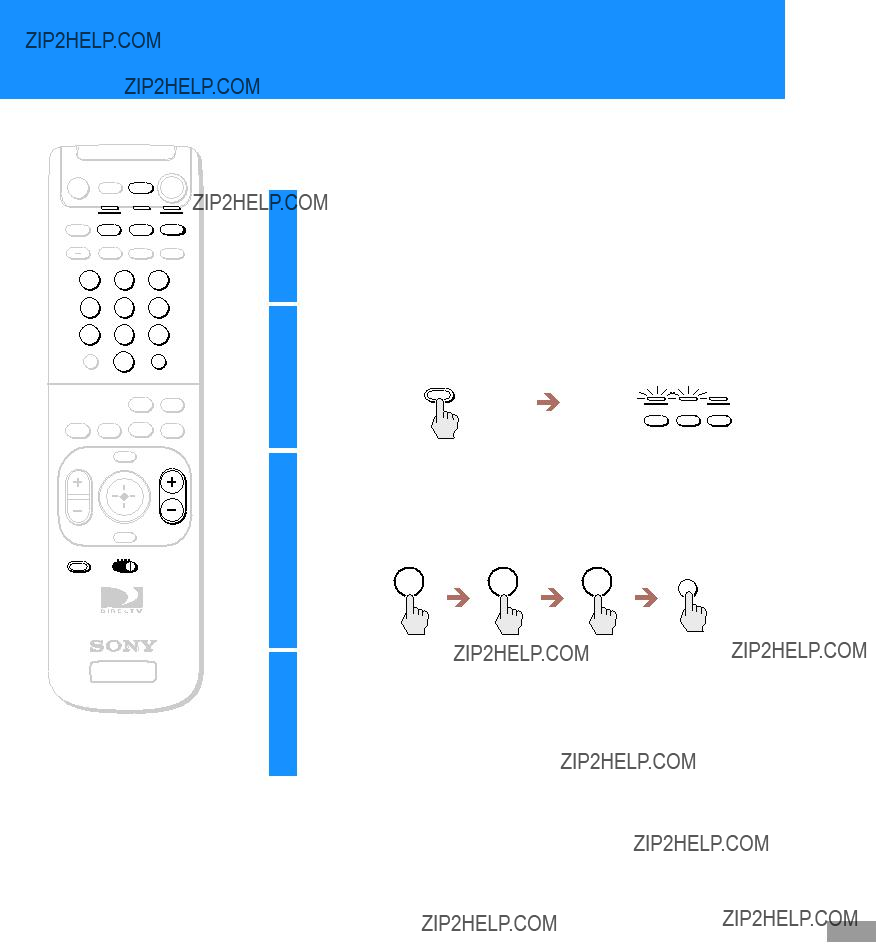


 Buttons

 button selects the highlighted item.


 button to complete your selection


