[When the photo frame is hanging on the wall]
Approx. 202 mm ?? 141 mm ?? 26.5 mm (8 ?? 5 1/2 ?? 1) inches
Mass
DPF-D1020: approx. 743 g (1 lb 10 1/4 oz)
DPF-D1010: approx. 630 g (1 lb 6 1/8 oz)
DPF-D820: approx. 599 g (1 lb 5 1/8 oz)
DPF-D810: approx. 525 g (1 lb 2 1/2 oz)
DPF-D720: approx. 405 g (14 1/4 oz)
DPF-D710: approx. 346 g (12 1/4 oz)
DPF-D700: approx. 346 g (12 1/4 oz) (Excluding the AC adaptor)
Included accessories
See ???Checking included items??? on page 8.
x AC adaptor
Power requirements
- 100 V to 240 V, 50 Hz/60 Hz, 0.4 A
Rated output voltage
DPF-D1020/D1010:  12 V, 1.5 A
DPF-D820/D810/D720/D710/D700:

 5 V, 2 A
Dimensions (depth/width/height)
Approx. 64 mm ?? 50 mm ?? 30 mm (2 5/8 ?? 2 ?? 1 3/16) inches
(excluding the protruding parts)
Mass
Approx. 110 g (3 7/8 oz)
See the label of AC adaptor for more details.
Design and specifications are subject to change without notice.
*1: Baseline JPEG with 4:4:4, 4:2:2, or 4:2:0 format
*2: RAW files of a Sony ?? camera are displayed as thumbnail preview.
*3: 17 bits or more are required both vertically and horizontally. An image with an aspect ratio of 20:1 or more may not be displayed properly. Even if the aspect ratio is less than 20:1, display problem may occur in thumbnails, slideshow or other occasions.
*4: When measuring media capacity, 1 MB equals
1,000,000 bytes and 1 GB equals 1,000,000,000 bytes, a portion of which is used for data management
and/or application files. The capacity that a user can use is approximately 1.9 GB (DPF-D1020/D820/ D720) / 80 MB (DPF-D1010/D710/D700) / 60 MB (DPF-D810).
*5: The number of stored images is an approximate guide when resizing and importing images.
When resizing and importing images, they are automatically resized to about 2,000,000 pixels. This varies depending on the subject and shooting conditions.
*6: Some files that satisfy the requirements mentioned may not be played properly depending on the performance or status of a memory card you are using.
Customer support home page
The latest support information is available at the following home page address:
http://www.sony.net/
On trademarks and copyrights
??? , Cyber-shot,
  ,
, 

 , ???Memory Stick???,


 , ???Memory Stick Duo???,


 , ???MagicGate
Memory Stick???, ???Memory Stick PRO???,


 , ???Memory Stick PRO
trademarks or registered trademarks of Sony Corporation.
???Microsoft, Windows, and Windows Vista are registered trademarks of Microsoft Corporation in the United States and/or other countries.
???Macintosh and Mac OS are registered trademarks of Apple Inc.. in the United States and/or other countries.
???The SD logo is a trademark. 

??? The SDHC logo is a trademark.
???Contains iTypeTM and fonts from Monotype Imaging Inc.
iTypeTM is a trademark of Monotype Imaging Inc.
???This software is based in part on the work of the Independent JPEG Group.
Continued


 Remote sensor (except for
  USB mini B connector

 (
(


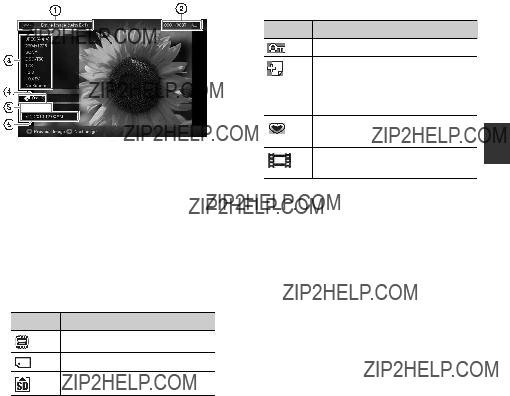
 (Settings) tab.
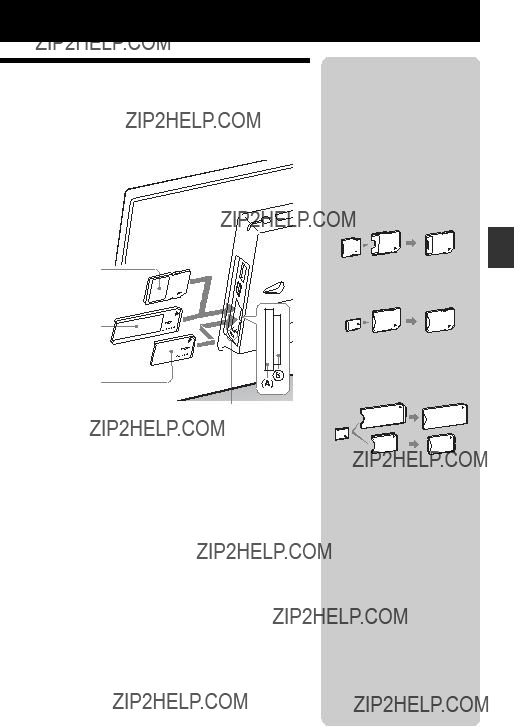
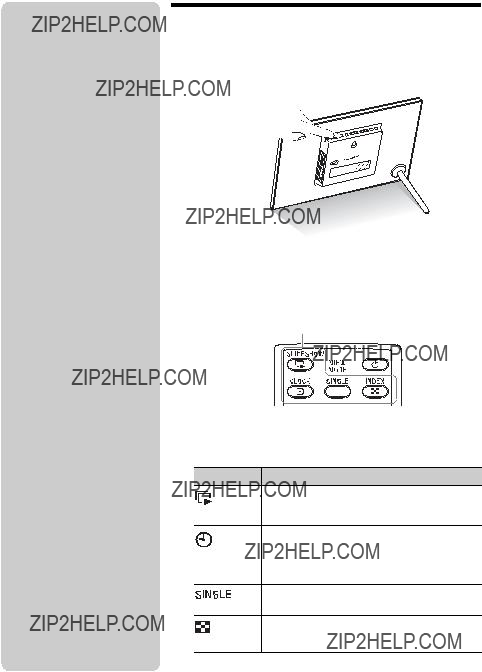

 (INDEX).
 (Settings) tab with
  (Settings) tab with
 (Slideshow) on the view mode screen, the music file with a check mark (
 (Settings) tab with
  (Editing) tab.
 (Editing) tab.
 (Editing) tab.
 (Select device) tab with
  (Select device) tab.
 (Editing) tab,
  (zoom in) on the remote control in Single view mode. To reduce an enlarged image, press
  (zoom out).
 (Editing) tab,
  (ROTATE) on the remote control. The image rotates 90 degrees counterclockwise every time you press the button.

 (Settings) tab only.
 Changing the settings
 (Settings) tab.

 USB mini B connector