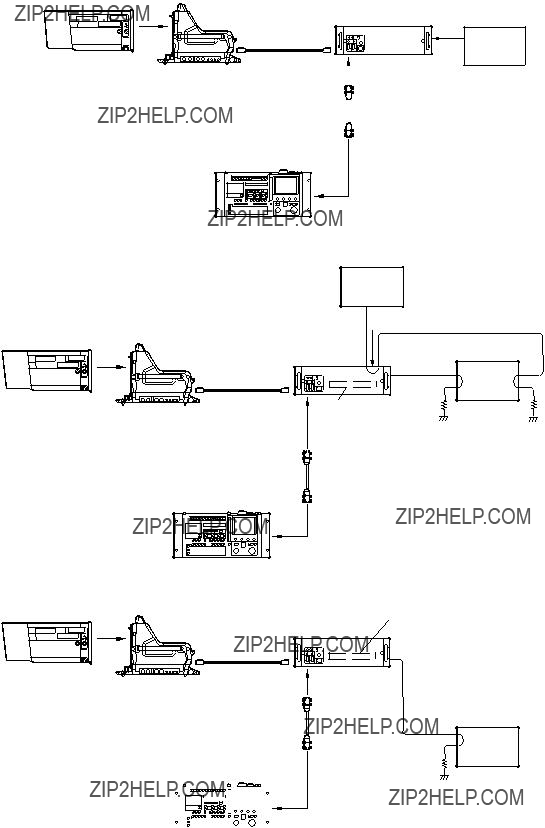
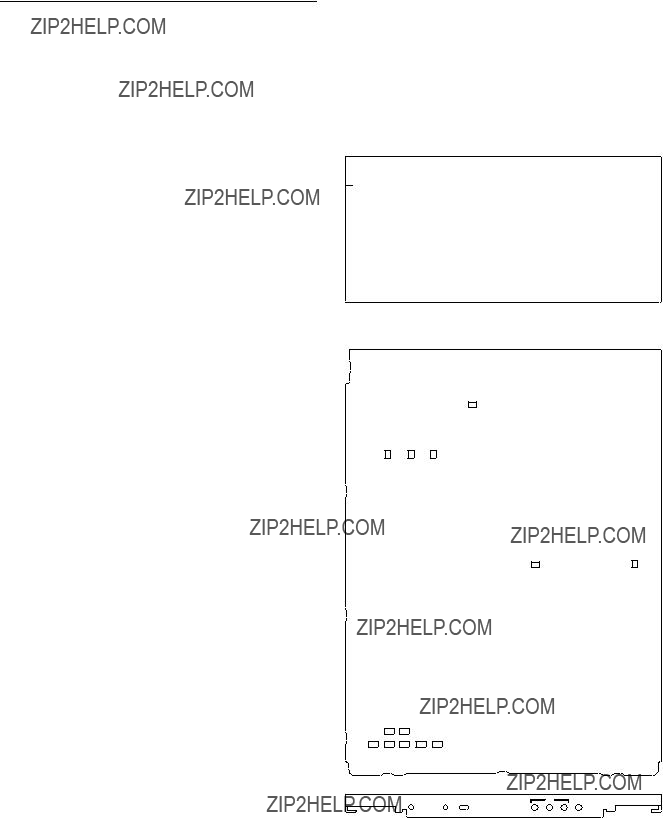
HD CAMERA CONTROL UNIT
SD ANALOG INTERFACE UNIT
HD ANALOG INTERFACE UNIT
FRAME RATE CONVERTER UNIT
LINE CONVERTER UNIT
MAINTENANCE MANUAL 1st Edition (Revised 2)
HD CAMERA CONTROL UNIT
SD ANALOG INTERFACE UNIT
HD ANALOG INTERFACE UNIT
FRAME RATE CONVERTER UNIT
LINE CONVERTER UNIT
MAINTENANCE MANUAL 1st Edition (Revised 2)

! WARNING
This manual is intended for qualified service personnel only.
To reduce the risk of electric shock, fire or injury, do not perform any servicing other than that contained in the operating instructions unless you are qualified to do so. Refer all servicing to qualified service personnel.
! WARNUNG
Die Anleitung ist nur f??r qualifiziertes Fachpersonal bestimmt.
Alle Wartungsarbeiten d??rfen nur von qualifiziertem Fachpersonal ausgef??hrt werden. Um die Gefahr eines elektrischen Schlages, Feuergefahr und Verletzungen zu vermeiden, sind bei Wartungsarbeiten strikt die Angaben in der Anleitung zu befolgen. Andere als die angegeben Wartungsarbeiten d??rfen nur von Personen ausgef??hrt werden, die eine spezielle Bef??higung dazu besitzen.
! AVERTISSEMENT
Ce manual est destin?? uniquement aux personnes comp??tentes en charge de l???entretien. Afin de r??duire les risques de d??charge ??lectrique, d???incendie ou de blessure n???effectuer que les r??parations indiqu??es dans le mode d???emploi ?? moins d?????tre qualifi?? pour en effectuer d???autres. Pour toute r??paration faire appel ?? une personne comp??tente uniquement.
Laser output power: _8 dBm
For
CLASS 1
LASER PRODUCT
LASER KLASSE 1
PRODUKT
This camera control unit is classified as a CLASS 1
LASER PRODUCT.
The CLASS 1 LASER PRODUCT label is located on the rear panel.
For
CAUTION
Use of controls or adjustments or performance of procedures other than those specified herein may result in hazardous radiation exposure.
1. Service Overview
2. Replacement of Main Parts

Manual Structure
Purpose of this manual
This manual is the maintenance manual of the following models :
This manual is intended for use by trained system and service engineers, and describes the information regarding the circuit description, character display func- tion, replacement of main parts and electrical alignment.
Related manuals
Beside this Maintenance Manual, the following manuals are available for the unit.
.Operation Manual (Supplied with
This manual describes how to operate the
.Installation and Maintenance Manual (Supplied with
This manual intended for use by trained system and service engineers describes the information regarding the installation of the
Part number:
.???Camera System
This ???Camera System
In addition to the
.???Semiconductor Pin Assignments???
This ???Semiconductor Pin Assignments???
Semiconductors that cannot be searched for on this
Part number:

Contents
The following is a summary of the sections of this manual.
Section 1 Service Overview
Describes information about circuit description,
Section 2 Replacement of Main Parts
Describes replacement of parts.
Section 3 Electrical Alignment
Describes the general information for electrical adjustment and the adjustment procedure of this unit.
1
0
2
3
4
9
5
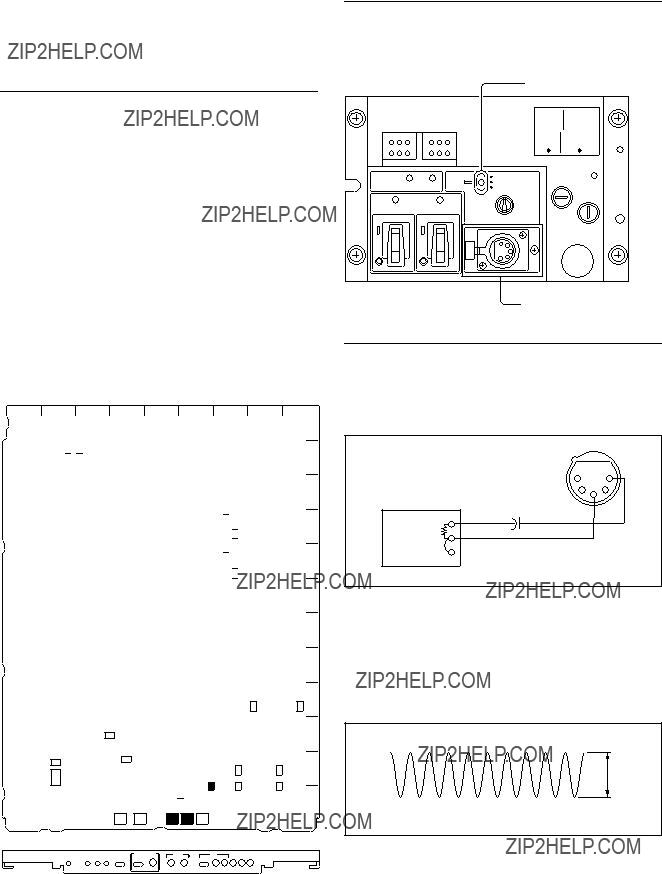
DC fans
!-
Switching regulator
!=
![
!]
!\

*1 : For UC
*2 : For CE
n
The slot to be used of each board differs depending on the used system. For details, refer to Section
.
The
The
The
.
The
.
The
.
The
As to the HD video signal, it performs the processing of the two HD video channels of both the camera picture and return picture. The processing includes the phase adjustment using the line memory and exchange of the clock signal with another desired clock.
The
It also performs embedding of the prompter signal into the signal of the return video signals and the interface processing with the digital audio system.
.
The
It supplies the main line output signal, the monitor output signal and accepts the return (four systems) input, the main reference input and the prompter input.
.
The
As the interface with external equipment, it performs processing of the component SDI format signal. The
.
The
It accepts the
In addition, it has a SYNC output of one channel that can be switched between
.
The
It has a
It has a return signal processing block that converts the analog composite input signal into the 4:2:2 digital component signal and interfaces it with the
In addition, it has a
.
The
.
The
.
The
The
The board is equipped with a monitor output for outputting the signals that have already undergone the marker and skin gate processing to be used for monitoring.
It also has an auxiliary reference input circuit for operating at multiple frame frequency. The auxiliary reference input circuit detects the frame sync point of both the main reference and sub reference signals, and establishes the frame lock of the sub reference signal with the main reference signal.
.
The
.
The
.
The
D609 : GEN LOCK display
Lights up when external synchronization is established.
D611 : /1.001 display
Lights up when the frame frequency factor of the HD signal is set to 1/1.001 times.
n
Set it with S603 on the
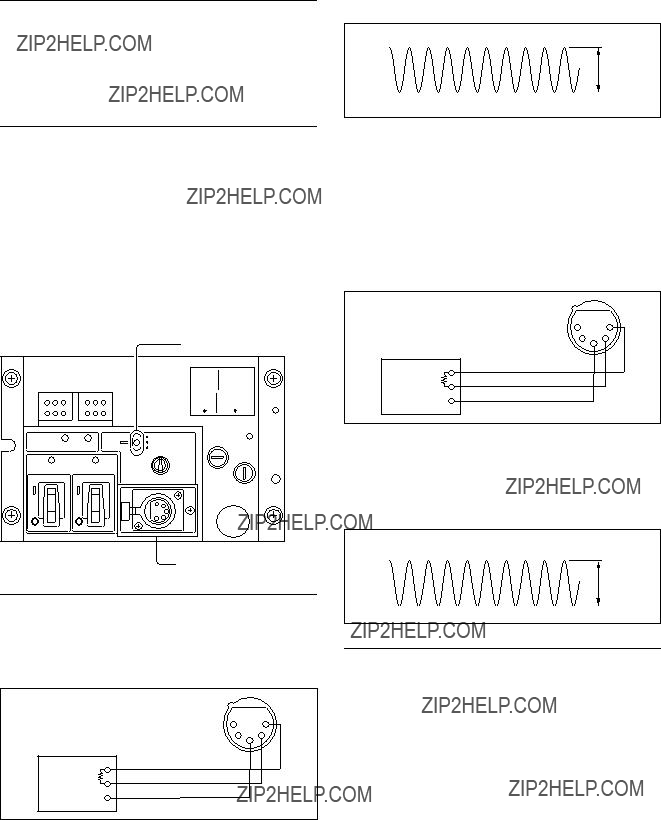
D612 : REF IN display
Lights up when the reference signal is input to the REFER- ENCE IN connector on the rear panel of the unit.
D802 : POWER display
Lights up when the voltage used on the board is normally supplied.
Board suffix:
n
When D813 and D821 light in red, be sure to clean the CAMERA connector of the unit, the CCU connector of the camera side and optical/electrical cable. It is also recom- mended to clean them when the indicators light in yellow. For the cleaning procedure, refer to Section
D801 : /1.001 display
Lights up when the frame frequency factor of the HD signal is set to 1/1.001 times.
n
Set it with S603 on the
D802 : 0
Factory use only
D803, D805, D807, D810 : MAIN OUTPUT display
Displays the frame frequency of the camera and the MAIN HD output of the CCU.
D803 lights up when the frequency is 30 Hz.
D805 lights up when the frequency is 25 Hz.
D807 lights up when the frequency is 24 Hz.
D810 lights up during progressive operation of the camera.
D804 : 1
Factory use only
D806 : 2
Factory use only
D808 : 3
Factory use only
D811 : 4
Factory use only
D812 : 5
Factory use only
D813 : OPTICAL CONDITION (CCU) display
Displays the optical level received at the
Lights in green : Normal (The optical reception level should be _17 dBm or more)
Lights in yellow : Normal (The optical reception level should be within _17 dBm to _20 dBm.)
Lights in red : Abnormal (The optical reception level should be less than _20 dBm.)
n
Attenuates about 0.5 dB for every 1 km of cable. Attenuates about 0.5 dB for each relay connector.
D814 : CHU LOCK display
Lights up when communication with the connected camera is normally established.
D815 : 6
Factory use only
D817 : 1035 line display
Lights up when the number of active video lines of the connected camera is 1035.
D818 : 7
Factory use only
D819 : 540P display
Lights up when the connected camera runs in 540P mode.
n
Set it with S805 on the
D820 : 8
Factory use only
D821 : OPTICAL CONDITION (CHU) display
Displays the optical level received at the camera side. (0 dBm = 1 mW)
Lights in green : Normal (The optical reception level should be _17 dBm or more)
Lights in yellow : Normal (The optical reception level should be within _17 dBm to _20 dBm.)
Lights in red : Abnormal (The optical reception level should be less than _20 dBm.)
n
Attenuates about 0.5 dB for every 1 km of cable. Attenuates about 0.5 dB for each relay connector.
D822 : 9
Factory use only
D904 : SYSTEM POWER display
Lights when the power supply unit and power supply of the
D907 : POWER display
Lights up when the voltage used on the board is normal.

Board suffix:
n
When D813 and D821 light in red, be sure to clean the CAMERA connector of the unit, the CCU connector of the camera side and optical/electrical cable. It is also recom- mended to clean them when the indicators light in yellow. For the cleaning procedure, refer to Section
D801 : /1.001 display
Lights up when the frame frequency factor of the HD signal is set to 1/1.001 times.
n
Set it with S603 on the
D803, D805, D807, D810 : MAIN OUTPUT display
Displays the frame frequency of the camera and the MAIN HD output of the CCU.
D803 lights up when the frequency is 30 Hz.
D805 lights up when the frequency is 25 Hz.
D807 lights up when the frequency is 24 Hz.
D810 lights up during progressive operation of the camera.
D813 : OPTICAL CONDITION (CCU) display
Displays the optical level received at the
Lights in green : Normal (The optical reception level should be _17 dBm or more)
Lights in yellow : Normal (The optical reception level should be within _17 dBm to _20 dBm.)
Lights in red : Abnormal (The optical reception level should be less than _20 dBm.)
n
Attenuates about 0.5 dB for every 1 km of cable. Attenuates about 0.5 dB for each relay connector.
D814 : CHU LOCK display
Lights up when communication with the connected camera is normally established.
D817 : 1035 line display
Lights up when the number of active video lines of the connected camera is 1035.
D819 : 540P display
Lights up when the connected camera runs in 540P mode.
n
Set it with S805 on the
D821 : OPTICAL CONDITION (CHU) display
Displays the optical level received at the camera side. (0 dBm = 1 mW)
Lights in green : Normal (The optical reception level should be _17 dBm or more)
Lights in yellow : Normal (The optical reception level should be within _17 dBm to _20 dBm.)
Lights in red : Abnormal (The optical reception level should be less than _20 dBm.)
n
Attenuates about 0.5 dB for every 1 km of cable. Attenuates about 0.5 dB for each relay connector.
D904 : SYSTEM POWER display
Lights when the power supply unit and power supply of the
D907 : POWER display
Lights up when the voltage used on the board is normal.

D4 : POWER display
Lights up when the voltage used on the board is normally supplied.
D809, D810, D811 : MAIN OUTPUT display
Displays the SD system.
D809 lights up when the SD system is set to 525/59.941 SDI.
D810 lights up when the SD system is set to 625/50I SDI. D811 lights up during 30PsF operation of the camera.
n
For details of the SD system setting, refer to Section
D813 : 0
Factory use only
D814 : 6
Factory use only
D815 : 1
Factory use only
D816 : 7
Factory use only
D817 : 2
Factory use only
D818 : 8
Factory use only
D819 : 3
Factory use only
D820 : 9
Factory use only
D821 : 4
Factory use only
D822 : 5
Factory use only

LEVEL CHROMA SYNC
D602 : BB REF IN display
Lights up when the external sync mode is set to SD and the reference signal for synchronizing the sub carrier is input.
n
Set it with S602 on the
D701 : POWER display
Lights up when the voltage used on the board is normally supplied.
D824 : POWER display
Lights up when the voltage used on the board is normally supplied.
D1005 : /1.001 display
Lights up when the frame frequency factor of the HD signal is set to 1/1.001 times.
n
Set it with S603 on the
After replacing each
While referring to Section 2, ???System Setup??? of the separate Installation and Maintenance Manual, readjust and reset the following items.
Adjustment and setting items
.Selecting the intercom system
.Setting the input level of the PGM audio signal
.Selecting an intercom line to be connected to the INTERCOM connector
.Controlling the microphone input level from the remote control
.Adjusting the microphone input level using the MIC LEVEL switch
.Setting the microphone output level
.Adjusting the sync signal phase
While referring to Section 2, ???System Setup??? of the separate Installation and Maintenance Manual, readjust and reset the following items.
Adjustment and setting items
.Adjusting the staircase signal
If required, adjust the following items too.
.Adjusting the WF Output Signal Level
While referring to Section 3, ???Electrical Alignment???, adjust the following item.
Adjustment item
(Board suffix:
Board
While referring to Section 3, ???Electrical Alignment???, adjust the following items.
Adjustment items
While referring to Section 2, ???System Setup??? of the separate Installation and Maintenance Manual, adjust the following item.
Adjustment item

Flexible Card Wire
The flexible card wire is used to connect between the following boards. Bending the flexible card wire may result in shortening the lifespan. Be careful not to bend it.
Disconnecting
1.Turn off the main power.
2.Slide portion A in the direction of the arrow to unlock and pull out the flexible card wire.
Connecting
m
.Do not insert the flexible card wire sideways.
.Confirm that there is no stain or dust on the contact surface of the flexible card wire.
1.Slide portion A in the direction of the arrow, turn over the contact surface of the flexible card wire, then securely insert it into the connector.
2.Return portion A to its original position and lock the connector.
A
A
Contact surface
The state of the optical connector while the receptor is receiving signals can be checked using the indicators on the
When the relevant indicator lights in red or yellow, clean the following optical contact blocks.
.CAMERA connector of the unit
.CCU connector of the camera side
.Optical/electrical cable
.Connection connector of
When replacing the CAMERA connector or replacing the
Follow the procedures below for cleaning.
Tools Required
.Alignment sleeve remover
Sony P/N :
n
Insert the shorter nose end when removing/installing the alignment sleeve.
Grasp not the shock absorber portion of the remover but
the handle in use.
.Cotton swabs (commercially available)
Use the shorter nose end.
n
Use a cotton swab whose diameter is about 4 mm.
If a cotton swab whose diameter exceeds 5 mm is used, the cotton swab cannot be inserted into the end of the connector and the tip of the optical contact cannot be cleaned.
Cleaning
Male connector
Clean the tip of the white optical contacts by a cotton swab moistened with alcohol.
Optical contacts (white)
Female connector
The optical contacts for female connector are in an unex- posed state. In cleaning, it is necessary to be exposed by removing the alignment sleeve in advance. Proceed as follows.
1.Insert the alignment sleeve remover into the alignment sleeve in the straight line and turn it clockwise.
Alignment sleeve
Alignment sleeve remover
2.When the turn stops, pull out the remover in the straight line forcedly.
n
The alignment sleeve can be removed/reinstalled with the sleeve itself attached to the tip of the remover. Great care should be taken so as not to lose or damage the alignment sleeve.
(Alignment sleeve: Sony P/N
Alignment sleeve
3.Clean the tip of the white optical contacts by a cotton swab moistened with alcohol.
Optical contacts (white)
4.Insert the remover with the alignment sleeve attached to its tip, and push it until it clicks.
5.Rotate the remover counterclockwise to install the alignment sleeve, and extract the remover.
Connection connector
Clean the optical contact block of the connector using a cotton swab moistened with alcohol.

The electric parts mounted on the
If the electric parts need to be replaced or adjusted, replace the entire unit.
The write/rewrite method of the PLD (Programmable Logic Device) that is mounted on the
If the parts listed below needs to be replaced and if PLD needs to be upgraded, contact your local Sony Sales Office/Service Center.
n
The PLD that is mounted on the
n
The part number of PLD (or ROM for PLD) in which data is not written yet, is shown in ??? Spare Parts??? of
Therefore, if part replacement is required, write the data by the following procedure.
In the case of the PLD type that runs on the program stored in external ROM, data needs not to be written only by replacing the part if the specific PLD only is defective.
.To write/rewrite the PLD internal data:
1.The standard fixture (cable) can be used.
2.The standard software (PLD Download Tool) can be used.
.The PLD internal data is controlled in the Sony Database Server under the name Project file (E_xxx_xxx_xx_xx).
.The printed circuit board is equipped with the standard connector (EPR connector) to write the PLD internal data. The indication ???EPR??? is shown on the printed circuit board.
Corresponding PLD and PLD ROM list
*: IC704 through IC709 are the PLD ROMs.
Data write procedure
Data write procedure in the PLD (or ROM for PLD) is outlined below.
For details of data write procedure, refer to ???Download Tool Operating Instruction for Device Program- ming???.
???Download Tool Operating Instruction for Device Programming??? is available in the same site where the PLD Download Tool software is available.
Equipment required
.PLD download fixture (Sony part number :
When connecting the fixture to the
.A PC having parallel port.
A PC in which the PLD Download Tool software is already installed.
For the applicable OS and the operating environment, refer to ???Download Tool Operating Instruction for Device Programming???.
Step 1 Prepare the Project file. n
Download the Project file from the Sony Database Server.
Step 2 Turn off the power of this unit. Connect the PC parallel port to the EPR connector of the target board using the PLD download fixture (cable).
Step 3 Turn on the power of this unit.
Start the Download Tool software and read the Project file.
Step 4 Program the PLD (or ROM for PLD) with the Download Tool software.
Step 5 Upon completion of programming, check that error message is not displayed. Turn off the power of this unit and back on.

The positive characteristic thermistor (for power supply) functions as a circuit protective element on the
1.Safety Related Components Warning w
Components marked !are critical to safe operation. Therefore, specified parts should be used in the case of replacement.
2.Standardization of Parts
Some repair parts supplied by Sony differ from those used for the unit. These are because of parts commonality and improvement.
Parts list has the present standardized repair parts.
3.Stock of Parts
Parts marked with ???o??? at SP (Supply Code) column of the spare parts list may not be stocked. Therefore, the delivery date will be delayed.
4.Harness
Harnesses with no part number are not registered as spare parts.
In need of repair, get components shown in the list and repair using them.
5.Destination Representation
The part indicated ???For J/UC/CE??? in the spare parts list is used in the unit written below. For J : The part is used in a unit for Japan.
For UC : The part is used in a unit for the U.S.A. and Canada.
For CE : The part is used in a unit for regions except the above countries.
The character generation circuit built into the unit can mix character information such as the settings, state and self- diagnosis of the unit with the SD video signal, output it from the PIX OUT
The character MIX function output from the PIX OUT connector can be forcibly turned off by turning off the
When the SD analog monitor is connected to the CHAR- ACTER OUT connector, only characters are displayed in black and white.
Operating procedure
To display the setting, state and
To change the page, press the CHARACTER button of the RCP. The page can also be changed by pressing the S131 switch on the
When the CHARACTER button of the RCP is kept pressed, the pages are changed continuously. After all the pages are displayed, the cycling display stops on the final page and the CHARACTER button of the RCP goes off. To display the character information again, press the CHARACTER button of the RCP.
n
The first page is blank. When selecting the first page, the display of characters is OFF.
G
H
J
S102
K
L
S131
M
The contents of the pages displayed on the SD analog monitor are as follows.
Required equipment
.Color monitor
Sony
.Remote control unit Sony
.HDVS camera system
Page 1
System Status Display
No. Contents
1Displays the type of camera connected to the unit.
2Displays the type of external sync signal.
(Free/SD Digital/HD Digital)
3Displays the setup format of the
4Displays the setup format of the board mounted in the second slot from the top of the front side.*1
5Displays the setup format of the board mounted in the third slot from the top of the front side.*1
6Displays the type of signal input to the RET INPUT 1 connector on the rear panel of the unit.
7Displays the type of signal input to the RET INPUT 2 connector on the rear panel of the unit.
8Displays the type of signal input to the RET INPUT 3 connector on the rear panel of the unit.
9Displays the type of signal input to the RET INPUT 4 connector on the rear panel of the unit.
0Displays abnormal portions of the system detected during
*1 : For details, refer to Section 2, ???System Setup??? of the separate Installation and Maintenance Manual.
Page 2
Auto & Diag Display
**Auto Black Balance** Completed 1
* Diagnosis * (Front) (Rear)
No. Contents
1Displays the progress of auto setup of the camera side.
2Displays the
(OK/NG).*2
3Displays the
4Displays the
5Displays the
6Displays the
7Displays the
*2 : For the contents of the
Page 3
Camera Status Display
Contents
Displays information of GAIN, ND, CC, Extender, Shutter, aperture, Write, Black, Flare, Black??, Detail, etc.
Page 4
SD Signal Status Display
No. Contents
1Setting state of the aspect ratio of the SD signal
(SQ/LB/EC) SQ : Squeeze LB : Letter box
EC : Edge crop
Displays the crop position too. (_99 to 99)
_99 : The
0 : Cuts out the center.
99 : The
2Setting state of the H
3Setting state of the V
4Setting state of SD GAMMA (_99 to 99)
5Setting state of the linear matrix correction coefficient
(ON/OFF)
6Setting state of the
(ON/OFF)
7Setting state of the coring level of the
8Setting state of the reducing level of the
9Setting state of the detail function (ON/OFF)
0Setting state of the detail level (_99 to 99)
!- Setting state of the detail limiter (_99 to 99)
!= Setting state of the detail crispening (_99 to 99)
![ Setting state of the level dependent knee (_99 to 99)
!] Setting state of the detail H/V ratio (_99 to 99)
!\ Setting state of the detail boost frequency (_99 to 99)
!; Setting state of the detail white limiter (_99 to 99)
!' Setting state of the detail black limiter (_99 to 99)
!, Setting state of the level dependent gain (_99 to 99)
Page 5
System Diag (1/3) Display
No. Contents
1State of the optical receiving level of the camera and camera control unit (OK/WARNING/NG)*3 WARNING :The optical level is _17 to _20 dBm.
NG : The state when the optical level is low and any signal waveform cannot be obtained
When either of WARNING or NG appears on the CCU side, clean the connector or cable while referring to
Section
When either of WARNING or NG appears on the camera side, clean the connector or cable while referring to the
Maintenances Manual of the camera.
2State of the fan of the power supply block and the fan of the rear panel (OK/NG)
NG : The fan of the switching regulator and the fan of the rear panel are defective.
3Accumulated power supply time to the
*3 : The optical sending/receiving state of the main unit also can be checked using the indicator on the panel of the
Page 6
System Diag (2/3) Display
No. Contents
1State of camera cable connection (Open/Short/NG)
2Existence of data from the camera (__/Wait/Sense/OK)
__: The communication with the camera cannot be established.
Wait : The communication with the camera is being waited.
Sense : The communication with the camera is being established.
3State of the power supply of the camera (ON/OFF)
4State of connection to the camera (OK/NG*4)
5State of cable connection of the RCP/CNU connector of the rear panel of the unit (Open/Connect)
6Existence of the data from the RCP/CNU connector of the rear panel of the unit (__/Wait/Sense/OK)
__: The communication with the equipment connected to the RCP/CNU connector cannot be established.
Wait : The communication with the equipment connect- ed to the RCP/CNU connector is being waited.
Sense : The communication with the equipment connect- ed to the RCP/CNU connector is being estab- lished.
7State of the power supply of the RCP/CNU connector of the rear panel of the unit (OK/NG)
*4 : When power of the camera is supplied from the outside too, NG appears.
Page 7
System Diag (3/3) Display
* System Diag 3/3 *
Intercom
No. Contents
1Setting state of the intercom 1ch of the camera side (ENG/PROD)
2Setting state of the intercom 2ch of the camera side
(ENG/PROD)
3Gain and control state of the microphone circuit of the camera side (Remote/Local)
Page 8
AT Diag Display
Displays the details of
No. Contents
1Setting state of the S603 switch on the
2Setting state of the S601 and S602 switches on the AT- 141 board (SD Local/SD Remote/HD Local/HD Remote)*5
3Setting state of delay amount (setting of the S120 switch on the
4Setting state of the S110 switch on the
5Setting state of the S111 switch on the
6Setting state of the
7State of the operation mode of the
*5 : For details, refer to Section

Page 9
DPR Diag Display
Displays the details of
No. Contents
1Whether the
(None/NG/OK)
2Setting state of the S804 to S807 switches on the DPR-
163 board*6
3Setting state of the S810 switch on the
4Setting of input signal that is output to DIGITAL AUDIO OUT
5Setting of input signal that is output to ANALOG AUDIO OUT
6State of the operation mode of the
(Normal/Test)
*6 : For details, refer to Section
Pages 10 and 11
Displays the details of
diagnosis of the
board is mounted.)
diagnosis of the
No. Contents
1Setting state of switch
(YCD/RGB)*7
2Setting state of switch
*7 : For details, refer to Section

a.When the
Front: RC
No. Contents
1Whether the
b.When the
No. Contents
1State of the format of the frame converter MAIN INPUT signal
2Setting state of the conversion format (setting of S2/S3 on the
3State of the format of the frame converter SUB INPUT signal
4State of the conversion format of the frame converter SUB OUTPUT signal
5Setting state of the format (setting of S11 to S13 on the
6State of the format of the RETURN VIDEO signal to be output from the
*7 : For details, refer to Section
c.When the
No. Contents
1State of the format of the line converter MAIN INPUT signal
2Setting state of the conversion format (setting of S2 on the
3Setting state of the format (setting of S11 and S12 on the
4State of the format of the RETURN VIDEO signal to be output from the
*8 : For details, refer to Section
d.When the
Front: IF
No. Contents
1Whether the
(None/NG/OK)

DL: OK
IE: OK
* CAMERA Diag *
Contents
Displays the
No. Contents
1Displays the ROM version of the camera.
2Displays the ROM version of the camera adapter.
3Displays the ROM (IC105,
ROM Version
Displays the ROM versions of the unit and the peripheral equipment of the unit.
No. Contents
1Displays the ROM version of the camera.
2Displays the ROM (IC105,

Section 2
Replacement of Main Parts
w
The components marked !are critical to safe operation. If you replace with parts other than the specified ones, fire or electric shock may result.
c
When repairing or replacing the power supply block, set the voltage. If the voltage is set incorrectly, a fire or electric shock may result.
.When repairing or replacing the power supply block, set to the same power supply voltage as that of repair shop work bench.
.When delivering to the user, adjust the power supply voltage to suit the user.
Gently remove or attach the power supply unit while holding it by hand.
Otherwise, the unit may fall, causing an injury.
If the power supply unit is not attached securely, the contact resistance of the unit increases, which may result in damage to parts or a fire. Tighten completely the fixing screws of the power supply unit.
Do not turn on the power before fixing the power supply unit securely.
Replacement Part
Part : Switching regulator
Part No. :
Replacement Procedure
1.Turn off the main power and disconnect the plug from the outlet.
n
Wait for at least three minutes before starting replace- ment, because there are electrically live blocks inside the machine that could cause electric shock.
2.Remove the front panel. (Refer to Section 1 of the Installation and Maintenance Manual.)
3.Fully loosen the four screws (with
4.Set the two voltage selectors of the new switching regulator as shown in the following figure.
5.Attach the switching regulator in reverse order of step 3.
n
When using the unit at a voltage other than the specified voltage, contact your local Sony Sales Office/Service Center.

w
The components marked !are critical to safe operation. If you replace with parts other than the specified ones, fire or electric shock may result.
Replacement Part
n
The CAMERA fuse differs depending on the destination of the unit.
MAIN fuse
Part : Fuse (6.3 A, 250 V)
Part No. :
CAMERA fuse
For UC
Part : Fuse (100 to 120 V, 6.3 A, 250 V)
Part No. :
For CE
Part : Fuse (220 to 240 V, 4 A, 250 V)
Part No. :
Replacement Procedure
1.Turn off the main power and disconnect the plug from the outlet.
m
.Wait for at least three minutes before starting replacement, because there are electrically live blocks inside the machine that could cause electric shock.
.Remove any foreign objects inside the machine that could cause a short before replacement.
2.Remove the front panel. (Refer to Section 1 of the Installation and Maintenance Manual.)
3.Fully loosen the screw (with
n
The MAIN and CAMERA fuses can be replaced in the same way.
4.Insert a flat screwdriver into the groove of the fuse holder, and rotate it in the direction of arrow A (by about 90d) to unlock. (Fig. 1)
5.Remove the fuse with the entire fuse holder. (Fig. 2)
6.Remove the fuse from the fuse holder. (Fig. 3)
7.Attach a new fuse in reverse order of steps 3 to 6. n
A spring is already attached in the fuse holder. When attaching a new fuse, rotate the flat screwdriver in the direction of arrow C (by about 90d) while pressing it in the direction of arrow B to lock the fuse holder.
B
Flat screwdriver
Fuse holder
C

1.Turn off the main power and disconnect the plug from the outlet.
m
.Wait for at least three minutes before starting replacement, because there are electrically live blocks inside the machine that could cause electric shock.
.If you bend or pull out the optical fiber cable forcibly, disconnection may result. Handle the cable carefully.
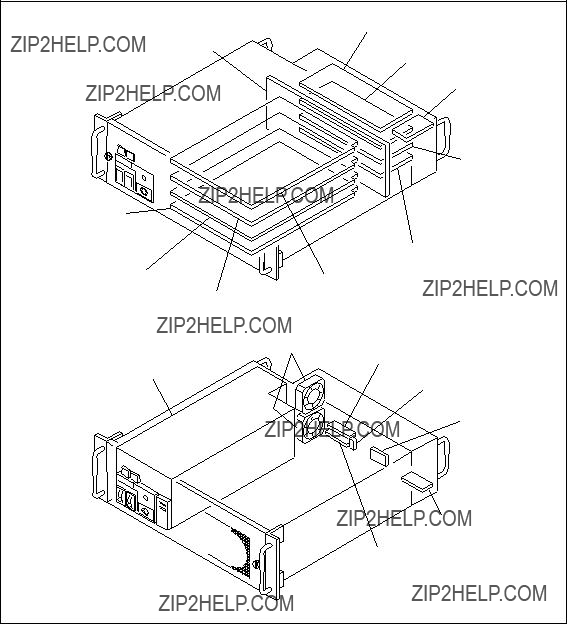
2.Remove the boards and the blank panel from the rear panel. (Refer to Section 1 of the Installation and Maintenance Manual.)
3.Remove the cap from the CAMERA connector.
4.Remove the four screws and slide the rear panel assembly in the direction of the arrow.
5.Remove the isolating sheet. n
The isolating sheet is not fixed.
6.Disconnect the connectors (CN1, CN16, CN18, CN19, CN20, CN21, CN22) of the
7.Reattach the rear panel in reverse order of the disas- sembling procedure.
c
If the fan is defective, the temperature inside the unit will rise. Touching the inside of the unit in this state may cause a burn.
Replace the parts after turning off the power and cooling the inside.
The fans that are used in the unit of the rear panel are recommended replacement parts.
The lifespan of these fans is about 30,000 hours, which means that the fans can be used for about three and a half years if the power is on all the time, so as a guideline the fans should be replaced every three and a half years.
n
The rear panel is provided with the two DC fans.
Replacement Procedure
1.Turn off the main power and disconnect the plug from the outlet.
n
Wait for at least three minutes before starting replace- ment, because there are electrically live blocks inside the machine that could cause electric shock.
2.Remove the rear panel. (Refer to Section
Only either the upper or the lower DC fan can be replaced.

Replacing the upper fan
1.Disconnect the harness from the two harness clamps.
2.Disconnect the connector (CN23) from the
3.Remove the four screws and remove the DC fan.
4.Attach a new DC fan in reverse order of steps 1 to 3. n
Attach the DC fan in the direction shown below.
Upper fan
Lower fan
Replacing the lower fan
1.Disconnect the harness from the harness clamp.
2.Disconnect the connector (CN24) from the
3.Remove the four screws and remove the DC fan.
4.Attach a new DC fan in reverse order of steps 1 to 3. n
Attach the DC fan in the direction shown below.
Upper fan
Lower fan
Replacement Procedure
5.Attach a new
When connecting the
Connector connection at the correct position

m
.The electric parts mounted on the
If the electric parts need to be replaced or adjusted,
replace the entire unit.
.If you bend or pull out the optical fiber cable forcibly, disconnection may result. Handle the cable carefully.
Replacement Procedure
1.Turn off the main power and disconnect the plug from the outlet.
n
Wait for at least three minutes before starting replace- ment, because there are electrically live blocks inside the machine that could cause electric shock.
2.Remove the rear panel. (Refer to Section
3.Remove the three screws and slide the optical unit in the direction of the arrow.
4.Disconnect the connectors (CN26, CN29) of the MB- 902 board and remove the optical unit.
5.Remove the four screws and remove the CAMERA connector from the optical unit.
CAMERA connector
Optical unit
B3 x5
B3 x5
6.Disconnect the two connectors from the rod holder. (Fig. 1)
7.Rotate each knurl block in the direction of arrow A to remove the connector. (Fig. 2)
n
The interconnection connector should be remain connected to the mate connector (yellow). To avoid the signal degration, do not touch an exposed tip of the connector.
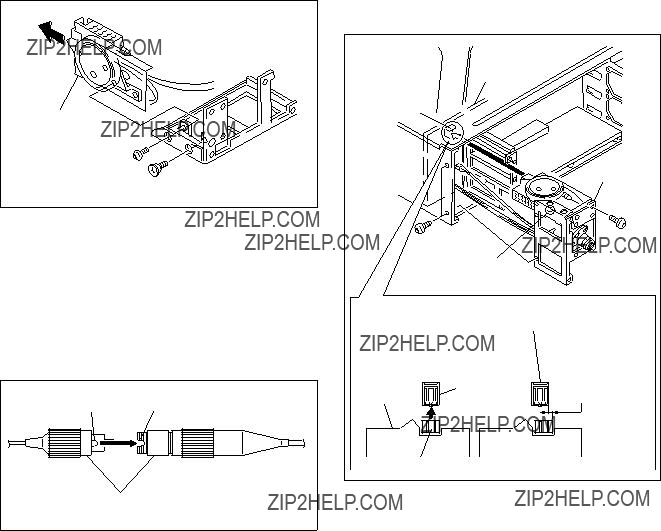
8.Remove the two screws (B3 x5, shoulder screw) and remove the board assembly in the direction of the arrow.
n
Be careful not to bend the cables (especially light blue and cream color).
9.Attach the new
m
10.Attach the optical unit to the unit with three screws. First, fasten temporarily the screws shown in the figure, then fasten them securely.
n
When connecting the connector (CN1) of the
Connect the boards securely with great care.
CN6
Optical unit
Fasten the screw temporarily.
.Before connecting the connector, clean the tip of the connector pin with alcohol.
.When connecting the connector, align the projecting portion with the
Connector connection at the correct position
CN6
Connector connection at incorrect position
Be careful to connect the connectors because they may get out of position by one pin.
CN1
11. Attach the rear panel. (Refer to Section

n
If you bend or pull out the optical fiber cable forcibly, disconnection may result. Handle the cable carefully.
Replacement Procedure
1.Follow steps 1 to 7 of Section
n
The interconnection connector should be remain connected to the mate connector (light blue and cream color). To avoid the signal degration, do not touch an exposed tip of the connector.
2.Attach a new CAMERA connector in reverse order of removal.
n
For the notes during assembling, refer to step 9 of Section

Section 3
Electrical Alignment
Measures
. Digital oscilloscope (300 MHz or higher) Tektronix TDS460A or equivalent
. HD waveform monitor
Tektronix 1735HD/1730HD or equivalent
. SD waveform/Vector monitor Tektronix 1780R or equivalent (for UC) Tektronix 1781R or equivalent (for CE)
.SD signal generator
Tektronix TSG170A or equivalent (for UC)
Tektronix TSG271 or equivalent (for CE)
. Audio oscillator
Tektronix
.Frequency counter
Advantest TR5821AK or equivalent
Related equipment
. HDVS color video camera
.Master setup unit
Tools
. Front extension board
.Rear extension board
.Extension board
. The measure should have already been calibrated.
.
. The adjustment of the
. Types of the color bars to be output from the
*1 : When
.To adjust the unit, extend each
power.
. Before starting adjustment, warm up for about 10 minutes.
.Before using the
Adjusting the
OPTICAL FIBER
CABLE
MASTER SETUP UNIT
Adjusting the
CABLE
HD
COLOR
CAMERA
MASTER SETUP UNIT
HD waveform monitor
75 Z

n
When changing the switch settings from the customer???s setting positions, it is recommended to write down the customer???s setting positions in the following table. After completing the adjustment, be sure to return the switches to the customer???s setting positions.
Set the switches other than the above to the state when shipped from the factory.
For details of the switch settings, refer to Section
*1 : for UC
*2 : for CE
When using the
. Power supply and signal selector block
When using the
. Power supply and signal selector block
* : Press the function button and select it on the function menu display.

Measures : Oscilloscope, Audio oscillator
Note
This adjustment is described on the premise that the output impedance of the audio oscillator is 600 Z.
Preparation
. Board extension :
. Board extension :
. S126 (MIC
MIN
. S128 (MIC
MIN
. S402
. S401
Adjustment Procedure
1.MIC1 level adjustment
Input a sine wave of 1 kHz, 220 mV
4.MIC2 level adjustment
Input a sine wave of 1 kHz, 220 mV
5. Measuring point : TP402
Adjusting point : 1RV402
Specifications : B = 1100 ?? 50 mV
B
Setting after Adjustment
S401
2. Measuring point : TP401
Adjusting point : 1RV401
Specifications : A = 1100 ?? 50 mV
A
3. Remove the cable that is connected in step 1.
Adjustment
Measures : Oscilloscope, Audio generator
Note
This adjustment is described on the premise that the output impedance of the audio oscillator is 600 Z.
A
Preparation
. MIC switch/HDCU front panel ??? CARBON
. Board extension :
MIC switch
MAIN CAMERA
INTERCOM connector
Adjustment Procedure
1.Connect the audio oscillator and the INTERCOM connector on the HDCU front panel as shown in the following figure.
TP608 
1RV602

 TP613
TP613
1RV604
1RV603
1RV605

 TP402 1RV402

 S401
S401

 TP401 1RV401

 S402
S402
B
C
D
E
F
G
H
J
2.Input a sine wave of 1 kHZ, 220 mV
3.Measuring point : TP503
Adjusting point : 1RV506 (TALK
board panel side
S110
S101
S102
S603
TP504 
S602 S126
S601
S128
K
L
M
Specifications : A = 200 ?? 10 mV
A
Measures : Oscilloscope, Audio generator
Note
.This adjustment is described on the premise that the output impedance of the audio oscillator is 600 Z.
.When the intercom system is the RTS system, perform this adjustment.
Preparation
. MIC switch/HDCU front panel ??? CARBON
. Board extension :
. S504
. S404
. S503 (INCOM
. S41
. S403
.Connect a resistance of 200 Z between
MIC switch
MAIN CAMERA
INTERCOM connector
Adjustment Procedure
1.Input a sine wave of 1 kHz, 220 mV
2.PROD CANCEL adjustment
Measuring point : TP502
Adjusting point : 1RV505 (2WIRE CANCEL 1)/
Specifications : A = Minimize
A
3.ENG CANCEL adjustment
S503 (INCOM
4.Connect a resistance of 200 Z between
5.Input a sine wave of 1 kHz, 220 mV
6.Measuring point : TP405
Adjusting point : 1RV405 (2WIRE CANCEL 2)/
Specifications : B = Minimize
B
Setting after Adjustment
After adjustment is completed, return the switches to the original setting.
Measures : Oscilloscope, Audio oscillator
Note
This adjustment is described on the premise that the output impedance of the audio oscillator is 600 Z.
Preparation
Board extension :
Adjustment Procedure
1.Input a sine wave of 1 kHz, 2.2 V
2. Measuring points : TP504
Adjusting point : 1RV501 (PGM
Specifications : A = 100 ?? 20 mV
A
TP608 

 TP613
TP613
1RV604
1RV603
1RV605
1RV602

 TP402 1RV402
S401

 TP401 1RV401
S402
A
B
C
D
E
F
G
n
These specifications are set for service. When using this unit, adjust the level to suit the user.
H
J
K
L
M

Measures : Oscilloscope, Audio oscillator
Note
This adjustment is described on the premise that the output impedance of the audio oscillator is 600 Z.
Preparation
. MIC switch/HDCU front panel ??? CARBON
. Board extension :
MIC switch
MAIN CAMERA
2.Adjust the output level of the audio oscillator so that a sine wave of 1 kHz, 200 mV
3.Measuring points : TP504
Adjusting point : 1RV502 (SIDE
Specifications : A = 20 ?? 2 mV
A
n
These specifications are set for service. When using this unit, adjust the level to suit the user.
A
INTERCOM connector
Adjustment Procedure
TP608 

 TP613
TP613
1RV604
1RV603
1RV605

 TP402 1RV402
S401

 TP401 1RV401
B
C
D
E
1RV602
S402
S110
S101
S102
S603
TP504 
S602 S126
S601 

S128
F
G
H
J
K
L
M

Adjustment
Adjustment
Measure : Frequency counter
Preparation
. Board extension:
. Remove the cable connected to the REFERENCE IN connector on the HDCU rear panel.
. S603
.S601
LOCAL
. S602
.
. Connect the measure as shown in the following figure.
.After turning on the power, wait for 10 minutes at least and start adjustment.
Adjustment Procedure
1.HD (60) frequency adjustment Measuring point : TP613
2.S603
3.HD (59.94) frequency adjustment Measuring point : TP613
4.S602
5.SD frequency adjustment
Measuring point : TP608
Adjusting point : 1RV602
Specifications : 27,000,000 ?? 10 Hz
Setting after Adjustment
After finishing the adjustment, return the switches to the original setting.
Board
Measure : Oscilloscope (20 MHz BWLimit: ON)
Adjustment Procedure
Measuring point : TP613
Adjusting point : 1RV605
Specifications : C = 1.65 ?? 0.04 Vdc
When this adjustment is completed, perform

Board
Perform
Measure : Oscilloscope (20 MHz BWLimit: ON)
Note
This adjustment corresponds to the
Adjustment Procedure
Measuring point : TP307
Adjusting point : 1RV301
Specifications : C = 1.65 ?? 0.04 Vdc
A
A
B
1RV501
C
D
E
H
J
K
L
M
Measures : SD waveform monitor
SD signal generator
Preparation
Connect the SD signal generator (for UC : SMPTE color
bar/for CE : EBU color bar) to the PROMPTER IN
Adjustment Procedure
Measuring point : PROMPTER connector/CAMERA side
(terminated at 75 Z) (for UC) A = 1000 ?? 7 mV

Measure : Frequency counter
Note
After replacing IC508 or IC510 on the
Preparation
. Board extension :
. COR501
. Connect the measure as shown in the following figure.
.After turning on the power, wait for 10 minutes at least and start adjustment.
Adjustment Procedure
1.Measuring point : TP501
Adjusting point : 1RV501
Specifications : 27.0 ?? 0.2 MHz
2.Measuring point : TP502
Adjusting point : 1RV502
Specifications : 27.0 ?? 0.2 MHz
Note
After finishing the adjustment and waiting for 10 minutes at least, confirm that each specification is satisfied.
If the specifications are not satisfied, perform the adjust- ment again.
Setting after Adjustment
COR501
(Short between

Adjustment
Measure : Frequency counter
Note
After replacing IC601 on the
Preparation
. Board extension :
. S110
. S101
. COR601
. Connect the measure as shown in the following figure.
.After turning on the power, wait for 10 minutes at least and start adjustment.
A
Adjustment Procedure
Measuring point : TP603
TP608 

 TP613
TP613
1RV604
1RV603
1RV605

 TP402 1RV402
S401

 TP401 1RV401
B
C
D
E
Note
1RV602
S402
After finishing the adjustment and waiting for 10 minutes at least, confirm that each specification is satisfied.
If the specifications are not satisfied, perform the adjust- ment again.
Setting after Adjustment
.After finishing the adjustment, return the switches to the original setting.
. COR601
(Short between
S110
S101
S102
S603
TP504 
S602 S126
S601
S128
F
G
H
J
K
L
M

Measure : Oscilloscope (20 MHz BWLimit: ON)
Note
This adjustment corresponds to the
Preparation
. Board extension :
Adjustment Procedure
Measuring point : TP201
Adjusting point : 1RV201
Specifications : C = 1.65 ?? 0.04 Vdc
A
Adjustment
Measure : Oscilloscope (20 MHz BWLimit: ON)
Note
This adjustment corresponds to the
Preparation
. Board extension :
Adjustment Procedure
Measuring point : TP703
Adjusting point : 1RV701
Specifications : C = 1.65 ?? 0.04 Vdc
Measures : Oscilloscope, SD waveform monitor
Preparation
. Board extension :
. Board extension :
.1RV354
LEVEL)
.
.
. S802
. PIX monitor select switch/MSU ??? ENC
. BARS button/MSU ??? ON
Adjustment Procedure
1.Video level adjustment
Measuring point : TP351
A, B
2.PIX OUT level adjustment
Measuring point : PIX OUT
Adjusting point : 1RV401
Specifications : B = 100.0 ?? 0.5 IRE (terminated at 75 Z) (for UC) B = 700.0 ?? 3.5 mV (terminated at 75 Z) (for CE)
Settings after Adjustment
.After finishing the adjustment, return the switches to the original setting.
. PIX monitor select switch/MSU ??? ENC
. BARS button/MSU ??? ON
n
Do not move 1RV354

Preparation
. Board extension :
. Board extension :
. 1RV354
.
.
. S802
. WF monitor select switch/MSU ??? ENC
. BARS button/MSU ??? ON
Adjustment Procedure
1.Video level adjustment
Measuring point : TP350
Adjusting point : 1RV350
Specifications : A = 1428 ?? 5 mV
A, B
2.WF OUT level adjustment
Measuring point : WF OUT
Adjusting point : 1RV404
Specifications : B = 100.0 ?? 0.5 IRE (terminated at 75 Z) (for UC) B = 700.0 ?? 3.5 mV (terminated at 75 Z) (for CE)
Settings after Adjustment
. After finishing the adjustment, return the switches to the original setting.
. WF monitor select switch/MSU ??? ENC
. BARS button/MSU ??? OFF
n
Do not move 1RV354
Note
Perform temporarily this adjustment after repairing. When the system is set up, perform the adjustment again according to the characteristic of the waveform monitor.
Preparation
. Board extension :
. 1RV354
LEVEL)
. S802
Adjustment Procedure
Measuring point : TP352
Adjusting point : 1RV353
Specifications : A = 10.0 ?? 0.5 V
Settings after Adjustment
After finishing the adjustment, return the switches to the original setting.
n
Do not move 1RV354
Preparation
. Board extension :
.
.
.
. S201
. S202
. S705
. S706
. S707
.1RV205 (VBS
.1RV210 (VBS
.1RV217 (RGB
. BARS button/MSU ??? ON
1
1
Measures : SD waveform monitor, Vector monitor
Preparation
Board extension :
Adjustment Procedure
1.SYNC level adjustment
Measuring point : TP202
Adjusting point : 1RV209
Specifications : A = 571 ?? 3 mV (for UC) A = 600 ?? 3 mV (for CE)
2.Video level adjustment
Measuring point : TP202
Adjusting point : 1RV202
Specifications : B = 1429 ?? 5 mV (for UC) B = 1400 ?? 5 mV (for CE)
3.VBS1 OUT level adjustment
Measuring point : VBS OUT1
Adjusting point : 1RV62
Specifications : C = 100.0 ?? 0.5 IRE (terminated at 75 Z) (for UC) C = 700.0 ?? 3.5 mV (terminated at 75 Z) (for CE)
4.VBS2 OUT level adjustment
Measuring point : VBS OUT2
Adjusting point : 1RV61
Specifications : D = 100.0 ?? 0.5 IRE (terminated at 75 Z) (for UC) D = 700.0 ?? 3.5 mV (terminated at 75 Z) (for CE)
5.Chroma adjustment
Adjust the PHASE knob of the vector monitor so that 75% of the luminescent spot of the burst is aligned
with the axis.
Measuring point : VBS OUT1
Adjusting point : 1RV208
Specifications : The luminescent spot should be located inside ???4???.
Measure : SD waveform monitor
Preparation
.The VBS output level adjustment (section
. PIX monitor select switch/MSU ??? ENC
. Board extension :
Adjustment Procedure
1.PIX signal level adjustment
Measuring point : PIX OUT
Adjusting point : 1RV121
Specifications : A = 100.0 ?? 0.5 IRE (terminated at 75 Z) (for UC) A = 700 ?? 3.5 mV (terminated at 75 Z) (for CE)
2.PIX monitor select switch/MSU ??? R, G or B
3.SYNC level adjustment
Measuring point: PIX OUT
Adjusting point: 1RV207
Specifications: B = 40.0 ?? 0.5 IRE (terminated at 75 Z) (for UC) B = 300.0 ?? 3.5 mV (terminated at 75 Z) (for CE)
C
B
4.Video level adjustment
Measuring point : PIX OUT
Adjusting point : 1RV204
Specifications : C = 75.0 ?? 0.5 IRE (terminated at 75 Z) (for UC) C = 525.0 ?? 3.5 mV (terminated at 75 Z) (for CE)
Setting after Adjustment
PIX monitor select switch/MSU ??? ENC

Measure : SD waveform monitor
Preparation
.The VBS output level adjustment (section
. WF monitor select switch/MSU ??? ENC
. Board extension :
Adjustment Procedure
1.WF signal level adjustment
Measuring point : WF OUT
Adjusting point : 1RV124
Specifications : A = 100.0 ?? 0.5 IRE (terminated at 75 Z) (for UC) A = 700.0 ?? 3.5 mV (terminated at 75 Z) (for CE)
2.WF monitor select switch/MSU ??? B
3.Video level adjustment
Measuring point : WF OUT
Adjusting point : 1RV203
Specifications : B = 75 ?? 1 IRE
(terminated at 75 Z) (for UC) B = 525 ?? 7 mV
B
Setting after Adjustment
WF monitor select switch/MSU ??? ENC
1
1

B
3.R signal level
Measuring point : TP207
Adjusting point : 1RV215
Specifications : C = 1000 ?? 5 mV
C, D

Measure : SD waveform monitor
Preparation
.The GRB output level adjustment (section
. Board extension :
. S705
. S201
1
1
Adjustment Procedure
1. Measuring point : Y/G OUTPUT
A, B
2.S201
3.Y signal level adjustment
Measuring point : Y/G OUTPUT
Adjusting point : 1RV211
Specifications : B = A (terminated at 75 Z) (100% color bar)
n
When turning ON S201
4.SYNC level adjustment
Measuring point : Y/G OUTPUT
Adjusting point : 1RV63
Specifications : C = 40 ?? 2 IRE (terminated at 75 Z)
(100% (Y) color bar) (for UC) C = 300 ?? 14 mV
(terminated at 75 Z)
(100% (Y) color bar) (for CE)
C
5.
Measuring point :
Adjusting point : 1RV213
Specifications : D = 700 ?? 5 mV
D = 525 ?? 5 mV
(75%
D
6.
Measuring point :
Adjusting point : 1RV212
Specifications : E = 700 ?? 5 mV
E = 525 ?? 5 mV
(75%
E
Measure : Oscilloscope
Preparation
. Board extension:
. Board extension:
.Connect the VBS OUT1 connector on the
.Connect the SERIAL OUTPUT1 connector on the DIF- 102 board and the SERIAL RET INPUT1 connector on
the
.
Adjustment Procedure
2. Measuring point : TP37/extension board
3.CONFIG button/MSU ??? ON
Set using MSU on the touch panel as follows.
[CCU] ??? [RET|SETTING] ??? RET1 : 3rd Slot
4.Measuring point : TP37/extension board
Adjusting point : 1RV402
Specifications : D = C
5.Measuring point : TP37/extension board
Adjusting point : 1RV501
Specifications : E = 0
6.Repeat steps 4 and 5 until the specifications are satisfied.
4. Return Level Adjustment (Pr)
Adjustment Procedure
1.CONFIG button/MSU ??? ON
Set using MSU on the touch panel as follows.
[CCU] ??? [RET|SETTING] ??? RET1 : 2nd Slot
H
F, G
2. Measuring point : TP31/extension board
3.CONFIG button/MSU ??? ON
Set using MSU on the touch panel as follows.
[CCU] ??? [RET|SETTING] ??? RET1 : 3rd Slot
4.Measuring point : TP31/extension board
Adjusting point : 1RV405
Specifications : G = F
5.Measuring point : TP31/extension board
Adjusting point: 1RV503
Specifications : H = 0
6.Repeat steps 4 and 5 until the specifications are satisfied.
5. Return Level Adjustment (Pb)
Adjustment Procedure
1.CONFIG button/MSU ??? ON
Set using MSU on the touch panel as follows.
[CCU] ??? [RET|SETTING] ??? RET1 : 2nd Slot
L
J, K
2. Measuring point : TP43/extension board
3.CONFIG button/MSU ??? ON
Set using MSU on the touch panel as follows.
[CCU] ??? [RET|SETTING] ??? RET1 : 3rd Slot
4.Measuring point : TP43/extension board
Adjusting point : 1RV406
Specifications : K = J
5.Measuring point : TP43/extension board
Adjusting point : 1RV502
Specifications : L = 0
6.Repeat steps 4 and 5 until the specifications are satisfied.
Measure : HD waveform monitor
Preparation
. Board extension :
. BARS button/MSU ??? ON
. S1
Adjustment Procedure
1. Y output level adjustment
Measuring point : Y/G OUTPUT1
A
2. PB output level adjustment
Measuring point : PB/B OUTPUT1
Adjusting point : 1RV201
Specifications : A = 700 ?? 5 mV
B
3.PR output level adjustment
Measuring point : PR/R OUTPUT1
Adjusting point : 1RV301
Specifications : C = 700 ?? 5 mV
(terminated at 75 Z)
Setting after Adjustment
. S1
. BARS button/MSU ??? OFF
1RV201 1 RV301
RV102 RV104 RV202 RV203 RV302 RV303
1
1 11 111
RV103

Measure : HD waveform monitor
Preparation
.The Y/PB/PR output level adjustment (section
. Board extension :
. S1
. BARS button/MSU ??? ON
Adjustment Procedure
1.G mix level adjustment
Measuring point : Y/G OUTPUT1 connector/
Adjusting point : 1RV102
Specifications : Portion A and portion B must be flat (within 5 mV).
Portion A
3.B mix level adjustment
Measuring point : PB/B OUTPUT1 connector/ADA-
59
Adjusting point : 1RV202
Specifications : Portion D and portion E must be flat (within 5 mV).
4.B signal level adjustment
Measuring point : PB/B OUTPUT1 connector/ADA-
59
Adjusting point : 1RV203
Specifications : F = 700 ?? 5 mV
2.G signal level adjustment
Measuring point : Y/G OUTPUT1
Adjusting point : 1RV104
Specifications : C = 700 ?? 5 mV
(terminated at 75 Z)

5.R mix level adjustment
Measuring point : PR/R OUTPUT1 connector/
Adjusting point : 1RV302
Specifications : Portion G and portion H must be flat (within 5 mV or less).
Portion G
J
Portion H
Measure : HD waveform monitor
Preparation
. Board extension :
. BARS button/MSU ??? ON
Adjustment Procedure
Measuring point : Y/G OUTPUT1
Adjusting point : 1RV752
Specifications : A = 600 ?? 5 mV (terminated at 75 Z)
6.R signal level adjustment
Measuring point : PR/B OUTPUT1 connector/ADA-
59
Adjusting point : 1RV303
A
Specifications : J = 700 ?? 5 mV (terminated at 75 Z)
Setting after Adjustment
. S1
. BARS button/MSU ??? OFF
Setting after Adjustment
BARS button/MSU ??? OFF
1RV201 1 RV301
RV102 RV104 RV202 RV203 RV302 RV303
1
1 11 111
RV103
Measure : Oscilloscope
Note
Do not connect anything to the VTR connector of the camera.
Preparation
.The Y/PB/PR output level adjustment (section
. Board extension :
. Board extension :
.Connect the Y/G OUTPUT1 connector on the
. S1
. BARS button/MSU ??? ON
.Set on the setup menu of the
TOP MENU : MAINTENANCE
PAGE :
ITEM : VIDEO SEL ??? RET (YPbPr)
. RET1 button/camera ??? ON
Adjustment Procedure
1.Measuring point : TP37/extension board
Adjusting point : 1RV501
Specifications : A = 0 ?? 5 mV
A
2.Measuring point : TP37/extension board
Adjusting point : 1RV502
Specifications : B = 1400 ?? 1 0 mV
B
Setting after Adjustment
. S1
. Return the setting on the setup menu of the
. RET1 button/camera ??? Return to the original setting.
. BARS button/MSU ??? OFF
Measure : Oscilloscope (20 MHz BWLimit: ON)
Note
This adjustment corresponds to the
Preparation
. Board extension :
Adjustment Procedure
Measuring point : TP601
Adjusting point : 1RV1
Specifications : C = 1.65 ?? 0.04 Vdc
A
A=B 

Measure : Oscilloscope (20 MHz BWLimit: ON)
Preparation
. Board extension :
Adjustment Procedure
Measuring point : TP1
Adjusting point : 1RV1
Specifications : C = 1.65 ?? 0.04 Vdc
Adjustment
Measure : Oscilloscope (20 MHz BWLimit: ON)
Preparation
. Board extension :
Adjustment Procedure
Measuring point : TP309
Adjusting point : 1RV301
Specifications : C = 1.65 ?? 0.04 Vdc
TP309 


E
F
G
H
J
K
L
M
SAFETY
After correcting the original service problem, perform the following safety checks before releasing the set to the customer :
Check the metal trim, ???metallized??? knobs, screws, and all other exposed metal parts for AC leakage. Check leakage as described below.
LEAKAGE TEST
The AC leakage from any exposed metal part to earth ground and from all exposed metal parts to any exposed metal part having a return to chassis, must not exceed 3.5 mA. Leakage current can be measured by any one of three methods.
1.A commercial leakage tester, such as the Simpson 229 or RCA
2.A
3.Measuring the voltage drop across a resistor by means of a VOM or
To Exposed Metal
Parts on Set
Fig A. Using an AC voltmeter to check AC leakage.