SM <P=001>
MODEL
HOME THEATER SYSTEM
OPERATION MANUAL
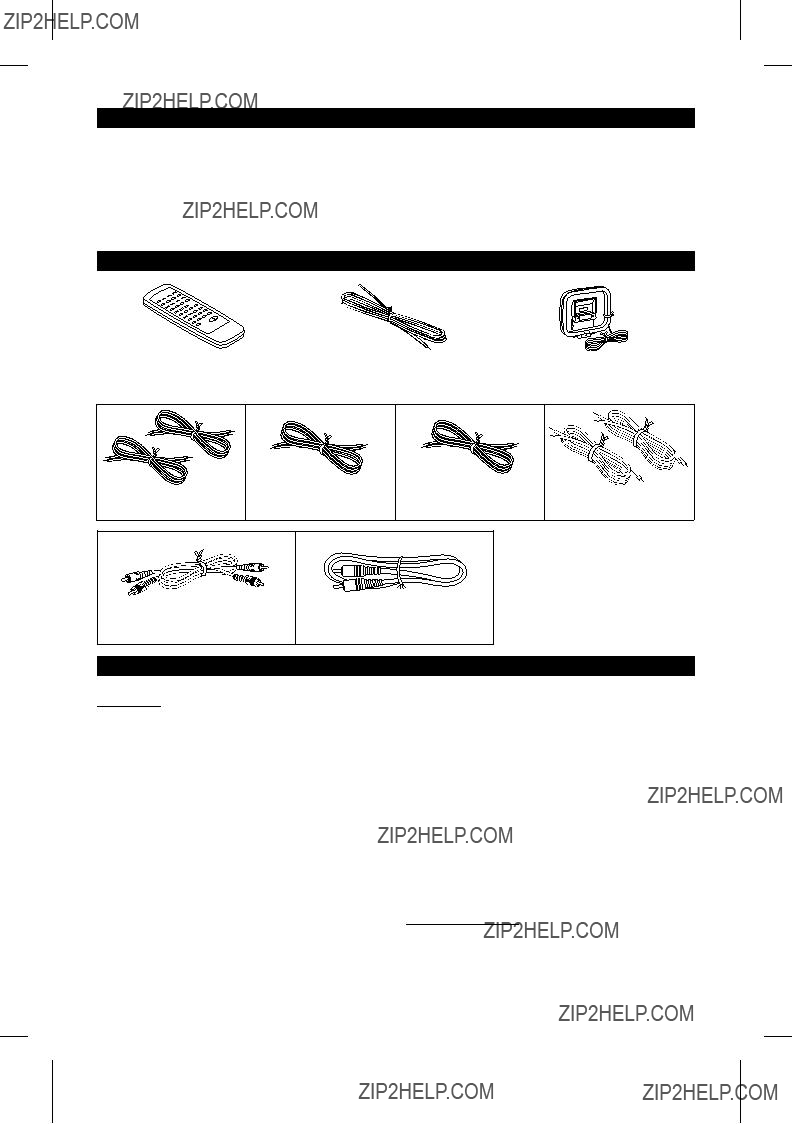
Thank you for purchasing this SHARP product.
To obtain the best performance from this product, please read this manual carefully.
It will guide you in operating your SHARP product.
Note:
This equipment has been tested and found to comply with the limits for a Class B digital device, pursuant to Part 15 of the FCC Rules. These limits are designed to provide reasonable protection against harmful interference in a residential installation.
This equipment generates, uses, and can radiate radio frequency en- ergy and, if not installed and used in accordance with the instructions, may cause harmful interference to radio communications.
However, there is no guarantee that interference will not occur in a particular installation. If this equipment does cause harmful interfer- ence to radio or television reception, which can be determined by turning the equipment off and on, the user is encouraged to try to correct the interference by one or more of the following measures:
???Reorient or relocate the receiving antenna.
???Increase the separation between the equipment and receiver.
???Connect the equipment into an outlet on a circuit different from that to which the receiver is connected.
???Consult the dealer or an experienced radio/TV technician for help.
WARNING
FCC Regulations state that any unauthorized changes or modifications to this equipment not expressly approved by the manufacturer could void the user's authority to operate this equipment.
FOR YOUR RECORDS
For your assistance in reporting this unit in case of loss or theft, please record below the model number and serial number which are located on the rear of the unit.
Please retain this information.
Model number ______________________________
Serial number_______________________________
Date of purchase ____________________________
Place of purchase ___________________________
Manufactured under license from Dolby Laboratories.
"Dolby", "Pro Logic" and the
Works.

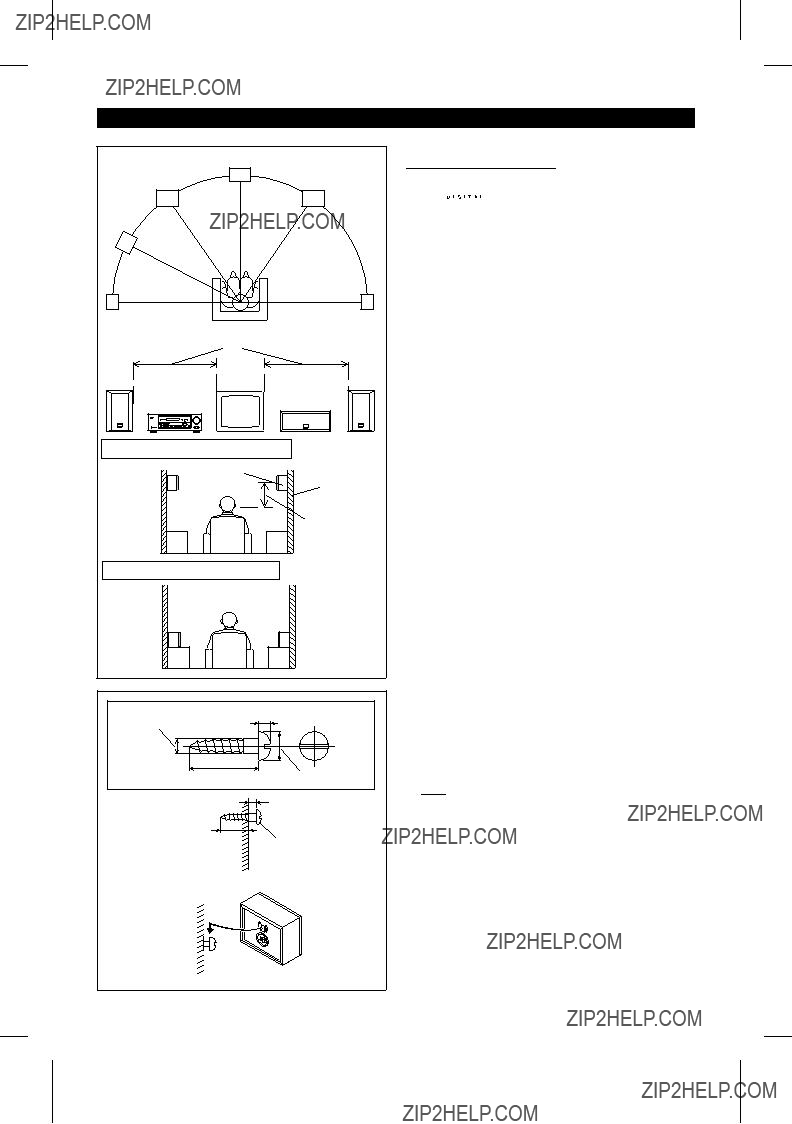


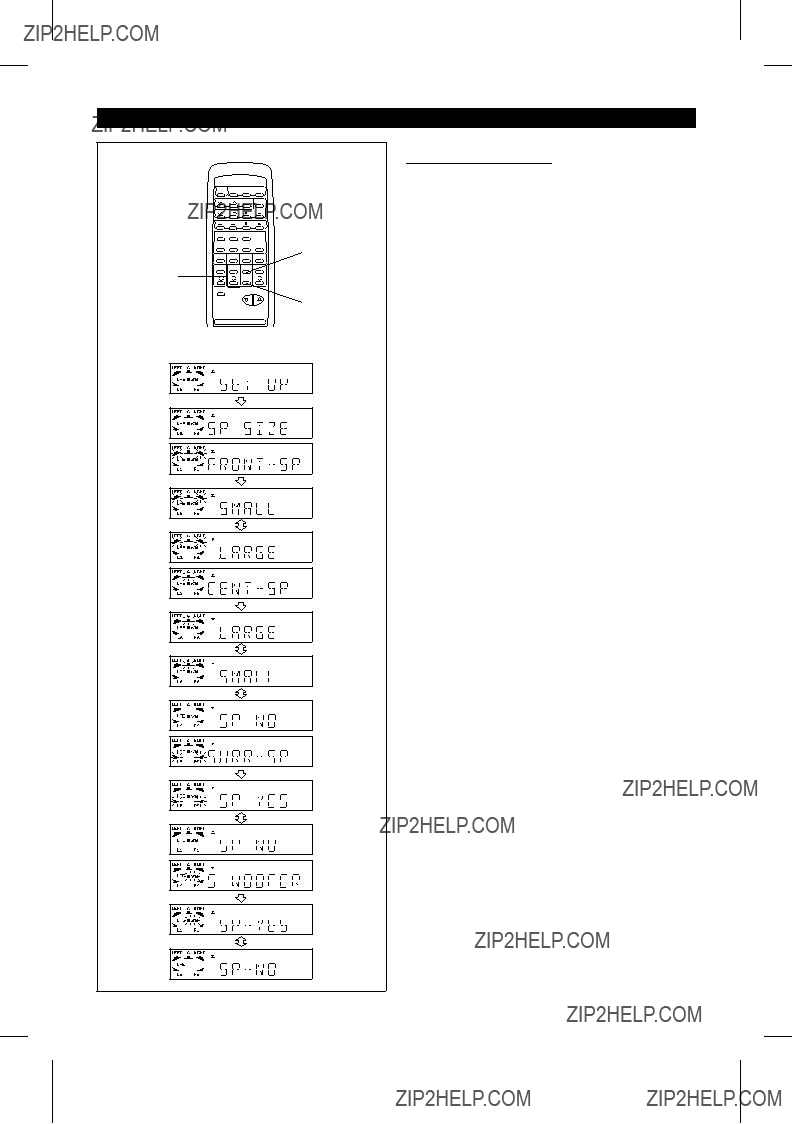
 trademark, you can enjoy realistic, powerful sound by playing the soundtrack through 6 channels; the front left, front right, center, surround left, surround right and sub woofer speakers.


 OFF
OFF  ON
ON


 79 80
79 80 button to increase the volume and the VOLUME
 button to decrease the volume.


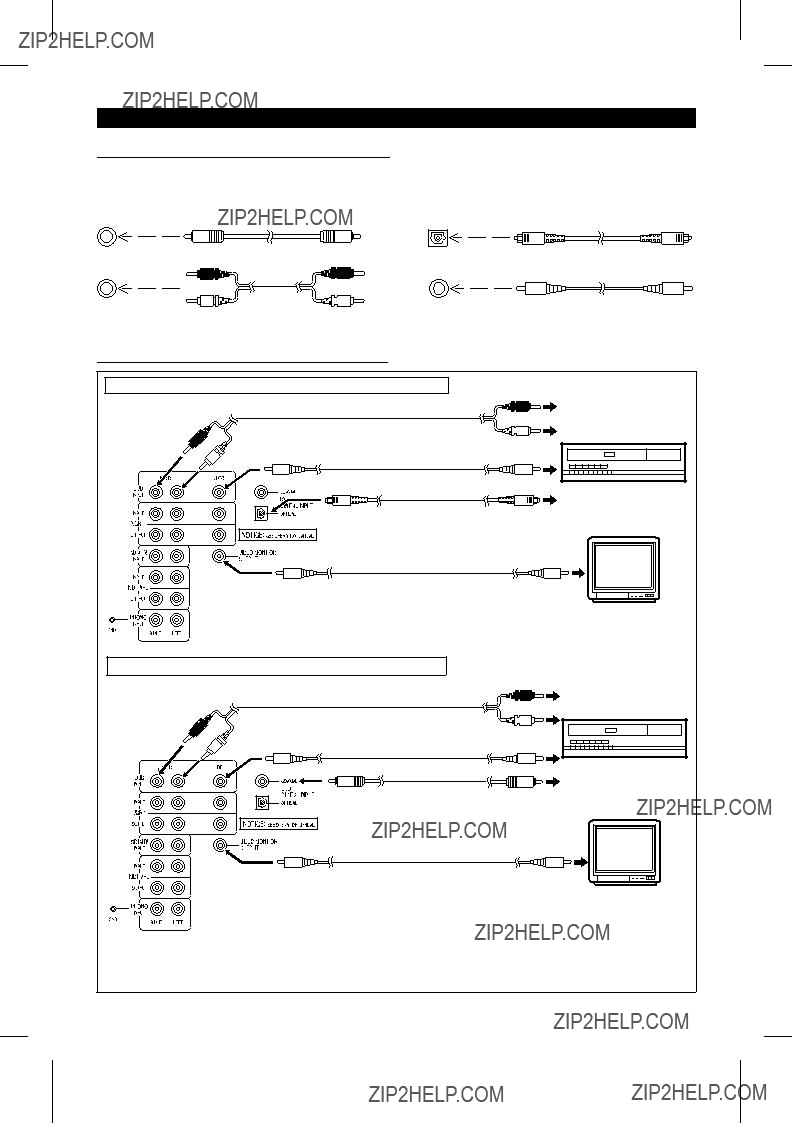
 trademark, you can enjoy realistic, powerful sound by playing back the recorded signal through


 ???
???


 (5.1 channels) or
 trademarks, you can enjoy surround sound using all 6 speakers.

 or
or 
 trademarks, you can enjoy surround sound using 5 speakers, but not the center speaker.
 or
or 
 trademarks, you can enjoy Dolby surround sound.


 4 5
4 5


 14 15
14 15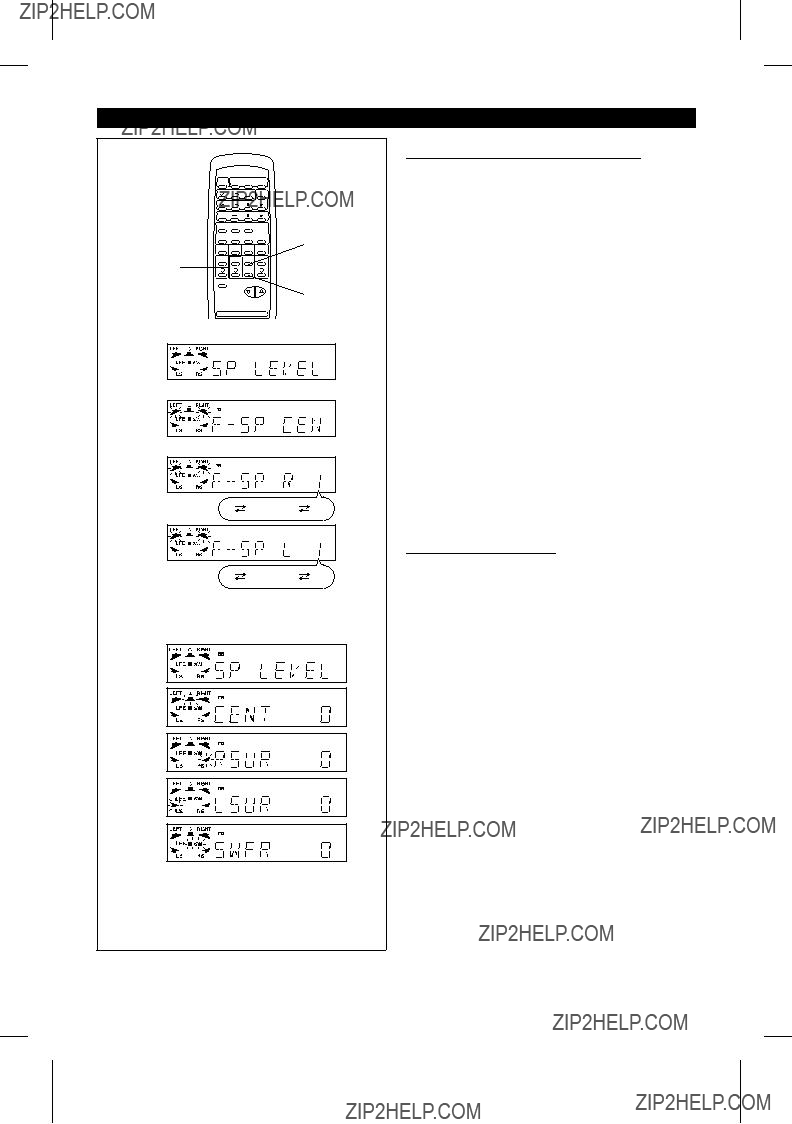
 DIGITAL


 9 20
9 20 DIGITAL


 9 20
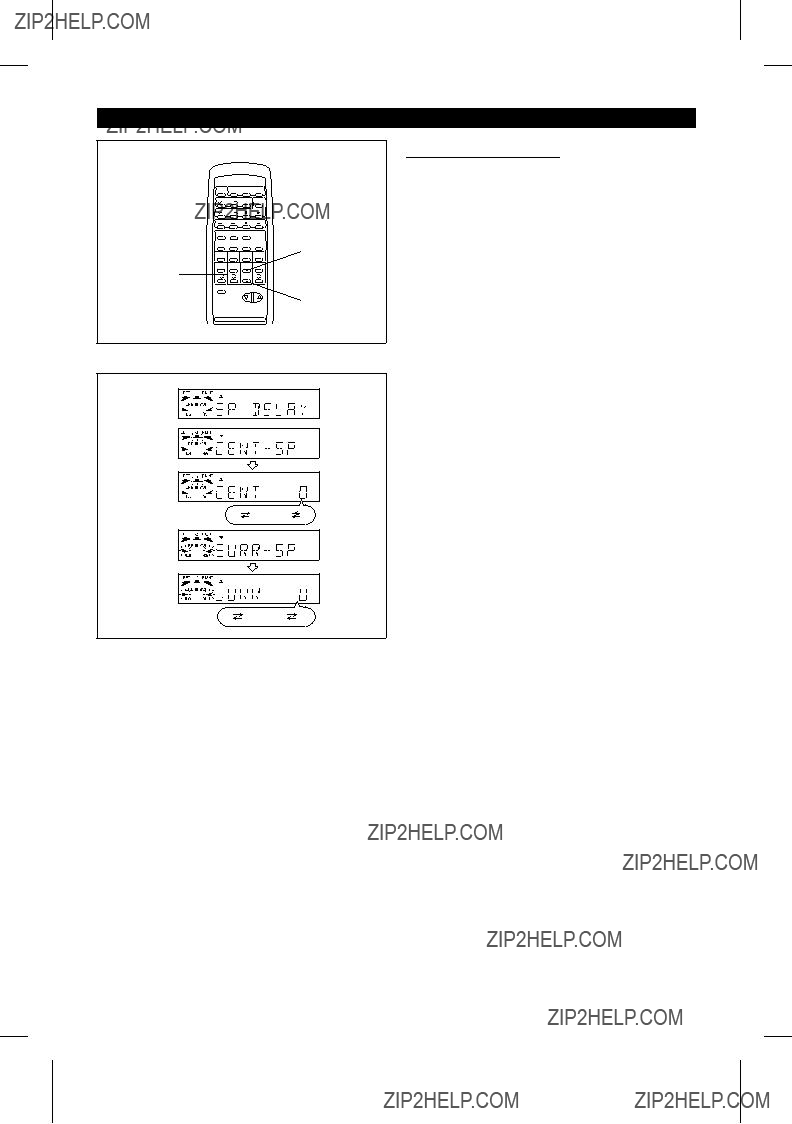
9 20 DIGITAL is lit, "RSUR" and "LSUR" will be displayed.
 DIGITAL is not lit, "SURR" will be displayed.
 DIGITAL is lit, the left and right speaker levels
 DIGITAL is not lit, "SURR 0dB" will be displayed, and both channels will be adjusted at the same time.


 DIGITAL
 DIGITAL is lit,
  DIGITAL is not lit, "SURR" will be displayed.
 DIGITAL is lit,
  DIGITAL is not lit, "SURR" will be displayed, and both channels will be adjusted at the same time.
 DIGITAL
 DIGITAL


 C
C 
 R
R
 C
C 
 R
R
