HAND MIXER OPERATION MANUAL
BATIDORA DE MANO MANUAL DE INSTRUCCTIONES
READ ALL INSTRUCTIONS CAREFULLY BEFORE USING THE MIXER.
LEA TODAS LAS INSTRUCCIONES COMPLETAMENTE ANTES DE UTILIZAR EL BATIDORA.
HAND MIXER OPERATION MANUAL
BATIDORA DE MANO MANUAL DE INSTRUCCTIONES
READ ALL INSTRUCTIONS CAREFULLY BEFORE USING THE MIXER.
LEA TODAS LAS INSTRUCCIONES COMPLETAMENTE ANTES DE UTILIZAR EL BATIDORA.

We suggest recording all the information listed below and saving the original sales receipt for future reference.
Please provide the following information when you write or call: model number, date of purchase, your complete mailing address (including zip code), your daytime telephone number (including area code) and description of the problem.
MODEL NUMBER
DATE OF PURCHASE
TO PHONE:
DIAL
SERVICE INFORMATION
ADDITIONAL CUSTOMER INFORMATION
TO WRITE:
Sharp Electronics Corporation
Customer Assistance Center
1300 Naperville Drive
Romeoville, IL
TO ACCESS INTERNET:
1

SHARP ELECTRONICS CORPORATION warrants to the first consumer purchaser that this Sharp brand product (the ???Product???), when shipped in its original container, will be free from defective workmanship and materials, and agrees that it will, at its option, either repair the defect or replace the defective Product or part thereof with a new or remanufactured equivalent at no charge to the purchaser for parts or labor for the period(s) set forth below.
This warranty does not apply to any appearance items of the Product nor to the additional excluded item(s) set forth below nor to any Product the exterior of which has been damaged or defaced, which has been subjected to improper voltage or other misuse, abnormal service or handling, or which has been altered or modified in design or construction.
In order to enforce the rights under this limited warranty, the purchaser should follow the steps set forth below and provide proof of purchase to the servicer.
The limited warranty described herein is in addition to whatever implied warranties may be granted to purchasers by law. ALL IMPLIED WARRANTIES INCLUDING THE WARRANTIES OF
MERCHANTABILITY AND FITNESS FOR USE ARE LIMITED TO THE PERIOD(S) FROM THE DATE OF PURCHASE SET FORTH BELOW. Some states do not allow limitations on how long an implied warranty lasts, so the above limitation may not apply to you.
Neither the sales personnel of the seller nor any other person is authorized to make any warranties other than those described herein, or to extend the duration of any warranties beyond the time period described herein on behalf of Sharp.
The warranties described herein shall be the sole and exclusive warranties granted by Sharp and shall be sole and exclusive remedy available to the purchaser. Correction of defects, in the manner and for the period of time described herein, shall constitute complete fulfillment of all liabilities and responsibilities of Sharp to the purchaser with respect to the Product, and shall constitute full satisfaction of all claims, whether based on contract, negligence, strict liability or otherwise. In no event shall Sharp be liable, or in any way responsible, for any damages or defects in the Product which were caused by repairs or attempted repairs performed by anyone other than an authorized servicer. Nor shall Sharp be liable or in any way responsible for any incidental or consequential economic or property damage. Some states do not allow the exclusion of incidental or consequential damages, so the above exclusion may not apply to you.
THIS WARRANTY GIVES YOU SPECIFIC LEGAL RIGHT. YOU MAY ALSO HAVE OTHER RIGHTS
WHICH VERY FROM STATE TO STATE.
To Obtain Supplies, Accessories or Product Information, call
2

When using electrical appliances, basic safety precautions should always be followed, including the following:
1.Read all instructions.
2.To protect against risk of electrical shock, do not put body, cord or plug in water or other liquid.
3.Close supervision is necessary when the mixer is used by or near children.
4.Unplug from outlet when not in use, before putting on or taking off parts and before cleaning.
5.Avoid contacting moving parts.
6.Keep hands, hair, clothing, as well as spatulas and other utensils away from beaters/dough hooks during operation to reduce the risk of injury to persons and/or damage to the mixer.
7.Do not operate the mixer with a damaged cord or plug or after the mixer malfunctions or is dropped or damaged in any manner.
Call
8.The use of accessory attachments not recommended or sold by SHARP may cause fire, electric shock or injury.
9.Do not use outdoors.
10.Do not let cord hang over edge of table or counter or touch hot surfaces.
11.Remove beaters/dough hooks from the mixer before washing.
12.Check that control is off before plugging cord into outlet.
13.Unplug before inserting or removing beaters or dough hooks.
14.Do not use the mixer for other than intended use.
15.Never add to container while appliance is operating.
16.Container must be properly in place before operating appliance.
SAVE THESE INSTRUCTIONS
and the Operation Manual
This product is intended for household use only.
This mixer has a polarized plug (one blade is wider than the other). To reduce the risk of electric shock, this plug is intended to fit into a polarized outlet only one way. If the plug does not fit fully into the outlet, reverse the plug. If it still does not fit, contact a qualified electrician. Do not attempt to modify the plug in any way.
3

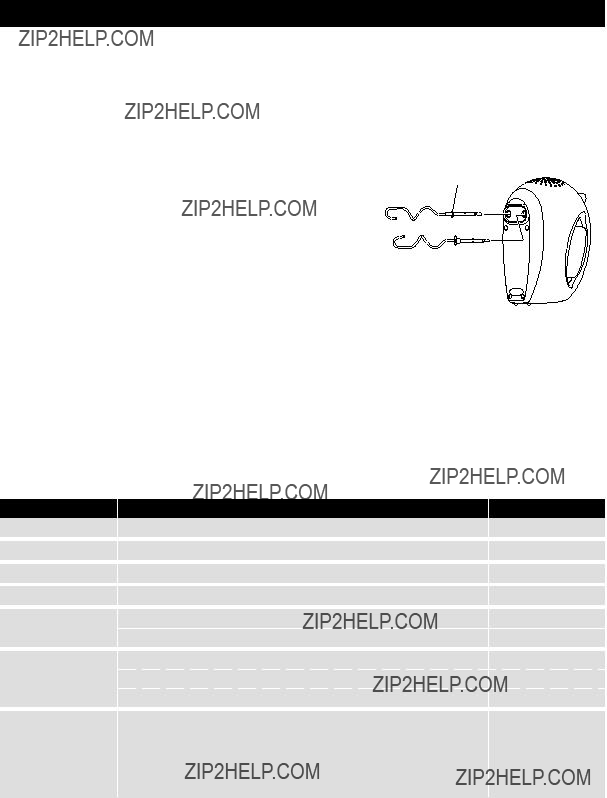
Attachments
4
BEFORE USING
Before using the mixer for the first time, wash beaters and dough hooks, rinse and dry. See page 6 for cleaning instructions.
Be sure to remove beaters or dough hooks from the body before washing.
HOW TO USE
1. Be sure the mixer is OFF (0) and unplugged before inserting the beaters or dough hooks.
3.Plug into outlet securely. Use the mixer on a 120V, 60Hz only protected electrical supply.
4. Place the beaters or dough hooks into the bowl.
5.Slide the Speed Control Switch to the desired speed. (See the ???MIXING GUIDE??? below.)
6.When finished mixing, slide the Speed Control Switch to the ???0??? position and unplug the mixer.
7.To detach beaters or dough hooks, position the mixer over a bowl or sink and push the Eject Button down.
NOTE:
???If mixing action stops or slows significantly, slide the Speed Control Switch to "0" immediately. Unplug the mixer and remove the food from the beaters or dough hooks.
???Thick doughs may need to have the final mixing done by hand.
MIXING GUIDE
Use the following chart for speed selections.
To begin mixing, speed should be set on the lowest speed (1) and then moved to desired speed.
SPEED
0
1(LOW)
2(LOW)
3(MEDIUM)
4(MEDIUM)
5(HIGH)
Power Boost
5

NOTE: ??? Always clean the mixer after using.
???Be sure the mixer is OFF(0) and unplugged from the outlet before removing parts or cleaning.
???Do not immerse the body, cord or plug in water.
???Be sure to use dish detergent, not cleanser, benzene, thinner, alcohol or a nylon scrubbing brush, because they may cause cracks and rust. Rinse and polish dry.
OUTSIDE
Prepare a mild detergent solution and carefully wipe the outside.
Rinse and dry with a soft cloth.
BEATERS / DOUGH HOOKS
Remove the beaters or dough hooks from the mixer body using the Eject Button. Wash in mild, sudsy water.
They are also
Combine peanut butter, sugars, margarine, shortening and egg; beat using Flat Beaters at speed 1 to blend ingredients. Increase to speed 3 and beat until smooth. Blend in flour, baking soda and baking powder at speed 1. Preheat oven to 375??F.
Shape dough into
Bake 12 minutes at 375??F.or until set but not hard. Cool on wire racks.
Preheat oven to 350??F. Cream together margarine, oil and sugars. Beat using Flat Beaters at speed 1 to blend ingredients. Increase to speed 3 and beat until creamy. Beat in eggs and orange extract at speed 3 until blended. Add rolled oats, flours, baking soda and salt; mix at speed 1 until blended. Stir in raisins or chocolate chips, orange peel and nuts at speed 1.
Drop dough by teaspoonfuls 2 inches apart on greased round baking pans. Bake 8 to 12 minutes at 350??F. or until light golden brown. Cool on wire racks.
6

 RECIPES
Combine crust ingredients in small bowl; beat until well mixed. Refrigerate, covered 1 hour.
Preheat oven to 400??F. Press
In large bowl, beat cream cheese using Flat Beaters at speed 3 until smooth. Slowly beat in sugar at speed 1. Add flour and remaining ingredients. Beat 5 minutes at speed 1. Press remaining dough around side of pan to within 1 inch of top; do not bake. Pour cream cheese mixture into pan.
Bake
Preheat oven to 350??F.
Grease and flour two
For frosting, combine remaining ingredients in medium bowl. Beat using Wire Beaters until stiff on speed 5. Frost cake and chill. Cake must be refrigerated.
Preheat oven to 350??F.
Mix flour, baking powder, baking soda and salt in medium bowl. Set aside. Beat 2 cups sugar and the margarine using Flat beaters at speed 3 until light and fluffy. Add eggs, one at a time, beating well after each. Mix in vanilla. Blend in flour mixture alternately with sour cream, beating after each addition at speed 1 until smooth. Set aside.
Combine 1/2 cup sugar, the nuts and cinnamon. Pour half the batter into
Bake
7

Cuando se utilicen aparatos el??ctricos, deber??n seguirse siempre ciertas normas de seguridad b??sicas, entre las que se incluyen las siguientes:
1.Lea todas las instrucciones.
2.Para protegerse contra el riesgo de sufrir una descarga el??ctrica, no ponga la batidora, el cable o la clavija en el agua o en otro l??quido.
3.Cuando la batidora sea utilizada por ni??os o cerca de ellos deber?? realizarse una atenta supervisi??n.
4.Desenchufe la batidora de la toma de corriente cuando no la utilice, antes de colocar o retirar piezas y antes de limpiarla.
5.Evite tocar las piezas m??viles.
Durante el funcionamiento de la batidora, mantenga las manos, el cabello y las ropas, as?? como tambi??n las esp??tulas y dem??s utensilios de cocina, alejados de los batidores/ganchos para amasar, para reducir as??el riesgo de que se lesionen las personas y/o se estropee la batidora.
6.No utilice la batidora si ??sta tiene un cable o clavija estropeado, ni tampoco si funciona mal, se ha ca??do o se ha estropeado de cualquier forma.
Llame al
7.La utilizaci??n de accesorios que no hayan sido recomendados ni vendidos por SHARP puede causar un incendio, una descarga el??ctrica o lesiones.
8.No utilice la batidora en exteriores.
9.No deje que el cable cuelgue sobre el borde de mesas o mostradores, ni que toque superficies que est??n calientes.
10.Retire los batidores/ganchos para amasar de la batidora antes de lavarla.
11.Verifique que el interruptor de control de velocidad est?? en la posici??n de apagado antes de enchufar el cable en una toma de corriente.
12.Desenchufe la batidora antes de colocar o retirar los batidores o los ganchos para amasar.
13.No utilice la batidora para otras cosas que no sean aquellas para las que ha sido dise??ada.
GUARDE ESTAS INSTRUCCIONES y el manual de instrucciones
Este producto ha sido dise??ado para ser utilizado en casa solamente.
Esta batidora tiene una clavija polarizada (una patilla es m??s ancha que la otra). Para reducir el riesgo de que se produzcan descargas el??ctricas, esta clavija ha sido dise??ada para poder enchufarse de una sola forma en una toma de corriente polarizada. Si la clavija no se puede enchufar completamente en la toma de corriente, d?? vuelta a la clavija. Si sigue sin poder enchufarla, p??ngase en contacto con un electricista cualificado. No intente modificar la clavija de ninguna forma.
8

Accesorios
9
ANTES DE UTILIZAR LA BATIDORA
Antes de utilizar la batidora por primera vez, lave los batidores y los ganchos para amasar, enju??guelos y s??quelos.
Consulte la p??gina 11 donde se indican las instrucciones de limpieza.
Aseg??rese de retirar los batidores o los ganchos para amasar de la batidora antes de lavarlos.
4.Ponga los batidores o los ganchos para amasar en el recipiente.
5.Deslice el interruptor de control de velocidad hasta la velocidad deseada. (Consulte la "GU??A PARA BATIR" indicada m??s abajo.)
6.Cuando termine de batir, deslice el interruptor de control de velocidad hasta la posici??n "0" y desenchufe la batidora.
7.Para retirar los batidores o los ganchos para amasar, ponga la batidora encima de un recipiente o fregadero de cocina y pulse el bot??n de eyecci??n.
NOTA:
???Si el batido se interrumpe inesperadamente, deslice inmediatamente el interruptor de control de velocidad hasta la posici??n "0" y desenchufe la batidora de la toma de corriente, y luego retire la comida de los batidores o de los ganchos para amasar.
GU??A PARA BATIR
Utilice la gu??a siguiente para seleccionar la velocidad.
Para batir deber?? empezar con la velocidad m??nima (1) y luego ir aumentando hasta alcanzar la velocidad deseada.
10

NOTA: ??? Limpie siempre la batidora despu??s de utilizarla.
???Aseg??rese de que la batidora est?? apagada (0) y desenchufada de la toma de corriente antes de retirar piezas o limpiarla.
???No meta la batidora, el cable o la clavija en el agua.
???Aseg??rese de utilizar detergente para vajillas para limpiar la batidora. No utilice productos de limpieza, bencina, diluyente, alcohol o un cepillo de nailon porque tal vez produzcan grietas y oxidaci??n. Enjuague la batidora despu??s de limpiarla y luego pase un pa??o para secarla.
EXTERIOR
Prepare una soluci??n de detergente suave y limpie suavemente el exterior. Enjuague y seque con un pa??o blando.
BATIDORES / GANCHOS PARA AMASAR
Retire los batidores o los ganchos para amasar de la batidora utilizando el bot??n de eyecci??n. L??velos en agua templada y jabonosa. Tambi??n los puede lavar en un lavavajillas.
Mezcle la mantequilla de cacahuete, los dos tipos de az??car, la margarina, la manteca vegetal y el huevo; bata la mezcla utilizando los batidores planos a la velocidad 1 para mezclar bien los ingredientes. Aumente la velocidad a 3 y siga batiendo hasta que quede una mezcla suave. Agregue la harina, el bicarbonato de soda y el polvo de hornear y bata a la velocidad 1. Precaliente el horno a unos 190??C.
Haga bolas de unos 2 cm con la masa y col??quelas separadas entre s?? por unos 5 cm en un molde untado con una ligera capa de mantequilla. Empleando un tenedor, aplaste las bolas de forma entrecruzada.
Cueza al horno durante 12 minutos a unos 190??C, o hasta que las galletas est??n listas pero no duras. Deje que se enfr??en en estantes de alambre.
Precaliente el horno a unos 175??C. Ponga juntos la margarina, el aceite y los dos tipos de az??car. Bata la mezcla utilizando los batidores planos a la velocidad 1 para mezclar los ingredientes. Aumente la velocidad a 3 y bata hasta que la mezcla quede cremosa. Agregue los huevos y el extracto de naranja y bata a la velocidad 3 hasta que se mezclen los ingredientes. Agregue los copos de avena, las harinas, el bicarbonato de soda y la sal y siga batiendo a la velocidad 1 hasta que todo quede mezclado. Agregue las uvas pasas o los trozos de chocolate, el pellejo de naranja y las nueces y bata a la velocidad 1.
Deje caer la masa de cucharitas llenas, manteniendo una separaci??n de 5 cm entre los trozos de masa, en moldes redondos untados con mantequilla. Cueza al horno de 8 a 12 minutos a 175??C o hasta que la masa adquiera un color marr??n dorado. Deje luego enfriar en estantes de alambre.
11

 RECETAS
Ponga los ingredientes de la corteza de la tarta en un recipiente peque??o; b??talos hasta que queden bien mezclados. Tape la mezcla y refrig??rela durante 1 hora.
Precaliente el horno a unos 200??C. Ponga un tercio de la mezcla de harina presion??ndola contra el fondo de un molde de borde separable de unos 23 cm de di??metro. Cueza al horno a 200??C durante 8 minutos y luego deje que se enfr??e.
En un recipiente grande, bata el queso crema utilizando batidores planos a la velocidad 3 hasta que quede suave. Bata luego lentamente el az??car a la velocidad 1. Agregue la harina y los ingredientes restantes. Bata durante 5 minutos a la velocidad 1. Presione el resto de la masa de la corteza de la tarta contra el lado del molde sin poner nada en el espacio que queda a 2.5 cm a partir del borde superior; no cueza al horno todav??a. Vierta la mezcla del queso crema en al horno.
Cueza al horno durante
Precaliente el horno a unos 175??C.
Unte con mantequilla y harina dos moldes redondos de 23cm para tartas; y luego cubra con papel de cera. Ponga los huevos y el az??car en un recipiente grande. Empiece utilizando los batidores planos a la velocidad 1 y vaya aumentando poco a poco la velocidad hasta llegar a la 4. Bata hasta que la mezcla quede suave y esponjosa. Agregue las nueces o avellanas y mezcle a la velocidad 1. Agregue la harina y el polvo de hornear y bata a la velocidad 1 hasta que todo quede mezclado. Vierta la mezcla en los moldes preparados. Cueza al horno durante 25 a 35 minutos. Si el palito de madera introducido en el centro no sale limpio, deje el molde en el horno unos pocos minutos m??s hasta completar la cocci??n. Luego, deje enfriar.
Para el ba??o de moca, combine los ingredientes restantes en un recipiente de tama??o medio. Bata a la velocidad 5 utilizando los batidores de alambre hasta que la mezcla quede firme. Cubra la tarta y p??ngala a enfriar. La tarta deber?? estar refrigerada.
Precaliente el horno a unos 175??C.
Mezcle la harina, el polvo de hornear, el bicarbonato de soda y la sal en un recipiente de tama??o medio. Ponga esta mezcla aparte. Bata 2 tazas de az??car y la margarina utilizando los batidores planos a la velocidad 3 hasta que la mezcla quede suave y esponjosa. Agregue los huevos uno a uno bati??ndolos bien. Mezcle la vainilla. Bata la mezcla de harina con la nata agria seg??n va agregando la nata. Bata a la velocidad 1 hasta que la mezcla quede suave. Ponga esta mezcla aparte.
Mezcle 1/2 de az??car, las nueces y la canela. Vierta la mitad de la masa en un molde tubular de 25cm bien untado en mantequilla; esparza por encima la mitad del relleno. Repita lo mismo con la otra mitad de la masa y del relleno.
Cueza al horno durante
12
