Specifications
VIEWCAM
Signal System: NTSC standard
Recording System: 2 rotary heads, helical scanning system Cassette: 8 mm video tape, MP type or Hi8 MP, ME type
Recording/Playback Time: 120 minutes (P6-120) Tape Speed: 14.345 mm/second
Pickup Device: 1???4 � (6.4 mm, effective size: 4.5 mm) CCD image sensor (with approx. 270,000 pixels including optical black)
Lens: 16� power zoom lens (F1.4, f�4.0???64.0 mm), and full-range auto focus
Lens Filter Diameter: 46 mm
Monitor: 3� (7.5 cm) full-color LCD screen (TFT active matrix) Microphone: Electret monaural microphone
Color Temperature Compensation: Auto white balance with white balance lock
Minimum Illumination: 0.8 lux (5 lux measured by EIA standard) (with gain-up, F1.4) Video Output Level: 1.0 Vp-p 75-ohm unbalanced
Audio Output Level: �8 dBs, impedance less than 2.2 kohms Speaker Output: 200 mW
Power Requirement: DC 3.6 V (with battery pack) DC 7.0 V (with AC adapter)
Power Consumption: 5.1 W (during camera recording in full auto mode with zoom motor off and backlight in normal mode)
Operating Temperature: 0�C to �40�C (32�F to 104�F) Operating Humidity: 30% to 80%
Storage Temperature: �20�C to �60�C (�4�F to 140�F) Dimensions (approx.): 7 7???32 � (W) � 4 9???32� (H) � 3 7???8� (D)
[183 mm (W) � 109 mm (H) � 99 mm (D)]
Weight (approx.): 1.57 lbs (710 g) (without battery pack, lithium battery, video cassette, and lens cap)
AC Adapter (UADP-0312TAZZ)
Power Requirement: AC 110???240 V, 50/60 Hz DC Output: 7.0 V
Power Consumption: 15 W
Dimensions (approx.): 2 11???16� (W) � 1 15???32� (H) � 5 13???32� (D) [68 mm (W) � 37 mm (H) � 137 mm (D)] Weight (approx.): 0.68 lbs (308 g)
Battery Pack (BT-H22)
DC Output: 3.6 V
Dimensions (approx.): 2 1???8 � (W) � 3???4 � (H) � 2 7???32 � (D) [54 mm (W) � 19 mm (H) � 56 mm (D)] Weight (approx.): 0.30 lbs (136 g)
Specifications are subject to change without notice.
SERVICE INFORMATION (For the U.S.)
For the location of the nearest Sharp Authorized Service, or to obtain product literature, accessories, supplies or customer assistance, please call 1-800-BE SHARP (1-800-237-4277) or visit SHARP???s website (http://www.sharp-usa.com).
 OPERATION MANUAL


 and cart combination to overturn.
 as a
as a  bookcase


 Recording Format
 mark to enjoy ordinary 8 mm recording and playback.
 indicator appears on the LCD screen.) When you load a normal 8 mm tape, recording is in ordinary 8 mm format. (The
  indicator does not appear.)
 menu item to ???OFF??? on the
  (MENU 1) screen (Camera mode) before recording. (See page 25 for operation of the menu screen.)

 AUDIO/VIDEO jack [pp. 22, 49]
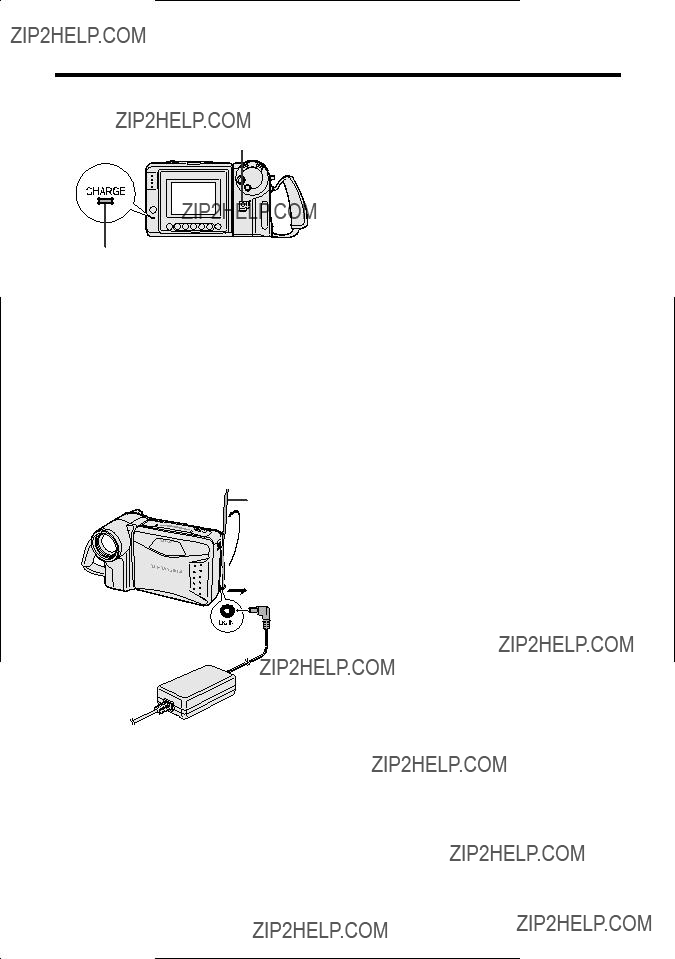
 DC IN jack [pp. 8, 9]
 [p. 8]
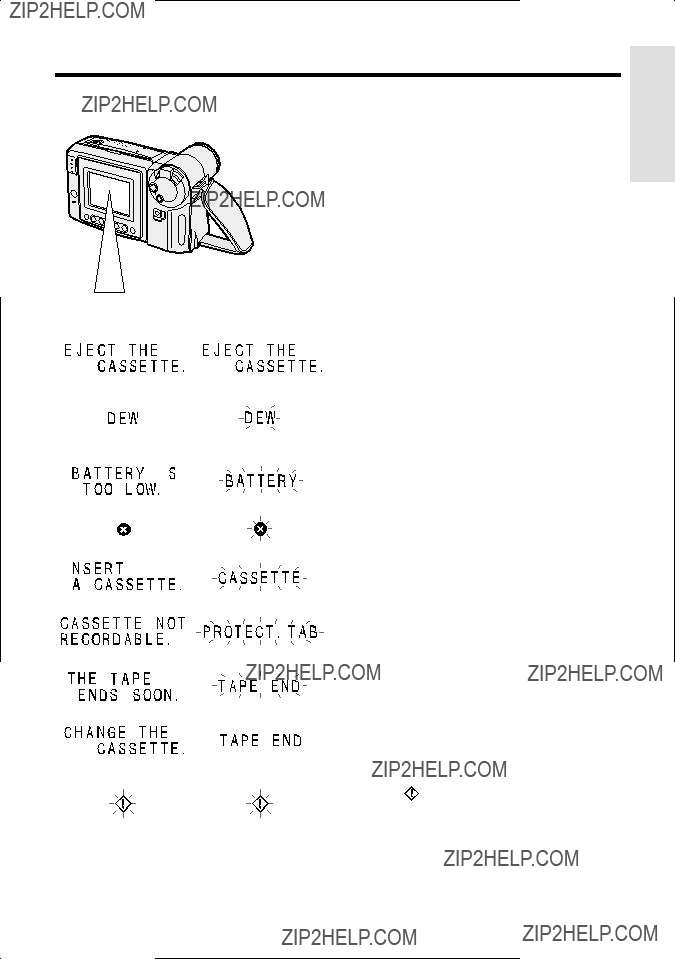
 indicates a flashing display.


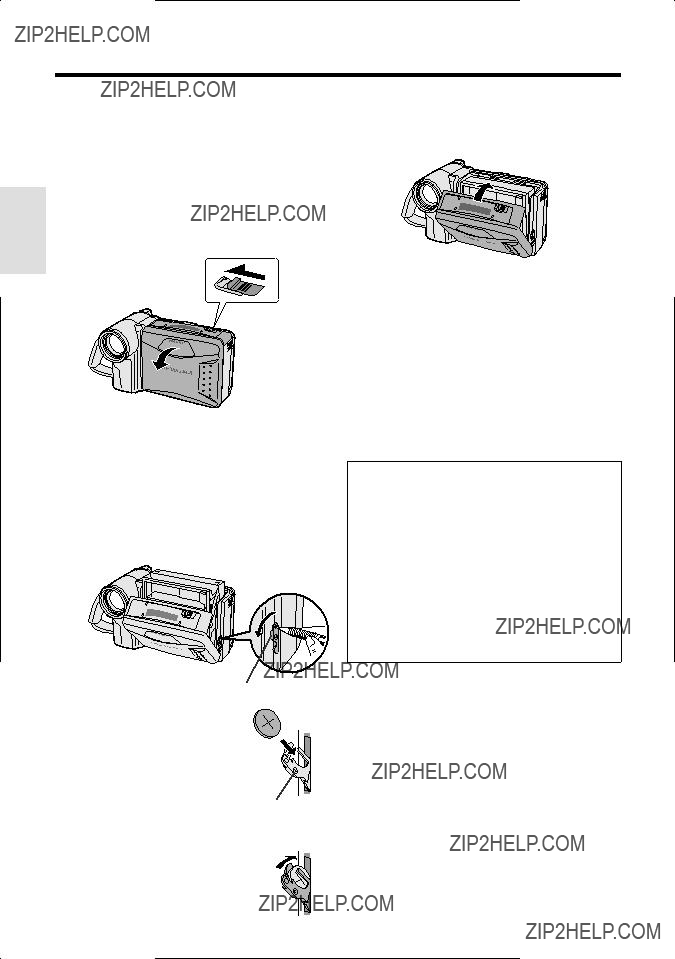
 Terminal cover

 ENGL I SH
 FRAN
FRAN  appears.
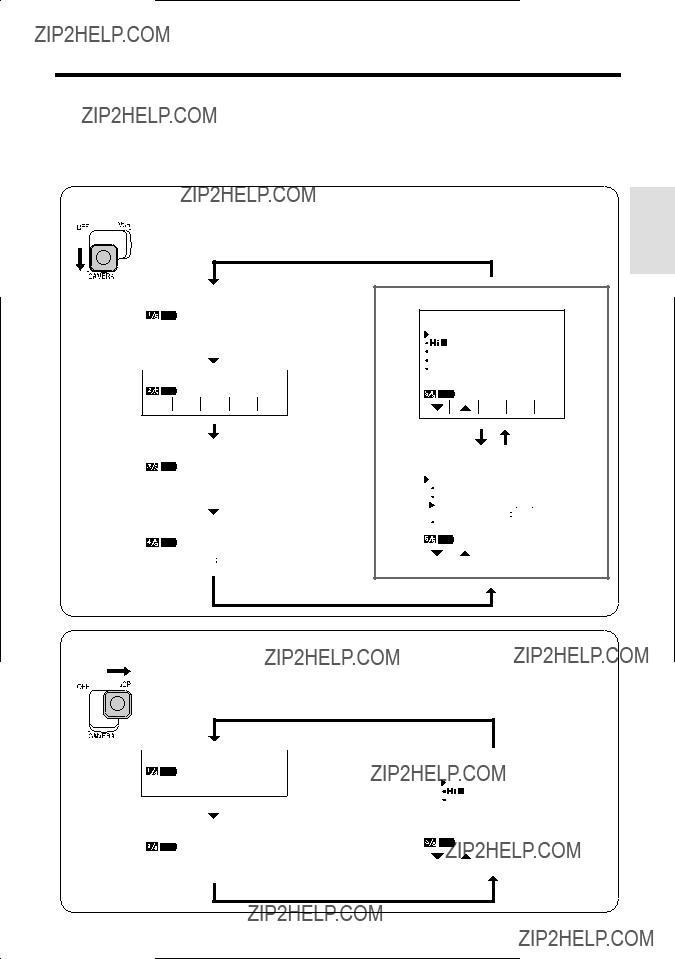
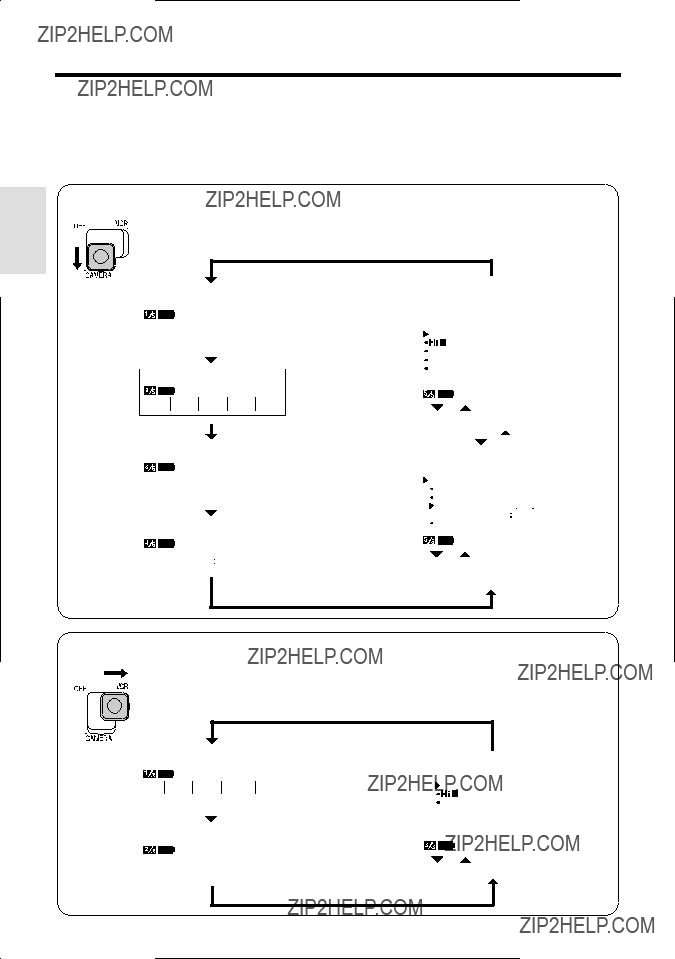
 ) to display MENU 1.


 Increase
 (supplied)
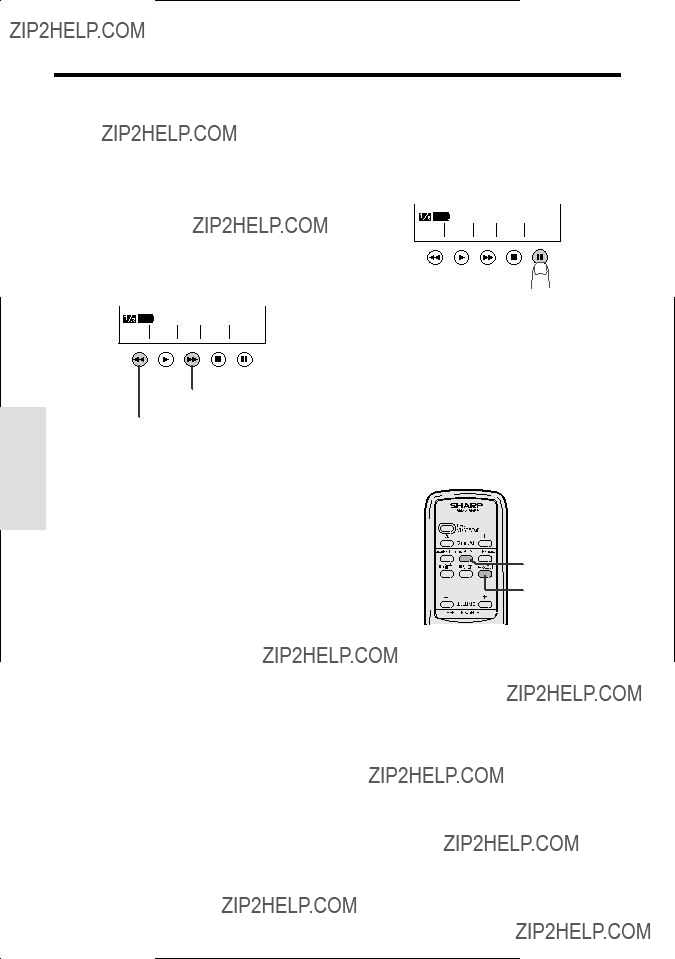

 ).
).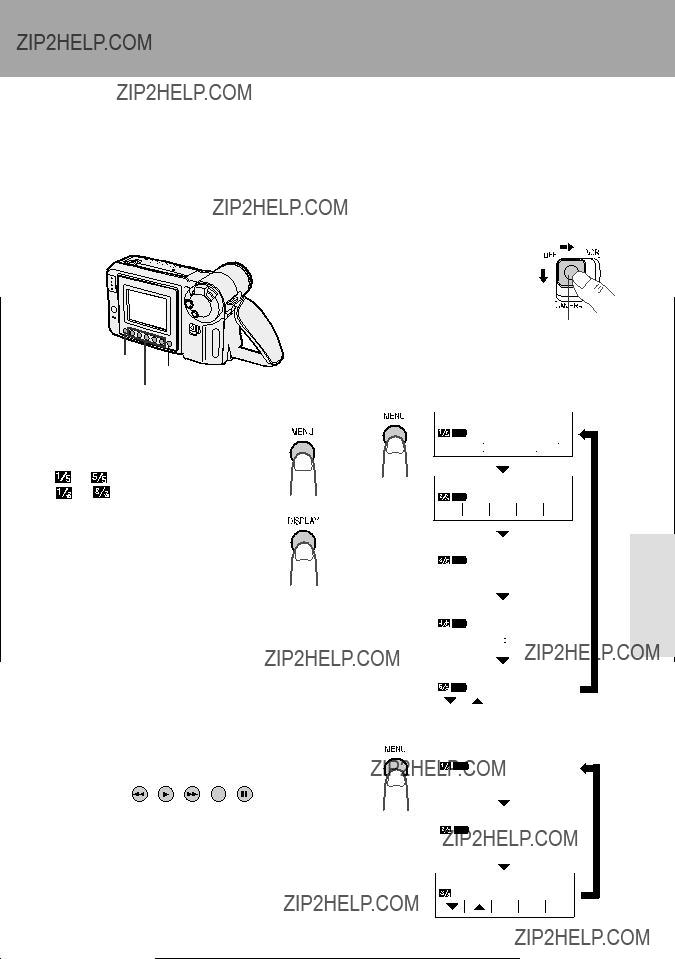


 DISPLAY button

 ) to display the desired menu screen.

 ) to display MENU 2.
 (MENU 1) appears.
 B I RT HDAY
 appears.
 indicator appears.
 indicator is displayed, the background will become slightly brighter.
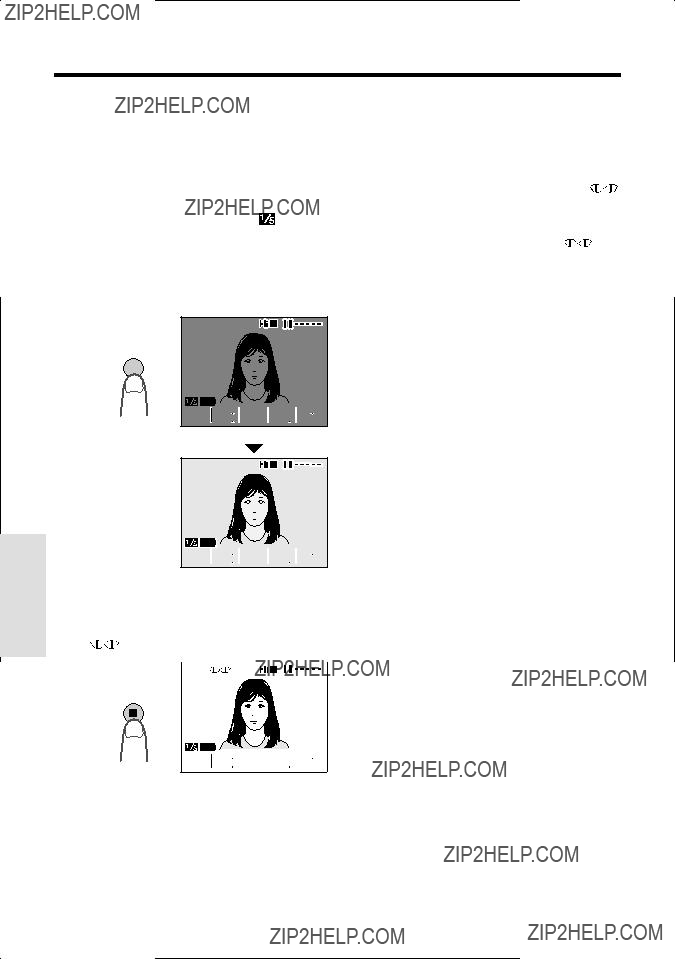
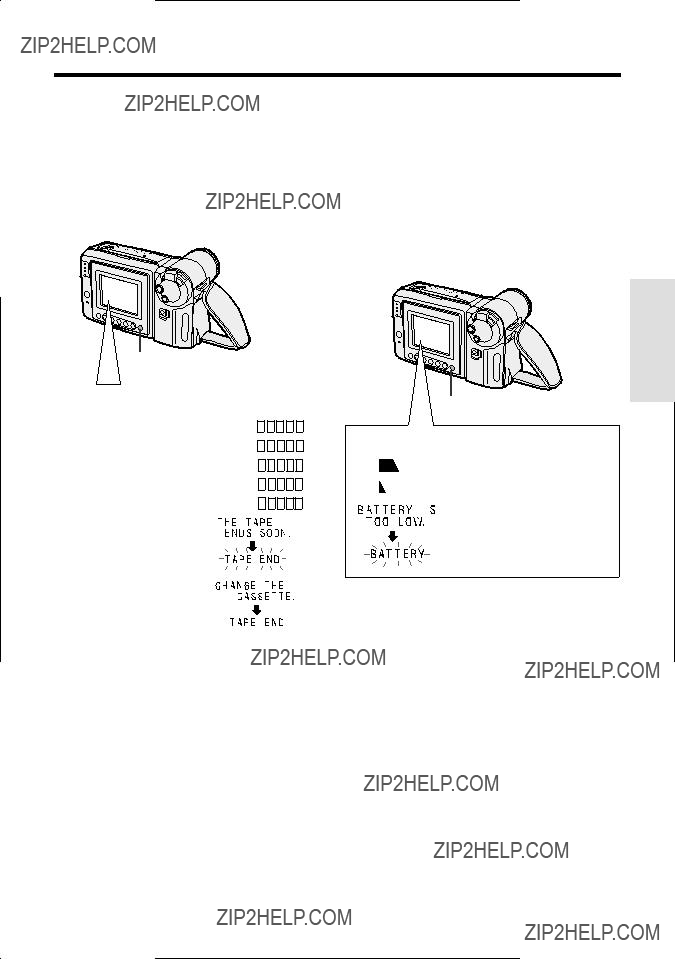
 indicator. To check the type of warning, rotate the monitor back to the normal position.

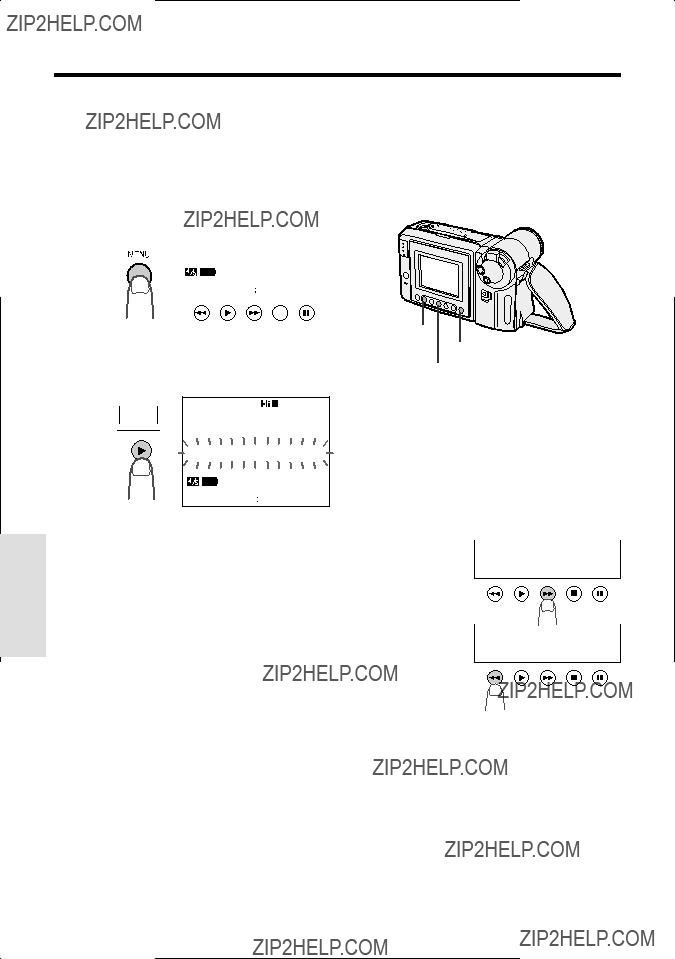
 ) to display the

 ) to display the exposure setting screen, then press the AUTO button (


 ).
).

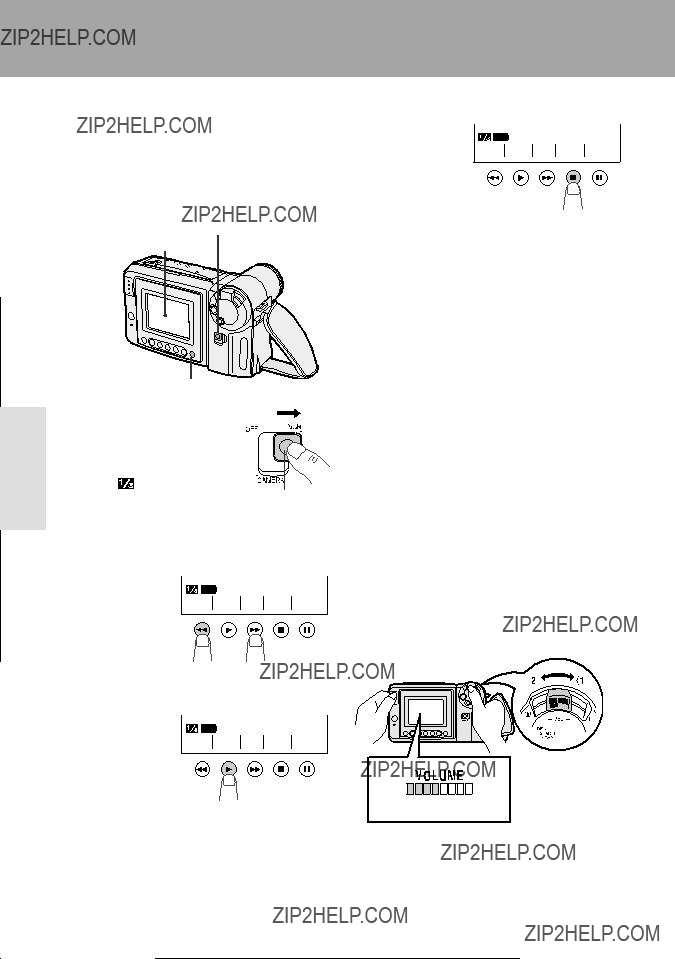
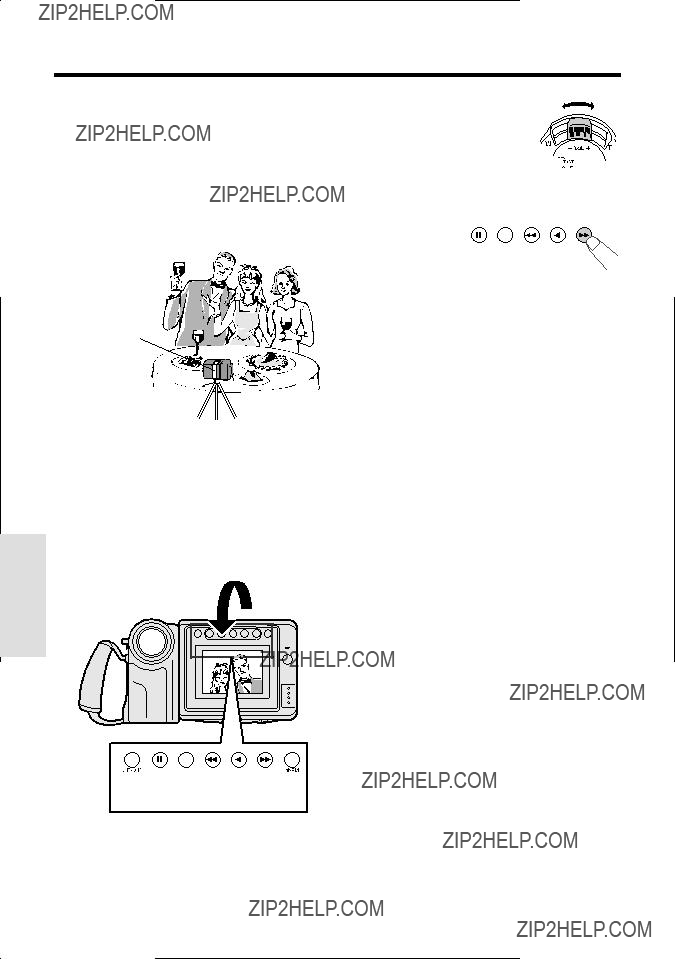
 appears. When you are ready to finish playback, press the STOP button (
 SLOW button
 STOP button
 (MENU 1) screen in Camera mode.

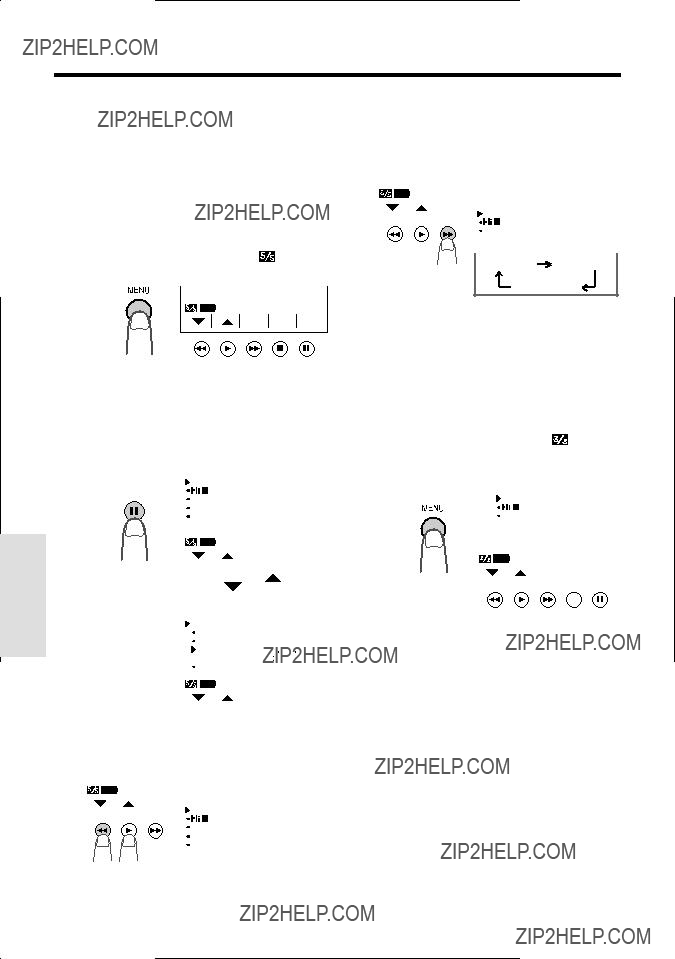
 SUP E RST AR !
 HAPPY B I R T HDAY !
 HAPPY HOL I DAYS !
 CONGRA T UL A T I ONS
 NEW B A BY
 OUR VAC AT I ON
 THE E ND
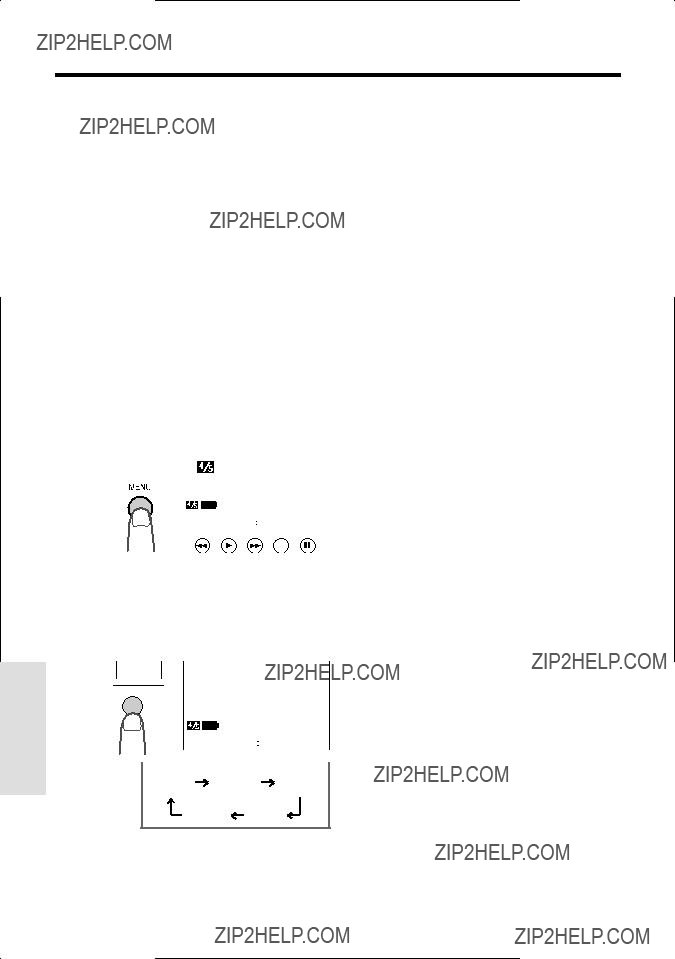
 ) to display the title input screen.
 button to move the cursor to that character and perform step 4.
 ). The new title will be displayed on the title selection screen.
 screen.


 More light
 ) to display the exposure setting screen.
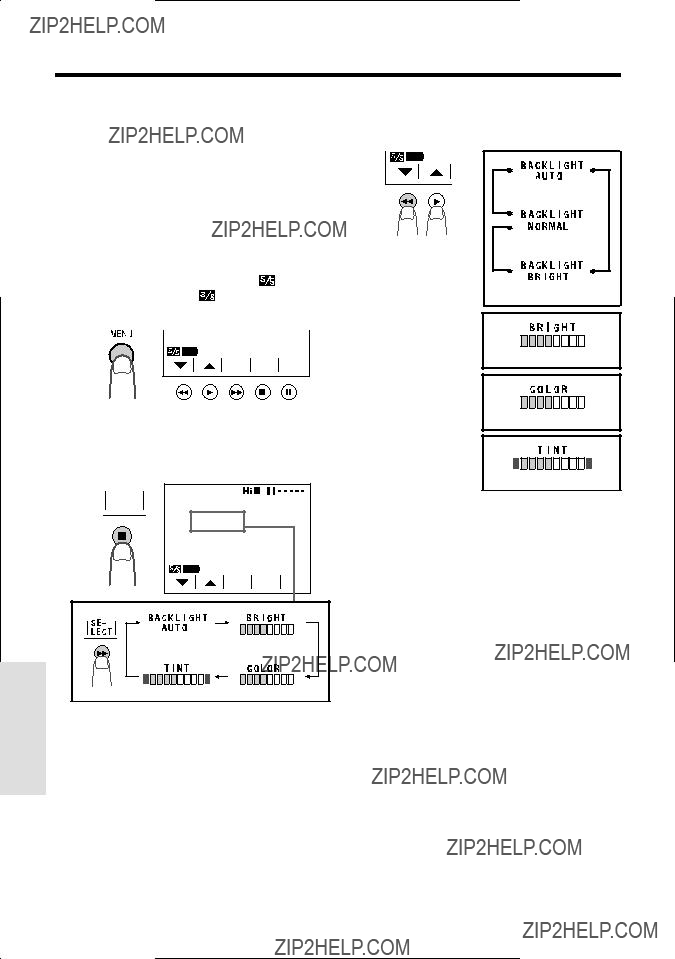

 Brighter
 Increase
 Green
Green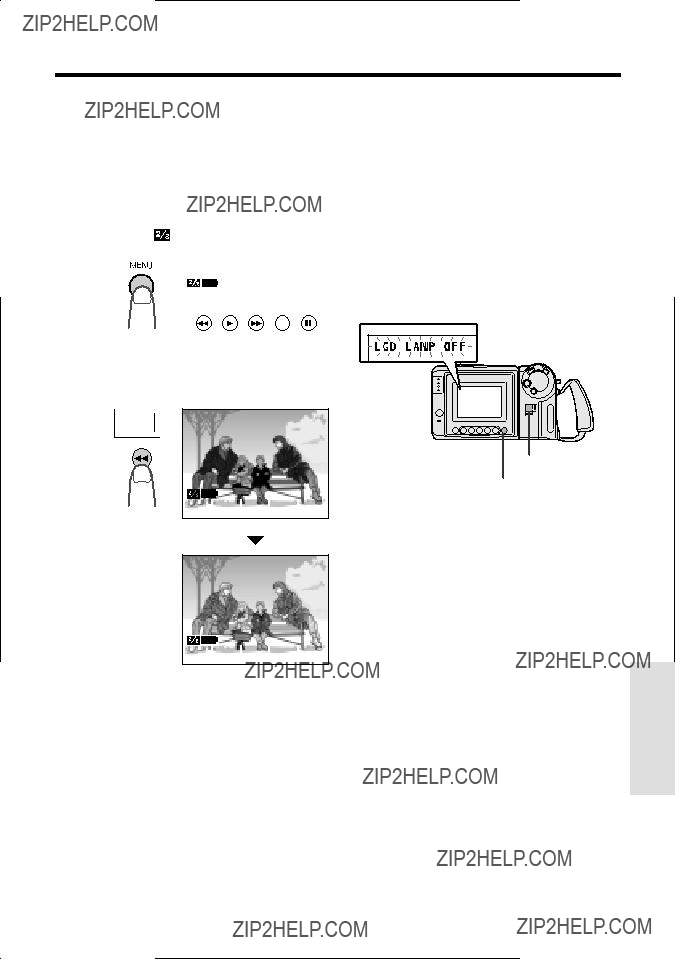

 (supplied)
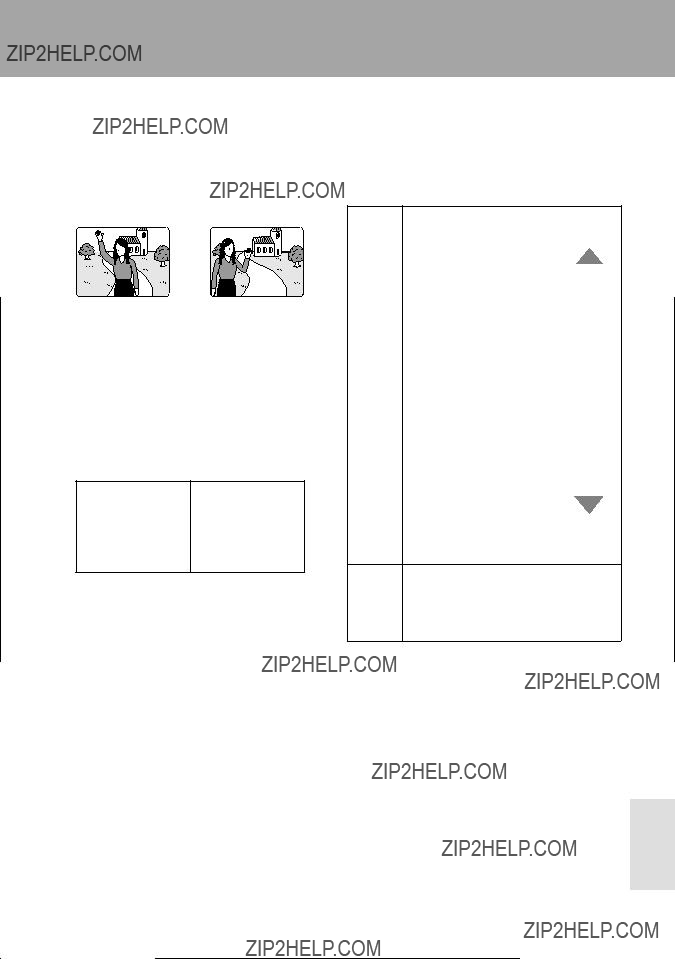
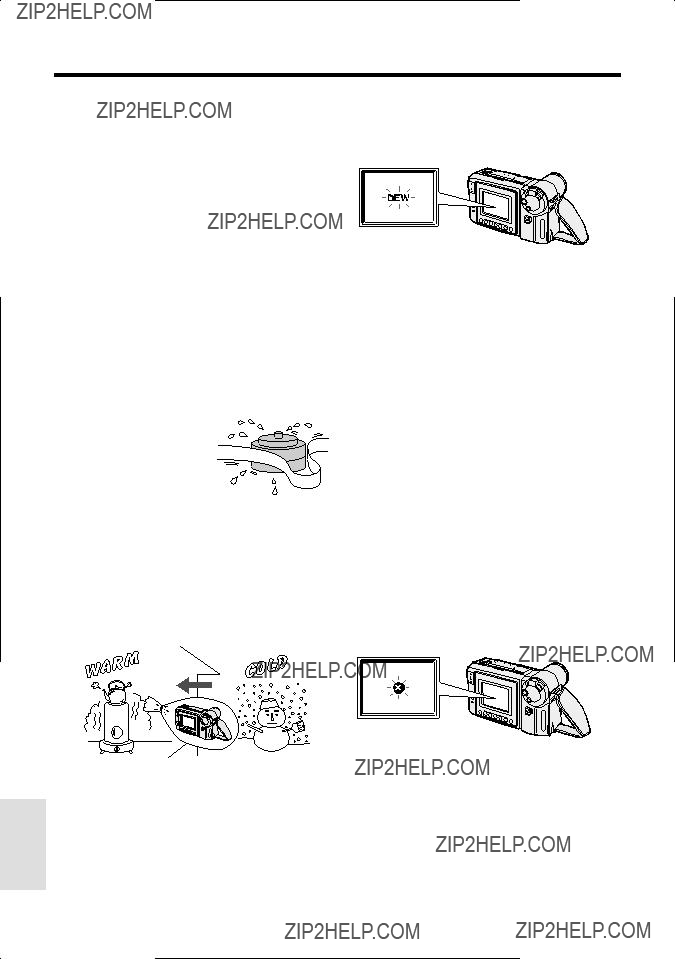
 indicator appears on the screen. Contact the
 or
or 

 mark with this VIEWCAM.
 AC
AC 

 ) to display MENU 1.


 Control de liberaci??n de la bater??a
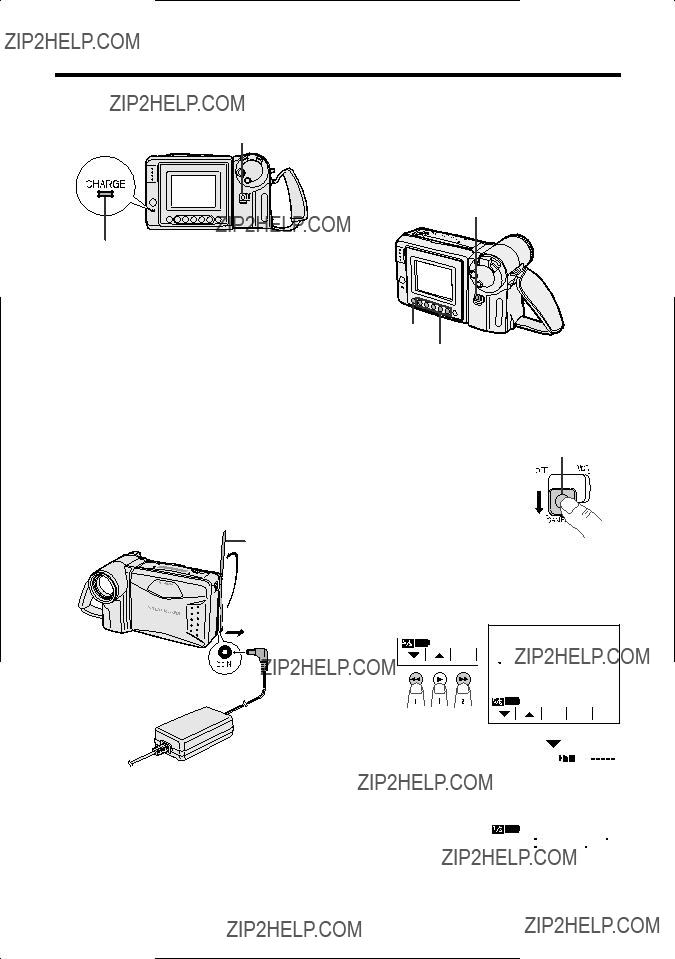

 ENG L I SH
 FRAN
FRAN 

 Aumenta