0-10MPH_ 2.0HP_ PROGRAMMABLESPEED/INCLINE
??
Model No. 831.297451 -
Serial No.
The serial number can be found in the location shown below. Write the serial number in the space above.
Serial Number
Decal
_kCAUTION!:
Read all safety precautions and instructions in this
manual before using this equipment. Keep this manual in a safe place for future reference.
OWNER'S MANUAL
SEARS, ROEBUCK AND CO., HOFFMAN ESTATES, IL 60179
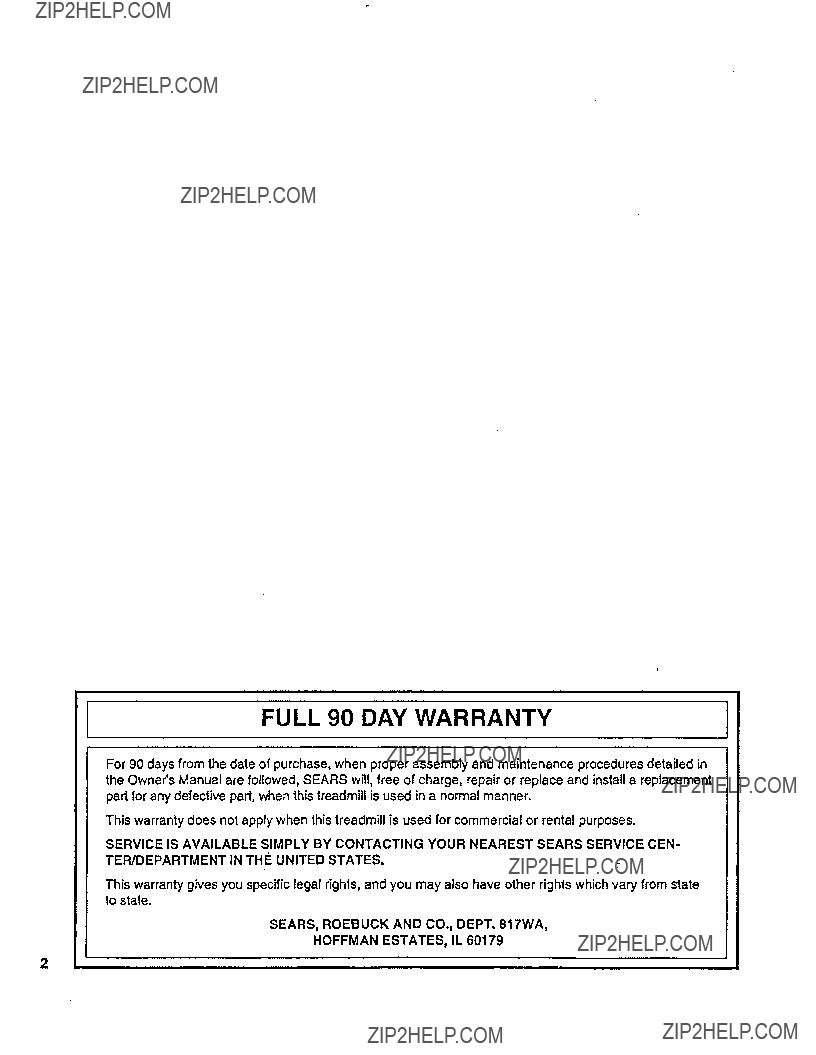
FULL 90 DAY WARRANTY
For 90 days from the date of purchase, when proper assembly and maintenance procedures detailed in
the Owner'sManual are followed, SEARS will, free of charge, repair or replace and install a replacement part for any defective part, when this treadmill is used in a normal manner.
This warranty does not apply when this treadmill is used for commercial or rental purposes.
SERVICE IS AVAILABLE SIMPLY BY CONTACTING YOUR NEAREST SEARS SERVICE CEN-
TER/DEPARTMENT IN THI_ UNITED STATES.
This warranty gives you specific legal rights, and you may also have other rights which vary from state to state.
SEARS, ROEBUCK AND CO., DEPT. 817WA,
HOFFMAN ESTATES, IL 60179
O0
0-10 MPHo_2.0HP_ PROGRAMMABLESPEED/INCLINE

IMPORTANT SAFETY PRECAUTIONS
WARNING: Toreducetheriskofburns,fire,electricshockor injury topersons,readthefol-
lowingimportant safety precautions and information before operating the treadmill.
1.Position the treadmill on a level surface, with at least 8 feet of clearance behind the treadmill. Do not place the treadmill near water, outdoors or on any surface that blocks an air opening. Do not operate
where aerosol products are used or where oxygen Is being administered.
2.When connecting the power cord (see PLUGGING IN THE POWER CORD on page 7), plug the power cord directly into a grounded circuit capable of carrying 12 or more amps. No other appliance should be on the same circuit. Keep the power cord away from heated surfaces. If an extension cord is need- ed, use only a 14-gauge general-purpose cord of five feet or less in length with a three-wire conduc- tor.
3.Never move the walking belt while the power is turned off. Do not operate the treadmill if the power cord or plug Is damaged, or if the treadmill is not working properly. (See BEFORE YOU BEGIN on page 5 if the treadmill is not working properly.)
4.Wear appropriate exercise clothing when using the treadmill; do not wear loose clothing that could become caught in the treadmill. Always wear athletic shoes; never use the treadmill with bare feet, wearing only stockings or in sandals. Athletic support clothes are recommended for both men and women.
5.The pulse sensor is not a medical device. Various factors, including the user's movement while exer- cising, may affect the accuracy of heart rate readings. The pulse sensor is intended only as an exer- cise aid in determining heart rate trends in general.
6.Never start the treadmill while you are standing on the walking belt. Always hold the handrail when exercising on the treadmill.
7.Never allow more than one person on the treadmill at a time. The treadmill should not be used by per- sons weighing more than 250 pounds.
8.Keep small children away from the treadmill at all times. Never leave the treadmill unattended while it
Is running. Always turn off the power when the treadmill is not in use.
9.Never drop or insert any object into any opening.
10.To reduce the possibility of overheating, do not operate the treadmill continuously for longer than 1 hour.
11.The treadmill is capable of high speeds. Adjust the speed slowly to avoid sudden jumps in speed.
12.Use the treadmill only as described in this manual.
13.Always unplug the power cord before performing the maintenance and adjustment procedures described in this manual. Never remove the safety cover unless instructed to do so by an authorized service representative. Servicing other than the procedures in this manual should be performed by an authorized service representative only.
SAVE THESE INSTRUCTIONS
BEFORE YOU BEGIN
Thank you for selecting the SEARS LIFESTYLER ?? EXPANSE 1000 treadmill. The EXPANSE 1000 treadmill
blends advanced technology with innovative design to let you enjoy an excellent form of cardiovascular exercise in the convenience and privacy of your home.
For your safety and benefit, read this manual carefully before uslng the treadmill. If you have additional questions, please call our Customer Service Department toll-free at 1-800-999-3756, Monday through Friday, 6 a.m. until 6 p.m. Mountain Time (excluding holidays). To help us assist you, please note the product model num- ber and serial number before calling. The model number of the treadmill is 831.297451. The serial number can be found on a decal attached to the treadmill (see the front cover of this manual for the !ocation).
Before reading further, please review the drawing below and familiarize yourself with the parts that are labeled.
Console \
Pulse Sensor
Handrail
Safety Key/Clip
Foot Rails
Power Cord
ASSEMBLY
Complete the assembly steps withthe help of a second person. Set the treadmill in a cleared area and remove all packing materials. Do not dispose of the packing materials until assembly is completed. THE FOLLOWING TOOLS ARE REQUIRED FOR ASSEMBLY: The 7/32" allen wrench _included and your own adjustable wrench
oWith the help of a second person, raTsethe Right Upright (18) and Left Upright (not shown) to a vertical position. Align the hole in the lower end of the Right Upright with the hole in the side of the Frame (45). Insert an Upright Bolt (22), with a Flat Washer (15), into the Right Upright and tighten the Bolt into the Frame. Tighten the Bolt that is already in the Right Upright.
Attach a Bolt and Washer on the left side in the same manner (not shown).
,With the help of a second person, rotate the Left and Right Handrails (7, 14) up as shown. Insert two Handrail Bolts (1) into the Left and Right Uprights (3, 18) and tighten the Bolts with the 7/32" Allen Wrench (71).
3.Remove the paper backing from the Wrench Clip (62). Press the Wrench Clip onto the Frame (45) in the indicated location. Press the 3/16" Allen Wrench (61) into the Wrench Clip.
Make sure that all parts are tightened before using the treadmill.
Note: To protect the floor, a covering should be placed under the treadmill.

OPERATION AND ADJUSTMENT
PLUGGING IN THE POWER CORD
This product must be grounded. If it should malfunction or break down, grounding provides a path of least resistance for electric current to reduce the risk of electric shock.
This product is equipped with a cord having an equipment-grounding conductor and a grounding plug. Plug the
power cord into an appropriate outlet that is properly installed and grounded in accordance with all local codes and ordinances.
DANG E R: Improper connection of the equipment-grounding conductor can result in a risk of elec- tric shock. Check with a qualified electrician or serviceman if you are in doubt as to whether the product is proper- ly grounded. Do not modify the plug provided with the product--if it will not fit the outlet, have a proper outlet installed by a qualified electrician.
This product is for use on a nominal 120-volt circuit, and has a grounding plug that looks like the plug illustrated in Drawing 1.
A temporary adapter that looks like the adapter illustrated in Drawing 2 may be used to connect this plug to a 2- pole receptacle as shown in Drawing 2 if a properly grounded outlet is not available. The temporary adapter should be used only until a properly grounded outlet (Drawing 1) can be installed by a qualified electrician. The green colored rigid ear, lug, or the like extending from the adapter must be connected to a permanent ground such as a properly grounded outlet box cover. Whenever the adapter is used it must be held in place by a metal screw.
Some 2-pole receptacle outlet box covers are not grounded. Contact a qualified electrician to determine if the outlet box cover is grounded before using an adapter.
Grounded Outlet Box 2
Grounding Plug
Grounding Pin
Grounding Plug
I
I
MAINTENANCE-FREE WALKING BELT
Your treadmill features a maintenance-free walking belt. IMPORTANT: Never apply silicone spray or other substances to the walking belt or the walking platform. They will deteriorate the walking
belt and cause excessive wear.
CONSOLE OPERATION
The heart of the treadmill is the state-of-the-art programmable console. The console offers both manual and pro- gram modes, and features four independent LCD displays to provide you with continuous exercise feedback. Please read these instructions carefully before operating the console. Note: if there is a sheet of clear protec- tive plastic on the face of the console, remove it before operating the console.
Step onto the foot rails of the treadmill. Locate the clip attached to the safety key, and slide the clip onto the waistband of your clothing.
,& CAUTION: Do not stand on the walking belt when turning on the power. Always wear the clip
while using the treadmill.
Insert the safety key into the console. The four LCD displays will appear and all indicators will light in sequence. When only the manual and distance indicators are lit, the console will be ready for operation. Note: The first time that the safety key is inserted after the power cord is plugged in, the treadmill will automatically rise to the maxi- mum incline level and then return to the minimum incline level. This will calibrate the incline system.
MANUAL MODE OPERATION
When the power is turned on, the console will be in the manual mode. For your safety, the walking belt will be stationary each tir_e the power is turned on. To start the walking belt, first slide the manual speed control to the "reset" position. Then, slide the control slowly to the right until the walking belt begins to move at slow speed. Note: Each time the walking belt is started, the control must first be moved to the "reset" position. The speed range of the walking belt is about 0.5 to 10 miles per hour.
CAUTION: After the manual speed control is moved, there will be a pause before the walking belt begins to move. Adjust the speed slowly until you are familiar with the operation of the treadmill.
PROGRAMMODE OPERATION
When the console is in the program mode, the console will automatically control either the speed of the walking belt or the incline of the treadmill, according to programs you create. To create a program, first press the MODE button repeatedly to select the WALK, RUN or INCLINE mode. An indicator will light to show which mode you have selected. If the WALK mode is selected, the console will control the speed of the walking belt during the pro- gram, and the speed range will be about 1 to 5 miles per hour; if the RUN mode is selected, console will control the speed of the walking belt during the program, and the speed range will be about 2 to 10 miles per hour; if the incline mode is selected, the console will control the incline of the treadmill during the program, and the incline range will be 2% to 12%.
Each program is divided into eight equal time periods, called segments. The speed or incline of the treadmill will change automatically at the beginning of each segment. If the WALK or RUN mode was selected, a speed setting should now be programmed for each of the eight segments. If the INCLINE mode was selected, an incline setting should now be programmed for each of the eight segments. Settings are programmed using the eight program- mable controls on the left side of the console. The control on the far left is for the first segment, and the control on the far right is for the eighth segment. Move the controls up or down to program the desired speed or incline set- tings. A sample program is shown on page 8. This program will begin with a low speed or incline setting. The speed or incline setting will then increase during the second and third segments, decrease during the fourth seg- ment, increase during the fifth and sixth segments, and decrease during the seventh and eighth segments. An infinite variety of settings can be programmed. Note: Do not set adjacent programmable controls too far
apart; if the speed changes too rapidly, you may lose your balance and fall.
Next, press the TIME SET buttons to set the length of time you want the program to last. The length of time will be shown in the TIME display. Each time one of the buttons is pressed, the length of time will change by 4 min- utes. The buttons can be held down to set the desired length of time rapidly. The program can be set to last for a minimum of 4 minutes, up to a maximum of 96 minutes.
To start the program, press the PROGRAM START button. The first segment indicator will begin to flash, and the treadmill will automatically adjust to the speed or incline setting of the first programmable control. (If the WALK or RUN mode was selected, the incline of the treadmill can be controlled during the program by pressing the INCLINE buttons. The speed of the walking belt can be adjusted, if desired, by moving the programmable control below the flashing segment indicator. If the INCLINE mode was selected, the speed of the walking belt can be controlled during the program by moving the manual speed control. First, move the speed control button to the "reset" position, and then slide the control to the right to adjust the speed.The incline of the treadmill can be adjusted, if desired, by moving the programmable control below the flashing segment indicator. ) Hold the handrails, step carefully onto the walking belt and begin exercising. The time rem'ainingin the program will be shown in the TIME display. When one-eighth of the total length of time you set has elapsed, the second segment indicator will begin to flash, and the treadmill will automatically adjust to the speed or incline setting of the second programmable control. The program will continue in this manner until no time remains in the TIME display. The walking belt will then slow to a stop and the program will be completed.
If you wish to stop the program before the program has been completed, press the MODE button. The console will then be in the same condition as if the program had been completed. After the program is completed, the console can be switched to a different mode by repeatedly pressing the MODE button.
LCD DISPLAY OPERATION
TIME display--When the console is in the manual mode, this display will show the total time that the walking belt has been moving. (If the treadmill is run for longer than 99 minutes and 59 seconds, the display will reset to zero and the treadmill will slow to a stop.) If desired, a time goal can be set. To set a time goal, first make sure that the walking belt is stopped. Next, press the TIME SET buttons to set the length of time you plan to exercise. Each time one of the buttons is pressed, the time goal will change by 1 minute. The buttons can be held down to set a time goal rapidly. While the walking belt is moving, the display will count down the time goal. When no time remains, the walking belt will slow to a stop. When the console is in the WALK, RUN or INCLINE mode, the dis- play will show the time remaining in the program.

SPEED display--This display shows the current speed of the walking belt.
PULSE display--This display shows your heart rate. To use the pulse display, first stand on the foot rails and place your thumb on the pulse sensor as shown. The pulse sensor is pressure-activated. Fully press down the sensor. Do not press too hard, or the circulation in your thumb will be restricted, and your pulse will not be detected. Next, slightly raise your thumb until the heart-shaped indicator next to the PULSE display flashes steadily. Hold your thumb at this level. After 5 to 10 seconds, your pulse will be displayed. If the pulse displayed appears to be too high or too low, or your pulse is not displayed, lift your thumb off the sensor and allow the display to reset. Press down again on the sensor as described above. Make sure that your thumb is positioned as shown, and that you are applying the proper amount of pressure to the sensor. Try the pulse sensor several times until you become familiar with the pulse sensor.
Another method of finding your pulse is to gently press down on the sensor until the top of the sensor is just above the surface of the console. Do not press too hard, or the circulation in your thumb will be restricted, and your pulse will not be detected. After a few seconds, the heart-shaped indicator will flash each time your heart beats. After another 5 to 10 seconds, your pulse will be displayed, if your pulse is not displayed, make sure that your thumb is positioned as shown, and that you are applying the proper amount of pressure to the sensor. Remember to stand still while measuring your pulse.
TURNING OFF THE POWER
To turn off the power, remove the safety key from the console. Store the safety key in a secure location.
TROUBLE-SHOOTING AND STORAGE
Most treadmill problems can be solved by following the simple steps below. Find the symptom that applies, and follow the steps listed. If further assistance is needed, call our Customer Service Department toll-free at 1- 800-999-3756, Monday through Friday, 6 a.m. until 6 p.m. Mountain Time.
1.SYMPTOM: THE POWER DOES NOT TURN ON
a.Make sure that the power cord is plugged into a properly grounded outlet. (See OPERATION AND ADJUST- MENT on page 7.) If an extension cord is needed, use only a 14-gauge general-purpose cord of five feet or less in length.
b.After the power cord has been plugged in, make sure that the safety key is fully inserted into the console. Various indicators on the console should light. (See OPERATION AND ADJUSTMENT on page 7.)
c.Check the circuit breaker located on the treadmill near the power cord. If the switch protrudes as shown, the circuit break- er has tripped. To reset the circuit breaker, wait for five min- utes and then press the switch back in.
d.Check the on/off switch located on the treadmill near the power cord. The switch must be in the ON position.
2.SYMPTOM: THE POWER TURNS OFF DURING USE
Tripped S Reset
oPosition.
a.Check the circuit breaker located on the treadmill near the power cord. tf the circuit breaker has tripped (see the drawing above.), wait for five minutes and then press the switch back in.
b.Make sure that the power cord is plugged in.
c.Remove the safety key from the console. Reinsert the safety key fully into the console. Various indicators on the console should light.
d.Check to make sure the on/off switch is in the ON position. (See 1. d. above.)
e.If the treadmill still will not run, please call our Customer Service Department.
3.SYMPTOM: THE PULSE SENSOR DOES NOT WORK PROPERLY
a.Make sure that your thumb is properly positioned (see PULSE display on page 10), and that you are applying the proper amount of pressure to the sensor. Stand still while measuring your pulse.
4.SYMPTOM: THE WALKING BELT SLOWS WHEN WALKED ON
a.If an extension cord is needed, use only a 14-gauge general-purpose cord of five feet or less in length.
bo If the walking belt is overtightened, treadmill performance may decrease and the walking belt may be permanently damaged. Remove the safety key and UNPLUG THE POWER CORD.
Using the 3/16" allen wrench, turn both rear roller adjustment bolts counterclockwise, 1/4 of a turn. When the walking belt is properly tightened, you should be able to lift each side of the walking belt 3-4 inches off the walking platform. The center of the walking belt should just touch the walking platform. Be care- ful to keep the walking belt centered. Plug in the power cord, insert the safety key and run the treadmill for a few minutes.
Repeat until the walking belt is properly tightened.
Rear Roller Adjustment Bolts
11

c. If the walking belt still slows when walked on, please call our Customer Service Department.
5, SYMPTOM: THE WALKING BELT IS OFF-CENTER OR SLIPS WHEN WALKED ON
a. If the walking belt has shifted to the left, first remove the safety
a
key and UNPLUG THE POWER CORD. Using the 3/16" allen wrench, turn the left rear roller adjustment bolt clockwise, and the right bolt counterclockwise, 1/4 of a turn each. Be careful not to overtighten the walking belt. Plug in the power cord, insert the safety key and run the treadmill for a few minutes. Repeat until the walking belt is centered.
C, If the walking belt slips when walked on, first remove the safety key and UNPLUG THE POWER CORD. Using the 3/16" allen wrench, turn both rear roller adjustment bolts clockwise, 1/4 of a rum. When the walking belt is correctly tightened, you should be able to lift each side of the walking belt 3-4 inches off the walking platform. The center of the walking belt should just touch the walking platform. Be careful to keep the walking belt centered. Plug in the power cord, insert the safety key and run the treadmill for a few minutes. Repeat until the walking belt is properly tightened.
6. SYMPTOM: THERE IS A NOTICEABLE DIFFERENCE IN THE INCLINE RANGE OF THE TREADMILL
a.Raise the incline of the treadmill to its maximum height and continue to press the incline button for three seconds. This will recalibrate the incline system.
STORAGE
Unplug the power cord when the treadmill is not in use. Remove the indicated bolt and washer from the lower end of each upright. Loosen the other bolts in each upright. Carefully lower the uprights. It is rec- ommended that the treadmill be covered during extended periods of storage.

CONDITIONING GUIDELINES
The following guidelines will help you to plan your exercise program. Remember that proper nutrition and ade- quate rest are essential for successful results.
, WAR NIN G: Before beginning this or any exercise program, consult your physician. This is especially important for individuals over the age of 35 or individuals with pre-existing health problems.
EXERCISE INTENSITY
To maximize the benefits of exercising, it is important to exercise with the proper intensity. The proper intensity level can be found by using your heart rate as a guide. For effective aerobic exercise, your heart rate should be maintained at a level between 70% and 85% of your maximum heart rate as you exercise. This is known as your training zone. You can find your training zone in the table below.
During the first few months of your exercise program, keep your heart rate near the low end of your training zone as you exercise. After a few months of regular exercise, your heart rate can be increased gradually until it is near the middle of your training zone as you exercise. You can measure your heart rate using the pulse mode of the console. Exercise for at least four minutes, and then measure your heart rate immediately. If your heart rate is too high, decrease the intensity of your exercise. If your heart rate is too low, increase the intensity of your exercise.
^_u_WAR NING: The pulse sensor is not a medical device. Various factors, including your move-
ment during exercise, may affect the accuracy of heart rate readings. The sensor is intended only as an
Each workout should consist of three basic parts: a warm-up, 20 to 30 minutes of training zone exercise, and a cool-down. Warming up prepares the body for exercise by increasing circulation, delivering more oxygen to the muscles and raising the body temperature. Begin each workout with 5 to 10 minutes of stretching and light exercise to warm up. Then, increase the intensity of your exercise to raise your heart rate to your training zone for 20 to 30 minutes. Breathe regularly and deeply as you exercise---never hold your breath. Finish each workout with 5 to 10 minutes of stretching to cool down. This will increase the flexibility of your muscles as well as help to decrease sore- ness and other post-exercise problems.
To maintain or improve your condition, complete three workouts each week, with at least one day of rest between workouts. After a few months of regular exercise, you may complete up to five workouts each week, if desired. The key to success is CONSISTENCY.
Note: "#" indicates a non-illustrated part. Specifications are subject to change without notice. See the back cover 14 for information about ordering replacement parts.

ORDERING REPLACEMENT PARTS
Each TREADMILL has its own MODEL NUMBER. Always mention this MODEL NUMBER when requesting ser- vice or repair parts for your TREADMILL.
All parts listed herein can be ordered through SEARS, ROEBUCK AND CO. SERVICE CENTERS and most SEARS RETAIL STORES. If parts you need are not stocked locally, your order will be transmitted to a SEARS PARTS DISTRIBUTION CENTER for handling.
WHEN ORDERING REPAIR PARTS, ALWAYS GIVE THE FOLLOWING INFORMATION:
1.The MODEL NUMBER of the product (831.297451).
2.The NAME of the product (SEARS LIFESTYLER ?? EXPANSE 1000).
3, The PART NUMBER of the part(s) from page 14 of this owner's manual.
4. The DESCRIPTION of the part(s) from page 14 of this owner's manual.
Your SEARS TREADMILL has added value when you consider that SEARS has service units nationwide, staffed with SEARS trained technicians specifically trained on SEARS products, having the parts, tools and equipment to ensure that we meet our pledge to you: "We service what we sell. =
Should you ever need repair service or parts, call toll free:
For repair service: 1-800-4-REPAIR (1-800-473-7247)
For repair parts: 1-800-FON-PART (1-800-366-7278)