Table of Contents
Warning Decal Placement . . . . . . . . . . . . . . . . . . . . . . . . . . . . . . . . . . . . . . . . . . . . . . . . . . . . . . . . . . . . . . . . 2
Important Precautions . . . . . . . . . . . . . . . . . . . . . . . . . . . . . . . . . . . . . . . . . . . . . . . . . . . . . . . . . . . . . . . . . . . 3
Before You Begin . . . . . . . . . . . . . . . . . . . . . . . . . . . . . . . . . . . . . . . . . . . . . . . . . . . . . . . . . . . . . . . . . . . . . . . 4
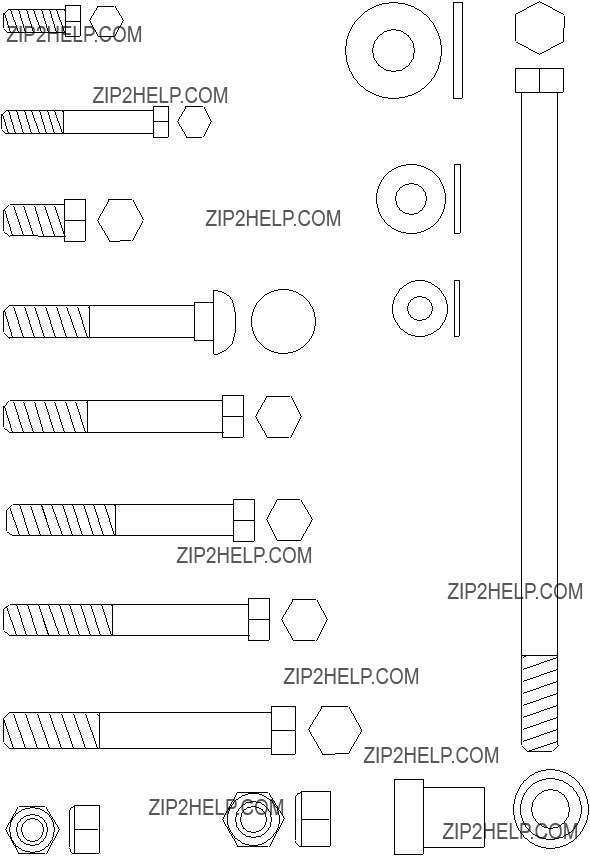
Part Identification Chart . . . . . . . . . . . . . . . . . . . . . . . . . . . . . . . . . . . . . . . . . . . . . . . . . . . . . . . . . . . . . . . . . . 5
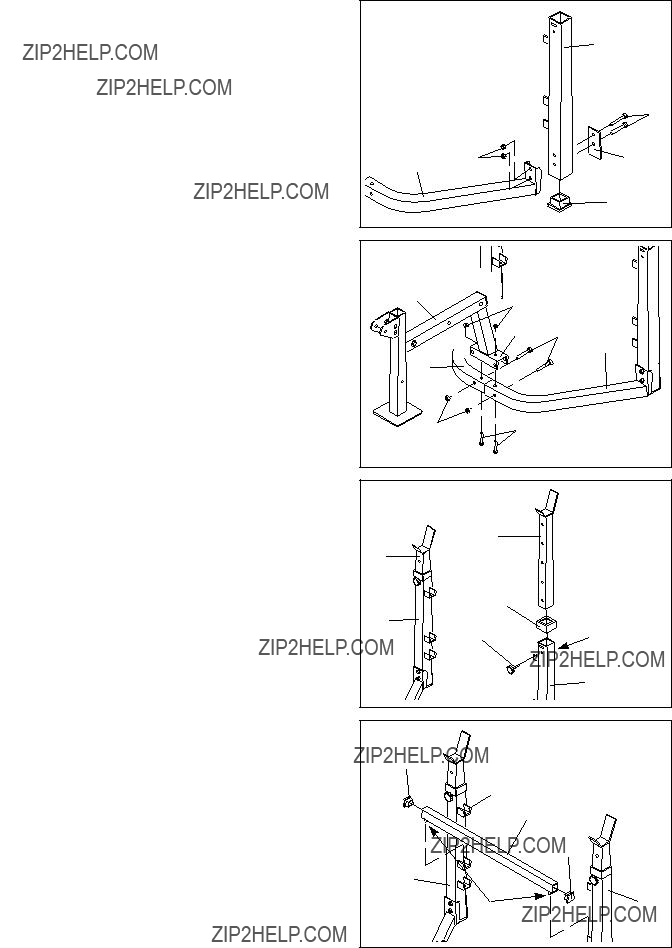
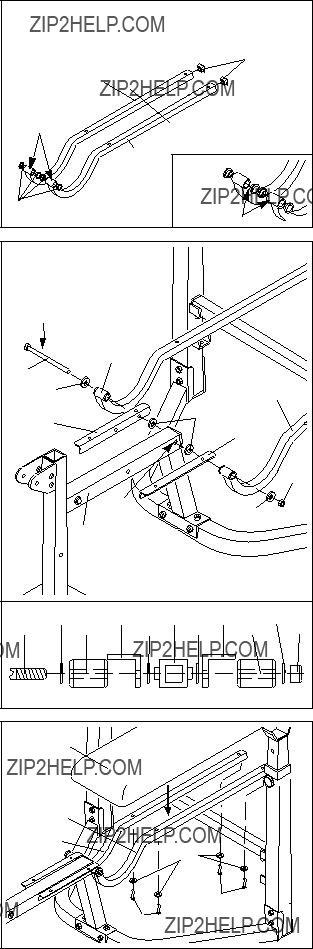
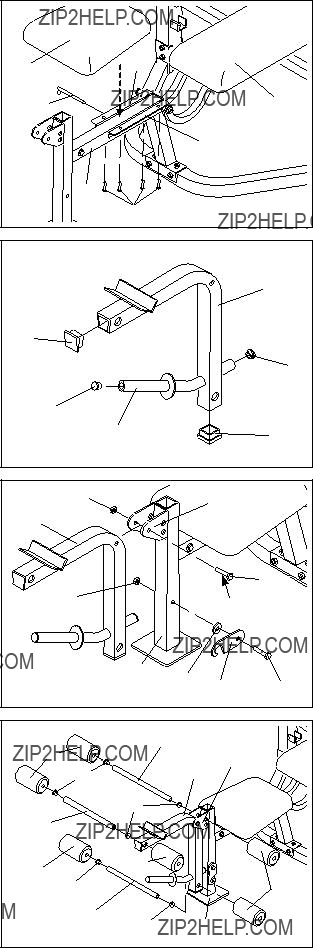
Assembly . . . . . . . . . . . . . . . . . . . . . . . . . . . . . . . . . . . . . . . . . . . . . . . . . . . . . . . . . . . . . . . . . . . . . . . . . . . . 6
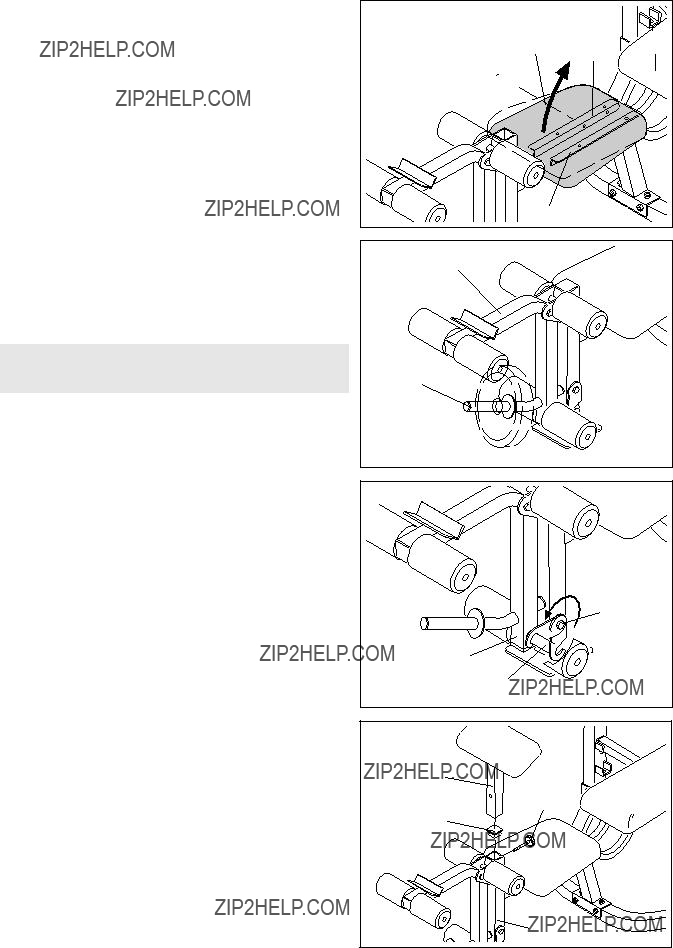
Adjusting the Weight Bench . . . . . . . . . . . . . . . . . . . . . . . . . . . . . . . . . . . . . . . . . . . . . . . . . . . . . . . . . . . . . . 10
Exercise Guidelines . . . . . . . . . . . . . . . . . . . . . . . . . . . . . . . . . . . . . . . . . . . . . . . . . . . . . . . . . . . . . . . . . . . . 13
Ordering Replacement Parts . . . . . . . . . . . . . . . . . . . . . . . . . . . . . . . . . . . . . . . . . . . . . . . . . . . . . . Back Cover
Full 90 Day Warranty . . . . . . . . . . . . . . . . . . . . . . . . . . . . . . . . . . . . . . . . . . . . . . . . . . . . . . . . . . . . Back Cover
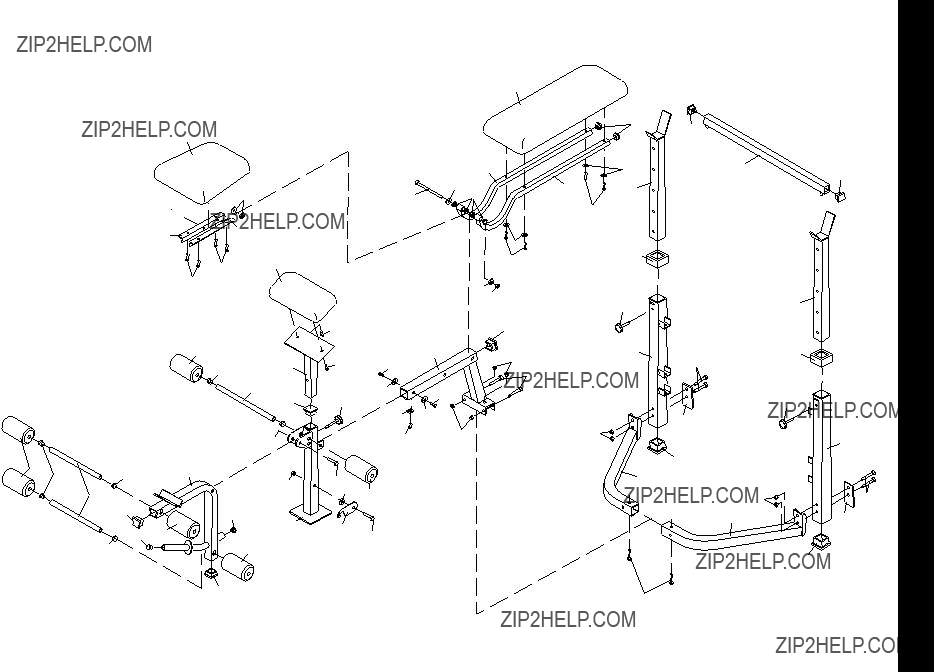
Note: A Part List/Exploded Drawing is attached to the center of this manual. Remove the Part List/Exploded Drawing before beginning assembly.
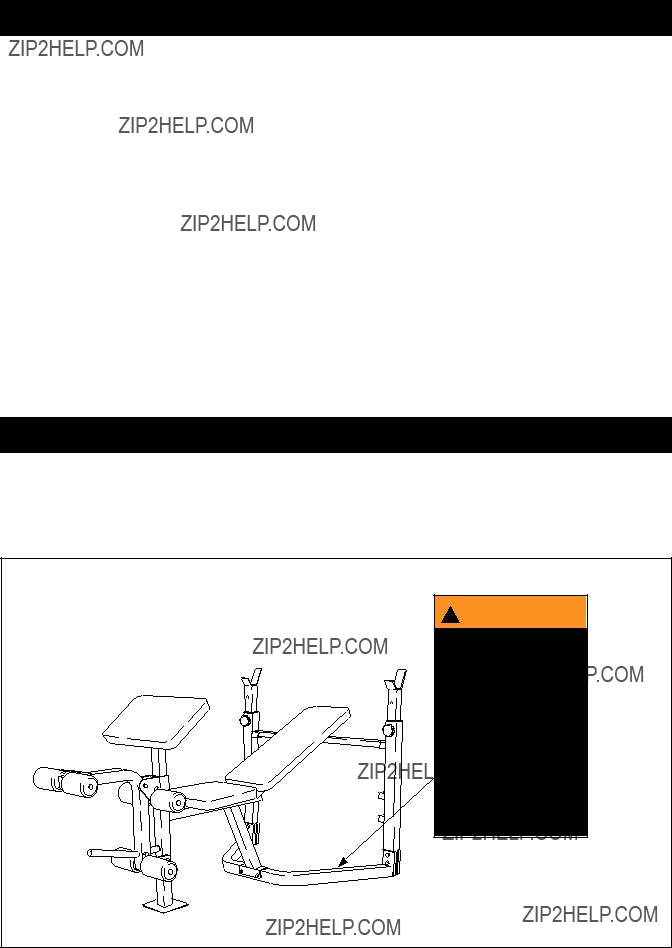
Warning Decal Placement
The decal shown below has been placed on the weight bench. If the decal is missing, or if it is not legi- ble, please call our Customer Service Department toll-free at 1-800-736-6879, Monday through Saturday, 7 a.m. until 7 p.m. Central Time, to order a replacement decal. Apply the replacement decal to the loca- tion shown.
! WARNINGI
???MisuseofthisproductMisuse of this product mayayresultinresulteriousin serious
injury.
injury.
???Readuser???smanualRead user???s manual andndfollowawarningsfollow all warnings
and operating instruc- andoperatinginstruc-
tions prior to use. tions prior to use.
???DonDotallowchildrennot allow children onoraron orundmachinearound. machine.
???ReplaceReplacelabellabelif if damaged,amaged,illegible,orillegible, or
removed.
removed.


 42
42