OWNER???S

MANUAL

Model No.

200.71450

CAUTION:

Read and Follow All Safety Rules and Operating Instructions Before Every Use of this Product.

50/15/2 AMP

MANUAL BATTERY

CHARGER

225/125 AMP

ENGINE STARTER with

BATTERY TESTER

Sears, Roebuck and Co., Hoffman Estates, IL 60179 U.S.A.

Table Of Contents

Please read this Owner???s Manual before using your Battery Charger.

The Sears model 200.71450, Manual Battery Charger/Tester/Engine Starter, offers a wide range of features to accommodate the needs for home or commercial use. This manual will show you how to use your charger safely and effectively. Please read and follow these instructions and precautions carefully.

Warranty

FULL THREE-YEAR WARRANTY

If, within three years from the date of purchase this battery charger fails due to a defect in materials or work- manship, simply RETURN IT TO THE NEAREST SEARS STORE IN THE UNITED STATES, and Sears will repair or replace it, free of charge.

This warranty gives you specific legal rights, and you may also have other rights which vary from state to state.

Sears, Roebuck and Co., Dept 817WA,

Hoffman Estates, IL 60179

1

Sch 517

Important Safety Instructions

???Read all instructions and cautions printed on the battery charger, battery, and vehicle or equipment using battery.

???Use charger only on lead-acid type rechargeable batteries, such as those used in cars, trucks, trac- tors, airplanes, vans, RV???s, trolling motors, etc.

This charger is not intended to supply power to a low voltage electrical system other than in an automotive application.

???Use only attachments recommended or sold by manufacturer. The use of attachments not recom- mended by the manufacturer may result in fire, electric shock, or injury.

???Do not disassemble charger. Take it to a qualified service professional if service or repair is required. Incorrect assembly may result in fire or electrical shock.

???To reduce risk of electrical shock, unplug the charger from the outlet before attempting any maintenance or cleaning.

???Always charge battery in a well ventilated area.

Help us help you

Remember:

???Place charger as far away from battery being charged as the charger cables will permit.

???Do not expose charger to rain or snow.

???Never charge a frozen battery. If battery fluid (electro- lyte) becomes frozen, bring battery into a warm area to thaw before you begin charging.

???Never allow battery acid to drip on charger when reading specific gravity or filling battery.

???Never set a battery on top of the charger.

???Never place charger directly above battery being charged. The gases from the battery will corrode and damage the charger.

???Never use charger for charging dry-cell batteries that are commonly used with home appliances. These batteries may burst and cause personal injury.

Personal Safety Precautions

For your own personal safety, please follow the follow- ing precautions:

???Wear complete eye and clothing protection when working with lead-acid batteries.

???Be sure that someone is within range of your voice to come to your aid if needed while you work with or are near a lead-acid battery.

???Have plenty of fresh water and soap nearby for use in case battery acid contacts your eyes, skin, or cloth- ing. If this happens, wash immediately with soap and water. Then get medical attention.

???Avoid touching your eyes while working with a battery. Acid particles (corrosion) may get into your eyes. If this occurs, flush eyes immediately with running cold water for at least 10 minutes. Then immediately get medical attention.

???Never touch the battery clamps together when the charger is energized.

???Never operate charger if it has received a hard blow, been dropped, or otherwise damaged. Take it to a qualified professional for inspection and repair.

???Be sure to position the charger power cord to prevent it from being stepped on, tripped over, or damaged.

???Never pull out the plug by the cord when unplug- ging the charger. Pulling on the cord may cause damage to the cord or the plug.

???Do not operate the charger if it has a damaged power cord or plug. Have the cord replaced.

???Remove all personal metal items from your body, such as rings, bracelets, necklaces, and watches while working with a lead-acid battery. A battery can produce a short circuit current high enough to weld a ring (or the like) to metal, causing a severe burn.

???Take care not to drop any metal tool or metal object onto the battery. This may spark or short circuit the battery or another electrical device that may cause an explosion.

???Always operate your battery charger in an open, well ventilated area.

???Never smoke or allow a spark or flame in the vicinity of the battery or engine. Batteries generate explosive gases.

???Neutralize any acid spills thoroughly with baking soda before attempting to clean up.

2

Sch 517

Parts

This section shows an illustration of your battery charger. Use it to become familiar with where all the parts are located, and what they look like.

Replacement Parts List Sears 71450

Wiring diagram

3

Sch 517

Before Using Your Battery Charger

It is important to prepare your charger for use. This section will tell you how to assemble the charger, ground and connect the power cord, and prepare to charge a battery.

Assembling your charger

It is important to fully assemble your charger before use. Follow these instructions for easy assembly.

To attach the axle assembly:

1.Remove charger from packing materials and place upside down on a flat surface. Attach mounting foot and secure with the two 1??4-20 thread cutting screws.

2.Hold axle upright on floor or work surface. Then, using a hammer, tap one of the plastic hubs onto the top end of the axle. Be sure to tap the hub on straight. Slide both wheels onto the axle with the hubs facing inward.

4

Sch 517

3.Tap the other axle cap onto the opposite end of the axle and place the axle assembly onto the bottom of the charger. Place one end of the bracket into slot, then place the axle assembly under each bracket. Fasten the other side of the brackets using the two 10-32 screws provided.

To attach the handle:

Turn the charger right side up onto its foot and wheels. Remove the two top screws from each side of the charger and align with the screw holes on the handle. Attach the handle using the same screws.

Plugging it in

???! WARNING

Electrical Shock Hazard

Be sure that power cord fits properly into outlet. If not, have a qualified technician install a proper outlet. Never alter the AC cord or plug provided.

Improper connection can result in electrical shock.

Your charger should be grounded to reduce the risk of electrical shock.

Your charger is equipped with an electrical cord that has an equipment grounding conductor and a ground- ing plug designed to be used on a 120 volt circuit. The plug must be plugged into an outlet that has been properly installed and grounded in accordance with all local codes and ordinances.

5

Sch 517

A TEMPORARY adapter may be used to connect the charger to a two-pole outlet if a properly grounded outlet is not available. Use the adapter ONLY until a properly grounded outlet can be installed by a qualified electrician.

DANGER: Before using an adapter as illustrated, be certain that the center screw of the outlet plate is grounded. The green colored grounding clip of the adapter must be attached by a screw to a properly grounded outlet. If unsure whether outlet is properly grounded, contact a professional electrician. If neces- sary, replace the original outlet cover screw with a longer one that will secure the grounding clip to the outlet cover and make a ground connection to the grounded outlet.

Using an extension cord

The use of an extension cord is not recommended. If you must use an extension cord, please make sure that you follow these guidelines:

???Make sure the pins on the plug of the extension cord are the same number, size, and shape as those of the plug on the charger.

???Use only 3-conductor (grounded) extension cord when necessary.

???Check that the extension cord is properly wired and in good electrical condition.

???Use the recommemnded minumum AWG (American Wire Gauge) to be sure that wire size is large enough for the rating of the charger.

6

Sch 517

Preparing your battery to be charged

It is important that you read and follow these guidelines while you are preparing to charge your battery.

???Make sure that you have a 12 volt or 6 volt lead-acid battery. Set the volt/amp selector switch to match the voltage rating of the battery to be charged.

???Clean the battery terminals. Be careful to keep corrosion from getting in or around your eyes.

???If you have a battery with removable cell caps, if required, add distilled water to each cell until the battery acid reaches the level indicated by the manu- facturer. This will help purge excessive gases from the cells. Be careful not to overfill. If you have a sealed battery without cell caps, no action is neces- sary. Continue to the next step listed below.

???Take time to read all battery manufacturer???s specific precautions, such as removing or not removing cell caps while charging, and recommended rates of charge.

???Wear safety glasses. See additional "Personal Safety Precautions" on page 2.

???Be sure that the area around the battery is well ventilated while it is being charged. If ventilation is poor, gas can be manually blown away by using a piece of cardboard or other non-metallic material as a fan.

???If it is necessary to remove the battery from the vehicle to charge it, always remove the grounded terminal from the battery first. A spark may be caused if all accessories in the vehicle are not completely turned off.

NOTE: A marine battery installed in a boat must be removed and charged on shore.

7

Sch 517

Using Your Battery Charger

To obtain the best results from your battery charger, you must know how to use it properly. This section will tell you how to set the controls, and how you can charge a battery while it is still in the vehicle, or you can remove it and then charge it. Follow the instructions below depending on how you choose to charge your battery.

Setting the controls

All the controls for your charger are located on the front of the unit. Follow these instructions to obtain the accurate charge level for your battery.

VOLT/AMP SELECTOR:

The volt/amp selector switch allows you to select an amp charge rate and battery voltage type to match your charging needs. Read the following operating instructions for making the proper settings for charging a battery and using the engine start feature.

TIMER:

The timer is designed to allow your battery to be charged for a designated amount of time. To accu- rately charge your battery, you must know the size of the battery in ampere hours or reserve capacity in minutes, as well as the state of charge. Since this information is often not known, the timer limit is set at 2.25 hours. This will help prevent the battery from overcharging to a point where it can be damaged. If you do not know the charge state of your battery, it is best to start out with the timer set at one hour or less.

HOLD feature:

This position overrides the timer, allowing the charger to continue charging for over 2.25 hours. This feature is most often used when the charging rate is 2 or

15 amps. Using this feature requires you to monitor the charging and to stop the charger when the battery is fully charged. Otherwise, charger will not stop and may cause damage to your battery.

AMMETER:

The ammeter indicates the measured amount of amperes being drawn by the battery. When you first start charging a battery, the reading will be high, with the needle around 50 or ???START??? when the selector is in the 50 amp charge position. As the battery becomes charged, the reading will decrease to 15 or 20 amps at full charge. This will be your indicator to stop charging. With the selector switch set to the 15 amp position, the meter should display 15 amps for a discharged battery and 7-8 amps when the battery is fully charged.

If you are using the 2 amp charge rate, you may see little or no activity by the needle.

8

Sch 517

The ???START??? area of the ammeter indicates a high rate of current being drawn by the battery. For example, when cranking an engine, the needle will be at the far right side of the ???START??? area since the starter will be drawing up to 225 amps from the charger.

VOLTMETER:

To obtain an accurate reading of your battery???s voltage before you charge, use the voltmeter as follows:

1.Set the timer to the OFF position, put the voltage selector switch at 12 or 6 VOLT according to the battery you are testing, and then connect the charger as indicated in ???Charging your battery in the vehicle??? on page 10. Charger does not have to be plugged into an outlet.

2.If a battery has recently been charged or in a vehicle that has been run recently, you may want to turn your headlights on for a few minutes before you read the meter so as not to get a false reading from a surface charge. Then shut lights off, read the meter, and follow the convenient color coding.

ALTERNATOR/GENERATOR TEST

1.Set the volt/amp selector switch to the OFF position.

2.Set the battery test switch to 6 or 12 volts.

3.Set the timer switch to the OFF position.

4.With the charger off, and the clamps properly hooked up to the battery, start the engine and while it is at a fast idle, read the charging system meter. The battery should be in a good state of charge before doing this test.

5.The volt meter is divided into three color zones:

A.Green and Lighter Green ??? Charging system is good.

B.Yellow ??? Alternator output is low.

C.Red ??? Charging system is bad.

NOTE: If meter needle points to Red or Yellow, the charging system may have loose fan belts, defective voltage regulator or alternator. Additional tests may be required to find the exact cause. Take the vehicle to a qualified service center.

BATTERY TEST

This test is based on the terminal voltage of the battery. If the battery is installed in the vehicle, make sure the engine and all accessories are turned off.

1.Set the volt/amp selector switch to the OFF position.

2.Set the battery test switch to 6 VOLT for 6 volt batteries or 12 VOLT for 12 volt batteries.

3.Set the timer switch to the OFF position.

4.Read lower 6 VOLT BATTERY section of meter for 6 volt batteries and read upper 12 VOLT BATTERY section for 12 volt batteries.

9

5.Both 6 volt and 12 volt battery sections are divided into three color zones:

A.Green - Good battery.

B.Yellow - Weak battery.

C.Red - Bad battery.

NOTE: If the meter needle is in the Red or Yellow area, the battery may only need charging. If, after charging, the needle still indicates in the Red or Yellow area, have the battery tested by a qualified technician.

The meter needle may point to the Lighter Green section of the meter if this test is done on a recently charged battery or a battery from a vehicle that has been run recently.

Sch 517

Charging your battery

Charging your battery in the vehicle:

1.Arrange the power cord and charging cords care- fully in order to avoid damage that could be caused by the hood, door, or moving engine parts.

2.Keep clear of the fan blades, belts, pulleys, and other parts that can cause injury.

3.Check the polarity of the battery posts using the identification marks on the battery case: POSITIVE (POS,P, +) and NEGATIVE (NEG,N, ???).

4.Identify which post of the battery is ground or connected to the chassis. THE NEGATIVE POST

IS NORMALLY THE ONE THAT IS GROUNDED.

5.To charge a negative grounded post system:

Connect the red (POSITIVE) battery charger clamp to the ungrounded POSITIVE (POS,P,+) post of the battery. Then connect the black (NEGATIVE) clamp to a heavy metal part of the chassis or engine block, away from the battery. Do not connect clamp to carburetor, fuel lines, or sheet metal parts.

To charge a positive grounded post system:

Connect the black (NEGATIVE) battery charger clamp to the NEGATIVE (NEG,N,???) ungrounded post of the battery. Then connect the red (POSI- TIVE) clamp to a heavy unpainted metal part of the chassis or engine block. Do not connect clamp to carburetor, fuel lines, or sheet metal parts.

6.Connect the clamp to the battery post and twist or rock back and forth to make a solid connection. This will help keep the clamps from slipping off the posts and causing sparks.

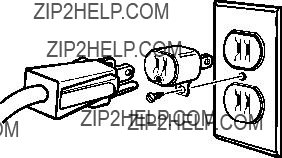
7.Set VOLT/AMP SELECTOR switch and TIMER to the OFF position. Next plug the power cord into a grounded AC outlet.

8.Set the TIMER to the desired charge time, from 30- 135 minutes. If more than 135 minutes of charging time is needed the HOLD position can be used.

When using the HOLD feature the battery being charged must be monitored closely to avoid over charging.

9.Set the VOLT/AMP SELECTOR to the desired charge position. (See ???CHARGE RATE??? chart on page 12 for correct settings.)

10.When battery is fully charged, the ammeter pointer will be in the farthest left position and the voltmeter pointer will be in the green area of the meter.

11.When the battery is fully charged, turn timer knob to OFF position, then unplug the charger power cord. Stand away from battery and remove the charger clamps from the NEGATIVE end of the cable first, then from the POSITIVE post.

12.Clean and store the battery charger in a dry location.

10

NEGATIVE GROUNDED SYSTEM

Sch 517

Charging your battery outside the vehicle:

1.Remove battery from vehicle, making sure to dis- connect grounded terminal first with all power turned off to the vehicle.

REMEMBER: A marine battery should be removed and charged on shore unless special equipment designed for marine use is available. Hydrogen gas emissions can create an explosion if battery is charged on board your boat.

2.Check the polarity of the battery posts as indicated on the battery case: POSITIVE (POS,P,+) and NEGATIVE (NEG,N,???).

NOTE: On top-post batteries, the positive battery terminal usually has a larger diameter than the negative one.

3.Connect the red (POSITIVE) charger clamp to the POSITIVE post of the battery. Be sure to rock the clip back and forth to make a solid connection.

4.Attach a 6-gauge (AWG) or a 4-gauge (SAE) insu- lated battery cable of at least 24-inches in length to the NEGATIVE battery post. This cable will provide a safer connection because any arcing and sparking will not occur directly over the battery. (The battery cable is not provided with the charger, but may be purchased at most automotive accessory outlets.)

5.Take the other end of the 6-gauge (AWG) or a 4-gauge (SAE) insulated 24-inch cable and, standing as far away from the battery as possible, connect the black (NEGATIVE) charger clamp to the free end of the cable. Be sure to rock the clamp back and forth to make a solid connection.

IMPORTANT: Wear safety glasses and face away from battery while you are making the final connection.

6.Set the VOLT/AMP SELECTOR switch and TIMER to the OFF position. Next plug the power cord into a grounded AC outlet.

7.Set the TIMER to the desired charge time, from 30- 135 minutes. If more than 135 minutes of charging time is needed the hold position can be used. When using the HOLD feature the battery being charged must be monitored closely to avoid over charging.

8.Set the VOLT/AMP SELECTOR to the desired charge position. (See ???CHARGE RATE??? chart on page 12 for correct settings.)

9.When battery is fully charged, the ammeter pointer will be in the farthest left position and the voltmeter pointer will be in the green area of the meter.

10.When the battery is fully charged, turn timer knob to the OFF position, then unplug the charger power cord. Stand away from battery and remove the charger clamps from the NEGATIVE end of the cable first, then from the POSITIVE post.

11.Clean and store the battery charger.

11

Sch 517

Calculating charge time

The Chart Method

Use the following table to more accurately determine the time it will take to bring a battery to full charge. First, identify where your battery fits into the chart.

???Small batteries ??? motorcycles, garden tractors, etc.

??? are usually rated in Ampere Hours (AH). For example; 6 to 12 AH, or 12 to 32 AH.

???Batteries in cars and smaller trucks are usually rated in Reserve Capacity (RC), Cold-Cranking Amps (CCA), or both.

???Marine, or deep-cycle batteries are usually rated in Reserve Capacity (RC).

???NR means that the charger setting is NOT

RECOMMENDED.

Find your battery???s rating on the following chart and note the charge time given for each charger setting. The times given are for batteries with a 50-percent charge prior to recharging. Add more time for severly discharged batteries.

The Hydrometer or Electronic Method

To find the time needed to fully charge your battery, determine the battery???s charge level with a hydrometer or electronic Percent-of-Charge Tester. The following table will help you convert hydrometer readings to percent of charge values.

When you know the percent of charge and the Amp Hour (AH) rating of your battery, you can calculate the approximate time needed to bring your battery to a full charge.

To convert Reserve Capacity to Amp Hours, divide Reserve Capacity by 2, and add 16:

Amp Hours = Reserve Capacity + 16

2

To calculate time needed for a charge:

???Find the percent of charge needed. (A battery at 50 percent charge that will be charged to 100 percent needs another 50 percent (.50).

???Multiply the Amp Hour rating by the charge needed (.50) and divide by the charger setting (2, 20 or 60 amps).

???Multiply the result by 1.25 and you???ll have the time needed, in hours, to bring the battery to full charge.

???Add one additional hour for a deep-cycle battery.

Example:

Amp Hour Rating x % of charge needed x 1.25 = hours Charger Settingof charge needed

100 (AH Rating) x .50 (charge needed) x 1.25 = 4.1625

15 (Charger Setting)hours

100 x .50 = 2.5 x 1.25 = 3.125

15

You would need to charge your 100-Ampere Hour Bat- tery for a little more than 4 hours at the 15-Amp charge rate using the above example.

12

Sch 517

Using the engine start feature

Your battery charger can be used to jump start your car if the battery is low. Follow these instructions on how to use the engine start feature.

1.Set the timer knob to the OFF position. Then follow the instructions for how to connect the charger to the battery in the section ???Charging your battery while it is in the vehicle??? on page 10.

2.Plug in the charger and set the timer to the HOLD position.

3.Set the volt/amp selector switch to the engine start position for a 12 volt battery and the charger at the 225 amp rating. For a 6 volt battery, set the charger at the 125 amp rating, and then crank the engine.

Crank the engine for no more than three seconds and if it does not start, wait four minutes before cranking again. During extremely cold weather, or if the battery is severely exhausted, charge the battery for about five minutes before cranking the engine.

4.If the engine does not start, charge the battery

for five more minutes in the 50 amp position, before cranking it again for three seconds.

5.After the engine starts, unplug charger power cord from the outlet. Then, move the volt/amp selector switch to OFF before disconnecting the DC clamps.

IMPORTANT: Do not try to start the engine without a battery in it. You could cause damage to the electrical system.

If the engine does turn over, but never starts up, there is not a problem with the starting system, there is a problem somewhere else with the vehicle. STOP cranking the engine until the other problem has been diagnosed and corrected.

Maintenance and Care

A minimal amount of care can keep your battery charger working properly for years.

1.Clean the clamps each time you are finished charg- ing. Wipe off any battery fluid that may have come in contact with the clamps to prevent corrosion.

2.Coil the input and output cords neatly when storing the charger. The cords can be wrapped over the handle of the charger. This will prevent accidental damage to the cords and charger.

3.Occasional cleaning of the case of the charger with a soft cloth will keep the finish shiny and help prevent corrosion.

13

Sch 517

Troubleshooting

Performance problems often result from little things that you can fix yourself. Please read through this chart for a possible solution if a problem occurs.

If the above solutions do not eliminate the problem...

call toll-free from anywhere in the U.S.A.

1-800-SEARS-64 (1-800-732-7764)

7 am to 4:30 pm CST Monday through Friday

14

Sch 517

OWNER???S

MANUAL

Model No.

200.71450

When requesting service or ordering parts, always provide the following information:

???Product Type

???Model Number

???Part Number

???Part Description

50/15/2 AMP

MANUAL BATTERY

CHARGER

225/125 AMP

ENGINE STARTER with

BATTERY TESTER

For information about troubleshooting

Call toll-free from anywhere in the U.S.A.

7 am to 4:30 pm CST Monday through Friday

1-800-SEARS-64

(1-800-732-7764)

For the repair or replacement parts you need

Call 7 am - 7 pm, 7 days a week

1-800-366-PART

(1-800-366-7278)

For the location of a Sears Repair

Service Center in your area

Call 24 hours a day, 7 days a week

1-800-488-1222

REPAIR SERVICES

America's Repair Specialists

0000000517-900