Msys 835P
Msys 835P

This manual is provided for information purposes only. All information included herein is subject to change without notice. Samsung Electronics is not responsible for any damages, direct or indirect, arising from or related to use of this manual.
?? 2002 Samsung Electronics Co., Ltd. All rights reserved.
???Msys 835P,
???IBM and IBM PC are trademarks of International Business Machines Corporation.
???PCL and PCL6 are trademarks of
???Microsoft, Windows, Windows 9x, Windows 2000, Windows NT and Windows XP are registered trademarks of Microsoft Corporation.
???Acrobat is a trademark of Adobe Systems Inc.
???All other brand or product names are trademarks of their respective companies or organizations.
i

ii

1INSTALLING SOFTWARE
This chapter provides information on installing the supplied Samsung software. You must install the Samsung software to use your product as a printer and scanner.
The topics included in this chapter are:
???Installing Samsung Software
???Installing USB Driver for Windows 98/Me
About Samsung Software
You must install the SmarThru
???MFP Driver
???SmarThru Software
???OCR Software (AnyPage Lite)
MFP Driver
To use your product as a printer and scanner, you must install the MFP driver.
SmarThru Software
SmarThru is the accompanying software for your multifunctional product. SmarThru contains a powerful image editor that allows you to edit images in many ways and also includes powerful Internet mail client software.
With SmarThru, you can save the scanned images in a dedicated storage area for subsequent editing, sending via
OCR Software (AnyPage Lite)
OCR (Optical Character Recognition) is software that has the ability to recognize most character formats, so that a scanned document can be read and edited with word processing software.
1.2 INSTALLING SOFTWARE

System Requirements
Before you begin, ensure your system meets the minimum requirements.
Supported Operating System
Professional or Advanced Server/Windows XP Home edition or Professional.
Minimal Requirements
???Disk space: 130 MB for installation
???Memory: 64 MB
???CPU: Pentium II 233 or higher
???Required software: Internet Explorer 4.01.
Recommended
???Disk space: 250 MB for installation
???Memory: 128 MB
???CPU: Pentium II 400 or higher
???Required software: Internet Explorer 5.5 or above
NOTES:
???Administrative rights should be set for installation/uninstallation on Windows NT 4.0/2000/XP.
???Windows 95 versions prior to OSR2 are not recommended due to compatibility with OLE/COM libraries.
INSTALLING SOFTWARE 1.3

Installing Samsung Software
NOTES:
???If you are using a USB cable, you must be running Windows 98/ Me/2000/XP. Windows 98 or Me and connect the printe rusing the USB cable, you must install the Samsung USB driver before proceeding to install the Samsung software. see ???Installing USB Driver for Windows 98/Me??? on page 1.11.
???Make sure that your product is plugged in and connected to your computer???s parallel port or USB port before installing software from the CD. Windows 95 and Windows NT 4.0 do not support USB connection.
1If the ???New Hardware Found??? screen appears when the computer boots up, click Cancel.
2Insert the supplied SmarThru
The SmarThru
If the opening window does not appear, click Start, and then Run. Type X:Autorun.exe, replacing ???X??? with the letter of your drive, and click OK.
3If you are asked to select the model name, click MFP 830 series.
1.4 INSTALLING SOFTWARE

4If you are asked to select the language, choose the desired language.
1
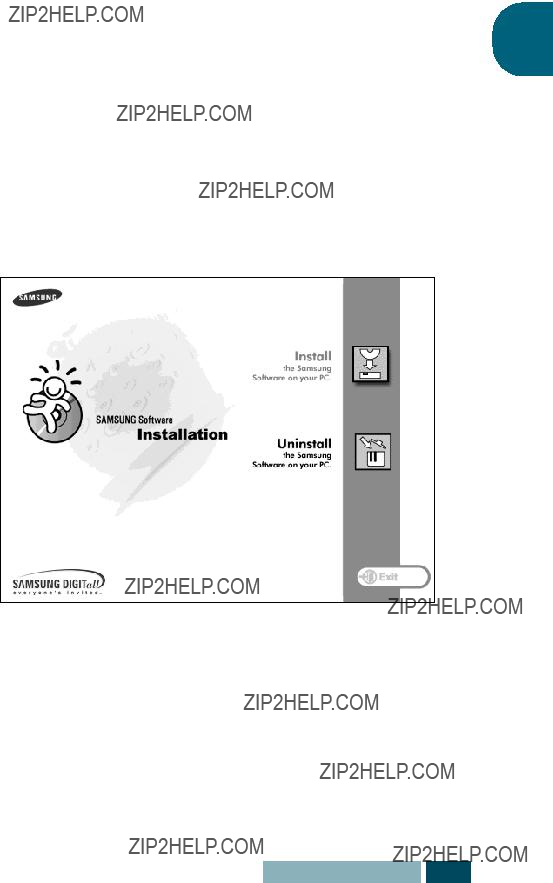
5 Click Install the Samsung Software on your PC.
Installs the Samsung Software on your PC.
Uninstall the Samsung Software. See page 1.19.
INSTALLING SOFTWARE 1.5
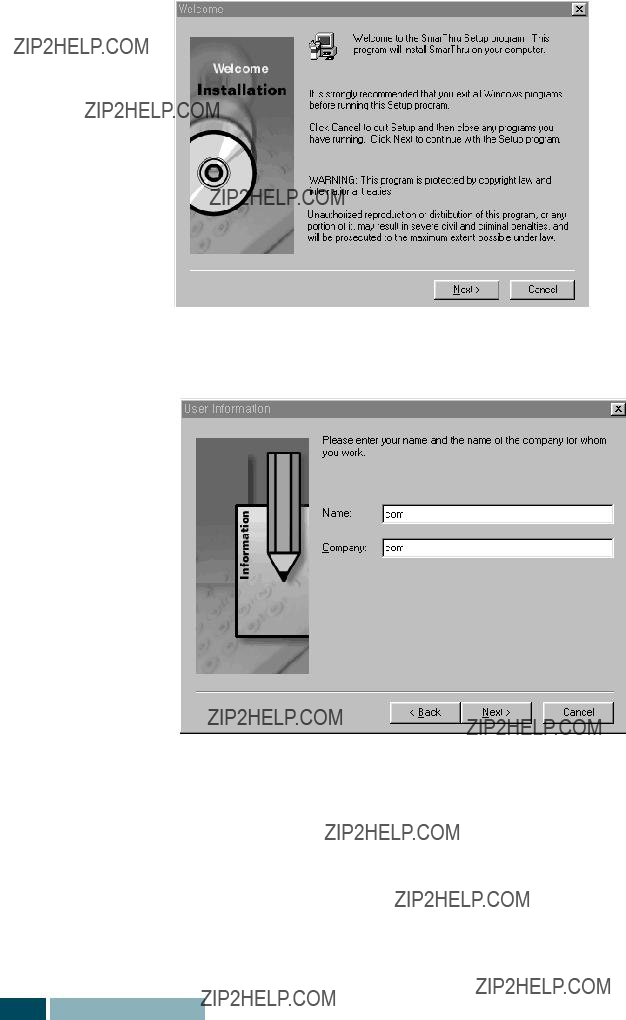
6 The Welcome window opens. Click Next.
7The User Information window opens. Enter company and your name, then click Next.
1.6 INSTALLING SOFTWARE
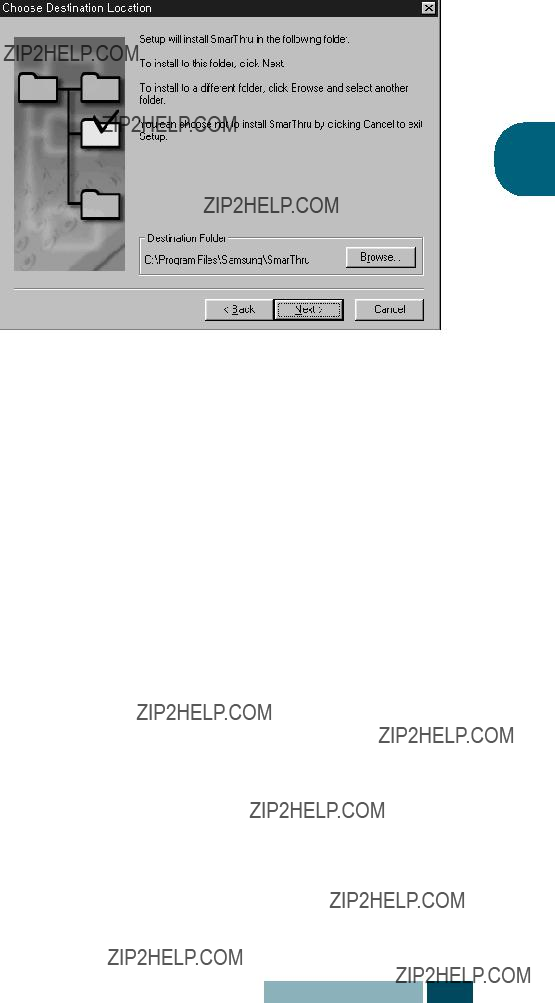
8 The Choose Destination Location window opens. Click Next.
1
INSTALLING SOFTWARE 1.7
9The SmarThru installation supports three types of setup:
???Typical: Program will be installed with the most common options and is recommended for most users.
???Compact: Only the MFP driver will be installed.
???Custom: You may choose the options you want to install. Recommended for advanced users.
If you select the Custom installation, you may choose the options you want to install.
???SmarThru Software: to scan and edit images and work with electronic documents.
???OCR Software: AnyPage Lite software to enable OCR.
???MFP Driver: to print and scan.
10Click Next.
1.8 INSTALLING SOFTWARE
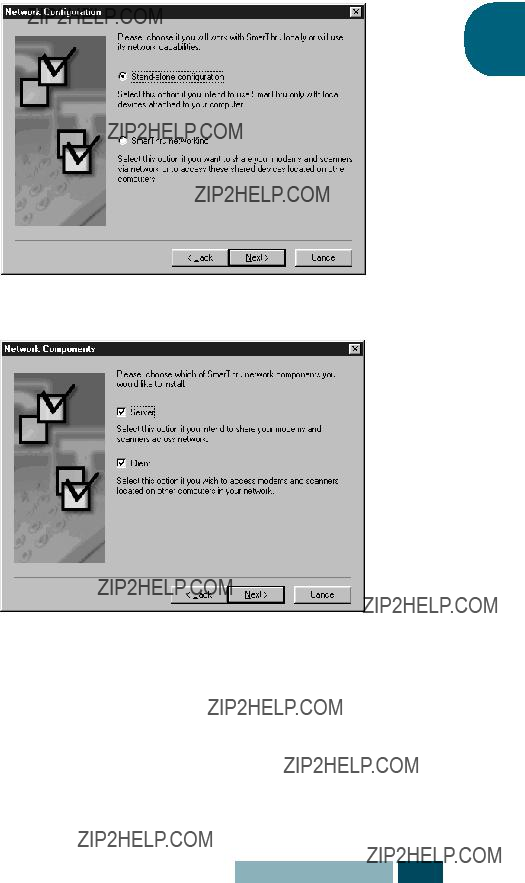
11You can choose SmarThru networking option. This feature allows you to share the modems on your computer and the product as a scan device via a network or to access these shared devices located on other computers.
1
If you selected SmarThru networking, you can select to install server, client, or both.
Server allows you to share local fax modem and/or scanner over a LAN. You can control sharing by managing remote service user. Client allows you to use Remote Fax or Remote Scan services provided by SmarThru Remote Services Server over a LAN. You need to have a client account. These accounts are provided by the server. For details on Remote Fax/Scan Services, please refer to the SmarThru User???s Guide.
INSTALLING SOFTWARE 1.9

12 Click Next.
13When the installation is completed, shut down and restart your computer.
If your computer does not shut down and restart automatically, you must shut it down manually and restart it before the changes will be saved.
1.10 INSTALLING SOFTWARE

Installing USB Driver for Windows 98/Me
For Windows 98 or Me, when you connect the printer using USB cable, take the following steps to install the Samsung USB driver and the Samsung software.
NOTE: If you have already used any Samsung printer using USB connection in your PC, you do not need to install the Samsung USB driver. You just install the Samsung software as described on page 1.4.
1Make sure that the printer is connected to the computer with USB cable and both the printer and the computer are turned ON. For details on the USB connection, please refer to the ???Laser Facsimile User???s Guide??? which came with your product.
2The Add New Hardware Wizard dialog box appears. Click
Next.
1
INSTALLING SOFTWARE 1.11

3Check Search for the best driver for your device and click Next.
4Check
1.12 INSTALLING SOFTWARE
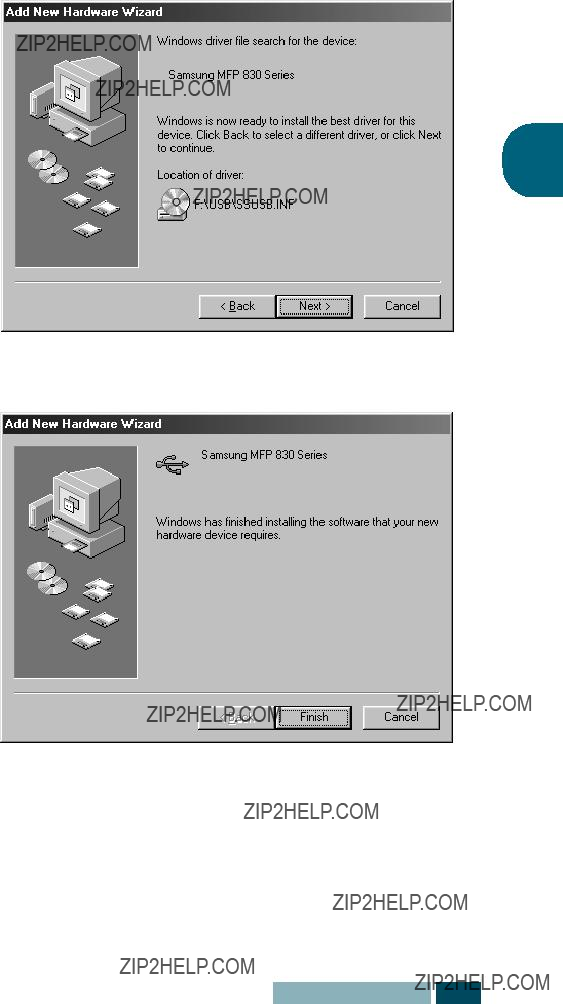
5 Click Next. The USB driver will be installed.
1
6 Click Finish.
7If you are asked to select the model name, click MFP 830 series.
INSTALLING SOFTWARE 1.13

8When the opening screen appears, select the appropriate language.
9 Click Install the Samsung Software on your PC.
10Follow the instructions on the screen to complete the installation. For more details, see page 1.4.
1.14 INSTALLING SOFTWARE

Configuring Fax and Internet Gates
networking option (see page 1.9), the following wizards appear only the first time you try to launch Mailbox in the SmarThru program. For information on SmarThru, please refer to the SmarThru User???s Guide.
NOTE: To configure the Internet gate, you must enter your
1When the New Modem Wizard appears, choose the system modem installed in your system and then click Next. This fax modem will be used by SmarThru Fax Gate for sending and/or receiving faxes.
INSTALLING SOFTWARE 1.15
NOTES:
???The SmarThru fax feature is available only if there is a fax modem installed in your PC. Press Cancel if there is no fax modem installed in your PC. Otherwise, purchase an internal or external fax modem and install into your PC and then configure the fax modem.
???The Windows NT or 2000 users must click System modems...
to open the Install New Modem dialogue box. Follow the instructions on screen to install fax modem on your computer.
2 Click Finish to save the modem setting.
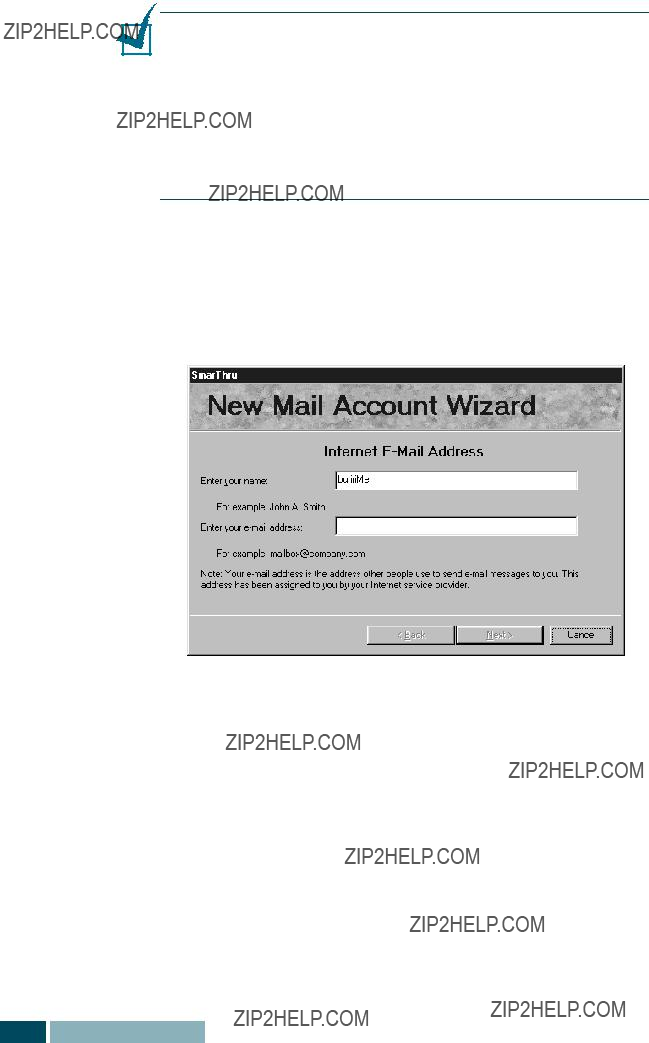
3Enter your name and
1.16 INSTALLING SOFTWARE

4Enter the addresses of your incoming and outgoing mail servers. Choose the incoming mail server type, then click Next. Your Internet service provider will be able to provide you with this information.
1
5Enter your account name and password to access your Internet mail server, then click Next. Your Internet service provider will be able to provide you with this information.
INSTALLING SOFTWARE 1.17
6 Enter the account record name, then click Next.
7Click Finish to quit the wizard and enable Internet
NOTE: If you wish, you can reconfigure the Internet gate later by using SmarThru Configuration. For details, refer to the SmarThru User???s Guide.
1.18 INSTALLING SOFTWARE

Uninstalling Samsung Software
Uninstall is required if you are upgrading the software or if your installation fails. You can uninstall all software including SmarThru and MFP drivers using the SmarThru CD or selectively uninstall the desired item using the Window unInstallShield.
are closed on your PC. A system reboot is required after the software is uninstalled.
Uninstalling the MFP Driver
1From the Start menu, select Programs, then select
Samsung MFP 830 Series.
2You can select the component in the MFP driver to uninstall individually.
If you want to uninstall the scan driver, select TWAIN Driver Uninstall.
If you want to uninstall the printer driver, select Printer Driver Uninstall.
If you want to uninstall the Remote Control Panel, select
Remote Control Panel Uninstall.
INSTALLING SOFTWARE 1.19

3When your computer confirms your selection, click Yes. The selected printer driver and all its components are removed from your computer.
4 When the uninstallation is done, click OK.
5The message box recommends you restart your computer. Click OK, then restart Windows.
NOTE: If you want to install the printer driver or the scan driver using the SmarThru
1.20 INSTALLING SOFTWARE
Uninstalling Samsung SmarThru
1 From the Start menu, select Programs.
2Select Samsung SmarThru, then select SmarThru 3 Uninstall.
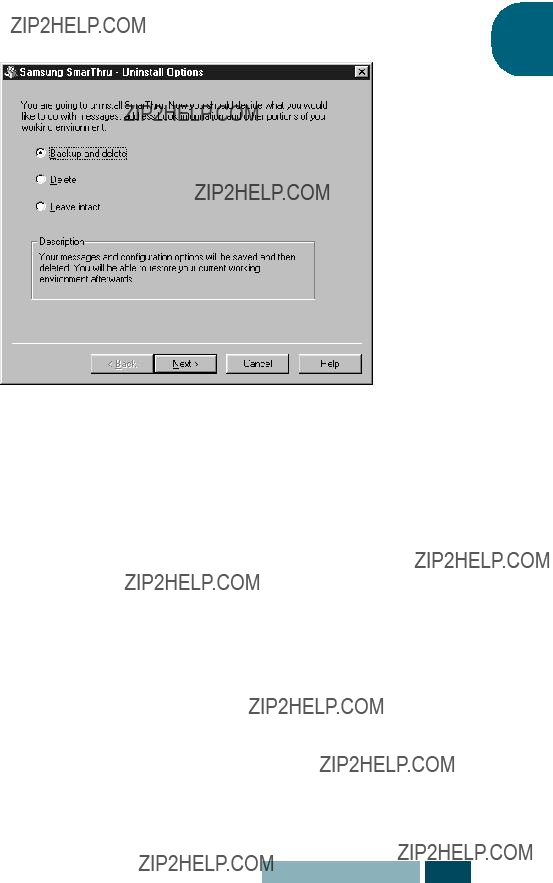
3 When your computer asks you to confirm your selection,
Uninstall options are:
???Backup and delete: Backs up all your data and options to a safe place. Then removes SmarThru system including the data.
???Delete: Deletes all the SmarThru data and options. No backup or copying takes place. Be careful while using this option as you can easily lose your data.
???Leave intact: Uninstalls SmarThru software leaving data and option intact. This can be useful, if, for example, you decide to install Stand Alone configuration over SmarThru Networking. In this case, uninstall Samsung SmarThru having Leave intact option set and install SmarThru Stand Alone configuration.
4 After selecting the uninstall option, click Next.
INSTALLING SOFTWARE 1.21

5Follow the
6When uninstalling is done, click OK. The message box recommends restarting your computer.
7Click OK.
Shut down and restart your computer to complete the un- installation process and save your changes.
1.22 INSTALLING SOFTWARE
Using the SmarThru
You can
1 Insert the SmarThru
The SmarThru
appear, select Run from the Start menu, then type1 X:Autorun.exe, replacing ???X??? with the letter of your drive
and click OK.
2If you are asked to select the model name, click MFP 830 series.
3If you are asked to select the language, choose the desired language.
4 Click Uninstall the Samsung software on your PC.
5Follow the
You must shut down and restart your computer before any changes you have made will take affect.
INSTALLING SOFTWARE 1.23

NOTE
1.24 INSTALLING SOFTWARE

2PRINTING
Read this chapter to learn how to select and load print media and how to use the print settings.
This topics included in this chapter are:

Printing a Document
This procedure describes the general steps required for printing from various Windows applications. The exact steps for printing a document may vary depending on the application program you are using. Refer to your software application???s documentation for the exact printing procedure.
The following steps describe the typical process to print from a Windows environment:
1Ensure that your product is properly connected to the computer, the product is powered on, and there is paper in the paper tray.
2Verify that you have installed the Samsung software for your computer. For details, see ???Installing Samsung Software??? on page 1.4.
3Start the program you are using to create the document, and create or open the document you want to print.
4Choose Print from the File menu. Make sure that
Samsung MFP 830 Series PCL 6 is selected as your default printer. Click Properties if you want to make any adjustments that are appropriate for printing your document. (For details, see ???Printer Settings??? on page 2.3.)
5 Click OK to close the Properties dialog box.
2.2 PRINTING
6After making any necessary changes to the printing parameters, click OK to start the print job.
Printer Settings
You can use the product with all your Windows 95/98/Me/2000/ XP or Windows NT 4.0 applications. Be sure to set Samsung MFP 830 Series PCL 6 as the default printer for all your Windows operations.
Most Windows software applications allow you to make changes to the printer settings. This includes settings that determine how a print job looks such as paper size, paper orientation, and margins. Settings made in the application to create the document will usually override settings made in the printer driver.
NOTE: You do not need to use any of the operation panel buttons to use the product as a PC printer. For example, if you want to adjust the printing contrast you do not have to press Contrast on
the control panel. The control panel buttons are used primarily for 2 copying.
Accessing Printer Settings
You can access printer settings by using either of these methods.
Windows 95/98/Me
???Select the File > Print > Properties command from within any Windows application.
Or
???Select Samsung MFP 830 Series PCL 6 printer from the
Printers folder, then select File > Properties (or select the printer icon in the Printers folder, and click the right mouse button).
PRINTING 2.3
Windows NT 4.0
??? Select the File > Print > Properties command from within any Windows application.
Or
???Select Samsung MFP 830 Series PCL 6 printer from the
Printers folder, click the right mouse button, then select Document Defaults from the
Windows 2000/XP
???Select the File > Print > Properties command from within any Windows application.
Or
???Select Samsung MFP 830 Series PCL 6 printer from the
Printers folder, click the right mouse button, then select Printing Preferences from the
Printer Properties Tabs
When the Printer Properties are displayed, you can review and change whatever settings are needed for your printer job.
Your printer???s Properties window consists of 5 tabs: Paper,
Graphic, Output, Watermark and About.
If you access the Printer Properties through the Printers folder, you can view more
The printer???s Properties window may differ depending on the operating system used. This User???s Guide shows the Properties window on Windows 98 unless otherwise specified.
NOTE: If you access the Printer Properties through the Printers folder, any settings made will become the default settings for the printer. Settings made when the Printer Properties are accessed through an application File menu and Print or Print Setup will remain active until the application you are printing from is closed.
2.4 PRINTING

Paper Tab
Use the Paper tab to select what size of paper you have in your printer, the orientation, the number of copies to print, etc.
5
1
2
3
4
Click on the box to put a check mark to use the different paper source for the first page. Select the
1desired paper source for the first
Select the desired paper source. Select Tray 1 if you
2load media in the paper tray,
Bypass Tray if you load in the bypass tray.
Select the size of paper you are using.
3
Select the type of paper you are using.
4
Select the check box to print from the optional tray
5(Tray2), and you can select Tray 2 from the Paper source dialogue box.
PRINTING 2.5

Graphic Tab
The Graphic tab allows you to adjust print quality for your specific printing needs.
1
3
2
4
You can select the printing resolution. The higher setting,
1the sharpen the clarity of printed image. Higher settings may increase the time it takes to print a document.
When you print with the resolution of 300 or 600 dpi, some printed characters or images can appear they have jagged or uneven edges. Set this Samsung Resolution enhancement Technology (SRT) option to improve the print quality of you text and image and make the characters and images appear smoother.
??? Printer Default - Choose this setting to use SRT that your
2printer provides.
???Normal - Choose to disable SRT mode.
???Text Enhance - Choose to refine the print quality of characters by smoothing out jagged edges that can occur on the angles and curves of each character.
???Image Enhance - Choose to refine the print quality of photo image using SRT.
With this option checked all text in your document will be
3printed in solid black. When it is not checked, colored text is printed in shades of gray.
Toner Save Mode allows the printer to use less toner on
each page. Using this mode will extend the life of your
4toner cartridge and reduce your cost per page, but will reduce print quality. Click to put a check mark to enable the mode.
2.6 PRINTING
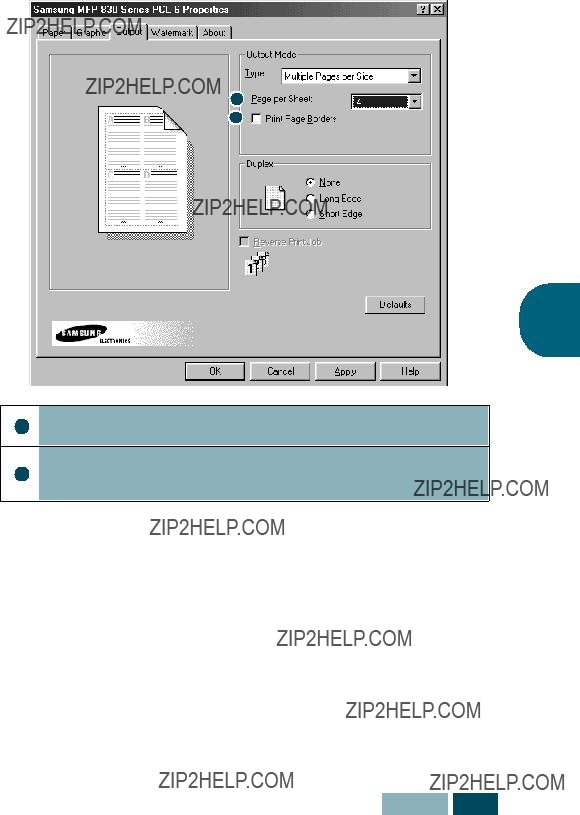
Output Tab
The Output tab provides options for you to adjust how the document will appear on the printed page. The Output Mode Type options includes Multiple Pages per Side, Booklet printing, Fit to Page, Poster and Duplex printing.
Multiple Pages per Side
Choose the Multiple Pages per Side option to print multiple pages on a single sheet of paper
1
2
2
1Select the number of page you want to print per sheet.
Click on the box to put a check mark to print a border
2around each page on the sheet.
PRINTING 2.7

Booklet Printing
The Booklet Printing option allows you to print a document out as a booklet.
Once your document prints, fold the pages in half and staple the pages.
Fit to Page
Choose this option to scale your print job to any selected paper size regardless of the logical document size.
2.8 PRINTING

Poster
Choose the Poster option to enlarge the printed document.
1
PRINTING 2.9

Duplex Printing
Choose the Duplex option from the Output tab to print the document on both sides of the paper.
1
Choosing Long Edge lets you have the binding orientation along the long edge of the paper as in a megazine.
1Choosing Short Edge lets you have the binding orientation along the short edge of the paper as in a calendar.
2.10 PRINTING
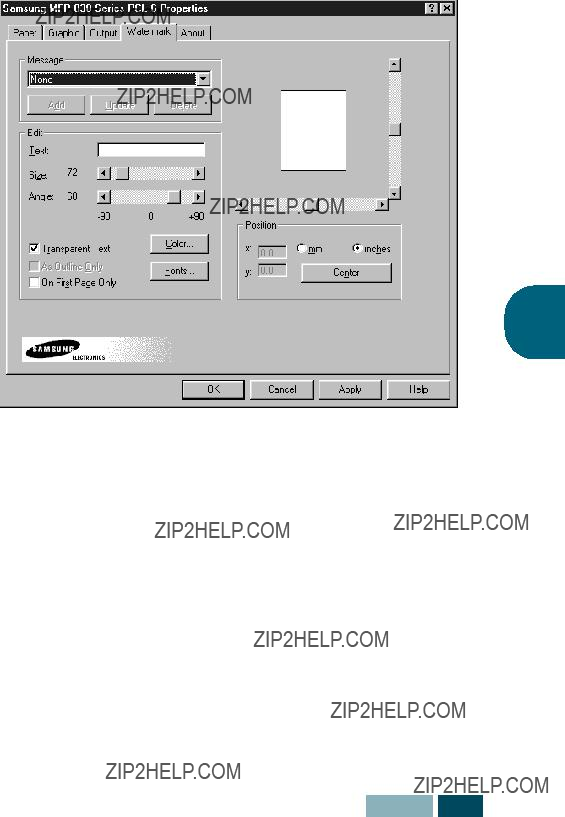
Watermartk Tab
The Watermark tab allows you to create a background image of text to print on each page of your document.
Watermarks are useful for printing identifying information on a document, information such as ???DRAFT??? or ???CONFIDENTIAL???, or perhaps the name of your company or department. By changing the watermark settings, you can create faint watermarks that are not intrusive to a document, or bold watermarks to call attention to specific information.
2
To create a watermark, enter the desired text message in the Text field, and select the desired watermark options. You can select the font type and size, color, position, and angle.
To add a new watermark to the list, click Add.
PRINTING 2.11

About Tab
The About tab gives you the program version number. If you click on the globe image on the window, you will be connected to the Samsung web site provided you are an internet user.
Printer Properties Buttons & Icons
???Click OK when done reviewing or making changes.
???Click Cancel if you want to exit the tab menus without applying any changes.
???Click Help to view the online Help feature and tab menu details.
???Click the ? icon in the title bar. Position the ? pointer over the parameter in question and click to see a
2.12 PRINTING

3SCANNING
Scanning with your product lets you turn pictures and text into digital files on your computer. Then you can fax or e- mail the files, display them on your web site, or use them to create projects that you can print out using Samsung SmarThru software which came with your product.
This chapter includes:
Scanning using the Samsung SmarThru
SmarThru is the accompanying software for your product. With the SmarThru, scanning becomes a pleasure.
Take the following steps to start scanning using the SmarThru:
1Feed the document(s) to be scanned face down into the ADF.
2Once you installed Samsung software, you see the SmarThru icon on the desktop window.
 Double click.
The SmarThru 3 window opens.
3.2 SCANNING

3To open the Scan Wizard, click the Scan Wizard icon in the plugin bar on the left of the SmarThru 3 window.
Scan Wizard 
icon.
The Scan Wizard lets you use the following services:
???Scan
Lets you scan the original documents and save them in the Image Manager of the Samsung SmarThru system. The Image Manager is an image database manager and image editor program.
???Copy
Lets you use your product to produce professional quality copies. You can adjust the image size and make advanced settings.
???Scan to Email
Lets you scan the original document then launches a New
Message form to send the just scanned image attached to 3 a new mail. The email account must be configured in the
Samsung SmarThru system to enable
???Scan to FAX
Lets you scan the original documents then launches a New
Fax form which helps you send them as a fax image.
???Scan to WEB
Lets you scan the original documents for further publishing to the Web.
???Scan to OCR
Lets you scan the original documents and pass them to the OCR program. OCR (Optical Character Recognition) is the process of converting a scanned image into text that you can edit in a word processing program. After you scan your document, the software processes or ???recognizes??? it. Then you can edit it and either save the file or open it in any word processing program on your computer.
SCANNING 3.3

4 Click the desired service.
5The Samsung Scan Manager for the selected service opens. Adjust the scan settings. You can use the Help button to get help.
6To start scanning, click Scan.
For further information, please refer to the SmarThru User???s Guide which came with your product.
Scanning Process with TWAIN-
enabled Software
If you want to scan documents using another software, you will have to use
The basic scanning process involves a number of steps:
???Placing your photograph or page into the ADF.
???Opening an application (such as PhotoDeluxe or Photoshop).
???Opening the TWAIN window and setting scan options.
???Scanning and saving your scanned image.
You have to follow the program???s instructions for acquiring an image. Please refer to the application user???s guide.
3.4 SCANNING

4.2 APPENDIX

Using Remote Control Panel
Using the Remote Control Panel, you can set up fax system data options, create and edit phonebook entries, or view the information of your product on the desktop window of your computer.
When you install the Samsung software, the Remote Control Panel utility is automatically installed.
For information on installing the Samsung software, see ???Installing Samsung Software??? on page 1.4.
To open the Remote Control Panel:
1 Start your Windows.
2 Click the Start button on your desktop computer.
3From Programs, select Samsung MFP 830 Series, and Remote Control Panel. Then the Remote Control Panel screen appears.
4The Remote Control Panel screen provides five tabs;
Settings, Advanced, Phonebook, Information, and Firmware Update.
To exit, click the Exit button at the bottom of each tab screen.
APPENDIX 4.3

Settings Tab
Click the Settings tab to configure fax system data settings.
For details on the system data setting options, please refer to the Samsung
Advanced Tab
Click the Advanced tab to change the dafault fax system setup options.
4.4 APPENDIX

Phonebook Tab
Click the Phonebook tab to create and edit phonebook entries.
Reads the phonebook entries from the product to the Remote Control Panel.
Information Tab
Click the Information tab to view the software version information and various counter which allows you to check how many scanning, printing, and jamming are made in your product.
4
APPENDIX 4.5

Firmware Update
Click the Firmware Update tab to update the firmware of your product. This feature should be used by an authorised technicians. Please consult with the purchase point.
4.6 APPENDIX

I
