Dolby Digital encoding method (discrete 5.1 channel digital audio format)records and digitally compresses the left front channel,right front channel,center channel,left rear channel,right rear channel,and Subwoofer channel signals (total 6 channels,but the Sub channel is counted as channel 0.1).
In addition,Dolby Digital enables stereo rear sounds,and sets the cutoff frequency of the rear treble at 20 kHz,compared to 7 kHz for Dolby Pro Logic.These facts result in better sound quality than Dolby Pro Logic.
When the system detects Dolby Digital signals,the DOLBY DIGITAL indicator lights up on the display.
DTS Digital Surround
Used to reproduce multichannel sound tracks of the software encoded with DTS Digital Surround ( 
 ).
).
DTS Digital Surround is another discrete 5.1 channel digital audio format available on CD,LD,and DVD software. Compared to Dolby Digital,audio compression rate is relatively low.
This fact allows DTS Digital Surround format to add breadth and depth to the reproduced sounds.As a result,DTS Digital Surround features natural,solid and clear sound.
When the system detects DTS Digital Surround signals, the DTS indicator lights up on the display.


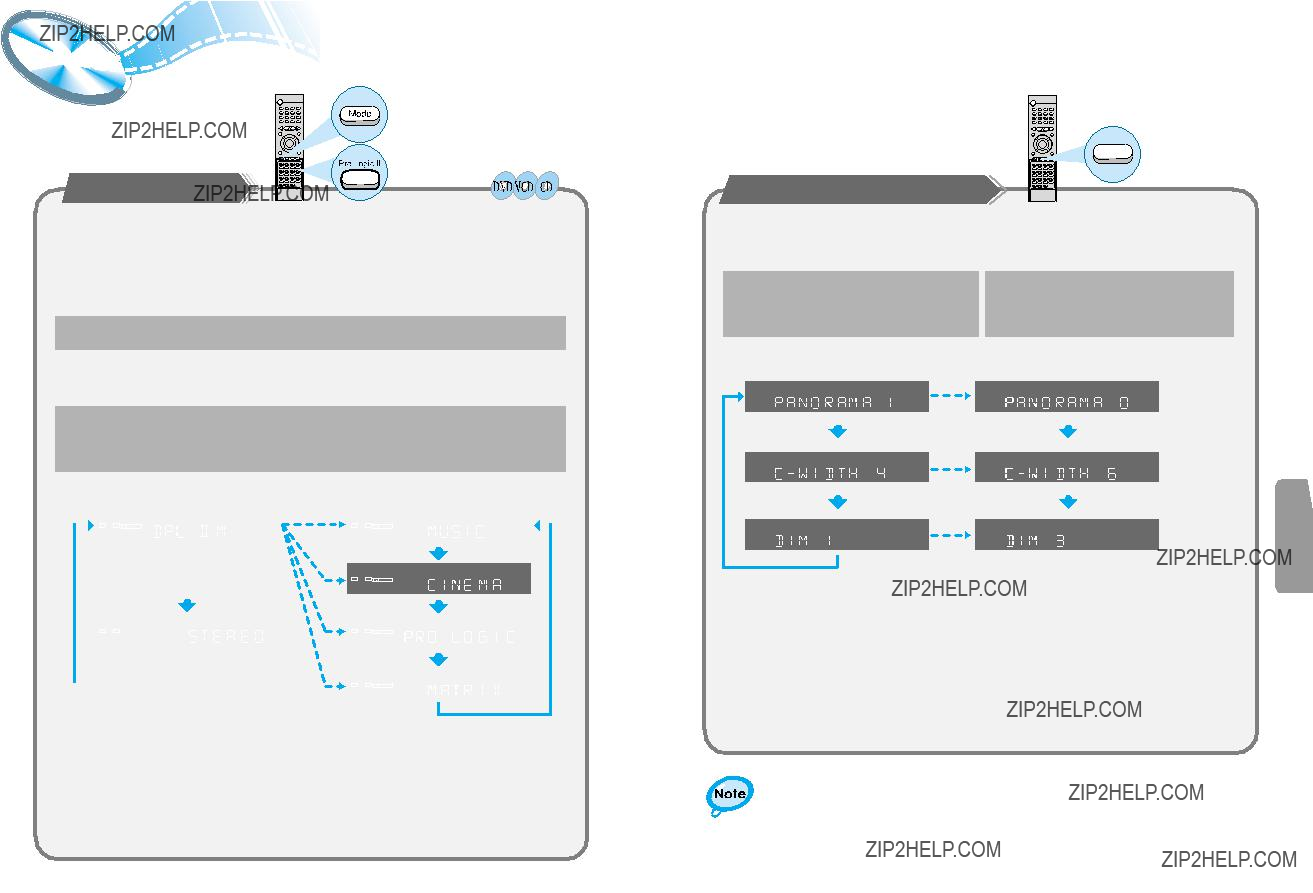
 Dolby Pro Logic II
???Dolby Pro-Logic II is a new multi-channel playback format developed by Dolby Laboratories using feedback logic steering technology and offering improvements over conventional Dolby Pro Logic circuits.
???Dolby Pro Logic II can be used to decode not only sources recorded in Dolby Surround ( 
 ) but also regular stereo sources into five channels (front left, front right, center, surround left and surround right) to achieve surround sound.
???Whereas with conventional Dolby Pro Logic the surround channel playback frequency band was limited, Dolby Pro Logic II offers a wider band range.
In addition, the surround channels were monaural (the surround left and right channels were the same) with previous Dolby Pro Logic, but with Dolby Pro Logic II they are stereo.
*Sources recorded in Dolby Surround
These are sources in which three or more channels of surround have been recorded as two channels of signals using Dolby Surround encoding technology.
Dolby Surround is used for the sound tracks of movies recorded on DVDs, LDs and video cassettes to be played on stereo VCRs, as well as for the stereo broadcast signals of FM radio, TV, satellite broadcasts and cable TV. Decoding these signals with Dolby Pro Logic makes it possible to achieve multi-channel surround playback.
The signals can also be played on ordinary stereo equipment, in which case they provide normal stereo sound.


 Precautions


 Contents


 Description


 COAXIAL terminal as temporary measure.
 coaxial cable (with a standard type connector), disconnect the supplied FM antenna.
 terminals.


 HEADPHONE jack
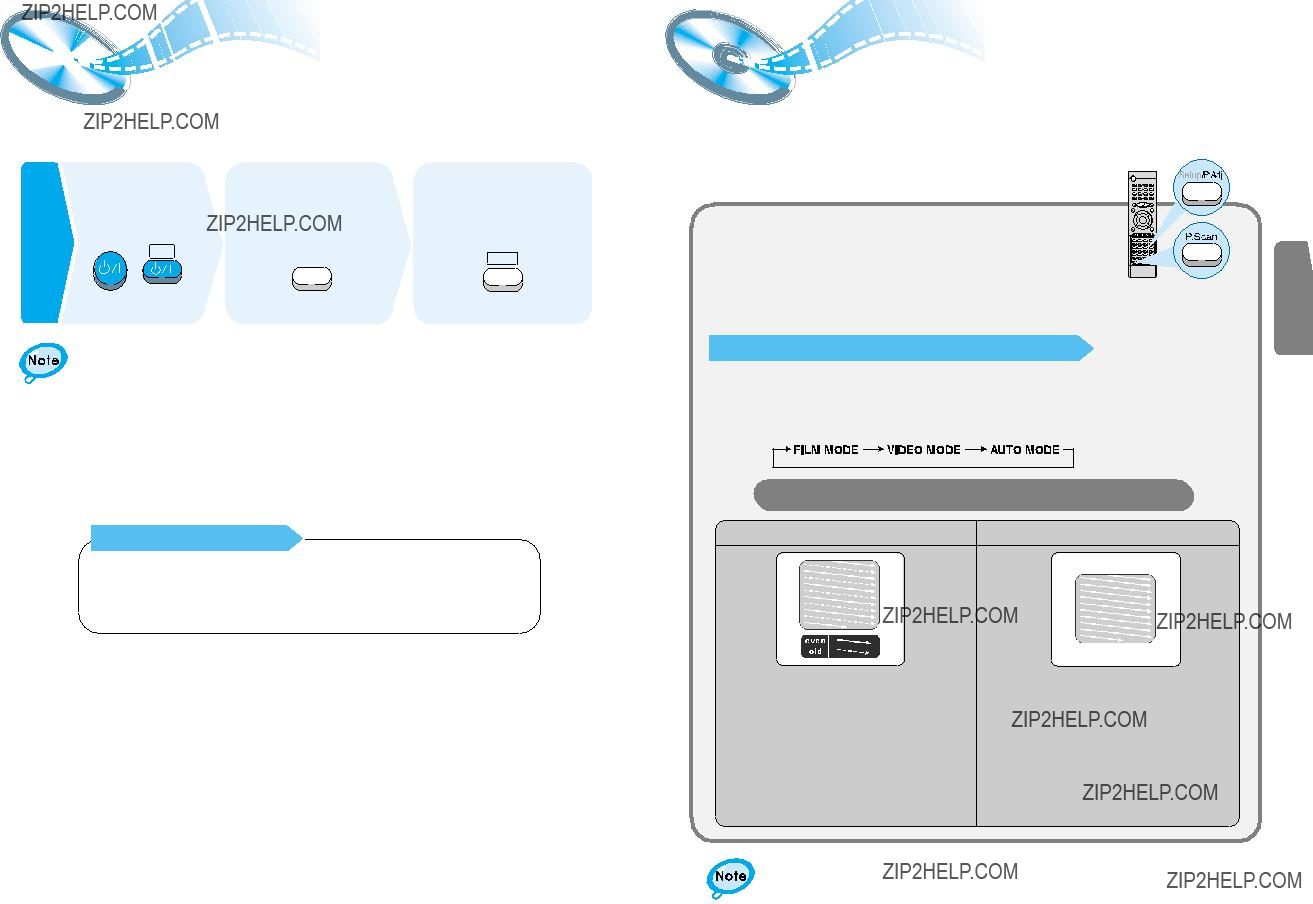


 ) button on the main unit for over 5 seconds.
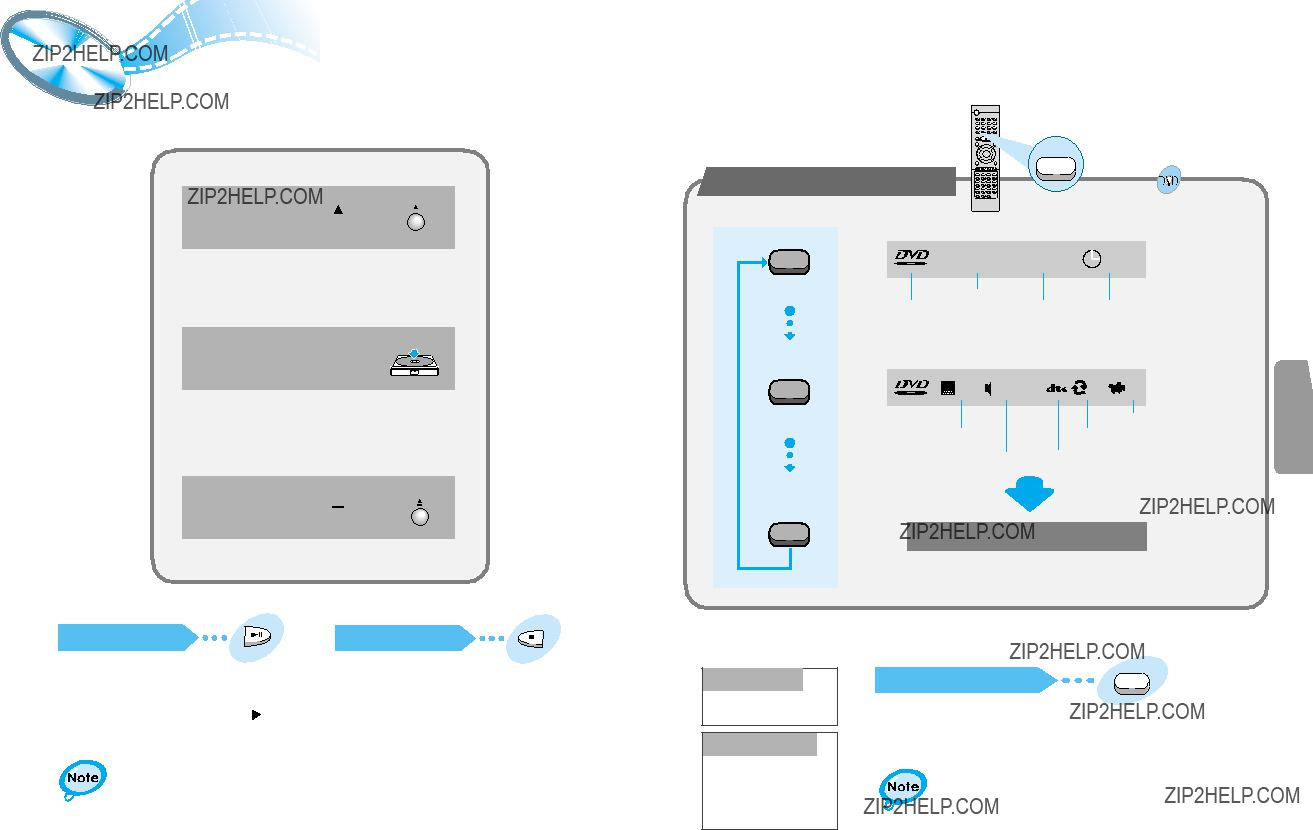


 ) button again to close the disc tray.

 ) button during playback.
 ) button during playback.
 )button is pressed, the position is stored in the memory, and
 STOP is shown on the display.

 ) button or Return button is pressed subsequently , playback resumes from the position at which it was stopped.
 ) button is pressed a second time, the resume play memory function is canceled, and
  STOP is shown on the display. When the Play/Pause

 )button is pressed, playback starts from the beginning.


 ) button to load a disc.

 ) button.

 Forward/Reverse


 SLOW 1/2


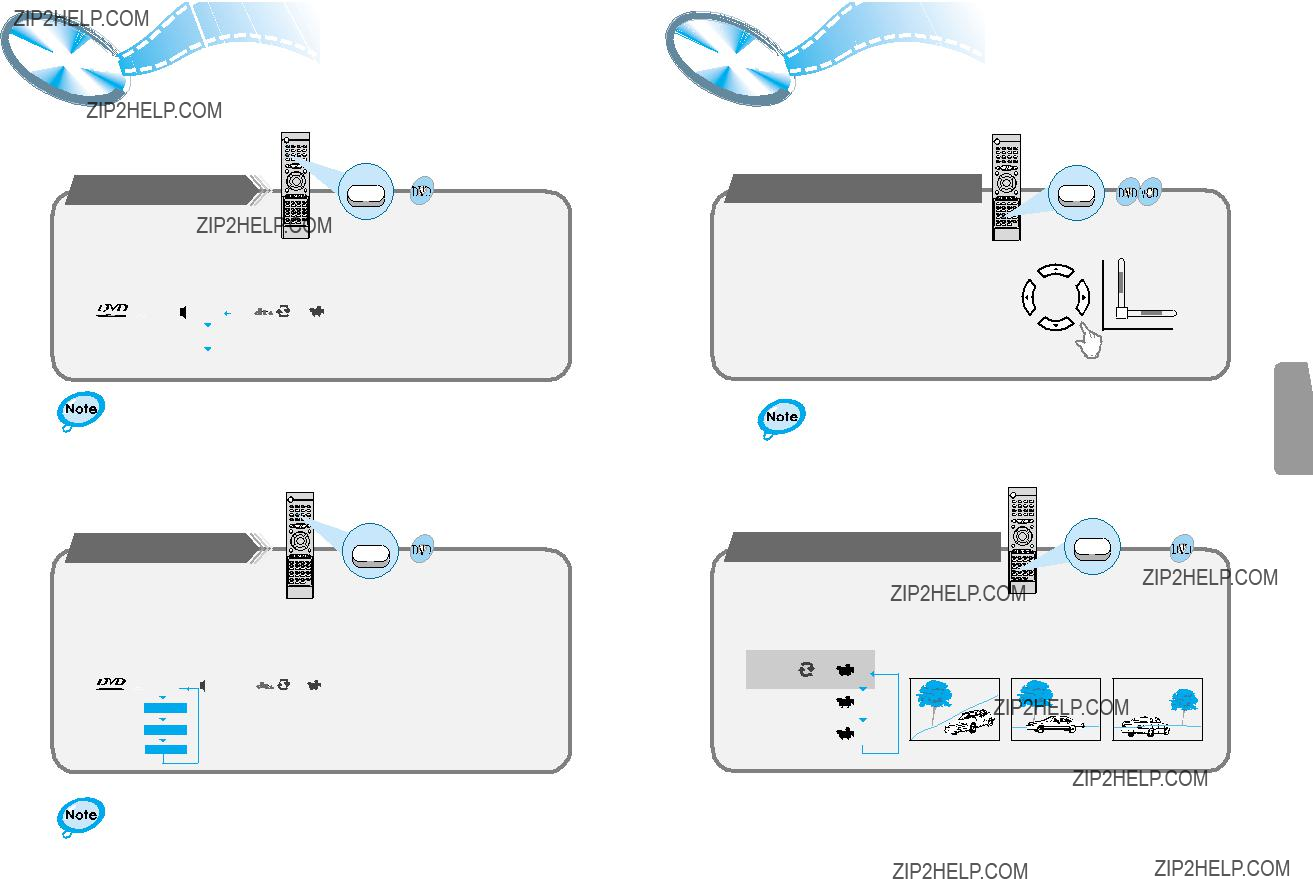


 Zoom/Ang
 INVALID appears on the TV screen while buttons are being operated, that operation is not possible with that particular disc.

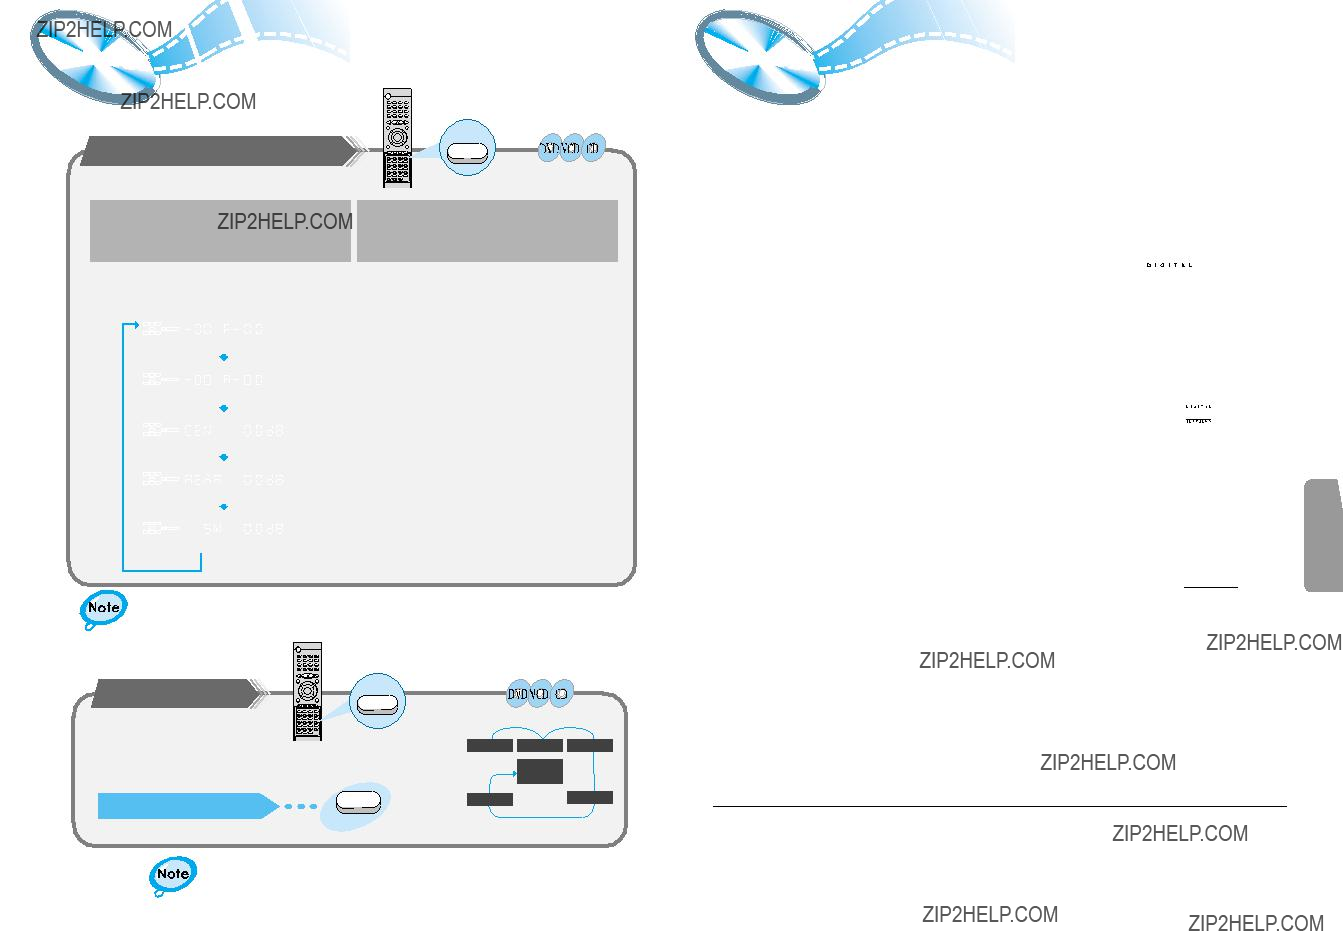
 Program
  PROGRAM MENU SELECT : ENTER

 ) button.
 ) button twice during playback.
 ) button once when in the Stop mode.
 ) button on the main unit. The disc tray will open and then close.


 Sleep/D.R.C


 System
 4:3PS
4:3PS
 ) button down on the main unit for more than


 Dolby Digital and DTS Digital Surround
 ).
).


 00 F 00
  00 R 00
  REAR
REAR  SW
SW REVERB

 indication

 Listeni
 Presettin


 button is pressed, a preset broadcast station is selected.
 button. Automatic searching begins, and then stops when a station is tuned in.
 button to tune to the chosen station. The frequency changes incrementally in either direction each time the corresponding button is pressed.
 , then press
 ) button to select the MANUAL mode on the front panel. Then hold in the


 button to make the unit begin automatically searching for broadcast stations.
 ) button to select the MANUAL mode on the front panel. Press the


 button to tune to the desired station. The frequency changes incrementally in either direction each time the corresponding button is pressed.


 Troubleshooting


 Specifications