Digital Photo Frame
User manual
800P
1000P
Click
Contents
Safety precautions
Get started
Play multimedia
Browse and manage multimedia
Use the Bluetooth wireless feature
Customize settings
Appendix
Index
Read this manual thoroughly for proper use and maintenance instructions.
The images and screen shots used in this manual are from the 800P.
Safety precautions
WARNING:
???TO PREVENT ELECTRIC SHOCK, DO NOT OPEN OR REMOVE THE COVER OR BACK OF THE FRAME. THERE ARE NO
USER-SERVICEABLE PARTS INSIDE. ALLOW ONLY QUALIFIED PERSONNEL TO SERVICE THIS FRAME.
???TO PREVENT FIRE, KEEP THIS FRAME AWAY FROM ALL OPEN FLAMES, SUCH AS CANDLES, AT ALL TIMES.
???The slots and openings in the frame provide needed ventilation. To ensure reliable operation and prevent overheating, these openings must not be blocked or covered:
-- Do not cover the slots or openings.
-- Do not block the slots or openings by placing the frame on soft surfaces, such as beds, sofas, or rugs.
-- Do not place the frame in an enclosed space, such as a bookcase or cabinet, without proper ventilation.
???Do not place the frame near or on sources of heat, such as radiators, or in direct sunlight.
???Do not allow the frame to come in contact with water. Do not place the frame near sources of water, such as bathtubs or sinks, or where water or other liquids may splash or drip on the frame. If the frame gets wet, unplug the frame immediately and contact the dealer or an authorized service center.
???Do not overload wall outlets, extension cords, or adaptors beyond their intended capacity, as this may result in fire or electrical shock.
???Route all power supply cords away from traffic areas and other objects so that they are not likely to be stepped on or pinched by items placed on or against them. Ensure that wires are not twisted or pinched at plug ends or adapter connections.
???During electrical storms or when the frame will be unattended and unused for extended periods of time, unplug the frame from the wall. This will prevent damage to the frame from electrical surges.
???Before connecting the power cord, make sure that the voltage designation of the frame corresponds to the local electrical supply.
Get started
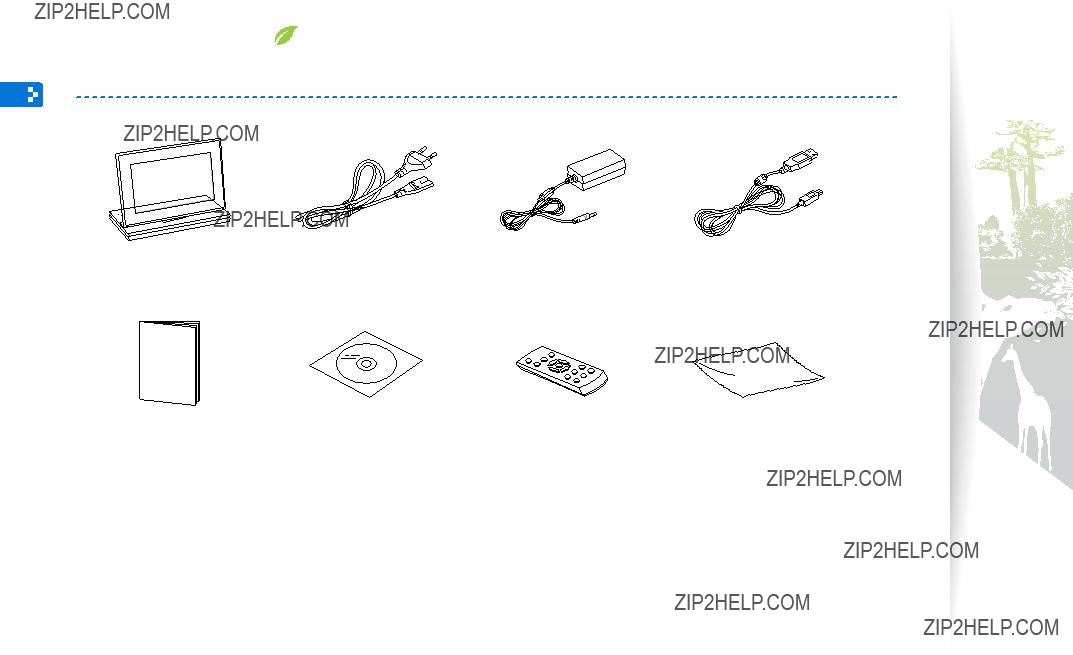
What???s in the box
*The shape of the plug may differ depending on your region.
**Warranty may be unavailable depending on your region.
Get started
Get to know your frame (continued)
The rear of your frame
Get started
Get to know your frame (continued)
Remote control
???Be sure to point the remote control to the remote control sensor on the frame (p. 7).
???Open the battery cover by turning to the left, replace the battery, and close the battery cover by turning to the right.
Button Description
Turn the frame on or off
Access the Main menu
Access menus
Return to the previous level
Scroll through menus or items (up/down/left/right)
Select menus or items
Play a slideshow in any screen; Change the view mode during a slideshow
View the time and date
Rotate a photo during a slideshow
Access the photo list screen
Access the music list screen
Access the video list screen
9
Get started
Set up your frame
Do not put too much pressure on the frame or force the screen to rotate in the wrong direction, as this may damage the frame.
 Connect the adapter and turn the power on
The shape of the plug may differ depending on your region.
Touch p to turn the frame on. The light on p will
turn and the Main menu will appear.10 To turn the frame off, touch and hold p.
Get started
Customize basic settings
When you turn the frame on for the first time, the Quick setup screen appears. Select a language and customize the basic settings of your frame.
Start Quick Setup
Quick Setup helps you setup several settings to use your photo frame.
This includes View Mode, Slideshow Transition, Clock Set, and Startup Mode settings
Do you want to start?
Yes No
1 Scroll to your language and touch e.
2 Select Yes to start the setup wizard.
3 Follow the on-screen instructions to customize your frame according to your preferences.
4 When you complete the setup, select Yes to view the product guide.
5 Review the basic usage instructions for your frame, and then select Done.
Get started
Get to know the Main menu
From the Main menu screen, you can access the following menus.
Frame Memory Photos
Music
Videos
Bluetooth
Clock
Mini Monitor
Settings
???You can set other functions to be activated instead of the Main menu when you turn the frame on (Startup Mode p. 39).
???While you are using other functions or the screensaver is active, touch h to access the Main menu screen.
Get started
View the time and date
Check the current time and date or customize clock settings.
1 From the Main menu screen, scroll to Clock and touch e.
??? The current time and date will display.
2 Touch m and select Settings.
3 Scroll to Clock and touch e.
4 Scroll to one of the following options and touch e.
???For Clock Set, touch l or r to select the option you want and touch u or d to set the value.
Get started
Connect external memory devices
You can connect USB memory devices or SD memory cards to the frame. The frame supports FAT16 and FAT32 file format systems for external memory devices.
Insert an SD memory card with the metal contacts facing down. Push the card in until it locks in place.
To remove the SD memory card, push it gently until it disengages from the frame.
??? If you connect an external memory device while the power is on, a pop-up window will appear. To start a slideshow of photos stored in the external memory device, select Slideshow.
??? Recommended memory capacities for different types of memory cards:
Get started
Select a memory location
When there is an external memory device (SD memory card or USB memory device) connected, you can select the source of files.
Frame Memory Photos
Music
Videos
Bluetooth
Clock
Mini Monitor
Settings
1 From the Main menu screen, scroll to the memory location list.
2 Scroll to one of the following memory locations and touch e.
You can also change the memory location while browsing photos by touching m and selecting Select Storage Device (p. 29).
Get started
Connect to a PC
You can transfer files (p. 17) or use the frame as a mini-monitor by connecting it to a PC (p. 42). Connect the smaller end of the USB cable to the frame and the larger end to the USB port of a PC.
USB connector
Get started
Transfer files from a PC (continued)
To disconnect the frame from a PC
Make sure to end the connection properly to prevent damage to the frame or your data.
1 Click  on the Windows Taskbar.
2 Click the pop-up message.
Safely remove USB Mass Storage Device - Drive(G:)
3 Disconnect the USB cable only when the message says that it is safe to remove the hardware.
???Do not disconnect the USB cable while the files are being copied, as this could result in loss of data or damage to the frame.
???The connection will not end if you have frame files open on the PC. Close all frame files and try again.
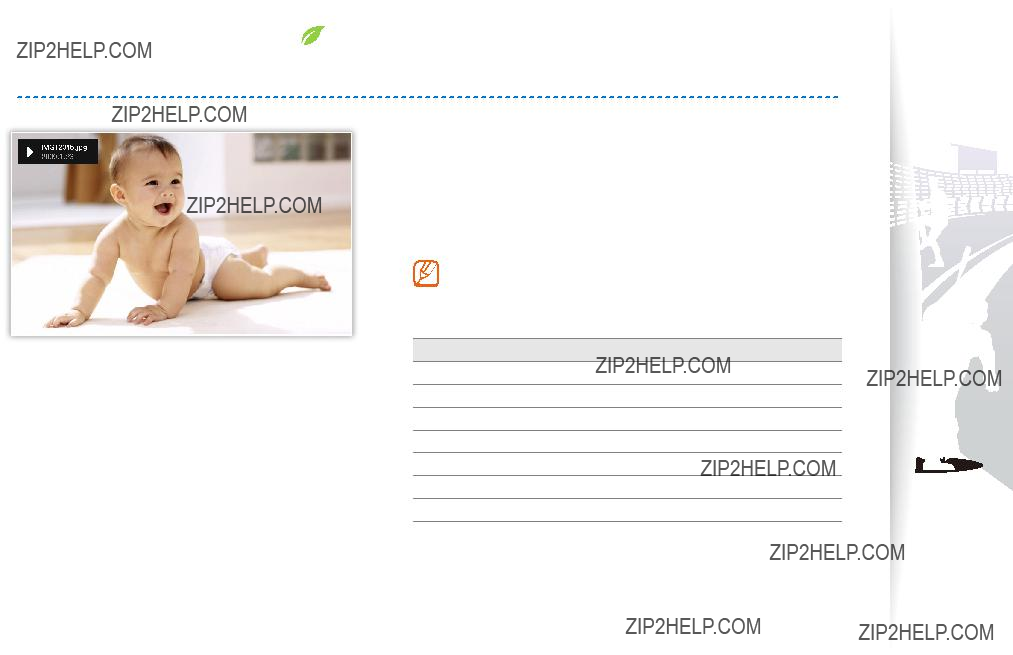
Play multimedia
Play music
???If the frame is not in use for some time while not playing music, the screensaver will appear. To return to the music player screen, touch any button except for p.
???When you play music files encoded in a variable bit rate (VBR), the playback time shown on the screen may differ from the actual playback time.
Browse and manage multimedia
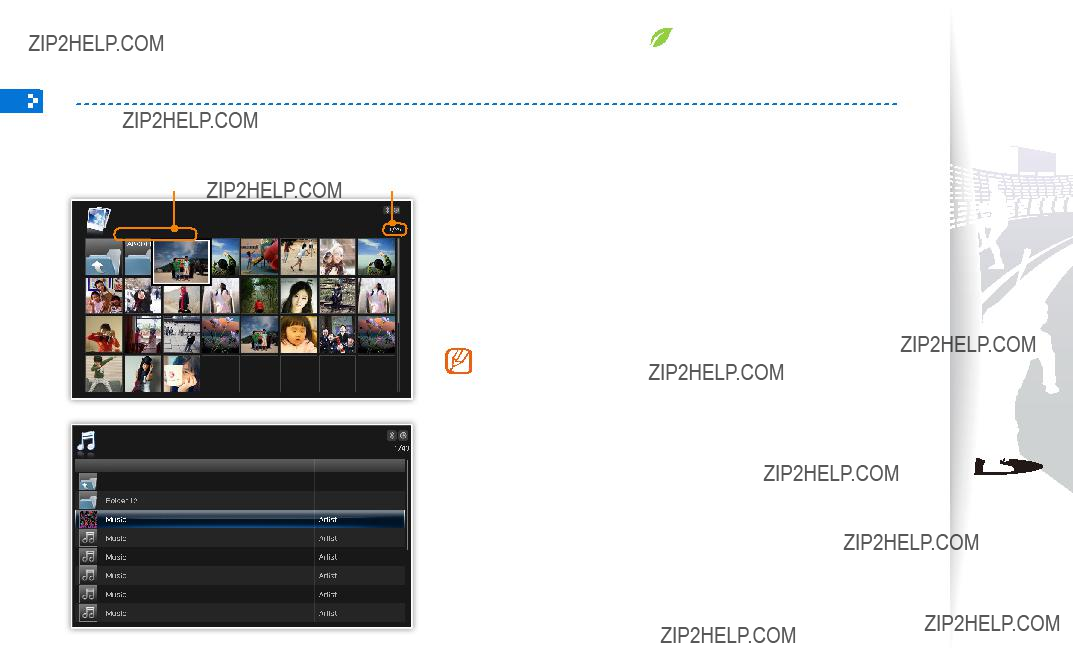
Browse files
Access the Photos, Videos, or Music menus and browse files.
Memory location/ Folder name/File name
Photos
Frame Memory ??? 2009 ??? IMG1
Current file number/ total number of files
1 From the Main menu screen, select a memory location (Frame Memory, SD Card, or USB).
2 Scroll to Photos, Videos, or Music and touch e.
3 Touch d, u, l, or r to browse files.
??? To view files in a folder, scroll to the folder and touch e.
If the frame is not in use for some time, the screensaver will appear.
Touch b to access the currently used screen.
Music
Frame Memory ??? 2009 ??? Music
TitleArtist
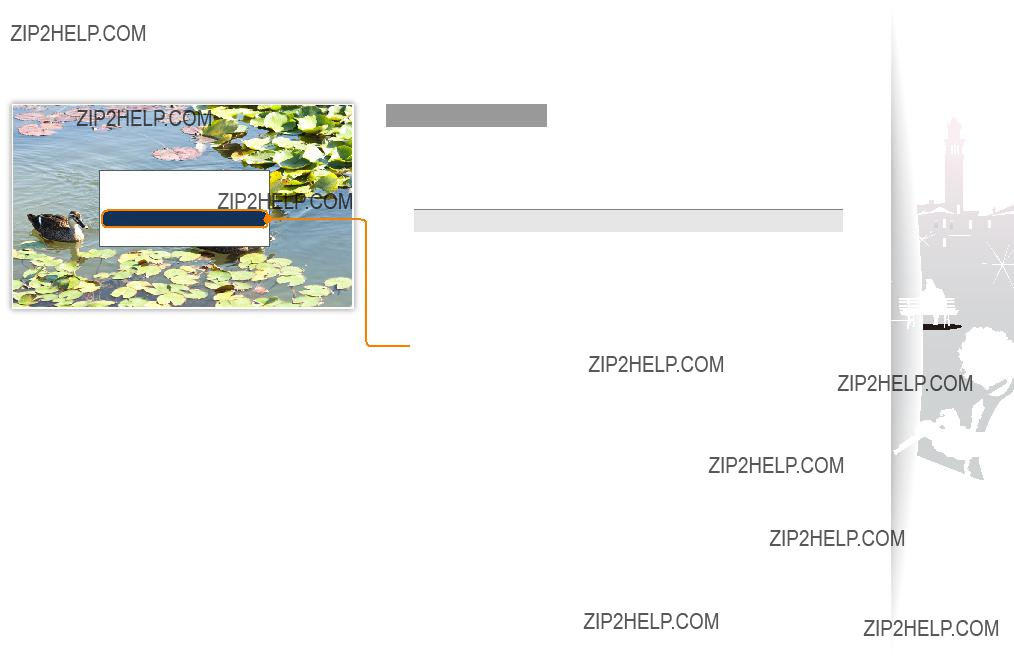
Browse and manage multimedia
Manage files
Copy or delete files stored in internal memory or external memory devices.
Photos
Photo Size
File Size
Date
Copy
Delete
Select Multiple Files
Select Storage Device
Settings
1 While browsing files, touch m.
2 Scroll to one of the following options and touch e.
Use the Bluetooth wireless feature
Connect to other wireless devices for exchanging data.
 Find and pair with
Bluetooth
other Bluetooth-enabled devices
1 From the Main menu screen, scroll to Bluetooth and touch e.
???The Bluetooth wireless feature turns on by default.
???To turn off the Bluetooth wireless feature, from the Main menu screen, select Settings ??? Bluetooth ??? Bluetooth Mode ??? Off.
2 Select Search to find other Bluetooth-enabled devices.
3 Scroll to a device and touch e.
???When the owner of the other device enters the same PIN or accepts the connection, pairing is complete.
The frame???s default PIN is 0000.
???To end the Bluetooth connection, move to any other screens and the connection will terminate automatically.
???To end the Bluetooth connection when connected to A2DP devcies, such as headsets, scroll to the connected device and touch e.
If you repetitively search and cancel Bluetooth functions, the remote control and touch buttons may cease to function due to instability of the frame.
Use the Bluetooth wireless feature
Get data using the Bluetooth wireless feature
1 In the device list, scroll to one of the paired devices and touch m.
2 Scroll to Photo List and touch e.
??? The photo list of the connected device will display.
Photo List is deactivated when you connect to a headset or speaker.
3 Select the files you want to copy and select Copy.
??? The selected files will be copied to the frame???s memory.
Receiving files is available in any screens except for the Bluetooth screen.

Use the Bluetooth wireless feature
Information for using Bluetooth
???The Bluetooth wireless feature can transmit data to a maximum of 10 meters (30 feet). This distance may be reduced by obstacles, such as walls or people, or other devices that use or produce radio waves, such as WLAN devices or other mobile phones on the 2.4GHz band. Obstacles or other wireless devices can interfere with the Bluetooth wireless connection and reduce the effective range.
???The frame???s wireless antenna is located in front of p. For best results, ensure that you are within the maximum distance for a Bluetooth connection and that there are no obstacles between the devices. Interference from other devices may cause the frame to emit unusual noises or function improperly.
???The Bluetooth wireless feature may cause interference with medical devices. Do not use the frame or other Bluetooth- enabled devices in hospitals, airplanes, and trains or near automatic doors, alarms, or flammable gases.
???Your frame supports security settings for safe connections with other Bluetooth-enabled devices. However, you should always take precautions to secure your data when connecting to other Bluetooth-enabled devices. Samsung is not responsible for any loss of private information over a Bluetooth wireless connection.
???The Bluetooth wireless feature in your frame may not be compatible with all Bluetooth-enabled devices. For best results, pair and connect your frame only with devices certified by the Bluetooth SIG and ensure that the Bluetooth profiles of the devices are compatible. Even when a device is certified by the Bluetooth SIG, some incompatibilities may occur and some features or functions may be unavailable.
???When playing music over a Bluetooth wireless connection, you may experience interference from other devices, temporary interruptions in your music, or limited functionality of your frame, depending on wireless devices present in the area or the physical environment.
Set the time and date and customize the clock settings (p. 13).
Select and adjust slideshow effects (p. 22).
From the Main menu screen, scroll to Settings and touch e.
Customize settings
Define frame settings according to your preferences.
 Adjust slideshow effects
Settings
1 From the Main menu screen, scroll to Settings and touch e.
2 Scroll to Photos and touch e.
3
 Set the time and date
Settings
1
2 Scroll to Clock and touch e.
3
36
Customize settings
Customize Bluetooth settings
Appendix
Use as a PC mini-monitor
You can use the frame as a mini-monitor (supplementary monitor) for a PC. Install the Frame Manager program on your PC and connect the frame to the PC with the USB cable. For more information, visit the Samsung Electronics webpage (http://www.samsung.com) and search for ???800P??? or ???1000P???.
System requirements for using the frame as a mini-monitor
??????OS: Windows XP (SP2/SP3), Vista (32bit)
??????USB: Extended Host Controller (EHCT) for USB 2.0
??????RAM: 512 MB or more
??????CPU: 2.4 GHz or more
Before use
?????? Read the Frame Manager User Manual to install the program properly. ?????? Use the USB cable provided with the frame.
?????? Do not use the frame as a primary monitor. The screen may not work properly.
?????? Touch d or u to adjust the brightness when you use the frame as a mini-monitor.
?????? If you have moved a program icon or window to the secondary monitor, move it back to the primary monitor after use.
??????The frame may not function properly with some video cards. In this case, try setting the hardware acceleration to None.
To set the hardware acceleration to None,
1.Right-click on the Windows desktop, and select Properties.
2.When the Display Properties window appears, select Settings ??? Advanced ???
Troubleshoot ??? Hardware acceleration and drag the indicator to None.
??????For Windows Vista, the Aero 3D effect may not function while using the frame as a mini-monitor and some videos may not play on the frame.
??????The frame does not function as a Windows Presentation Foundation application.
42
Appendix
Update Firmware
Download and install the latest firmware from the Samsung Electronics web page (http://www.samsung.com).
Upgrade Software
Getting upgrade files now.
Do not remove the storage device.
Upgrading???
???Back up your files (photos, videos, or music) before updating the firmware to prevent losing them.
???While the update is in progress,
--Do not disconnect the external device (SD memory card or USB memory device) from the frame.
--Do not touch any buttons.
--Do not insert any other memory cards. --Do not turn the frame off .
???You can verify that the firmware is updated to the
latest version by accessing Product Information in Settings ??? Upgrade Software.
1 Connect the external memory device (SD memory card or USB memory device) to the PC (p. 14).
2 Copy the latest firmware you have downloaded to the external memory device.
??? Copy the firmware to the root folder on the memory device.
3 Disconnect the external memory device from the PC, and then connect it to the frame.
4 From the Main menu screen, scroll to Settings and touch e.
5 Scroll to Support and touch e.
6 Scroll to Upgrade Software and touch e.
7 Select the external memory device.
??? The firmware will be updated.
8 When the update is complete, turn the frame off , remove the external memory device (SD memory card or USB memory device), and turn the frame on.
43
Appendix
Troubleshooting
Try the following if you have trouble using the frame.
Appendix
Troubleshooting (continued)
Appendix
Specifications (continued)
*The design of the product may vary according to the model. Specifications are subject to change without notice.
*This device is a class B digital apparatus.
* RF power may differ depending on user environment.
Correct disposal of the frame
Dispose of the product according to local regulations and applicable laws.
Appendix
Contact information of Samsung Worldwide
If you have any questions or comments relating to Samsung products, please contact.


 Customize basic settings


 Get to know the Main menu


 ......


 Play a slideshow


 will appear at the top right corner of the screen.