Register your product at www.samsung.com/global/register
Safety Precautions
The following safety precautions are provided to protect the users??? safety and prevent property damage. Make sure to read the following and use the dehumidifier properly.
???Keep this user???s manual in a handy place so that you can find it whenever you need to see it after reading this manual thoroughly.
 WARNING ???This indicates the possibility of serious injury or death.

WARNING
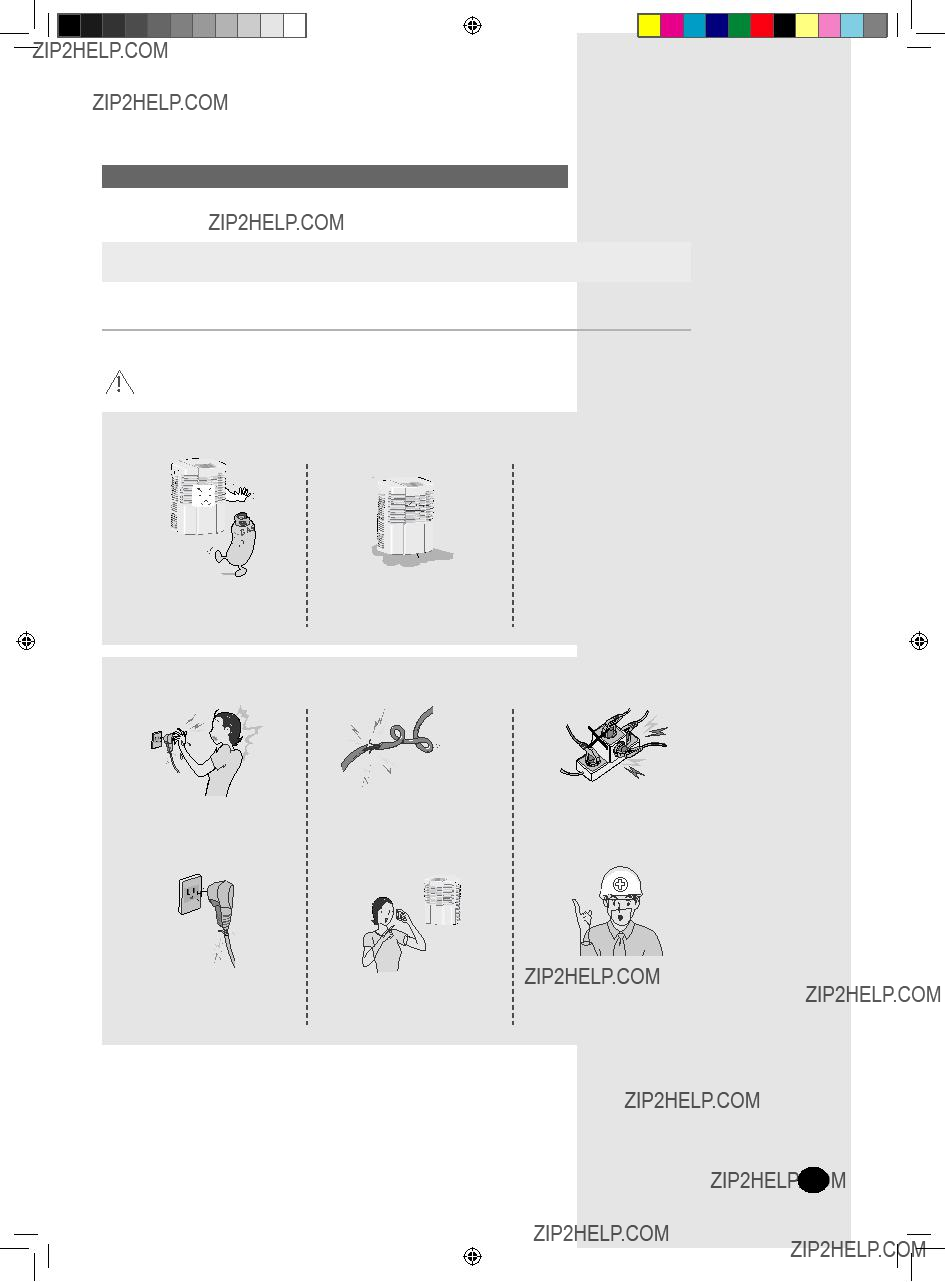
DURING OPERATION
???Do not disassemble or modify this unit.
???Never spill any kind of liquid into the unit. Should this happen, unplug or power off the unit and contact an authorized service center. (page 20.)
???Do not place any obstacles in front of the unit.
Make sure that the unit is correctly ventilated at all times: Do not place clothing or other materials over it.
???Do not allow children to sit on top of the unit.
???Do not insert anything between the air outlet blades because the inner fan may be damaged and could cause injury. Keep children away from the unit.
DISPOSING OF THE UNIT
???Please recycle or dispose
of the packaging materials for this product in an environmentally responsible manner.
???When you need to dispose of the unit, consult your dealer. If pipes are removed incorrectly, refrigerant may blow out and come into contact with your skin, causing injury. Releasing refrigerant into the atmosphere also damages the environment.
CAUTION
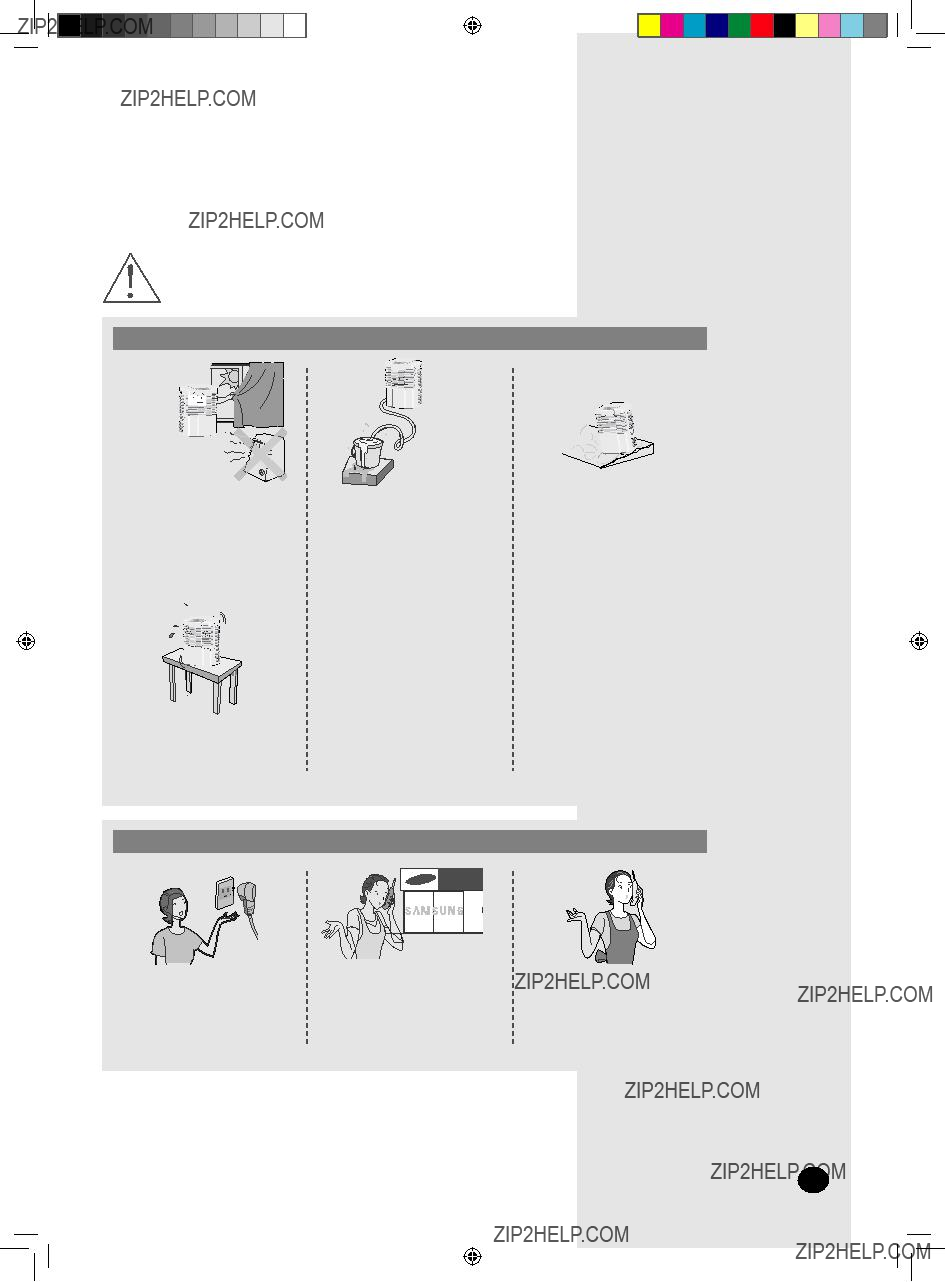
WHEN INSTALLING
???This unit vibrates therefore do not install this unit in a place where the product may fall and become damaged.
REGARDING POWER SOURCE

CAUTION
DURING OPERATION
???Do not drink the water from the dehumidifier.
???Do not use the dehumidifier to maintain food, pets, plants or cosmetics.
???Do not use excessive force when using the dehumidifier.

CAUTION
OTHER PRECAUTIONS
???Be sure that the air filter is not exposed to direct sunlight.
???Be sure to insert the air filter.
???If the fan stops working, turn the dehumidifier off and clean it.
???Do not clean the dehumidifier by spraying water, benzene, thinner or alcohol directly onto the unit.
???Clean the air filter every 2 weeks.
???Be careful when removing the water bucket. There is a risk of water splashing when bucket is full.
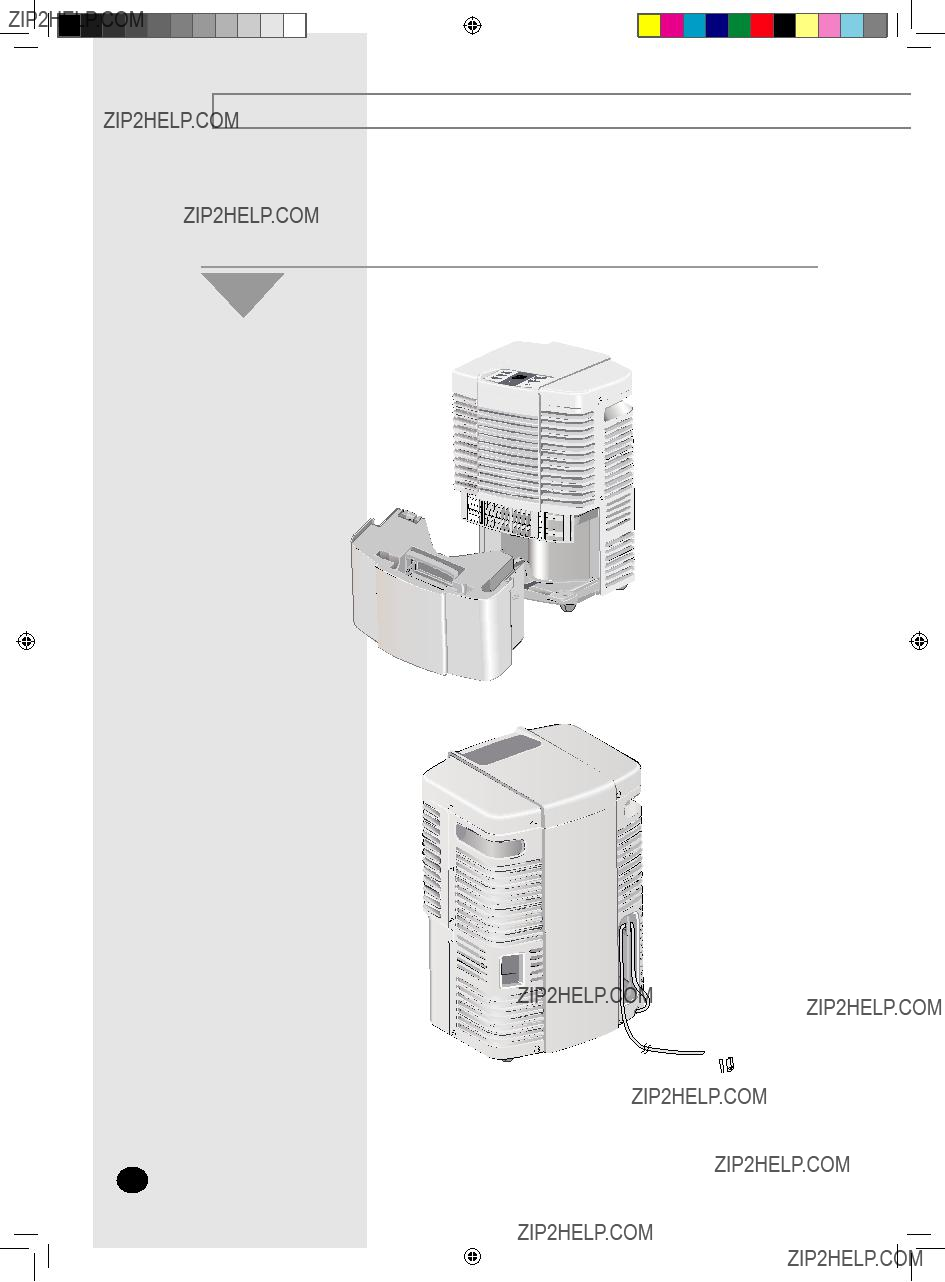
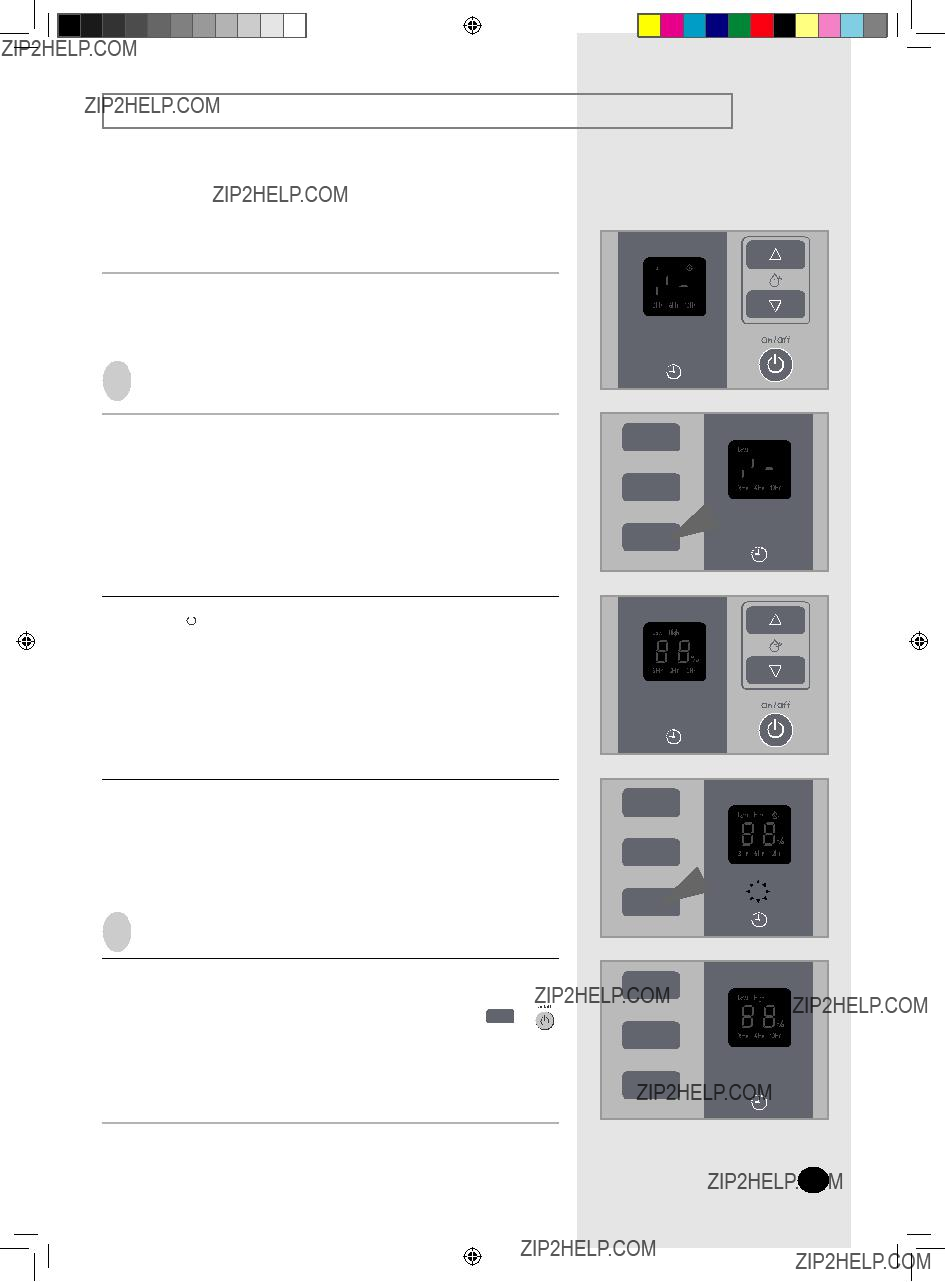
Overview of Each Component
Main Unit The design and shape are subject to change.
Control Part for consistency
Handle
Drain Hose Connector
Water Bucket
Drain Connector Hole
 Power Cord

Control Part
Humidity Setting Display
Fan Speed button
Continuous Run
button
Self Dry button
Humidity Control button
Humidity Setting Display
Humidity display&
Operating display
Off Timer indicator
Getting Started
This User???s Manual provides you with valuable information about your dehumidifier. In order to take full advantage of the dehumidifier???s features, please read this manual carefully before using.
You have already seen the basic description of the unit on from pages 8 and 9. Starting with the next page, you will find a series of
The illustrations in the

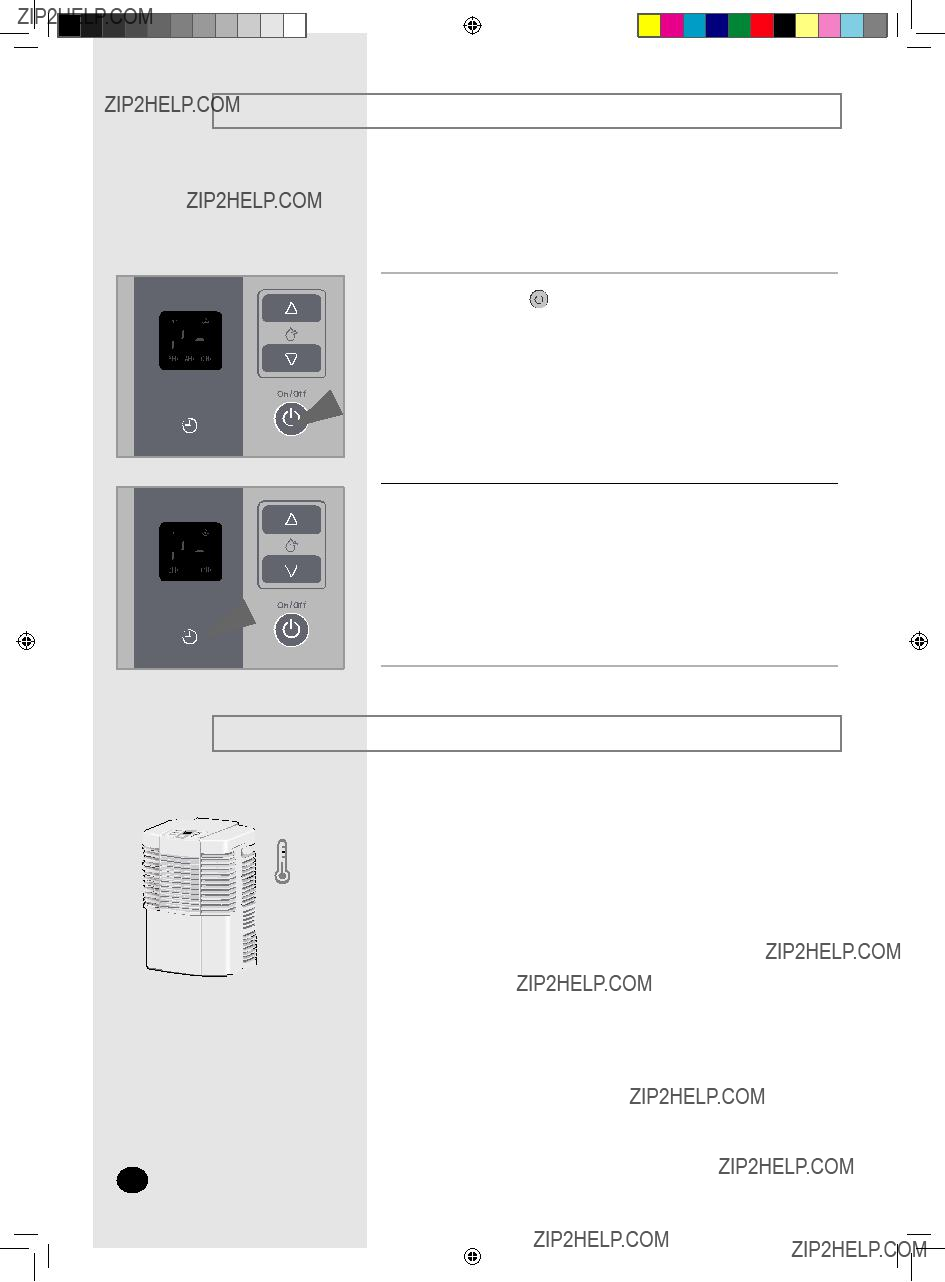
Selecting the Humidity Mode
You must select the Humidity Control button if you wish to lower the humidity. You can also set the Fan speed.
1Press the button to turn the unit on.
: The product will stop once the button is pressed again.
The humidity adjusts in 5% increments.
Note If the location humidity level is below the set level, the compressor won???t start.
3Press the  button to select the fan speed. Result: ??? When pressing the
  button,
the Fan Speed will switch between Low and High.
Selecting the Continuous Run Mode
Pressing the Continuous Run button allows the dehumidifier to continuously run in humidity mode.
1Press the button to turn the unit on.
2Press the  button.
??? On this setting humidity level is not adjustable.
Note The dehumidifier will stop when the Bucket Full indicator lights up.
For more information see page 15.
Selecting the Self Dry Mode
Self Dry mode can be used to clean the unit and removes excess humidity. You can operate Self Dry mode when the dehumidifier is powered on or off.
Power On
1Press the  button.
Result: ??? The [  ]symbol and humidity % will be displayed.
???Self Dry mode can be canceled by pressing the  button.
2Press the  button.
Result: ??? Only the [  ] symbol will be displayed and the fan speed will automatically adjust to low.
???The inside moisture of the unit is removed in 30 minutes.
???In Self Dry mode the product will power off after 30 minutes.
Power O???
1Press the  button.
Result: ??? The [  ] symbol will be displayed, and Self Dry mode will start.
???The inside moisture of the unit is removed in 30 minutes.
???After 30 minutes, the product will power off.
Selecting the Off Timer Mode
The Off timer mode can be used to power off the unit after 3, 6 or 12 hours.
1If necessary, press the button.
: Off timer mode is available in Continuous Run mode.
2Press the  button.
Result: ??? You can select the off timer to shut off in 3Hr ??? 6Hr ??? or 12Hr.
Automatic Defrost Operation
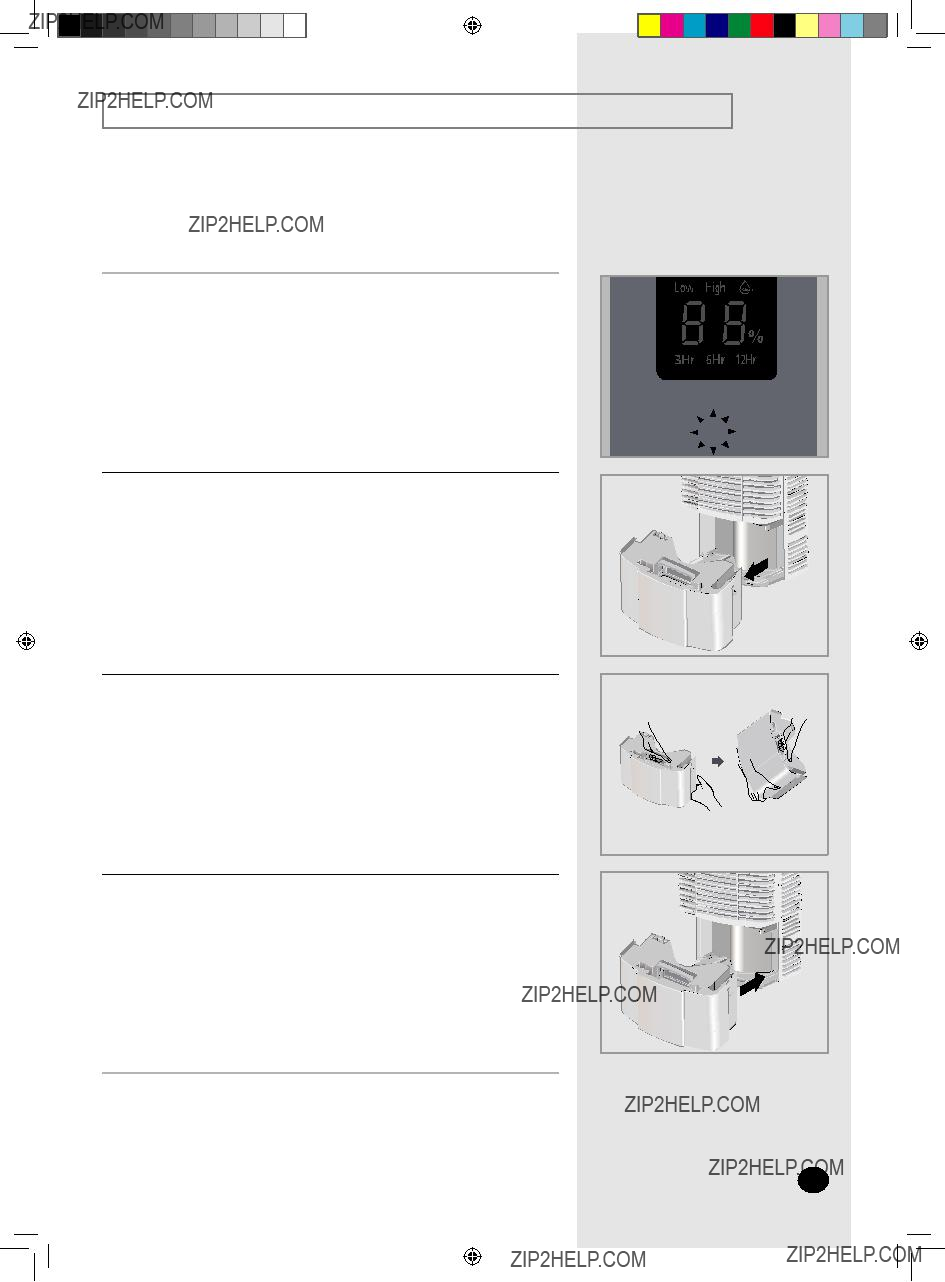
Bucket Full Indicator
When the water bucket is full, the Bucket Full indicator will light up and the unit will power off.
1Once the unit has powered off.
???Please unplug the power cord for safety.
???When the bucket full indicator is on, you will not be able to operate the unit.
2Hold the holes on both sides of the water bucket, and slide out.
3Hold the handle on the top of the water bucket and dispose of the water.
4Slide the empty water bucket back into place.
???When the Bucket Full indicator is off, push the ON/OFF button to select the operating mode you wish to use.
???If the water bucket is not empty or incorrectly inserted, the Bucket Full indicator will come on and the product will not operate.
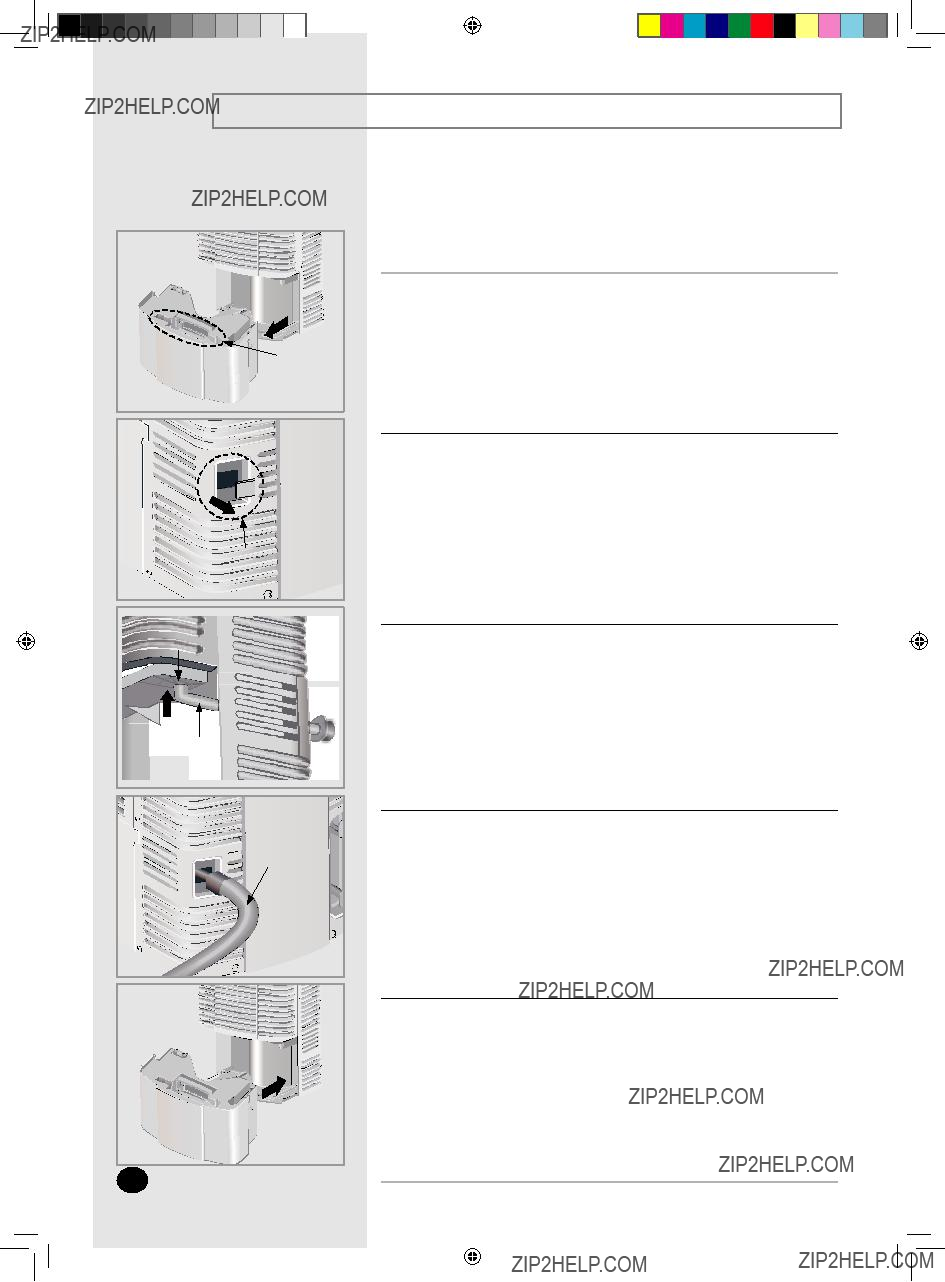
Setting up the Drain Hose Connector
The Drain hose connector can be used to drain the water externally, instead of using the water bucket.
1 Hold the holes on both sides of the water bucket and slide it out.
Drain Hose
Connector
2 Remove the Drain Connector Hole cover located in the back of the unit.
Drain Connector Hole
Drain Hole
 Drain Hose
3Slide the Drain Hose Connector through the Drain Connector Hole, and connect it to the Drain Hole.
4Connect the Drain Hose to the Drain Hose Connector.
: The Drain hose sold separately at participating retail stores.
(An optional drain hose is available for purchase through Retail stores.)
5 Slide the water bucket back into place.
: If the water bucket is incorrectly inserted, the Bucket Full light will come on and the product will not operate.
Cleaning the Dehumidi???er
Cleaning the outside of the unit
1Please use a soft piece of cloth to clean the outside of the product.
Note To prevent water from entering the unit please dry it with a dry piece of cloth.
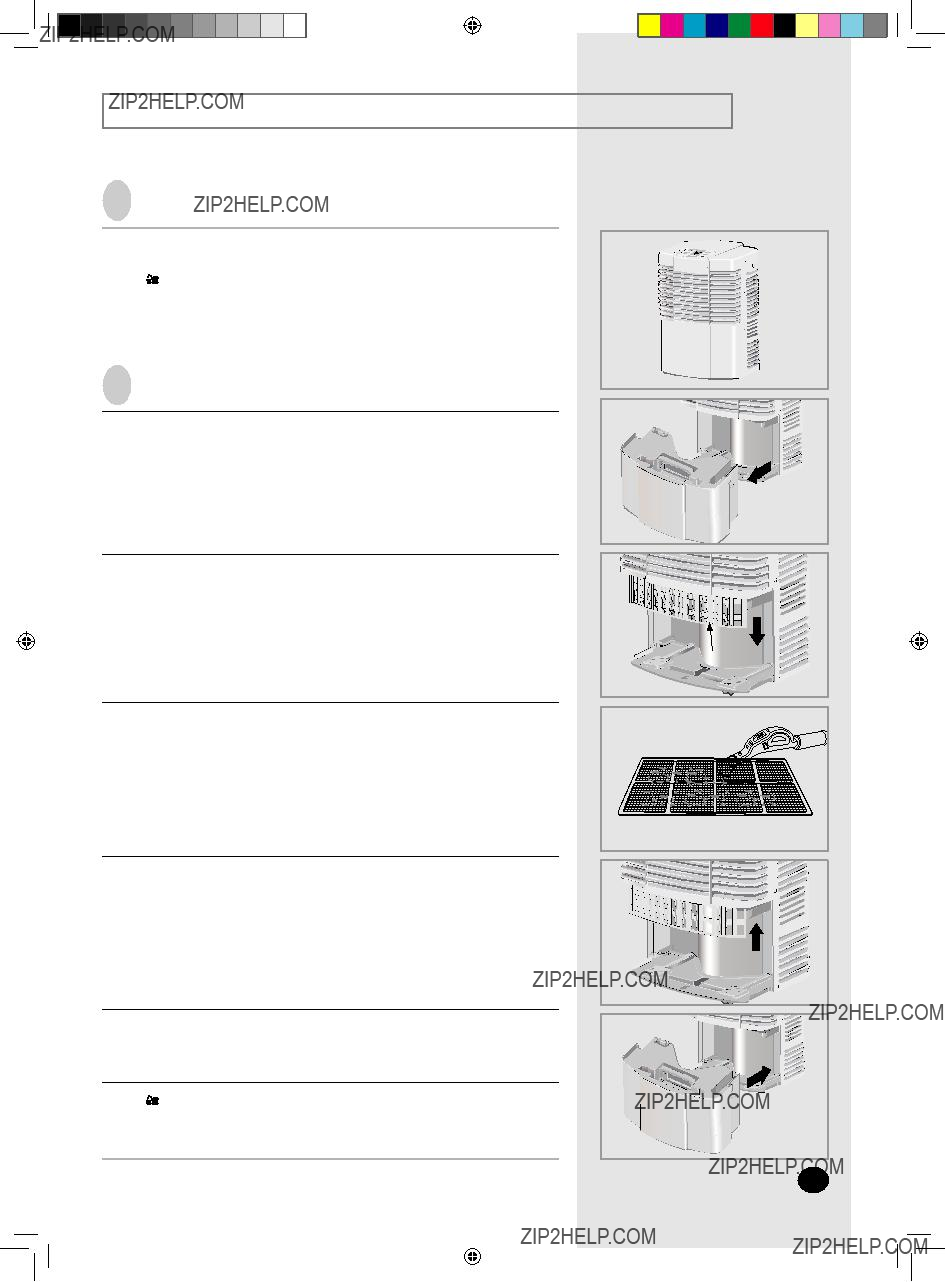
Cleaning the Air Filter
1 Hold the holes on both sides of the water bucket and slide it out.
2Remove the air filter by pulling down.
3You may remove the dust with a vacuum cleaner or brush.
:If there is too much dust, please wash the air filter with warm water and dry it in the shade.
Please do not wrap the air filter when cleaning it.
4 Insert the air filter.
5 Slide the water bucket back into place.
: If the water bucket is incorrectly inserted, the Bucket Full indicator will go on and the product will not operate.
Note We recommend cleaning the air filter every 2 weeks. If the unit is in
an area where there is a lot of dust, please clean the air filter once a week.

Cleaning the Dehumidi???er
Cleaning the Water Bucket
1 Hold the holes on both side of the water bucket and slide it out.
2 Pull the bucket cover up to remove it.
3Clean the water bucket with a warm, damp soft cloth.
4 Place the bucket cover back into place by pushing it down.
5 Slide the water bucket back into place.
: If the water bucket is incorrectly inserted, the Bucket Full indicator will come on and the product will not operate.

Troubleshooting Guide
Dehumidifier does not dry the air as it should.
???Check that the humidity setting is correct low humidity 35%.
???Check if there is too much dust on the filter.
???Check if there is anything blocking the air flow.
Technical Specifications
Design and specifications are subject to change without notice.
Temperature Ranges

YOUR SAMSUNG DEHUMIDIFIER
WARRANTY
Limited Warranty to Original Purchaser
Samsung will repair or replace, at our option, this product if found defective within the warranty period beginning from the original date of purchase. This Samsung Product is warranted by SAMSUNG ELECTRONICS CANADA Inc. against manufacturing defects in materials or workmanship for the period specified. During the warranty labor period,
Limited
Within one year of purchase Samsung Electronics Canada Inc. will provide a replacement compressor if it is found to be defective in material or workmanship. During the existing four years (second through fifth year) Samsung Electronics Canada Inc. will provide a replacement only, without charge, if it is found to be defective in material or workmanship. Labor to install the compressor during these existing four years is not included in the warranty. All warranty repairs must be performed by a Samsung Authorized Service Centre.
Obligation of the Original Owner
The original dated purchase receipt must be retained as proof of purchase and presented to the Authorized Service Centre before warranty services are rendered.
Exclusions of the Warranty
This warranty does not cover damage due to accident, fire, flood and/or other Acts of God: misuse, incorrect line voltage, improper installation, improper or unauthorized repairs, commercial use, or damages which occur in shipping. Exterior and interior finish and plastic parts, are not covered under this warranty, Customer adjustments which are explained in the instruction manual are not covered under the terms of this warranty. This warranty will automatically be voided for any unit found with a missing or altered serial number.
This warranty is valid only on products purchased and used in Canada.
SAMSUNG ELECTRONICS CANADA INC.
55 Standish Court, Mississauga, Ontario L5R 4B2

USER???S MANUAL
DED30EL8
DED40EL8
DED45EL8
DED50EL8
DED65EL8
DEHUMIDIFIER
E F