Please read before using this unit.
DVD/CD Player with Video Cassette Recorder
INSTRUCCIONES EN ESPA??OL INCLUIDAS.
Supplied Accessory
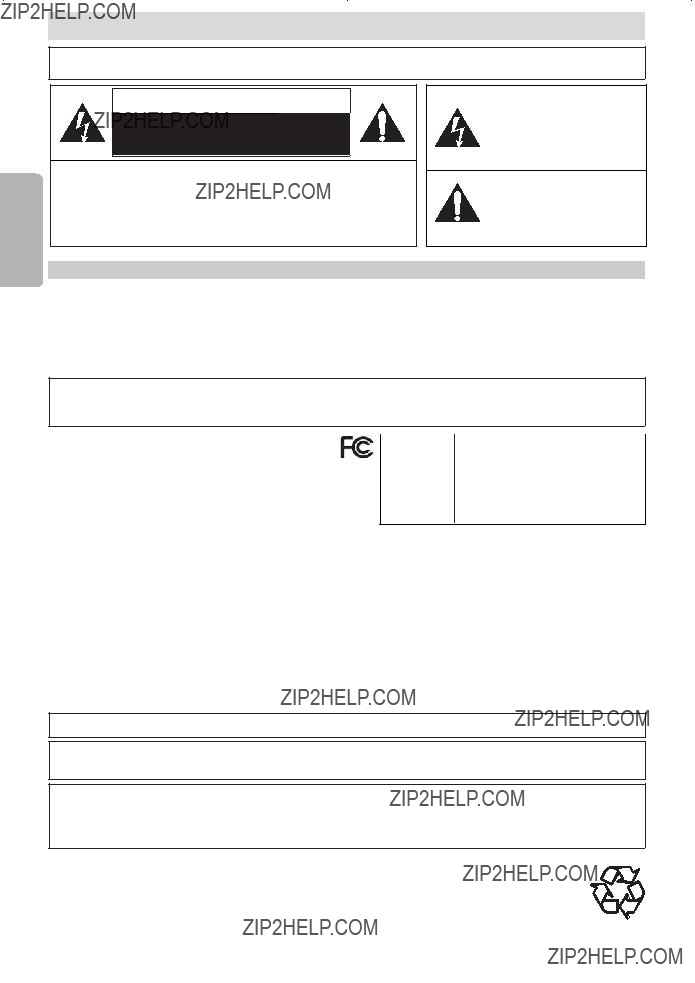
Precautions
??2006. RadioShack ?? Corporation.
All rights reserved. Presidian, RadioShack and RadioShack.com are trademarks used by RadioShack Corporation.
Table of Contents
Precautions
Laser Safety. . . . . . . . . . . . . . . . . . . . . . . . . . . . . . . . . . . . . . . . 2
??? Important Safeguards . . . . . . . . . . . . . . . . . . . . . . . . . . . . . . . . 3
Installation Location . . . . . . . . . . . . . . . . . . . . . . . . . . . . . . . . . . 4 Avoid the Hazards of Electrical Shock and Fire . . . . . . . . . . . . . . 4 Moisture Condensation Warning . . . . . . . . . . . . . . . . . . . . . . . . . 4 Notice for Progressive Scan Outputs . . . . . . . . . . . . . . . . . . . . . 4 About Copyright . . . . . . . . . . . . . . . . . . . . . . . . . . . . . . . . . . . . . 4 Symbols Used in This Manual . . . . . . . . . . . . . . . . . . . . . . . . . . 4 Maintenance . . . . . . . . . . . . . . . . . . . . . . . . . . . . . . . . . . . . . . . 4
??? About the Video Cassettes and Discs . . . . . . . . . . . . . . . . . . . 5
Playable Video Cassettes . . . . . . . . . . . . . . . . . . . . . . . . . . . . . . 5
Playable Discs . . . . . . . . . . . . . . . . . . . . . . . . . . . . . . . . . . . . . . 5
Unplayable Discs . . . . . . . . . . . . . . . . . . . . . . . . . . . . . . . . . . . . 5
Setup
??? Connections . . . . . . . . . . . . . . . . . . . . . . . . . . . . . . . . . . . . . . . 6
RF Output Channel . . . . . . . . . . . . . . . . . . . . . . . . . . . . . . . . . . 6 Hint for Cable Box or Satellite Box . . . . . . . . . . . . . . . . . . . . . . . 6 Connection to an Audio System . . . . . . . . . . . . . . . . . . . . . . . . . 6 Connection to a TV . . . . . . . . . . . . . . . . . . . . . . . . . . . . . . . . . . 7 Front & Rear Terminals. . . . . . . . . . . . . . . . . . . . . . . . . . . . . . . . 7
??? Preparation for Use. . . . . . . . . . . . . . . . . . . . . . . . . . . . . . . . . . 8
Turn on the Unit for the First Time . . . . . . . . . . . . . . . . . . . . . . . 8 Clock Setup . . . . . . . . . . . . . . . . . . . . . . . . . . . . . . . . . . . . . . . . 8
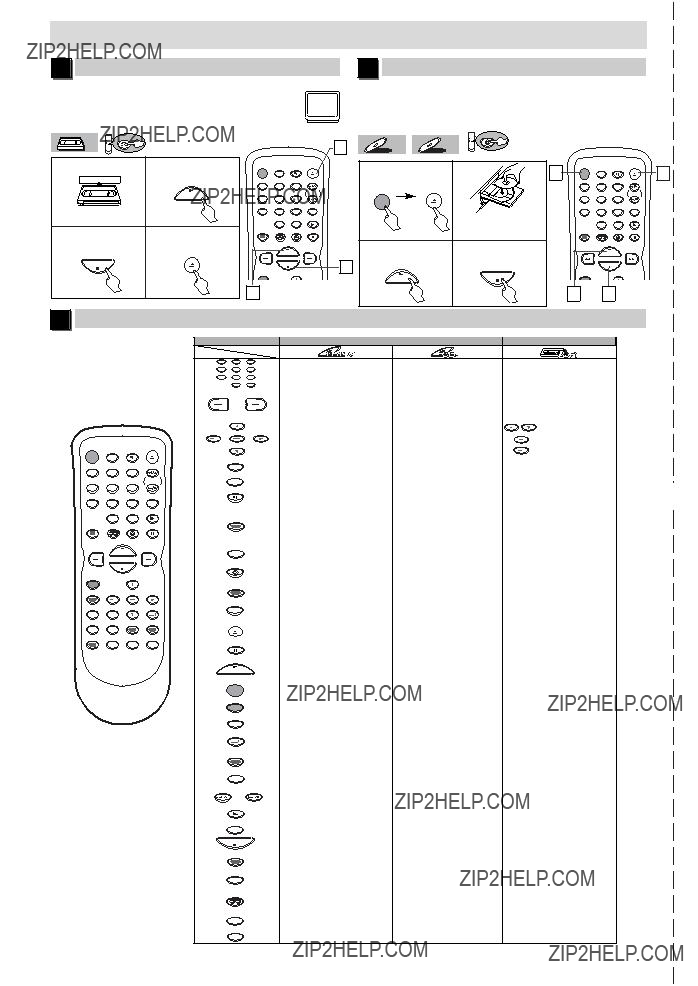
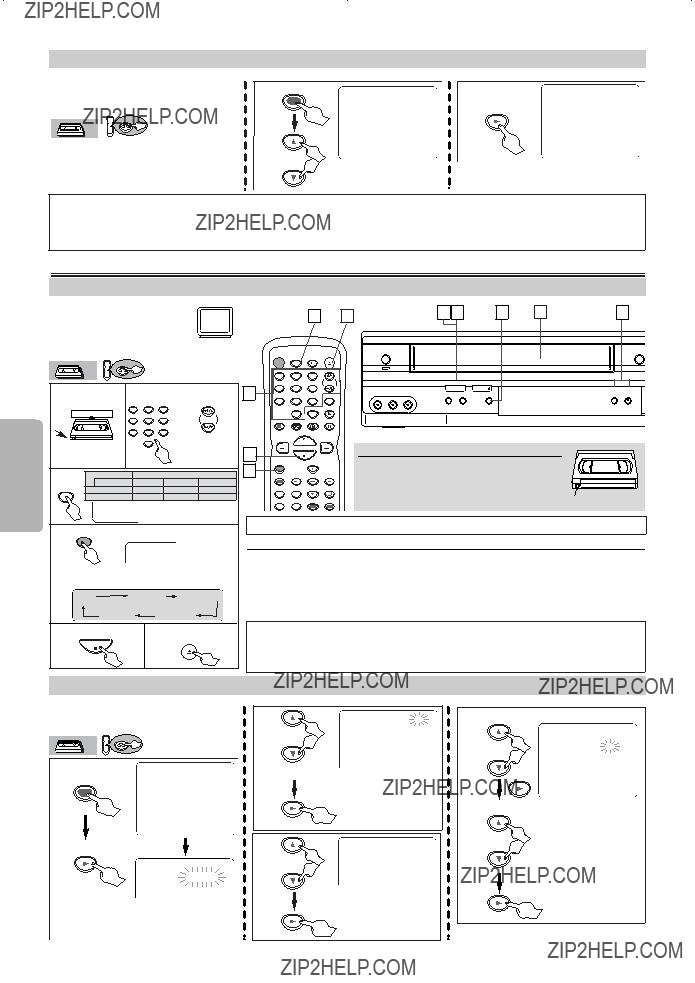
??? Function Overview . . . . . . . . . . . . . . . . . . . . . . . . . . . . . . . . . . 9
Front Panel Display . . . . . . . . . . . . . . . . . . . . . . . . . . . . . . . . . . 9 VCR/DVD Switching . . . . . . . . . . . . . . . . . . . . . . . . . . . . . . . . . . 9 Remote Control . . . . . . . . . . . . . . . . . . . . . . . . . . . . . . . . . . . . 10 Installing the Batteries for the Remote Control . . . . . . . . . . . . . 10
VCR Functions
??? Playback . . . . . . . . . . . . . . . . . . . . . . . . . . . . . . . . . . . . . . . . . 11
??? Other Operations . . . . . . . . . . . . . . . . . . . . . . . . . . . . . . . . . . 11
Index Search . . . . . . . . . . . . . . . . . . . . . . . . . . . . . . . . . . . . . . 11
Time Search. . . . . . . . . . . . . . . . . . . . . . . . . . . . . . . . . . . . . . . 11
Auto Repeat . . . . . . . . . . . . . . . . . . . . . . . . . . . . . . . . . . . . . . . 12
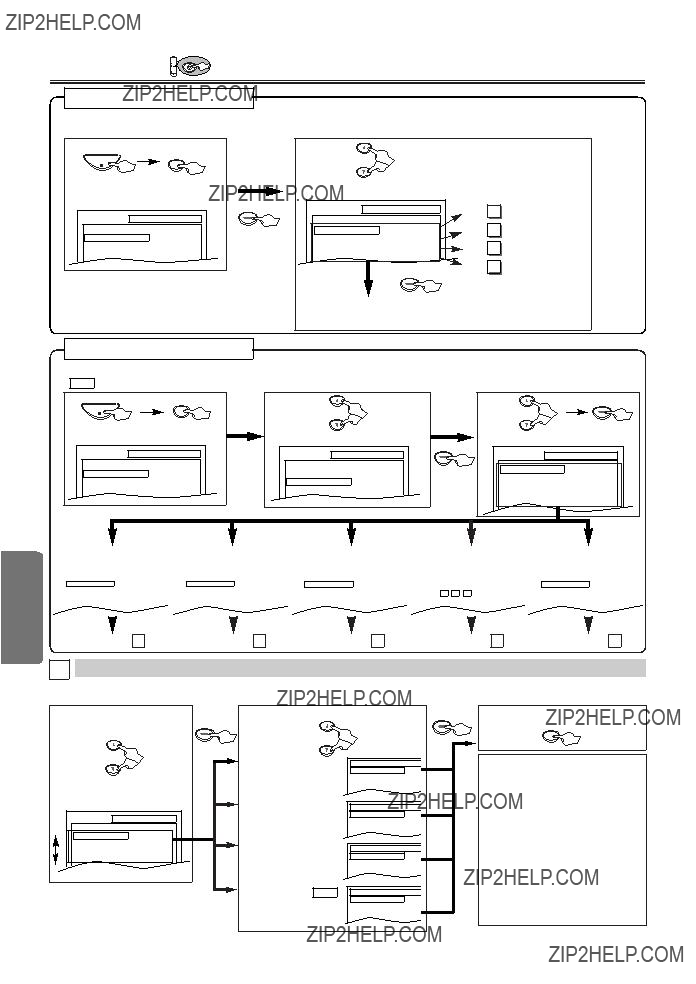
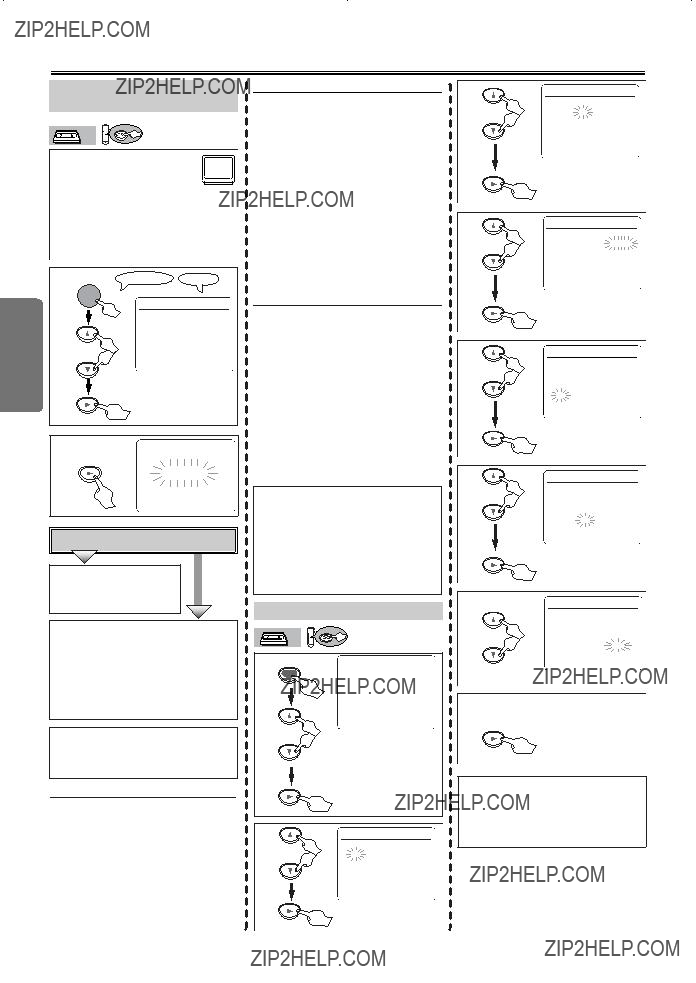
??? Recording . . . . . . . . . . . . . . . . . . . . . . . . . . . . . . . . . . . . . . . . 12
Recording & OTR (One Touch Recording) . . . . . . . . . . . . . . . . 12 Timer Recording. . . . . . . . . . . . . . . . . . . . . . . . . . . . . . . . . . . . 12 Hints for OTR and Timer Recording . . . . . . . . . . . . . . . . . . . . . 13 Copying a Video Tape. . . . . . . . . . . . . . . . . . . . . . . . . . . . . . . . 14
??? MTS System
When You Receive or Record a Program Broadcast in MTS . . . 14 When You Play Back a Tape Recorded in
DVD Functions
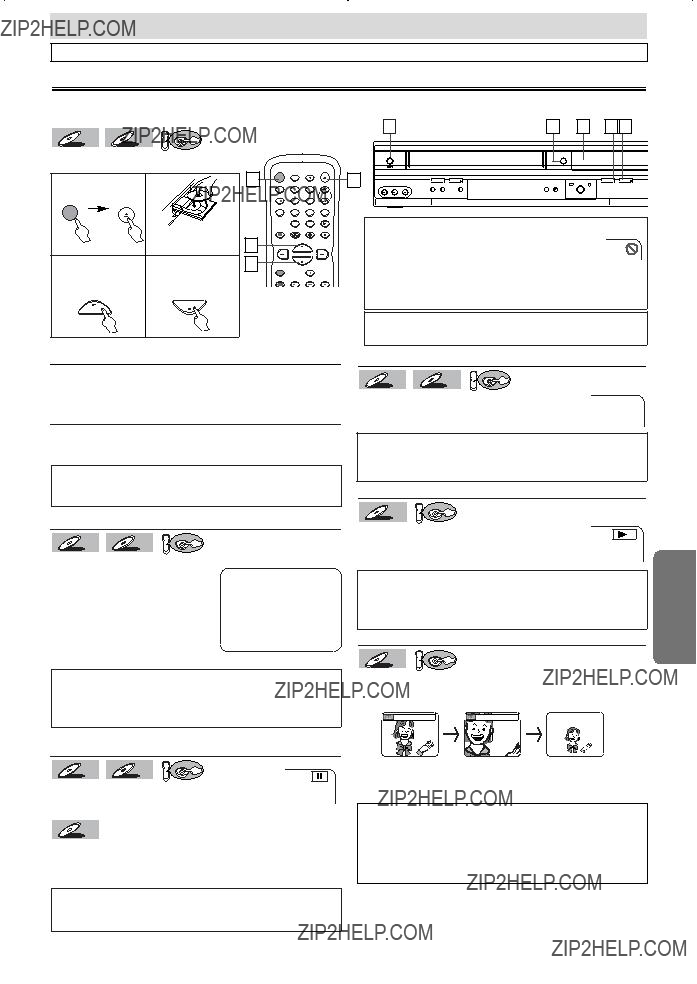
??? Playback . . . . . . . . . . . . . . . . . . . . . . . . . . . . . . . . . . . . . . . . . 15
???
??? Search Function . . . . . . . . . . . . . . . . . . . . . . . . . . . . . . . . . . . 17
Track Search / Title/Chapter Search / Time Search . . . . . . . . . 17
??? Marker Setup. . . . . . . . . . . . . . . . . . . . . . . . . . . . . . . . . . . . . . 17 ??? Repeat / Random / Programmed Playback . . . . . . . . . . . . . . 18
Repeat Playback / Repeat
Random Playback / Programmed Playback. . . . . . . . . . . . . . . . 18
??? Special Settings . . . . . . . . . . . . . . . . . . . . . . . . . . . . . . . . . . . 19
Subtitle Language / Audio Language / Camera Angle /
Black Level Setting / Stereo Sound Mode / Virtual Surround . . . . . . . 19
??? DVD Setup. . . . . . . . . . . . . . . . . . . . . . . . . . . . . . . . . . . . . . . . 20
LANGUAGE Setting . . . . . . . . . . . . . . . . . . . . . . . . . . . . . . . . . 20 DISPLAY Setting . . . . . . . . . . . . . . . . . . . . . . . . . . . . . . . . . . . 21 AUDIO Setting . . . . . . . . . . . . . . . . . . . . . . . . . . . . . . . . . . . . . 21 PARENTAL Setting . . . . . . . . . . . . . . . . . . . . . . . . . . . . . . . . . . 22 OTHERS Setting . . . . . . . . . . . . . . . . . . . . . . . . . . . . . . . . . . . 22 Reset to the Default Setting (Except for PARENTAL Setting) . . . 23
Information
??? Troubleshooting Guide . . . . . . . . . . . . . . . . . . . . . . . . . . . . . . 23
??? Specifications . . . . . . . . . . . . . . . . . . . . . . . . . . . . . . . . . . . . . 24
??? Language List . . . . . . . . . . . . . . . . . . . . . . . . . . . . . . . . . . . . . 24
??? Limited
Espa??ol . . . . . . . . . . . . . . . . . . . . . . . . . . . . . . . . . . . . . . . . . . 25
Quick Use Guide . . . . . . . . . . . . . . . . . . . . . . . . . . . . . . . . . . . 27
Information DVD Functions VCR Functions Setup
Connect
From TV
RF cable (supplied)
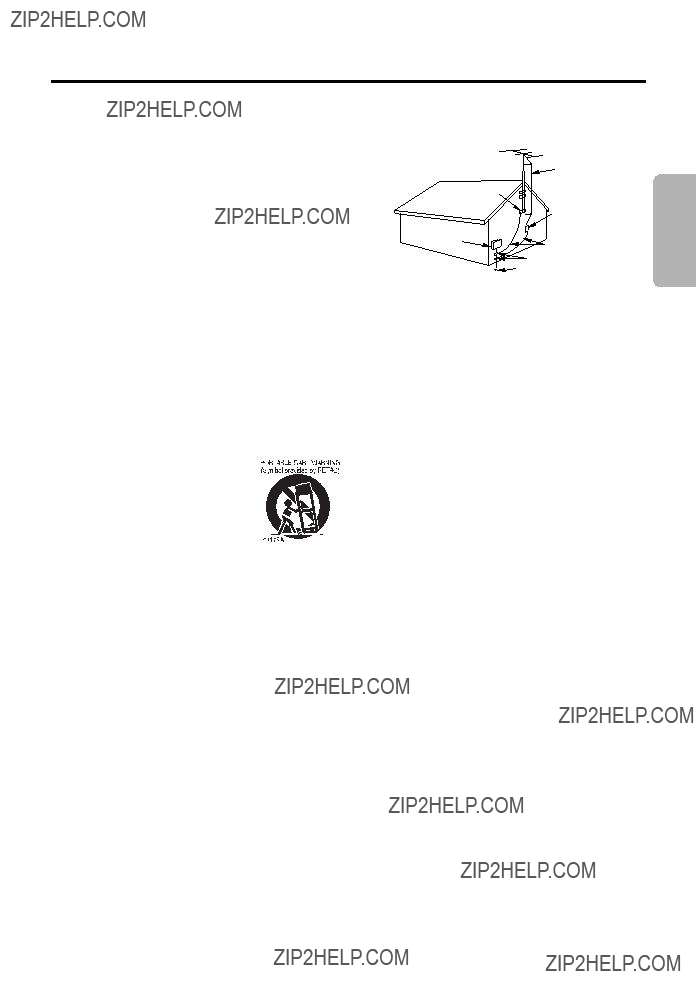
5 Please refer to ???Connections??? on page 6.
Espa??ol


 with this unit.
 is a trademark of DVD Format/Logo Licensing Corporation.
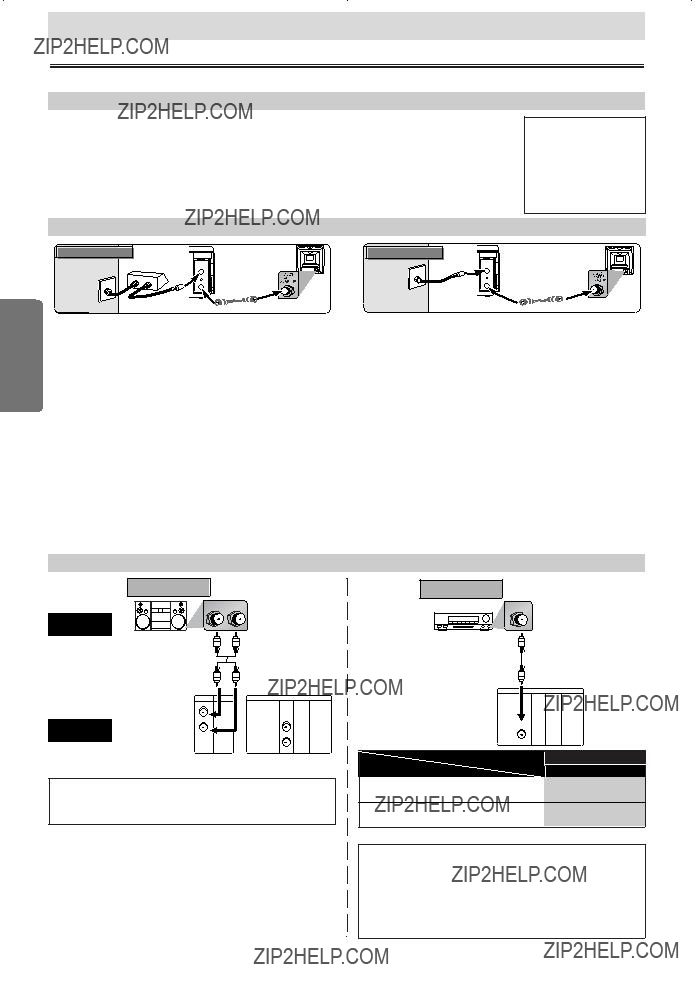


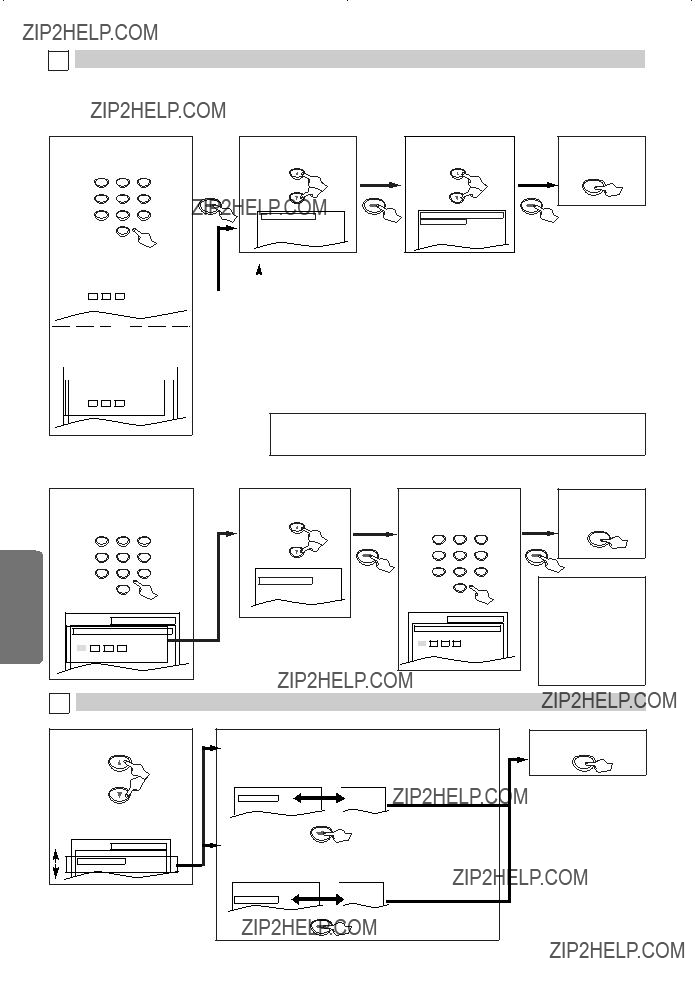
 To Add or Delete Channels
 ,
,  and
and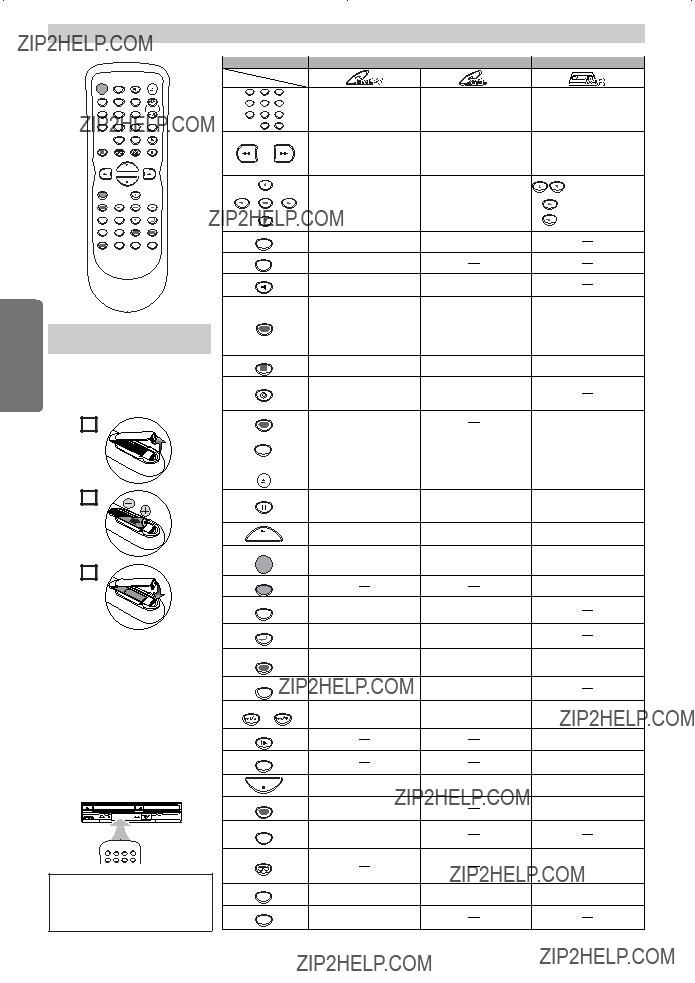
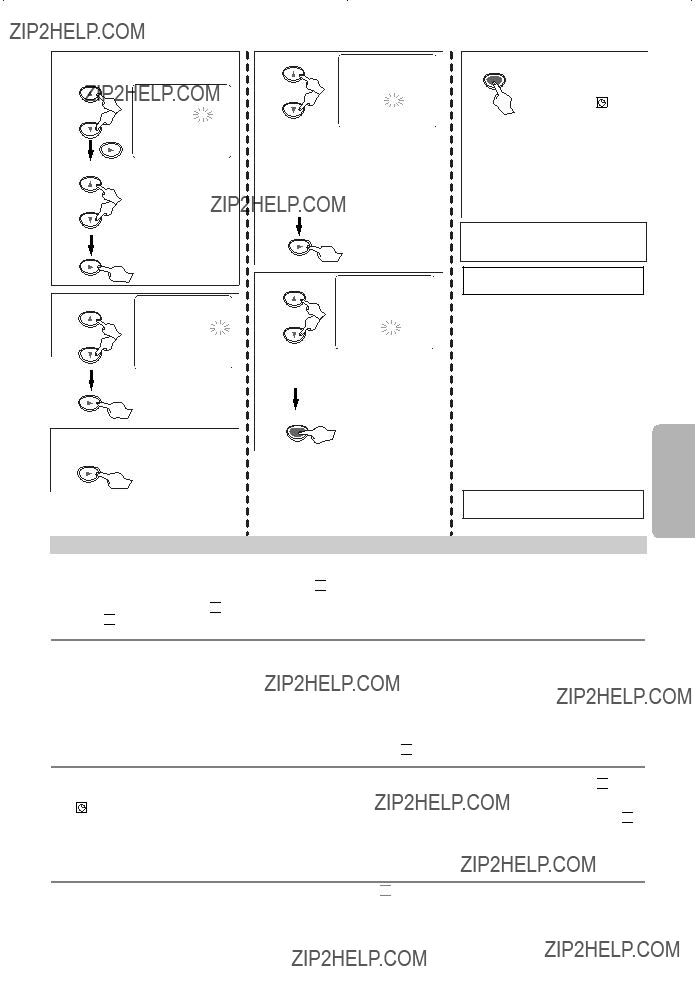

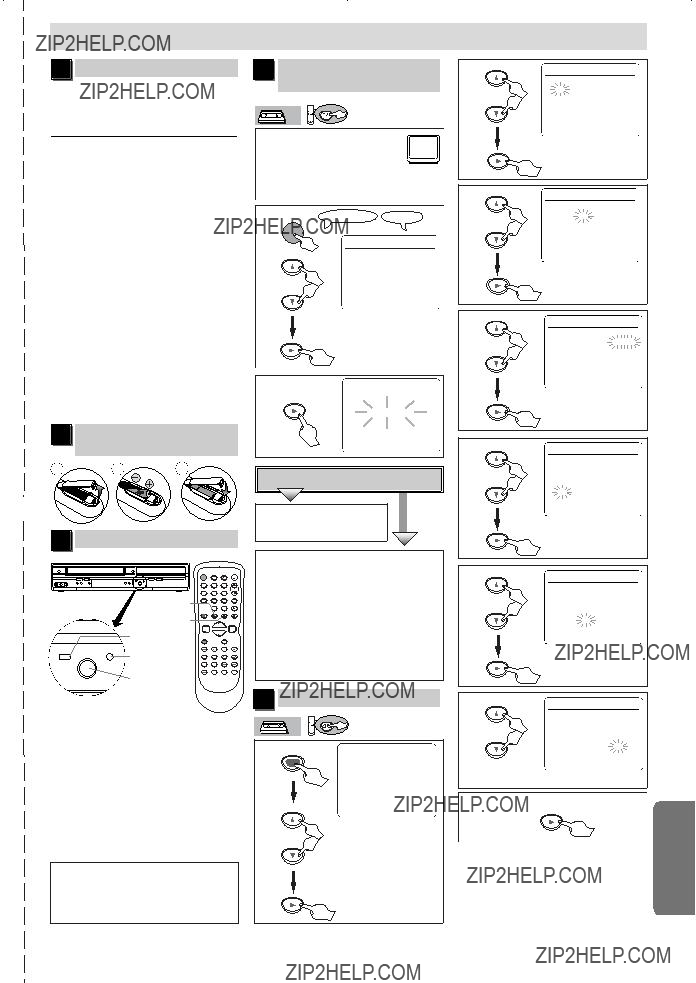
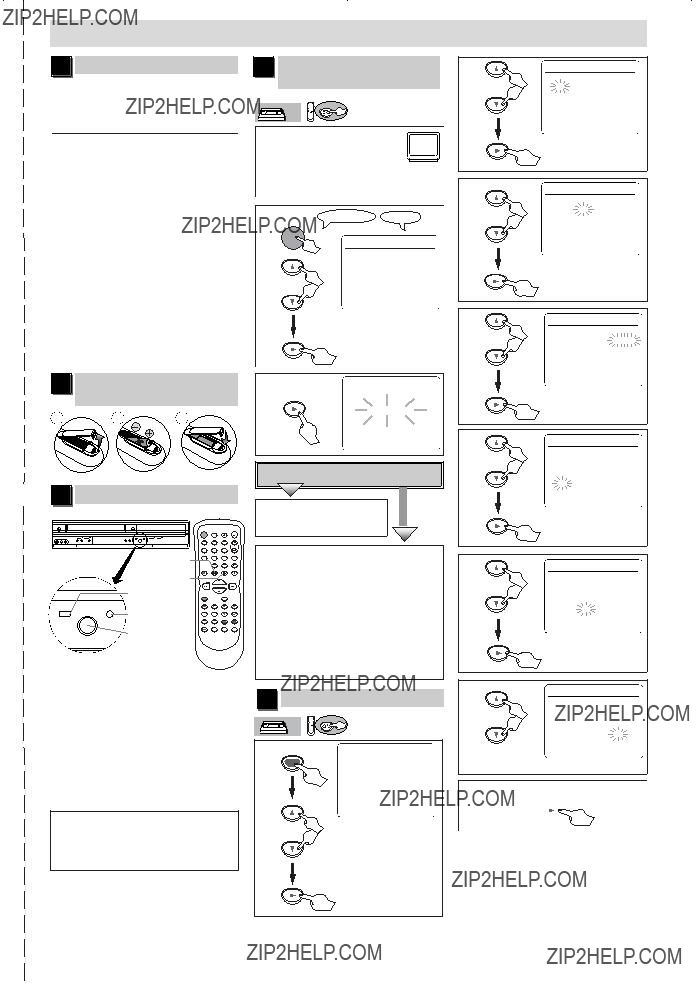
 light flashes and Timer Recording cannot be performed. Please insert a recordable tape.
 light will appear. To use the VCR as usual until the time for the recording, press
 light disappears. Press
 ??? will not appear as long as the DVD is in use. All the DVD functions are available during OTR, timer standby mode and Timer Recording.
 light appears to indicate the unit is in the timer standby mode.
 light will not appear as long as the DVD is in use. All the DVD functions are available during OTR, timer standby mode and Timer Recording.
 light is on or blinking.
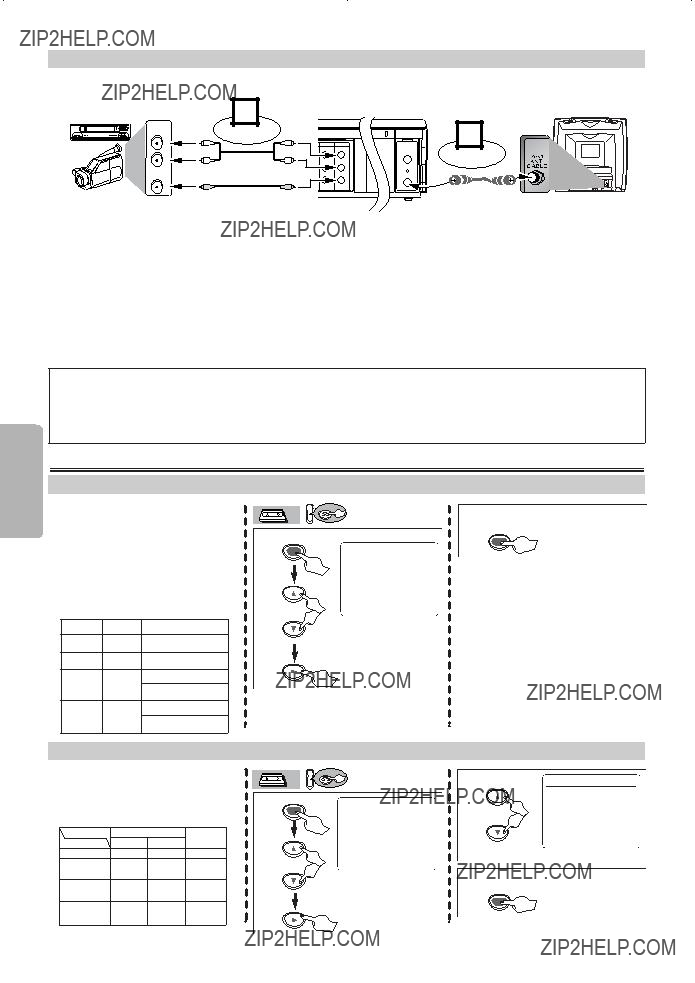
 x2(x4) to the zoomed position guide.
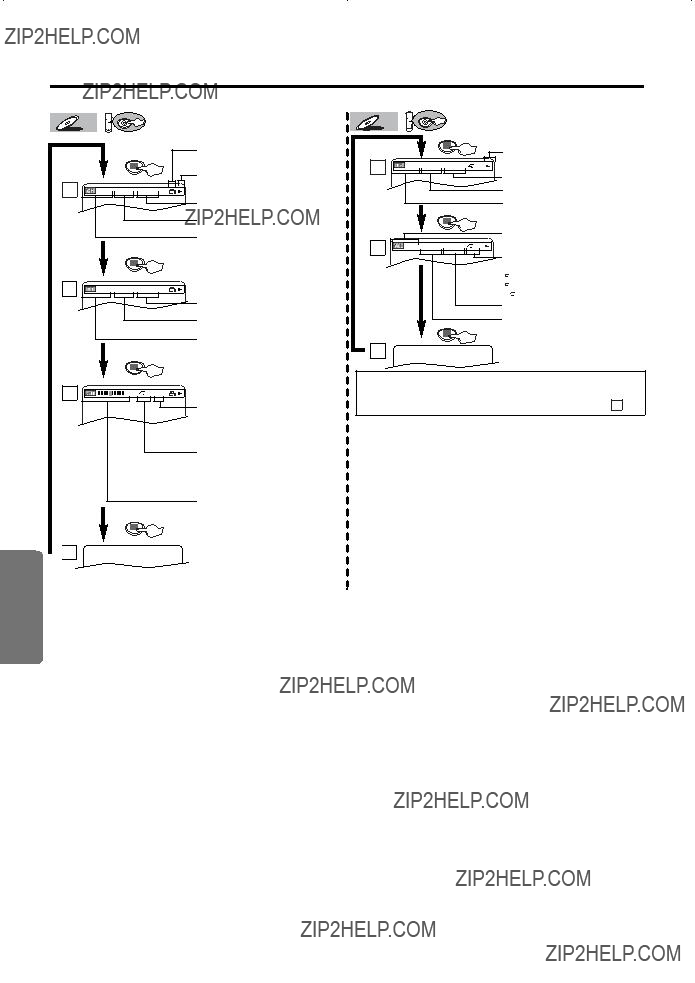

 4
4 C: Chapter repeat /
  T: Title repeat / A
 B:
B:  PROGRAM (or RANDOM) will be displayed instead of
 +10
+10

 A-
A-
 TRACK??? appears during playback.
 ALL??? appears during playback.
 TRACK?????? appears during playback.
 ALL?????? appears during playback.
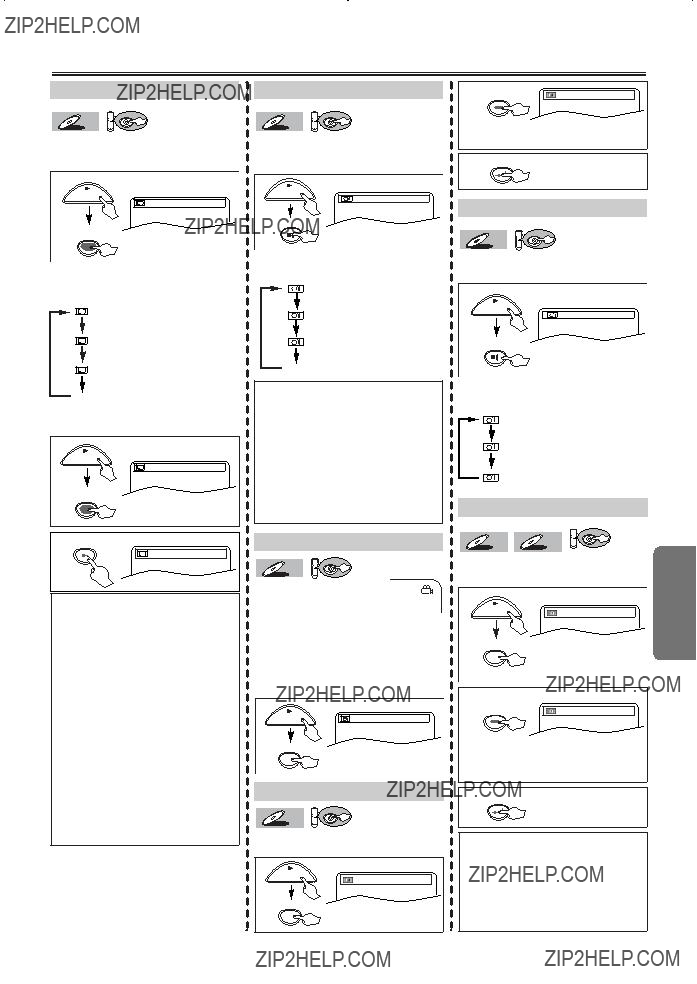
 icon appears on the screen. If the ???ANGLE ICON??? setting is ???OFF??? in the OTHERS menu, the
  icon will not appear. (Refer to pages 20 and 22.)