5.8 GHz Cordless Telephone

Caller ID/Call Waiting ID

www.radioshack.comSM

OWNER???S MANUAL ???

Please read before using this equipment.

43-3549

Ten-Number Memory Dialing ??? lets you store

up to ten numbers in memory for easy dialing. (See ???Memory Dialing??? on page 18.)

Ample Talk and

Standby Time ??? the

supplied battery (when fully charged) provides about six hours of talk time or 11 days of standby time.

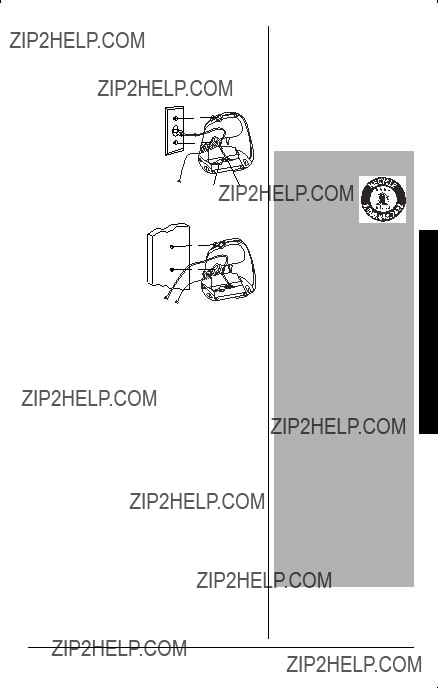
Headset Jack ??? lets

you connect an optional headset for hands-free convenience. (See ???Headset Installation??? on page 32.)
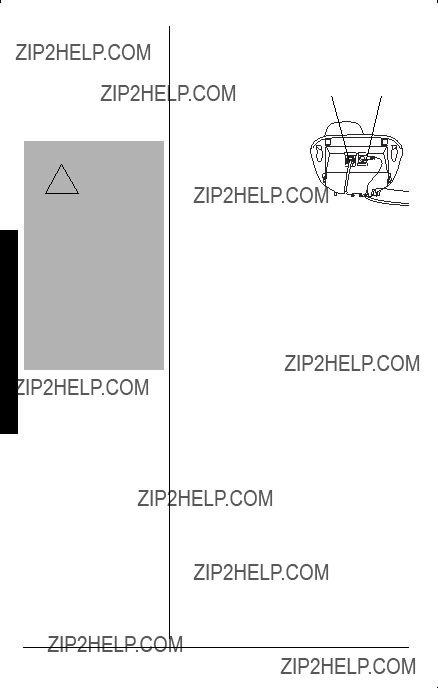
CID / MENU SPEED DIAL

! IMPORTANT !

If an icon appears at the end of a paragraph, go to the box on that page with the corresponding icon for pertinent information.

?? 2004 RadioShack Corporation.

All Rights Reserved. RadioShack and RadioShack.com are

trademarks used by RadioShack Corporation.

Introduction

! IMPORTANT !

???When AC power is lost, the phone loses the digital security code connection between the base and the handset. When power is restored, put the handset on the base briefly to restore this connection so you can use the handset.

???Your phone operates on standard radio frequencies as allocated by the FCC.

???It is possible for other radio units operating nearby on similar frequencies to unintentionally intercept your conversation or cause interference. This possible lack of privacy can occur with any cordless phone.

INTRODUCTION

Thank you for purchasing a RadioShack 5.8 GHz Cordless Telephone. Your phone uses advanced technology to give you superior audio quality and extended range. The phone???s Caller ID unit records each caller???s telephone number (and name, if available in your area) and the date and time of the call, as provided by your local phone company to Caller ID service subscribers. If you subscribe to Call Waiting with Caller ID, the phone shows you the incoming caller information, even when you are already talking on the phone.

Cordless phones require AC power to operate. When the power is off, you cannot make or receive calls by using your phone. You should also have a phone that does not need AC power to operate (not a cordless phone), so you can still make and receive calls if there is an AC power failure. !

2

As an ENERGYSTAR Partner, RadioShack Corporation has determined that this product meets the ENERGYSTAR guidelines for energy efficiency.

IMPORTANT

INFORMATION

This telephone has been tested and found to comply with all applicable UL and FCC standards.

FCC STATEMENT

Your telephone compiles with Part 68 of the FCC Rules.Upon request, you must provide the phone???s FCC registration number and REN to your phone company. These numbers are on the base unit.

Your phone is not intended to be used with party-line systems. Connection to party line service is subject to state tariffs. Contact the state public utility commission, public service commission, or corporation commission for information. ??

We have designed your phone to conform to federal regulations, and you can connect it to most telephone lines. However, each phone (and each device, such as a telephone or answering machine) that you connect to the telephone line draws power from the telephone line. We refer to this power draw as the device???s ringer equivalence number, or REN on the back of your phone.

If you use more than one phone or other device on the line, add up all of the RENs. If the total is more than five (three in rural areas), your telephones might not ring. If

Important Information

?? NOTE ??

You must not connect your phone to:

???coin-operated systems

???most electronic key telephone systems

3

Information Important

ringer operation is impaired, remove a device from the line.

In the unlikely event that your phone causes problems on the phone line, the phone company can temporarily discontinue your service. If this happens, the phone company attempts to notify you in advance. If advance notice is not practical, the phone company notifies you as soon as possible and advises you of your right to file a complaint with the FCC.

Also, the phone company can make changes to its lines, equipment, operations, or procedures that could affect the operation of this phone. The telephone company notifies you of these changes in advance, so you can take the necessary steps to prevent interruption of your telephone service.

This device complies with part 15 of the FCC rules. Operation is subject to the following two conditions: (1) This device may not cause harmful interference, and (2) This device must accept any interference received, including interference that may cause undesired operation. Privacy of communications, may not be ensured when using this phone.

SURGE PROTECTION

Your telephone has built-in protection circuits to reduce the risk of damage from surges in telephone line and power line current. These protection circuits meet or exceed the FCC requirements. However, lightning striking the telephone or power lines can damage your telephone.

Lightning damage is not common. Nevertheless, if you live in an area that has severe electrical storms, we suggest that you unplug your phone when storms approach to reduce the possibility of damage.

4

IMPORTANT SAFETY INSTRUCTIONS

When using your telephone equipment, basic safety precautions should always be followed to reduce the risk of fire, electric shock and injury to persons, including the following:

1.Do not use this product near water, for example, near a bathtub, wash bowl, kitchen sink, or laundry tub, in a wet basement or near a swimming pool.

2.Avoid using a telephone (other than a cordless type) during an electrical storm. There may be a remote risk of electric shock from lightning.

3.Do not use the telephone to report a gas leak in the vicinity of the leak.

4.Use only the power cord and batteries indicated in this manual. Do not dispose of batteries in a ???re. They may explode. Check with local codes for possible special disposal instructions.

SAVE THESE INSTRUCTIONS

Important Safety Instructions

5

Information ID Caller Important

IMPORTANT CALLER

ID INFORMATION

To use Caller ID and Call Waiting, you must be in an area where those services are available and you must subscribe to those services through your local phone company. Where Caller ID is offered, one or more options are generally available:

???caller???s number only

???caller???s name only

???caller???s name and number

If you subscribe to Call Waiting ID and Caller ID, the system can show you the incoming caller information, even when you are already talking on the phone.

6

INSTALLATION

Before using your phone, carefully peel the protective film off the display. The film protects the handset window during shipment and is not necessary for use.

SELECTING A LOCATION

You can place the phone???s base on a desk or table, or mount it on a standard wall plate or directly on a wall. Select a location that is:??

???near an accessible AC outlet

???near a telephone line jack

???out of the way of normal activities

???away from electrical machinery, electrical appliances, metal walls or ???ling cabinets, wireless intercoms, alarms, and room monitors

???away from other cordless phones

The base???s location affects the handset???s range. If you have a choice of several locations, try each to see which provides the best performance.

Your telephone connects directly to a modular telephone line jack. If your telephone wiring does not have a modular jack, you can update the wiring yourself using jacks and adapters (available at your local RadioShack store), or have the telephone company update the wiring for you. You must use compatible modular jacks that are compliant with Part 68 of FCC Rules. ??

Installation

?? NOTES ??

???If your home has specially wired alarm equipment connected to the telephone line, be sure that installing the system does not disable your alarm equipment. If you have questions about what will disable alarm equipment, contact your telephone company or a qualified installer.

???The USOC number of the jack to be installed is RJ11C (or RJ11W for a wall plate jack).

7

ON A DESK TOP

1.Plug one end of the supplied long modular cord into the TEL LINE jack on the bottom of the base.

TEL

LINE DC IN 9V

Installation

" CAUTION "

You must use

!a Class 2 power source that supplies

9V DC and delivers at least 350 mA. Its center tip must be set to positive and its plug must fit the phone???s DC IN 9V jack. The supplied adapter meets these specifications. Using an adapter that does not meet these specifications could damage the phone or the adapter.

2. Insert the supplied

AC adapter???s barrel plug into the

DC IN 9V jack on the bottom of the

base and route the adapter???s cord through the strain

relief slot on the base."

3.Plug the other end of the modular cord into a modular phone line jack.

4.Plug the adapter into a standard AC outlet.

ON A WALL PLATE OR WALL

To mount the phone directly on a wall, you need two screws (not supplied) with heads that fit into the keyhole slots on the base.

Drill two holes 315/16 inches apart. Thread a screw into each hole, letting the heads extend about 1/8 inch.

1.Plug one end of the supplied modular cord (short for a wall plate, long for direct wall mounting) into the TEL LINE jack on the base???s back.

2.Plug the supplied AC adapter's barrel plug into the DC IN 9V jack.

3.Route the adapter and modular cords through the base???s grooves.

8

4.Plug the adapter into a standard AC outlet. And plug the modular cord???s other end into a modular phone line jack.

5.For a wall plate,

align the base???s keyhole slots with the wall plate studs and slide the base downward to

CONNECTING/CHARGING THE

BATTERY PACK

The phone comes with a rechargeable nickel-cadmium battery pack in the handset, but not connected. Before using your phone, you must connect the battery pack. Then charge it for about 15???20 hours. !

1.Press down and slide off the battery compartment cover.

2.Lift the battery pack out of the compartment.

3.Plug the battery pack???s connector into the socket in the compartment (the connector ???ts only one way). Then place the battery pack in the compartment.

! IMPORTANT !

The EPA certified RBRC?? Battery Recycling Seal on the nickel-

cadmium (Ni-Cd) battery indicates RadioShack is voluntarily participating in an industry program to collect and recycle these batteries at the end of their useful life, when taken out of service in the United States or Canada. The RBRC program provides a convenient alternative to placing used Ni-Cd batteries into the trash or the municipal waste stream, which may be illegal in your area. Please call 1-800-THE-SHACK (1- 800-843-7422) for information on Ni-Cd battery recycling and disposal bans/restrictions in your area. RadioShack???s involvement in this program is part of the company???s commitment to preserving our environment and conserving our natural resources.

Installation

9

Installation

! IMPORTANT !

Be sure the battery pack is properly connected before you try to charge it. The

CHARGE/IN USE indicator lights when the handset is on the base, even if the battery pack is not connected.

?? NOTES ??

???The handset should always sit in charging cradle face forward to make good contact with base unit???s charge contacts.

???If the phone does not work, recharge the battery pack. (The battery power might be too low for the display to operate.)

???If the battery pack becomes weak during a call, the handset beeps and Low Battery flashes. When this happens, you cannot make a call on the phone until you recharge the battery pack.

???If the battery pack is completely discharged or the base loses power while the handset is away from it, place the handset on the base to change the digital security code.

4. Replace the cover.

To charge the battery pack, place the handset on the base face forward. The CHARGE/IN USE indicator on the base lights.

! ??

Recharge the battery pack when Low Battery flashes on the display.??

When you first use the phone after charging or recharging the battery pack, the phone might not work and you might hear error beeps. If this happens, place the handset on the base to change the digital security code.

Using a damp cloth, clean the charging contacts on the handset and base about once a month.

About once a month, fully discharge the battery pack by keeping the handset off the base until Low Battery flashes. Otherwise, the battery pack loses its ability to fully recharge.

10

The supplied battery pack should last about a year. If the battery pack does not hold a charge for more than two hours after an overnight charge, replace it with a new 3.6V, 600 mAh battery pack with a connector that fits the socket in the battery compartment. You can order a replacement battery pack through your local RadioShack store (or online at RadioShack.com). Install the new battery pack and charge it for about 24 hours.

If you have trouble replacing the battery pack, take the phone to your local RadioShack for assistance. o

oWARNINGo

Dispose of the old battery pack promptly and properly. Do not burn or bury it. There is a risk of explosion if battery is replaced by an incorrect type. Dispose of used batteries according to the instructions.

Installation

11

?? NOTE ??

Refer to page 16 ???Setting Menu Options??? to turn On the Auto Talk feature if desired.

Operation

OPERATION

MAKING AND RECEIVING

CALLS

12

ADJUSTING THE HANDSET

RINGER AND EARPIECE

VOLUME

Handset Ringer Tone and

Volume

Press the volume up key or volume down key (labeled as, VOL/RING or VOL/ RING keys) in standby mode to select one of five ringer tones and volume combinations.

Ring Type A High, Ring Type A Low, Ring Type B High, Ring Type B Low, or Ringer Off.

Earpiece Volume

Press the volume up key or volume down key (labeled as, VOL/RING or VOL/ RING keys) during a call to change the earpiece volume of the handset. This setting will remain in effect after the telephone call has ended. ??

Temporarily Mute Ringer

If the handset is off the base, simply press END to temporarily mute the incoming ring. The ringer will sound with the next incoming call.

REDIAL

REDIAL/PAUSE redials the last number dialed. The redialed number can be up to 32 digits long.

?? NOTE ??

When you press volume up key ( VOL/RING) in Maximum mode or volume down key ( VOL/RING ) in Low mode, an error tone sounds.

Operation

13

?? NOTES ??

???The tone feature only applies when the dial mode is set to pulse.

???This special number can be stored in a memory location. This is referred to as Chain Dialing (See ???Chain Dialing??? on

page 22.)

Operation

TONE DIALING SWITCH-OVER

Some telephone companies use equipment that requires pulse dialing (sometimes referred to as rotary dialing).

If you need to enter tone dialing digits, you can switch-over to tone dialing during the call. For example, entering your bank account number after you have called your bank. ??

Initially make your call with the pulse dialing mode. Once your call connects, press / TONE/<. Enter the desired number. These digits will be sent as tone dialing. Once the call ends, the tone mode is canceled and pulse dialing mode resumes.

TRAVELING OUT-OF-RANGE

During a call, as you begin to move your handset too far from your base unit, noise increases. If you pass the range limits of the base unit, your call will terminate within one minute.

SELECTING A DIFFERENT

CHANNEL

If you encounter interference while using your phone, you can manually change the phone??s channel for clear operation. This function works only when the phone is in use. Press DELETE/CH. ??Scanning?? appears on the display, indicating the phone is changing to another channel.

14

PAGE

To locate the handset (while it???s off the base), press PAGE on the base. The handset beeps for 60 seconds. Paging is canceled when pressing PAGE on the base, any handset key or the handset is returned to the base. ??

FLASH AND CALL WAITING

If you have ???Call Waiting??? service and a call waiting tone sounds while you are on a call, press TALK/FLASH to accept the waiting call. There is a short pause. Then you will hear the new caller. To return to the original caller, press TALK/FLASH again.??

VOICE MAIL WAITING

INDICATOR

If you subscribe to voice mail service, you can use your cordless telephone to access your voice mailbox. The CHARGE/IN USE light on the base of your phone flashes whenever you have messages waiting in your voice mailbox. Just program SPEED DIAL with your access number and you can get your messages at the touch of a button. (The voice mail service provider will supply you with the access number. This number may be simply a phone number. Refer to the provider???s literature.)??

You may need to occasionally reset the indicator if it remains On after you have retrieved your messages. To reset the indicator, press and hold PAGE for five seconds.

?? NOTES ??

Page

Paging is also canceled when the phone receives an incoming call.

Flash and Call Waiting

You must subscribe through your local telephone company to receive Call Waiting Service.

Voice Mail Waiting

Indicator

You must subscribe to voice mail service from your telephone company in order to use this feature. The voice mail company will provide you with the access number.

Operation

15

?? NOTE ??

The Cordless phone features include Auto Talk and Auto Standby. Auto Standby allows you to hang up by simply returning the handset to the base.

Operation

SETTING MENU OPTIONS

There are five setup options available. They are Auto Talk, CIDCW (Caller ID on Call Waiting), Area Code, Dial and Language.

Auto Talk allows you to answer the phone without pressing TALK/FLASH.

If the phone rings when Auto Talk is On, simply remove the handset from the base and the phone automatically answers the call. If the phone rings when Auto Talk is Off, you must press TALK/FLASH to answer the call. ??

Changing the Auto Talk and

CIDCW

1.Press and hold CID/MENU.

2.Use VOL/RING or VOL/RING keys to move the pointer to the selection that you would like to change. Press SELECT to toggle between ??On?? and ??Off?? for Auto Talk and CIDCW.

3.Press END and return the handset to the base unit to complete the setting. The handset returns to the standby mode.

Entering Your Area Code

If you enter a three-digit area code number in the Area Code option, your local area code does not appear in Caller ID messages. Do not program this option if your calling area requires ten-digit dialing. When reviewing Caller ID messages, you will see only the local seven digit number. For calls received from outside your local area code, you will see a full ten-digit number.

16

1.When the phone is in the standby mode, press and hold CID/MENU. The Caller ID setting screen appears.

2.Press VOL/RING key twice to select ??Area Code??.

3.Press SELECT. ??

4.Use the number keys (0 - 9), or DELETE/CH to enter the three-digit area code.

5.Press SELECT. A con???rmation tone sounds and the displayed area code is entered.

6.Press END or return the handset to the base unit to complete the setting. The handset returns to the standby mode.

Choosing the Dialing Mode

Most phone systems use tone dialing which sends DTMF tones through the phone lines. However some phone systems still use pulse dialing such as in rural areas.

The default setting is tone dialing. Depending on your dialing system, set the mode as follows:

1.When the phone is in the standby mode, press and hold CID/MENU.

2.Press VOL/RING key three times to select ??Dial??.

3.Press SELECT to toggle between ??Tone?? and ??Pulse?? for each setting.

4.Press END or return the handset to the base unit to complete the setting. The handset returns to the standby mode.

?? NOTE ??

When the area code has already been stored in memory, the stored area code will be displayed. To change it, use the

DELETE/CH and number keys to enter the new area code. Then press SELECT. A confirmation tone sounds. To complete the setting, press END or return the handset to the base unit.

Operation

17

Dialing Memory

?? NOTES ??

Setting the Language

There are three languages to choose from; English, French and Spanish.

Storing Phone Numbers

and Names

In memory dialing operation, you must press a key within 30 seconds or the phone will return to the standby mode. If you return the handset to the base, the phone will return to the standby mode also.

???If you are not sure of your dialing system, set for tone dialing. Make a trial call.

If the call connects, leave the setting as is, otherwise set for pulse dialing.

???If your phone system requires pulse dialing and you need to send the DTMF tones for certain situations during a call, you may ???switch-over??? to tone dialing. (Refer to ???Tone Dialing Switch-over??? on page 14.)

Setting the Language

1.When the phone is in the standby mode, press and hold CID/MENU.

2.Press VOL/RING key four times to select ??Language??.

3.Press SELECT to toggle between ??Eng??(English), ??Fr.??(French) and ??Esp??(Spanish) for each setting. ??

4.Press END or return the handset to the base unit to complete the setting. The handset returns to the standby mode.

MEMORY DIALING

STORING PHONE NUMBERS

AND NAMES

Memory Dialing allows you to dial a number using just a few key presses. Your cordless telephone stores up to ten names/numbers in the handset. ??

1.Press MEM , ??Select Memory?? is displayed.

2.Press VOL/RING or VOL/RING keys, or enter a number (1 - 0) to select the memory location where you would like to store the number.

18

3.Press MEM or SELECT.

4.Press MEM or SELECT. The ??Store Name?? screen appears and a cursor ???ashes indicating that the display is ready for the name to be entered.

If ???Edit Memory X X??? appears, the selected memory location is already stored. Then you must either edit the entry in this location, delete the entry in this location, or select ??Go Back?? to choose another location.

5.To enter a name (up to 13 characters), use the number keys.

???See ???Steps for Entering Names and Special Characters??? on page 20.

???Use #/> and /TONE/< to move the cursor to the desired location.

???Use DELETE/CH to delete characters as needed.

???Press and hold DELETE/CH to delete all the characters.

???If a name is not required, go to step 6.

6.Press MEM or SELECT. ??Store Number?? is displayed.

The cursor ???ashes indicating that the display is ready for the number to be entered.

7.Use the number keys to enter the phone number.

???The phone number cannot exceed 20 digits.

Memory Dialing

19

Dialing Memory

?? NOTE ??

The pause feature is useful for long distance calling, credit card dialing, or sequences that require a pause between digits.

???Use REDIAL/PAUSE to enter a pause in the dialing sequence. The display shows a ??P??. Each pause counts as one digit and represents a two second delay of time between the digits. ??

???Use DELETE/CH to delete digits as needed.

8.Press MEM or SELECT. You will hear a con???rmation tone. Memory storage is complete. For example, if you store a name and number into memory location number 01, the display shows ??Memory01 Stored??.

After about two seconds, the Select Memory screen is displayed.

Repeat steps 2 - 8 to store more numbers.

9.Press END to return to the standby mode.

STEPS FOR ENTERING NAMES

AND SPECIAL CHARACTERS

Refer to the letters on the number keys to select the desired characters.

With each press of a numeric key, the displayed character appears in the following order: Upper case letters first, lower case letters next and finally the number corresponding to the key.

20

For example, to enter Movies.

1.Pick up the handset. Press MEM .

2.Enter a number or press VOL/RING or VOL/RING keys to select a memory location.

3.Press MEM or SELECT.

4.Press MEM or SELECT. (When there is information already stored in the selected memory location, ??Edit MemoryXX?? is displayed. See ???Editing a Stored Name and/or Phone Number??? on page 23 for information.)

5.Press 6. Then press #/> to move the cursor to the right. ??

6.Press 6 six times.

7.Press 8 six times.

8.Press 4 six times.

9.Press 3 ???ve times.

10.Press 7 eight times.

11.When ???nished, press MEM or SELECT.

To continue to store the telephone number, proceed to step 7 on ???Storing Phone Numbers and Names??? on page 19.

If you make a mistake while entering a name

Use /TONE/< or #/> to move the cursor to the incorrect character.

Press DELETE/CH to erase the wrong character. Then enter the correct character.

To delete all characters, press and hold

DELETE/CH.

Memory Dialing

?? NOTE ??

If the next character uses the same number key, you must press #/> to move the cursor over. Otherwise the next time you press the number key, it changes the character that was previously set.

21

Dialing Memory

?? NOTES ??

Memory Dialing from Standby Mode

???If you press SELECT or

MEM before TALK/ FLASH, you can confirm the name and the number stored in the selected memory location.

???To exit the memory function without dialing, press END. The handset returns to the standby mode.

???Whenever you are using a memory menu screen, you must press a key within 30 seconds or the phone will return to the standby mode.

Memory Dialing from Talk Mode

If you select a memory location that does not have a stored number, the phone will not dial.

MAKING CALLS WITH

MEMORY DIALING

Memory Dialing from Standby Mode

1.Press MEM . The handset displays your programmed memory locations.

2.Press VOL/RING or VOL/RING keys, or enter the number (1 - 0) to select the memory location you would like to dial. ??

3.Press TALK/FLASH. ??Talk?? and the volume setting appear on the display. Then the displayed number is dialed. ??

Memory Dialing from Talk Mode

1.Press TALK/FLASH. ??Talk?? and the volume setting appear.

2.Press MEM .

3.Press VOL/RING or VOL/RING keys or enter a number (1 - 0) to select the memory location of the desired phone number. The selected name is displayed. ??

4.The phone number in the memory will be dialed when SELECT is pressed.

5.To hang up, press END.

CHAIN DIALING

The memory locations on the handset are not limited to phone numbers. You can also store a group of numbers (up to 20 digits) that you need to enter once your call connects. This is referred to as Chain Dialing.

22

An example of this is a bank account number. Once you have called your bank, and are prompted to enter the account number, press MEM and select the location number where the special number has been stored. Then press SELECT.

Store your special number with an identifying name. (Refer to ???Storing Phone Numbers and Names??? on page 18.)

EDITING A STORED NAME

AND/OR PHONE NUMBER

1.Press MEM , ??Select Memory?? is displayed.

2.Press VOL/RING or VOL/RING keys, or enter a number (1 - 0) to select the memory location you would like to edit, and press MEM or SELECT.

The screen appears with the memory location number that you have selected in the display.

3.Press MEM or SELECT.

4.Press VOL/RING or VOL/RING keys to select ??Edit MemoryXX??. Then press MEM or SELECT. Store Name is displayed. The cursor ???ashes indicating that the display is ready for the name to be edited. When a name has not been stored, the cursor appears at the beginning of the second line.

5.Use the number keys, /TONE/<, #/>, or DELETE/CH to edit the name. (See ???Storing Phone Numbers and Names??? on page 18.) To edit only the phone number, skip this step.

Memory Dialing

23

Dialing Memory

6.Press MEM or SELECT. The cursor ???ashes indicating that the display is ready for the number to be edited.

7.Use the number key, /TONE/<, #/>,

REDIAL/PAUSE or DELETE/CH to edit the phone number. The phone number cannot exceed 20 digits. (See ???Storing Phone Numbers and Names??? on page 18.)

If you don???t want to change the phone number, skip this step.

8.Press MEM or SELECT. If you changed either name or phone number, a con???rmation display shows up. If it is correct, press VOL/RING key to select ???Yes??? and press SELECT. You hear a con???rmation tone. The memory storage is complete.

For example, if you edit a name and number into memory location number 01, the display shows ??Memory01 Stored??. After about two seconds, Select Memory screen is displayed.

9.Press END to return to the standby mode.

ERASING A STORED NAME

AND PHONE NUMBER

1.Press MEM , ??Select Memory?? is displayed.

2.Press VOL/RING or VOL/RING keys, or enter a number (1 - 0) to select the memory location you would like to erase.

3.Press MEM or SELECT.

24

The screen appears with the memory location number that you have selected in the display.

4.Press MEM or SELECT.

5.Press VOL/RING key to move the pointer down to ??Delete MemoryXX??.

6.Press MEM or SELECT. The ??Delete MemoryXX ??? screen appears.

7.Press VOL/RING key to move the pointer to ??Yes??.

8.Press SELECT or DELETE/CH.

You hear a con???rmation tone, and the ??MemoryXX Deleted?? screen appears.

9.After about two seconds, the display returns to the Select Memory screen. You may delete the information in another memory location (return to step 2) or press END to return to the standby mode.

TESTING STORED EMERGENCY

NUMBERS

If you store an emergency service???s number (police department, fire department, ambulance) and you choose to test the stored number, make the test call during the late evening or early morning hours to avoid peak demand periods. Also, remain on the line to explain the reason for your call.

ONE-TOUCH SPEED DIAL

You can store your most frequently dialed number in the SPEED DIAL location. The One-touch speed dial allows you to dial a number with one key press. (There is no

Memory Dialing

25

Dialing Memory

?? NOTES ??

Storing and Editing the

Speed Dial

Number stored in SPEED DIAL is independent from the numbers stored in

Memory Dial locations.

Making Calls with the Speed Dial

If the SPEED DIAL does not have a stored number, the handset will beep rapidly and the phone will not dial.

need to press TALK/FLASH. The phone will automatically dial the number stored.)

If you subscribe to voice mail service, you can store your access number in this location.

STORING AND EDITING THE

SPEED DIAL

1.When the phone is in the standby mode, press and hold SPEED DIAL . ??

If ???Edit Number??? appears, there is a number already stored. Press VOL or VOL/RING keys to select ??Edit Number??. Then press SELECT.

2.Store the number by following step 7 under ???Storing Phone Numbers and Names??? on page 19.

3.Press SELECT.

You hear a con???rmation tone. Memory storage is complete.

MAKING CALLS WITH THE

SPEED DIAL

When the phone is in the standby mode, simply press SPEED DIAL . The number stored in the SPEED DIAL memory location is instantly dialed. ??

DELETING THE SPEED DIAL

1.When the phone is in the standby mode, press and hold SPEED DIAL.

2.Press VOL/RING or VOL/RING keys to select ??Delete Number??.

3.Press SELECT.

26

4.Press VOL/RING key to move the pointer to ??Yes??.

5.Press SELECT or DELETE/CH.

You hear a con???rmation tone. After about two seconds, the handset returns to the standby mode.

CALLER ID

You must subscribe to Caller ID service to use this feature.

When the telephone rings, the Caller ID feature allows you to view the caller??s name and phone number on the display before you answer the phone. The handset displays the phone number of the incoming call, the name, and time. Additionally, you can dial the displayed number and store the information for memory dialing. Make sure you have turned on the Caller ID on Call Waiting feature. (See ???Changing the Auto Talk and CIDCW??? on page 16.)

WHEN THE TELEPHONE RINGS

1.When the Caller ID message is received, the display shows the caller??s phone number along with the date and time. The incoming call information is stored in the Caller ID record. If the Caller ID service includes the caller??s name, the caller??s name appears on the display (up to 15 letters). ??

?? NOTES ??

???If you answer a call before the Caller ID message is received (Example: before the second ring), the Caller ID message will not appear.

???When the call is received via a telephone company that does not offer Caller ID service, the caller??s phone number and name do not appear. (This includes international calls.)

???When the call is via a private branch exchange (PBX), the caller??s phone number and name may not appear.

???Data errors appear as ?? ??.

Caller ID

27

ID Caller

You may receive any one of the following messages:

2. When you pick up the phone, the

?? ?? display changes to ??Talk??. (Auto Talk

NOTES

feature is set to on.)

???In Caller ID operation, if

no key is pressed for

more than 30 seconds, VIEWING THE CALLER ID

28

DELETING INFORMATION

FROM THE CALLER ID LIST

The cordless phone stores up to 30 messages. If the phone receives the 31st message, the oldest one in the list is automatically deleted and the newest is stored. Caller ID message can also be deleted manually. ??

Deleting a Caller ID Message

1.Press CID/MENU. Display the message to be deleted from the Caller ID list by pressing VOL/RING or VOL/RING keys.

2.Press DELETE/CH.

3.Press VOL/RING or VOL/RING keys to select ??Yes?? or ??No??.

4.Press SELECT or DELETE/CH.

When the pointer is at ??Yes??: ??

A tone sounds and the Caller ID message is deleted. The next Caller ID message is then displayed.

When the pointer is at ??No??:

The display returns to the Caller ID message.

Deleting all Caller ID Names/ Numbers

1.Press CID/MENU.

2.Press DELETE/CH.

3.Press VOL/RING or VOL/RING keys to select ??Yes?? or ??No??.

4.Press SELECT or DELETE/CH.

When the pointer is at ??Yes??:

?? NOTES ??

Deleting Information from the Caller ID List

While using the ??Delete

All??? or ??Delete

Message??? screen if no key is pressed for more than 30 seconds, an error tone sounds and the telephone returns to the standby mode.

Deleting a Caller ID

Message

If you get an incoming call or page, the deleting operation is canceled and you can answer the call or page.

Caller ID

29

ID Caller

?? NOTES ??

Calling a Party from the Caller ID List

???You cannot make a call from the Caller ID list if your cordless telephone is connected to a private branch exchange (PBX).

???You can place a call from talk mode. Press

TALK/FLASH. Then press CID/MENU. Select the phone number that you want to dial by pressing the

VOL/RING or VOL/ RING key. Press

SELECT.

The displayed phone number will be dialed.

Long Distance Calls and

Area Code Setting/

Cancellation

When a long distance call has been set, ??1?? appears

in the display.

Storing Caller ID

Messages in Memory

Dialing

You cannot store a Caller ID message if no phone number appears in the message.

A tone sounds and all stored Caller ID messages are deleted.

When the pointer is at ??No??:

The display returns to the summary screen.

USING THE CALLER ID LIST

Calling a Party from the Caller ID List

You can place a call from the Caller ID list. The cordless phone stores up to 30 messages.??

1.Press CID/MENU. Select the phone number that you want to dial by pressing VOL/RING or VOL/RING keys.

2.Press TALK/FLASH. The displayed phone number dials automatically.

Long Distance Calls and Area

Code Setting/Cancellation

Pressing 1 while the incoming Caller ID information is displayed will place or remove the prefix 1 in the display to set up for a long distance call or cancel. Pressing 3 will set or cancel an area code setting. ??

Storing Caller ID Messages in

Memory Dialing

Messages shown in the Caller ID list can be stored in memory dialing. Using the incoming call information (i.e., Caller ID list), the phone number of the party on the Caller ID list can be stored in memory.??

1. Press CID/MENU.

30

Select the phone number to be stored from the Caller ID list by pressing

VOL/RING or VOL/RING keys.

2.Press MEM .

3.Press VOL/RING or VOL/RING keys or enter a number (0 - 9) to select the memory location to be stored.

4.Press SELECT. ??

You hear a con???rmation tone, and the number is stored in memory. The display returns to the Caller ID list.

?? NOTE ??

If a message has already been stored in the selected memory number location, a confirmation screen is displayed.

Press VOL/RING key to select ??Yes??. Press SELECT to overwrite. The display returns to the Caller ID list.

Caller ID

31

Information Additional

?? NOTES ??

???If you place the handset on the base to recharge it while the headset is connected, be sure the handset seats properly.

???You can use a handset holder (available from your local RadioShack store) to hang the handset on your belt for greater convenience when using a headset.

ADDITIONAL

INFORMATION

INSTALLING THE BELTCLIP

To attach the beltclip

Insert the beltclip into the holes on each side of the handset. Press down until it clicks.

To remove the beltclip

Pull both sides of the beltclip to release the tabs from the holes.

HEADSET INSTALLATION

You can connect an optional headset with a 3/32-inch (2.5-mm) plug. Contact RadioShack for a suitable headset.

To connect the headset, open the rubber cover on the side of the handset. Then insert the headset???s plug into the jack.??

When you ???nish using the headset, disconnect it from the handset and close the rubber cover to protect the jack.

32

TROUBLESHOOTING

If your phone is not performing to your expectations, please try these simple steps first

33

If you still have problems, disconnect the phone. If other phones on the same line work properly, the fault is in this phone or its installation. If you cannot find the problem, take the phone to your local RadioShack store for assistance.

CARE

Keep the phone dry; if it gets wet, wipe it dry immediately. Use and store the phone only in normal temperature environments. Handle the phone carefully; do not drop it. Keep the phone away from dust and dirt, and wipe it with a damp cloth occasionally to keep it looking new.

SERVICE AND REPAIR

If your phone is not performing as it should, take it to your local RadioShack store for assistance. To locate your nearest RadioShack, use the store locator feature on RadioShack???s website (www.radioshack.com), or call 1-800-The Shack (843-7422) and follow the menu options. Modifying or tampering with the phone???s internal components can cause a malfunction and might invalidate its warranty and void your FCC authorization to operate it.

34

NOTE

35

Limited One-Year Warranty

This product is warranted by RadioShack against manufacturing defects in material and workmanship under normal use for one (1) year from the date of purchase from RadioShack company-owned stores and authorized RadioShack franchisees and dealers. EXCEPT AS PROVIDED HEREIN, RadioShack MAKES NO EXPRESS WARRANTIES AND ANY IM-

PLIED WARRANTIES, INCLUDING THOSE OF MERCHANTABILITY AND FITNESS FOR A

PARTICULAR PURPOSE, ARE LIMITED IN DURATION TO THE DURATION OF THE WRIT- TEN LIMITED WARRANTIES CONTAINED HEREIN. EXCEPT AS PROVIDED HEREIN, Ra- dioShack SHALL HAVE NO LIABILITY OR RESPONSIBILITY TO CUSTOMER OR ANY

OTHER PERSON OR ENTITY WITH RESPECT TO ANY LIABILITY, LOSS OR DAMAGE

CAUSED DIRECTLY OR INDIRECTLY BY USE OR PERFORMANCE OF THE PRODUCT

OR ARISING OUT OF ANY BREACH OF THIS WARRANTY, INCLUDING, BUT NOT LIM-

ITED TO, ANY DAMAGES RESULTING FROM INCONVENIENCE, LOSS OF TIME, DATA,

PROPERTY, REVENUE, OR PROFIT OR ANY INDIRECT, SPECIAL, INCIDENTAL, OR CONSEQUENTIAL DAMAGES, EVEN IF RadioShack HAS BEEN ADVISED OF THE POS-

SIBILITY OF SUCH DAMAGES.

Some states do not allow limitations on how long an implied warranty lasts or the exclusion or limitation of incidental or consequential damages, so the above limitations or exclusions may not apply to you.

In the event of a product defect during the warranty period, take the product and the Ra- dioShack sales receipt as proof of purchase date to any RadioShack store. RadioShack will, at its option, unless otherwise provided by law: (a) correct the defect by product repair with- out charge for parts and labor; (b) replace the product with one of the same or similar design; or (c) refund the purchase price. All replaced parts and products, and products on which a re- fund is made, become the property of RadioShack. New or reconditioned parts and products may be used in the performance of warranty service. Repaired or replaced parts and prod- ucts are warranted for the remainder of the original warranty period. You will be charged for repair or replacement of the product made after the expiration of the warranty period.

This warranty does not cover: (a) damage or failure caused by or attributable to acts of God, abuse, accident, misuse, improper or abnormal usage, failure to follow instructions, improper installation or maintenance, alteration, lightning or other incidence of excess voltage or cur- rent; (b) any repairs other than those provided by a RadioShack Authorized Service Facility;

(c) consumables such as fuses or batteries; (d) cosmetic damage; (e) transportation, ship- ping or insurance costs; or (f) costs of product removal, installation, set-up service adjust- ment or reinstallation.

This warranty gives you speci???c legal rights, and you may also have other rights which vary from state to state.

RadioShack Customer Relations, 200 Taylor Street, 6th Floor, Fort Worth, TX 76102

12/99