USER MANUAL
SAFETY PRECAUTIONS
The following marks and symbols are located on the back of the unit.
PRECAUTIONS
Follow the advice below for safe and appropriate operations.
IMPORTANT SAFETY INSTRUCTIONS
RS22162 S
CAUTION: TO REDUCE THE RISK OF
ELECTRICSHOCK,DONOTREMOVECOVER
(OR BACK). NO
PARTS INSIDE. REFER SERVICING TO
QUALIFIED SERVICE PERSONNEL.
T h e l i g h t n i n g f l a s h w i t h arrowhead symbol, within an equilateral triangle, is intended to alert the user to the presence of uninsulated ???dangerous voltage??? within the product???s enclosure that may be of sufficient magnitude to constitute a risk of electric shock to persons.
The exclamation point within an equilateral triangle is intended to alert the user to the presence of important operating and maintenance (servicing) instructions in this owner???s manual.
ON PLACEMENT
???Do not use the unit in places which are extremely hot ,cold ,dusty, or humid.
???Place the unit on a flat and even surface.
???Do not restrict the air flow of the unit by placing it in a place with poor air flow, by cover- ing it with a cloth, or by placing it on a carpet.
ON SAFETY
???Before operating, make sure that the rated voltage of the AC adapter matches your local voltage.
???When you are not going to use the unit for a long period of time, disconnect the AC adapter.
ON CONDENSATION
It's important to read this instruction prior to using your new product for the first time.
WARNING:
TO PREVENT FIRE OR SHOCK HAZARD, DO NOT EXPOSE THIS APPLIANCE TO
RAIN OR MOISTURE.
The symbol for Class 

(Double lnsulation)
This product contains a low power laser device.
Warnings
???The apparatus shall not be exposed to dripping or splashing and that no objects filled with liquids, such as vases, shall be placed on apparatus.
???The AC adapter is used as disconnect device and it should remain readily operable during intended used. In order to disconnect the apparatus from the mains completely, the AC adapter should be disconnected from the mains socket outlet completely.
???Minimum 10 cm (4 inches) distances around the apparatus for sufficient ventilation.
???Batteries shall not be exposed to excessive heat such as sunshine, fire or the like.
???Do not restrict the airflow of the unit by placing it in a place with poor airflow, by covering it with a cloth, or by placing it on carpeting.
???No naked flame sources such as lighted candles should be placed on the apparatus.
-2 -
FCC INFORMATION
This device complies with Part 15 of the FCC rules. Operation is subject to the following two conditions: (1) This device may not cause harmful interference, and (2) This device must accept any interference received, including interference that may cause undesired operation.
Note: This equipment has been tested and found to comply with the limits for a Class B digital device, pursuant to Part 15 of the FCC Rules. These limits are designed to provide reasonable protection against harmful interference in a residential installation. This equipment generates, uses, and can radiate radio frequency energy and, if not installed and used in accordance with the instructions, may cause harmful interference to radio communications. However, there is no guarantee that interference will not occur in a particular installation. If this equipment does cause harmful interference to radio or television reception, which can be determined by turning the equipment off and on, the user is encouraged to try to correct the interference by one or more of the following measures:
-Reorient or relocate the receiving antenna.
-Increase the separation between the equipment and receiver.
-Connect the equipment into an AC power outlet that is on a circuit different from the one the receiver is connected.
-Consult the dealer or an experienced radio/TV technician for help.
Warnings: Changes or modifications to this unit not expressly approved by the party responsible for compliance could void the user???s authority to operate the equipment.
This Class B digital apparatus complies with Canadian
Cet appareil num??rique de la classe B est conforme ?? la norme
- 3 -
Portable Cart Warning
13Unplug this apparatus during lightning storms or when unused for long periods of time.
14Refer all servicing to qualified service personnel. Servicing is required when the apparatus has been damaged in any way, such as the AC power cord or plug is damaged, liquid has spilled or objects have fallen into the apparatus, the apparatus has been exposed to rain or moisture, does not operate normally, or has been dropped.
-4 -
SYSTEM CONNECTIONS
1.CONNECTING THE SPEAKERS
Connect the wires to the speaker terminals.
Note: Connecting speakers other than the speakers supplied with the unit, may damage the unit.
2.USING THE AC ADAPTER
Before use, make sure that the rated voltage of your AC adapter matches your local voltage. Make sure both speakers are connected correctly before plugging the AC adapter cord into the AC power outlet.
3. CONNECTING WITH OTHER OPTIONAL EQUIPMENT
Listening to the audio signals from the external equipment
1) Connect the AC adapter to the AC power outlet.
2) Slide the FUNCTION selector to the AUX position. The  AUX IN indicator lights up.
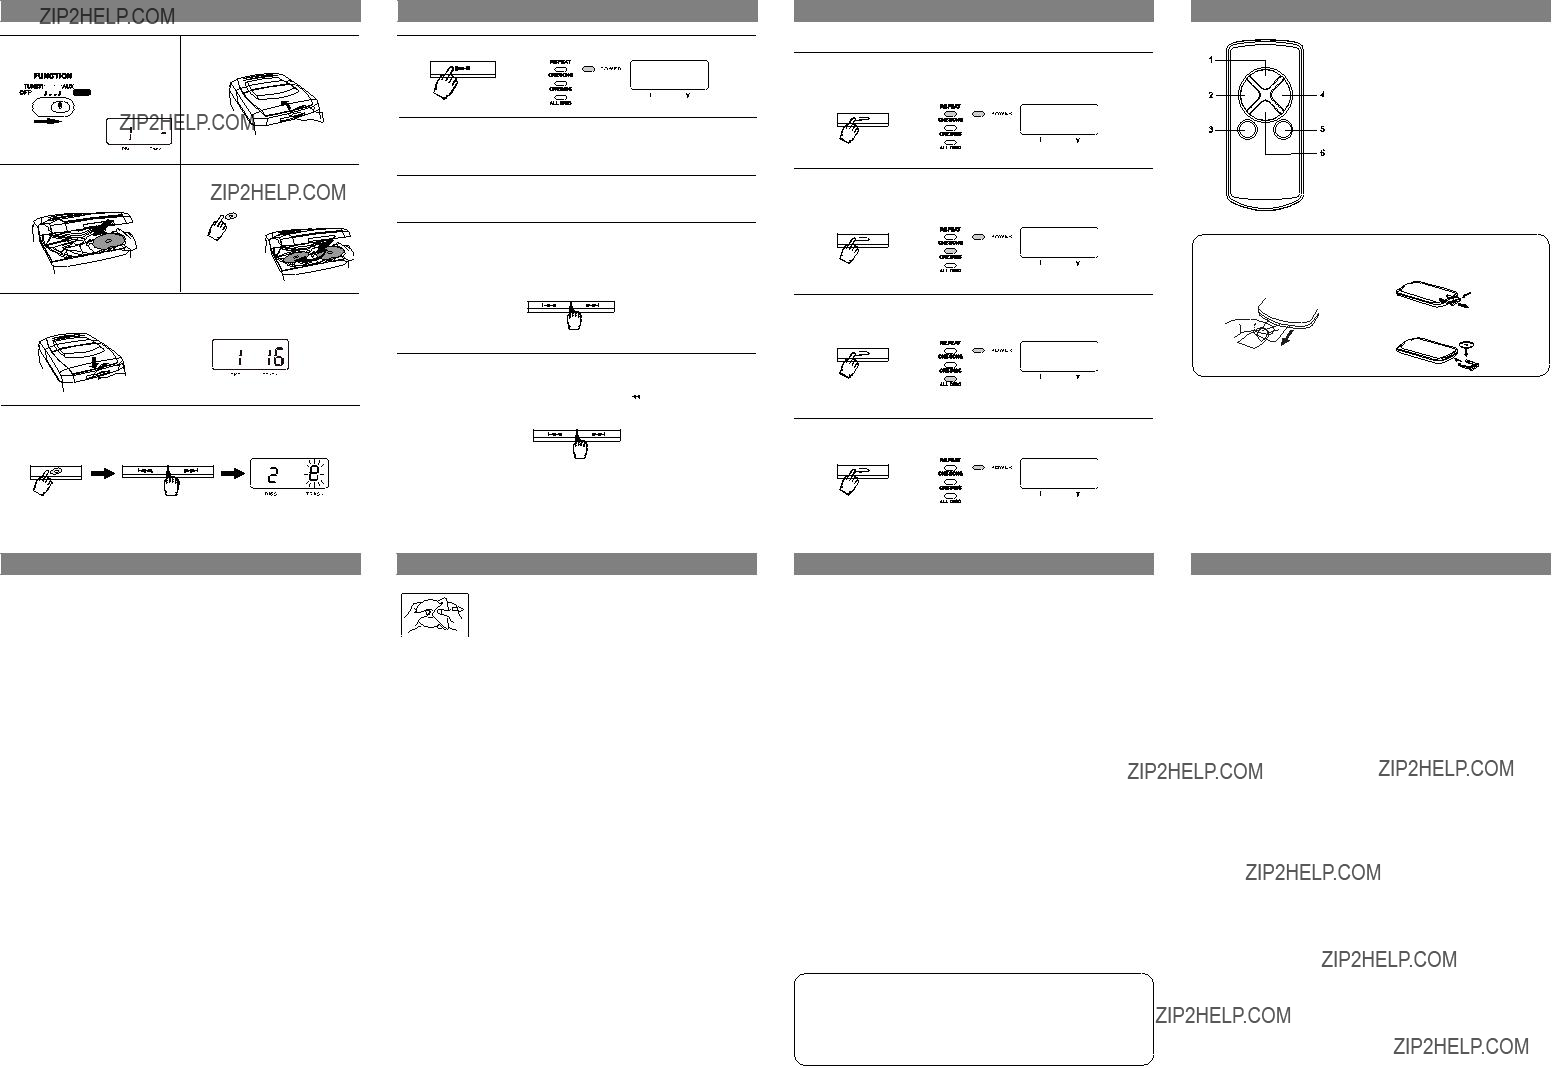
RADIO OPERATION


 To AC Power outlet
3) Turn on your audio equipment and play the external source.
Storing the
Audio
Equipment
AUX cable
FOR BETTER RECEPTION
AC adapter
1)Place the
2)Gently push the tray door up until it is closed.
9.TUNING control
10.VOLUME control
11. DISC SKIP button
12. STOP button
13.

 PLAY/PAUSE button
14.Remote sensor
15.Dial scale
16.BAND selector (AM/FM)
17.AUX IN indicator
18.AUX IN cable
NOTE: DO NOT CONNECT TO AN OUTSIDE ANTENNA.
AFTER LISTENING
Slide the FUNCTION selector to OFF.


 button to start playback.
 button and the track no. will flash. Press this button again to resume playing.
 button.

 SKIP or SEARCH

 button can only be used to choose a track on the

 reverse skip button.

 forward skip button.
 REPEAT button until the ONE SONG indicator lights up. The current track will be played repeatedly until the STOP
  button is pressed.
 REPEAT button until the ONE DISC indicator lights up. The current disc will be played repeatedly starting from the current playing point.
 button
 SKIP/SEARCH button
 SKIP/SEARCH button
 REPEAT button
 STOP button
 SKIP or SEARCH
 button to select the desired track.
 forward search button and release it at the desired point.
 REPEAT button until the ALL DISC indicator lights up.
 REPEAT button until all indicators turn off.