3 LIMITATION OF LIABILITY
IN NO EVENT SHALL PIONEER BE LIABLE
FOR ANY DAMAGES, CLAIM OR LOSS IN-
CURRED BY YOU (INCLUDING, WITHOUT LIM-
ITATION, COMPENSATORY, INCIDENTAL,
INDIRECT, SPECIAL, CONSEQUENTIAL, OR
EXEMPLARY DAMAGES, LOST PROFITS, LOST
SALES OR BUSINESS, EXPENDITURES, IN-
VESTMENTS, OR COMMITMENTS IN CON-
NECTION WITH ANY BUSINESS, LOSS OF
ANY GOODWILL, OR DAMAGES) RESULTING
FROM THE USE OF OR INABILITY TO USE
THE SOFTWARE, EVEN IF PIONEER HAS
BEEN INFORMED OF, KNEW OF, OR SHOULD
HAVE KNOWN OF THE LIKELIHOOD OF
SUCH DAMAGES. THIS LIMITATION APPLIES
TO ALL CAUSES OF ACTION IN THE AGGRE-
GATE, INCLUDING WITHOUT LIMITATION
BREACH OF CONTRACT, BREACH OF WAR-
RANTY, NEGLIGENCE, STRICT LIABILITY, MIS-
REPRESENTATION, AND OTHER TORTS. IF
PIONEER???S WARRANTY DISCLAIMER OR
LIMITATION OF LIABILITY SET FORTH IN THIS
AGREEMENT SHALL OR FOR ANY REASON
WHATSOEVER BE HELD UNENFORCEABLE
OR INAPPLICABLE, YOU AGREE THAT
PIONEER???S LIABILITY SHALL NOT EXCEED
FIFTY PERCENT (50%) OF THE PRICE PAID BY
YOU FOR THE ENCLOSED PIONEER PRO- DUCT.
Some states do not allow the exclusion or lim- itation of incidental or consequential da- mages, so the above limitation or exclusion may not apply to you. This warranty disclaimer and limitation of liability shall not be applic- able to the extent that they are prohibited by any applicable federal, state or local law which provides that such a disclaimer or limitation cannot be waived or preempted.
4 EXPORT LAW ASSURANCES
You agree and certify that neither the Software nor any other technical data received from Pioneer, nor the direct product thereof, will be exported outside Canada except as authorized and as permitted by the laws and regulations of Canada. If the Software has been rightfully
obtained by you outside of Canada, you agree that you will not re-export the Software nor any other technical data received from Pioneer, nor the direct product thereof, except as per- mitted by the laws and regulations of Canada and the laws and regulations of the jurisdic- tion in which you obtained the Software.
5 TERMINATION
This Agreement is effective until terminated. You may terminate it at any time by destroying the Software. The Agreement also will termi- nate if you do not comply with any terms or conditions of this Agreement. Upon such ter- mination, you agree to destroy the Software.
6 MISCELLANEOUS
This is the entire Agreement between Pioneer and you regarding its subject matter. No change in this Agreement shall be effective unless agreed to in writing by Pioneer. Pioneer retailers do not have the authority to change this Agreement. This Agreement shall be gov- erned by and construed in accordance with the internal laws of the Province of Ontario and the federal laws of Canada applicable therein. If any provision of this Agreement is declared invalid or unenforceable, the remain- ing provisions of this Agreement shall remain in full force and effect.


 Contents
 Important
 En
En
 Contents


 Contents
 En
En
 Contents


 Contents

 En
En
 Contents


 Contents
 En
En
 WARNING


 En
En Introduction


 Introduction
 En
En
 Introduction


 Introduction
 En
En


 Introduction
 En
En


 Introduction
 En
En


 En
En CAUTION


 Introduction
 WARNING
 CAUTION
 En
En
 WARNING
 WARNING
 WARNING
 CAUTION


 Introduction

 En
En


 Introduction
 CAUTION
 En
En
 Introduction


 Basic operation


 6
6 

 En
En


 CAUTION

 Basic operation


 En
En CAUTION
 CAUTION

 Basic operation


 En
En


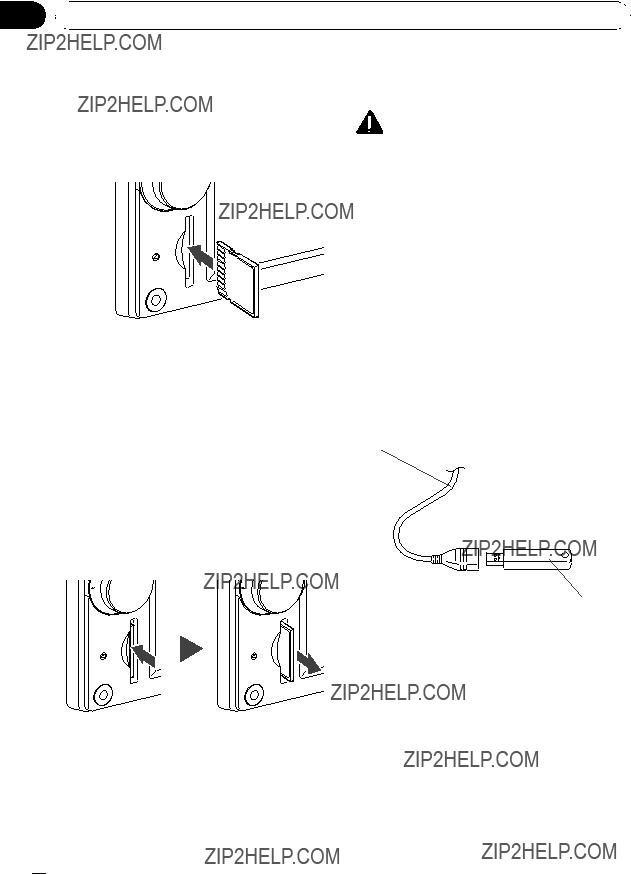
 .
.


 Basic operation
 En
En


 Basic operation
 is displayed.
 is dis- played.
 is displayed.
 En
En
 Basic operation


 Basic operation
 hides the tilt controls and rota- tion angle.

 En
En


 or
or  on the scroll bar scrolls through the list and allows you to view the re-
 ??? enables you to capitalize the first letter of a word.
 ??? enables you to enter letters in
  automatically.)
 ??? enables you to enter letters with capitals (caps) lock.

 :
:


 Searching for and selecting a location
 En
En


 Searching for and selecting a location
 to retry with another ad- dress.

 En
En


 Searching for and selecting a location
 En
En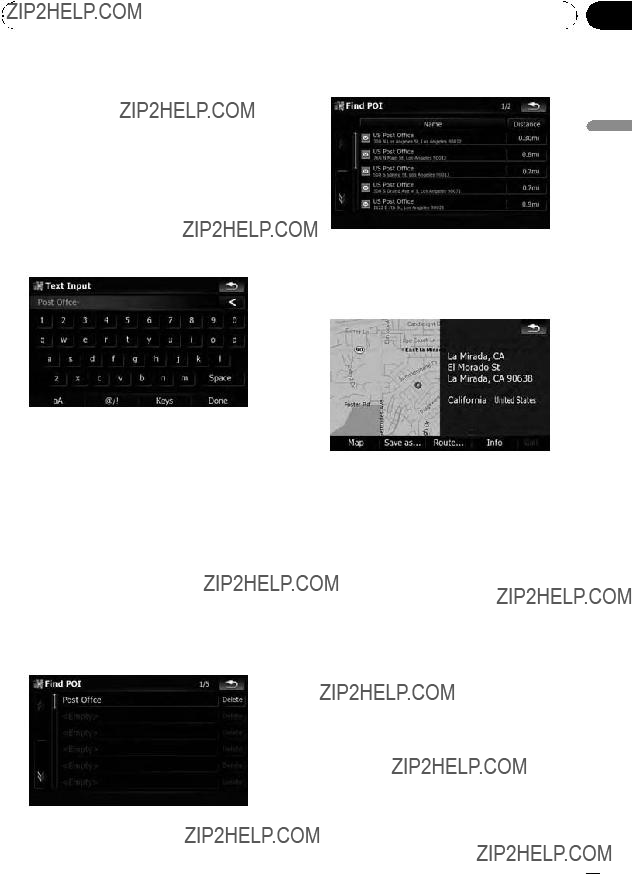


 Searching for and selecting a location

 En
En
 to delete the current value and enter the desired coordinate.


 Searching for and selecting a location


 En
En


 Searching for and selecting a location

 to display the ???Map Confirmation Screen???.
 En
En


 After the location is decided (Map Confirmation Screen)

 En
En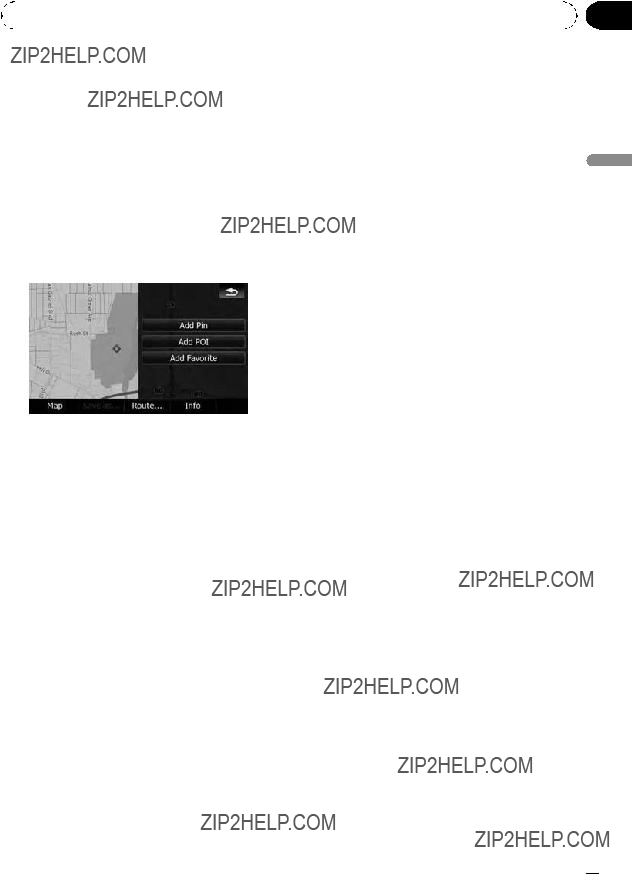


 After the location is decided (Map Confirmation Screen)
 to display the ???Map Confirmation Screen???.
 or
or  to scroll the nearby POI list and then touch the desired POI.

 En
En


 After the location is decided (Map Confirmation Screen)


 En
En
 to show the next four icons.
 Checking the current route
 or
or  to scroll the list.
 3
3 on the map.
 En
En Checking the current route


 Editing waypoints and the destination

 En
En
 Editing waypoints and the destination


 Browsing information on MSN Direct
 ) on ???MSN Direct??? screen is not weak.


 Browsing information on MSN Direct

 En
En


 Browsing information on MSN Direct

 En
En
 with yellow line: Heavy traffic
 with red line: Traffic jam
 with black line: Closed/blocked roads
 etc.:
etc.:


 Browsing information on MSN Direct

 En
En or
or  to scroll the list.

 Browsing information on MSN Direct
 .
.

 En
En
 CAUTION

 : Network name of the cellular phone company
 : Reception status of the cellular phone
 : Battery status of the cellular phone
 : Name of connected cellular phone


 Using
Using 
 En
En


 En
En
 .
. .
. to end the call.
 .
.


 Using
Using  :
: :
: to make a call.
 .
. to end the call.
 .
. to end the call.
 .
. to end the call.
 En
En
 .
. to end the call.
 or
or  :
: to end the call.
 .
. to end the call.


 Using
Using 


 En
En


 Using
Using 

 En
En
 to delete the current name, and enter the new name by using the key- board.


 Using
Using 
 ,
,  , [Vol +], and [Vol
 En
En


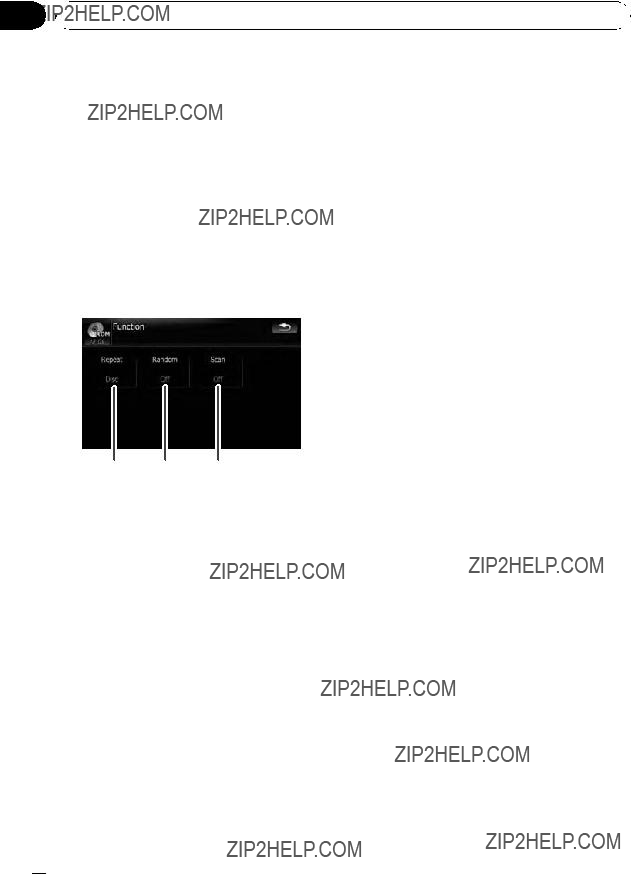
 Playing audio CDs
 : Scan
 : Random
 and repeat range: Displays the current repeat range
 4
4 5
5 6
6  7
7

 En
En
 Playing audio CDs


 Playing music files on ROM
 and repeat range: Displays the current repeat range


 b
b 
 : Scan
 : Random
 4
4 5
5 6
6 7
7  8
8
 En
En
 or
or  switches the selection to the next or previous page in the list.
 displays the content of the upper folder (parent folder). If the uppermost folder is listed,
  cannot be used.
 .
.

 Playing music files on ROM


 En
En
 3
3 4
4 5
5 6
6  7
7
 c
c e
e 6
6  7
7 i j
i j 6
6 7
7


 Playing a
  is displayed. Turn the angle icon display on or off using the ???DVD Setup??? menu.
 En
En


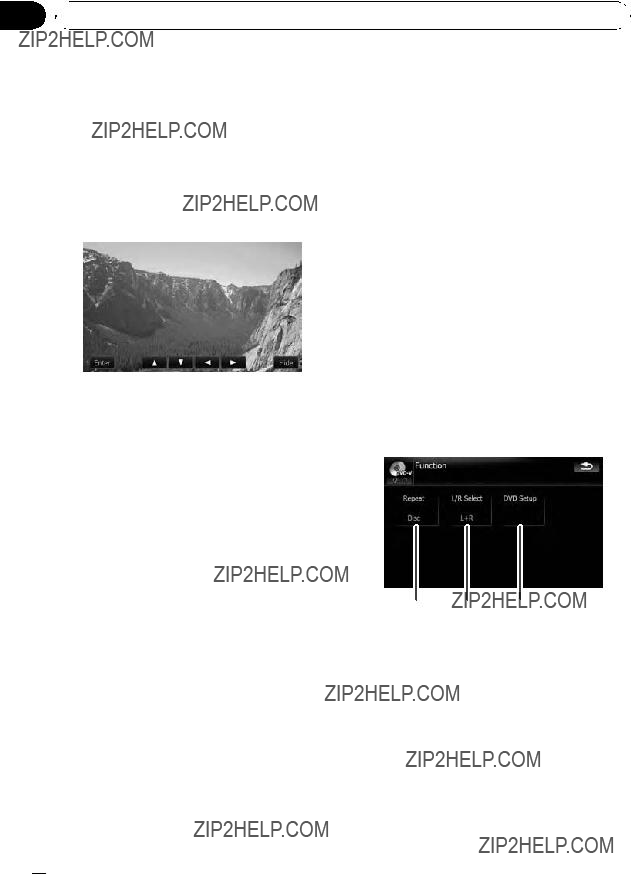
 Playing a
  displays them again.


 is dis- played during playback.

 is displayed, and forward slow motion playback begins.
 En
En


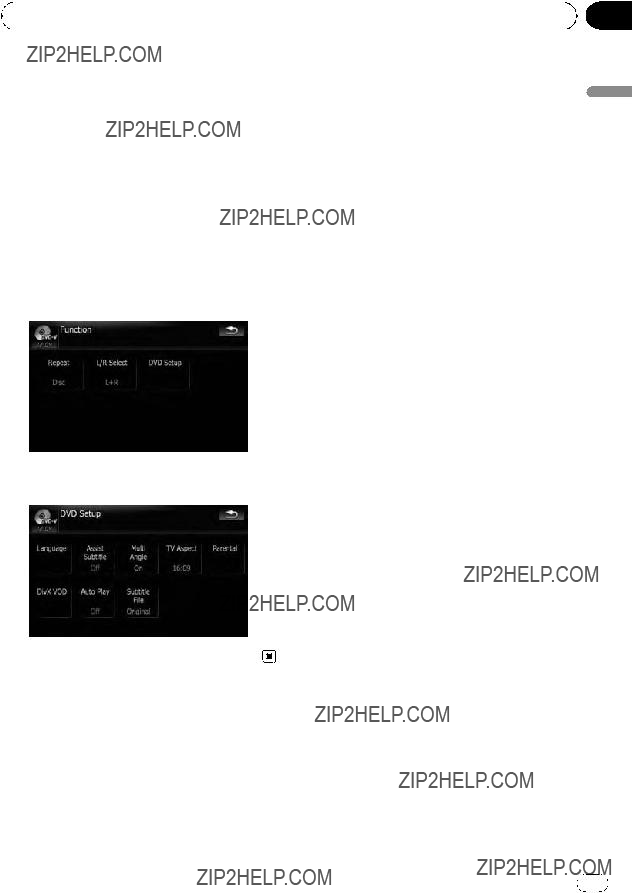
 Playing a
 e
e 7
7  8
8
 En
En


 Playing a
  or
or  switches the selection to the next or previous page in the list.

 is dis- played during playback.

 is displayed, and forward slow motion playback begins.

 En
En
 Playing a


 Playing a DivX video
 6
6  7
7 3
3 6
6  7
7

 is dis- played during playback.

 is displayed, and forward slow motion playback begins.
 Playing a DivX video


 DVD-Video,
 to display in scenes where the angle can be switched.


 mark.
mark.


 DVD-Video,

 DVD-Video,
 Playing music files (from USB or SD)


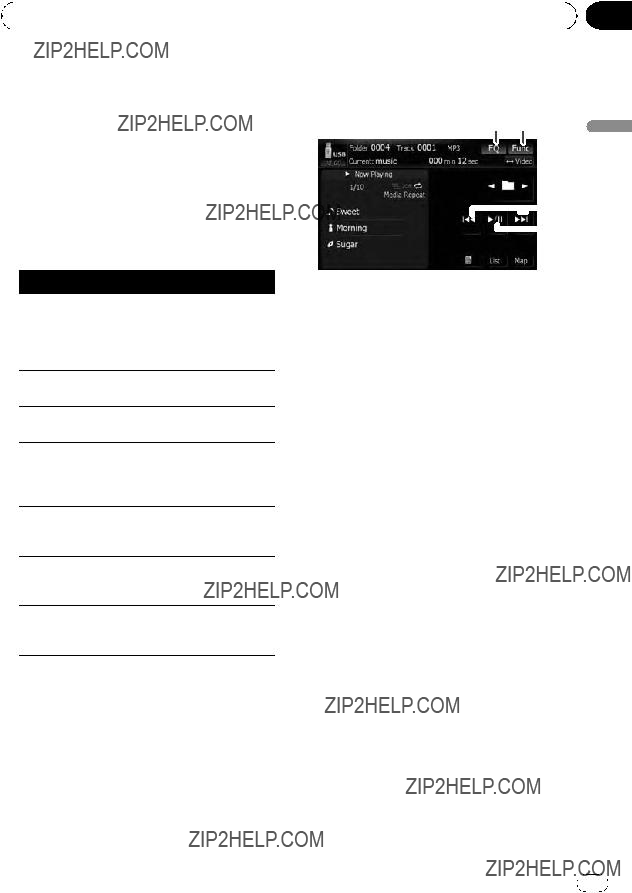
 : Scan play
 : Random play
 : Repeat play
 3
3 4
4 5
5  6
6 7
7

 Playing music files (from USB or SD)
 or
or  switches the selection to the next or previous page in the list.
 displays the content of the upper folder (parent folder). If the uppermost folder is listed,
  cannot be used.
 .
.
 Playing music files (from USB or SD)

 Playing video files (from USB or SD)


 3 4
3 4  5
5  6
6 7
7
 Playing video files (from USB or SD)


 a
a :
:  :
: 
 Using an iPod (iPod)
 5
5 7
7 9
9
 or
or  switches the selection to the next or previous page in the list.

 Using an iPod (iPod)
 3
3 5
5 7
7
 or
or  switches the selection to the next or previous page in the list.
 Using an iPod (iPod)


 3
3 4
4 5
5  6
6
 Using the radio (FM)

 Using the radio (FM)
 HD Radio??Reception


 3
3 4
4 5
5  6
6


 HD Radio??Reception


 3
3 4
4 5
5


 Using the XM tuner


 4
4 5
5 6
6  7
7 c
c 5
5 6
6  7
7
 Using the XM tuner
 .
. or
or  to switch to the next page or pre- vious page.


 Using the XM tuner


 5
5 6
6 7
7  8
8
 Using the SIRIUS tuner
 d
d 6
6 7
7  8
8 .
.

 Using the SIRIUS tuner


 CAUTION


 Using the external unit (EXT1, EXT2)
 4
4  5
5


 Customizing preferences

 Customizing preferences
 Customizing preferences
 allows you to enter the detailed setting screen only when [On] has been se- lected.
 Customizing preferences
 allows you to enter the detailed setting screen only when [On] has been se- lected.
 CAUTION
 Customizing preferences
 allows you to enter the de- tailed setting screen only when [On] has
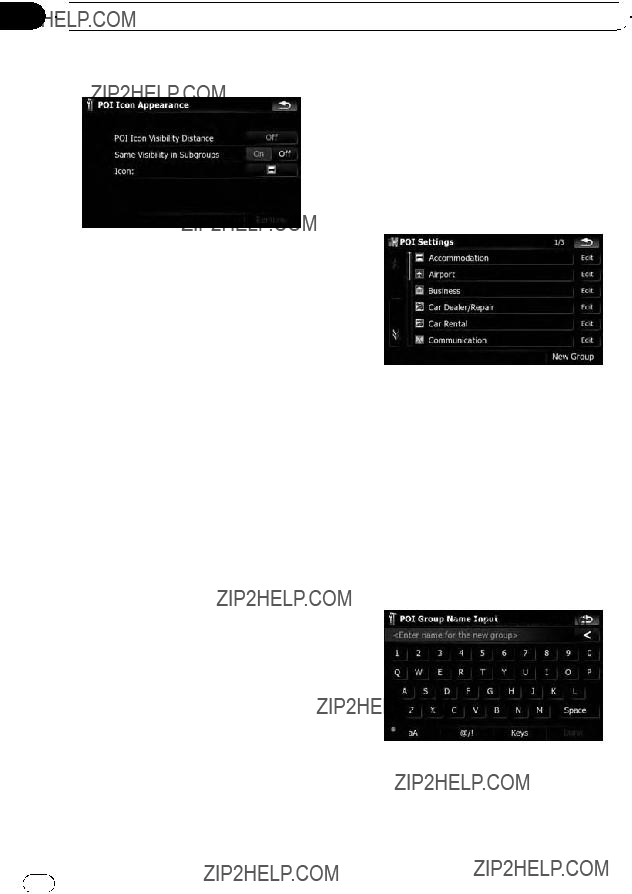
 Customizing preferences
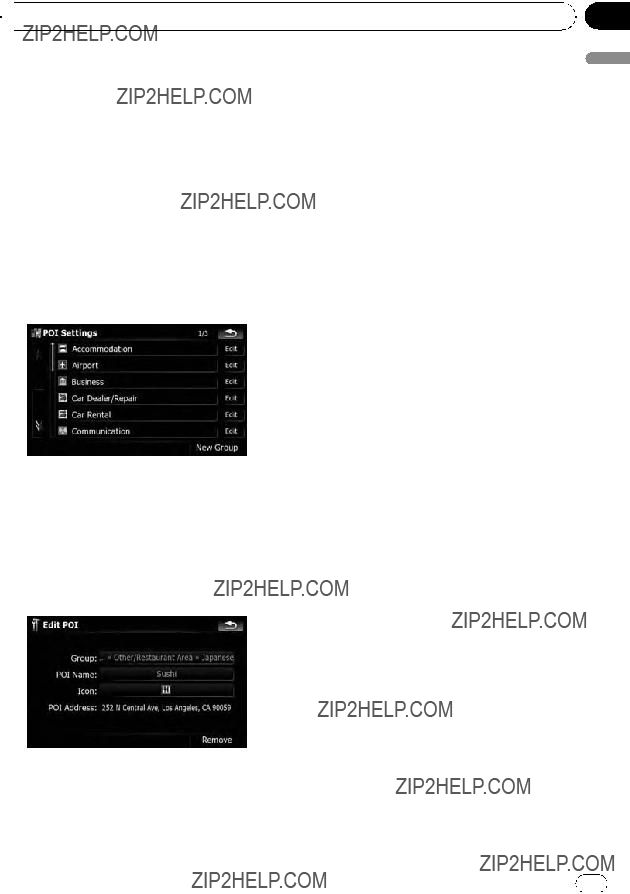
 Customizing preferences
 Customizing preferences
 enables you to replay the track log with ???Fly over???.

 Customizing preferences
 CAUTION
 Customizing preferences
 to return to the previous screen.
 to return to the previous screen.
 Customizing preferences
 Customizing preferences
 Customizing preferences

 Customizing preferences


 Customizing preferences
 Customizing preferences

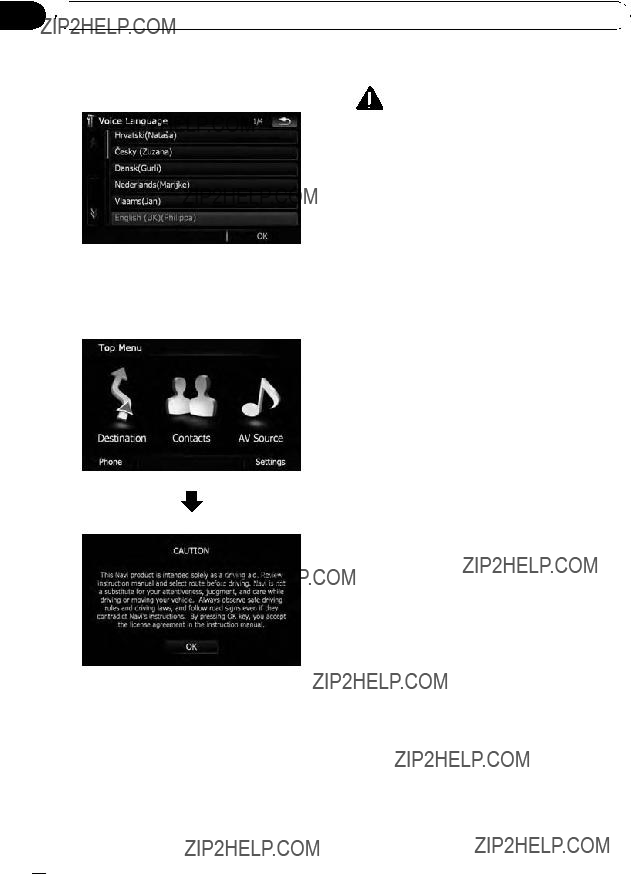
 Operating Your Navigation System with Voice
 CAUTION
 .
. on the voice operation screen, or press MENU button or MAP button.


 Operating Your Navigation System with Voice
 Operating Your Navigation System with Voice
 Operating Your Navigation System with Voice
 Operating Your Navigation System with Voice

 Other functions

 Other functions
 Other functions


 Appendix
 Appendix

 Appendix
 Appendix

 Appendix
 Appendix

 Appendix
 Appendix

 Appendix
 Appendix

 Appendix
 Appendix

 Appendix
 Appendix
 CAUTION

 Appendix

 Appendix
 is a trademark of DVD Format/Logo Licensing Corporation.


 Appendix
 Appendix

 Appendix
 Appendix

 Appendix
 Appendix

 Appendix
 Appendix
 : Folder
 : File
 1
1 
 2
2
 5
5 
 6
6
 3
3 
 4
4 Notes
Notes


 Appendix


 CAUTION
 Appendix


 Appendix

 Appendix

 Appendix
 Appendix

 Appendix
 Appendix

 Appendix
 Appendix

 Appendix

 Appendix

 Appendix
 Note
Note
