Terms and Conditions for the Tele Atlas Data
THIS IS A LEGAL AGREEMENT (THE ???AGREE-
MENT???) BETWEEN YOU, THE END USER, AND TELE ATLAS NORTH AMERICA, INC. (???Tele Atlas???). BY USING YOUR COPY OF THE TELE
ATLAS DATA, YOU AGREE TO THE TERMS AND
CONDITIONS OF THIS AGREEMENT.
1. Grant of License.
Tele Atlas grants you a non-transferable, non- exclusive license to use the map data and busi- ness points of interest information (the ???POIs???), (together, the ???Data???) contained on these discs, solely for personal, non-commercial use and not to operate a service bureau or for any other use involving the processing of data of other persons or entities. You may make one (1) copy of the Data for archival or backup purposes only but you may not otherwise copy, reproduce, modify, make derivative works, derive the structure of or reverse engineer the Data. The Data contains confidential and proprietary information and materials, and may contain trade secrets, so you agree to hold the Data in confidence and in trust and not to disclose the Data or any portions in any form, including by renting, leasing, publish- ing, leasing, sublicensing or transferring the Data to any third party. You are prohibited from using the POIs (i) to create mailing lists or (ii) for other such similar uses.
2. Ownership.
The Data is copyrighted by Tele Atlas and its licensors and they retain all ownership rights in the Data. You agree not to alter, remove, obliter- ate, or obscure any copyright notice or proprie- tary legend contained in or on the Data.
3. Warranty Disclaimer.
THE DATA IS PROVIDED ON AN ???AS IS??? AND
???WITH ALL FAULTS BASIS??? AND TELE ATLAS, ITS
LICENSORS, AND ITS LICENSED DISTRIBUTORS
AND SUPPLIERS (COLLECTIVELY, ???SUPPLI-
ERS???) EXPRESSLY DISCLAIM ALL OTHER WAR-
RANTIES, EXPRESS OR IMPLIED, INCLUDING
BUT NOT LIMITED TO, THE IMPLIED WARRAN-
TIES OF NON-INFRINGEMENT, MERCHANTABIL-
ITY, EFFECTIVENESS, COMPLETENESS,
ACCURACY, TITLE AND FITNESS FOR A PARTIC-
ULAR PURPOSE. TELE ATLAS, ITS LICENSORS
AND SUPPLIERS DO NOT WARRANT THAT THE
DATA WILL MEET YOUR REQUIREMENTS OR
THAT THE OPERATION OF THE DATA WILL BE
UNINTERRUPTED OR ERROR FREE. NO ORAL
OR WRITTEN ADVICE GIVEN BY TELE ATLAS, ITS
LICENSORS, SUPPLIERS OR ANY OF THEIR
RESPECTIVE EMPLOYEES CREATES A WAR-
RANTY OR IN ANY WAY INCREASES TELE
ATLAS???, ITS LICENSORS OR SUPPLIERS LIABIL-
ITY AND YOU MAY NOT RELY ON ANY SUCH
INFORMATION OR ADVICE. THIS DISCLAIMER
IS AN ESSENTIAL CONDITION OF THIS AGREE-
MENT AND YOU ACCEPT THE DATA ON THIS
BASIS.
4. Limitation of Liability.
IN NO EVENT SHALL TELE ATLAS???, ITS LICEN-
SORS??? OR SUPPLIER??? AGGREGATE LIABILITY
FOR ALL MATTERS ARISING OUT OF THE SUB-
JECT MATTER OF THIS AGREEMENT, WHETHER
IN CONTRACT, TORT OR OTHERWISE, EXCEED
THE AMOUNT PAID BY YOU FOR YOUR COPY OF
THE TELE ATLAS DATA. TELE ATLAS, ITS LICEN-
SORS AND SUPPLIERS SHALL NOT BE LIABLE
IN ANY MATTER TO YOU FOR ANY SPECIAL,
INDIRECT, CONSEQUENTIAL OR INCIDENTAL
DAMAGES (INCLUDING DAMAGES FOR LOSS
OF BUSINESS PROFITS, BUSINESS INTERRUP-
TION, LOSS OF BUSINESS INFORMATION, AND
THE LIKE) ARISING OUT OF THIS AGREEMENT
OR THE USE OF OR INABILITY TO USE THE
DATA, EVEN IF TELE ATLAS, ITS LICENSORS OR
SUPPLIERS HAVE BEEN ADVISED OF THE POS-
SIBILITY OF SUCH DAMAGES.
5. Termination.
This Agreement will terminate immediately and automatically, without notice, if you breach any term of this Agreement. You agree that in the event of termination of the Agreement, you shall return the Data (including all documentation and all copies) to Tele Atlas and its suppliers.
6. Indemnity.
You agree to indemnify, defend and hold Tele Atlas, its Licensors, and its Suppliers (including their respective licensors, suppliers, assignees, subsidiaries, affiliated companies, and the respective officers, directors, employees, share- holders, agents and representatives) free and


 :
:
 or
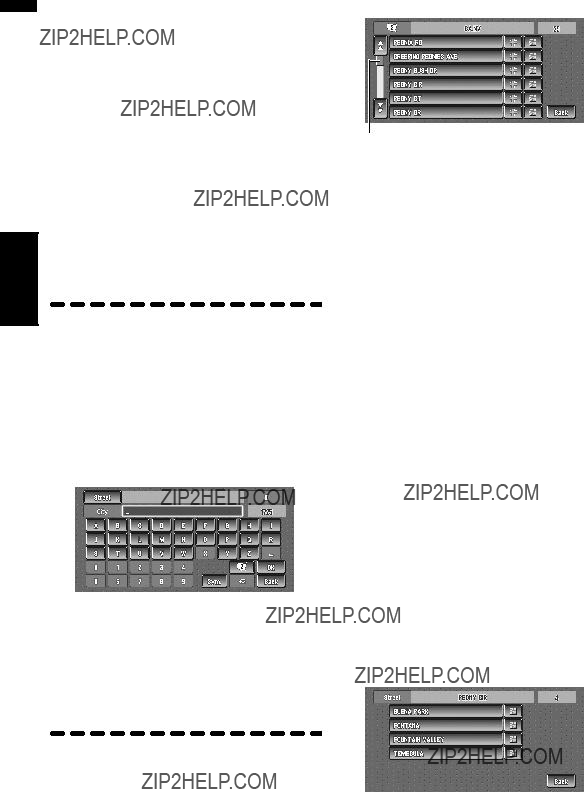
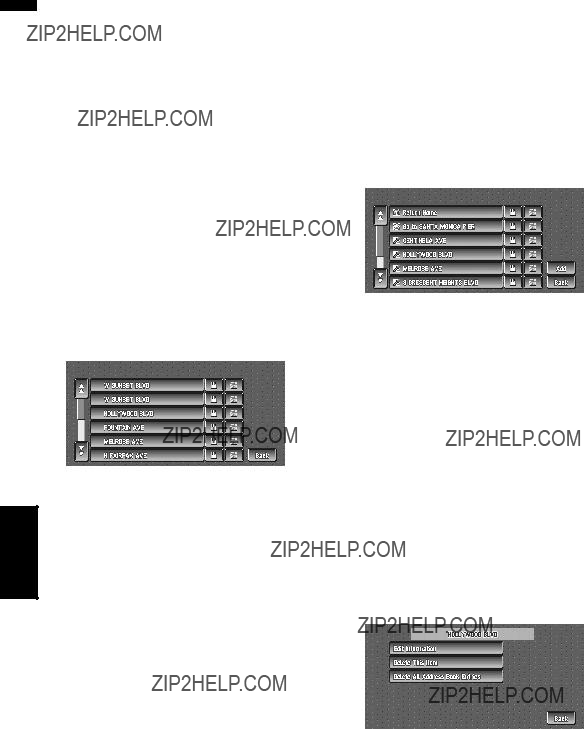
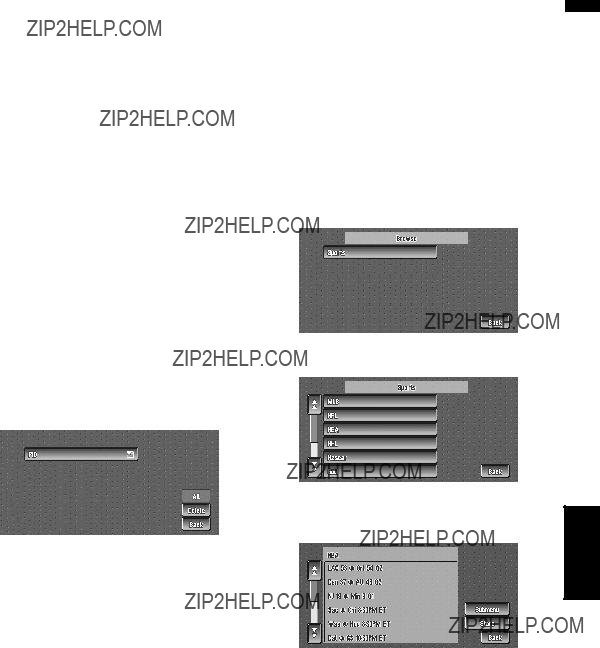
or  on the scroll bar scrolls you through the list and allows you to view the remaining items.
 to the right of the item allows you to see the whole line.
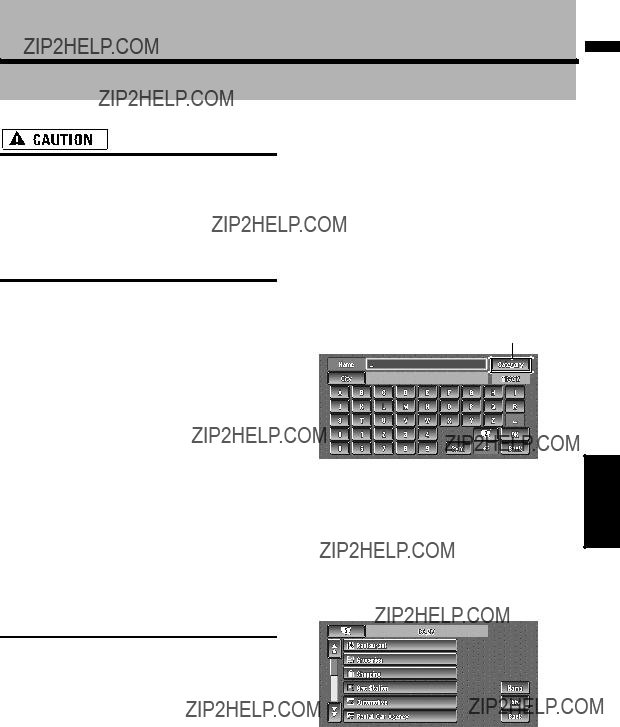
 specifies the selected street and streets intersecting it, allowing you to set an intersection as your destination. This is use- ful when you don???t know the house number of your destination or cannot input the house number of the specified street.
 displays a map of the place you have selected. (Candidate place names may appear in the list screen.)
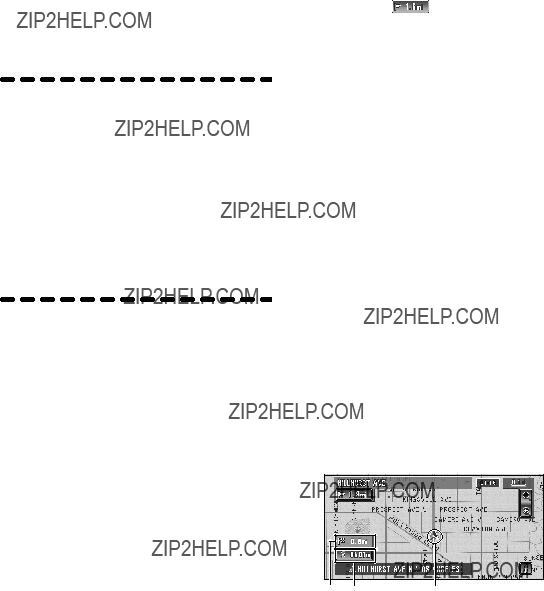
 to the right of the list.
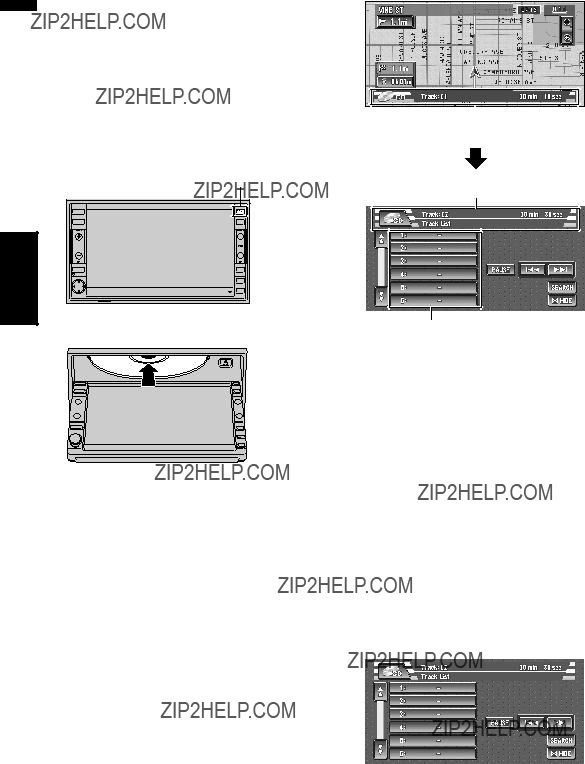
 or
or  , you can switch the list to the next page or the previous page.
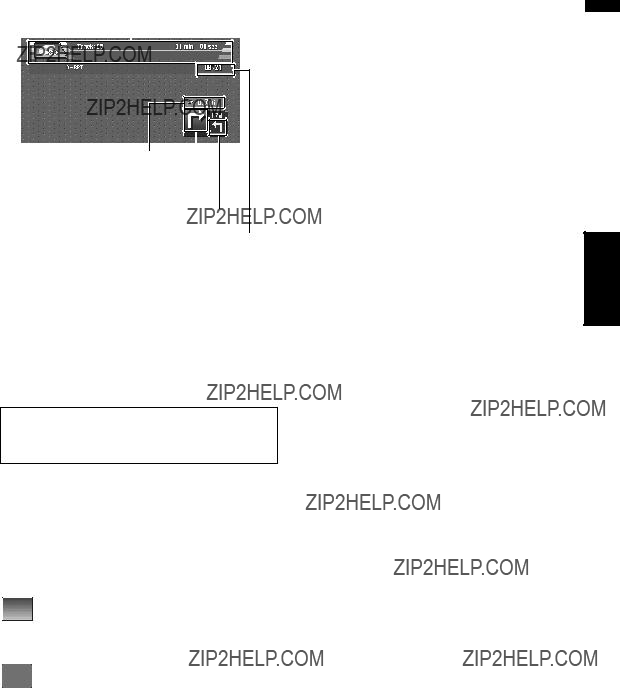

 : Destination*
 : Chg.Route*
 : Whole Route Overview
 : Vicinity Search
 : Registration
 : Menu Close


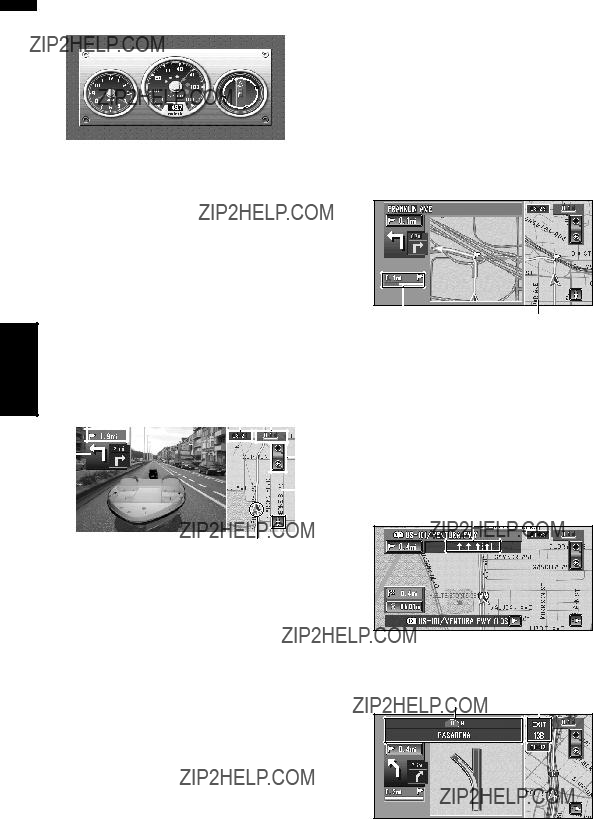


 Guidance point*
 Destination*
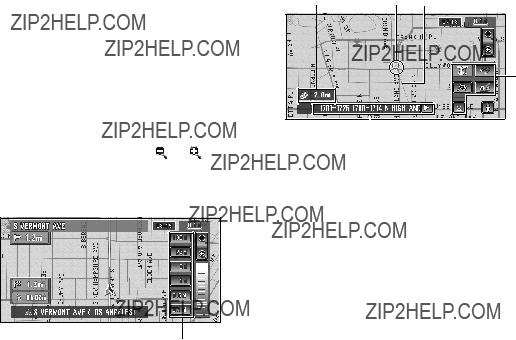
 on the right displays hidden text.
 .
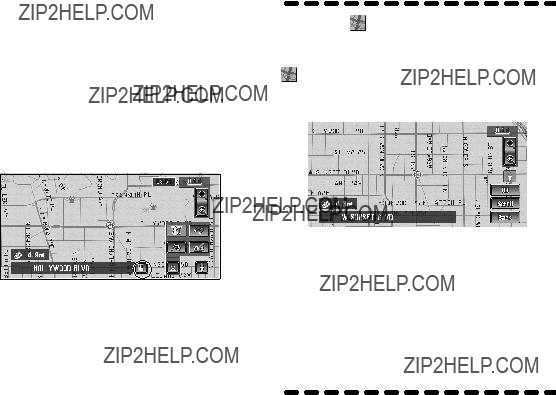
. in the Shortcut menu, you can specify your destination on the map.
 .
.

 displays a map of the surroundings of the selected POI.
 ), you can start searching POI directly by selected category on the POI shortcut.
 . When the subcate- gory list appears, touch the item and touch
 , the POIs around the specified location are shown on a map.
 .
.
 in the Shortcut menu (
 on the right of the list.
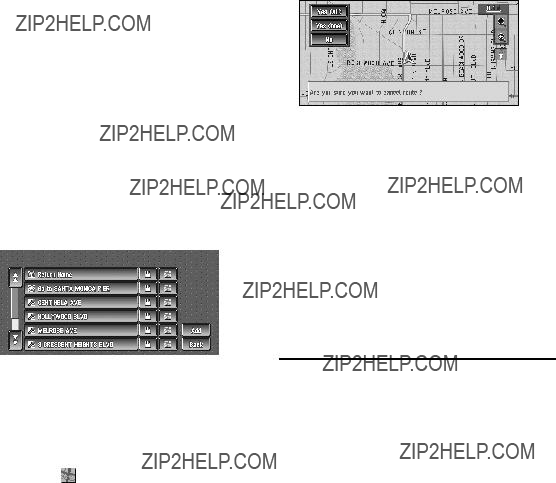

 on the right of the list.
 or
or  to scroll the map.
 or
or  . If necessary, the scale of the map can be changed.
 .
.
 .
.
 on the right of the list.
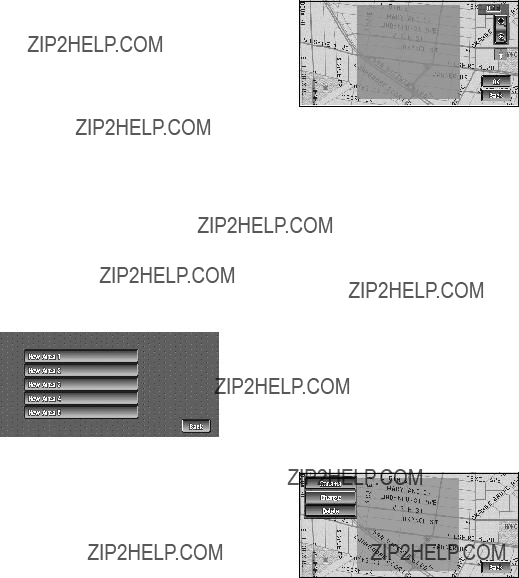
 . When the subcate- gory list appears, touch the item you want
 ), you can display POI immediately by selected category on the POI shortcut.
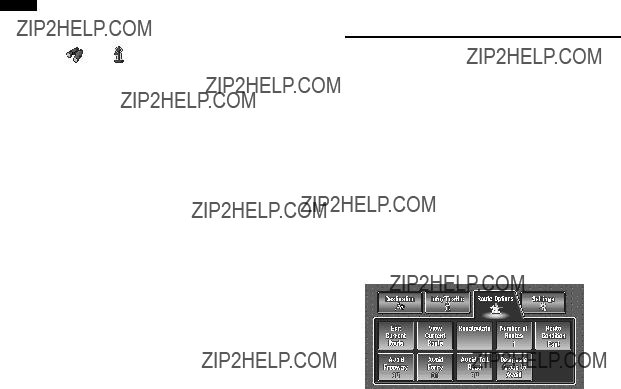
 in the shortcut menu or ???
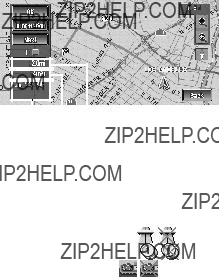


 :
: :
:
 on the
  :
: :
: in the Shortcut menu
  on the
  on the
  :
: :
:
 .
. on the
 or
or  to view the incident list.
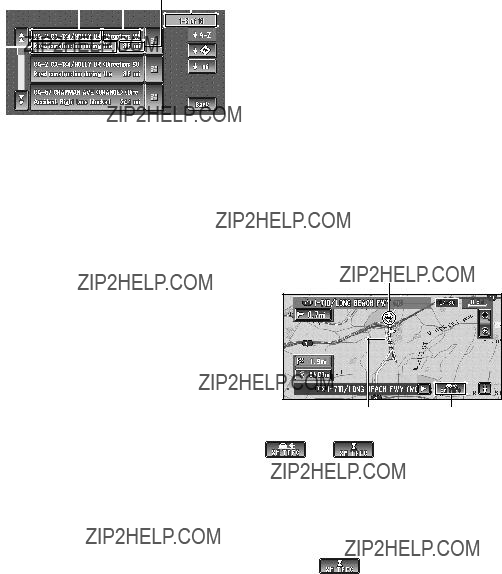
 allows you to check the place on a map. (Traffic information with-
 :
: :
: :
: :
: or
or  to view the remaining information.
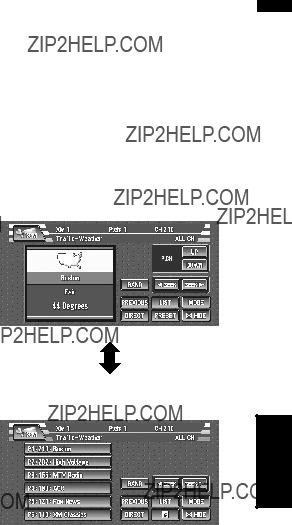
 on the screen allows you to check for traffic congestion information on your route.
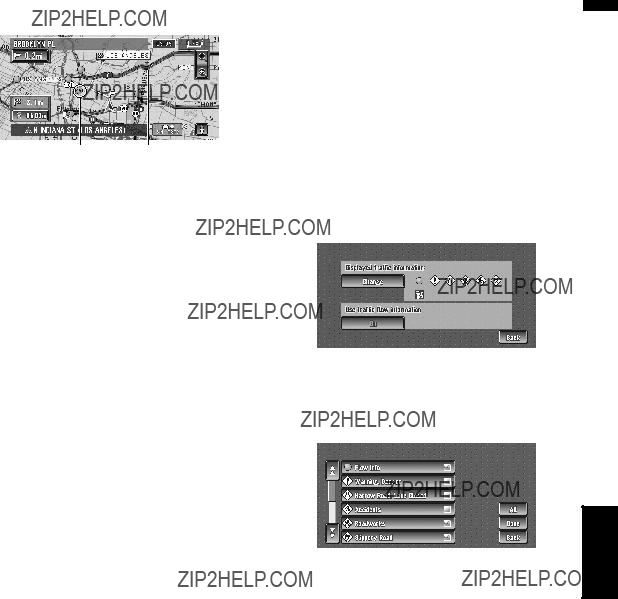
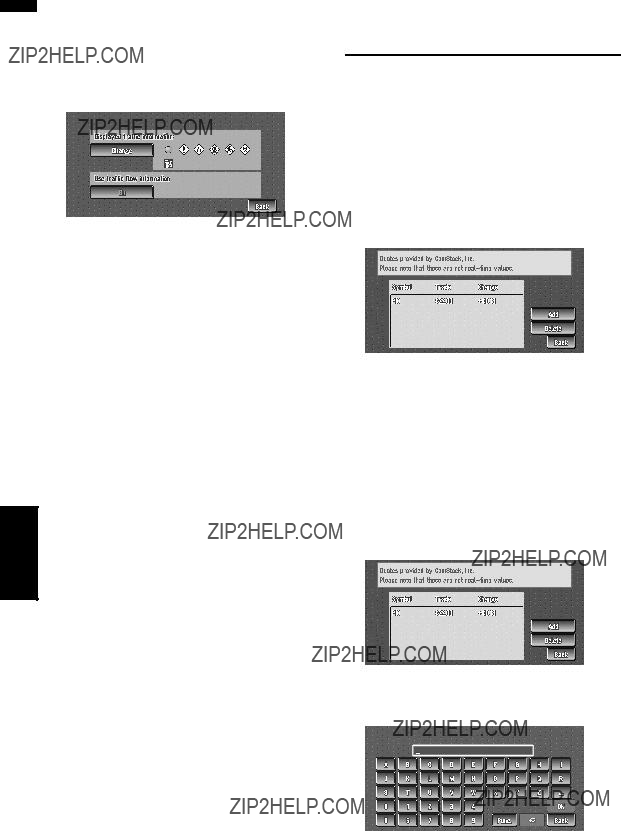
 instead of
  . The list will be sorted according to the average speed
 .
.

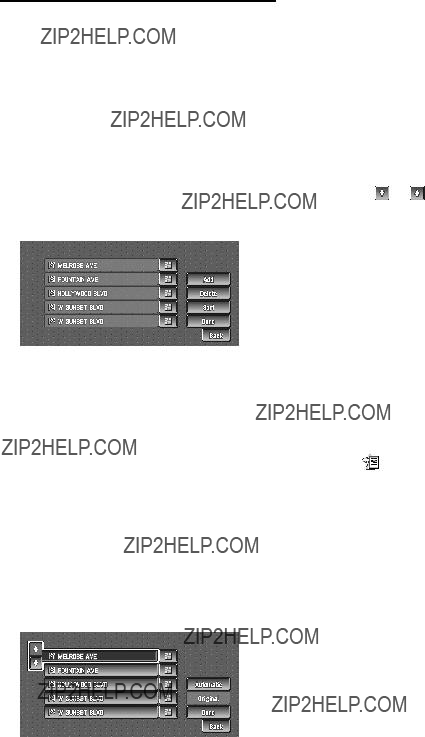
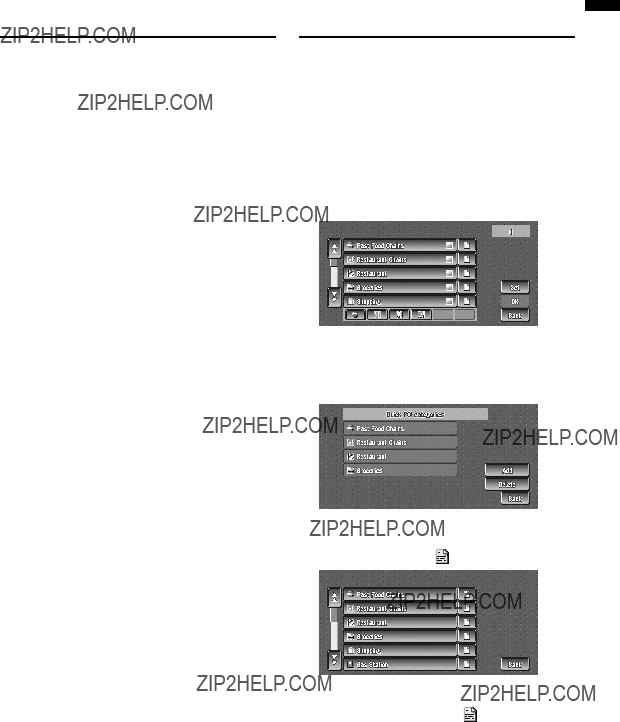
 displays a list of subcatego- ries. Touch the subcategory you wish to
 appears on the right of the list
 to the right of the list. Touch ???
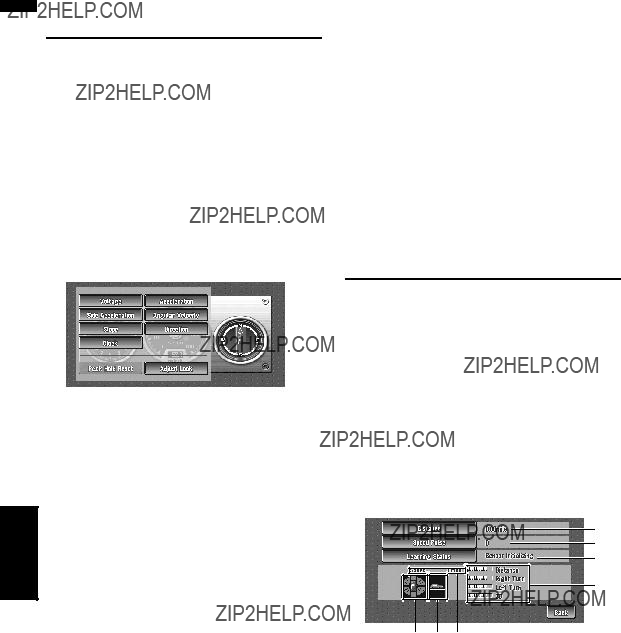

 : Registration *
 : Vicinity Search *
 : Whole Route Overview *
 : Address Book
 : Route Options
 : Edit Current Route
 : Traffic On Route
 : Stock Info
 : Browse
 : My Favorites


 (8)
(8) (3)
(3) (6)
(6) (4)
(4) or
or  switches to the next or previous page in the list.


 or
or  briefly.
 or
or  for about one second and release.
 or
or  briefly.
 or
or  you can skip broadcasting stations. Seek tuning starts as soon as you release the keys.
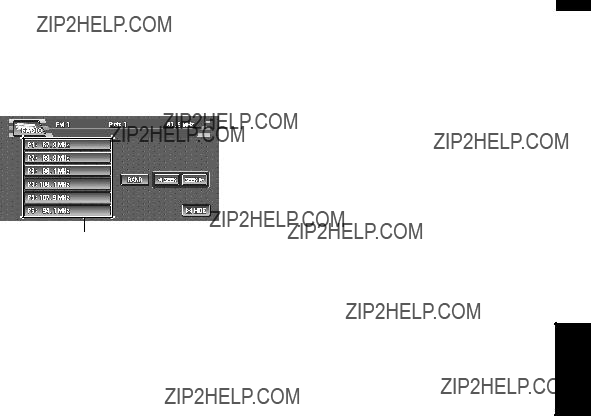
 repeatedly to switch these items.
 or
or  to display
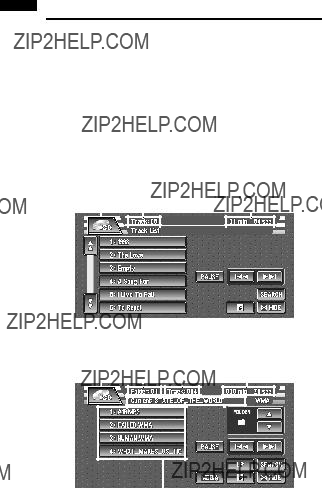
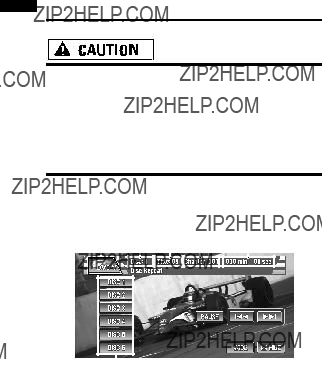
 or
or  to switch between the lists of tracks.
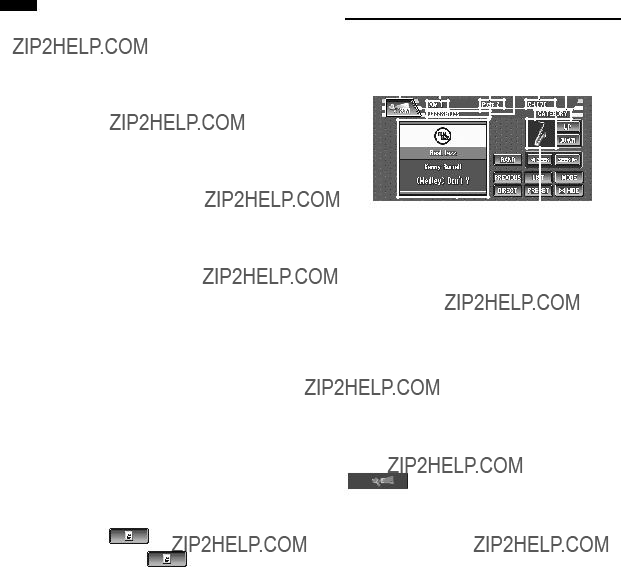
 or
or  .
. or
or  , you can increase or decrease channel number contin- uously. You can also perform manual tuning by moving the joystick left or right.
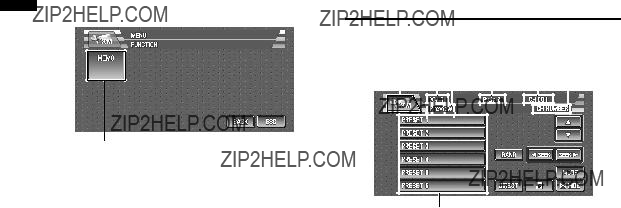
 (or ???PRESET???).
 (or ???
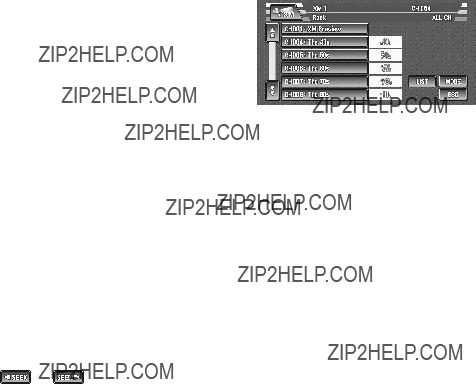
 or
or  to switch to the next page or previous page.

 or
or  .
. or
or  , you can increase or decrease channel number contin- uously.
 .
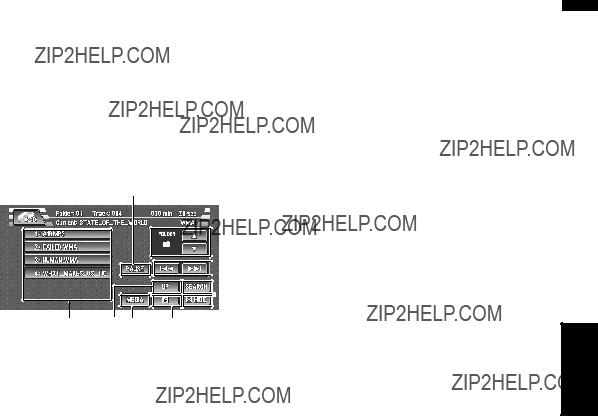
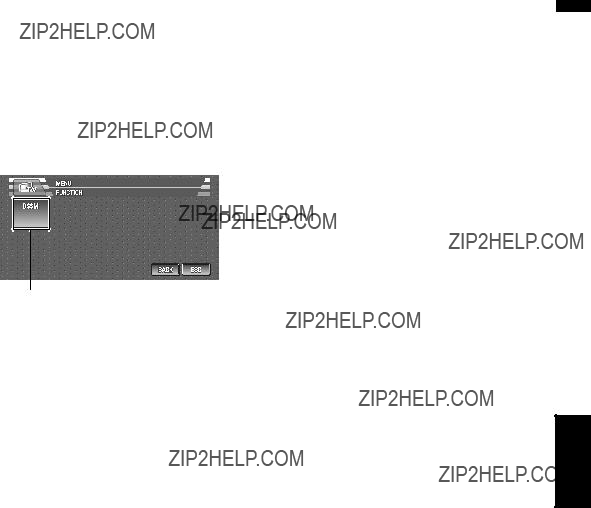
. changes the information as follows:
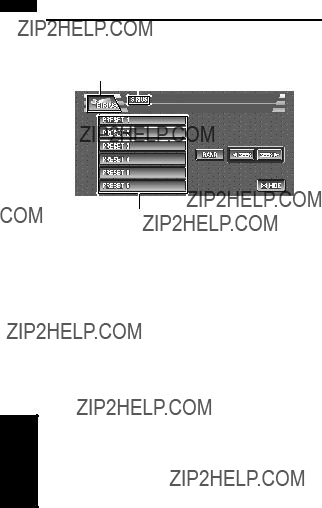
 or
or  .
. or
or  , you can increase or decrease channel number contin- uously. You can also perform manual tuning by moving the joystick left or right.
 or
or  to select the desired channel in the selected channel category.
 or
or , the channel number moves up or down in the category selected in step 3
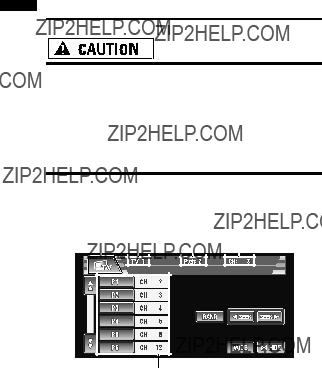
 or
or  briefly.
 or
or  for about one second and release.
 or
or  briefly.
 or
or  you can skip broadcasting channels. Seek tuning starts as soon as you release the keys.
 or
or  .
.


 or moon
  is dis- played to the left of
  ??? bright ambient light (day- time)
 ??? intermediate brightness (evening)
 ??? dark ambient light (night- time)


 Messages and how to react to them


 Route Setting Information

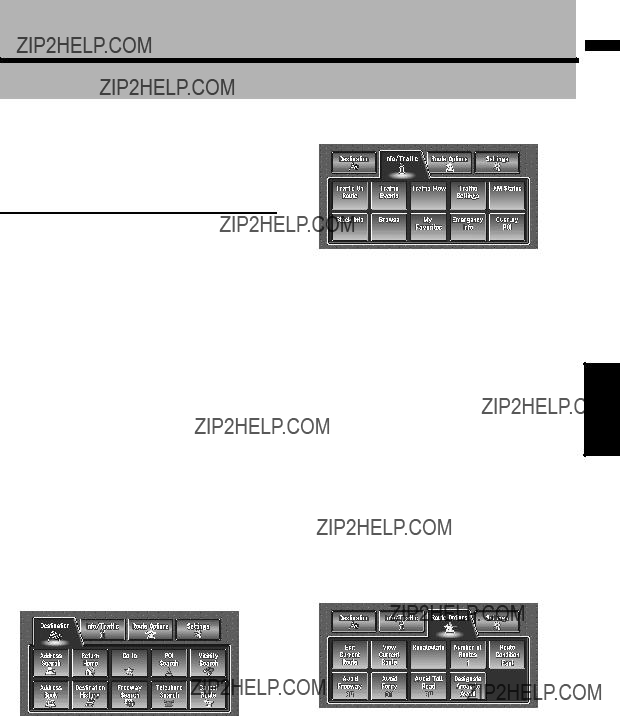
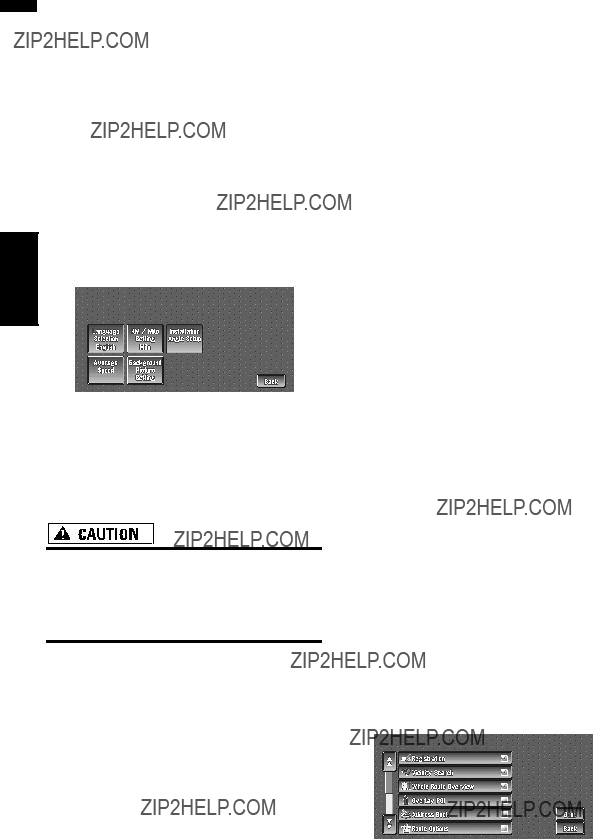
 Address Search
 Return Home
 Go to
Go to POI Search
 Vicinity Search*1
 Address Book
 Destination History
 Freeway Search
 Telephone Search
 Cancel Route
 Traffic On Route
 Traffic Events
 Traffic Flow
 Traffic Settings*2
 XM Status
 Stock Info
 Browse
 My Favorites
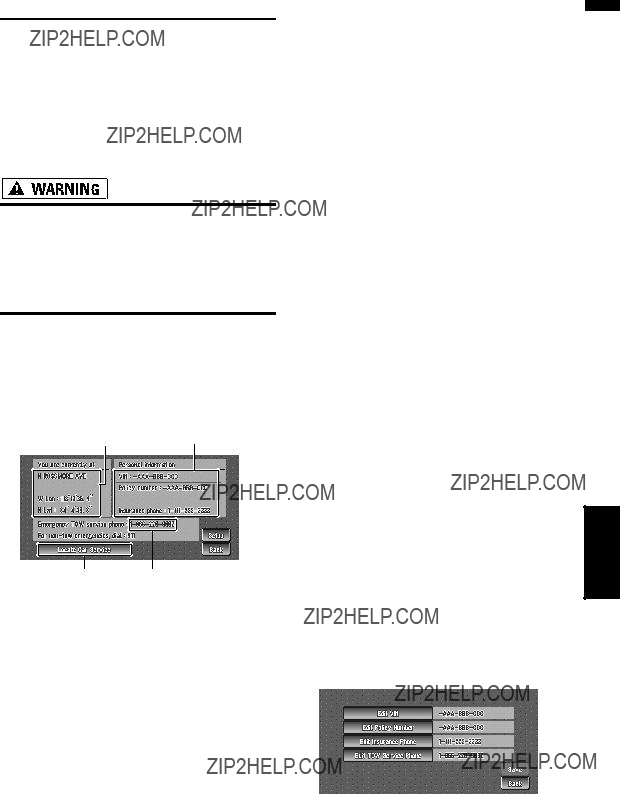
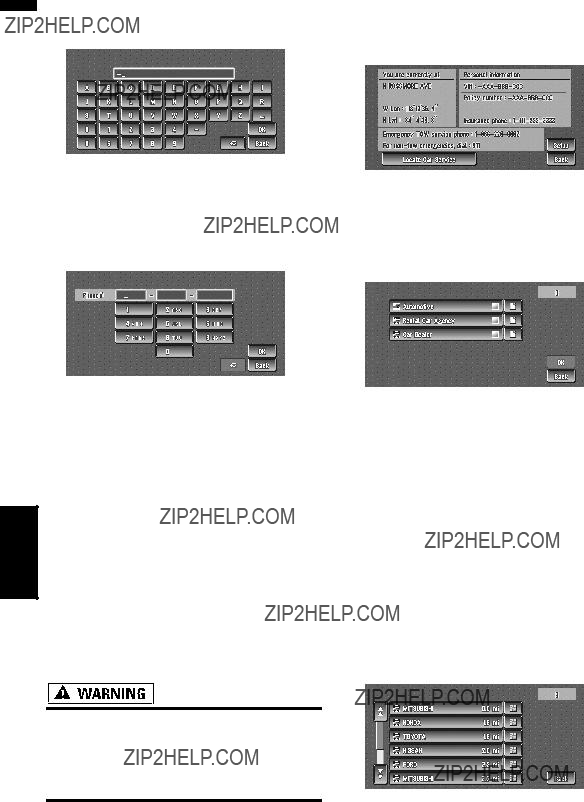
 Emergency Info
 Overlay POI*1
 P. 20
P. 20
 P. 37, 47
 P. 37, 47
 P. 35
P. 35
 P. 36
P. 36
 P. 38, 48
 P. 38, 48
 P. 37
P. 37
 P. 37
P. 37 
 P. 38
P. 38
 P. 51
P. 51
 P. 50
P. 50
 P. 52
P. 52
 P. 53
P. 53
 P. 56
P. 56
 P. 54
P. 54
 P. 55
P. 55
 P. 56
P. 56
 P. 57
P. 57
 P. 36
P. 36 Edit Current Route
 View Current Route
 Recalculate
 Number of Routes*2
 Route Condition*2
 Avoid Freeway*2
 Avoid Ferry*2
 Avoid Toll Road*2
 Designate Areas to Avoid
 P. 41, 44
 P. 38, 44
 P. 40, 45
 P. 45
P. 45
 P. 45
P. 45
 P. 45
P. 45
 P. 45
P. 45
 P. 45
P. 45
 P. 42
P. 42
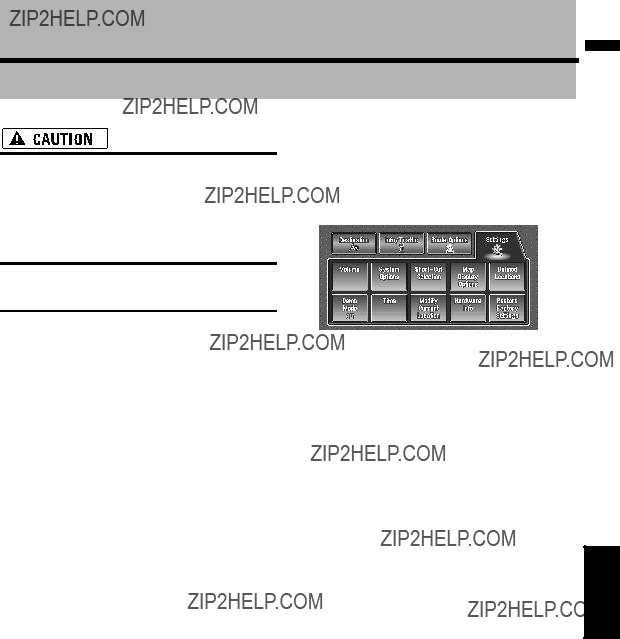
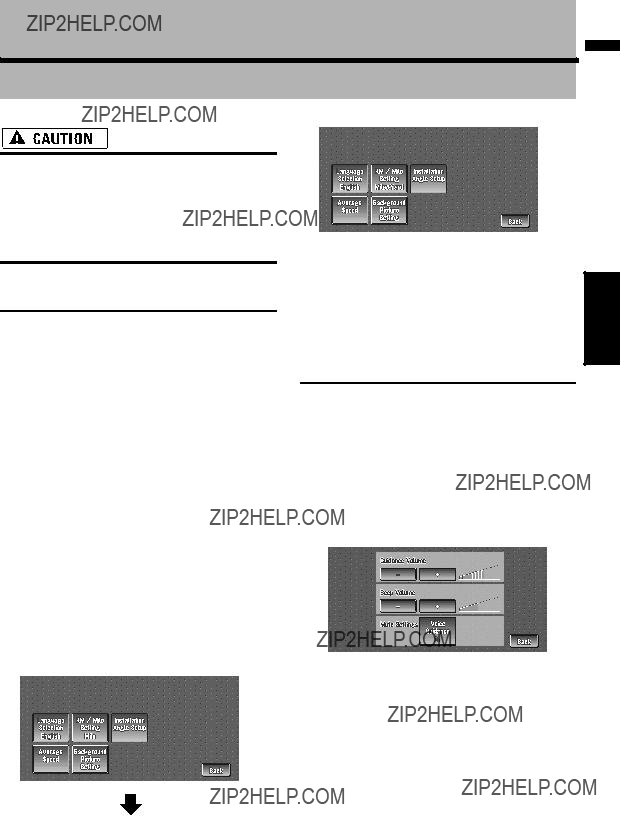
 Volume*2
 System Options
 Map Display Options*2
 Defined Locations
 Demo Mode
 Time
Time Hardware Info
 Restore Factory Settings
 Shortcut menu
 : Destination*3
 : Chg.Route*3
 : Registration
 : Vicinity Search*1
 : Whole Route Overview
 : Address Book
 P. 28, 33
 P. 28, 48
 P. 28
P. 28
 P. 39
P. 39


 P. 43
P. 43
 P. 38, 48
 Cancel Route
 Route Profile
 Route Scroll
 Skip Way Point
 1 mile (km) - 50 mile (km)
 P. 40
P. 40
 P. 38
P. 38
 P. 39, 40
 P. 38, 40
 P. 41
P. 41 
 P. 40
P. 40
 : Route Options
 : Edit Current Route
 : Traffic On Route
 : Stock Info
 : Browse
 : My Favorites
 P. 41, 44
 P. 51
P. 51
 P. 54
P. 54
 P. 55
P. 55
 P. 56
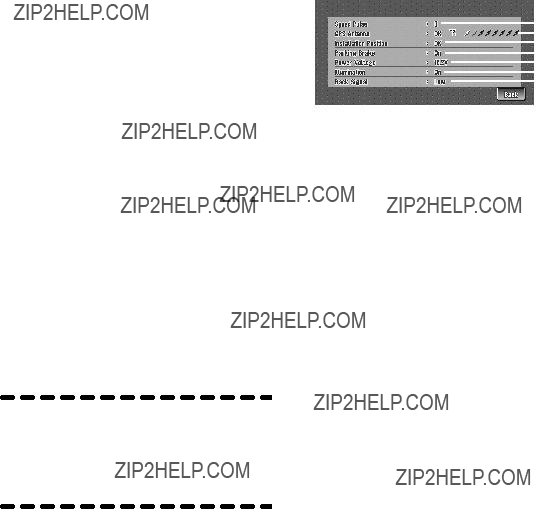
P. 56 PREOUT
 POLARITY
 P. 100
 P. 100
 P. 102
 P. 102
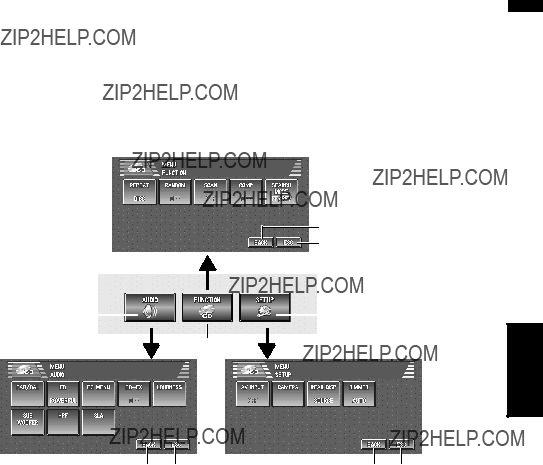
 REPEAT
 RANDOM
 SCAN
SCAN COMP
COMP SEARCH MODE
 BSM
BSM LOCAL
LOCAL MEMO
MEMO FUNCTION 1
 FUNCTION 2
 BSSM
BSSM
 P. 74
P. 74
 P. 75
P. 75
 P. 75
P. 75
 P. 75
P. 75 
 P. 75
P. 75
 P. 77
P. 77 
 P. 77
P. 77
 P. 86
P. 86
 P. 89
P. 89 
 P. 89
P. 89
 P. 91
P. 91