WICHTIGE SICHERHEITSHINWEISE
Bitte lesen Sie diese Anleitung zum Einbau des Farbdisplays aufmerksam durch und bewahren Sie die Anleitung f??r sp??teres Nachschlagen auf
1.Bitte lesen Sie diese Anleitung vor dem Einbau des Farbdisplays aufmerksam durch.
2.Bewahren Sie die Anleitung f??r sp??teres Nachschlagen auf.
3.Beachten Sie alle Warnungen in dieser Anleitung, und folgen Sie den hier gegebenen Anweisungen genauestens.
4.Gestatten Sie anderen Personen nicht, dieses Ger??t zu verwenden, bevor diese die Bedienungsanleitung gelesen haben.
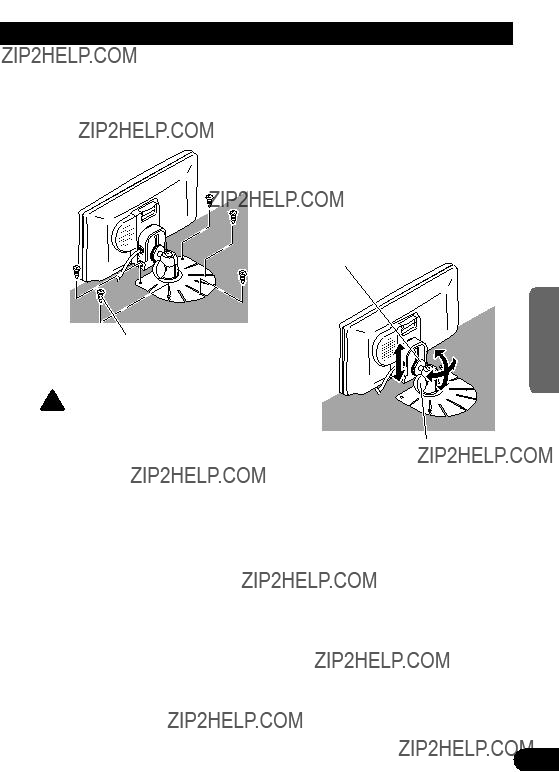
5.Bringen Sie das Display nicht an Stellen an, wo es (i) die Sicht des Fahrers beein- tr??chtigt, (ii) beim F??hren des Fahrzeugs st??rt oder Sicherheitseinrichtungen des Fahrzeugs wie etwa die Airbags in ihrer Funktion behindert oder (iii) die F??higkeit des Fahrers, das Fahrzeug sicher zu steuern, beeintr??chtigt.
6.Zubeh??r im Innenraum des Fahrzeugs sollte die Aufmerksamkeit des Fahrers niemals vom Verkehrsgeschehen ablenken, und das Gleiche gilt auch f??r dieses Display. Falls Schwierigkeiten hinsichtlich der Bedienung des Ger??ts auftreten, oder das angezeigte Bild schlecht erkennbar ist, sollten weitere Einstellungen erst nach dem sicheren Parken des Fahrzeugs vorgenommen werden.
7.Versuchen Sie niemals, das Display eigenh??ndig einzubauen oder zu warten. Der Einbau oder die Wartung des Displays durch ungeschulte Personen, die im Umgang mit elektronischer Ausr??stung und Fahrzeugzubeh??r keine Erfahrung haben, setzt den Fahrer der Gefahr elektrischer Schl??ge und anderer Verletzungen aus.
8.Beachten Sie bitte, beim Fahren stets den Sicherheitsgurt anzulegen. Nicht kor- rekt angeschnallte Insassen sind bei einem Unfall einer wesentlich h??heren Verletzungsgefahr ausgesetzt.
9.Der Gebrauch dieses Produkts unterliegt jeglichen Landesgesetzen hinsichtlich Platzierung und Nutzung.
PIONEER ??bernimmt keinerlei Verantwortung f??r jedwede Probleme, Sch??den oder Verluste, die auf den Gebrauch des Produkts mit falscher Einrichtung oder unter Verletzung von Landesgesetzen zur??ckzuf??hren sind.
10.Dieses Produkt ist f??r Gebrauch mit einer R??ckw??rtskamera vorgesehen. Anwender k??nnen den AV IN2-Eingang mit ???REVERSE-GEAR SIGNAL INPUT??? (R??ckw??rtsgang-Signaleingang) nur an eine R??ckw??rtskamera anschlie??en. Anwender d??rfen keine anderen Ger??te an den AV IN2-Eingang mit ???REVERSE-GEAR SIGNAL INPUT??? anschlie??en.


 CAUTION

 CAUTION


 A
A R
R AV I N 1+ GUIDE


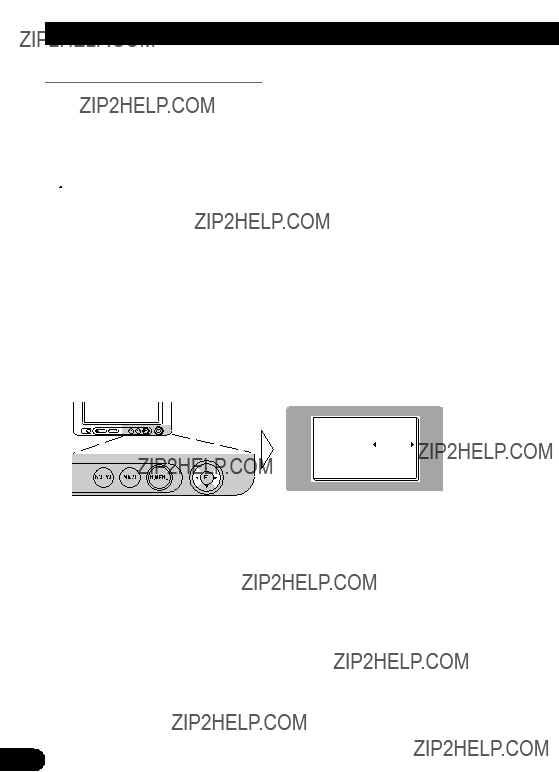
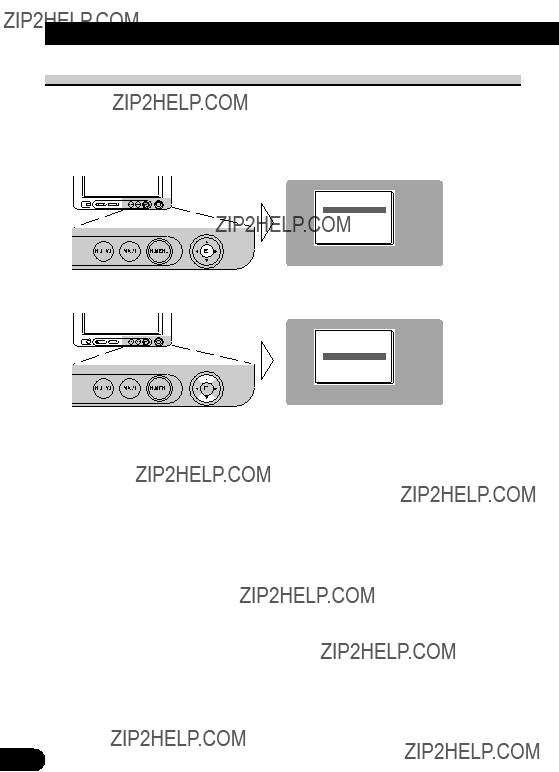
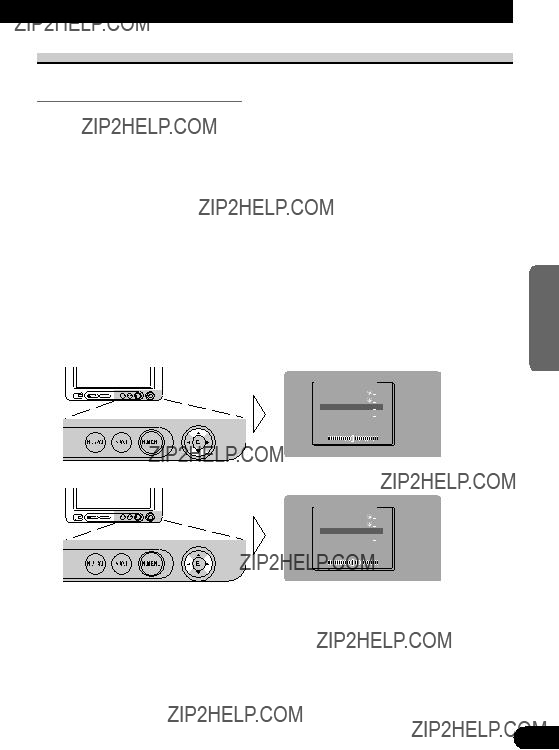
 ) or blue mark (
  ) is displayed to the right of [BRIGHTNESS] and [CONTRAST] on the screen, respectively, as the

 CAUTION
 CAUTION

 CAUTION
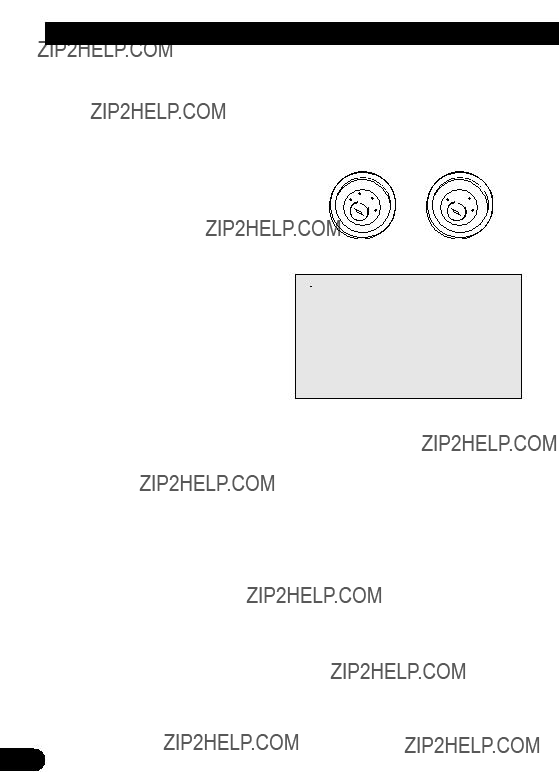
 CAUTION

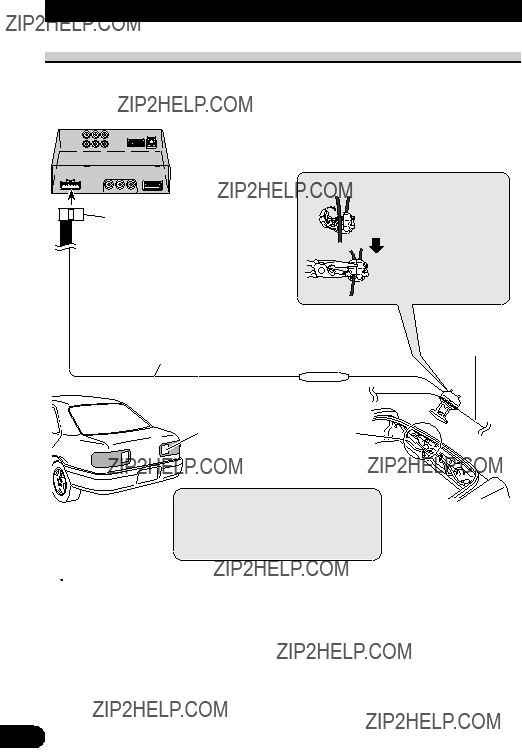
 supply side of the parking brake switch.
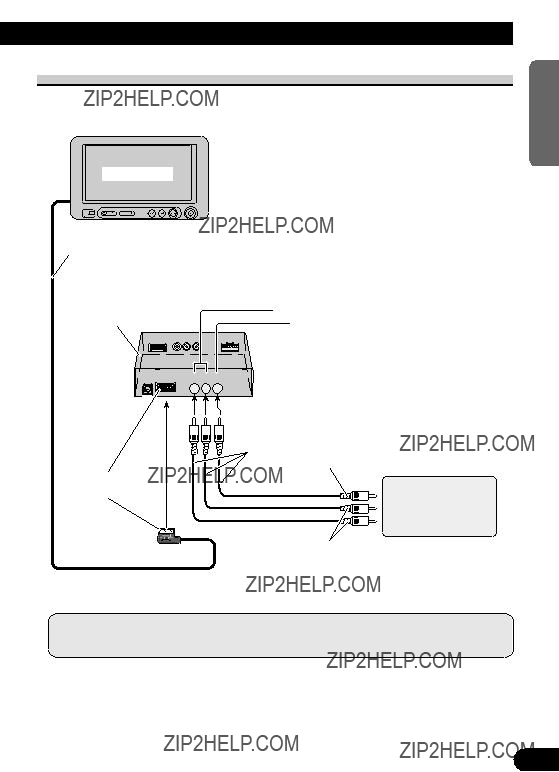


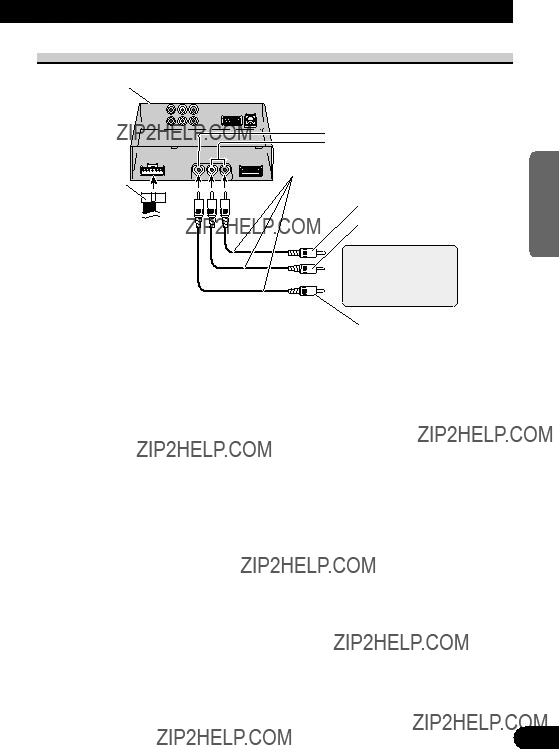
 AV IN1 INPUT

 AV IN2 INPUT
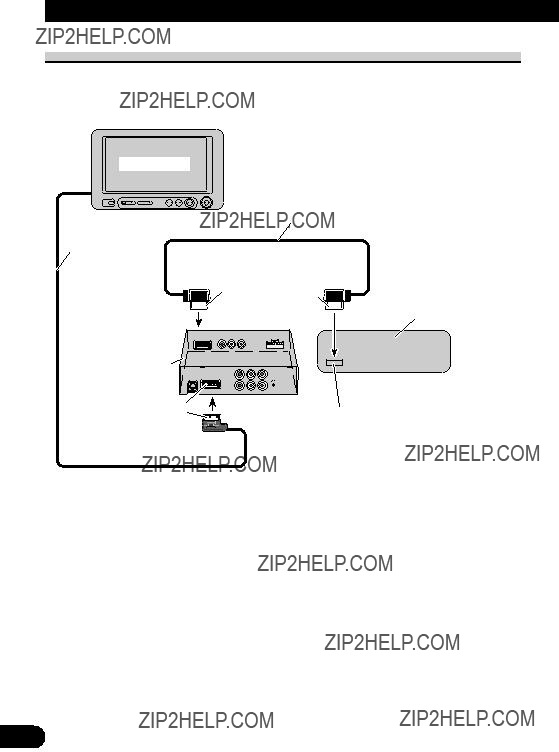


 CAUTION
 CAUTION


 CAUTION


 PRECAUCI??N
 PRECAUCI??N


 A
A R
R AV I N 1+ GUIDE


 ) o marca azul (
  ) se visualiza a la derecha de [BRIGHTNESS] y [CONTRAST] en la pantalla, respectivamente, seg??n que el sensor de luz ambiental del panel frontal determine brillantez u oscuridad.
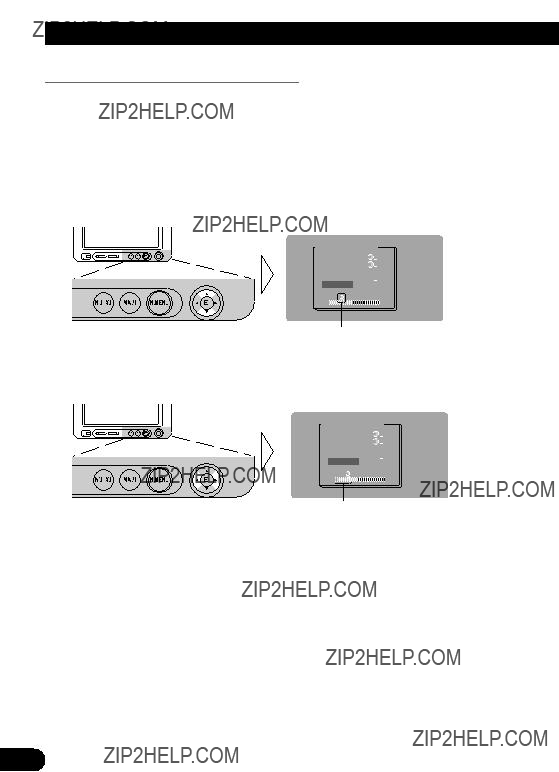
 PRECAUCI??N

 PRECAUCI??N

 PRECAUCI??N
 PRECAUCI??N


 Cable de alimentaci??n
 Resistencia de fusible


 Entrada AV IN1

 Entrada AV IN2
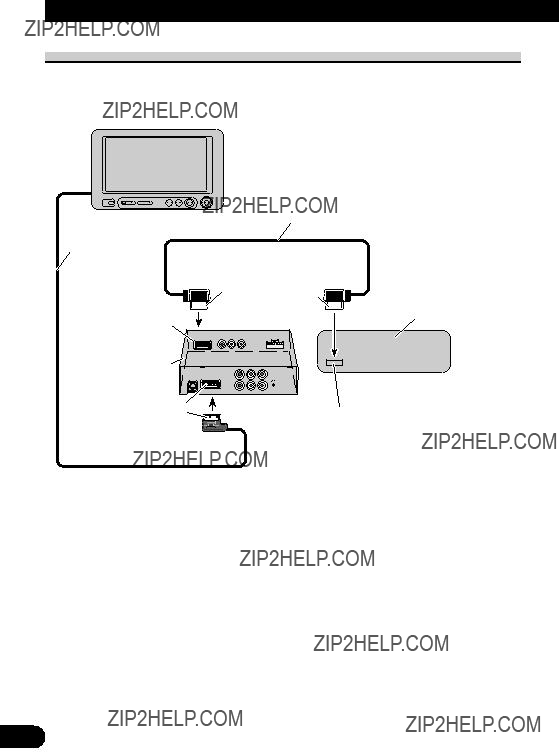
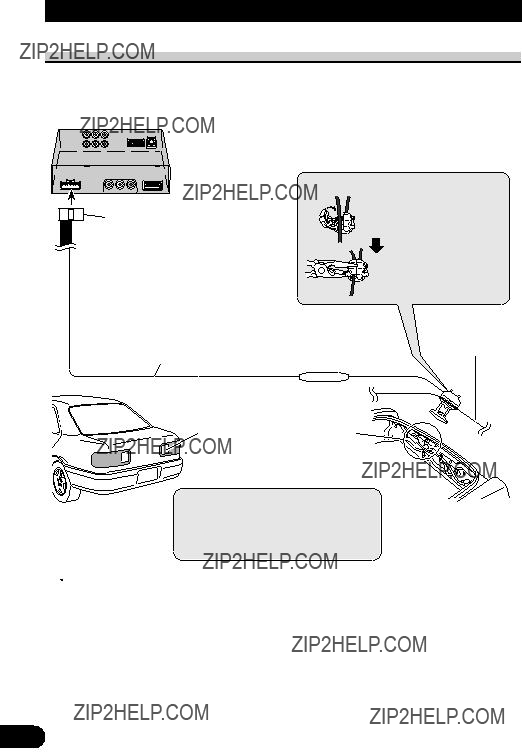
 Unidad
  PRECAUCI??N
 PRECAUCI??N


 PRECAUCI??N
 Unidad


 VORSICHTSMA??NAHME

 VORSICHT

 A
A R
R AV I N 1+ GUIDE
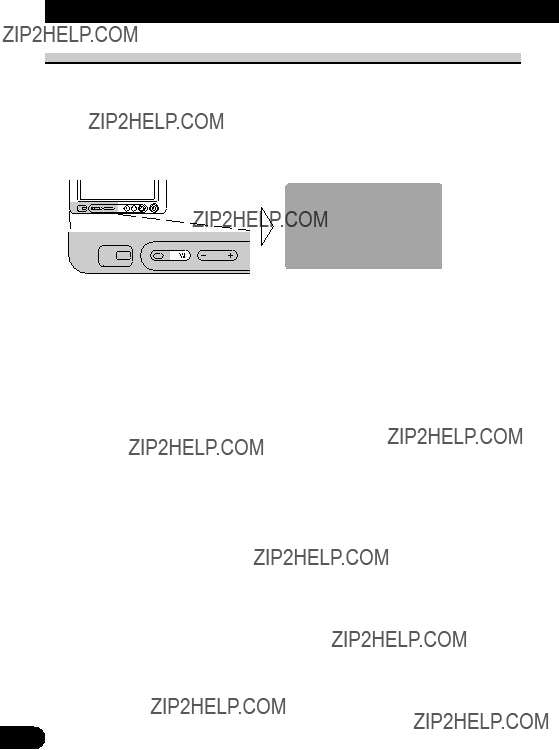

 ) oder blaue Marke (
  ) erscheint jeweils rechts von [BRIGHTNESS] und [CONTRAST] am Schirm, w??hrend der Umgebungslichtsensor an der Frontplatte Helligkeit oder Dunkelheit abtastet.

 VORSICHT

 VORSICHT

 VORSICHT
 VORSICHT
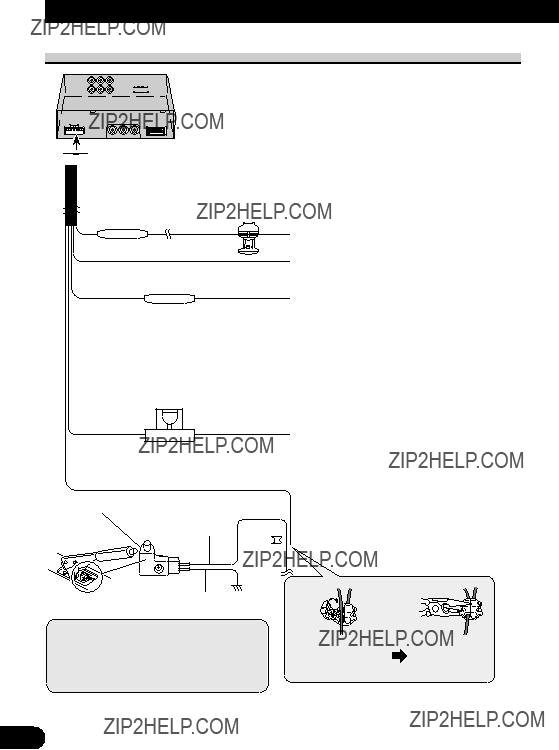


 Stromversorgungskabel
 Sicherungswiderstand
 Feststellbremsschalters anschlie??en.
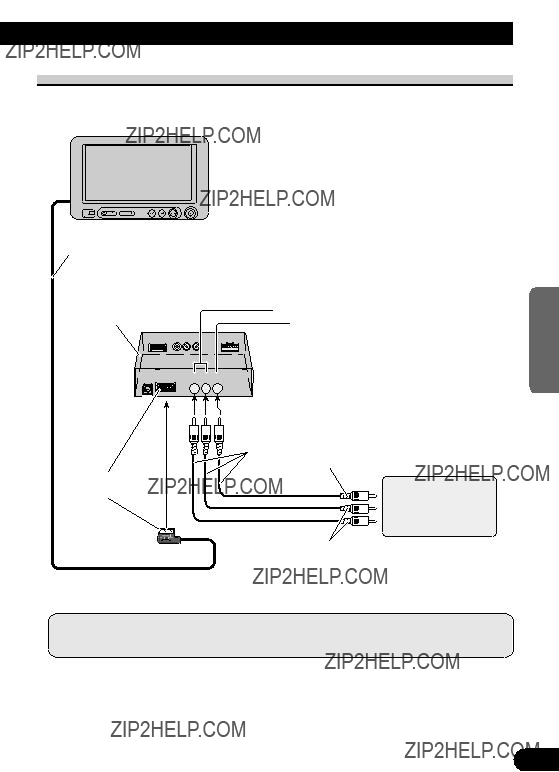


 AV
AV 

 AV
AV 


 VORSICHT
 VORSICHT


 VORSICHT