Electrical Information . . . . . . . . . . . . . . . . 4
Environmental Markings . . . . . . . . . . . . . . 5
Getting Started . . . . . . . . . . . . . . . . . . . . . . . 6
In the Box . . . . . . . . . . . . . . . . . . . . . . . . . . . . . . . . . . 6
Identification of Parts . . . . . . . . . . . . . . . . . 6
Remote Control . . . . . . . . . . . . . . . . . . . . . . . . . . . . . 6
Digital Set Top Box . . . . . . . . . . . . . . . . . . . . . . . . . . . 7
Mains Adaptor . . . . . . . . . . . . . . . . . . . . . . . . . . . . . . . 7
The Remote Control . . . . . . . . . . . . . . . . . 7
Using the Remote Control . . . . . . . . . . . . . . . . . . . . . 7
Mains adaptor . . . . . . . . . . . . . . . . . . . . . . . 7 Connecting Your Digital Set Top Box to other equipment . . . . . . . . . . . . . . . . . . . . . 8
Connecting to a Television and DVD player . . . . . . . 8 Connecting to a TV and audio equipment . . . . . . . . . 9
Switching on for the first time . . . . . . . . 10
Using the Set Top Box . . . . . . . . . . . . . . . . 11
Channel List . . . . . . . . . . . . . . . . . . . . . . . 11
To Watch a channel . . . . . . . . . . . . . . . . . . . . . . . . . 11 To Delete a Channel . . . . . . . . . . . . . . . . . . . . . . . . . 11 To Edit a channel name . . . . . . . . . . . . . . . . . . . . . . . 11 To Lock a channel . . . . . . . . . . . . . . . . . . . . . . . . . . . 12 To Add a channel to your Favourites list . . . . . . . . . 12 Changing Channels . . . . . . . . . . . . . . . . . . . . . . . . . . 13 Channel browse keys . . . . . . . . . . . . . . . . . . . . . . . . 13 Number keys (0-9) . . . . . . . . . . . . . . . . . . . . . . . . . . 13 Channel list . . . . . . . . . . . . . . . . . . . . . . . . . . . . . . . . 13
Configuration . . . . . . . . . . . . . . . . . . . . . . 13
Receiver Upgrade . . . . . . . . . . . . . . . . . . . . . . . . . . . 13
Parental Settings . . . . . . . . . . . . . . . . . . . . . . . . . . . . 14
Audio Language . . . . . . . . . . . . . . . . . . . . 14
Timers . . . . . . . . . . . . . . . . . . . . . . . . . . . . 14
Electronic Program Guide . . . . . . . . . . . . 15
Favourites . . . . . . . . . . . . . . . . . . . . . . . . . 16
2 CONTENTS
Expert settings . . . . . . . . . . . . . . . . . . . . . 16
Manual channel search . . . . . . . . . . . . . . . . . . . . . . . 16 Clear all settings . . . . . . . . . . . . . . . . . . . . . . . . . . . . 16
Troubleshooting . . . . . . . . . . . . . . . . . . . . . 17
Symptom . . . . . . . . . . . . . . . . . . . . . . . . . . . . . . . . . . 17 Possible cause . . . . . . . . . . . . . . . . . . . . . . . . . . . . . . 17 Remedy . . . . . . . . . . . . . . . . . . . . . . . . . . . . . . . . . . . 17
Technical Data . . . . . . . . . . . . . . . . . . . . . . 18
Guarantee . . . . . . . . . . . . . . . . . . . . . . . . . . 19


 English
 English
 English
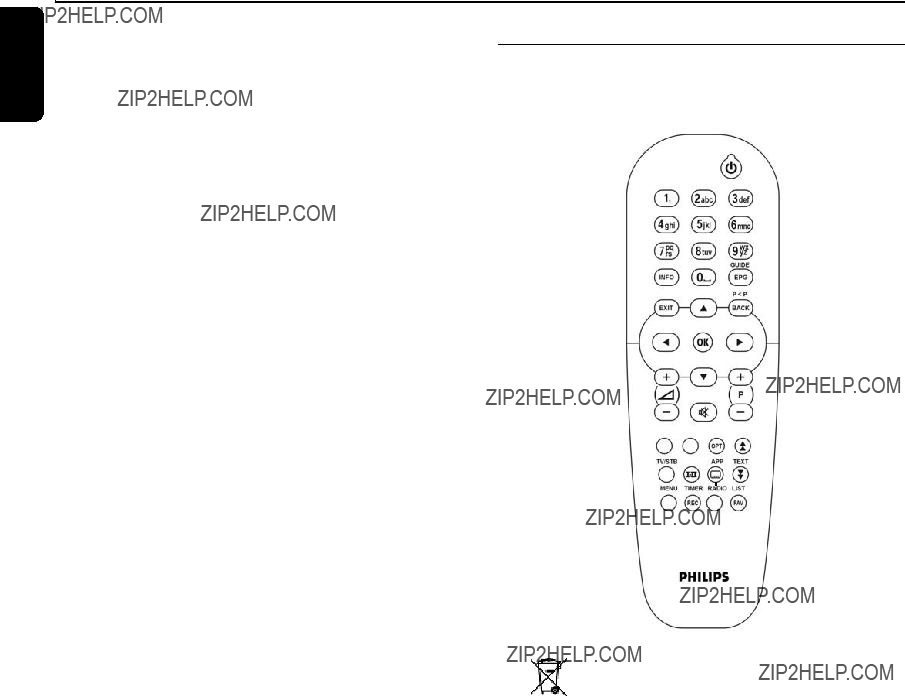
 English
 English
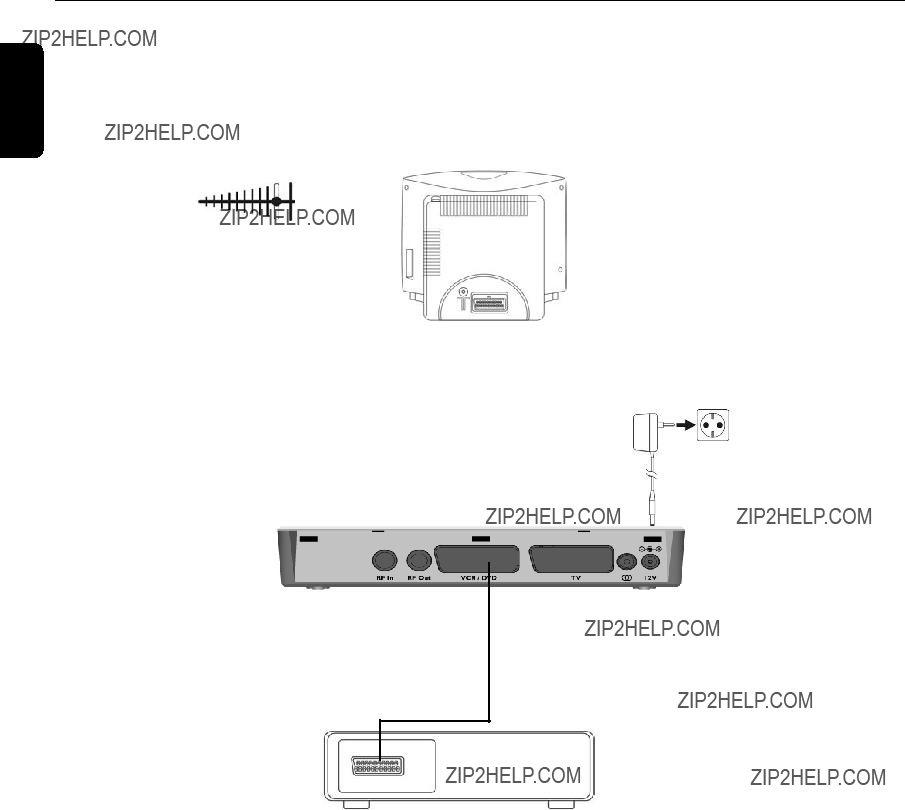
 English
 English
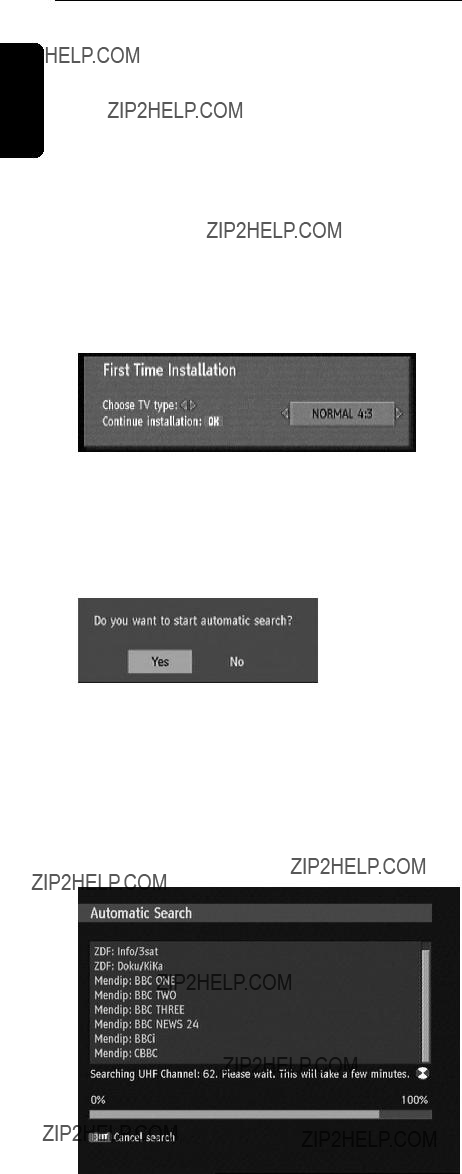
 keys to choose either NORMAL 4:3 or WIDESCREEN 16:9.
 key to start installation.
 keys to highlight Yes and then press the
  key.
key. to navigate through the channel list until you reach the channel you want to watch.
 to step along the options until you reach
 to watch the selected channel in the picture window located at the top right corner.
 again or press EXIT.
 to navigate through the channel list until you reach the channel you want to delete.
 to step along the options until you reach
 to delete the selected channel in the picture window, top right corner.
 to navigate through the channel list until you reach the channel you want to edit.
 to step along the options until you reach
 to select the edit name function.
 English
 to step along the characters of the name and modify each as required. The new name can be shorter or
 to confirm the new name.
 to navigate through the channel list until you reach the channel you want to lock.
 to step along the options until you reach Lock.
 to set the lock.
 appears alongside the selected chan- nel in the list. Enter your Lock Key (0000 is the default
 again to remove the lock.
 to step along the options until you reach
 to navigate through the channel list until you reach the channel you want to add to your favourites list.
 to select one of the available Favourites lists.
 to set this channel as a favourite to the selected list.
 appears alongside the selected channel in the list. The symbol indicates the number of the
 again to remove from the favourites list. See page 16 on how to activate the favourites lists.
 to view the list of available channels in the Channel List
 .
. keys.
keys. to view/listen to the channel in the window. Press EXIT to go to full screen.
 .
.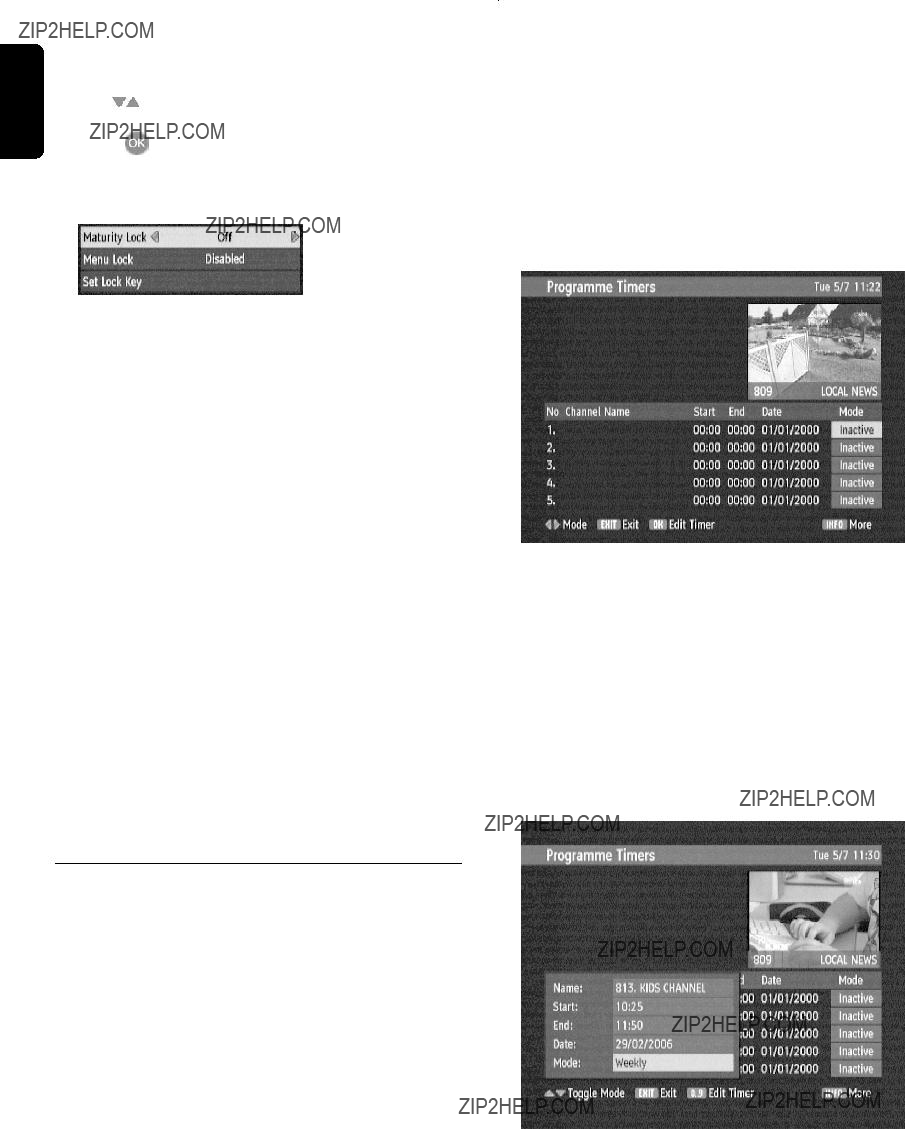
 to step through and display the available options:
 to highlight Set Lock Key.
 to select Audio Menu.
 to select the desired language.
 to apply these settings and exit this function. This change is only temporarily for the current program.
 to select Timers.
 to select one of the five timer settings available.
 to step through the list of loaded channels until the channel to be set for timed turn on/off displays.
 to step to the Start time.
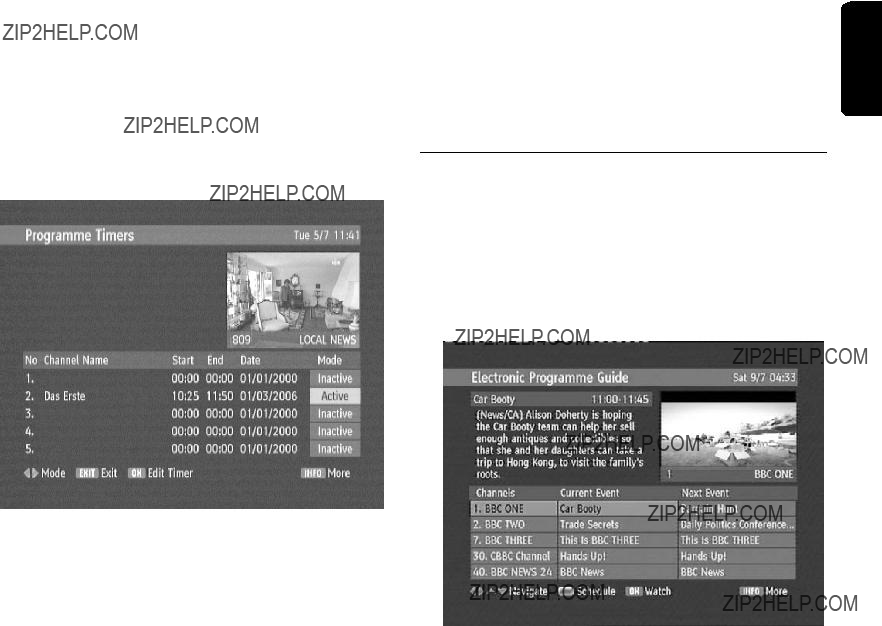
 to step to the End time.
 to step to the Date.
 to apply changes and move the entered data to the main timing list, as shown below.
 to navigate through Channels.
 to step to the Next Event.
 to return to the Current Event.
 to watch the currently selected event in the upper right panel in this window.
 English
 keys to navigate through the menu.
 to select an item.
 to search for channels.
 English
 English
 English