Mistral
GC2225, GC2220, GC2215, GC2130, GC2125, GC2120,
GC2115, GC2110, GC2105
Read manual before use
Mistral
GC2225, GC2220, GC2215, GC2130, GC2125, GC2120,
GC2115, GC2110, GC2105
Read manual before use

2

3
BK A
L E
MC
F G 


 I
I
D
H

4

GC2225, GC2220, GC2215, GC2130, GC2125, GC2120, GC2115, GC2110, GC2105

6 ENGLISH
Important
Read these instructions for use carefully and look at the illustrations before you start using the appliance.
Save these instructions for use for future reference.
???Check if the voltage indicated on the type plate corresponds to the local mains voltage before you connect the appliance.
???Never leave the iron unattended when it is connected to the mains.
???This appliance is not intended for use by young children or infirm persons without supervision.
???Young children should be supervised to ensure that they do not play with the appliance.
???The soleplate of the iron can become extremely hot and may cause burns if touched. Do not allow the cord to come into contact with the soleplate when it is hot.
???When you have finished ironing, when you clean the appliance, when you fill or empty the water tank and also when you leave the iron even for a short while: set the steam control to position O, put the iron on its heel and remove the mains plug from the wall socket.
???If the mains cord of this appliance is damaged, it must always be replaced by Philips or a service centre authorised by Philips in order to avoid hazardous situations.
???Never use the appliance if it is damaged in any way.
???This appliance is intended for household use only.
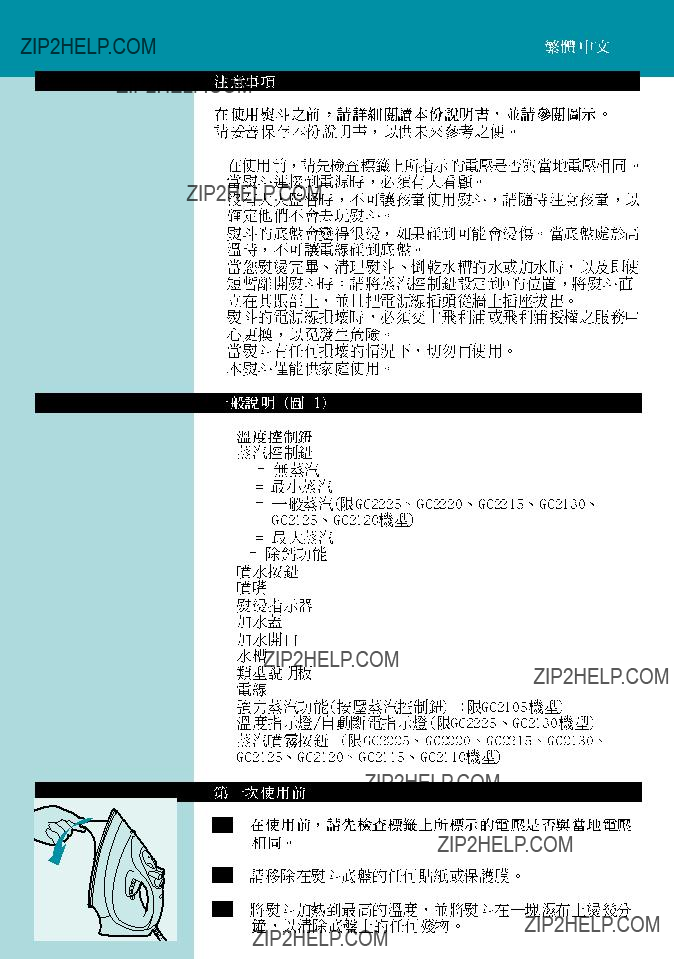
General description (fig. 1)
A Temperature control dial
BSteam control dial O = no steam
?? = minimum steam
q= moderate steam (types GC2225, GC2220, GC2215, GC2130, GC2125, GC2120 only)
w = maximum steam
x =
D Spray nozzle
E Temperature indicator F Filling cap
G Water filling opening H Water tank
I Type plate J Cord
K Extra Steam function (press steam control dial) (type GC2105)
L Temperature pilot
MShot of steam button 9 (types GC2225, GC2220, GC2215, GC2130, GC2125, GC2120, GC2115, GC2110 only)

ENGLISH 7
Before first use
1Check if the voltage indicated on the type plate corresponds to the local mains voltage before you connect the appliance.
C 2 Remove any sticker or protective foil from the soleplate.
3Heat up the iron to maximum temperature and pass the iron over a piece of damp cloth for several minutes to remove any
residues from the soleplate.
The iron may give off some smoke when you use it for the first time
This will cease after a short while.
Preparing for use
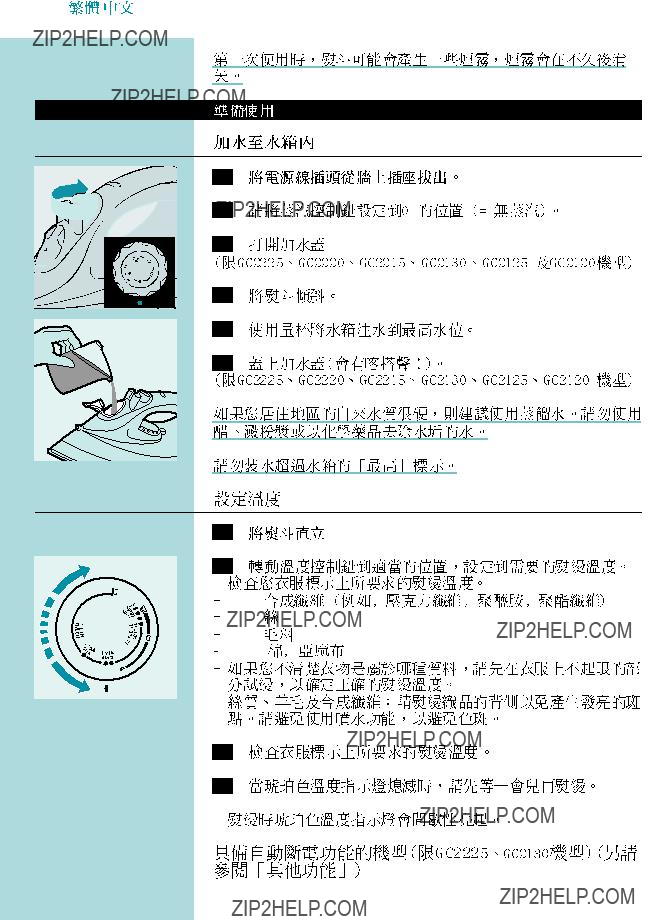
Filling the water tank
(types GC2225, GC2220, GC2215, GC2130, GC2125, and GC2120 only)
If the tap water in your area is very hard, we advise you to use distilled water. Do not use vinegar, starch or chemically descaled water.
Do not fill the water tank beyond the MAX indication.
Setting the temperature

8 ENGLISH
-If you do not know what kind of fabric(s) a garment is made of, determine the right ironing temperature by ironing a part that will be invisible when you wear the garment.
-Silk, woollen and synthetic materials; iron the reverse side of the fabric to prevent shiny patches. Avoid using the spray function to prevent stains.
3Put the mains plug in an earthed wall socket.
4When the amber temperature light has gone out, wait a while before you start ironing.
B The amber pilot light will go on from time to time during ironing.
For versions with auto
C ??? If the automatic
Using the appliance
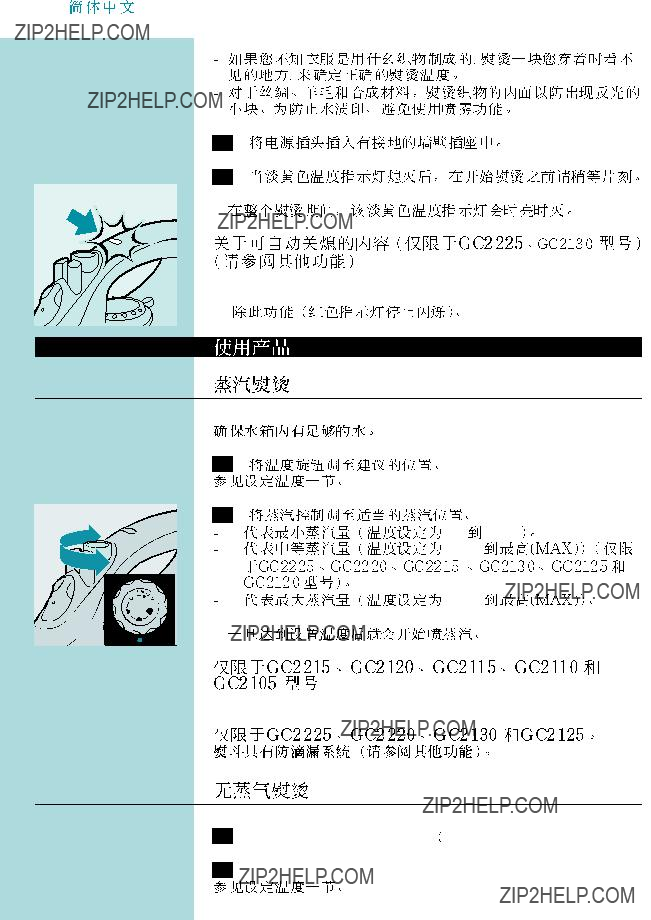
Steam ironing
Make sure that there is enough water in the water tank.
1 Set the temperature dial to the recommended position.
See 'Setting the temperature'.
Types GC2215, GC2120, GC2115, GC2110 and GC2105 only
Water may leak from the soleplate if the set temperature is too low (MIN to 2).
GC2225, GC2220, GC2130 and GC2125 only
The iron is equipped with a drip stop system (see also 'Other features).
Ironing without steam
1 Set the steam control to position O (= no steam).

ENGLISH 9
2 Set the temperature dial to the recommended position.
See 'Setting the temperature'.
Other features
Spraying
To remove stubborn creases at any temperature
1 Make sure that there is enough water in the water tank.
C 2 Press the spray button several times to moisten the garment to be ironed.
Extra Steam (type GC2105 only)

 C
C
 C
C
This function provides extra steam to remove really stubborn creases.
The Extra Steam function only works at temperature settings between 3 and MAX.
1Set the steam control to maximum position ??.
2Press and hold the Steam Control button down for max. 5 seconds.
3Wait at least 1 minute before using Extra Steam again to prevent water from dripping out of the soleplate.
Shot of Steam (GC2225, GC2220, GC2215, GC2130, GC2125, GC2120, GC2115 and GC2110 only)
A powerful shot of steam helps to remove very stubborn creases.
The
C 1 Press and release the

10 ENGLISH
Vertical Shot of Steam (types GC2225, GC2220, GC2215,
GC2130, GC2125, GC2120 and GC2115 only)
C 1 The
Never direct the steam towards people.
Drip Stop (types GC2225, GC2220, GC2130, GC2125 only)
This iron is equipped with a drip stop function: the iron automatically stops steaming when the temperature is too low to prevent water from dripping out of the soleplate. When this happens you will hear a click.
Automatic
An electronic safety device will automatically switch the heating element off if the iron has not been moved for a while.
C ??? To indicate that the heating element has been switched off, the red
To heat up the iron again:
1Pick up the iron or move it slightly.
2The red
3If the amber pilot light goes on after the iron has been moved, wait for it to go out before you start ironing.
4If the amber light does not go on after the iron has been moved, the iron is ready for use.
Cleaning and maintenance
The
Use the
C
C
 C
C
ENGLISH 11
1Set the steam control to position O.
2Fill the water tank to the maximum level.
Do not pour vinegar or other descaling agents into the water tank..
3Set the temperature dial to MAX.
4Put the plug in the wall socket.
5Unplug the iron when the amber pilot light has gone out.
6Hold the iron over the sink and set the steam control to position 1
7Pull the steam control knob upwards to remove the steam control needle.
8Move the iron to and fro.
BSteam and boiling water will come out of the soleplate. Impurities and scale (if any) will be flushed out.
C 9 Use vinegar to remove scale, if any, from the needle.
Do not bend or damage the steam control needle.
C 10 Put the steam control needle back by inserting the point of the needle exactly in the centre of the hole and by fitting the small projection on the side of the needle into the slot. Set the steam control knob to position O.
11 Repeat the
After the
1Plug the iron in to let the soleplate dry up.
2Unplug the iron when the amber pilot light has gone out.

12 ENGLISH
3Move the iron gently over a piece of used cloth to remove any water stains that may have formed on the soleplate.
4Let the iron cool down before you store it.
After ironing
1Remove the mains plug from the wall socket and let the iron cool down.
2Wipe scale and any other deposits off the soleplate with a damp cloth and a
Keep the soleplate smooth: avoid hard contact with metal objects.
Never use a scouring pad, vinegar or other chemicals.
3Clean the upper part of the appliance with a damp cloth.
4Regularly rinse the water tank with water. Empty the water tank after cleaning.
Storage

 C
C
C
1Remove the mains plug from the wall socket, let the iron cool down and set the steam control to position O.
2Empty the water tank.
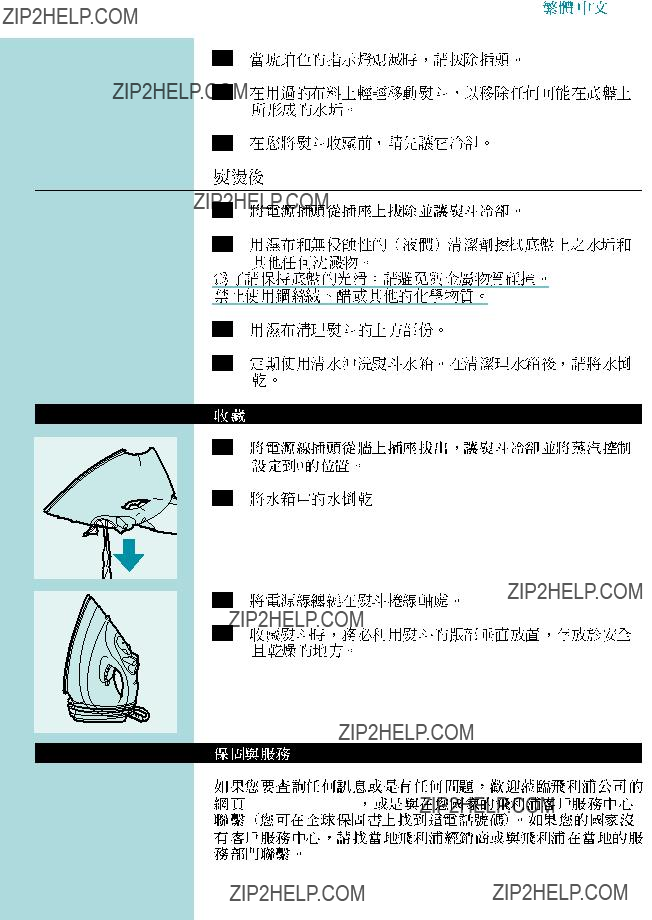
3Wind the mains cord round the cord storage facility.
4Always store the iron standing on its heel in a safe and dry place.
Guarantee & service
If you need information or if you have a problem, please visit the Philips Web site at www.philips.com or contact the Philips Customer Care Centre in your country (you will find its phone number in the worldwide guarantee leaflet). If there is no Customer Care Centre in your country, turn to your local Philips dealer or contact the Service Department of Philips Domestic Appliances and Personal Care BV.

ENGLISH 13
Troubleshooting
This chapter summarises the most common problems you could encounter with your iron. Please read the different sections for more details. If you are unable to solve the problem, please contact the Philips Customer Care Centre in your country.
The steam control has been set to position O.
Set the steam position to ??, ?? or ?? (see 'Using the appliance', section 'Steam ironing').
The soleplate is not hot enough and/or the Drip stop function (types GC2225, GC2220, GC2130 and GC2125 only) has been activated.
Set the temperature dial to a position in the steam area (2 to MAX). Put the iron on its heel and wait until the amber pilot light has gone out before you start ironing.
No shot of steam (types GC2225, GC2220, GC2215, GC2130, GC2125, GC2120, GC2115 and GC2110 only) or no Vertical Shot of Steam (types GC2225, GC2220, GC2215, GC2120 GC2130, GC2125 and GC2115 only).
The (Vertical) Shot of Steam function has been used too often within a very short period.
Put the iron in horizontal position and wait a while before using the (Vertical) Shot of Steam function again.
The soleplate is not hot enough.
Set the temperature dial to a position in the steam area (2 to MAX). Put the iron on its heel and wait until the amber pilot light has gone out before you start ironing.
Flakes and impurities come out of the soleplate during ironing.
Hard water forms flakes inside the soleplate.
Use the
Water droplets on fabric (types GC2225, GC2220, GC2215, GC2130, GC2125 and GC2120 only)
The filling cap has not been closed properly.
Press the filling cap until you hear a click.
Water drips from the soleplate after the iron has been stored or cooled down.
The iron has been put in horizontal position while there was still water in the water tank.
Empty the water tank before you store the iron. Set the steam control to position O and store the iron standing on its heel.

14 BAHASA MELAYU
Penting
Baca arahan penggunaan ini dengan teliti dan perhatikan gambar- gambar sebelum anda mula menggunakan perkakas.
Simpan arahan penggunaan ini untuk rujukan pada masa depan.
???Periksa sama ada kuasa voltan yang ditunjukkan pada plat jenis berpadanan dengan voltan utama setempat sebelum anda menyambungkan peralatan.
???Jangan tinggalkan seterika setelah disambungkan pada punca kuasa utama.
???
???Plat tapak seterika boleh menjadi terlalu panas dan boleh menyebabkan kelecuran jika disentuh. Jangan biarkan kord tersentuh dengan plat tapak ketika ianya panas.
???Bila anda selesai menyeterika, bila anda membersihkan peralatan, bila anda mengisi atau mengosongkan tangki air dan bila anda tinggalkan seterika biarpun sebentar: tetapkan kawalan wap pada kedudukan 0, letakkan seterika pada tumitnya dan tanggalkan plag utama dari soket dinding.
???Jika kord utama peralatan rosak, penggantian hanya boleh dilakukan oleh Philips atau pusat perkhidmatan yang diiktiraf oleh Philips kerana peralatan dan alat ganti khas diperlukan.
???Jangan gunakan peralatan jika terdapat kerosakan.
???Perkakas ini hanya untuk kegunaan di rumah sahaja.
Gambaran am (gamb. 1)
A Tombol kawalan suhu
BTombol kawalan stim O = tiada stim
?? = bagi stim minimum
q= stim sederhana (jenis GC2225, GC2220, GC2215, GC2130, GC2125, GC2120 sahaja)
w = stim maksimum
x = fungsi
D Muncung sembur E Penunjuk Suhu F Penutup pengisi G Bukaan isian air H Tangki air
I Plat jenis J Kord
K Fungsi Stim Tambahan (tekan tombol kawalan stim) (jenis GC2105) L Lampu panduan suhu/Lampu panduan pematian automatik (jenis
GC2225, GC2130 sahaja)
MButang pancutan stim 9 (jenis GC2225, GC2220, GC2215, GC2130, GC2125, GC2120, GC2115, GC2110 sahaja)

BAHASA MELAYU 15
Sebelum penggunaan pertama
1Periksa sama ada kuasa voltan yang ditunjukkan di plat jenis berpadanan dengan voltan utama setempat sebelum anda menyambungkan peralatan.
Seterika akan mengeluarkan asap bila anda menggunakannya buat
pertama kali. Ianya akan terhenti selepas beberapa ketika.
Persediaan bagi penggunaan
Mengisi tangki air.
Jika air paip di kawasan anda keruh, kami nasihatkan anda supaya menggunakan air suling. Jangan gunakan cuka, kanji atau air berkimia.
Jangan isikan tangki air melepasi tanda MAKSIMUM.
Menetapkan suhu
1 Letakkan seterika pada tumitnya.

16BAHASA MELAYU
-Jika anda tidak tahu fabrik jenis apa digunakan untuk membuat sesuatu pakaian, pastikan suhu penyeterikaan yang betul dengan menyeterika satu bahagian pakaian yang tidak akan kelihatan semasa anda memakainya.
-Kain sutera, sakhlat dan sintetik; seterika sebelah dalam fabrik untuk mencegah
3Pasangkan palam di soket dinding berlitar bumi.
4Apabila lampu suhu kuning jingga padam, tunggu sebentar sebelum anda mula menyeterika.
BLampu panduan kuning jingga akan menyala dari masa ke semasa sewaktu menyeterika.
Bagi versi dengan pematian automatik (jenis GC2225,
GC2130 sahaja) (juga lihat
C ??? Jika fungsi pematian automatik diaktifkan (lampu panduan merah berkelip), gerakkan seterika dengan sedikit untuk menyahaktifkan fungsi ini (lampu panduan merah berhenti berkelip).
Penggunaan perkakas
Menyeterika dengan stim
Pastikan air di dalam tangki air mencukupi.
1 Setkan dail suhu kepada kedudukan yang disarankan.
Lihat 'Menetapkan suhu'.

BAHASA MELAYU 17
Jenis GC2215, GC2120, GC2115, GC2110 dan GC2105 sahaja
Air mungkin bocor dari plat tapak jika suhu yang ditetapkan terlalu rendah (MIN hingga 2).
GC2225, GC2220, GC2130 dan GC2125 sahaja.
Seterika dilengkapi sistem penghenti titis (juga lihat
Menyeterika tanpa stim
1Laraskan kawalan stim pada posisi O (=tanpa stim).
2Setkan dail suhu kepada kedudukan yang disarankan.
Lihat 'Menetapkan suhu'.
Penyemburan
Bagi menghilangkan kedutan degil pada sebarang suhu.
1 Pastikan air di dalam tangki air mencukupi.
C 2 Tekan butang sembur beberapa kali untuk melembapkan pakaian yang hendak diseterika.
Stim Tambahan (jenis GC2105 sahaja)
Fungsi ini memberikan stim tambahan untuk melicinkan kedut yang sangat degil.
Fungsi Stim Tambahan hanya berfungsi pada tetapan suhu di antara 3 dan MAKSIMUM.

18 BAHASA MELAYU
Pancutan Stim (GC2225, GC2220, GC2215, GC2130, GC2125,
GC2120, GC2115 dan GC2110 sahaja)
Pancutan stim yang kuat menolong melicinkan kedut yang sangat degil. Fungsi Pancutan Stim hanya berhasil pada ketetapan suhu di antara 2 dan MAKSIMUM.
C 1 Tekan dan lepaskan butang Pancutan Stim.
Pancutan Stim Menegak (jenis GC2225, GC2220, GC2215,
GC2130, GC2125, GC2120 dan GC2115 sahaja)
C 1 Fungsi Pancutan Stim boleh juga digunakan apabila anda memegang seterika dalam kedudukan menegak. Ini berguna untuk melicinkan kedut pada pakaian yang tergantung, langsir, dsb.
Jangan halakan stim kepada orang.
Penghenti Titis (jenis GC2225, GC2220, GC2130 dan GC2125 sahaja)
Seterika ini dilengkapi dengan fungsi pemberhenti titisan: Seterika akan secara automatik berhenti mengewap bila suhu terlalu rendah untuk menghalang air dari menitis keluar dari dasar. Bila ini berlaku anda akan mendengar bunyi klik.
Pematian Automatik (jenis GC2225 dan GC2130 sahaja)
Alat keselamatan elektronik akan secara automatik memadamkan elemen pemanas jika seterika tidak digerakkan untuk beberapa ketika.
C ??? Bagi menandakan yang elemen pemanas telah pun dipadamkan, lampu panduan
Untuk memanaskan semula seterika:
1Angkat seterika atau gerakkannya sekejap.
2Lampu panduan pematian automatik merah akan padam. Lampu panduan suhu kuning jingga akan menyala, bergantung pada suhu plat tapak.
3Jika lampu pemulaan kuning jingga akan menyala selepas seterika digerakkan, tunggu sehingga lampu pdam menghilang sebelum memulakan menyerika.

BAHASA MELAYU 19
4Jika lampu permulaan kuning jingga tidak menyala selepas seterika digerakkan, seterika kini sedia digunakan.
Pembersihan dan penyelenggaraan
Fungsi
Gunakan fungsi
1 Laraskan kawalan stim pada posisi O.
C
C
 C
C
2 Isi tangki air sampai paras maksimum.
Jangan curahkan cuka atau ejen hapuskapuran lain ke dalam tangki air.
3Tetapkan suhu dial ke MAKSIMUM.
4Pasangkan palam di soket dinding.
5Cabut palam alat seterika kalau lampu panduan kuning jinnga itu mati.
6Pegang seterika di atas singki dan tetapkan kawalan stim pada kedudukan 1
7Tarik tombol kawalan stim ke atas untuk mengeluarkan jarum kawalan stim.
8Gerakkan seterika ke depan dan ke belakang.
BStim dan air yang mendidih akan keluar dari tapak alat. Kekotoran dan kerak air (kalau ada) akan mengalir keluar.
C 9 Gunakan cuka untuk menanggalkan kerak, jika ada, dari jarum.
Jangan bengkokkan atau rosakkan jarum kawalan stim.

20 BAHASA MELAYU
Selepas proses
1
2
3
Sambungkan alat seterika supaya tapak alat dapat menjadi kering.
Cabut palam alat seterika kalau lampu panduan kuning jingga itu mati.
Gerakkan seterika
4 Biarkan seterika menyejuk sebelum menyimpannya.
Setelah menyeterika
1Cabut palam kuasa utama dari soket dinding dan biarkan alat seterika mendingin dahulu.
2Mengelap kerak air dan mendapan lain daripada tapak alat dengan kain yang lembap dan bahan pencuci (cecair) yang tidak
mengempelas.
Jangan sampai objek logam terkeena tapak alat supaya tetap licin.
Jangan
lain.
3Bersihkan bahagian atas peralatan dengan kain lembab.
4Selalu bilas tangki air dengan air. Kosongkan tangki air selepas membersihkannya.
Penyimpanan
BAHASA MELAYU 21
C 3 Gulungkan kord utama sekeliling kemudahan penyimpanan kord.
4Selalu simpan seterika berdiri atas tumit di tempat yang selamat dan kering.
Maklumat & perkhidmatan.
Jika anda memerlukan maklumat lanjut atau menghadapi masalah, sila lawati Laman Web Philips di www.philips.com atau di Pusat Penjagaan Pengguna Philips di negara anda (anda akan mendapati nombor telefonnya di helaian jaminan seluruh dunia). Jika tiada Pusat Khidmat Pengguna di negara anda, pergi ke kedai pembekal Philips tempatan atau hubungi Bahagian Servis Peralatan Rumah dan Penjagaan Persendirian BV Philips.

22 BAHASA MELAYU
Penyelesaian masalah
Tajuk ini merumuskan masalah biasa yang selalu dihadapi dengan seterika anda. Sila baca bahagian- bahagian berlainan untuk keterangan lanjut. Jika anda tidak berupaya menyelesaikan masalah, sila hubungi Pusat Penjagaan Pelanggan Philips di negara anda.
Periksa wayar utama, palam dan soket dinding.
Tetapkan tombol suhu pada kedudukan yang dikehendaki.
Condongkan seterika semasa mengisi.
Isikan tangki air (lihat 'Persediaan bagi penggunaan'; seksyen 'Pengisian tangki air'.)
Tetapkan kedudukan stim pada ??, ?? atau ?? (lihat 'Penggunaan perkakas', seksyen 'Penyeterikaan berstim').
Tetapkan tombol suhu pada kedudukan dalam lingkungan stim (2 hingga MAX). Letakkan seterika pada tumitnya dan tunggu sehingga lampu panduan kuning jingga padam sebelum anda mula menyeterika.
Tiada Pancutan Stim (jenis GC2225, GC2220, GC2215, GC2130, GC2125, GC2120, GC2115 dan GC2110 sahaja) atau tiada Pancutan Stim Menegak (jenis GC2225, GC2220, GC2215, GC2130, GC2125, GC2120 dan GC2115 sahaja).
Fungsi Semburan Wap (Menegak) telah selalu digunakan dalam jangka masa singkat.
Letakkan seterika dalam kedudukan mendatar dan tunggu seketika sebelum menggunakan fungsi Pancutan Stim (Menegak) sekali lagi.
Plat tapak tidak cukup panas.
Tetapkan tombol suhu pada kedudukan dalam lingkungan stim (2 hingga MAX). Letakkan seterika pada tumitnya dan tunggu sehingga lampu panduan kuning jingga padam sebelum anda mula menyeterika.
24
???


???


 ???
???


???


???


???


???


 ???
???


A 


B


O 


q 


q 


w 


 x
x 


C 
 8
8
D 

E 

F 

G 

H 
I 

J 

K 


L 


M 

 9
9


25
1 


 ,
, 


C 2
3 


 ,
, 


4
C 5
6
1
C 2
 1
1
 1
1
 2
2 
 3
3 


26
3
4
B
C ??? 


1
C 2
B


 2
2


1


 0 =
0 =


2


27
1
C 2


 3
3 


C
 C
C
1


 ??
??
2


 5
5 

3


 1
1 


 2
2


C 1

28
 C 1
C 1
C ??? 


1
2
3
4

29
C
C
 C
C
1


 0
0
2


 (MAX)
(MAX)
3


 (MAX)
(MAX) 
4


5


6


1


7


8


C
C
B
9
10


 0
0
11


 ,
, 


1
2

30
3


 ,
, 


4
 ,
, 


1
2
3
4

 C
C
C
2
3
4
 www.philips.com


31


 ?? ??
?? ?? ??
??

 2
2 


 2
2 


 2
2 


32


 2004/04/20
2004/04/20
33
???
???
???
???
???
???
???
???
A
B
M9
1
C 2
3
34
1

 C 2
C 2
3
4
C 5
6
1
C 2
1
1
2
3
3
4
B

35
C ??? 


1
C 2
 ??3
??3
B


 2
2


1
2
1

36

 C 2
C 2


 3
3 


C
 C
C
1 


 ??
??
2
3


 2
2 


 C 1
C 1

37
 C 1
C 1
C ??? 


1
2
3
4
1

38
C
C
 C
C
2
3
4
5


 1
1 

7
B
C 9
C 10
11
1
39
2
3
4
1
2
3
4
1

 C
C
C
2
3
4
www.philips.com

40


 ?? ?? ??


 2
2
2
2
41

u


