62 Helpful Hints (cont???d)
You cannot change the camera angle of a DVD.
???The DVD might not contain segments recorded from different camera angles. See if multiple angles are available by referring to the disc case or DVD disc menu. Details are on page 42.
You cannot change the audio or subtitle language of a DVD.
???The DVD does not contain audio or subtitles in the desired language. Not all DVDs contain audio or subtitles in multiple languages. See if other languages are available by referring to the disc case or DVD disc menu. Details are on pages 42-43.
An X appears in the top right corner of the TV screen when you try a DVD feature.
???The operation is not available at the current time or the feature is not available on the disc. Some features are only available during playback. Others can be accessed only if playback is stopped.Try stopping or playing the disc, then try the feature again.
The DVD/VCR switches from DVD mode to VCR mode after 30 minutes of no activity.
???When AUTO POWER OFF is set to ON, the DVD/VCR switches itself from DVD mode to VCR mode if disc playback stops for more than 30 minutes and you press no buttons on the remote or the DVD/VCR. Details are on
pages 58-59. This prevents possible damage to your TV???s picture tube that can occur if a still image is left on too long.
A screen saver appears on the TV screen during DVD mode.
??? The DVD logo will appear on the TV screen when you stop disc playback.You cannot remove it.
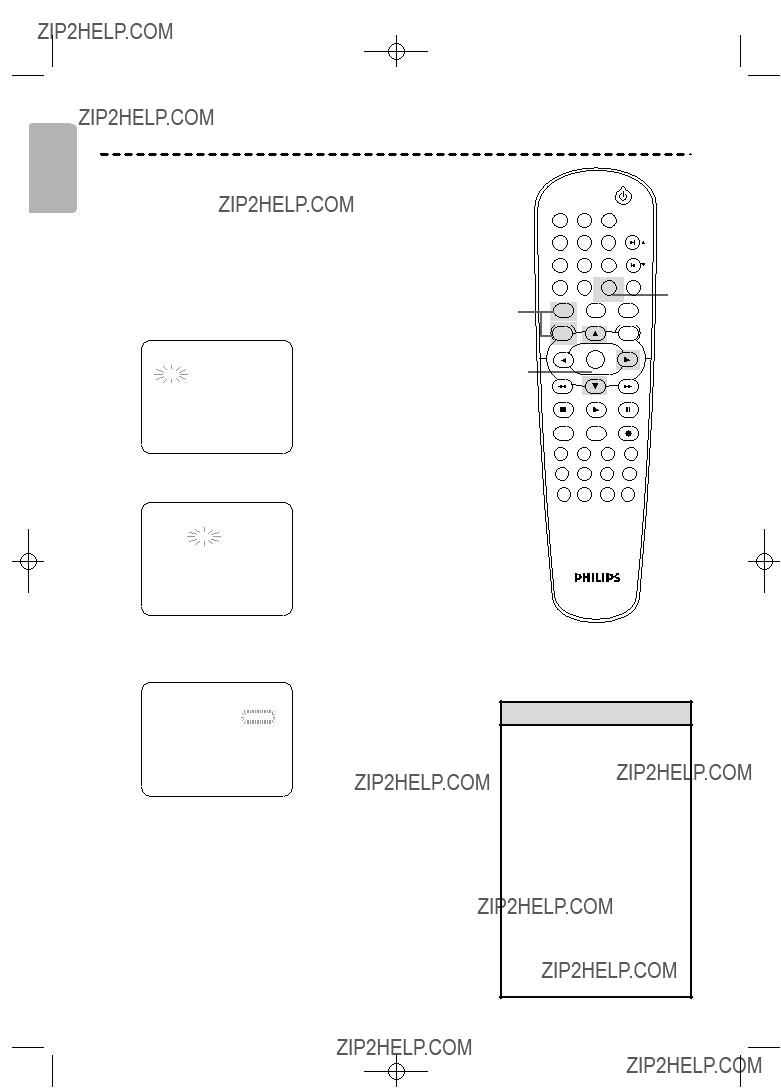
You want to use the DVD player during a VCR timer recording or while ??? ??? appears on the display panel.
???Press STANDBY-ONy to turn on the DVD/VCR. Press DVD to choose DVD mode, then continue with other DVD features as described in this manual.
A maximum of 999 MP3/JPEG files can be recognized.
Power Failure
???Clock setting, language selection and channel setup may be lost if the power fails. See pages 21-23 to set up the channels, clock and language again.
The VCR will not record a TV program.
??? Put the DVD/VCR in VCR mode. Press VCR or SOURCE so VCR light appears on the front of the DVD/VCR.
???Check the connections between the DVD/VCR,TV, antenna/Cable TV signal and Cable Box/Satellite Receiver (if applicable). Details are on pages 9-14. For VCR features, you must connect the DVD/VCR to a TV with the RF coaxial cable or the yellow video cable as described on pages 9-12.
???Make sure the video cassette has a record tab. Details are on page 24.
The VCR will not perform a timer recording.
??? Make sure the recording start and stop times are set correctly. Details are on pages 28-29.
??? Make sure a tape is in the VCR and the tape has a record tab. Details are on page 24. If, after programming a timer
???Finish programming a timer recording at least 5 minutes before it is set to begin.
???12 p.m. is noon; 12 a.m. is midnight.
There is no picture or the picture is noisy or has streaks during video cassette playback.
??? Put the DVD/VCR in VCR mode. Press VCR or SOURCE so VCR light appears on the front of the DVD/VCR.
???If you used the supplied RF coaxial cable to connect the DVD/VCR to the TV, make sure the TV is on the same channel as the DVD/VCR???s output channel (03 or 04).The DVD/VCR???s output channel is channel 3 when you receive it.To change it to channel 4, see page 9. Make sure channel 03 or 04 is properly adjusted at the TV.
Or, if you connected the DVD/VCR to the TV using audio and video cables, select the correct Video In channel at the TV. Details are on pages 8 and 12.
???Adjust the tracking. Details are on page 33.
???TVs placed too close to the DVD/VCR can cause interference during tape playback. Move the DVD/VCR away from the TV.
The Number buttons won???t work for TV channels above 69.
???Enter channel numbers as a 2-digit number. If you want to select channels 100 and above, enter channel numbers as a 3-digit number. If you do not have Cable TV, only channels 2-69 are available.
TV programs cannot be watched normally.
???Check the connections between the DVD/VCR,TV, antenna/Cable TV signal and Cable Box/Satellite Receiver (if applicable). Details are on pages 9-14.
 Thank you for choosing Philips.
 Visit our World Wide Web Site at http://www.philips.com/usasupport


 is a trademark of DVD Format/Logo Licensing Corporation.
 mark.The use of other tapes may result in poor picture quality and excessive deposits on the


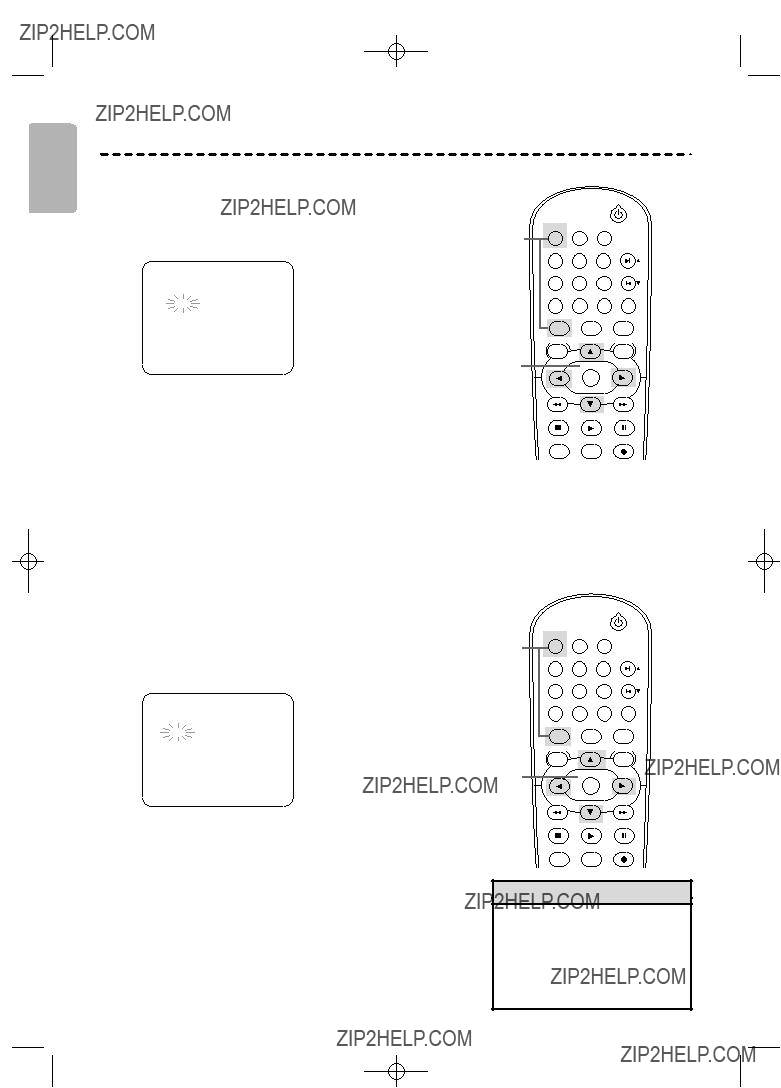
 ??? on the DVD/VCR's display panel will flash indicating that the recording is complete, or it may switch to DVD mode automatically. Press TIMER SET to use the DVD/VCR as usual.
 ??? disappears.
 ??? flashes because the VCR is still on standby for timer recordings. Press TIMER SET on the remote or STOP/EJECT C A (VCR) on the DVD/VCR to cancel timer standby and use the VCR normally again.
 ??? will appear on the DVD/VCR's display panel indicating that it is now ready for another timer recording.
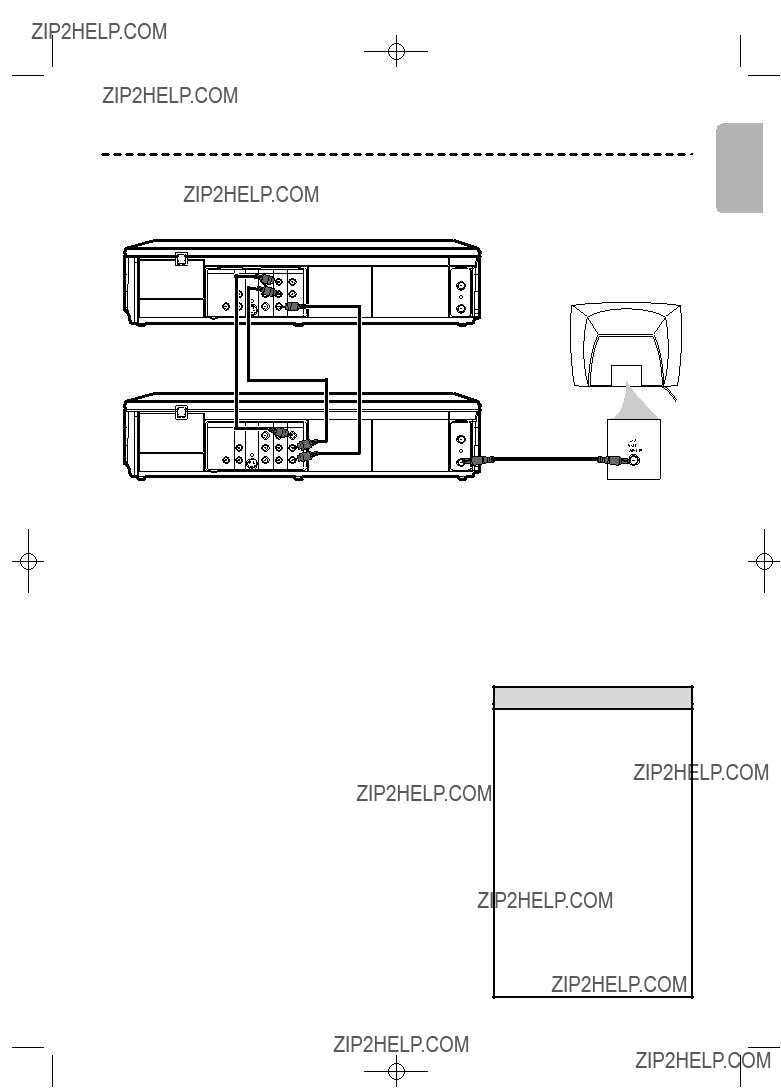


 ??? will appear in the display panel. In some cases, the DVD/VCR will switch to DVD mode instead.You may use the DVD player during a timer recording.
 ??? appears, you cannot put the DVD/VCR in VCR mode by pressing VCR or SOURCE.You must first press TIMER SET to cancel the timer recording temporarily.Then, you can use the VCR features again.
 ??? on the DVD/VCR's display panel will flash indicating that the recording is complete. Or it may switch to DVD mode automatically. Press TIMER SETto use the DVD/VCR as usual.
 ??? is on, pressing STOP/EJECT C
  ??? will disappear. Press STOP/EJECT C
  ??? will flash. Insert a tape.
 ??? will appear on the DVD/VCR's display panel indicating that it is now ready for another timer recording.

 ??? is flashing in the display panel, the power will not come on automatically when you insert a tape with the record tab intact.
 ??? is flashing in the display panel, the DVD/VCR will eject the tape if the record tab is missing.
 ??? appears on the display panel, pressing STOP/EJECT CA (VCR) will turn on the DVD/VCR and/or cancel the timer recording. Press STOP/EJECT CA (VCR) again to remove the tape. Remember to insert a tape and press TIMER SET to reset the timer recording.


 (x1.3),
  (x0.8) and OFF


 A ??? B


 will appear on the TV screen when the current portion of the disc has multiple camera angles.To set the ANGLE ICON ON or OFF, see pages


 BIT RATE: The amount of audio
 C L0
C L0 
 Layer number, appears only when playing a

 T: The current track will play repeatedly.
 A: All tracks will play repeatedly


 ON
ON


 (AUDIO) at the top of the menu, then press OK.


 ??? will disappear from the display panel. Then, press STOP/EJECT C A (VCR) on the front of the DVD/VCR to

