About This Electronic User's Manual
About This Electronic User's Manual
About This Guide ??? Other Documents You May Need ??? Notational Descriptions
About This Guide
This electronic user's guide is intended for anyone who uses the Philips Color Monitor. It describes the monitor's features, setup, operation and all other information, which is the same exact information described in our printed version.
The sections are as follows:
???Safety and Troubleshooting Information provides tips and solutions for common problems, and other related information you may need.
???About This Electronic User's Manual gives overview of what information are included as well as notation icon descriptions and other documentation you can refer to.
???Product Information gives an overview of the monitor's features and as well as the technical specifications for this monitor.
???Installing Your Monitor describes the initial setup process and gives an overview of how to use the monitor.
???On Screen Display provides information on adjusting the settings on your monitor.
???Customer Care and Warranty is a list of worldwide Philips consumer information centers along with the help desk phone numbers and information on the applicable warranty of your product..
???Glossary provides more information for technical terms.
???Download allows users to install the entire manual on their hard drive.
???Frequently Asked Questions provides answers to commonly asked questions.
RETURN TO TOP OF THE PAGE
Other Documents You May Need
In addition to this Electronic User's Guide, you may need to refer to the following documentation:
???Philips Color Monitor Quick Start Guide which summarizes the steps for setting up the monitor. This is included with this product.
RETURN TO TOP OF THE PAGE
Notational Descriptions
file:///D|/rita/LF2/LF2/LFa1/multi_manual/english/107X/ABOUT/ABOUT.HTM (1 of 2) [10/3/2001 4:11:24 PM]


 or the
  keys to make your adjustments within.


 or coloured GREEN or GREEN AND
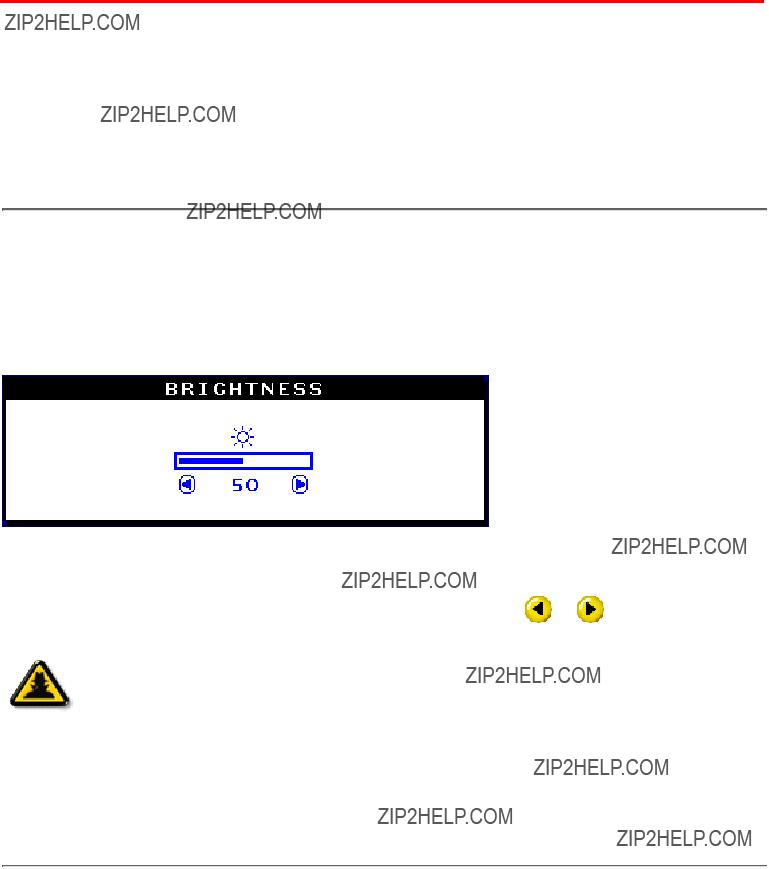
 or
or button on the monitor. The BRIGHTNESS window appears.
 or
or button to adjust the brightness.
 or
or button on the monitor. The CONTRAST window appears.
 or
or button to adjust the contrast.
 button again. The LANGUAGE window appears.
 or
or button until the desired language is highlighted.
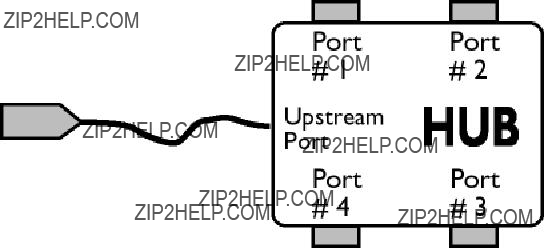
 button on the monitor. The MAIN CONTROLS window appears.
 button until INPUT SIGNAL SELECTION is highlighted.
 button. The INPUT SIGNAL SELECTION window appears.
 or
or button to highlight INPUT B or INPUT A.
 button to confirm your selection and return to the MAIN CONTROLS window. CLOSE
 button on the monitor. The MAIN CONTROLS window appears.
 button until ZOOM is highlighted.
 button. The ZOOM window appears.
 or
or button to adjust ZOOM.
 button on the monitor. The MAIN CONTROLS window appears.
 button until ADJUST HORIZONTAL is highlighted.
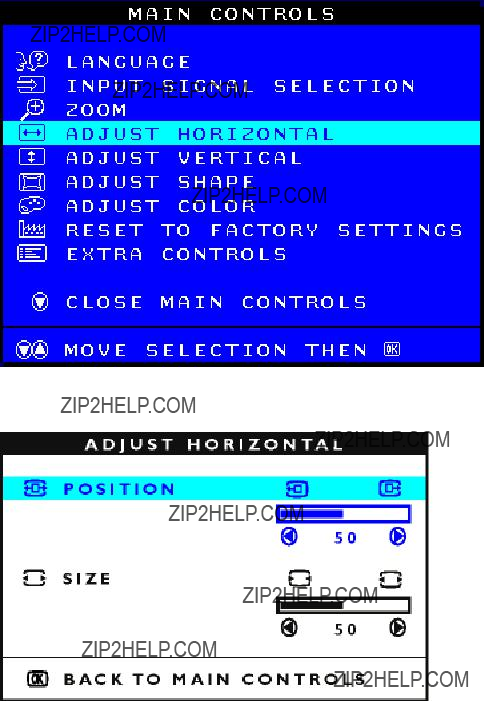
 button. The ADJUST HORIZONTAL window appears. POSITION should be highlighted.
 or
or button to move the image to the left or right.
 button to return to MAIN CONTROLS window, or press the
 to highlight SIZE.
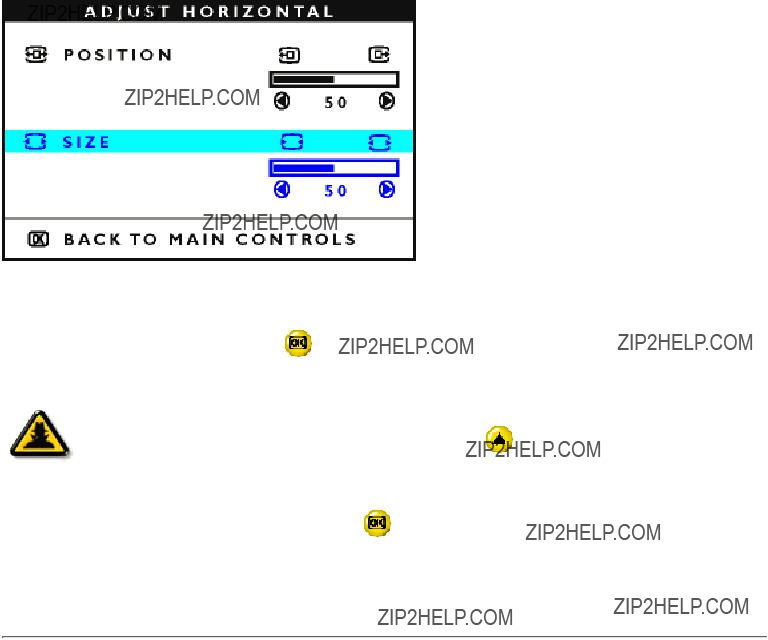
 or
or button.
 button on the monitor. The MAIN CONTROLS window appears.
 button until ADJUST VERTICAL is highlighted.
 button. The ADJUST VERTICAL window appears. POSITION should be highlighted.
 or
or  button to move the image up or down.
 button to return to MAIN CONTROLS window, or press the
 to highlight SIZE.
 or
or  button.
 button on the monitor. The MAIN CONTROLS window appears.
 button until ADJUST SHAPE is highlighted.
 button. The SIDE CURVE window appears. PINCUSHION should be highlighted.
 or
or button.
 Smart
Smart button, and follow steps 7 - 9.
 button on the monitor. The MAIN CONTROLS window appears.
 button until ADJUST SHAPE is highlighted.
 button to highlight ADJUST SIDE ANGLES.
 button. The SIDE ANGLES window appears. TRAPEZOID should be highlighted.
 or
or button.
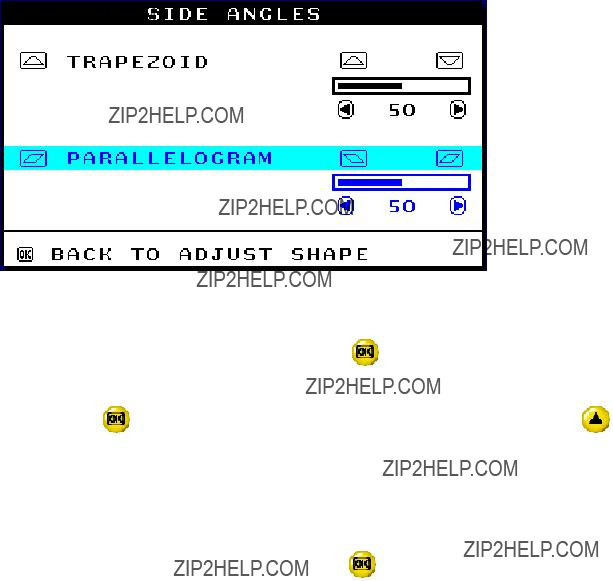
 or
or button.
 Smart
Smart button, and follow steps 7 - 9.
 button on the monitor. The MAIN CONTROLS window appears.
 button until ADJUST SHAPE is highlighted.
 arrow until ROTATE IMAGE is highlighted.
 button. The ROTATE IMAGE window appears. ROTATE should be highlighted.
 or
or button.
 button to return to MAIN CONTROLS.
 button twice.
 button on the monitor. The MAIN CONTROLS window appears.
 button until ADJUST COLOR is highlighted.
 button. The ADJUST COLOR window appears.
 button.
 button on the monitor. The MAIN CONTROLS window appears.
 button until RESET TO FACTORY SETTINGS is highlighted.
 button. The RESET TO FACTORY SETTINGS window appears.
 button.
 button on the monitor. The MAIN CONTROLS window appears.
 button until EXTRA CONTROLS is highlighted.
 button. The EXTRA CONTROLS window appears. MOIRE will be highlighted.
 button to highlight DEGAUSS.
 button.
 button on the monitor. The MAIN CONTROLS window appears.
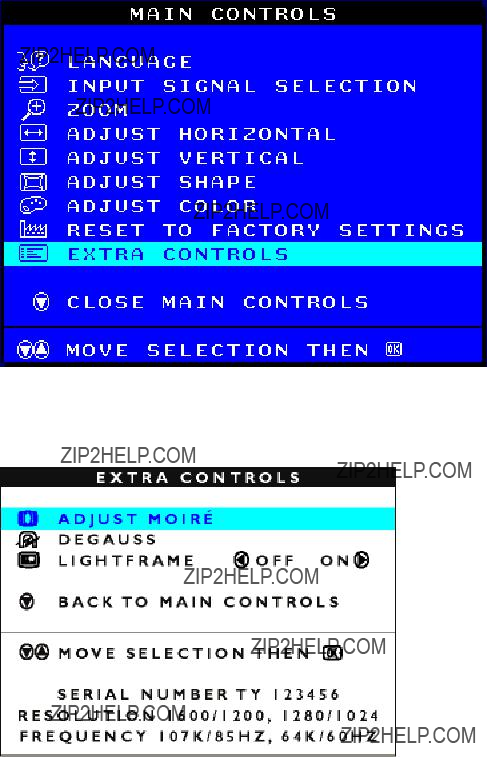
 button. The EXTRA CONTROLS window appears. ADJUST MOIRE will be highlighted.
 button. The ADJUST MOIRE window appears. HORIZONTAL will be highlighted.
 or
or button.
 button to highlight VERTICAL.
 or
or button.
 Smart
Smart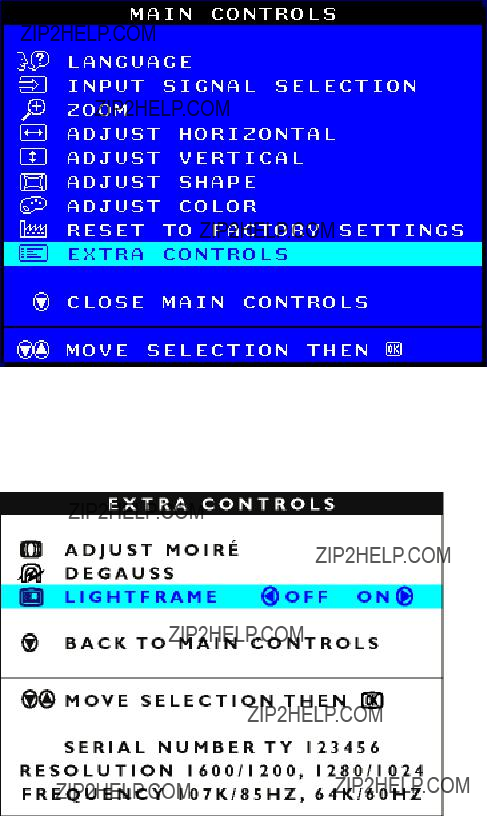
 button on the monitor. The MAIN CONTROLS window appears.
 button until EXTRA CONTROLS is highlight.
 button. The EXTRA CONTROLS window appears. ADJUST MOIRE will be highlighted.
 button until LIGHTFRAME is highlighted.
 button. LIGHTFRAME will be activated.
 button to highlight BACK TO MAIN CONTROLS. Press
  button to go back to MAIN CONTROLS. Press
  button again to exit the OSD.


