Safety precautions
WARNING!
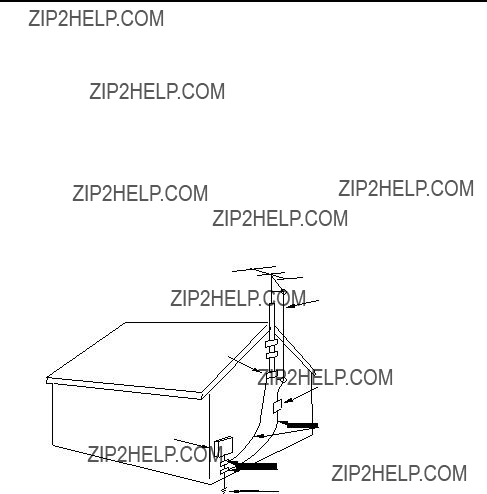
INSTALL THE TV/DVD IN YOUR CAR
???For a car equipped with air bags, be sure to follow the manufacturer???s instructions whenever performing any electrical wiring work. Incorrect wiring can cause the air bag system of a car to malfunction.
???Never cut the insulation from the power supply lead in an attempt to draw power for another device. Doing so can overload the current capacity of the lead, creating the danger of fire and electric shock.
???For proper installation and wiring special technical knowledge is required. If you have any doubts about where to position or how to install components, contact the retailer where you purchased the product, your automobile dealership, or an automotive service provider. Note that you will be charged separately for installation work.
???Use all of the components that come with this product only as directed. Improper use of components can damage interior components or result in improper anchoring of components, which creates the danger of accident and personal injury.
???Improper installation creates the danger of fire and accident.
???Take care so wires are not pinched between chassis parts, by screws or by the seat as it slides on its rails, etc. Such conditions can cut wires and cause shorts, creating the danger of accident, electric shock, and fire.
???Avoid installation in areas subject to strong vibration and areas where secure anchoring cannot be achieved. Components installed in such areas can work loose, creating the danger of accident and personal injury.
???Never install the TV/DVD on the dashboard or in any other location where it obstructs forward vision.
???Never attach the stand to the roof of your car. Doing so creates the danger of the TV/DVD falling down.
???Never attach the stand to a sharply angled surface or to a surface that causes the TV/DVD to face downwards. Such installation can cause the TV/DVD to fall.
???Be sure to turn the ignition key of the car to the ???OFF??? position before connecting or disconnecting wires and cables. Failure to do so creates the danger of electric shock and personal injury.
DRIVING SAFETY
???Never watch the TV/DVD or try to adjust settings while driving. Doing so creates the danger of traffic accident. Before operating the TV/DVD, be sure to stop the car in a safe area.
???Never install the unit on the dashboard or in any other location where it obstructs forward vision. Items that obstruct forward vision in a motor car may be illegal.
Also, make sure that all components are installed where they do not interfere with operation of the steering wheel, shift lever, brake pedal, etc., for example under the driver???s seat, and where they do not endanger passengers. Improper installation creates the danger of traffic accident and personal injury.
???Make sure all cables are bundled together so they do not interfere with car operation, as described in this manual. Improperly installed cables create the danger of entanglement with the steering wheel, shift lever, brake pedal, etc.
IMPORTANT NOTES:
???The unit is designed for use with a 12V DC automotive power supply. Never use it in a truck, bus, or any other car that has a 24V power supply.
???Be sure to stop your car in a safe area before watching or adjusting the TV/DVD.
???Operating the TV/DVD for a long time with the engine of your car stopped can run down your car???s battery.
???Never leave the TV/DVD in areas exposed to temperature extremes or strong direct sunlight. Leaving it in a closed car, in direct sunlight, near a heater, etc. can cause deformation of the case. Using this product in
areas that are colder than 5?? C (41?? F) or hotter than 40?? C (104?? F) can result in poor image quality.
???Never use benzene or other chemical agents for cleaning.
Chemicals can damage the case and remove markings. Use a soft cloth moistened with a weak solution of water and mild neutral detergent. Wring out all excess moisture from the cloth before wiping.
???Never drop the TV/DVD or otherwise subject it to strong impact.
???Should the TV/DVD ever begin to emit smoke, abnormal odor, or a strange noise, immediately turn off power and unplug the unit from the cigarette lighter socket. Continued use of the TV/DVD under any of these conditions creates the danger of fire and electric shock.
???Do not continue to use the TV/DVD if it is malfunctioning and does not produce a video image or sound. Whenever you notice such symptoms, immediately turn off power, unplug the TV/DVD from the cigarette lighter socket. Continued use of the TV/DVD creates the danger of fire and electric shock.
???When you leave your car unattended for long periods, be sure to unplug the TV/DVD from the cigarette lighter socket. Leaving the TV/DVD plugged in can run down the car???s battery.
This product utilizes both a Cathode Ray Tube (CRT) and other components that contain lead. Disposal of these materials may be regulated in your community due to environmental considerations. For disposal or recycling information please contact your local authorities, or the Electronics Industries Alliance: <http://www.eiae.org.>


 Please use correct fuse.
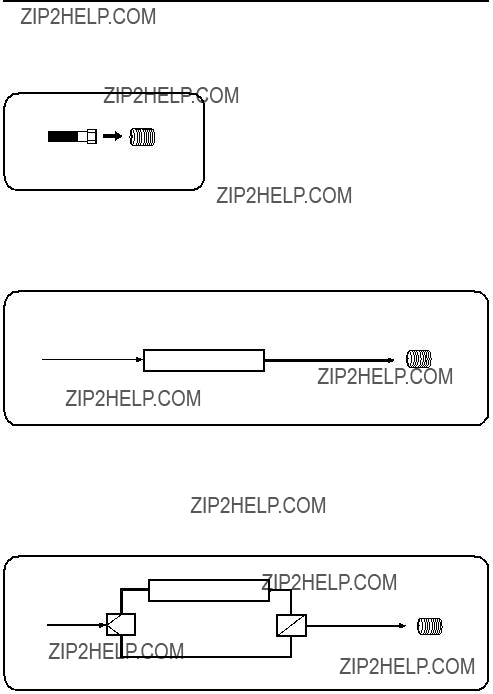

 /
/ /
/ /
/  /MENU
/MENU LANGUAGE/IDIOMA/LANGUE
 /
/ /
/ /
/  /MENU
/MENU ENGLISH
 /
/ /ENTER/MENU


 or . The channel automatically stops at the next channel set into memory.

 or
or to select the ???TV/ CATV??? option.
 or
or  to select the ???AUTO
 or
or  . The TV will begin memorizing all the channels available in your area.

 or
or  until SET UP menu appears.
 or
or  to select the ???ADD/ DELETE???.
 or
or  to select ADD or DELETE, whichever function you want to perform.
 until the OPTION menu appears.
 /
/ /
/ /
/  /MENU
/MENU or
or to select the ???V- CHIP SET???, then press or .
 V-CHIP
 /
/ /
/ /
/  /MENU
/MENU " appears instead of the number.
 to select the ???TV
 /
/ /
/ /
/  /MENU
/MENU or
or to select the ???V- CHIP SET???, then press
 or .
or . V-CHIP
 /
/ /
/ /
/  /MENU
/MENU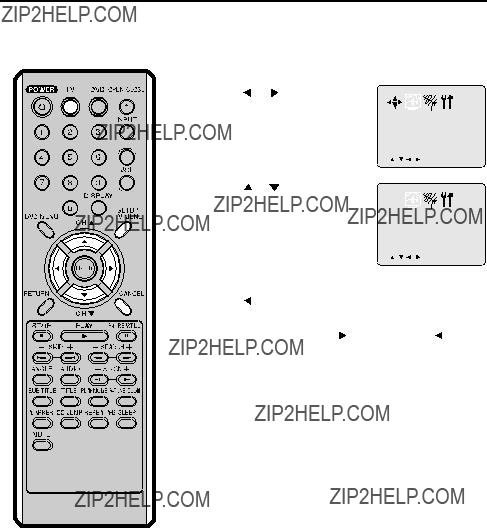
 to adjust the


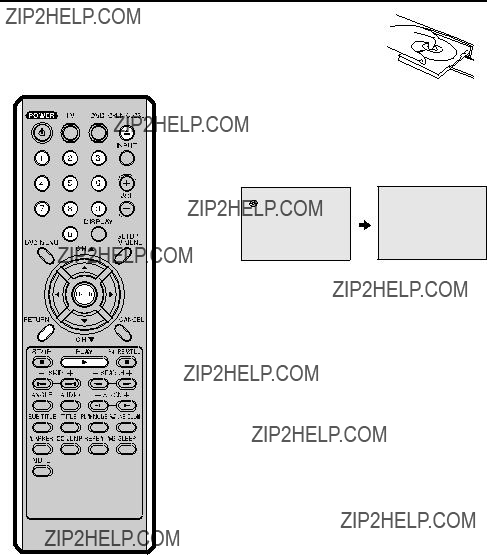
 ??? will appear on the display for about 3 seconds and then ???No Disc??? or ???Incorrect Disc??? will be displayed.
 ??? and then playback commences.
 / to make a selection.
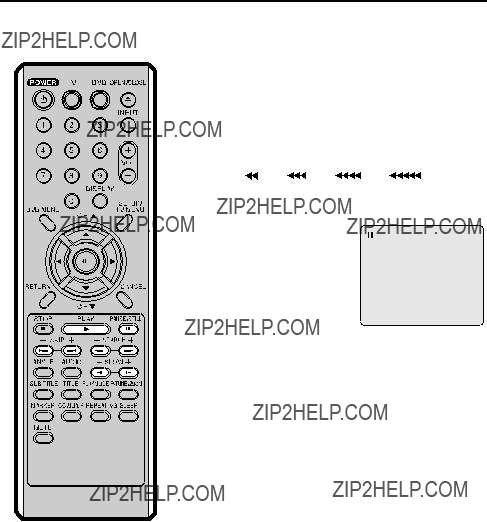
 (x 2),
 (x 4),
 (x 8),
 (x 15). (CD:
 (x 2),
 (x 4),
 (x 8),
 (x 20))
 (x 2),
 (x 4),
 (x 8),
 (x 15).
 to display next track list.
 /
/ /
/ /
/ to view a different part of the frame. You may move the frame from the center position to UP, DOWN, LEFT or RIGHT direction.
 Off).
Off).


 Off??? appears on the screen.

 A
A

 A B
A B


 C
C 


 C
C 


 C
C 


 /Enter/Cancel/Marker


 C
C 


 C
C 


 /Enter/Cancel/Marker
 /Enter/Cancel/Marker
 2/8 Fra Dolby Digital
 1/8 Eng Dolby Digital
 /
/ to select the desired title.
 /
/ to select the desired item.
 or
or  to select ???Language???, then press
 or to select de- sired language (e.g. Eng- lish), then press
 /Enter/Setup/Return
 /Enter/Setup/Return
 /Enter/Setup/Return

 or
or to select ???Sound???.
 /Enter/Setup/Return
 /Enter/Setup/Return


 ??
??  hasta que aparezca el men?? SET UP.
 ??
??  para seleccionar el modo TV/CATV.
 ??
??  para seleccionar el modo TV ?? CATV. La flecha indica el modo seleccionado.
 ??
??  para seleccionar el modo AUTO CH MEMORY, a continuaci??n presione
  ??
??  . El TV comenzar?? a memorizar todos los canales disponibles en su ??rea.
 /
/ /
/ /
/  /MENU
/MENU
 ??? en la pantalla durante 3 segundos y despu??s aparecer?? continuamente la palabra ???No Disc???.