Most sources can be played with ???AUTO ??? (factory setting).
However, in the following cases, change the input signal detection setting.
???When the beginning of the song is cut during playback of CD, set to ???PCM ??? (PCM FIX).
???When the signal is not detected during playback of DTS sources, set to ???DTS ??? (DTS FIX).
???When noise occurs, return the setting to ???AUTO ???.
1. Press and hold [???SETUP, OFF] for about 2 seconds.
The setting items are displayed. (??? page 21)
2.Press [w][q] to select ???INPUT MODE ??? and press [OK].
3.Press [w][q] to select the input and press [OK].
Input: TV, DVD, AUX1, AUX2
4. Press [e][r] to select the detection method of input signal and press [OK].
AUTO : Automatic detection
PCM : PCM (from CDs) digital input ???xed
DTS : DTS digital input ???xed
Factory setting : AUTO
?? Repeat steps 3 and 4 to change setting.
5.Press [ RETURN] several times to select ???EXIT ??? and press [OK] to ???nish the setting.
Reset (factory settings)
The operation settings for the system will be initialized to the settings made at the time of shipment.
1. Press and hold [???SETUP, OFF] for about 2 seconds.
The setting items are displayed. (??? page 21)
2.Press [w][q] to select ???RESET ??? and press [OK].
3.Press [e][r] to select ???YES ??? and press [OK].
YES : Choice for resetting NO : Choice against resetting
???To cancel, select ???NO ???.
Note
???All the settings are reset when you select ???YES ??? and the input selector automatically switches to ???BD/DVD ???.
???If you select ???NO ???, you will return to step 2. To exit setup mode, press [ RETURN] a few times to display ???EXIT ???, and then press [OK].
???The contents of speaker setting are not reset. However, the contents set at ???Changing the number of speakers to 2??? (??? page 15) are reset.
When other equipment (mini component system, AV amp, etc.) manufactured by Panasonic operates with the remote control operations of this system
When using this system???s remote control, other equipment may operate. In this case, switch this system???s remote control code to ???REMOTE 1 ???. Do the following to set the same code number for this main unit and remote control.
Setting the main unit
1. Press and hold [???SETUP, OFF] for about 2 seconds.
The setting items are displayed. (??? page 21)
2.Press [w][q] to select ???REMOTE ??? and press [OK].
3.Press [e][r] to select ???1 ??? and press [OK].
Factory setting : 2
???You cannot ???nish the setting mode until the setting on the remote control is changed. Go to step 4.
???To set the remote control code to 2, select ???2 ??? in step 3 and press [OK].
Setting the remote control
4. Press and hold [OK], and then press [TV] (more than 2 seconds).
TV: Remote control code 1
BD/DVD: Remote control code 2 (factory setting)
???Select the same number as the code number you have selected in step 3.
???To set the remote control code to 2, press and hold [OK] in step 4, and then press [BD/DVD] more than 2 seconds.
5.Press [ RETURN] several times to select ???EXIT ??? and press [OK] to ???nish the setting.
Note
If different codes are set between the main unit and remote control, the error message ???REMOTE 2 ??? or ???REMOTE 1 ??? is displayed.
 , Panasonic has determined that this product meets the ENERGY STAR?? guidelines for energy efficiency.


 switch
 For
For 


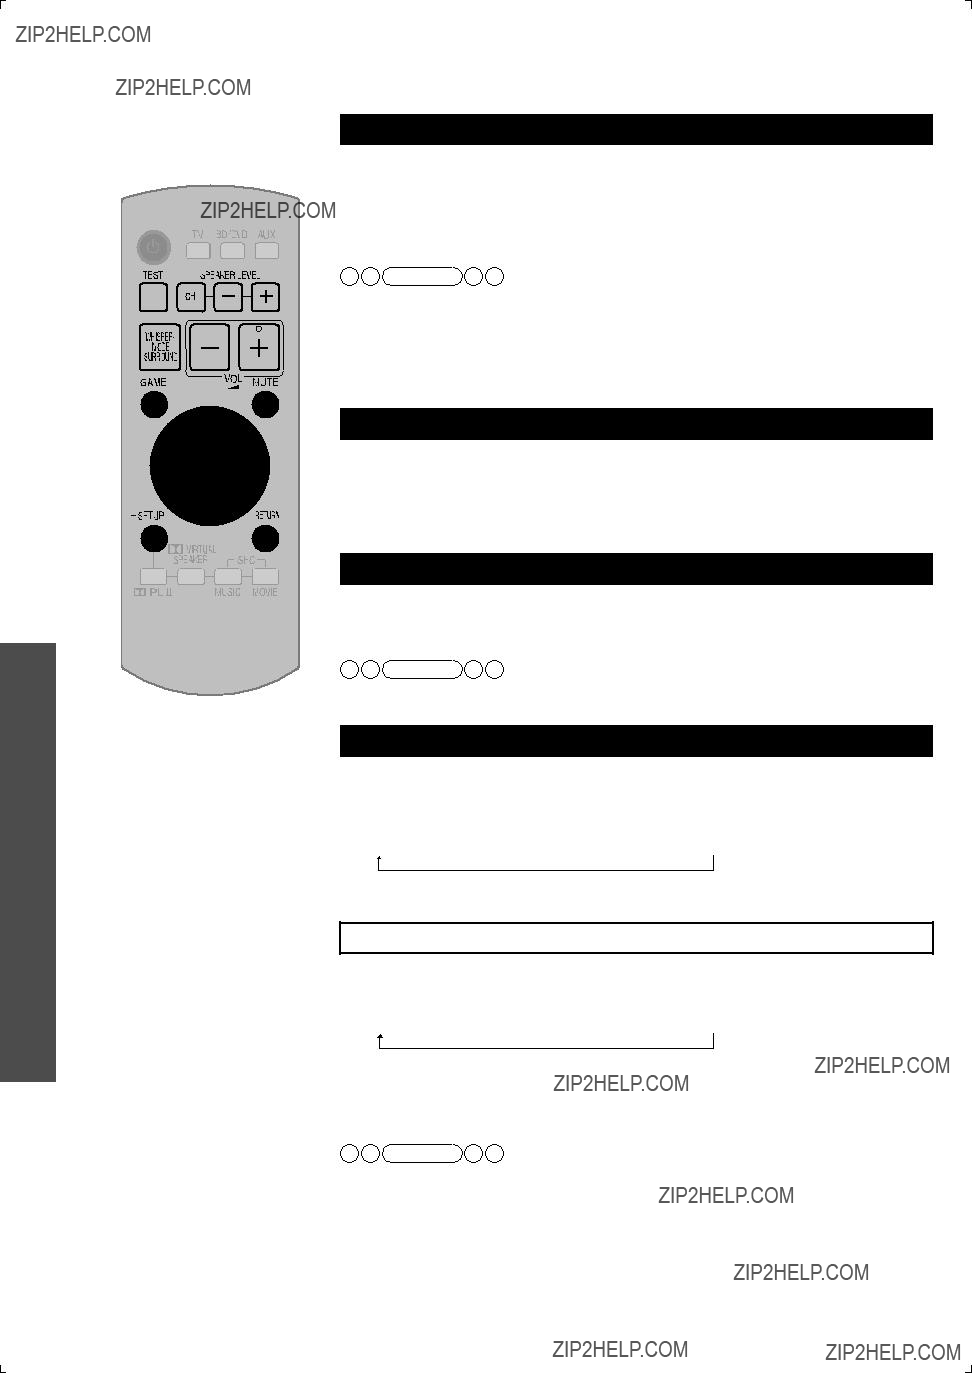
 [INPUT SELECTOR]
 For connecting headphones


 and SFC mode
 For adjusting speaker output
 For adjusting the volume
 For adjusting/activating settings
 For returning to the previous menu
 Surround
  speaker (right)
 so its shape ???ts
 RETURN] several times to select ???
 its shape ???ts correctly into the terminal.
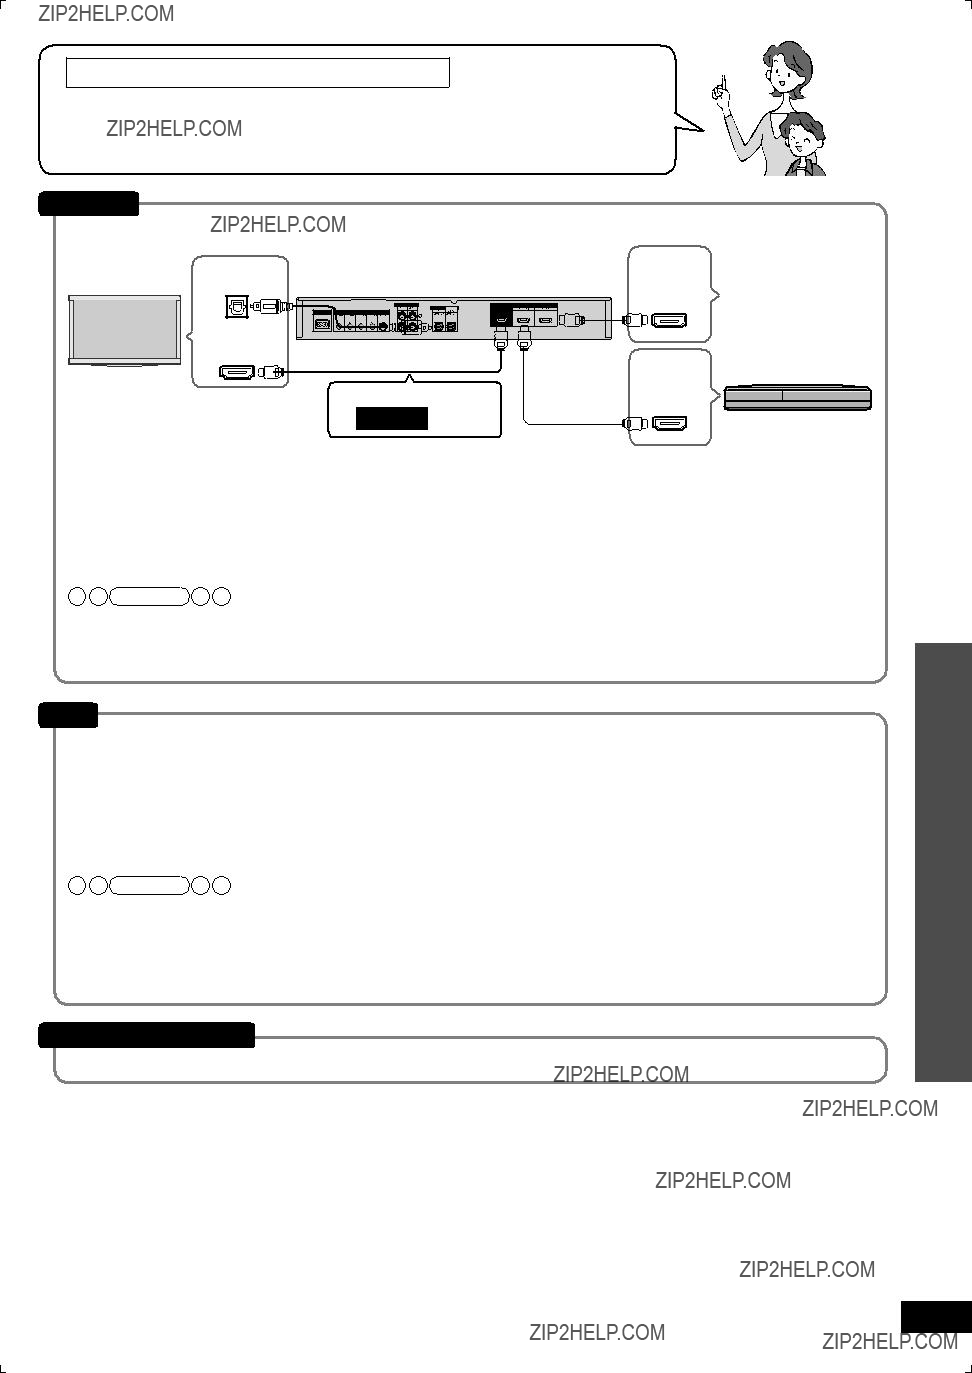
 To connect a DVD recorder with
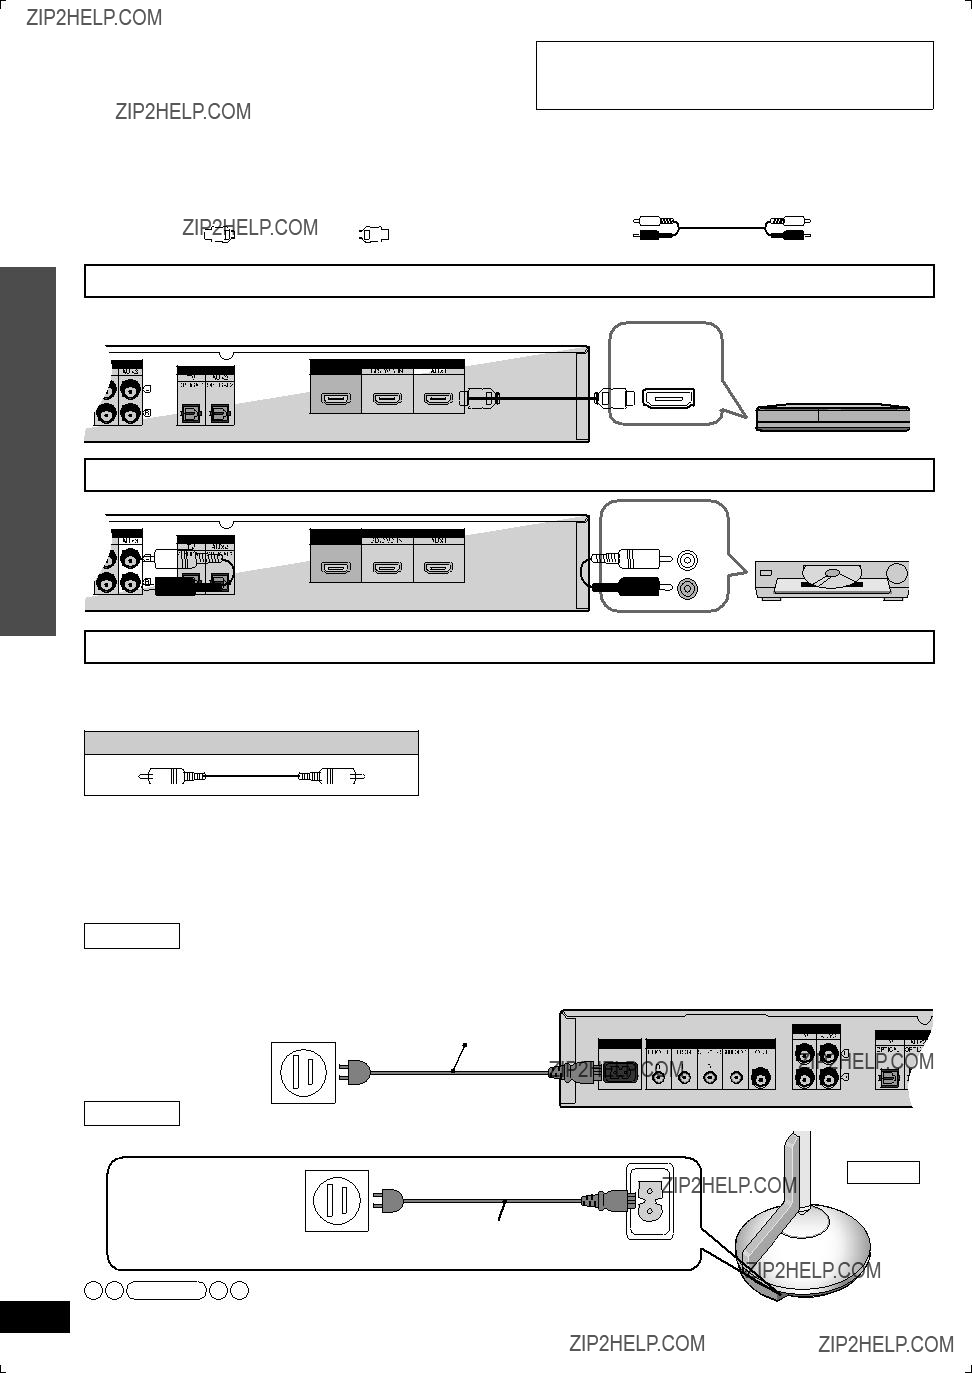

 Press
Press
 POWER
POWER 

 When installing front speakers only
 speaker (right)

 RETURN].


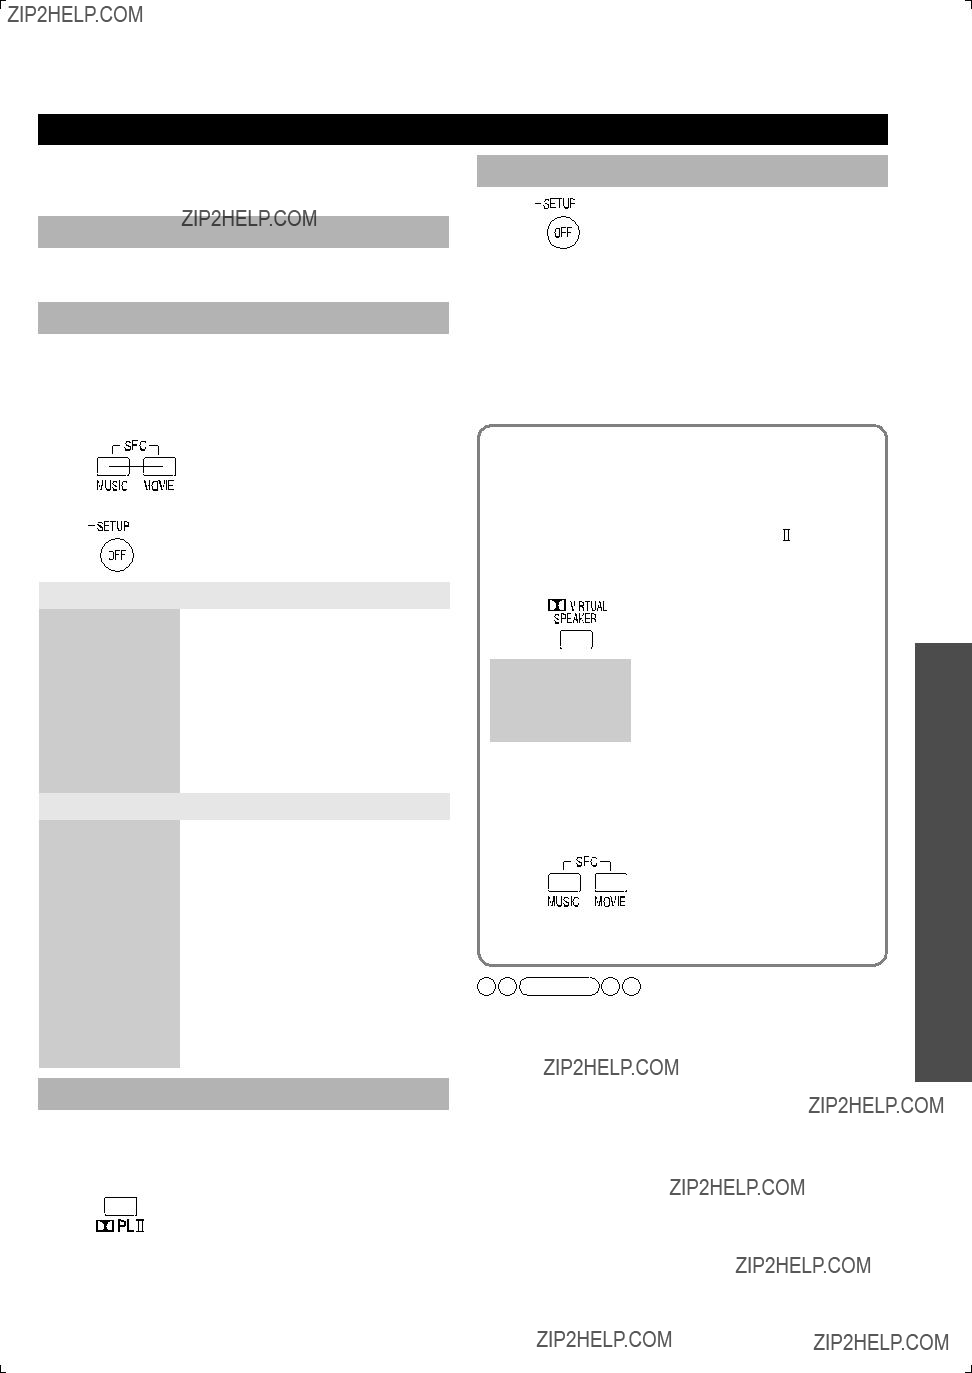
 To cancel SFC mode

 To cancel sound ???eld effects
 To cancel SFC mode
 VIRTUAL SPEAKER].
 PL
PL  ]. (Only when not connecting the surround speakers)
 and SFC when the source contains PCM signals with sampling frequencies of over 48 kHz. They are automatically canceled if those signals are input. To use the effect when playing back
 VIRTUAL SPEAKER], [
 PL
PL  ] or [SFC MUSIC, MOVIE] again to select.
 cannot be used for surround signals such as Dolby Digital and DTS, and
 RETURN].
 and SFC are off with
  +,
+,  also works in conjunction. (
 is off).
 RETURN] several times to select ???
 RETURN] several times to select ???
 RETURN].
 RETURN] several times to select ???
 RETURN] several times to select ???
 RETURN] several times to select ???
 RETURN] several times to select ???
 RETURN] several times to select ???
 RETURN] several times to select ???
 RETURN] several times to select ???
 RETURN] several times to select ???
 RETURN].


 to add surround effects to stereo sources such as video cassettes and CDs.