Gracias por haber adquirido el sill??n de masaje Swede-AtsuTM Panasonic modelo EP1060/EP1061. Lea atentamente este manual para obtener un rendimiento y una seguridad ??ptimos.
INSTRUCCIONES DE SEGURIDAD
Es muy importante observar siempre las precauciones b??sicas durante el uso de instrumentos el??ctricos, entre las cuales se incluyen las siguientes.
Aseg??rese de leer todas las instrucciones antes de utilizar el sill??n de masaje dom??stico.
PELIGRO ??? Riesgo de descargas el??ctricas:
1.Desconecte siempre la unidad inmediatamente despu??s de su uso.
2.Desconecte siempre la unidad antes de su limpieza.
ADVERTENCIAS ??? Riesgo de quemaduras, incendios, descargas el??ctricas o da??os a otras personas:
1.Inserte el enchufe completamente en la toma a fin de reducir el riesgo de cortocircuitos o incendios.
2.No descuide la unidad durante el tiempo que est?? conectada. Descon??ctela siempre una vez finalice su uso.
3.La supervisi??n cercana y continua se har?? necesaria siempre que usen la unidad personas limitadas en su capacidad de movimiento o comunicaci??n.
4.Use el sill??n ??nicamente para el prop??sito descrito en estas instrucciones.
5.No ponerse de pie sobre la unidad.
6.No utilice otros accesorios distintos a los recomendados por el fabricante.
7.Esta unidad no debe ser utilizada por los ni??os. Mantenga a los ni??os alejados del sill??n. Coloque siempre el respaldo del sill??n de nuevo en posici??n vertical y plegar por completo el reposapiernas a fin de evitar accidentes. Aseg??rese de que la zona se encuentra despejada al plegar el reposapiernas.
8.Nunca ponga la unidad en funcionamiento si hay un cable o enchufe el??ctrico defectuosos. Si la unidad no funciona correctamente, se ha ca??do, da??ado o sumergido en agua, ll??vela al centro de asistencia autorizado m??s pr??ximo.
9.Levante siempre el coj??n central para comprobar que el tapizado de la unidad no ha sufrido rasgaduras antes de su uso. Inspeccione adem??s otras ??reas para asegurarse de que el tapizado se encuentra en perfecto estado. En caso de descubrir cualquier rasgadura, independientemente de su tama??o, deber?? interrumpir el uso del sill??n, desconectarlo y llevarlo a un centro de asistencia autorizado para su reparaci??n.
10.Mantenga los cables de alimentaci??n alejados de superficies expuestas al calor. Evite cualquier tipo de suciedad o humedad en el enchufe. No coloque la unidad sobre utensilios de calefacci??n como por ejemplo alfombras el??ctricas, etc.
11.Nunca cubra las salidas de ventilaci??n durante el funcionamiento y aseg??rese de que est??n libres de pelusa o suciedad.
12.No vierta o inserte nada en las aberturas de la unidad.
13.No use la unidad en cuartos de ba??o u otros espacios h??medos ya que existe posibilidad de descargas el??ctricas o mal funcionamiento de la unidad. Evite derramar agua u otro l??quido sobre el mando de control.
14.No utilice la unidad a la intemperie.
15.No use la unidad en lugares donde se usen productos que contengan aerosoles o donde se utilice ox??geno.
16.Cuando desenchufe la unidad, apague primero todos los controles antes de extraer el enchufe de la toma de alimentaci??n. No utilice transformadores con la unidad ya que podr??a originar fallos en el funcionamiento o descargas el??ctricas.
17.Conecte esta unidad a una toma de alimentaci??n que garantice la puesta a tierra adecuadamente. Consulte las instrucciones referentes a la puesta a tierra.
18.Con el fin de evitar descargas el??ctricas o cualquier tipo de da??os, no abra o desmonte la unidad ya que contiene piezas delicadas.
CONSERVE ESTAS INSTRUCCIONES


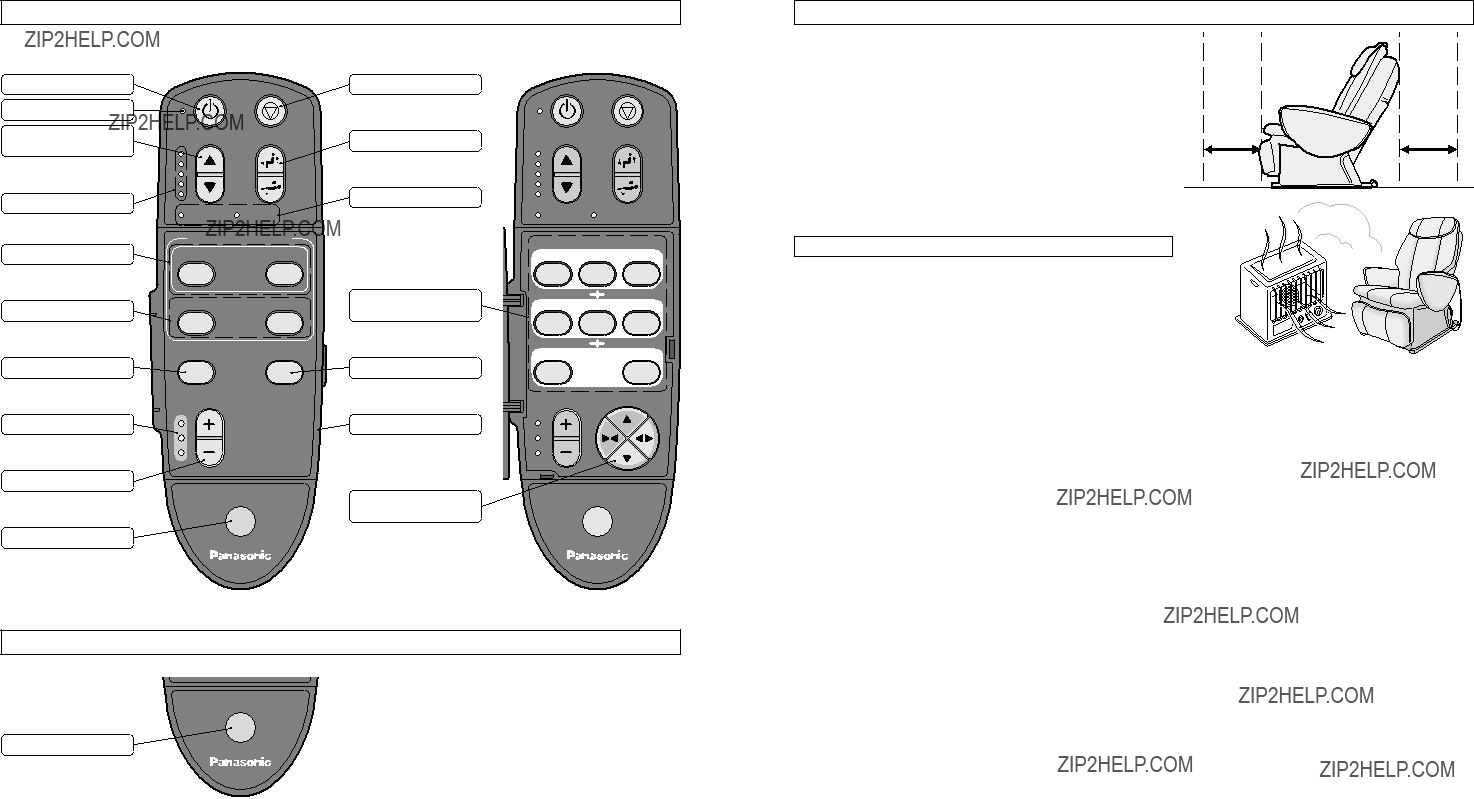
 EP1061/EP1060


 fast
fast 
 fast
fast 
 strong
 button, the Programmed Operation and Leg Massage
 Main Cushion Fabric
 off
off off
off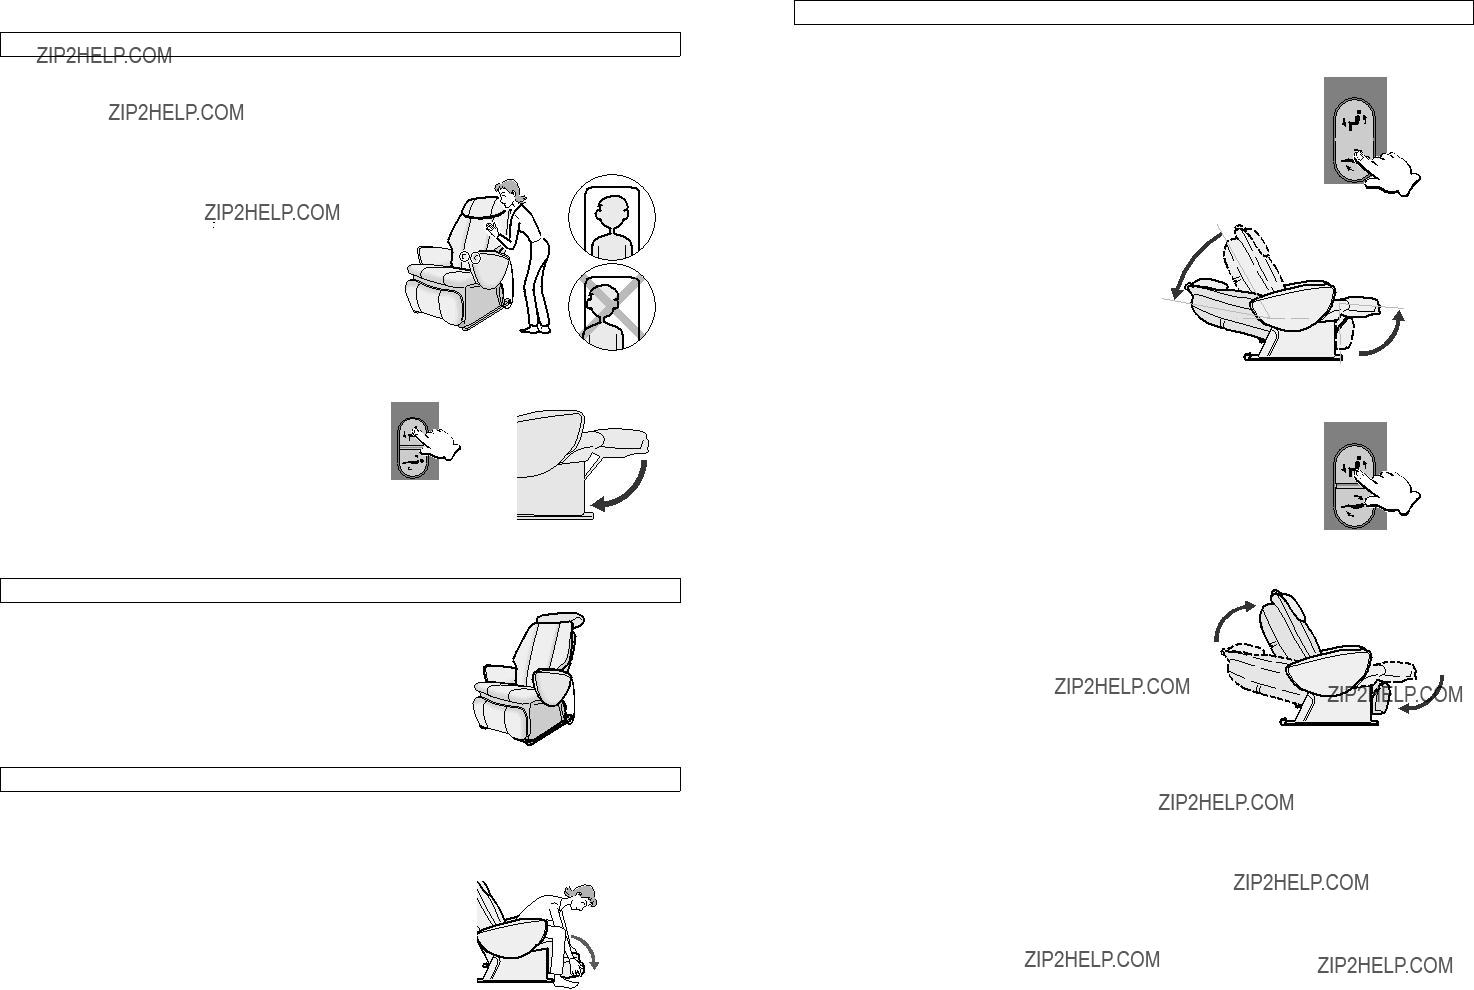
 button twice to retract the massage heads to the proper position. (If
  button is pushed during the massage, then the massage heads will not be retracted.)
 button to lower the legrest before sitting down.
 Raised
 button to stop programmed operation.
 button to stop programmed operation immediately.
 button twice in order to return the massage heads to the retracted position.
 button
 button.
 button to stop manual operation.
 button to stop the leg massage.
 button
 button.
 button to stop the leg massage.
 off
off


 button, the program button or the manual operation selection button has not been


 fast
fast
 fast
fast
 strong


 off
off para realizar el masaje.
 off
off off
off durante el masaje, los rodillos de masaje no se encontrar??n regidos.)

 aprox. 60
 para detener el modo programado.
 bot??n para detener de inmediato el funcionamiento programado.

 shiatsu
  swedish
 knead
knead 
 tap A
tap A  tap B
tap B 
 roll
roll 

 fast
fast para detener el modo manual.

 para detener el masaje de piernas.
 .
. para detener el masaje de piernas.
 off
off

