gSOAP Public License 1.3
Part of the software embedded in this product is gSOAP software.
Portions created by gSOAP are Copyright (C) 2001-2009 Robert A. van Engelen, Genivia inc. All Rights Reserved.
THE SOFTWARE IN THIS PRODUCT WAS IN PART PROVIDED BY GENIVIA INC AND ANY EXPRESS OR IMPLIED
WARRANTIES, INCLUDING, BUT NOT LIMITED TO, THE IMPLIED WARRANTIES OF MERCHANTABILITY AND FITNESS
FOR A PARTICULAR PURPOSE ARE DISCLAIMED. IN NO EVENT SHALL THE AUTHOR BE LIABLE FOR ANY DIRECT,
INDIRECT, INCIDENTAL, SPECIAL, EXEMPLARY, OR CONSEQUENTIAL DAMAGES (INCLUDING, BUT NOT LIMITED
TO, PROCUREMENT OF SUBSTITUTE GOODS OR SERVICES; LOSS OF USE, DATA, OR PROFITS; OR BUSINESS
INTERRUPTION) HOWEVER CAUSED AND ON ANY THEORY OF LIABILITY, WHETHER IN CONTRACT, STRICT
LIABILITY, OR TORT (INCLUDING NEGLIGENCE OR OTHERWISE) ARISING IN ANY WAY OUT OF THE USE OF THIS
SOFTWARE, EVEN IF ADVISED OF THE POSSIBILITY OF SUCH DAMAGE.
(1) MS/WMA
This product is protected by certain intellectual property rights of Microsoft Corporation and third parties. Use or distribution of such technology outside of this product is prohibited without a license from Microsoft or an authorized Microsoft subsidiary.
(2) MS/PlayReady/Final Product Labeling
This product contains technology subject to certain intellectual property rights of Microsoft. Use or distribution of this technology outside of this product is prohibited without the appropriate license(s) from Microsoft.
(3)MS/PlayReady/End User Notices
Content owners use Microsoft PlayReadyTM content access technology to protect their intellectual property, including copyrighted content. This device uses PlayReady technology to access PlayReady-protected content and/or WMDRM-protected content. If the device fails to properly enforce restrictions on content usage, content owners may require Microsoft to revoke the device???s ability to consume PlayReady-protected content. Revocation should not affect unprotected content or content protected by other content access technologies. Content owners may require you to upgrade PlayReady to access their content. If you decline an upgrade, you will not be able to access content that requires the upgrade.
(4) Vorbis
The software license is displayed when ???License??? in the Setup menu is selected.(> 40)
(5) FLAC, WPA Supplicant
The software licenses are displayed when ???License??? in the Setup menu is selected.(> 40)
This product incorporates the following software:
(1)the software developed independently by or for Panasonic Corporation,
(2)the software owned by third party and licensed to Panasonic Corporation,
(3)the software licensed under the GNU General Public License, Version 2 (GPL v2),
(4)the software licensed under the GNU LESSER General Public License, Version 2.1 (LGPL v2.1) and/or,
(5)open sourced software other than the software licensed under the GPL v2 and/or LGPL v2.1
For the software categorized as (3) and (4), please refer to the terms and conditions of GPL v2 and LGPL v2.1, as the case may be at http://www.gnu.org/licenses/old-licenses/gpl-2.0.html and
http://www.gnu.org/licenses/old-licenses/lgpl-2.1.html.
In addition, the software categorized as (3) and (4) are copyrighted by several individuals. Please refer to the copyright notice of those individuals at
http://panasonic.net/avc/oss/bdplayer/AWBPP12.html
The GPL/LGPL software is distributed in the hope that it will be useful, but WITHOUT ANY WARRANTY, without even the implied warranty of MERCHANTABILITY or FITNESS FOR A PARTICULAR PURPOSE.
At least three (3) years from delivery of products, Panasonic will give to any third party who contacts us at the contact information provided below, for a charge no more than our cost of physically performing source code distribution, a complete machine-readable copy of the corresponding source code covered under GPL v2/LGPL v2.1.
Contact Information cdrequest.bdplayer@gg.jp.panasonic.com
Source code is also freely available to you and any other member of the public via our website below. http://panasonic.net/avc/oss/bdplayer/AWBPP12.html
For the software categorized as (5) includes as follows.
1.This product includes software developed by the OpenSSL Project for use in the OpenSSL Toolkit. (http://www.openssl.org/)
2.This product includes software developed by the University of California, Berkeley and its contributors.
3.FreeType code.
4.The Independent JPEG Group's JPEG software.
Copyright 2004-2010 Verance Corporation. CinaviaTM is a Verance Corporation trademark. Protected by U.S. Patent 7,369,677 and worldwide patents issued and pending under license from Verance Corporation. All rights reserved.


 ??????????????????
 ????????????
 ???????????????


 ???
???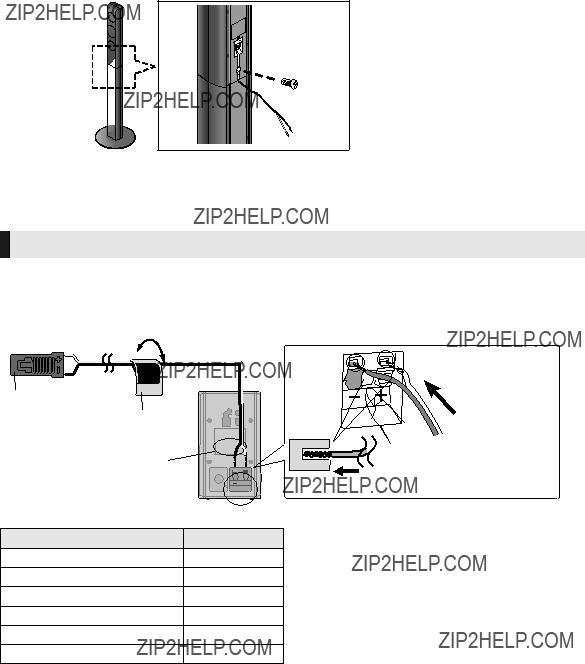


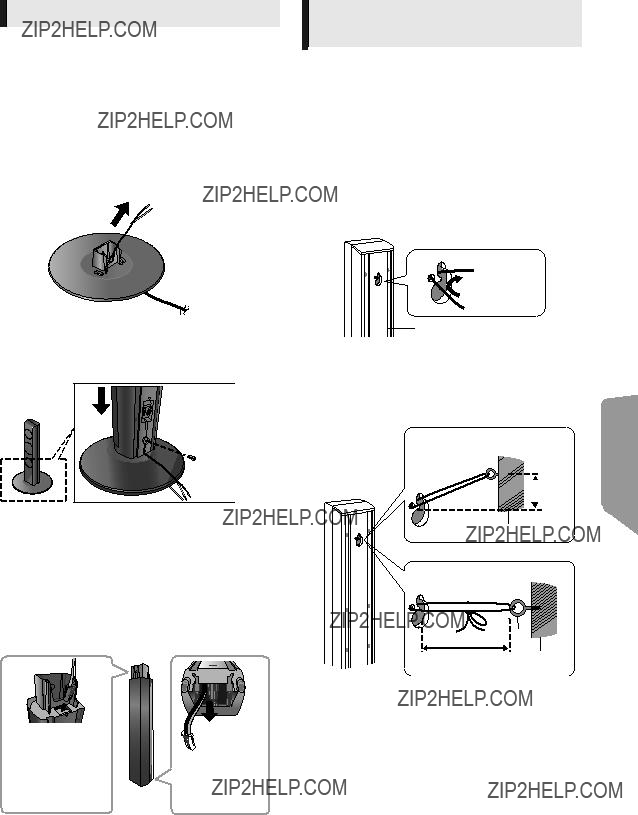
 Affix this end of the antenna to a wall or
  pillar where the reception is best.

 (supplied)
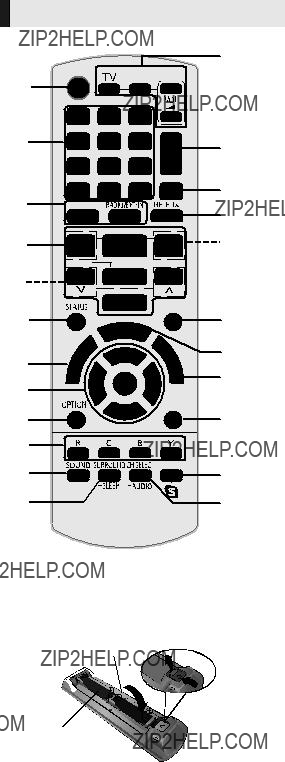
 OK
OK RETURN

 RETURN
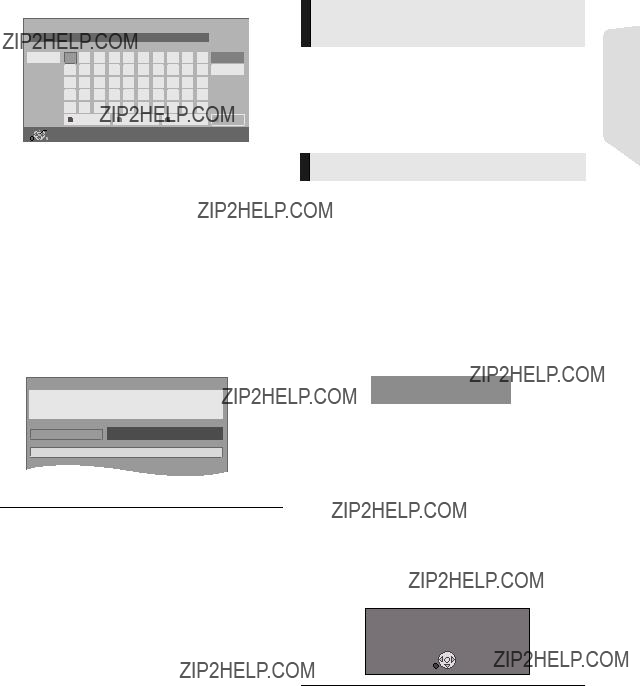
 OK
OK RETURN


 ???
??? (not supplied)
 ??? will appear on TV.


 ] button, and NETFLIX can be accessed directly by pressing [NETFLIX] button.
 : Settings of the items with this indication are saved by the respective users registered in the Home menu.


 : Settings of the items with this indication are saved by the respective users registered in the Home menu.
 System
 OK
OK RETURN
 (
( (
( (
( (
( (
(
 (
( (
(

 (
( (
(


 ) and press [OK].
 ???
???


 ???
??? ???
???
 ???
???


 ???
??? ???
???  ??? ???


 ??? logo are trade marks of Skype Limited.

 For Canada only: The word ???Participant??? is used in place of the word ???Partner???.