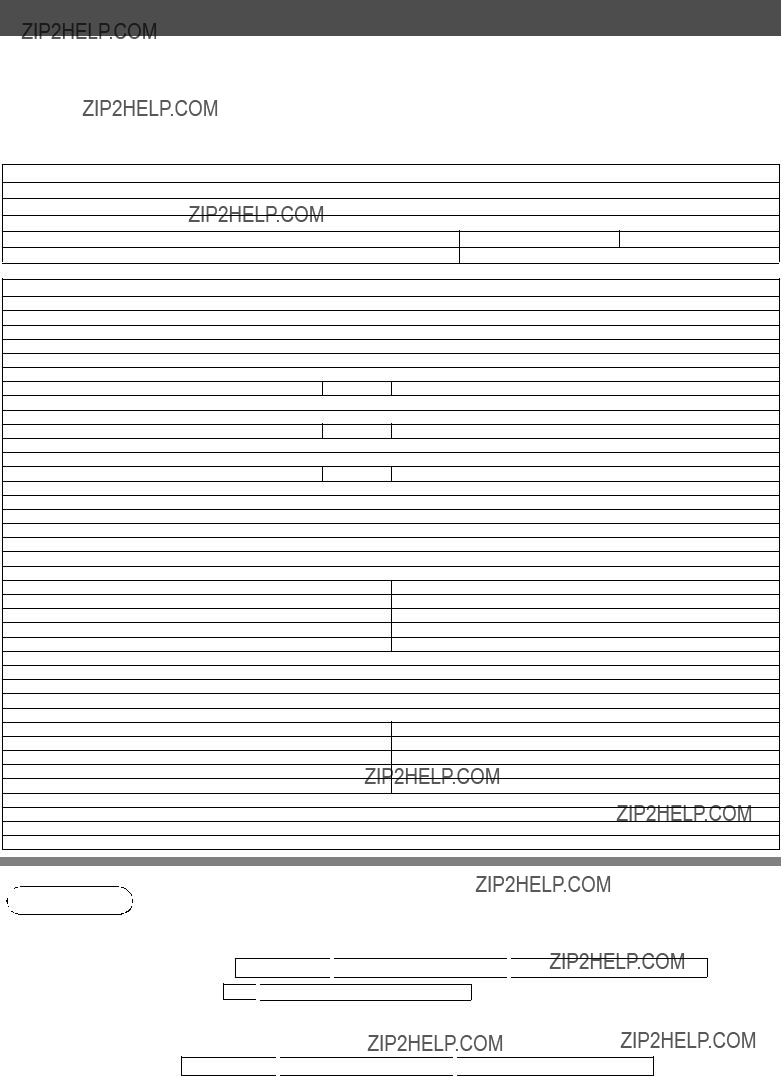
Explanation of Contents
MAC Address
(1)IP Address
(2)Subnet Mask
(3)Default Gateway IP Address
(4)Primary DNS Server IP Address
(5)Secondry DNS Server IP Address
(6)Email Address
(7)SMTP Server Name or SMTP Server IP Address
(8)SMTP Auth Name
(9)SMTP Auth Password
(10)POP Server Name or POP Server IP Address
(11)POP User Name
(12)POP Password
(13)LDAP Server Name
or LDAP Server IP Address
(14)LDAP User Name
(15)LDAP Password
(16)LDAP Search Base
(17)Host Name
(18)Default Subject
(19)Default Domain
(20)Selectable Domains
(21)Remote Password
(22)Relay XMT Password
(23)Manager???s Email Address
(24)Insert Email Text
(25)Relay Domain (01 to 10)
(26)Community Name (1)
(27)Community Name (2)
(28)Device Name
(29)Device Location
MAC Address from the 2nd page of the General Settings List printout
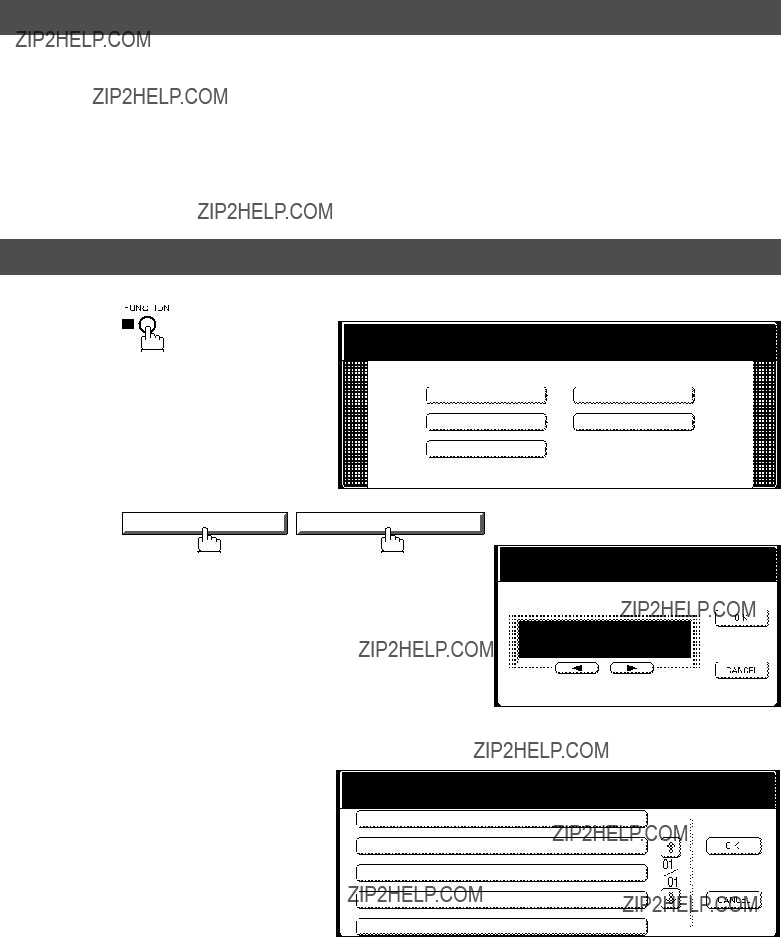
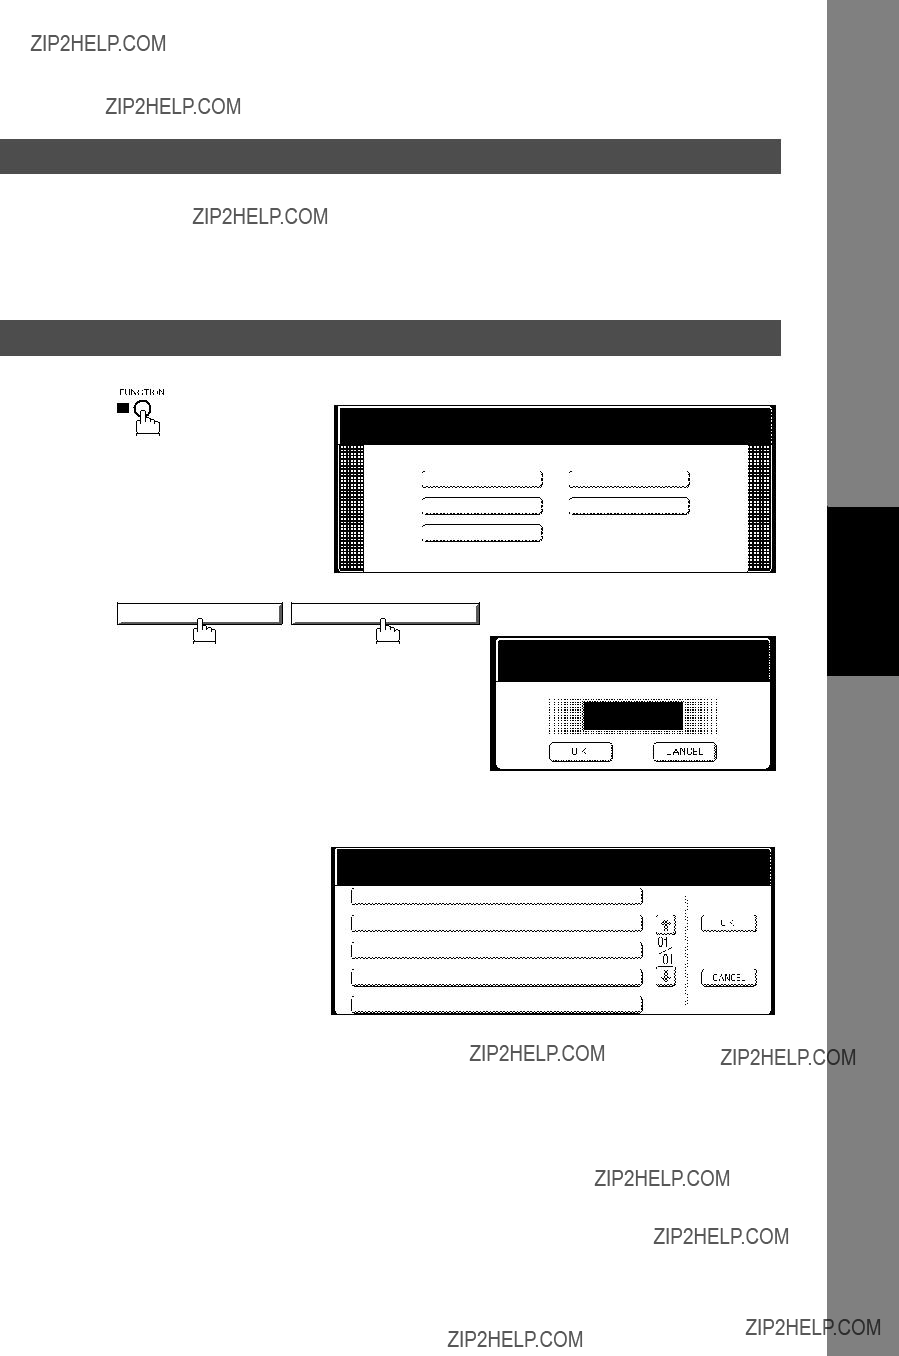
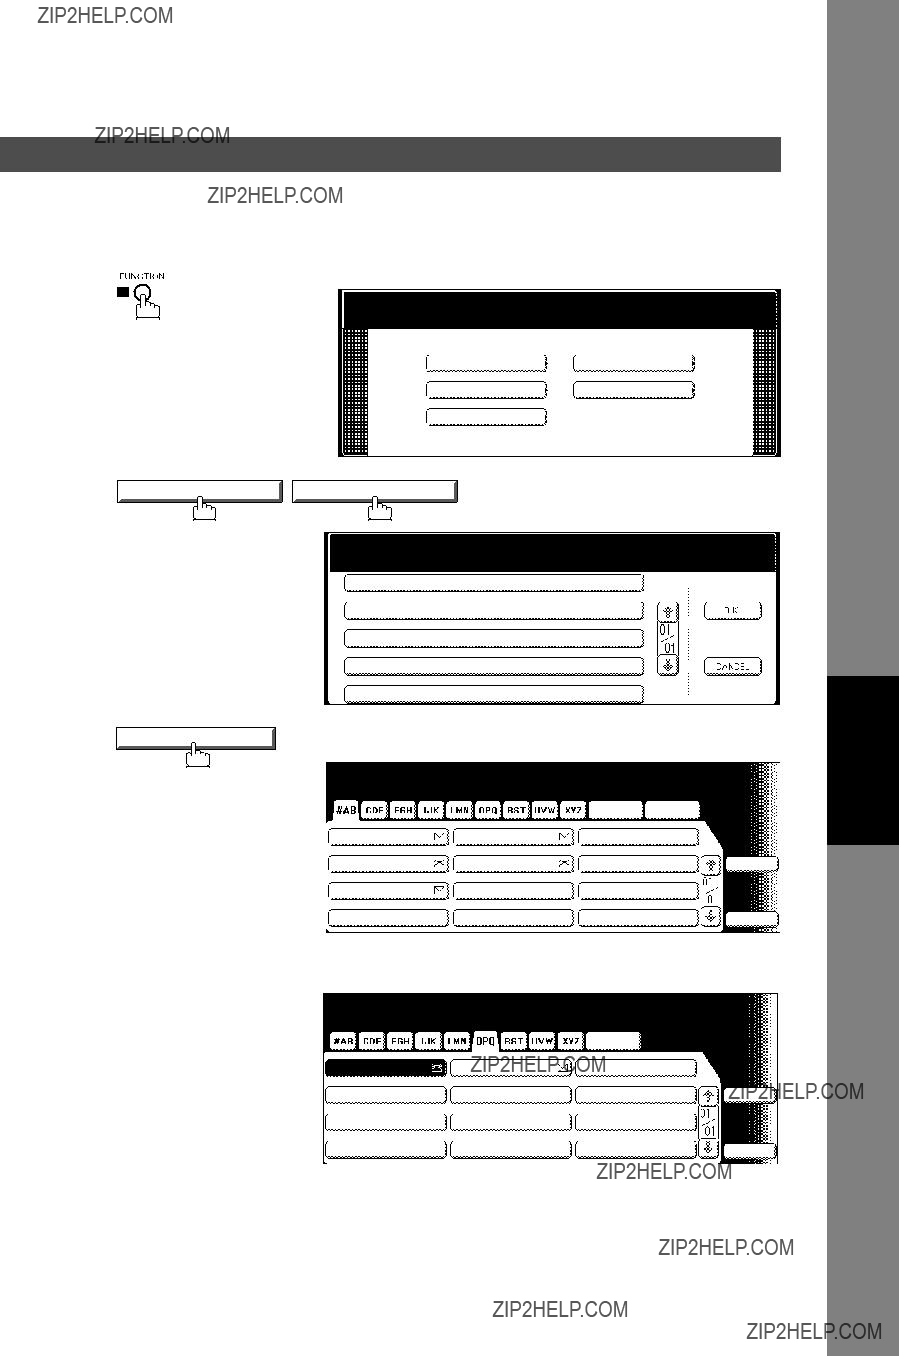
(press FUNCTION 
 GENERAL SETTINGS
09/04*KeyKeyOperatorMode , Input ID Code, OK
: 00/31*PrintPrintGeneneralSettings 
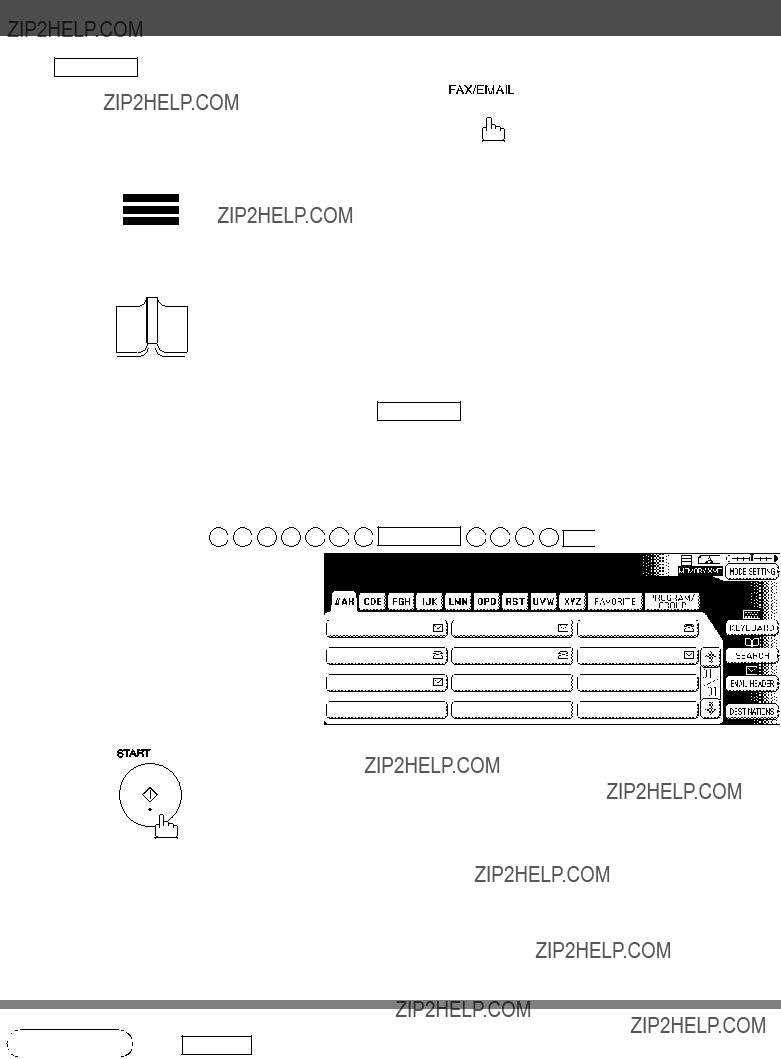
 Start
Start 
 OK ).
OK ).
* Certain Parameter Numbers may differ between the DP-2310/3010 and DP-3510/3520/4510/4520/6010/6020 series. If you encounter two Parameter Numbers separated by a "/" and an asterisk ("*"), the first number corresponds to (DP-2310/3010) and the second number corresponds to (DP-3510/3520/4510/4520/6010/6020).
:The Internet Protocol (IP) address assigned to your machine.
:The Subnet Mask number.
:The Default Gateway's IP Address.
:The IP address of the Primary DNS Server.
:The second IP address of the Primary DNS Server.
:The email address assigned to your machine. (Up to 60 characters)
:The SMTP Server Name (up to 60 characters). The SMTP Server IP Address.
The SMTP Autn Name. The SMTP Auth Password.
:The POP Server Name (up to 60 characters). The POP Server IP Address.
:POP User Name. (Up to 40 characters)
:POP Password. (Up to 10 characters)
:The LDAP Server Name or IP Address. (Up to 60 characters)
:LDAP Login Name. (Up to 40 characters)
:LDAP Password. (Up to 10 characters)
:LDAP Search Base. (Up to 60 characters)
:The name assigned to your machine. (Up to 60 characters)
:The information to be added to the Subject Line for all outgoing emails. (Up to 40 characters)
:Specify the Domain Name (up to 50 characters) to be added to frequently used or incomplete outgoing email addresses (i.e. @yourcompany.com).
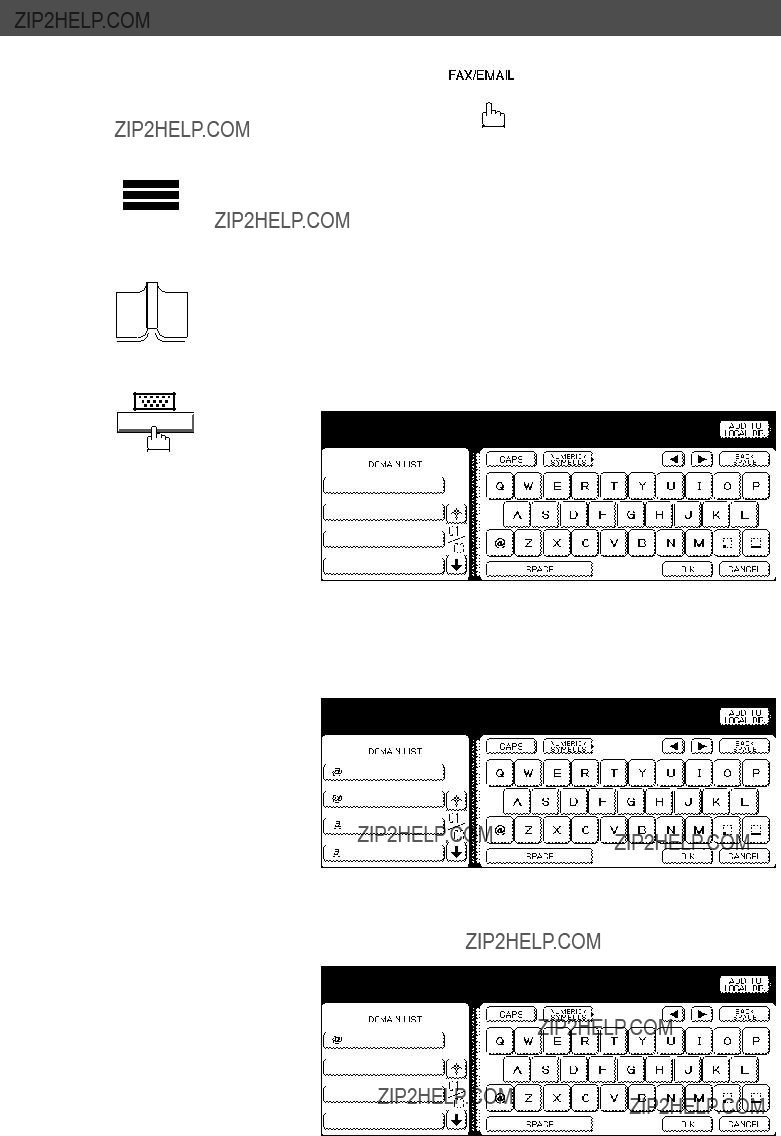
:Enter up to 10 Domain Names that can be selected during manual email addressing. (Up to 30 characters)
Enter a security password (up to 10 characters) to allow Remote
:Programming of the Internet Parameters and Auto Dialer or the retrieval of the Journal via email.
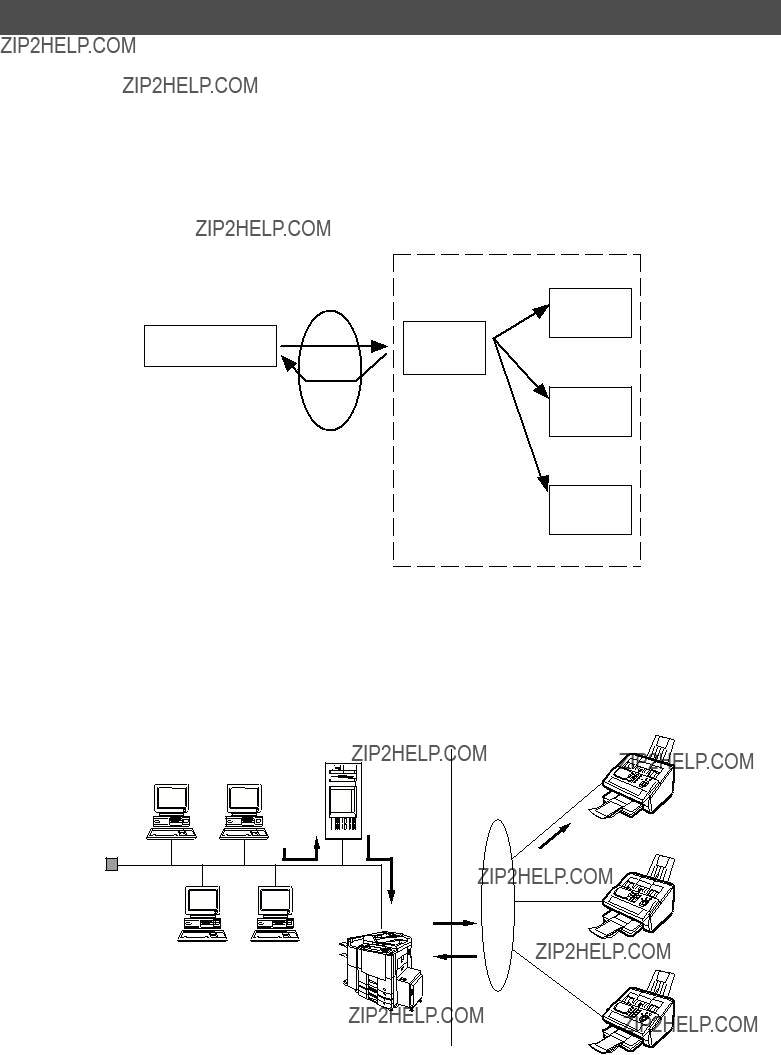
:Enter a password to provide network security to your Relay Station (for G3 relay purposes). (Up to 10 characters)
Enter you Department Manager???s email address for notification of all
:Internet relayed transmissions for supervision and cost control purposes. (Up to 60 characters)
The email text can be changed. Requires an authorized service provider to activate this feature. (Up to 40 characters)
Enter up to 10 Domain Names that are authorized to access your Internet
:Fax for Relayed Transmission Request. (Up to 30 characters) Relay Domain, a.k.a. Domain Name in your machine.
:Community Name used for the Network Device Locator. (Up to 32 characters).
:Community Name used for the Network Device Locator. (Up to 32 characters).
:Device Name used for the Network Device Locator. (Up to 32 characters).
:Device Location for the Network Device Locator. (Up to 32 characters).


 GENERAL SETTINGS
 09/04* Key Operator Mode
 Start
Start 
 OK
OK 


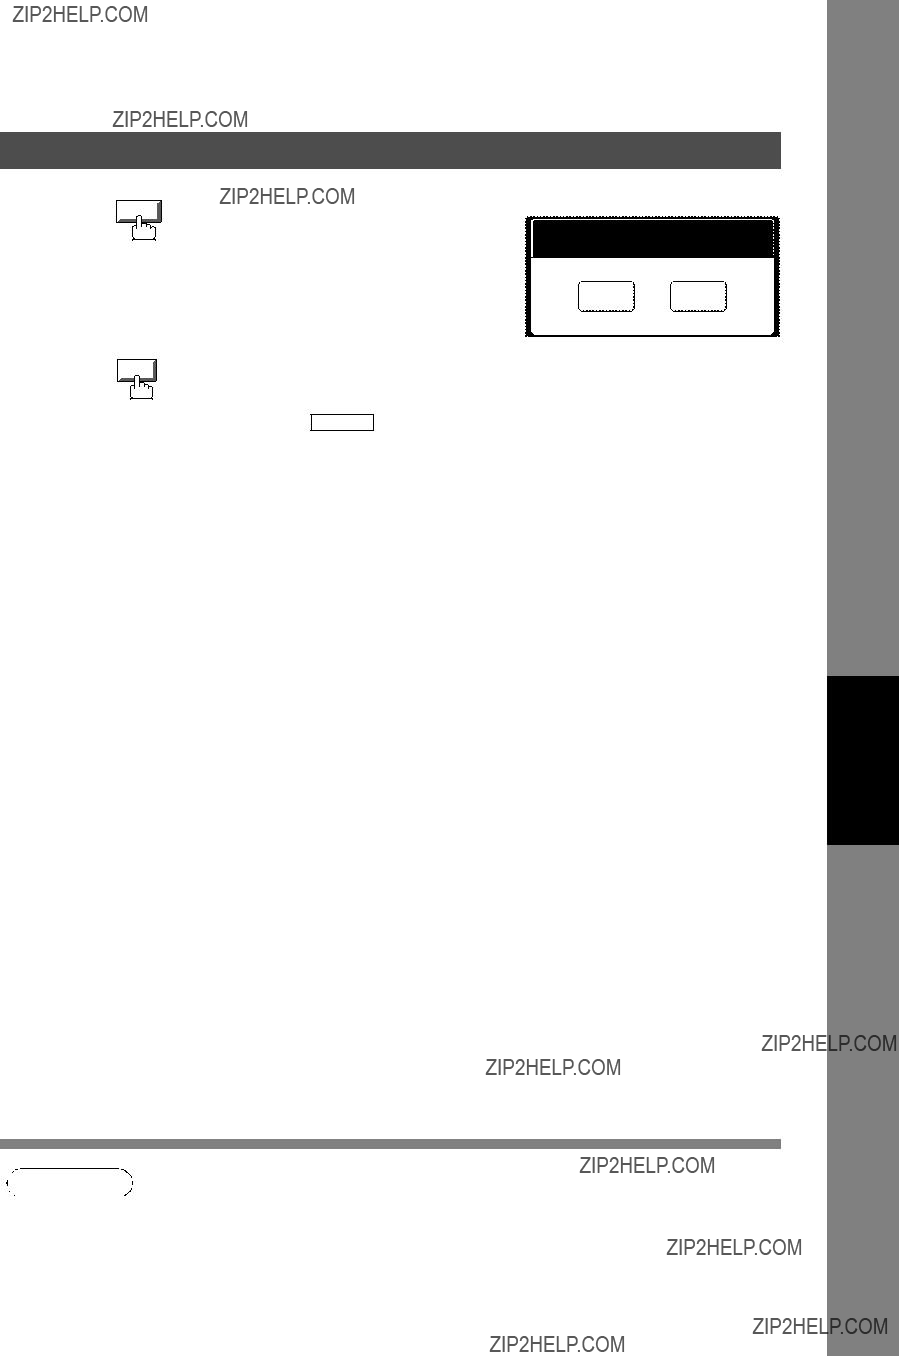
 Plug one end of the telephone line cable into the
  You can connect an additional standard single line telephone to the machine. To connect the telephone, remove the protective tab on the TEL jack.
 After connecting all cables and the Power Cord, turn the Main Power Switch on the Back
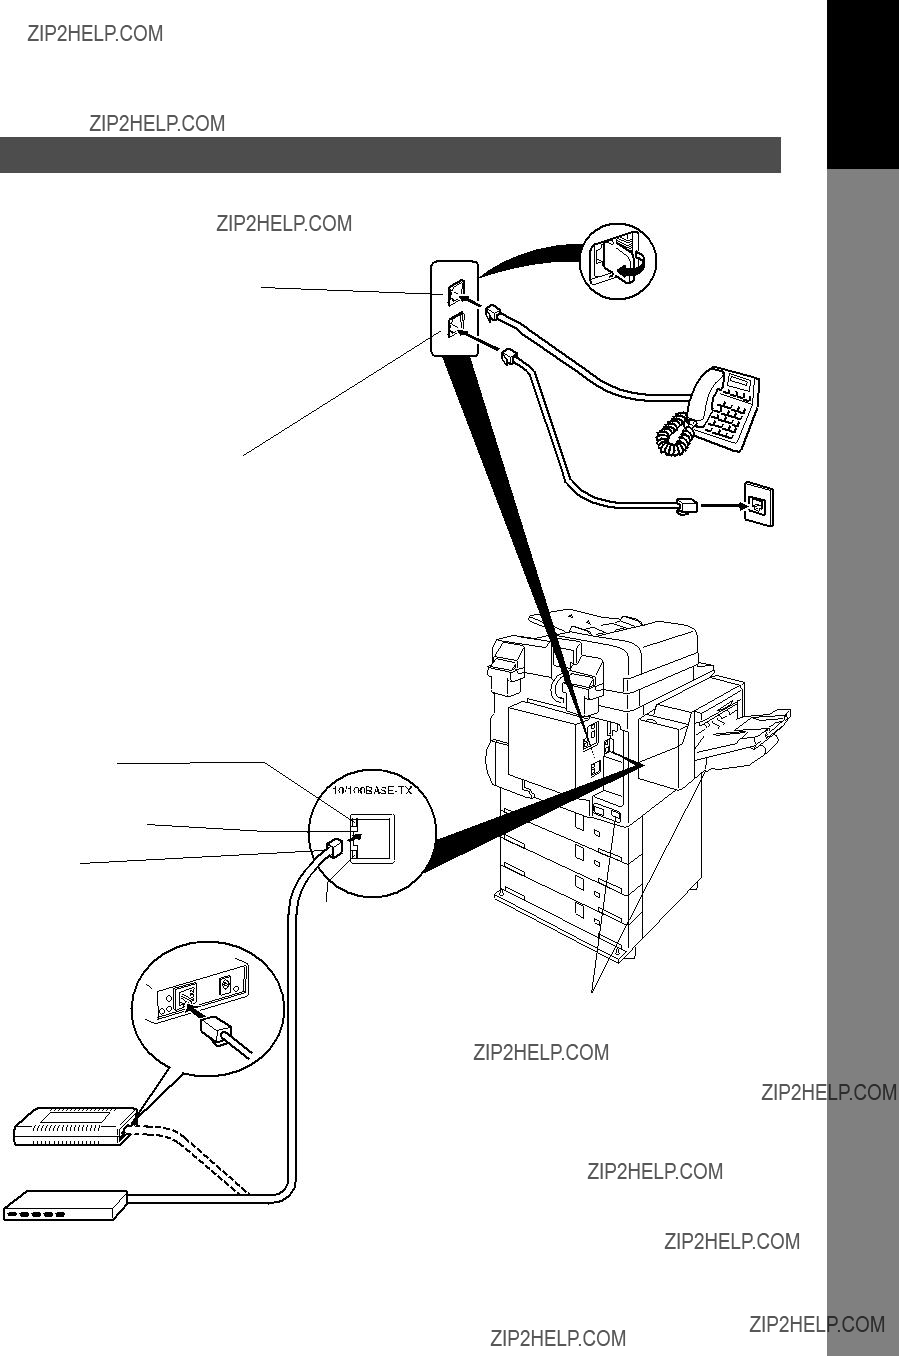
 You can connect an additional standard single line telephone to the machine. To connect the telephone, remove the protective tab on the TEL jack.
 Plug one end of the telephone line cable into the
  After connecting all cables and the Power Cord, turn the Main Power Switch on the Back
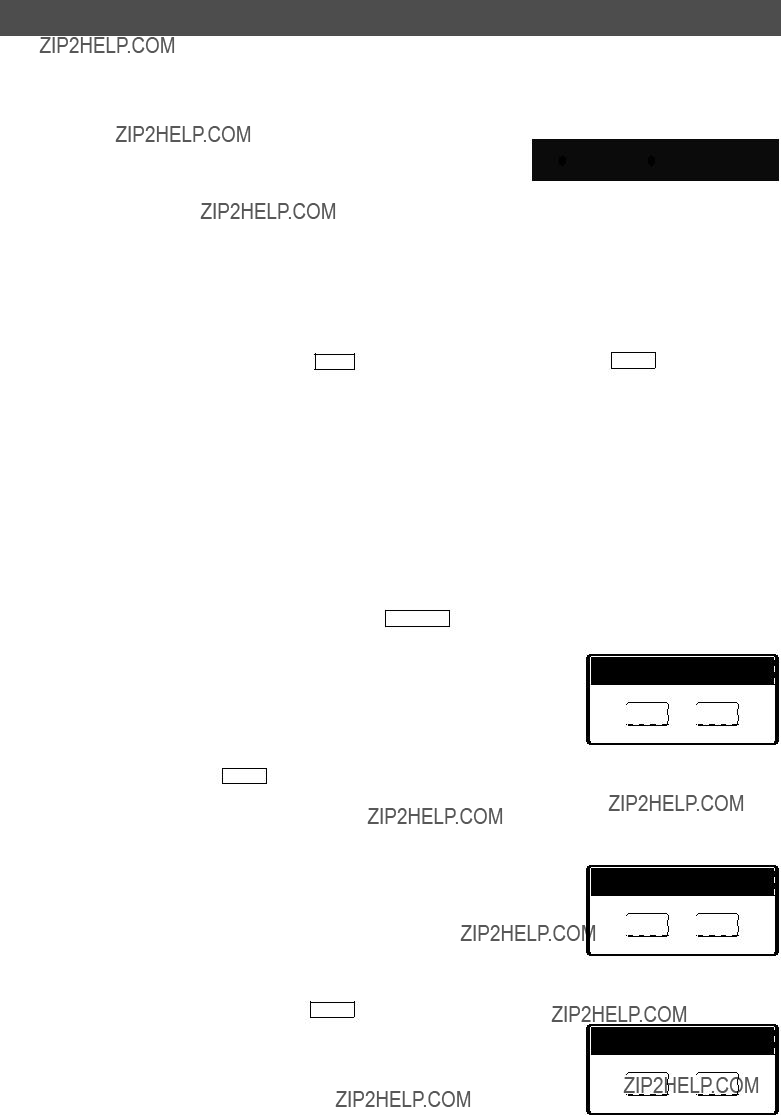
 Lights when receiving print data.
 Lights when trouble occurs.
 Blinks when machine is active.
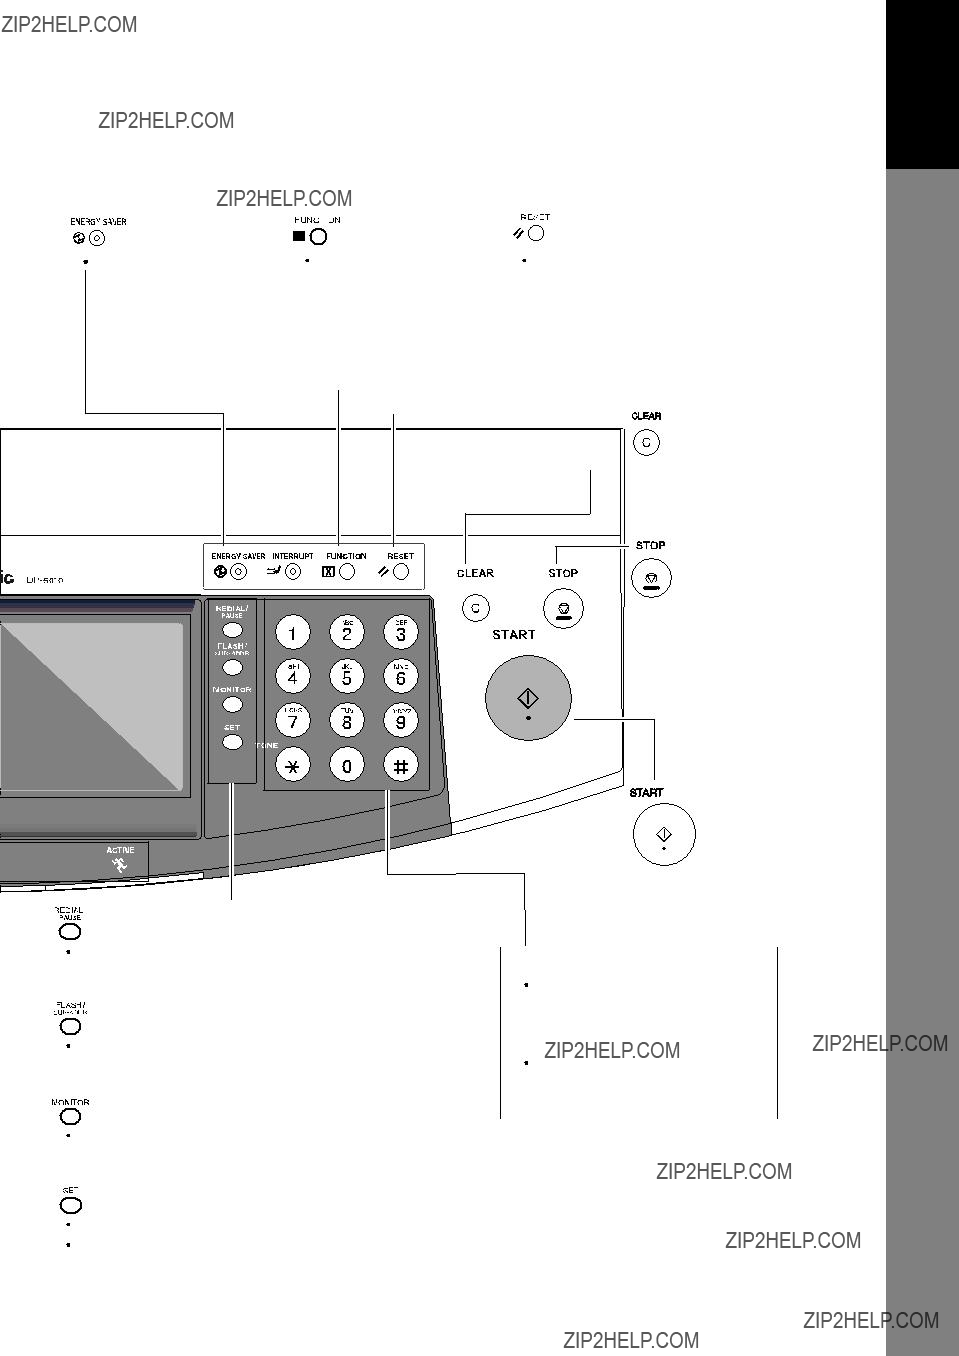

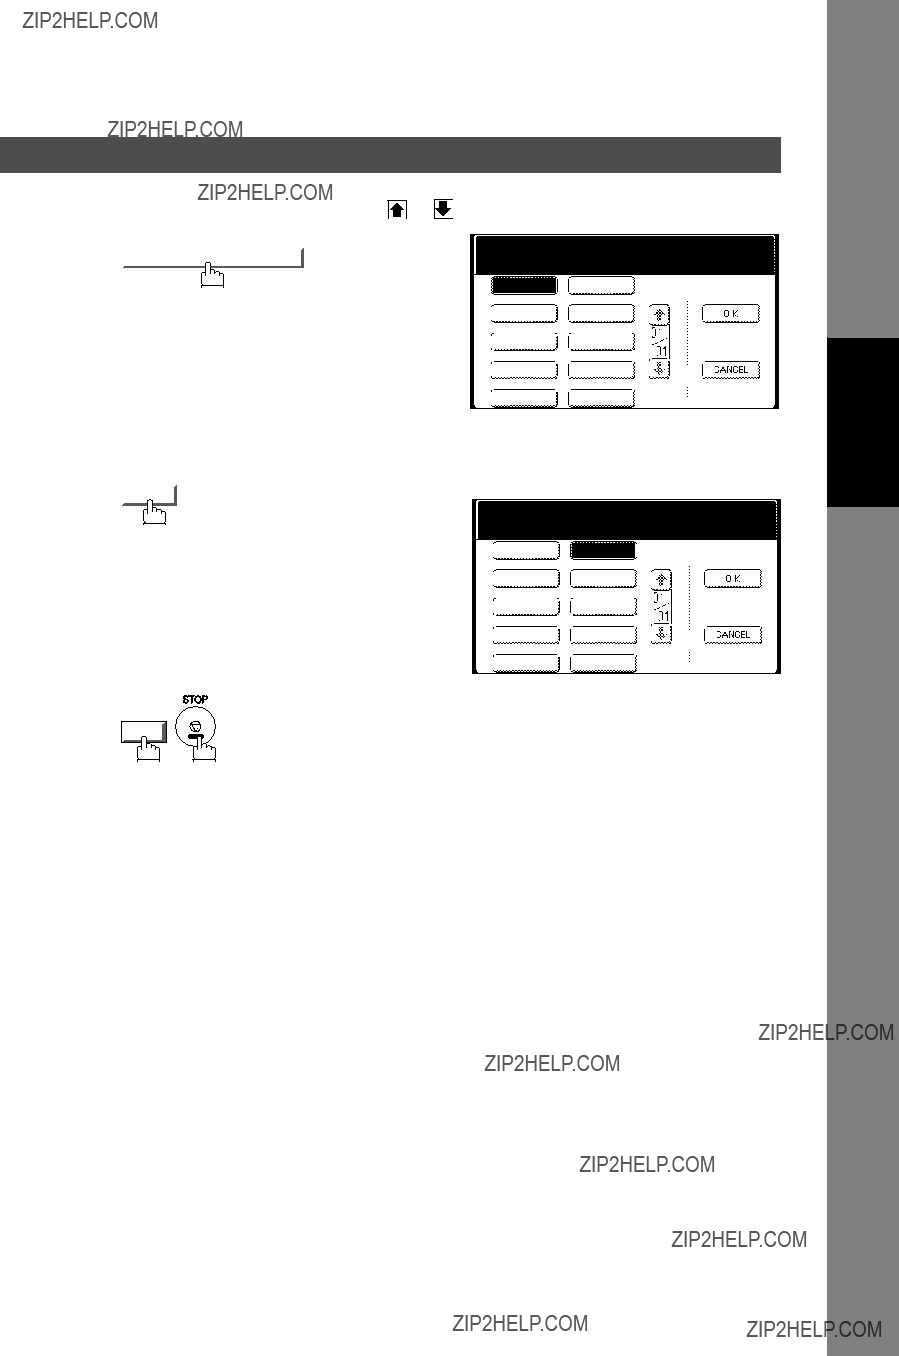
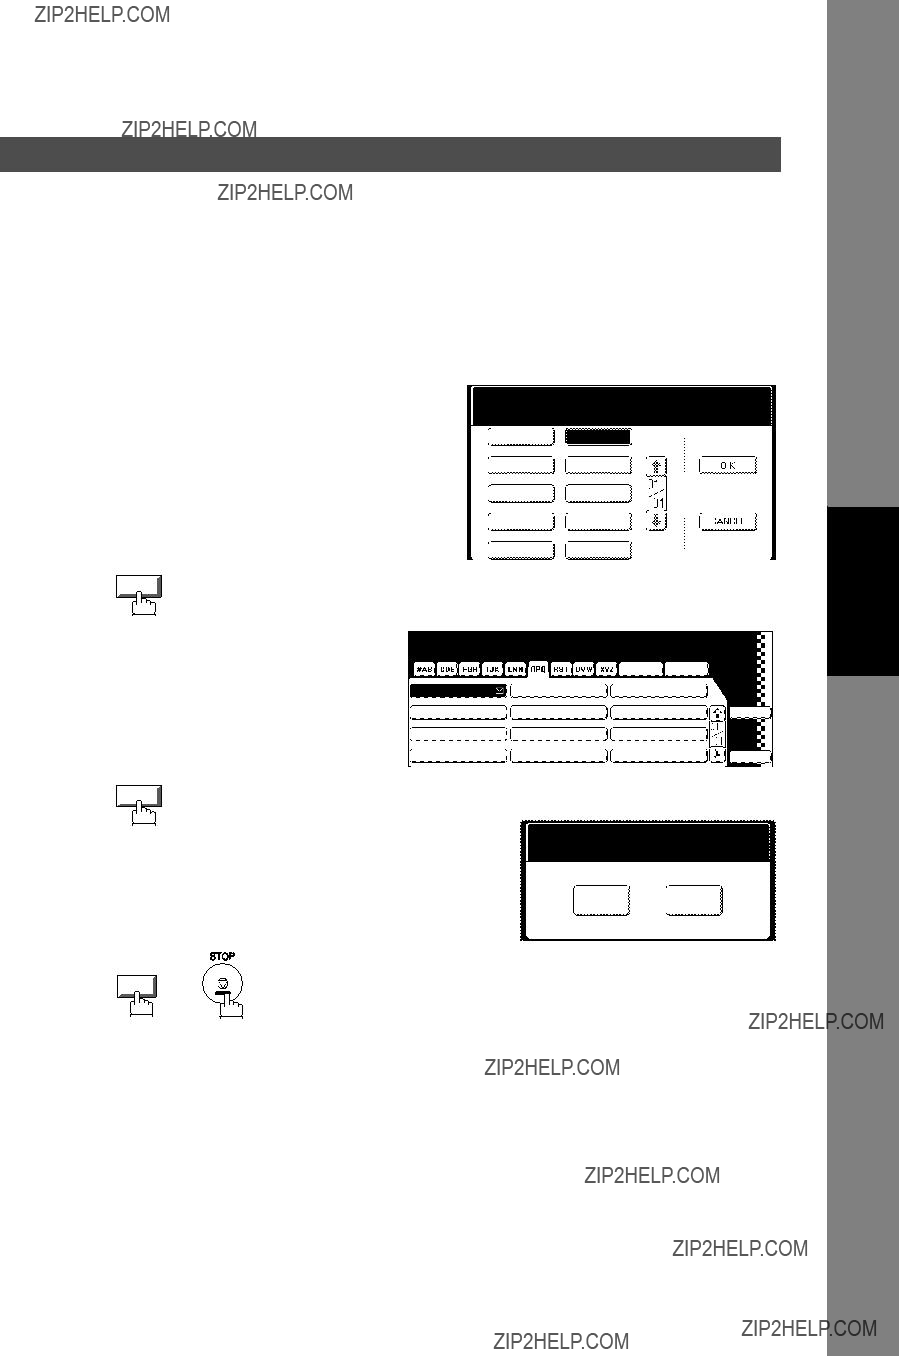
 Use this button when correcting entered numbers or characters.
 Press this button when you want to stop the communication, registration operation, or audible tone.
 Press this button to start transmission, email communication or a manual fax reception.


 mark.
mark.

 EDIT
EDIT 


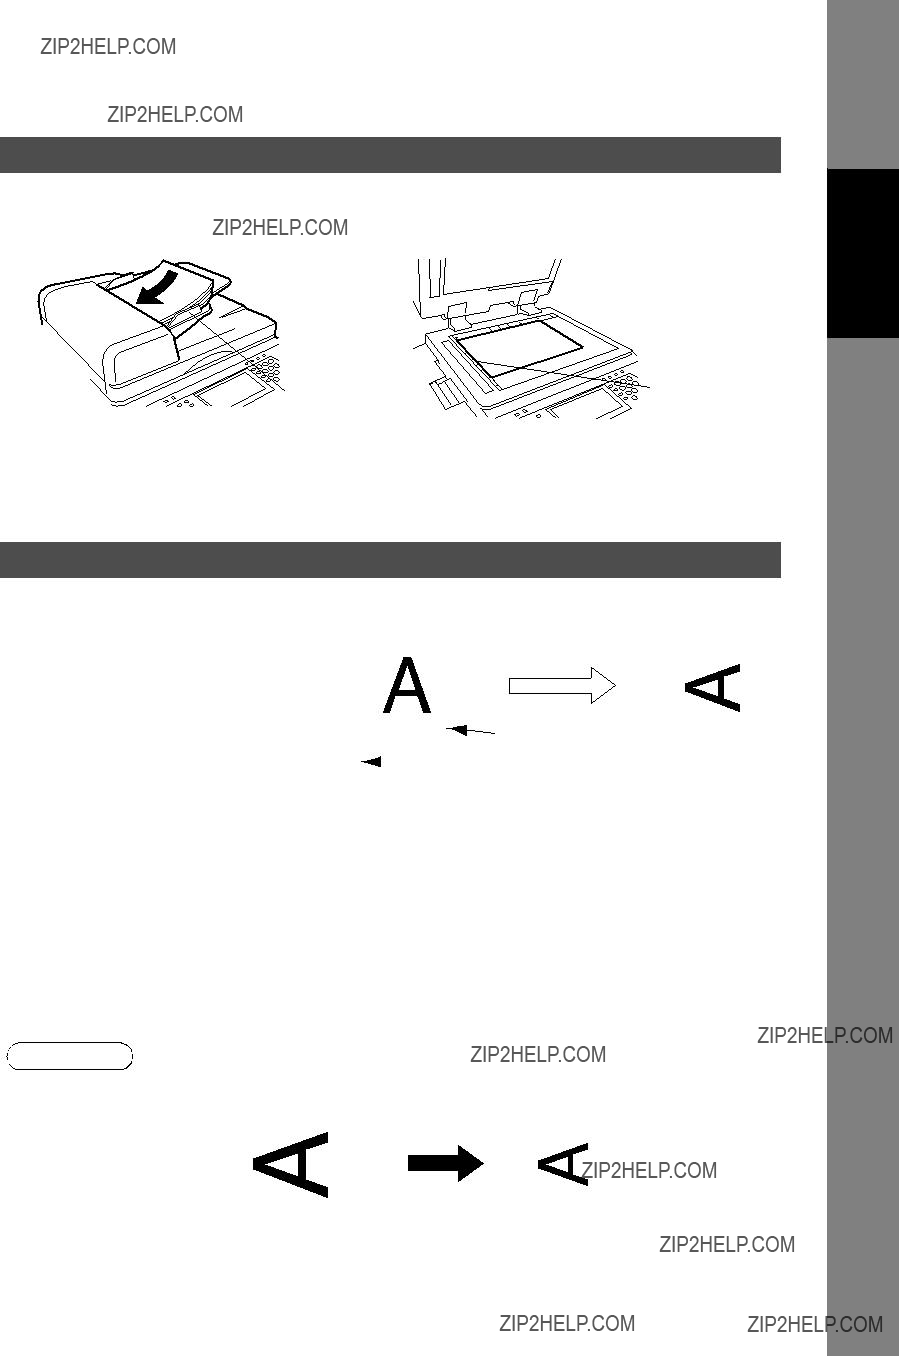
 ) direction, the document(s) will be rotated by 90?? and

 ) direction. The document(s) will be printed the same size as the transmitted originals at the Receiving Station.


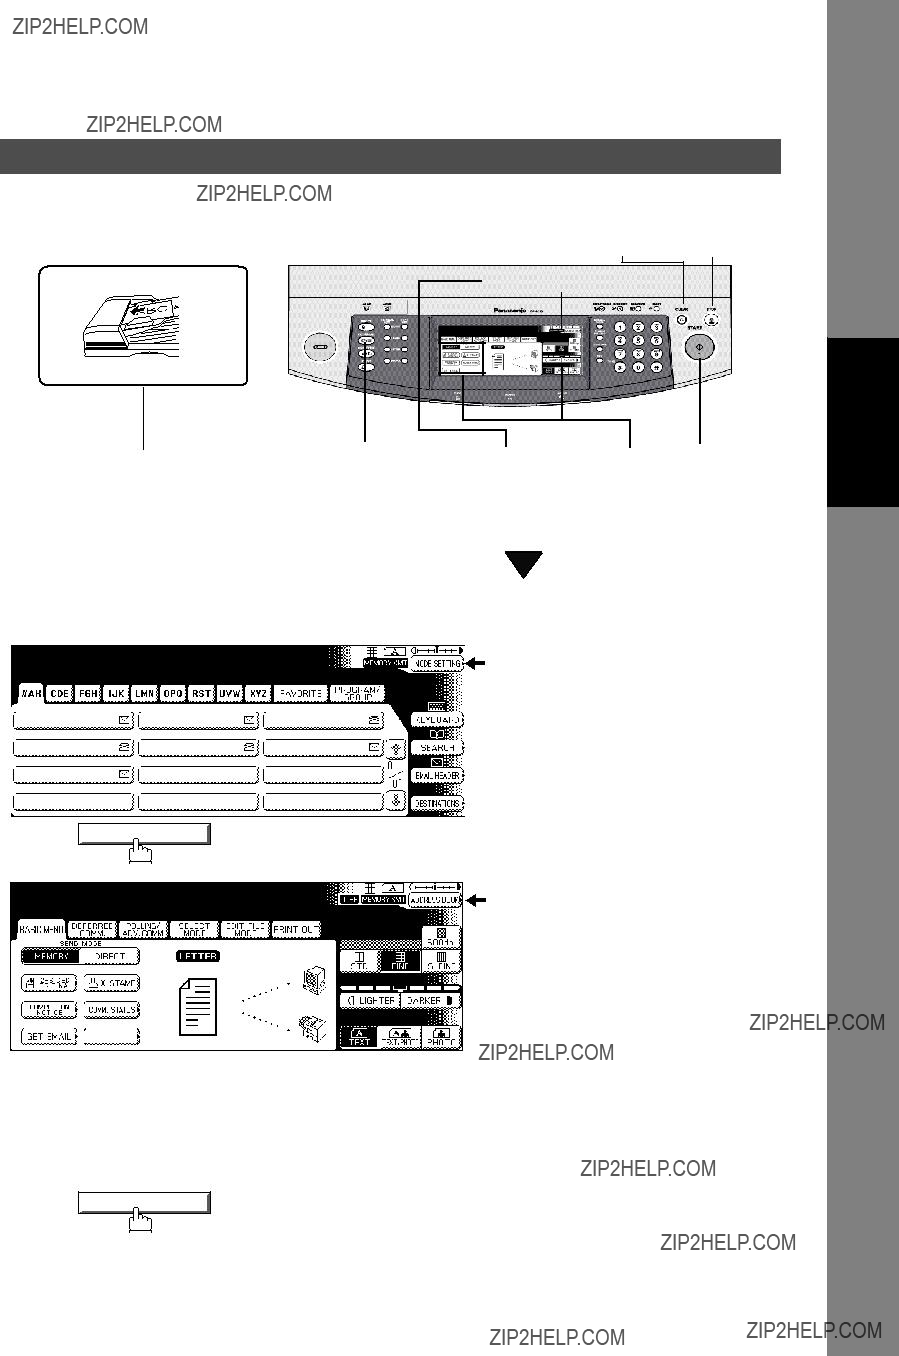


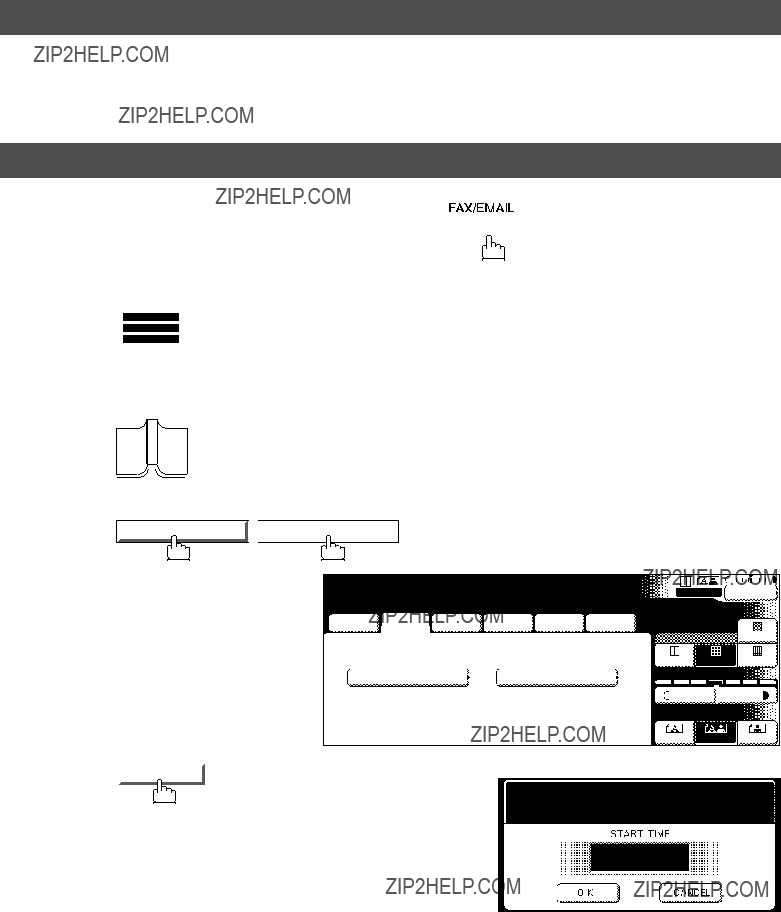
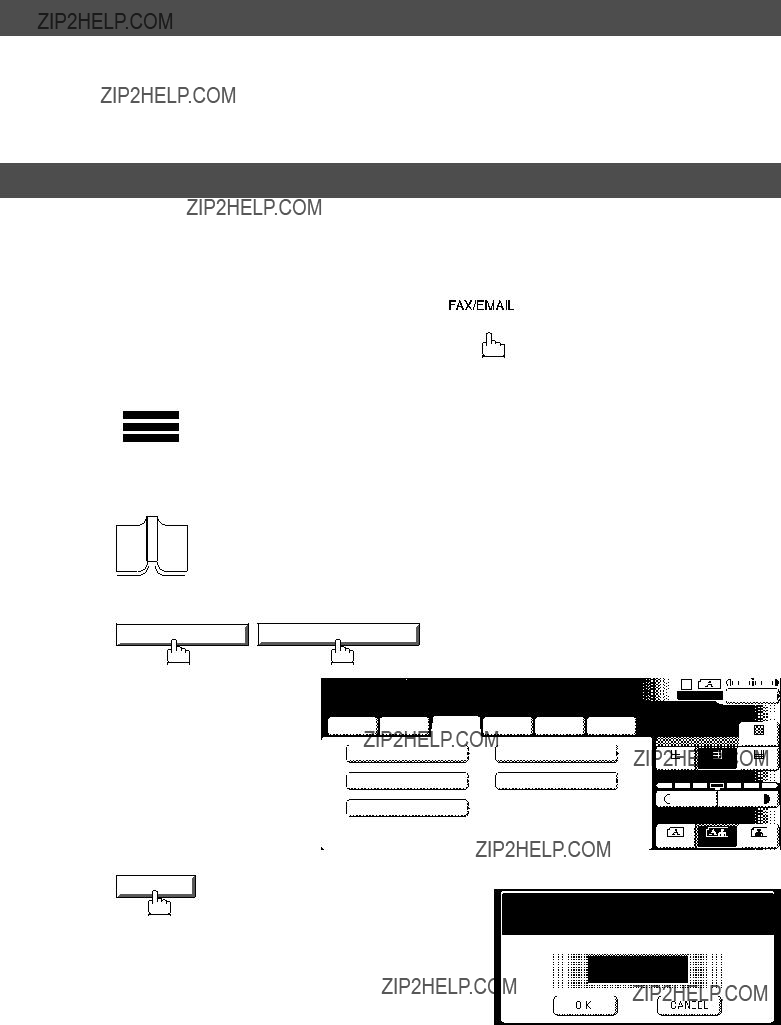
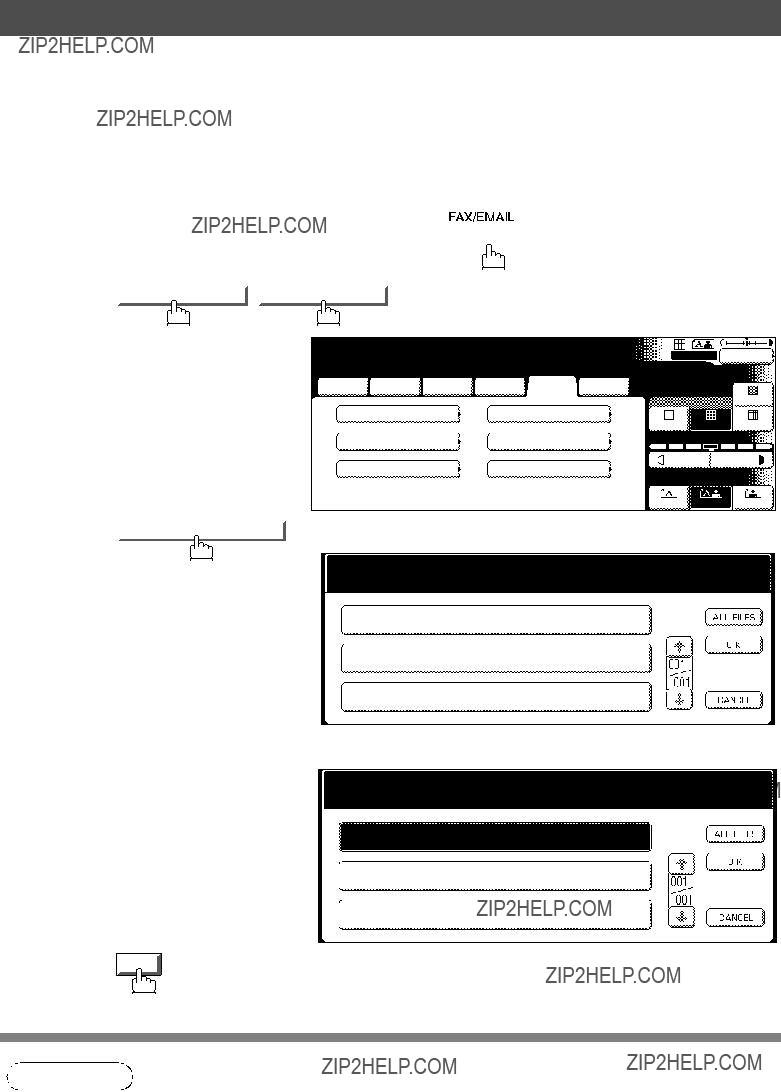
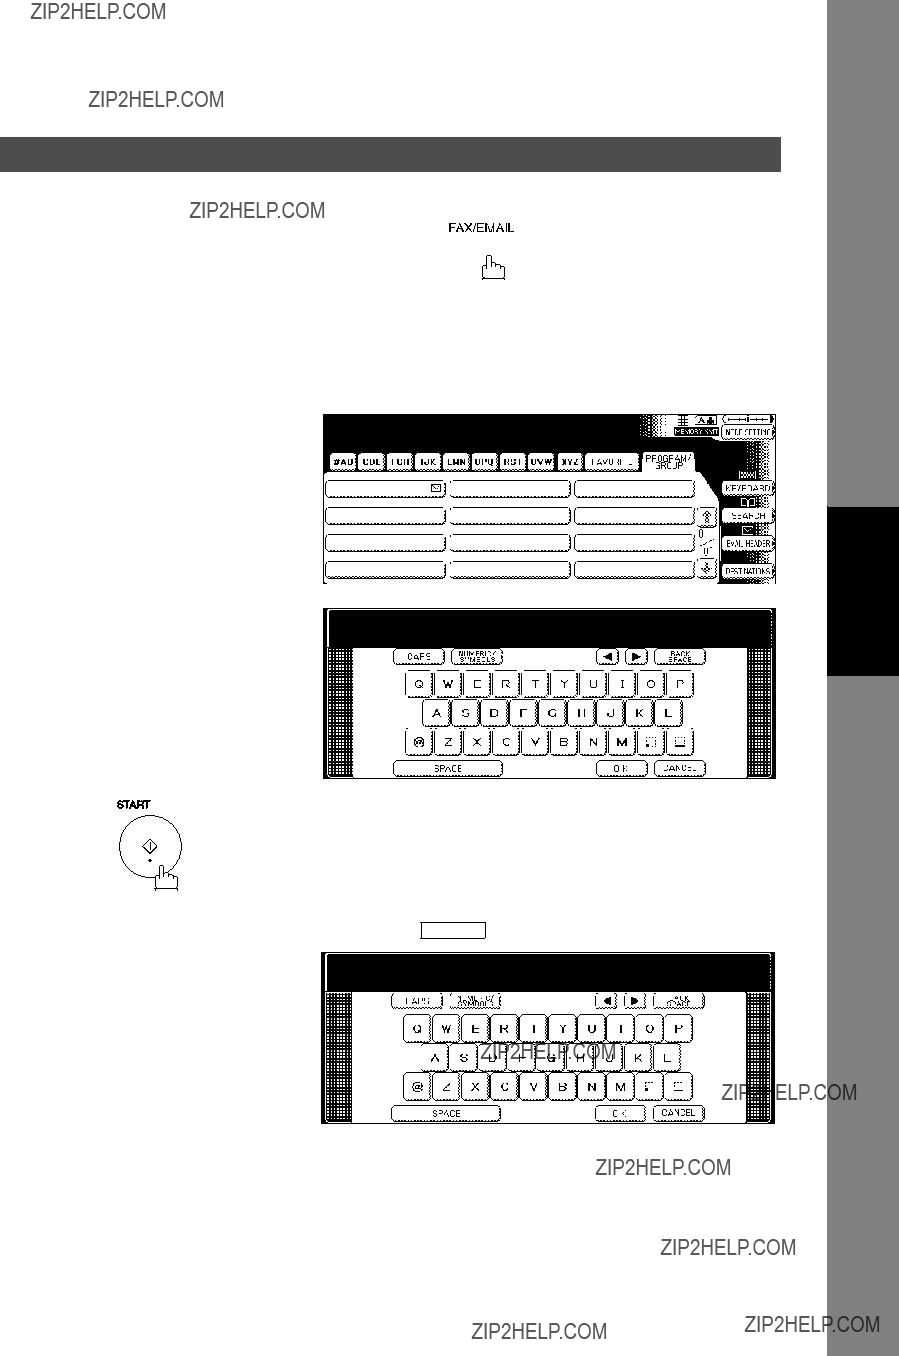
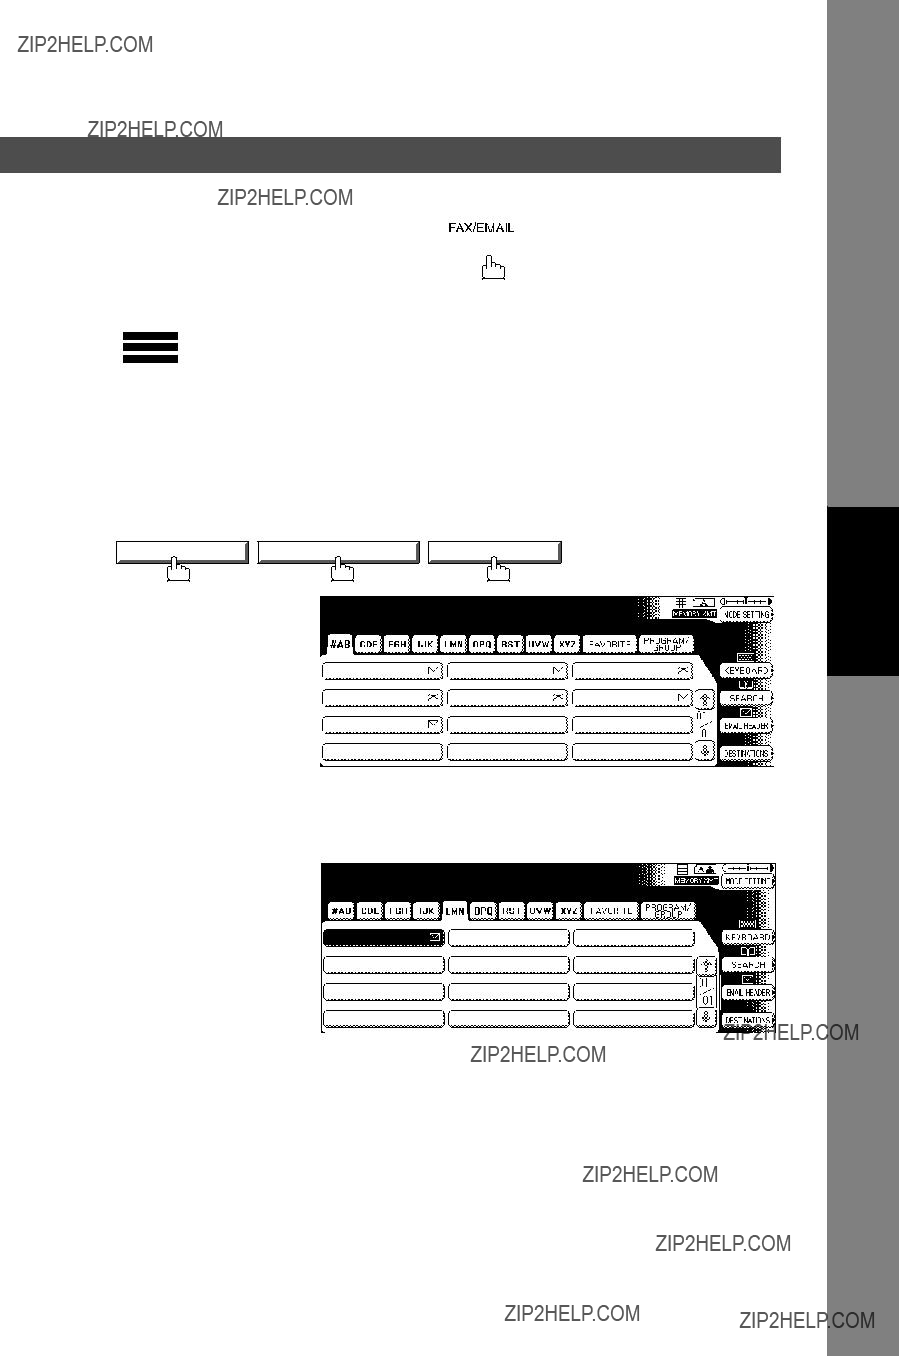
 to select the "FAX/EMAIL" mode.

 DEFERRED COMM.

 to select the "FAX/EMAIL" mode.
 DEFERRED COMM.
 to select the "FAX/EMAIL" mode.


 to select the "FAX/EMAIL" mode.
 POLLING/ADV.COMM.
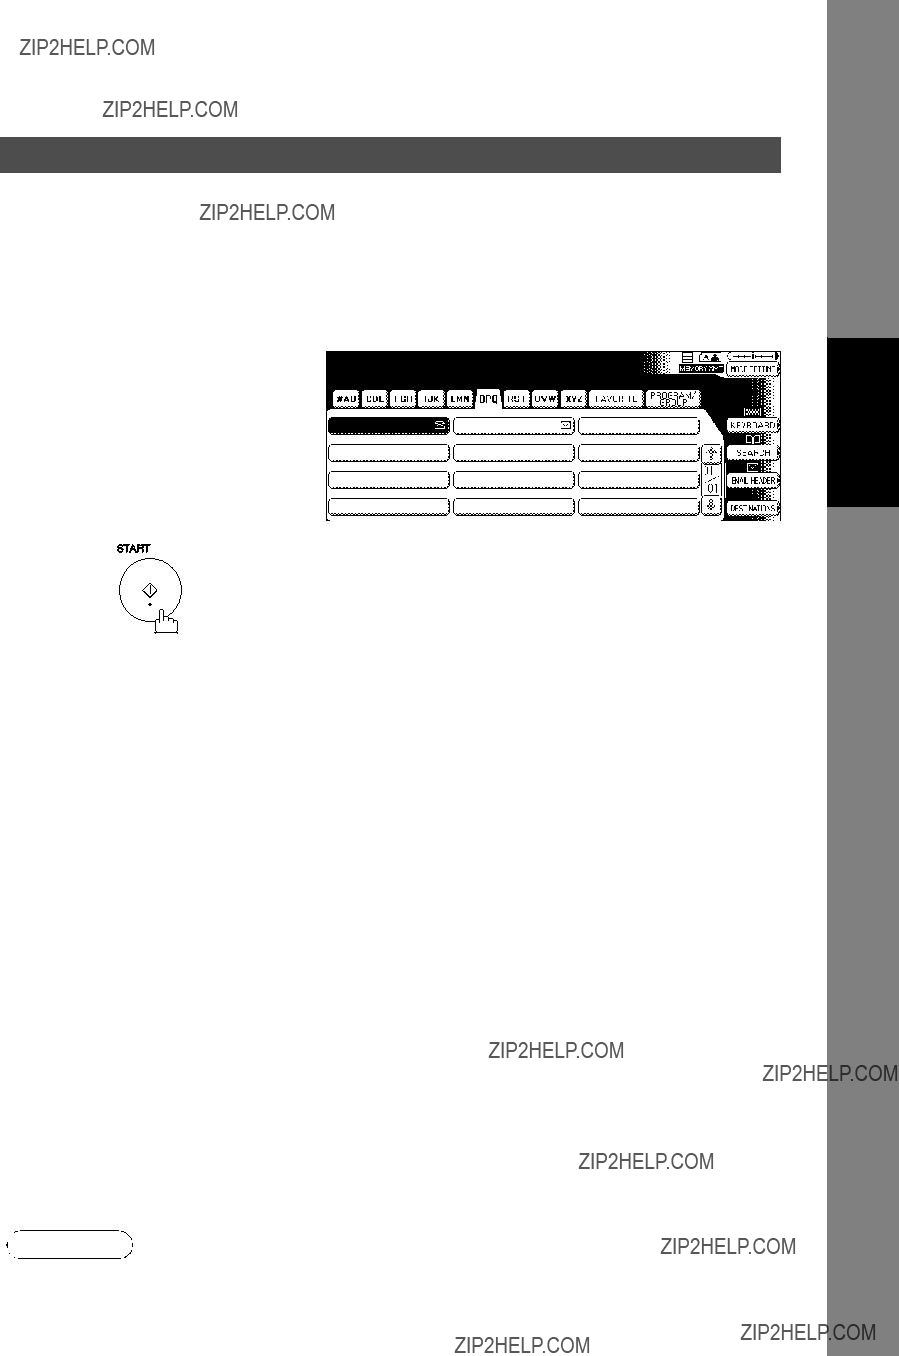


 YES
YES

 to select the "FAX/EMAIL" mode.


 to select the "FAX/EMAIL" mode.
 POLLING/ADV.COMM.
 to select the "FAX/EMAIL" mode.


 POLLING/ADV.COMM.
 to select the "FAX/EMAIL" mode.
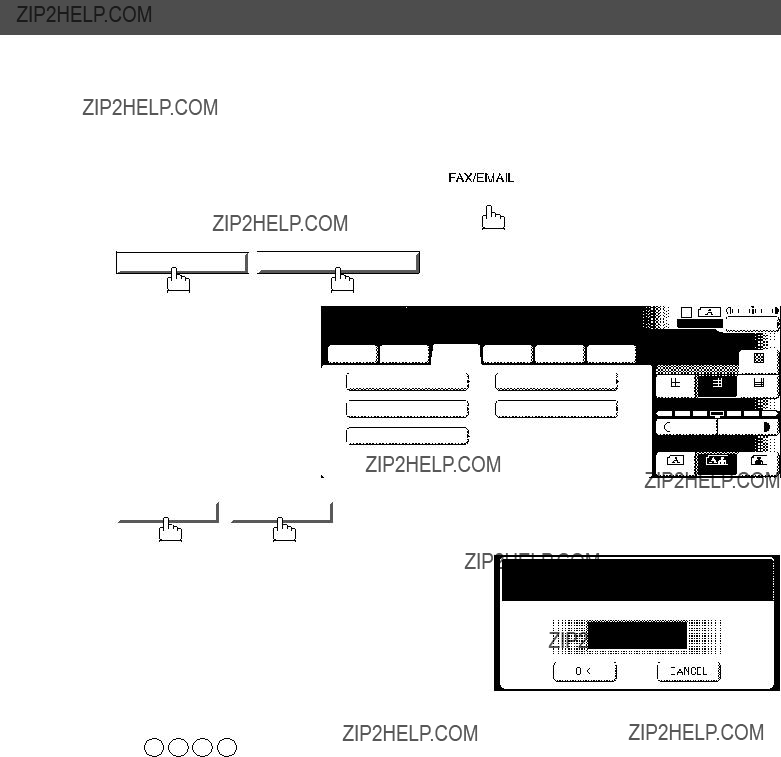
 to select the "FAX/EMAIL" mode.
 POLLING/ADV.COMM.
 to select the "FAX/EMAIL" mode.


 to select the "FAX/EMAIL" mode.

 to select the "FAX/EMAIL" mode.
 to select the "FAX/EMAIL" mode.


 to select the "FAX/EMAIL" mode.


 for each transmission. See page

 to select the "FAX/EMAIL" mode.


 to select the "FAX/EMAIL" mode.
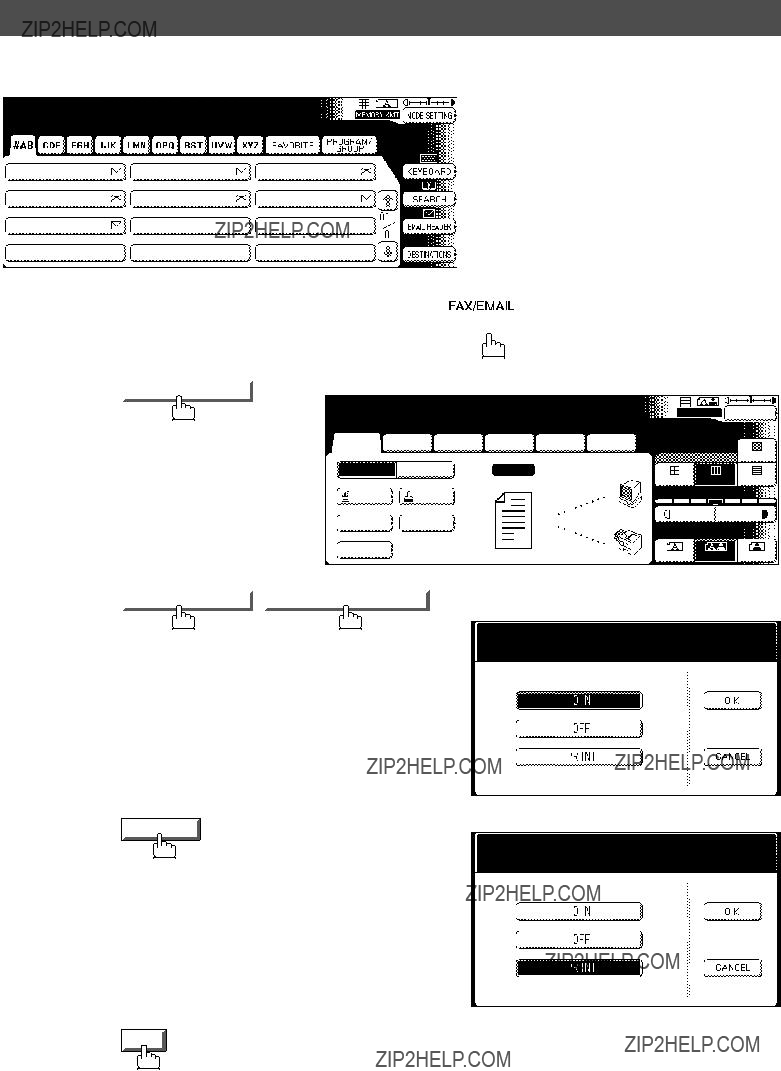
 to select the "FAX/EMAIL" mode.


 to select the "FAX/EMAIL" mode.


 to select the "FAX/EMAIL" mode.

 to select the "FAX/EMAIL" mode.


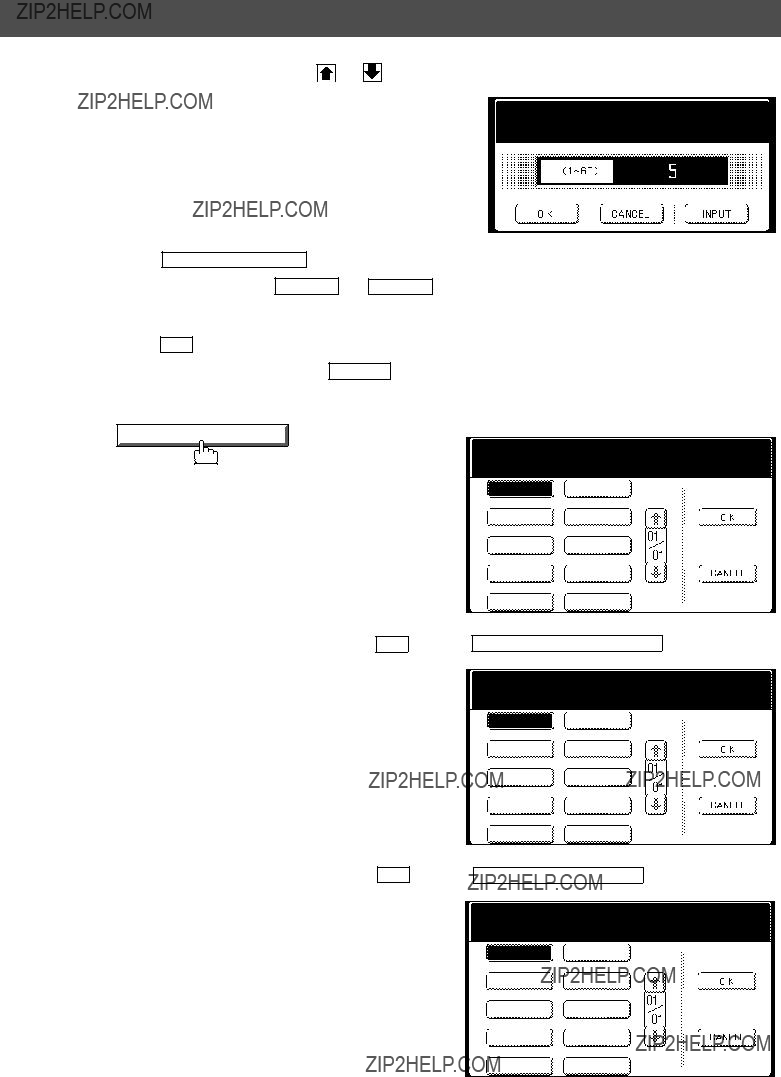
 or
or  repeatedly until the display shows a file you want to view.
 to select the "FAX/EMAIL" mode.
 or
or  key until the station you want to
 to select the "FAX/EMAIL" mode.
 EDIT FILE MODE
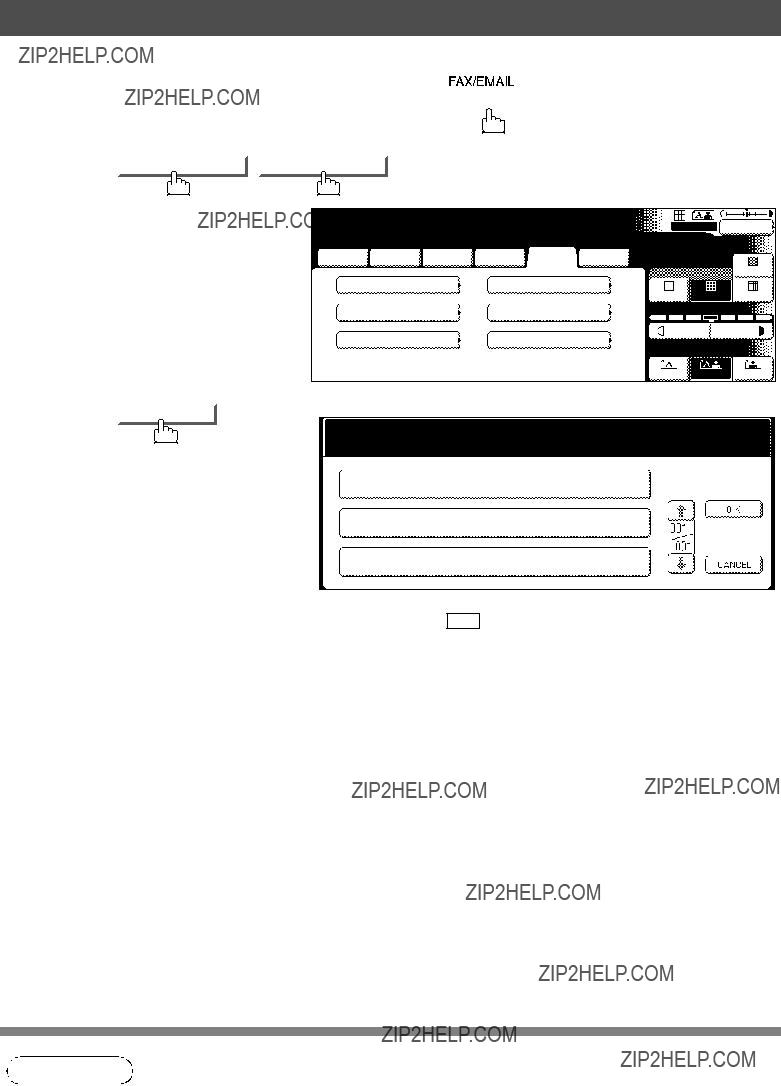
 to select the "FAX/EMAIL" mode.
 to select the "FAX/EMAIL" mode.

 to select the "FAX/EMAIL" mode.

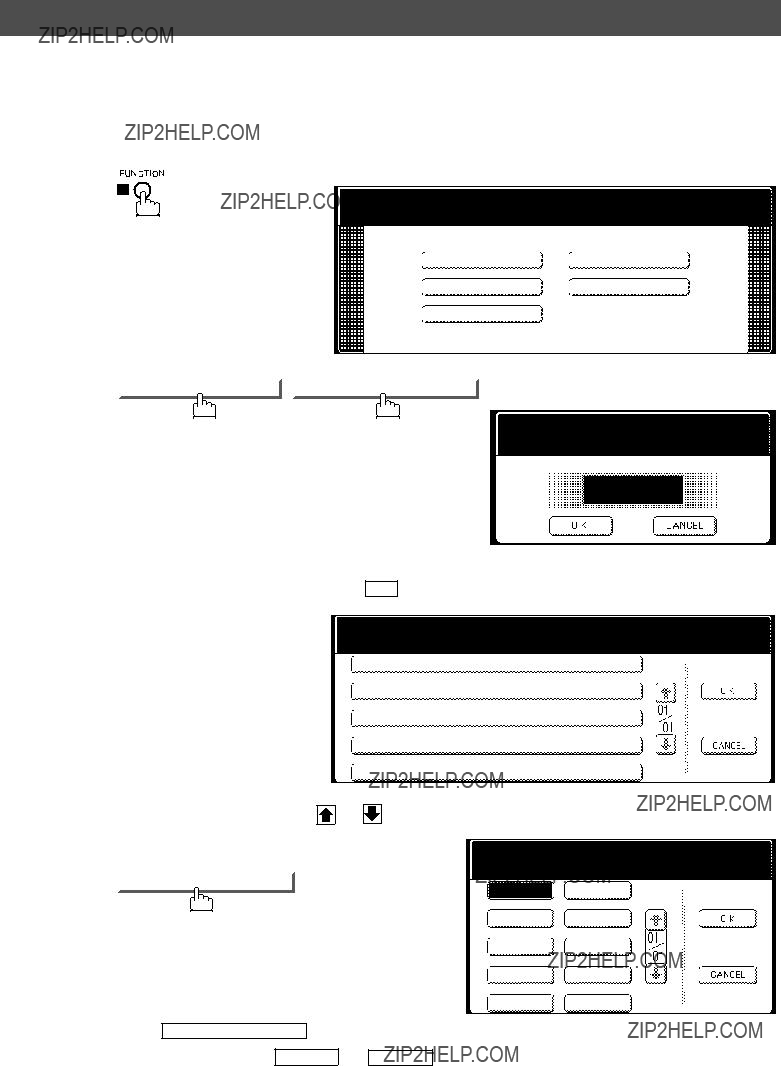
 GENERAL SETTINGS
 09/04*KeyKeyOperatorMode


 GENERAL SETTINGS
 09/04*KeyKeyOperatorMode


 GENERAL SETTINGS
 09/04*KeyKeyOperatorMode
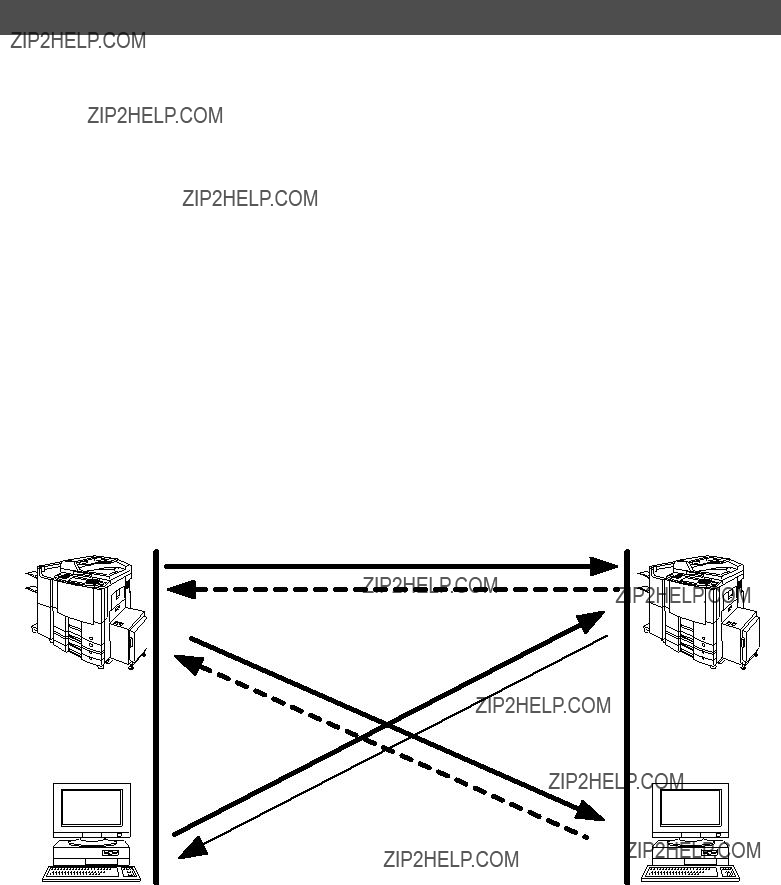
 : MDN Request from the Originator
 : MDN Response with Capability Notification from the Recepient
  : MDN Response from the Recipient


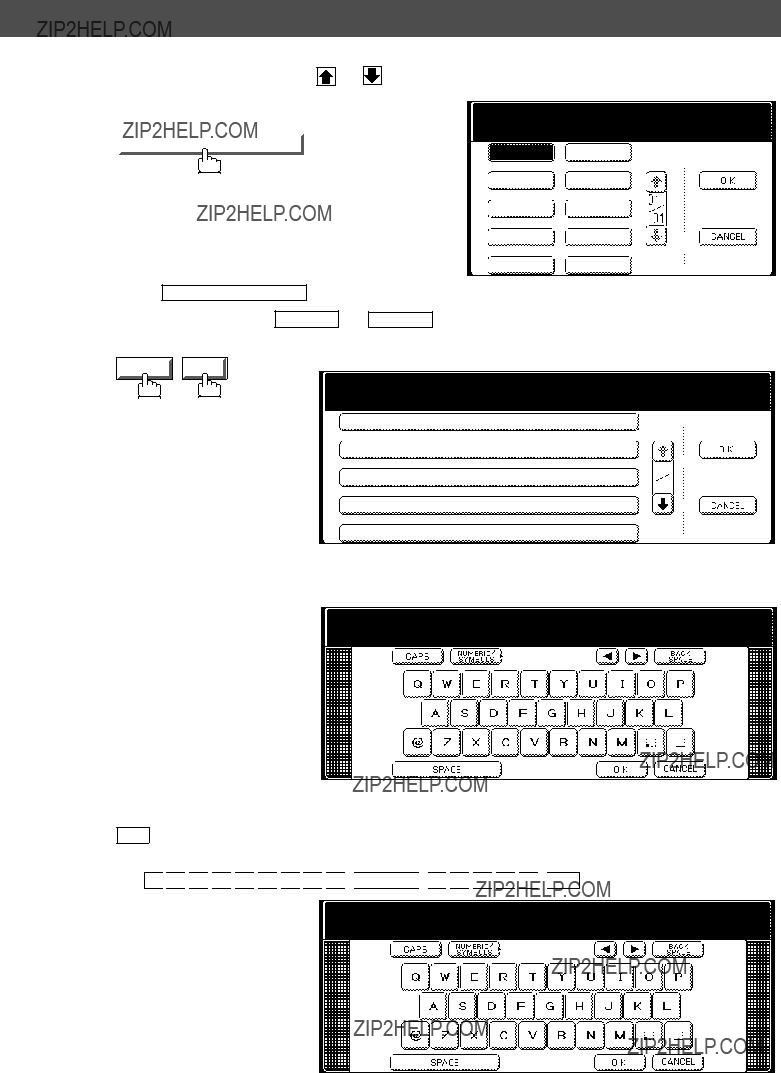
 or
or 

 .
.


 27/26* DNS Server Address

 to select the "FAX/EMAIL" mode.
 panasonic.com
 mgcs.co.jp
 abc-net.wxy.com
 world.service.com
 mgcs.co.jp
 abc-net.wxy.com
 world.service.com

 panasonic.com
 panasonic.com
 mgcs.co.jp
 abc-net.wxy.com
 world.service.com
 to select the "FAX/EMAIL" mode.


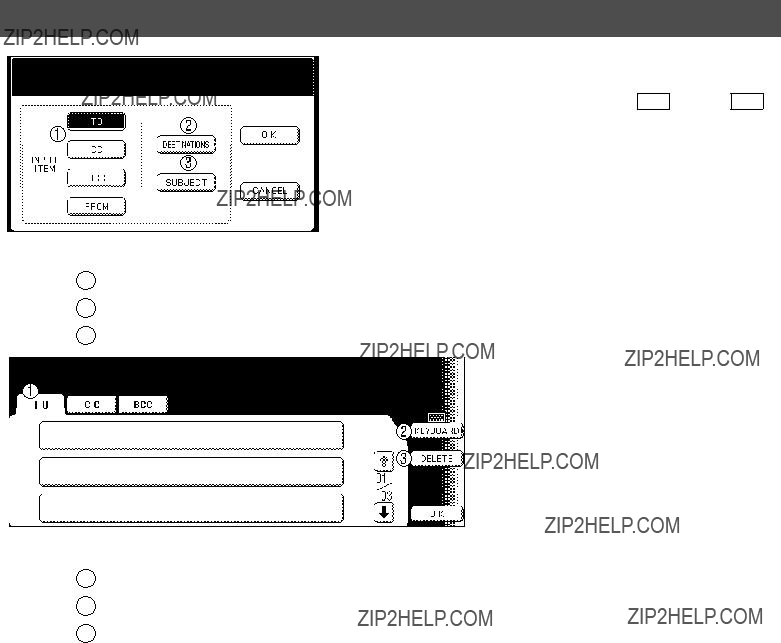
 or
or 

 to scroll to the desired display page. You can select multiple destinations (up to 270 stations). (Address Book Email Addressing: max. 200 stations; Manual Email Addressing: max. 70 stations)

 to select the "FAX/EMAIL" mode.
 to select the "FAX/EMAIL" mode.


 to select the "FAX/EMAIL" mode.


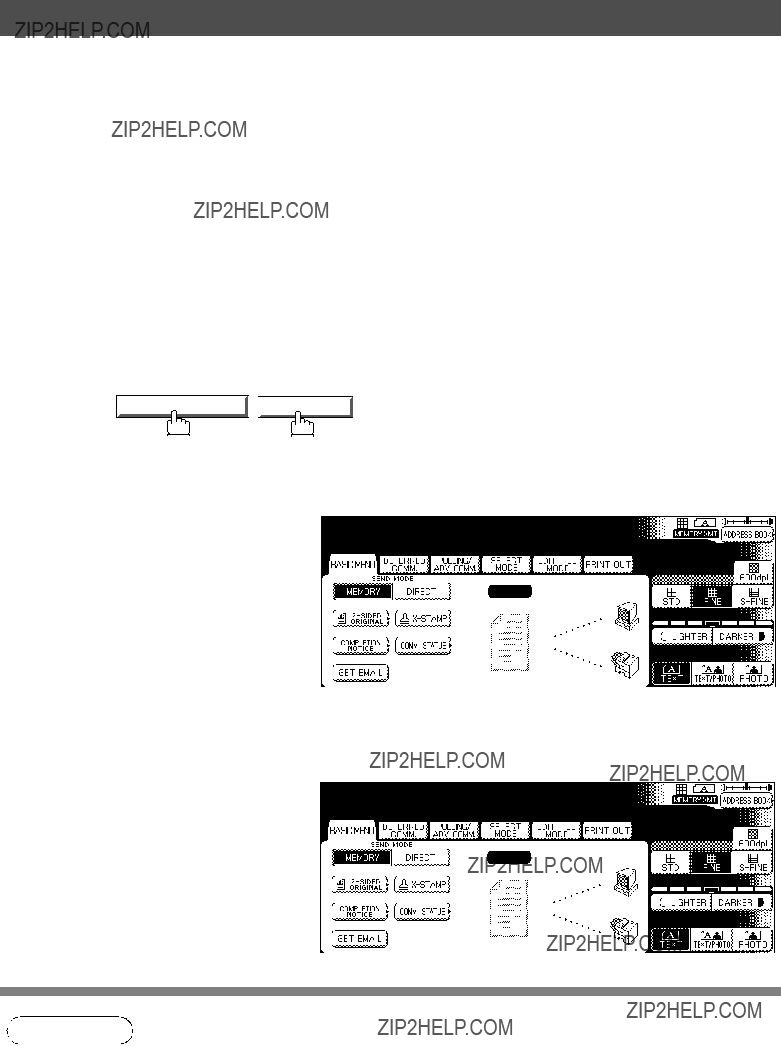

 GET EMAIL
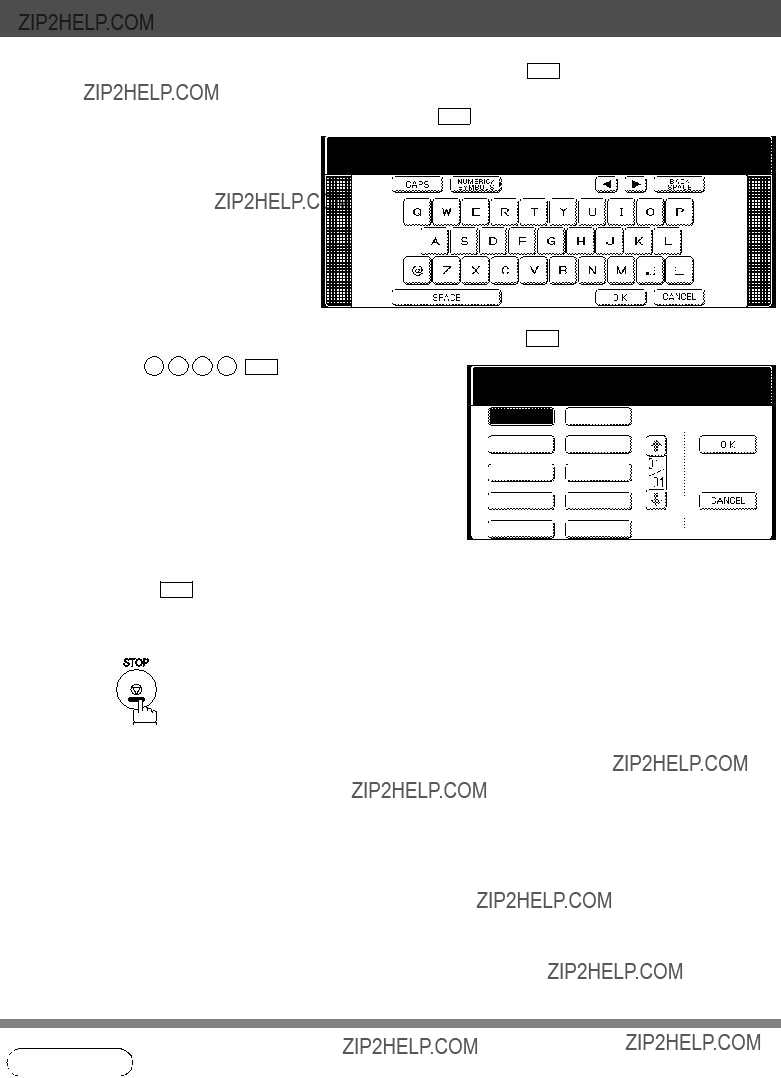
 to select the "FAX/EMAIL" mode.
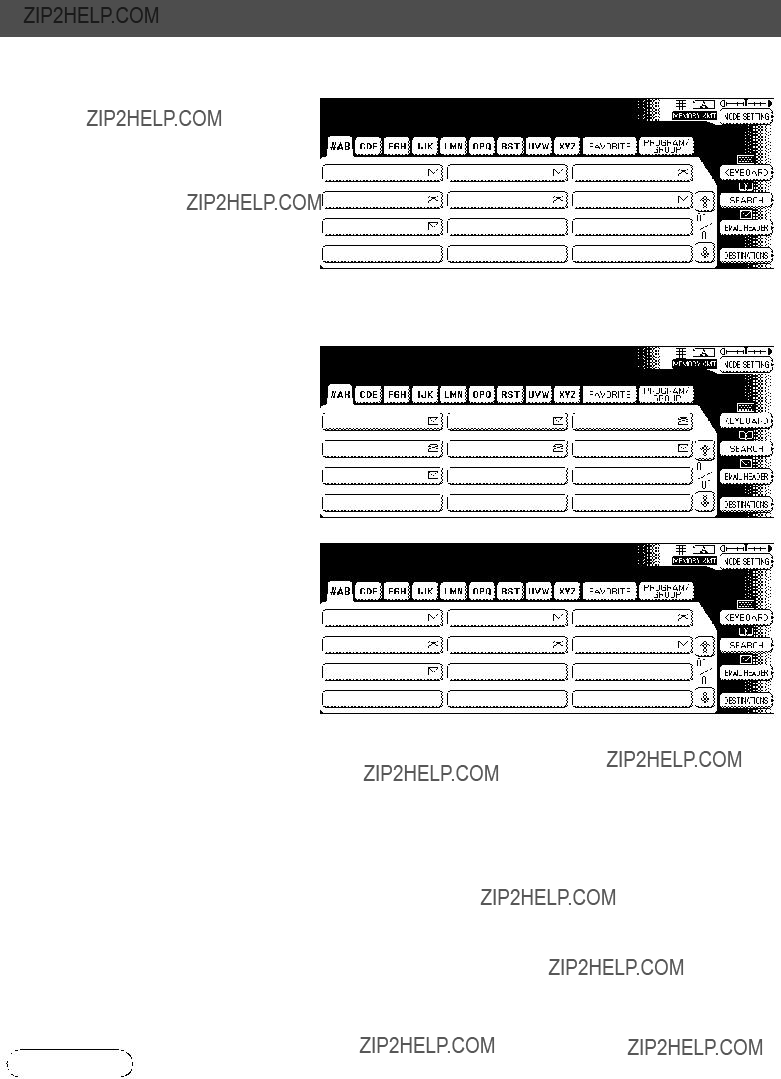

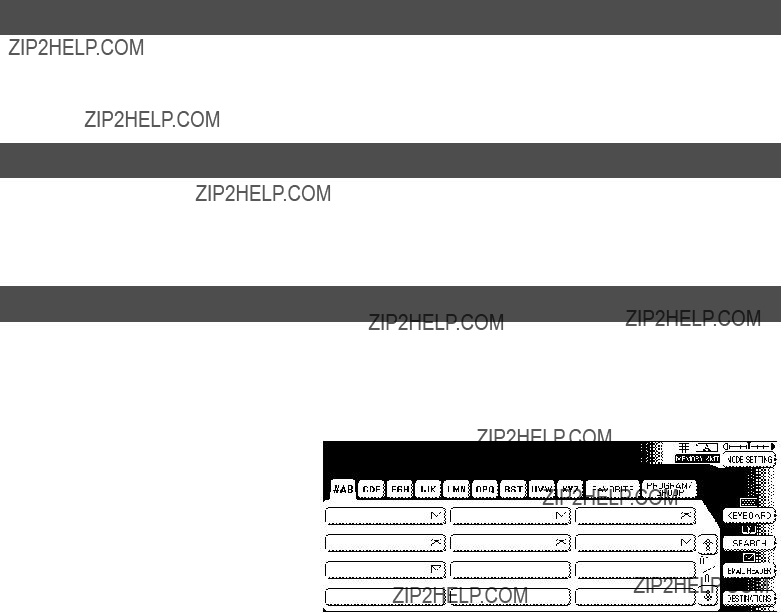
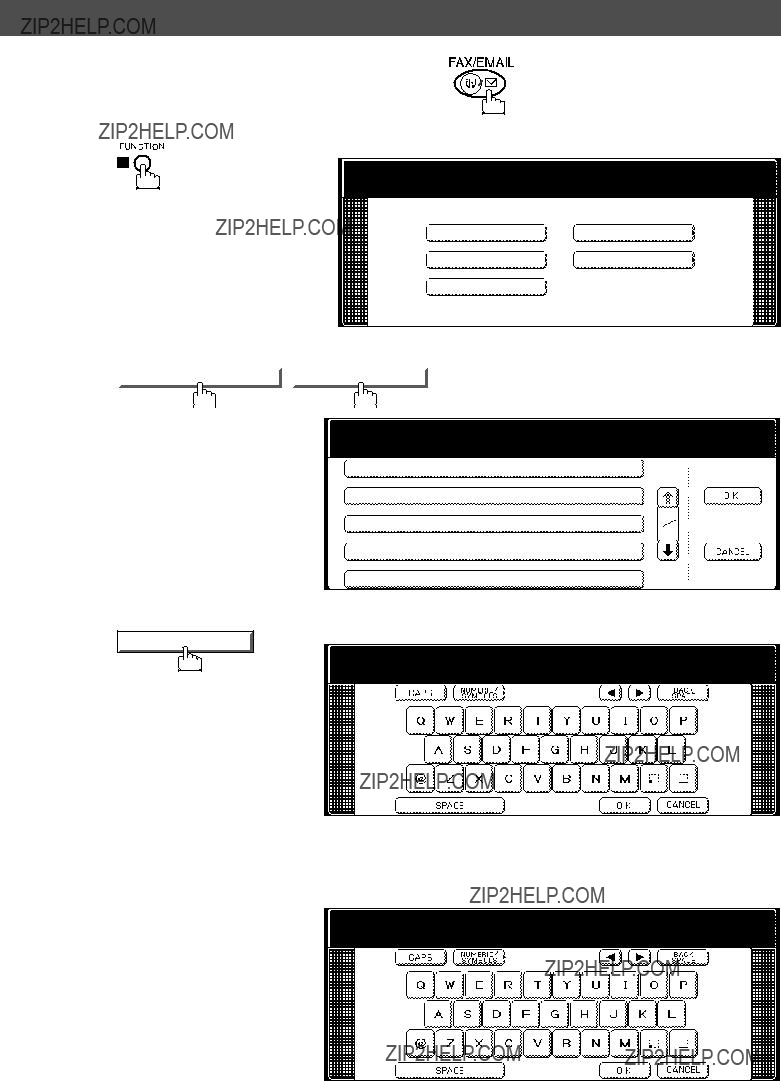
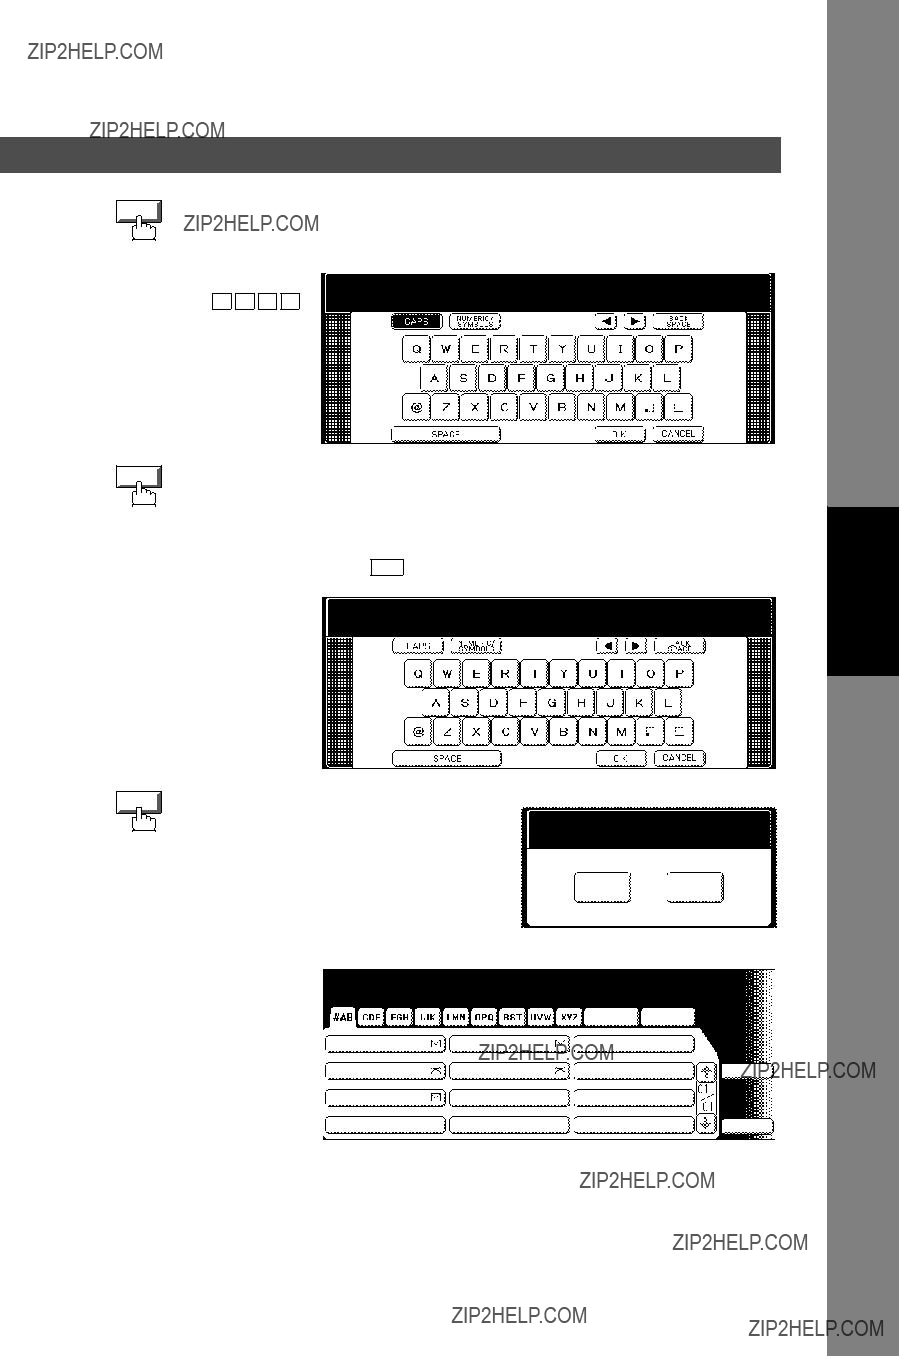
 A
A 
 N
N 
 A
A 
 S
S 
 O
O
 N
N 
 I
I 
 C
C 
 SPACE
SPACE 
 S
S 
 A
A 
 L
L 
 E
E 
 S
S 
 OK
OK

 to select the "FAX/EMAIL" mode.

 or
or 

 to scroll the display to select the User Name that you want to use. (See note 2)
 to select the "FAX/EMAIL" mode.


 S
S 
 A
A 
 L
L 
 E
E 
 S
S 
 SPACE
SPACE 
 D
D 
 E
E 
 P
P 
 T
T


 to select the "FAX/EMAIL" mode.


 to select the "FAX/EMAIL" mode.

 or
or  repeatedly to raise or lower the Volume.

 P
P 
 A
A 
 N
N 
 A
A 
 S
S 
 O
O
 N
N 
 I
I 
 C
C

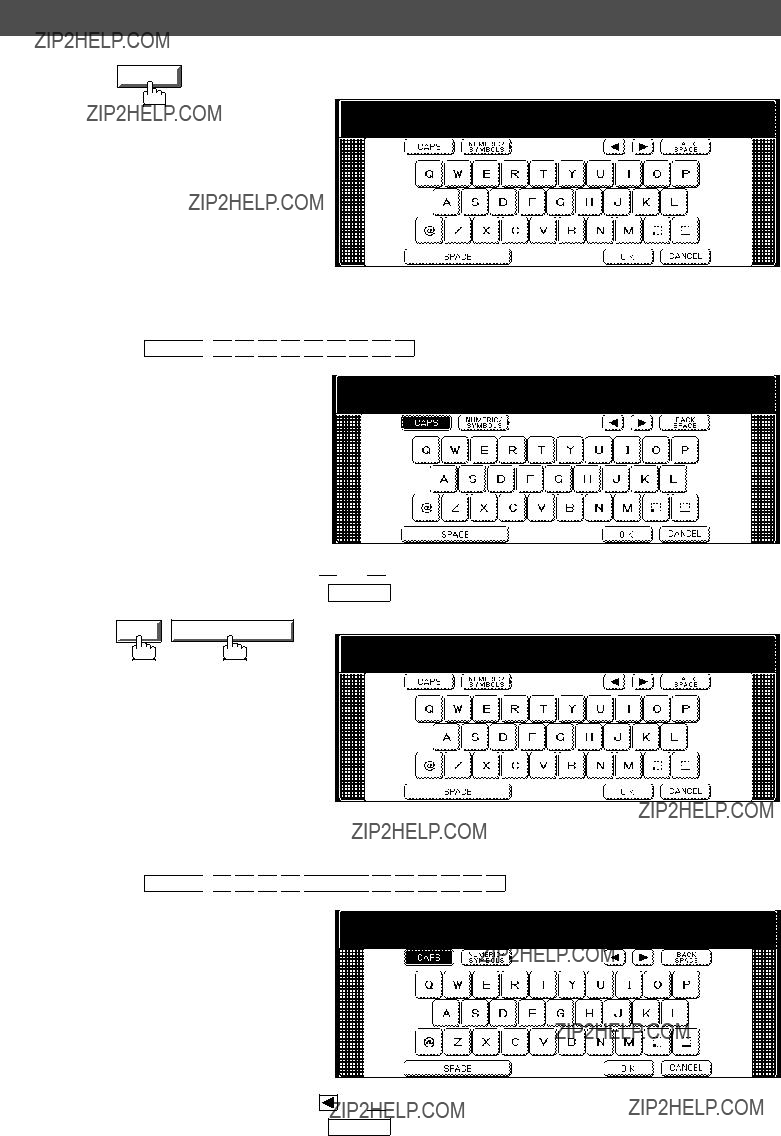
 or
or 

 to move the cursor one space beyond the incorrect character, press
 H
H 
 E
E 
 A
A 
 D
D 
 SPACE
SPACE 
 O
O
 F
F 
 F
F 
 I
I 
 C
C 
 E
E to move the cursor one space beyond
 or
or 

 to move the cursor one space beyond the incorrect number, press
  to enter a "+" character at the beginning of the ID number to indicate the

 S
S 
 A
A 
 L
L 
 E
E 
 S
S 
 SPACE
SPACE 
 D
D 
 E
E 
 P
P 
 T
T


 P
P 
 A
A 
 N
N 
 A
A 
 F
F 
 A
A 
 X
X
 P
P 
 A
A 
 N
N 
 A
A 
 F
F 
 A
A 
 X
X
 or
or  to move the cursor beyond the incorrect number, press then
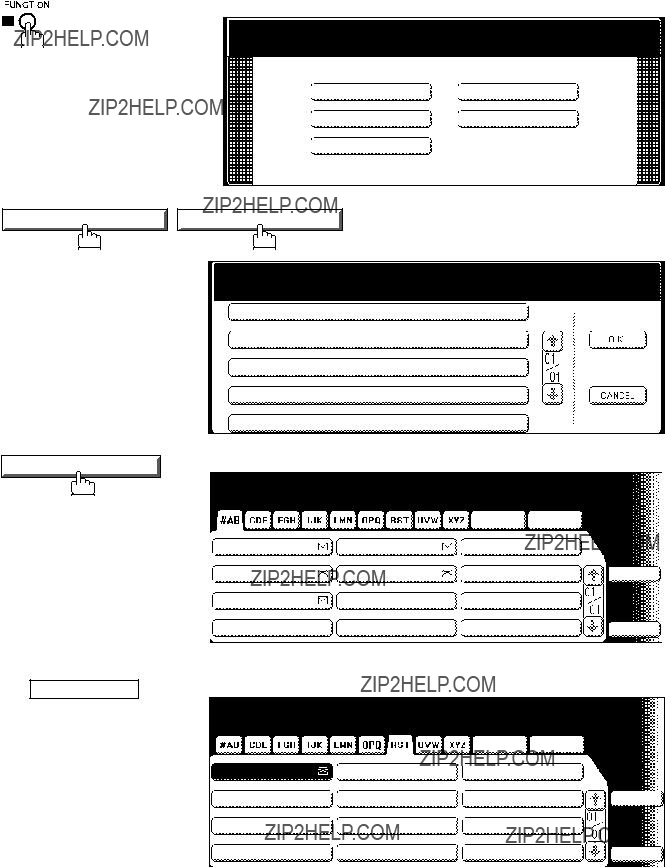


 to select the "FAX/EMAIL" mode.
 or
or  . Press to return to standby.


 to select the "FAX/EMAIL" mode.

 to select the "FAX/EMAIL" mode.
 to select the "FAX/EMAIL" mode.


 ), the image is rotated by 90?? and then transmitted as (

 ).
).

