Operating Instructions

DVD Recorder

Model No. DMR-ES15

Recording Getting started

Playing back

Editing

Copying

Convenient functions

Dear customer

Thank you for purchasing this product. For optimum performance and safety, please read these instructions carefully.

Before connecting, operating or adjusting this product, please read the instructions completely.

Please keep this manual for future reference.

Region number supported by this unit

Region numbers are allocated to DVD players and software according to where they are sold.

???The region number of this unit is ???1???.

???The unit will play DVDs marked with labels containing ???1??? or ???ALL???.

Example:

If you have any questions contact

In the U.S.A.: 1-800-211-PANA(7262)

In Canada: 1-800-561-5505

For U.S.A. only

The warranty can be found on page 46.

For Canada only

The warranty can be found on page 47.

La referencia r??pida en espa??ol se puede encontrar en la p??gina 48???51.

Reference

Espa??ol

10) Protect the power cord from being walked on or pinched particularly at plugs, convenience receptacles, and the point where they exit from the apparatus.
11) Only use attachments/accessories specified by the manufacturer.
12) Use only with the cart, stand, tripod, bracket, or table specified by the manufacturer, or sold with the apparatus. When a cart is used, use caution when moving the cart/apparatus combination to avoid injury from tip-over.
13) Unplug this apparatus during lightning storms or when unused for long periods of time.
14) Refer all servicing to qualified service personnel. Servicing is required when the apparatus has been damaged in any way, such as power-supply cord or plug is damaged, liquid has been spilled or objects have fallen into the apparatus, the apparatus has been exposed to rain or moisture, does not operate normally, or has been dropped.

CAUTION!

THIS PRODUCT UTILIZES A LASER.

USE OF CONTROLS OR ADJUSTMENTS OR PERFORMANCE

OF PROCEDURES OTHER THAN THOSE SPECIFIED HEREIN

MAY RESULT IN HAZARDOUS RADIATION EXPOSURE.

DO NOT OPEN COVERS AND DO NOT REPAIR YOURSELF.

REFER SERVICING TO QUALIFIED PERSONNEL.

CAUTION!

DO NOT INSTALL OR PLACE THIS UNIT IN A BOOKCASE,

BUILT-IN CABINET OR IN ANOTHER CONFINED SPACE.

ENSURE THE UNIT IS WELL VENTILATED. TO PREVENT RISK

OF ELECTRIC SHOCK OR FIRE HAZARD DUE TO

OVERHEATING, ENSURE THAT CURTAINS AND ANY OTHER

MATERIALS DO NOT OBSTRUCT THE VENTILATION VENTS.

WARNING:

TO REDUCE THE RISK OF FIRE, ELECTRIC

SHOCK OR PRODUCT DAMAGE, DO NOT

EXPOSE THIS APPARATUS TO RAIN, MOISTURE,

DRIPPING OR SPLASHING AND THAT NO

OBJECTS FILLED WITH LIQUIDS, SUCH AS

VASES, SHALL BE PLACED ON THE

APPARATUS.

THE FOLLOWING APPLIES ONLY IN THE U.S.A.

Note to CATV system installer:

This reminder is provided to call the CATV system installer???s attention to Article 820-40 of the NEC that provides guidelines for proper grounding and, in particular, specifies that the cable ground shall be connected to the grounding system of the building, as close to the point of cable entry as practical.

The lightning flash with arrowhead symbol, within an equilateral triangle, is intended to alert the user to the presence of uninsulated ???dangerous voltage??? within the product???s enclosure that may be of sufficient magnitude to constitute a risk of electric shock to persons.

The exclamation point within an equilateral triangle is intended to alert the user to the presence of important operating and maintenance (servicing) instructions in the literature accompanying the appliance.

THE FOLLOWING APPLIES ONLY IN THE U.S.A.

FCC Note:

This equipment has been tested and found to comply with the limits for a Class B digital device, pursuant to Part 15 of the FCC Rules. These limits are designed to provide reasonable protection against harmful interference in a residential installation. This equipment generates, uses, and can radiate radio frequency energy and, if not installed and used in accordance with the instructions, may cause harmful interference to radio communications. However, there is no guarantee that interference will not occur in a particular installation. If this equipment does cause harmful interference to radio or television reception, which can be determined by turning the equipment off and on, the user is encouraged to try to correct the interference by one or more of the following measures:

???Reorient or relocate the receiving antenna.

???Increase the separation between the equipment and receiver.

???Connect the equipment into an outlet on a circuit different from that to which the receiver is connected.

???Consult the dealer or an experienced radio/TV technician for help.

FCC Caution: To assure continued compliance, follow the attached installation instructions and use only shielded interface cables when connecting to peripheral devices.

Any changes or modifications not expressly approved by the party responsible for compliance could void the user???s authority to operate this equipment.

This device complies with Part 15 of the FCC Rules. Operation is subject to the following two conditions: (1) This device may not cause harmful interference, and (2) this device must accept any interference received, including interference that may cause undesired operation.

Responsible Party:

Panasonic Corporation of North America One Panasonic Way

Secaucus, NJ 07094 Telephone No.: 1-800-211-7262

The socket outlet shall be installed near the equipment and easily accessible. The mains plug of the power supply cord shall remain readily operable. To completely disconnect this apparatus from the AC Mains, disconnect the power supply cord plug from AC receptacle.

(Inside of product)

RQT8314

2

IMPORTANT SAFETY INSTRUCTIONS

Read these operating instructions carefully before using the unit. Follow the safety instructions on the unit and the applicable safety instructions listed below. Keep these operating instructions handy for future reference.

1) Read these instructions.

2) Keep these instructions.

3) Heed all warnings.

4) Follow all instructions.

5) Do not use this apparatus near water.

6) Clean only with dry cloth.

7) Do not block any ventilation openings. Install in accordance with the manufacturer???s instructions.

8) Do not install near any heat sources such as radiators, heat registers, stoves, or other apparatus (including amplifiers) that produce heat.

9) Do not defeat the safety purpose of the polarized or grounding- type plug. A polarized plug has two blades with one wider than the other. A grounding-type plug has two blades and a third grounding prong. The wide blade or the third prong are provided for your safety. If the provided plug does not fit into your outlet, consult an electrician for replacement of the obsolete outlet.

Table of contents

Getting started

IMPORTANT SAFETY INSTRUCTIONS . . . . . . . . . . . . . . .2 Accessories. . . . . . . . . . . . . . . . . . . . . . . . . . . . . . . . . . . . .3 Disc information . . . . . . . . . . . . . . . . . . . . . . . . . . . . . . . . .4 The remote control information. . . . . . . . . . . . . . . . . . . . .6 Disc handling . . . . . . . . . . . . . . . . . . . . . . . . . . . . . . . . . . .6 Unit care . . . . . . . . . . . . . . . . . . . . . . . . . . . . . . . . . . . . . . .6 Control reference guide . . . . . . . . . . . . . . . . . . . . . . . . . . .7 STEP 1 Connection. . . . . . . . . . . . . . . . . . . . . . . . . . . . . . .8 STEP 2 Plug-in Auto Tuning . . . . . . . . . . . . . . . . . . . . . .12 Channel captions/Television type . . . . . . . . . . . . . . . . . .14 Remote control settings. . . . . . . . . . . . . . . . . . . . . . . . . .15 Clock settings . . . . . . . . . . . . . . . . . . . . . . . . . . . . . . . . . .15

Recording

Important notes for recording . . . . . . . . . . . . . . . . . . . . .16

Recording modes and approximate recording times . . . . . . . 17 Disc Insertion/Ejection . . . . . . . . . . . . . . . . . . . . . . . . . . . . . . 17

Recording television programs . . . . . . . . . . . . . . . . . . . .18

To specify a time to stop recording ???One Touch Recording . . 19 Flexible Recording . . . . . . . . . . . . . . . . . . . . . . . . . . . . . . . . . 19 Playing while you are recording . . . . . . . . . . . . . . . . . . . . . . . 19 Selecting audio to record . . . . . . . . . . . . . . . . . . . . . . . . . . . . 19

Scheduled recording . . . . . . . . . . . . . . . . . . . . . . . . . . . .20

Cancel scheduled recording that has already begun . . . . . . . 21 Release program from recording standby . . . . . . . . . . . . . . . 21 Notes on scheduled recording . . . . . . . . . . . . . . . . . . . . . . . . 21 Check, change or delete a program . . . . . . . . . . . . . . . . . . . . 21

Playing back

Playing discs. . . . . . . . . . . . . . . . . . . . . . . . . . . . . . . . . . .22

Operations during play . . . . . . . . . . . . . . . . . . . . . . . . . . . . . . 23

Using menus to play MP3 and still pictures

(JPEG/TIFF) . . . . . . . . . . . . . . . . . . . . . . . . . . . . . . . . . .24

Playing MP3 . . . . . . . . . . . . . . . . . . . . . . . . . . . . . . . . . . . . . . 24 Playing still pictures (JPEG/TIFF). . . . . . . . . . . . . . . . . . . . . . 25 Useful functions during still picture play . . . . . . . . . . . . . . . . . 25

Using on-screen menus/

FUNCTIONS window and Status messages . . . . . . . .26

Using on-screen menus . . . . . . . . . . . . . . . . . . . . . . . . . . . . . 26 FUNCTIONS window . . . . . . . . . . . . . . . . . . . . . . . . . . . . . . . 27 Status messages . . . . . . . . . . . . . . . . . . . . . . . . . . . . . . . . . . 27

Editing

Editing titles/chapters . . . . . . . . . . . . . . . . . . . . . . . . . . 28

Editing titles/chapters and playing chapters . . . . . . . . . . . . . . 28 Title operations . . . . . . . . . . . . . . . . . . . . . . . . . . . . . . . . . . . . 29 Chapter operations . . . . . . . . . . . . . . . . . . . . . . . . . . . . . . . . . 29

Creating, editing and playing playlists . . . . . . . . . . . . . 30

Creating playlists . . . . . . . . . . . . . . . . . . . . . . . . . . . . . . . . . . . 30 Editing and playing playlists/chapters . . . . . . . . . . . . . . . . . . . 31 Playlist operations . . . . . . . . . . . . . . . . . . . . . . . . . . . . . . . . . . 31 Chapter operations . . . . . . . . . . . . . . . . . . . . . . . . . . . . . . . . . 31

Copying

Copying from a video cassette recorder . . . . . . . . . . . 32

DV camcorder recording . . . . . . . . . . . . . . . . . . . . . . . . . . . . . 32 Manual recording. . . . . . . . . . . . . . . . . . . . . . . . . . . . . . . . . . . 32

Convenient functions

Entering text . . . . . . . . . . . . . . . . . . . . . . . . . . . . . . . . . . 33 Deleting titles . . . . . . . . . . . . . . . . . . . . . . . . . . . . . . . . . 33

Selecting recorded titles to delete ???Delete Navigator . . . . . . . 33 Deleting title during play . . . . . . . . . . . . . . . . . . . . . . . . . . . . . 33

DVD Management . . . . . . . . . . . . . . . . . . . . . . . . . . . . . . 34

Providing a disc with a name ???Disc Name . . . . . . . . . . . . . . . 34 Setting the protection ???Disc Protection . . . . . . . . . . . . . . . . . . 34 Deleting all titles and playlists ???Delete All Titles . . . . . . . . . . . 34 Deleting all contents of a disc ???Format Disc ( DVD ). . . . . . . . 34 Selecting whether to show the Top Menu first

???Playback will start with:. . . . . . . . . . . . . . . . . . . . . . . . . . . . 35 Enabling discs to be played on other equipment ???Finalize . . . 35 Creating Top Menu ???Create DVD Top Menu . . . . . . . . . . . . . . 35 Enabling the second layer on DL (dual- or double- layer on single side) discs to be recordable ???Close First Layer . . . . . . . . . . 35

Changing the unit???s settings . . . . . . . . . . . . . . . . . . . . . 36

Common procedures. . . . . . . . . . . . . . . . . . . . . . . . . . . . . . . . 36 Summary of settings . . . . . . . . . . . . . . . . . . . . . . . . . . . . . . . . 36

Reference

Messages. . . . . . . . . . . . . . . . . . . . . . . . . . . . . . . . . . . . . 39 Frequently asked questions . . . . . . . . . . . . . . . . . . . . . 40 Troubleshooting guide . . . . . . . . . . . . . . . . . . . . . . . . . . 41 Product Service. . . . . . . . . . . . . . . . . . . . . . . . . . . . . . . . 43 Glossary. . . . . . . . . . . . . . . . . . . . . . . . . . . . . . . . . . . . . . 44 Specifications . . . . . . . . . . . . . . . . . . . . . . . . . . . . . . . . . 45 Limited Warranty (ONLY FOR U.S.A.) . . . . . . . . . . . . . . 46 Limited Warranty (ONLY FOR CANADA). . . . . . . . . . . . 47

Referencia r??pida en espa??ol . . . . . . . . . . . . . . . . . . . . 48 (Spanish Quick Reference)

Index. . . . . . . . . . . . . . . . . . . . . . . . . . . . . . . . . . Back cover

IMPORTANT SAFETY INSTRUCTIONS/Table of contents/Accessories

Accessories

Please check and identify the supplied accessories. Use numbers indicated in parentheses when asking for replacement parts. (Product numbers correct as of December 2005. These may be subject to change.)

Only for U.S.A.: To order accessories, refer to ???Accessory Purchases??? on page 46.

Only for Canada: To order accessories, call the dealer from whom you have made your purchase.

??? For use with this unit only. Do not use it with other equipment.

Also do not use the cords for other equipment with this unit.

1 75 ??? coaxial cable 1 AC power supply cord

(K2KZ2BA00001) (K2CB2CB00018)

(U.S.A. only)

Product Registration Card

Please complete and return the included product registration card, or register via the Internet at: http://www.prodreg.com/panasonic/

RQT8314

3

???We recommend using Panasonic discs. We also recommend using DVD-RAM discs with cartridges to protect them from scratches and dirt.

???You may not be able to record depending on the condition of the discs and you may not be able to play due to the condition of the recording.

???For the recording time, refer to ???Recording modes and approximate recording times??? on page 17.

*1 You can record onto the second layer of dual- or double-layer discs after closing the first layer (?? page 35). You will no longer be able to record to the first layer after you do this (?? page 16).

When playing a title recorded on both layers, video and audio may momentarily cut out when the unit is switching layers.

*2 You may not be able to use +R recorded on this unit in another Panasonic DVD recorder and vice versa. Once the disc is finalized, however, it can be played in the other unit.

*3 The amount of the recordable disc space doesn???t increase even if the program is deleted when you use a one time recording disc. *4 CPRM (?? page 44) compatible discs only.

*5 This unit can use the high-speed recording discs shown in the chart, but using them will not shorten the recording time. *6 You can play 8x recording speed discs recorded on another equipment.

*7 Play on DVD-R DL compatible equipment. *8 Play on +R DL compatible equipment.

Regarding recording format

VR (DVD Video Recording) format

This is a recording method which allows you to freely record and edit television broadcasts and so on.

???Digital broadcasts that allow ???One time only recording??? can be recorded to a CPRM compatible disc. You can record to CPRM compatible DVD-RAM on this unit.

???Play is only possible on a compatible DVD player.

DVD-Video format

This recording method is the same as commercially available DVD-Video.

???Digital broadcasts that allow ???One time only recording??? cannot be recorded.

???You can play on compatible equipment such as DVD players after finalizing the disc on this unit.

RQT8314

4

Play-only discs

Disc type

Indication in these instructions

Logo

Instructions

Disc information

???The producer of the disc can control how discs are played. So you may not always be able to control play as described in these operating instructions. Read the disc???s instructions carefully.

* Close the session after recording. Play may be impossible on some discs due to the condition of the recording.

Regarding DVD-Audio

Some multi-channel DVD-Audio will prevent down-mixing (?? page 44) of all or part of their contents if this is the manufacturer???s intention. Tracks that are prevented from being down-mixed will not play properly on this unit (e.g. audio is played from the front two channels only). Refer to the disc???s jacket for more information.

Note about using a DualDisc

The digital audio content side of a DualDisc does not meet the technical specifications of the Compact Disc Digital Audio (CD-DA) format so play may not be possible.

Discs that cannot be played

???2.6 and 5.2 GB DVD-RAM, 12 cm (5???)

???3.95 and 4.7 GB DVD-R for Authoring

???DVD-R recorded in VR format

???DVD-R (DVD-Video format), DVD-R DL, DVD-RW (DVD-Video format), +R, +R DL recorded on another unit and not finalized (?? page 44)

???PAL discs (you can still play the audio on DVD-Audio)

???DVD-Video with a region number other than ???1??? or ???ALL???

???Blu-ray

???DVD-ROM, +R 8 cm (3???), CD-ROM, CDV, CD-G, Photo CD, CVD, SVCD, SACD, MV-Disc, PD, Divx Video Disc, etc.

RQT8314

5

R6/LR6, AA

The remote control information

n Batteries

??? Insert so the poles (+ and ???) match those in the remote control.

??? Do not use rechargeable type batteries.

??? Do not mix old and new batteries.

??? Do not use different types at the same time.

???Do not heat or expose to flame.

???Do not take apart or short circuit.

???Do not attempt to recharge alkaline or manganese batteries.

???Do not use batteries if the covering has been peeled off. Mishandling of batteries can cause electrolyte leakage which can damage items the fluid contacts and may cause a fire.

Remove if the remote control is not going to be used for a long period of time. Store in a cool, dark place.

n Use

Remote control signal sensor

20

30 20

30

7 m (23 feet) directly in front of the unit

Disc handling

n How to hold a disc

Do not touch the recorded surface.

n Concerning non-cartridge discs

Be careful about scratches and dirt.

n If there is dirt or condensation on the disc

Wipe with a damp cloth and then wipe dry.

n Handling precautions

???Do not attach labels or stickers to discs. (This may cause disc warping and un-balanced rotation, rendering it unusable.)

???Write on the label side of the disc only with a soft, oil-based felt pen. Do not use ballpoint pens or other hard writing implements.

???Do not use record cleaning sprays, benzine, thinner, static electricity prevention liquids or any other solvent.

???Do not use scratch-proof protectors or covers.

???Do not drop, stack, or impact discs. Do not place objects on them.

???Do not use the following discs:

???Discs with exposed adhesive from removed stickers or labels (rented discs, etc.).

???Discs that are badly warped or cracked.

???Irregularly shaped discs, such as

heart shapes.

??? Do not place in the following areas:

???In direct sunlight.

???In very dusty or humid areas.

???Near a heater.

???Locations susceptible to significant differences in temperature (condensation can occur).

???Where static electricity or electromagnetic waves occur.

???To protect discs from scratches and dirt, return them to their cases or cartridges when you are not using them.

The manufacturer accepts no responsibility and offers no compensation for loss of recorded or edited material due to a problem with the unit or recordable media, and accepts no responsibility and offers no compensation for any subsequent damage caused by such loss.

Examples of causes of such losses are

???A disc recorded and edited with this unit is played in a DVD recorder or computer disc drive manufactured by another company.

???A disc used as described above and then played again in this unit.

???A disc recorded and edited with a DVD recorder or computer disc drive manufactured by another company is played in this unit.

Unit care

The precision parts in this unit are readily affected by the environment, especially temperature, humidity, and dust. Cigarette smoke also can cause malfunction or breakdown.

To clean this unit, wipe with a soft, dry cloth.

???Never use alcohol, paint thinner or benzine to clean this unit.

???Before using chemically treated cloth, carefully read the instructions that came with the cloth.

Observe the following points to ensure continued listening and viewing pleasure.

Dust and dirt may adhere to the unit???s lens over time, making it impossible to record or play discs.

Use the DVD lens cleaner (RP-CL720PP) about once every year, depending on frequency of use and the operating environment. Carefully read the lens cleaner???s instructions before use.

Do not place the unit on amplifiers or equipment that may become hot.

The heat can damage the unit.

Before moving the unit, ensure the disc tray is empty. Failure to do so will risk severely damaging the disc and the unit.

RQT8314

6

Control reference guide

Remote control

Main unit

12

1 Turn the unit on (?? page 12)

2 Select channels and title numbers, etc./Enter numbers

3 Cancel

4 Basic operations for recording and play

5 Skip the specified time (?? page 23)

6 Show Direct Navigator/Top menu (?? page 22, 24, 28) 7 Selection/Enter, Frame-by-frame (?? page 12, 23)

8 Show sub menu (?? page 25, 28, 31) 9 Show on-screen menu (?? page 26) bk Select audio (?? page 19, 23)

bl Start recording (?? page 18)

bm Change recording mode (?? page 18) bn Remote control signal output

bo Television operations (?? page 15) bp Channel select (?? page 18)

bq Add/delete channel (?? page 13) br Input select (IN1 or IN2 or DV) bs Delete items (?? page 33)

bt Skip a minute forward (?? page 23)

ck Show scheduled recording list (?? page 20) cl Show FUNCTIONS window (?? page 27) cm Return to previous screen

cn Create chapters (?? page 23)

co Show Setup menu (?? page 14, 36) cp Start Flexible Recording (?? page 19) cq Show status messages (?? page 27)

The remote control information/Disc handling/Unit care/Control reference guide

DV IN

Opening the front panel

Press down on the part with your finger.

1POWER button (POWER 8) (?? page 12)

Press to switch the unit from on to standby mode or vice versa. In standby mode, the unit is still consuming a small amount of power.

2 Disc tray (?? page 18)

3 Connector for a digital video (DV) camcorder (?? page 32) 4 Connectors for external equipment (?? page 32)

5 Channel select (?? page 18)

IN2

6 8 9 bl

5

6 Open/close disc tray (?? page 18)

7 Display (?? below)

8 Stop (?? page 18, 23)

9 Start play (?? page 22)

bk Remote control signal sensor bl Start recording (?? page 18)/

Specify the time to stop recording (?? page 19)

The unit???s display

12

1Disc indicator

???This indicator lights up when a disc that is supported by this unit is inserted.

7

STEP 1 Connection

This section includes diagrams of four common methods of connections (A-D, pages 8-9). Please connect using the one that best suits you.

???Visit Panasonic???s homepage for more information about connection methods. (This is in English only.) http://www.panasonic.com/consumer_electronics/dvd_recorder/dvd_connection.asp

???Before doing any connection, turn off all equipment and read the appropriate operating instructions.

???Peripheral equipment and optional cables are sold separately unless otherwise indicated.

n The unit???s RF OUT terminal

The picture and sound signal from this unit does not go through the RF OUT terminal to the television.

Make sure you connect one of the following terminals on this unit to the television: the AUDIO/VIDEO OUT terminal, the S VIDEO OUT terminal or the COMPONENT VIDEO OUT terminal.

??? Refer to page 11 if the antenna connector doesn???t match.

n When the unit is not to be used for a long time

To save power, unplug it from the household AC outlet. This unit consumes a small amount of power, even when it is turned off (approx. 2.0 W).

n Connect the unit directly to the television

Video signals fed through video cassette recorders will be affected by copyright protection systems and the picture will not be shown correctly on the television.

A Connection with a television

Cable from wall or antenna signal

Television

75 ??? coaxial cable

(Included)

AC power supply cord (Included)

Connect only after all other connections are complete.

This unit???s rear panel

B Connection with a television and video cassette recorder

The connection will allow the video cassette recorder to be used for playback and recording when this unit is turned off.

VHF/UHF

RF IN

Television

75 ??? coaxial cable

3

6

AC power supply cord

(Included)

Connect only after all other connections are complete.

To RF OUT

75 ??? coaxial cable

(Included)

2

RQT8314

8

CConnection with a television and cable box or satellite receiver

???You need to subscribe to a cable TV service to enjoy viewing their programming.

???Consult your service provider regarding appropriate cable TV box.

Cable from wall or antenna signal

Television

Red White Yellow

To RF OUT

75 ??? coaxial cable

Red White Yellow

This unit???s rear panel

To IN1

Cable box or Satellite receiver

STEP 1 Connection

DConnection with a television, video cassette recorder and cable box or satellite receiver

???You need to subscribe to a cable TV service to enjoy viewing their programming.

???Consult your service provider regarding appropriate cable TV box.

???The connection will allow the video cassette recorder to be used for playback and recording when this unit is turned off.

This unit???s rear panel

RQT8314

9

STEP 1 Connection

If your television does not have Audio/Video terminals, RF Modulator is necessary

b Connection with a television and video cassette recorder (?? page 8 B)

Video cassette recorder

VHF/UHF

RF IN

3

VHF/UHF

RF OUT

75 ??? coaxial cable

75 ??? coaxial cable

cConnection with a television and cable box or satellite receiver (?? page 9 C)

dConnection with a television, video cassette recorder and cable box or satellite receiver (?? page 9 D)

Cable box or Satellite receiver

4

75 ??? coaxial cable

75 ??? coaxial cable

To enjoy higher picture quality

Connecting to the S VIDEO IN terminal

The S VIDEO OUT terminal achieves a more vivid picture than the VIDEO OUT terminal. (Actual results depend on the television.)

Television

Connecting to the COMPONENT VIDEO IN terminal

These terminals can be used for either interlace or progressive output (?? page 44) and provide a purer picture than the S VIDEO OUT terminal.

??? Connect to terminals of the same color.

Television

Red WhiteRed White

10

If the antenna connector doesn???t match

Use one of the following connections to suit the antenna lead to the unit???s RF IN terminal, and the 75 ??? coaxial cable to the antenna terminals on the equipment (television etc.). Refer to other equipment???s operating instructions.

STEP 1 Connection

Connecting an amplifier or system component

n Connecting an amplifier with a digital input terminal

??? To enjoy multi-channel surround on DVD- Video, connect an amplifier with a built-in decoder displaying these logo marks using an optical digital audio cable and change the settings in Digital Audio Output

(?? page 38).

??? Before purchasing an optical digital audio cable, check the terminal shape of the connected equipment.

???You cannot use DTS Digital Surround decoders not suited to DVD.

???Even if using this connection, output will be only 2 channels when playing DVD-Audio.

Amplifier???s rear panel

OPTICAL IN

Optical digital audio cable

Do not bend sharply when connecting.

Insert fully, with this side facing up.

n Connection to a stereo amplifier

Amplifier???s rear panel

AUDIO IN

R L

Red White

Audio cable

Red White

This unit???s rear panel

This unit???s rear panel

RQT8314

11

STEP 2 Plug-in Auto Tuning

After pressing [^ DVD POWER] to turn the unit on for the first time, the unit starts necessary setup.

Regarding DST (Daylight Saving Time) (?? page 15)

Legal revision is expected to change the DST period in 2007. When you use the unit with DST on, the change may cause the unit???s clock to go behind the actual time. Check the DST setting in ???Set Clock Manually??? in the Setup menu, set DST off and reset the clock precisely if you are using this function.

Preparation

Turn on the television and select the appropriate video input to suit the connections to this unit.

1 Press [^ DVD POWER].

Select Language

Seleccione el idioma

S??lection de Langue

English

Espa??ol

Fran??ais

Press ENTER

Pulse ENTER

Appuyer sur ENTER

2 Press [e,r] to select the language and press [ENTER].

If you make a mistake, press [RETURN] to return to an earlier screen.

Aspect Ratio Selection

Select TV type and press ENTER. (Please refer to Operation Instruction for details)

16:9 16:9 Widescreen TV

3 Press [e,r] to select ???4:3 TV??? or

???16:9 Widescreen TV??? and press [ENTER].

Quick Start setting

The unit can be turned on faster, in about 1 second. Please note that Quick Start mode slightly increases power consumption when the unit is off.

(See Operation Instructions for details) Turn Quick Start on ?

On

Off

4 Press [e,r] to select ???On??? or ???Off??? and press [ENTER].

If you activate ???Quick Start??? function, select ???On???.

About ???Quick Start??? function

If you set Quick Start to on, you can start recording to DVD-RAM about 1 second after you press [^ DVD POWER] to turn the unit on and then sequentially press [* REC]. The following happens when you have selected ???On???.

???Power consumption in standby mode increases because power is supplied to the unit.

Default Recording Source

Please select the source from which this unit will record each time it is turned on. Note: Selecting "Internal TV Tuner" will start the Auto Channel Clock Settings process.

This one time process takes a few minutes.

Internal TV Tuner

Input

5 Press [e,r] to select ???Internal TV Tuner??? or ???Input??? and press [ENTER].

When you do not set channels on this unit, select ???Input???. The unit then displays ???Set Clock Manually??? screen. Set the clock manually (?? page 13).

(Continued on next page)

RQT8314

12

6 Press [ENTER] to start Plug-in Auto Tuning.

Set Channels Automatically

Ch. 1

Set Channels Automatically

Proceeding . . .

The unit then proceeds with Auto Clock Setting. The time is displayed when finished.

Set Clock Automatically

Auto Clock Setting is complete.

4/4/2006 12:15 AM

n When one of the following screen appears

???No channels were found.??? screen

Set Channels Automatically

No channels were found.

Please check antenna or cable connection. then...

press ENTER again

After turning off the unit, confirm following and perform setup again.

???Confirm the antenna cable is firmly connected to RF IN terminal.

???If you do not set channels on this unit, select ???Input??? in step 5.

???Auto Clock Setting is incomplete.??? screen

Set Clock Automatically

Auto Clock Setting is incomplete.

Press ENTER

to set clock manually.

Press [ENTER] and set clock manually (?? right).

7 Press [ENTER].

A picture or a blue background screen is displayed.

n If the clock is an hour slower or faster than the actual time

Select ??????1??? or ???+1??? in ???Adjust Time Zone??? in the Setup menu (?? page 15).

The unit configures channels according to the Signal Source (RF IN) settings (?? page 36) as follows.

Adding and deleting channels

e.g., The channel is deleted.

Channel 15 Deleted

Restart Plug-in Auto Tuning (after relocation, for example)

The setting of the clock and channel is cleared when you perform the procedure below. Scheduled recording settings are also cleared.

1 When the unit is on and stopped

Press and hold [2 CH] and [1 CH] on the main unit for about five seconds.

The unit turns off.

2 Press [^ DVD POWER].

The language selection screen is displayed.

When ???Set Clock Manually??? screen is displayed

The ???Set Clock Manually??? screen is automatically displayed when:

???there is an error while setting the clock automatically.

???you have selected ???Input??? in step 5 while setting (?? page 12).

1 Press [w,q] to select the item you

want to change and press [e,r] to change the setting.

Set Clock Manually

???DST (Daylight Saving Time):

If you select ???On???, the clock is advanced one hour starting at 2 a.m. on the first Sunday in April and ending at 2 a.m. on the last Sunday in October.

???Time Zone shows the time difference from Greenwich Mean Time (GMT).

2 Press [ENTER].

A picture or a blue background screen is displayed.

The clock starts.

RQT8314

13

Channel captions/Television type

TV operation buttons

Channel captions

You can give the preset captions, or manually enter new ones yourself.

The captions you enter are displayed when the channel is displayed and in the Direct Navigator screen.

???You can set channel captions after channel setting on this unit is completed (?? page 12???13).

1 While stopped

Press [SETUP].

2 Press [e,r] to select ???Channel??? and press [q].

Preset Channel Captions

3 Press [e,r] to select ???Preset Channel Captions??? and press [ENTER].

You can choose from the following captions.

ABC, PBS, CBS, CNN, FOX, ESPN, NBC, HBO, A&E, AMC, FAM, MAX, MTV, SHOW, TBS, USA, TNT, CBC, UPN, CTV, WB, TSN, DSC, GLOB

??? When selecting the caption, press and hold [e,r] to scroll up and down the screen.

5 Press [e,r] to select the channel

corresponding to the caption and press [w].

???Channels are only displayed if they contain a station and if captions have not been added manually.

???To delete the channel number, press [CANCEL ].

Manual Channel Captions

3 Press [e,r] to select ???Manual

Channel Captions??? and press [ENTER].

4 Press [e,r] to select the channel and press [q].

??? Channels are only displayed if they contain a station and if preset captions have not been added.

5 Press [e,r] to select the first character and press [q].

???You can choose from the following characters: A???Z, 0???9, -, &, !, /, (space)

???To delete the caption, press [CANCEL ].

???Repeat this step to enter the other characters.

To exit the screen

Press [SETUP].

To return to the previous screen

Press [RETURN].

Selecting television type

Do the following if you connect a progressive television or if you connect a different type of television after choosing a type during initial setup just after turning the unit on for the first time. Select the item that matches your television.

1 While stopped

Press [SETUP].

2 Press [e,r] to select ???TV Screen??? and press [q].

3 Press [e,r] to select ???TV Type??? and press [ENTER].

??? 480p/480i:

Select ???480p??? if the television is compatible with progressive output.

4 Press [e,r] to select the item and press [ENTER].

To exit the screen

Press [SETUP].

To return to the previous screen

Press [RETURN].

Remote control settings

Refer to the control reference on page 14.

Television operation

You can operate the TV through the unit???s remote control.

Point the remote control at the television

While pressing [^ POWER TV], enter the code with the numbered buttons.

e.g., 0250: [0] ?? [2] ?? [5] ?? [0]

Manufacturer and Code No.

Test by turning on the television and changing channels. Repeat the procedure until you find the code that allows correct operation.

???If your television brand is not listed or if the code listed for your television does not allow control of your television, this remote control is not compatible with your television.

When other Panasonic products respond to this remote control

When other Panasonic products placed nearby affect this unit???s remote control, change the remote control code on the main unit and the remote control (the two must match).

Use ???1???, the factory set code, under normal circumstances.

To change the code on the main unit

1 While stopped

Press [SETUP].

2 Press [e,r] to select ???Setup??? and press [q].

3 Press [e,r] to select ???Remote Control Code??? and press [ENTER].

4 Press [e,r] to select the code (???1???, ???2??? or ???3???) and press [ENTER].

To change the code on the remote control

5 While pressing [ENTER], press and

hold the numbered button ([1], [2] or [3]) for more than 2 seconds.

6 Press [ENTER].

nWhen the following indicator appears on the unit???s display

Press and hold [ENTER] and the indicated number button at the same time for more than 2 seconds.

To exit the screen

Press [SETUP].

Clock settings

Refer to the control reference on page 14.

Set Clock Manually

The clock starts.

Adjust Time Zone

Adjust the time zone (???1 or +1) if it was not set correctly with auto clock setting.

You can set this menu only after ???Set Clock Automatically??? is completed.

1 While stopped

Press [SETUP].

2 Press [e,r] to select ???Setup??? and press [q].

3 Press [e,r] to select ???Clock Settings??? and press [ENTER].

4 Press [e,r] to select ???Adjust Time Zone??? and press [ENTER].

5 Press [e,r] to select ??????1??? or ???+1??? and press [ENTER].

To exit the screen

Press [SETUP].

To return to the previous screen

Press [RETURN].

RQT8314

Important notes for recording

Recording of MTS broadcasting

RAM

Both main and secondary audio can be recorded

You can change the audio during playback. (?? page 23, Changing audio)

Main SAP

Hello Hola

If you record from external equipment

???Select both ???Main??? and ???SAP??? on the external equipment.

-R -R DL -RW(V) +R +R DL +RW

Select the main or secondary audio before recording

(?? page 38, ???Multi-channel TV Sound ( MTS )???) The selected audio only is recorded.

Main

Hello

If you record from external equipment

??? Select ???Main??? or ???SAP??? on the external equipment.

Recording of Widescreen broadcasting

It is not possible to record digital broadcasts that allow ???One time only recording??? onto DVD-R, DVD-R DL, DVD-RW, +R, +R DL, +RW or 8 cm (3???) DVD-RAM discs. Use a CPRM (?? page 44) compatible DVD-RAM.

Recording of digital broadcasting

Playing the disc on other DVD players

-R -R DL -RW(V) +R +R DL

The disc must be finalized after recording (?? page 35).

It is necessary to finalize DVD-R, etc. on this unit after recording or copying titles to them. You can then play them as a commercially sold DVD-Video. However, the discs become play-only and you can no longer record or copy.*

* You can record and copy again if you format DVD-RW.

Finalize

+RW

To enable play on other DVD equipment, please use ???Create DVD Top Menu??? in DVD Management menu (?? page 35).

-R DL +R DL

DVD-R DL and +R DL discs have two layers of recording surface on one side.

It is not possible to record continuously from the first layer to the second layer. Recording stops when space on the first layer becomes full. You must close the first layer to start recording on the second layer. Closing makes the first layer unavailable for recording (editing is still available). You cannot cancel closing. Make certain before proceeding.

Recording to a DVD-R DL and

+R DL

RQT8314

16

Recording modes and approximate recording times

Depending on the content being recorded, the recording times may become shorter than indicated.

*1 It is not possible to record or play continuously from one side of a double sided disc to the other.

*2 When ???Recording Time in EP Mode??? is set to ???EP ??? Extended Play (6H)??? in the Setup menu (?? page 37).

The sound quality is better when using ???EP ??? Extended Play (6H)??? than when using ???EP ??? Extended Play (8H)???.

*3 It is not possible to record continuously from the first layer to the second layer.

Note

???This unit uses variable bit rate (VBR) recording which varies the amount of data recorded to suit the images, so actual recording times and remaining recording times shown by the unit will be different. (The difference will be especially noticeable with DVD-R DL and +R DL.)

Use a disc with plenty of remaining time.

???RAM When recording to DVD-RAM using EP (8H) mode, play may not be possible on DVD players that are compatible with DVD- RAM. Use EP (6H) mode if playback may be on other equipment.

FR (Flexible Recording)

The unit automatically selects a recording rate between XP and EP (8H) that will enable the recordings to fit in the remaining disc space with the best possible recording quality.

???You can use FR mode in Scheduled recording (?? page 20, step 3) and Flexible recording (?? page 19).

Using ???FR mode??? is convenient in these kind of situations

???When the amount of free space on the disc makes selecting an appropriate recording mode difficult

???When you want to record a long program with the best picture quality possible

e.g., Recording a 90 minutes program to disc

If you select XP mode

The program will not fit one disc.

If you select SP mode

The program will fit one disc.

There will be 30 minutes remaining disc space.

4.7GB

DVD-RAM

Remains

If you select FR mode

The program will fit one disc perfectly.

4.7GB

DVD-RAM

Fit

Important notes for recording

Disc Insertion/Ejection

When the format confirmation screen is displayed

RAM -RW(V) +R +R DL +RW

When you insert a new disc and a disc recorded on a computer or other equipment, a format confirmation screen might be displayed. Format the disc to use it. However all the recorded contents are deleted.

Format

This disc is not formatted properly. Do you want to format the

disc in DVD Management?

YesNo

ENTER

Press [w,q] to select ???Yes??? and press [ENTER].

???Several steps are necessary to format a disc. Refer to ???Deleting all contents of a disc ???Format Disc ( DVD )??? (?? page 34).

When remove a recorded disc

-R -R DL -RW(V) +R +R DL

When you press [; OPEN/CLOSE] on the main unit while stopped: The following screen appears when you have not processed the disc for play on other equipment.

Make compatible for playback on other DVD players ( Finalize )

Finalizing is necessary to enable playback of the disc on compatible DVD players.

Once finalized, titles cannot be added to the disc. It will take approximatelyminutes. Start ?

Press "REC" to start finalizing.

Press the OPEN/CLOSE button to postpone finalizing. The disc can be played only on this unit. You can Finalize it later.

n When finalizing the disc

Press [* REC].

???You cannot stop this process once you have started it.

???If you want to provide the disc with a name or set play menu select, select ???Disc Name??? (?? page 34) or ???Playback will start with:???

(?? page 35) in ???DVD Management??? before finalizing.

??? RAM
??? +RW
??? You can record up to 49 titles on one disc.
See also the notes ???Important notes for recording??? (??
Note

Recording television programs

??? You can record up to 99 titles on one disc.

+R +R DL +RW

page 16).

You can create a Top Menu using ???Create DVD Top Menu??? (?? page 35). Recording or editing on the disc may delete the menu. In that case, create the menu again.

It is not possible to record continuously from one side of a double sided disc to the other. You will need to eject the disc and turn it over.

Preparation

???Turn on the television and select the appropriate video input to suit the connections to this unit.

???Turn the unit on.

Off Timer

The unit switches to standby after about 6 hours in the stop mode. You can turn this feature off or change the time to 2 hours

(?? page 36, ???Off Timer???).

RQT8314

1 Press [; OPEN/CLOSE] on the main unit to open the tray and insert a disc.

???Press the button again to close the tray.

???When using 8 cm (3???) DVD-RAM, or 8 cm (3???) DVD-R, remove the disc from the cartridge.

Insert fully.

2 Press [1 2 CH] to select the channel.

To select with the numbered buttons:

recording mode (XP, SP, LP, or EP).

Remaining time on the disc

4 Press [* REC] to start recording.

The elapsed time is shown on the display.

Recording will take place on free space on disc. Data will not be overwritten.

???You cannot change the channel or recording mode during recording. You can change the channel or recording mode while paused; however, the recording will then be as a separate title.

???You can record while the unit is in standby for scheduled recording, but once the time for the scheduled recording to begin is reached, any recording taking place will stop and the scheduled recording will begin.

n To pause recording

Press [h].

Press again to restart recording.

You can also press [* REC] to restart. (Title is not split into separate titles.)

n To stop recording

Press [g].

??? From the start to the end of the recording is called one title.

It takes about 30 seconds for the unit to complete recording management information after recording finishes.

n When recording the channel (not set on this unit) from cable box or satellite receiver

1 Select the channel on the equipment before turning the unit on. 2 Press [1 2 CH] to select IN1 or IN2 in step 2 (?? above).

18

To specify a time to stop recording ???One Touch Recording

During recording

Press [* REC] to select the recording time.

??? The unit???s display changes as shown below.

???This does not work during scheduled recordings (?? page 20) or while using Flexible Recording (?? below).

???If you change the channel or recording mode while recording is paused, the time specified to stop recording is cancelled.

???The unit turns off automatically after the time to stop recording is reached.

To cancel

Press [* REC] several times until the counter appears.

???The time to stop recording is cancelled; however, recording continues.

To stop recording partway

Press [g].

Flexible Recording

(Recording that fits the remaining disc space)

RAM -R -R DL -RW(V) +R +R DL +RW

The unit sets the best possible picture quality that fits the recording within the remaining disc space. The recording mode becomes FR mode. Refer to ???FR (Flexible Recording)??? (?? page 17).

Preparation

Select the channel or the external input (IN1, IN2 or DV) to record.

1 While stopped

Press [F Rec].

2 Press [w,q] to select ???Hour??? and

???Min.??? and press [e,r] to set the recording time.

???You can also set the recording time with the numbered buttons.

???You cannot record for more than 8 hours.

3 When you want to start recording

Press [e,r,w,q] to select ???Start??? and press [ENTER].

Recording starts.

Playing while you are recording

RAM

Playing from the beginning of the title you are recording???Chasing playback

Press [q] (PLAY) during recording.

??? There is no sound output while searching forward or backward.

To stop play

Press [g].

To stop recording

2 seconds after play stops Press [g].

To stop scheduled recording

1 Press [g] to stop playing.

2 After 2 seconds, press [g].

3Press [w,q] to select ???Stop recording??? and press [ENTER].

Playing a title previously recorded while recording??? Simultaneous rec and play

1 Press [DIRECT NAVIGATOR] during recording.

2 Press [e,r,w,q] to select a title and press [ENTER].

???There is no sound output while searching forward or backward.

To stop play

Press [g].

To stop recording

1 Press [g] to stop playing.

2 Press [DIRECT NAVIGATOR] to exit screen.

3 Press [g].

To stop scheduled recording

1 Press [g] to stop playing.

2 Press [DIRECT NAVIGATOR] to exit screen.

3 Press [g].

4 Press [w,q] to select ???Stop recording??? and press [ENTER].

Selecting audio to record

RAM

Press [AUDIO].

Stereo: Main audio (stereo)

???If the broadcast is ???Mono+SAP???, audio will be monaural even if you select Stereo mode.

SAP Secondary audio program (SAP)

Audio: ??? If recorded in SAP mode, main audio is also recorded.

Mono: Main audio (monaural)

???Select ???Mono??? if reception is poor during a stereo broadcast.

???((??? appears when the unit is receiving the audio type you selected.

???If you change the sound setting while recording, the recorded sound will also change.

-R -R DL -RW(V) +R +R DL +RW

Select the audio (Main or SAP) in ???Multi- channel TV Sound ( MTS )??? in the Setup menu (?? page 38).

Recording television programs

RQT8314

19

Scheduled recording

1 Press [SCHEDULE].

n To return to the previous screen

Press [RETURN].

n To exit the screen

Press [SCHEDULE].

n When recording the channel (not set on this unit) from cable box or satellite receiver

1 Press [e,r] to select IN1 or IN2 in the channel column (?? above, step 3).

2 Select the channel on the equipment before the scheduled time.

RQT8314

20

Scheduled recording

Not recorded

???If the actual broadcasting times of scheduled recordings overlap, the recording that starts first always has priority, and the recording of the later program will start only after the first scheduled recording has finished.

???If you set DST (Daylight Saving Time) to On when manually setting the clock (?? page 15), scheduled recording may not work when summer switches to winter and vice versa.

n To exit the schedule list

Press [SCHEDULE].

???Programs that failed to record are displayed gray, and cannot be changed. They are automatically deleted from the schedule list at 4 a.m. two days later.

RQT8314

21

Playing discs

Preparation

???Turn on the television and select the appropriate video input to suit the connections to this unit.

???Turn on this unit.

1 Insert a disc (?? page 18).

2 Press [q] (PLAY).

RAM -R -R DL -RW(V) +R +R DL +RW -RW(VR)

Play starts from the most recently recorded title.

DVD-V DVD-A CD VCD

Play starts from the beginning of the disc.

n When a menu screen appears on the television

DVD-V DVD-A

Press [e,r,w,q] to select the item and press [ENTER].

Some items can also be selected using the numbered buttons.

VCD

Press the numbered buttons to select the item.

??? To return to the menu screen

DVD-V Press [DIRECT NAVIGATOR] or [SUB MENU]. DVD-A Press [DIRECT NAVIGATOR].

VCD Press [RETURN].

???The playing method may differ from the one described above depending on disc types. Read the disc???s instructions carefully.

Selecting recorded titles to play ???Direct Navigator

RAM -R -R DL -RW(V) +R +R DL +RW -RW(VR)

Simply select the recorded titles you want to play from the menu.

1 Press [DIRECT NAVIGATOR].

2Press [e,r,w,q] to select the title and press [ENTER].

You can also select titles with the numbered buttons.

To show other pages

Press [u] (Previous) or [i] (Next).

To exit the screen

Press [DIRECT NAVIGATOR].

Direct Navigator screen icons

Title protected.

Title that was not recorded due to recording protection (Digital broadcasts, etc.)

Title cannot be played because data is damaged. Currently recording.

Title with ???One time only recording??? restriction

Note

disc when scheduled recording starts.

??? RAM Press [q] (PLAY) when you wish to start playing the disc while recording (?? page 19, ???Chasing playback???).

RQT8314

22

DVD-A

Operations during play

play will begin.

Press the numbered buttons.

Play starts from the selected title, chapter or track.

Playing discs

Starting from a selected item

Selecting groups

While stopped (screen saver is displayed on the television ?? right)

5:[5]

???This works only when stopped (screen saver is displayed on the television ?? above) with some discs.

???VCD (with playback control)

If you press the numbered buttons while stopped (the above screen saver is displayed on the television) you can cancel PBC. (Elapsed play time appears on the unit???s display.)

e.g., DVD-V English is the selected language (?? page 26, Soundtrack).

RQT8314

23

Using menus to play MP3 and still pictures (JPEG/TIFF)

Regarding MP3 and still pictures (JPEG/TIFF)

???Compatible formats: ISO9660 level 1 or 2 (except for extended formats) and Joliet

???Maximum number of files (tracks) and folders (groups) recognizable: 999 files* (tracks) and 99 (including the root folder) folders (groups)

*Total number for all the MP3, JPEG and other type of files

???This unit is compatible with multi-session but reading or play of the disc may take time if there are a lot of sessions.

???Operation may take time to complete when there are many files (tracks) and/or folders (groups) and some may not display or be playable.

???The display order on this unit may differ from how the order is displayed on a computer.

???Depending on how you create the disc (writing software), files (tracks) and folders (groups) may not play in the order you numbered them.

???This unit is not compatible with packet-writing format.

???Depending on the recording, some items may not be playable.

Regarding MP3

???File format: MP3

Files must have the extension ???.mp3??? or ???.MP3???.

???Bit rates: 32 kbps to 320 kbps

???Sampling frequency: 16 kHz/22.05 kHz/24 kHz/32 kHz/44.1 kHz/ 48 kHz

???This unit is not compatible with ID3 tags.

???If there is a large amount of still picture data etc. within an MP3 file, play may not be possible.

Regarding still pictures (JPEG/TIFF)

???File format: JPEG, TIFF (non-compressed RGB chunky format) Files must have the extension ???.jpg???, ???.JPG???, ???.tif??? and ???.TIF???.

???Number of pixels: between 34 x 34 and 6144 x 4096 (Sub sampling is 4:2:2 or 4:2:0)

???This unit cannot play images that have resolutions beyond the range shown.

???Operation may take time to complete when playing TIFF format still pictures.

???The unit is not compatible with MOTION JPEG.

???You can play MP3 and still pictures (JPEG/TIFF) on this unit by making folders as shown below. However, depending on how you create the disc (writing software), play may not be in the order you numbered the folders.

???When the highest level folders are ???DCIM??? folders, they are

Playing MP3

CD

You can play CD-R, CD-RW discs which contain MP3 files that have been recorded on a computer.

1 Press [DIRECT NAVIGATOR].

??? Files are treated as tracks and folders are treated as groups.

2 Press [e,r] to select the track and press [ENTER].

Play starts on the selected track.

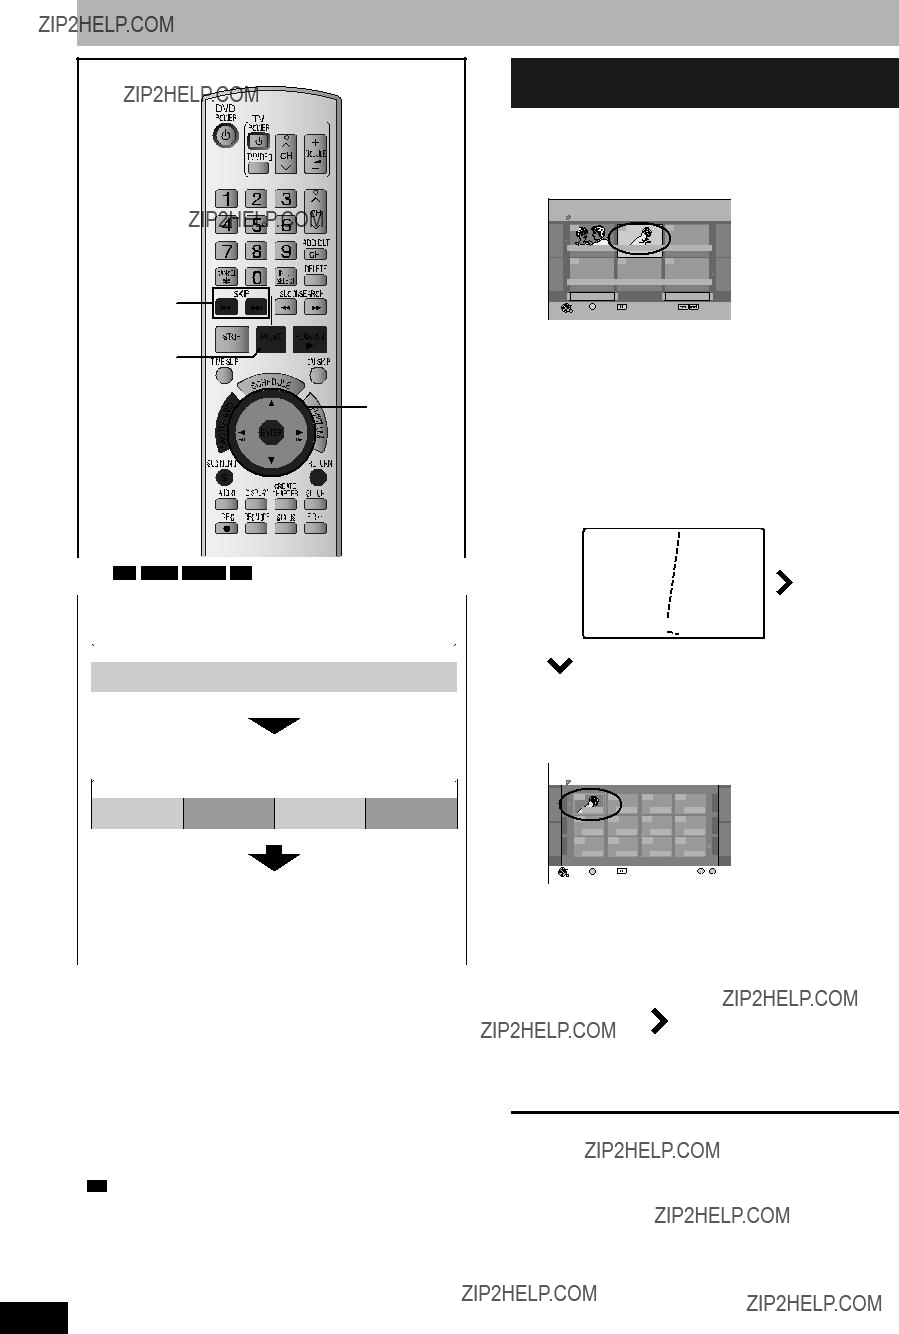
?????? ??? indicates the track currently playing.

???You can also select the track with the numbered buttons.

e.g., 5: [0] ?? [0] ?? [5]

15:[0] ?? [1] ?? [5]

To show other pages

Press [u] (Previous) or [i] (Next).

n To select other group 1 Press [q].

G: Selected group no. /Total group no.

If the group has no track, ?????? ?????? is displayed as group number.

2 Press [e,r] to select a group and press [ENTER].

The file list for the group appears.

To stop playing

Press [g].

To return to the previous screen

Press [RETURN].

To switch to Pictures menu

(?? page 25, ???To select Pictures Menu???)

To exit the screen

RQT8314

24

displayed first on the tree.

Structure of MP3 folders

Prefix with 3-digit numbers in the order you want to play them.

Structure of still pictures (JPEG/TIFF)

Files inside a folder are displayed in the order they were updated or taken.

Press [DIRECT NAVIGATOR].

Playing still pictures (JPEG/TIFF)

CD

You can play CD-R, CD-RW discs which contain still pictures (JPEG/ TIFF) that have been recorded on a computer.

Useful functions during still picture play

You can display still pictures one by one with constant interval.

While the Pictures Menu is displayed

1Press [e,r,w,q] to select ???Folder??? and press

[SUB MENU].

pictures (JPEG/TIFF)

nTo select Pictures Menu

1 Press [RETURN].

2 Press [FUNCTIONS].

3 Press [e,r] to select ???Menu??? and press [ENTER].

4 Press [e,r] to select ???Pictures??? and press [ENTER].

??below, step2

Multimedia content

Music and pictures on disc. Please select playback mode.

MP3 Music

Pictures

ENTER

2 Press [e,r] to

Slide Interval select ???Start Start Slideshow Slide Interval

Slideshow??? and

play MP3 and still

1 Press [DIRECT NAVIGATOR].

picture and press [ENTER].

???The selected still picture is displayed on the screen.

???You can also select still pictures with the numbered buttons.

e.g., 5: [0] ?? [0] ?? [5]

15:[0] ?? [1] ?? [5]

To show other pages

Press [u] (Previous) or [i] (Next).

n To select another folder

While the Pictures Menu is displayed

1Press [e,r,w,q] to select ???Folder??? and press [ENTER].

F:Selected folder no./Total folder no.

2Press [e,r] to select the folder and press [ENTER].

To display the previous or next still picture during play

Press [w,q].

To stop playing

Press [g].

???The unit remembers the still picture where you stopped play. This is cleared when you turn the unit off or remove the disc.

To return to the previous screen

Press [RETURN].

To switch to MP3 menu

Select ???MP3 Music??? in step 4 of ???To select Pictures Menu??? (?? above).

To exit the menu screen

Press [DIRECT NAVIGATOR].

press [ENTER].

To change the slide interval

1In step 2 above, press [e,r] to select ???Slide Interval??? and press [ENTER].

2Press [w,q] to select the slide interval and press [ENTER].

???You can select a slide interval between 0-30 seconds.

and press [ENTER].

???When zooming in, the picture may be cut off.

???The enlargement information will not be stored.

???The ???Zoom in/Zoom out??? function is only available for still pictures smaller than 640 x 480 pixels.

While playing

Press [STATUS] twice.

Shooting date

To exit the picture properties screen

Press [STATUS] again.

Using menus to

RQT8314

25

Using on-screen menus/FUNCTIONS window and Status messages

FUNCTIONS

e,r,w,q

ENTER

DISPLAY

STATUS

Using on-screen menus

Common procedures

1 Press [DISPLAY].

??? Some items can be changed by pressing [ENTER].

To clear the on-screen menus

Press [DISPLAY].

Disc menu???Setting disc content

Soundtrack* DVD-V DVD-A

Select the audio and language (?? below, Audio attribute, Language).

Turn the subtitle on/off and select the language (?? below, Language).

RAM -R -R DL -RW(V) +R +R DL +RW -RW(VR)

(Only discs that contain subtitle on/off information)

???Subtitle on/off information cannot be recorded using this unit.

???If the subtitles overlap closed captions recorded on discs, turn the subtitles off.

Audio channel RAM -RW(VR) VCD

?? page 23, Changing audio

Angle* DVD-V DVD-A

Change the number to select an angle.

Still-P (Still picture) DVD-A

Selects the play method for still pictures.

Slide Show: Plays according to the default order on the disc.

Page: Select the still picture number and play.

???RANDOM: Plays in random order.

???Return: Returns to the default still picture on the disc.

PBC (Playback control ?? page 44) VCD

Indicates whether menu play (playback control) is on or off (unchangeable).

* With some discs, you may only be able to make changes using the menus (?? page 22) on the disc.

???The display changes according to the disc content. You cannot change anything when there is no recording.

Play menu???Change play sequence

This function works only when the elapsed play time is displayed. Select the item for repeat play. Depending on the disc, the items that can be selected will differ.

RQT8314

26

Video menu???Change picture quality

Picture

RAM -R -R DL -RW(V) +R +R DL +RW DVD-V DVD-A

-RW(VR) VCD

Select the picture mode.

???Normal: Default setting

???Soft: Soft picture with fewer video artifacts

???Fine: Details are sharper

???Cinema: Mellows movies, enhances detail in dark scenes.

DNR

RAM -R -R DL -RW(V) +R +R DL +RW DVD-V DVD-A

-RW(VR) VCD

Reduces noise and picture degradation.

On???Off

Progressive

[Only when you have selected ???480p??? in ???TV Type??? (?? page 14).]

Select ???On??? to enable progressive output.

???Select ???Off??? if the picture is stretched horizontally.

???When progressive output is on, closed captions cannot be displayed.

Transfer [Only when ???Progressive??? (?? above) is set to ???On???.]

Select the method of conversion for progressive output to suit the type of material being played (?? page 44, Film and video).

??? Auto1 (normal):

Automatically detects the film and video content, and appropriately converts it.

??? Auto2: In addition to ???Auto1???, automatically detects film contents with different frame rates and appropriately converts it.

??? Video: Select when using ???Auto1??? and ???Auto2???, and the video content is distorted.

Line-in NR (Only when IN1, IN2 or DV is selected.)

Reduces video tape noise while copying. Depending on the video signal, jittering may occur.

??? Automatic:

Noise reduction only works on picture input from a video tape.

???On: Noise reduction works for any video input.

???Off: Noise reduction is off. Select when you want to

record input as it is.

Audio menu???Change sound effect

V. Surround Sound

RAM -R -R DL -RW(V) +R +R DL +RW DVD-V DVD-A

-RW(VR)

(Dolby Digital, 2-channel or over only)

Enjoy a surround-like effect if you are using two front speakers only.

???Turn V. Surround Sound off if it causes distortion.

???Turn off the surround function on the connected equipment.

???V. Surround Sound does not work for SAP recordings.

Dialog Enhancer

RAM -R -R DL -RW(V) +R +R DL +RW DVD-V DVD-A

-RW(VR)

(Dolby Digital, 3-channel or over only, including a center channel)

The volume of the center channel is raised to make dialog easier to hear.

Other menu???Change the display position

Position

1 (Standard) - 5: The higher the setting the lower the screen moves.

RQT8314

27

Editing titles/chapters

Editing titles/chapters and playing chapters

1 During play or while stopped

Press [DIRECT NAVIGATOR].

2 Press [e,r,w,q] to select the title.

RQT8314

28

Note

???Once deleted, divided or shortened, a title cannot be restored to its original state. Make certain before proceeding.

???You cannot edit during recording.

???+RW You can create a Top Menu using ???Create DVD Top Menu???

(?? page 35). Recording or editing on the disc may delete the menu. In that case, create the menu again.

??? +R +R DL Management information is recorded in unused

sections when you edit discs. The available space on these discs decreases each time you edit their contents.

Preparation

???Turn on the television and select the appropriate video input to suit the connections to this unit.

???Turn the unit on.

???Insert a disc (?? page 18).

???RAM Release protection (?? page 34).

??? You can go back to the Title View.

To exit the screen

Press [DIRECT NAVIGATOR].

To return to the previous screen

Press [RETURN].

Title operations

After performing steps 1???3 (?? page 28)

You can remove unnecessary parts of the recording such as commercials.

Editing titles/chapters

Change Thumbnail

RAM -R -R DL -RW(V)

+R +R DL +RW

(?? below, ???For quicker editing???)

You can change the image to be shown as a thumbnail picture in the Title View.

1 Press [q] (PLAY) to start play.

2 Press [ENTER] when the image you want to use as a thumbnail is shown.

To change the thumbnail

Restart play and press [e,r] to select ???Change???, then press [ENTER] at the point you want to use as the thumbnail.

3 Press [e,r] to select ???Exit??? and press [ENTER].

DIRECT NAVIGATOR Change Thumbnail

DVD-RAM

ENTER

Divide Title

RAM

(?? below, ???For quicker editing???)

You can divide a title into two.

1 Press [ENTER] at the point you want to divide the title. 2 Press [e,r] to select ???Exit??? and press [ENTER].

3 Press [w,q] to select ???Divide??? and press [ENTER].

To confirm the division point

Press [e,r] to select ???Preview??? and press [ENTER]. (The unit plays 10 seconds before and after the division point.)

To change the division point

Restart play and press [e,r] to select ???Divide???, then press [ENTER] at the point you want to divide.

DIRECT NAVIGATOR Divide Title

DVD-RAM

Divide

ENTER

Note

???The divided titles retain the name and CPRM property (?? page 44) of the original title.

???Video and audio just before and after the dividing point may momentarily be cut out. Make certain using ???Preview??? function (?? above) before proceeding.

* Multiple editing is possible.

Chapter operations

After performing steps 1???5 (?? page 28)

Select the point where you want to start a new chapter while viewing the title.

ENTER

Combine Chapters Press [w,q] to select ???Combine??? and press [ENTER].

For quicker editing

???Use search, Time Slip or slow-motion (?? page 23) to find the desired point.

???To skip to the start or end of a title, press [u] (start) or [i] (end).

RQT8314

29

Creating, editing and playing playlists

You can arrange the chapters (?? page 28) to create a playlist.

Title Title

Chapter Chapter Chapter Chapter Chapter

Playlist Chapter Chapter

???Editing playlists doesn???t modify the recorded data. Playlists are not recorded separately so this doesn???t use much capacity.

???You cannot create or edit a playlist while recording.

RAM

???The maximum number of items on a disc: ???Playlists:99

???Chapters in playlists: Approximately 1000

Depends on the state of recording.

???If you exceed the maximum numbers of items for a disc, all the items entered will not be recorded.

Preparation

???Turn on the television and select the appropriate video input to suit the connections to this unit.

???Turn the unit on.

???Insert a disc (?? page 18).

???Release disc or cartridge protection (?? page 34).

RQT8314

30

Creating playlists

1 While stopped

Press [FUNCTIONS].

2 Press [e,r] to select ???Other Functions??? and press [ENTER].

3 Press [e,r] to select ???Playlists??? and press [ENTER].

4 Press [e,r,w,q] to select ???Create??? and press [ENTER].

ENTER

5 Press [w,q] to select the source title and press [r].

Press [ENTER] to select all the chapters in the title, then skip to step 7.

6 Press [w,q] to select the chapter you

want to add to a playlist and press [ENTER].

Press [e] to cancel.

insert the chapter and press [ENTER].

To exit the screen

Press [RETURN] several times.

To return to the previous screen

Press [RETURN].

Editing and playing playlists/chapters

RAM -RW(VR) (play only)

1 While stopped

Press [FUNCTIONS].

2 Press [e,r] to select ???Other Functions??? and press [ENTER].

3 Press [e,r] to select ???Playlists??? and press [ENTER].

4 Press [e,r,w,q] to select the playlist.

To start play ?? Press [ENTER].

To edit ?? Step 5

??? To show other pages/Multiple editing (?? page 28)

5 Press [SUB MENU], then press [e,r]

to select the operation and press [ENTER].

???If you select ???Edit???, press [e,r] to select the operation and press [ENTER].

If you select ???View Chapters??? (?? Step 6)

6 Press [e,r,w,q] to select the chapter.

To start play ?? Press [ENTER].

To edit ?? Step 7

PLAYLISTS Chapter View

DVD-RAM

08 10/30 Mon 0:30

View Playlists

??? You can go back to the Playlist View.

To exit the screen

Press [RETURN] several times.

To return to the previous screen

Press [RETURN].

Playlist operations

RAM

* Multiple editing is possible.

Chapter operations

RAM

After performing steps 1???7 (?? left)

???Editing chapters in a playlist does not modify the source titles and source chapters.

* Multiple editing is possible.

RQT8314

31

Other video equipment

Connect to Audio/video output terminals.

If the audio output of the other equipment is monaural

Connect to L/MONO.

*The S VIDEO terminal achieves a more vivid picture than the VIDEO terminal.

See also the notes ???Important notes for recording??? (?? page 16).

Preparation

???Turn on the unit and connected equipment.

???Insert a disc (?? page 18).

???Press [REC MODE] to select the recording mode.

???To reduce noise in input from external equipment, set ???Line-in NR??? to ???On??? (?? page 27).

???When recording from the unit???s DV IN terminal

Select the type of audio recording from ???Select Audio Channel for DV Input??? in the Setup menu (?? page 38).

When recording from DV equipment (e.g., digital video camcorder), you can record audio/video recordings from DV tape only.

DV camcorder recording

RAM -R -RW(V) +R +RW

RAM Programs are recorded as a title while at the same time chapters are created at each break in the images and the playlist is created automatically.

When ???DV camcorder connection??? screen is displayed

If the DV automatic recording function does not work properly, check the connections and DV equipment settings, and turn the unit off and back on.

If that does not work, follow the instructions for manual recording (?? below).

Manual recording

RAM -R -R DL -RW(V) +R +R DL +RW

Note

When recording using this unit???s input terminals, only the sound received at the time of recording will be recorded.

As long as secondary audio that is recorded on the video cassette is not output on the unit in play, it is not recorded.

1 While stopped

Press [INPUT SELECT] to select the input channel for the equipment you have connected.

e.g., If you have connected to IN2 input terminals, select ???IN2???.

2 Start play on the other equipment.

3 When you want to start recording

Press [* REC].

Recording starts.

??? Using Flexible Recording (?? page 19), you can record the content of a video cassette (approx. 1???8 hours) to a 4.7 GB disc with the best possible quality of recording without wasting disc space.

To skip unwanted parts

Press [h] to pause recording. (Press again to restart recording.)

To stop recording

Press [g].

Almost all videos and DVD software on sale have been treated to prevent illegal copying. Any software that has been so treated cannot be recorded using this unit.

Entering text

Refer to the control reference on page 32.

RAM -R -R DL -RW(V) +R +R DL +RW

You can give names to recorded titles, etc.

The maximum number of characters:

* Scheduled recording

If a name is long, parts of it may not be shown in some screens.

1 Show Enter Name screen.

If you enter a long name, only part of it is shown in the Top Menu after finalization (?? page 35). When entering a title name, the name that will appear in the Top Menu can be previewed in ???Top Menu Preview (Finalized Disc)??? window.

Repeat this step to enter other characters.

???To erase a character

Press [e,r,w,q] to select the character in the name field and press [h].

???Using the numbered buttons to enter characters

e.g., entering the letter ???R???

1 Press [7] to move to the 7th row.

2 Press [7] twice to highlight ???R???.

3 Press [ENTER].

???To enter a space

Press [CANCEL ] and press

[ENTER].

3 Press [g] (Set).

Returns to the previously displayed screen.

To end partway

Press [RETURN].

Text is not saved.

n To save frequently used phrases

You can add frequently used phrases and recall them later. Maximum number of saved phrases: 20

Maximum number of characters per phrase: 20 After entering the phrase (??above, steps 1???2)

1Press [i] while the phrase to be saved is shown in the name field.

2Press [w] to select ???Save??? and press [ENTER].

???To cancel saving phrase Press [RETURN].

n To recall a saved phrase

1Press [u].

2Press [e,r,w,q] to select the phrase to be recalled and press [ENTER].

n To erase a saved phrase

1Press [u].

2Press [e,r,w,q] to select the phrase to be erased and press [SUB MENU].

3Press [ENTER].

4Press [w] to select ???Erase??? and press [ENTER].

5Press [RETURN].

Deleting titles

Refer to the control reference on page 32.

??? Turn on the television and select the appropriate video input to suit the connections to this unit.

??? Turn the unit on.

??? Insert a disc (?? page 18).

1 While stopped

Press [FUNCTIONS].

2 Press [e,r] to select ???Delete??? and press [ENTER].

DELETE Navigator Title View

DVD-RAM

3 Press [e,r,w,q] to select the title and press [ENTER].

To show other pages

Press [u] (Previous) or [i] (Next).

Multiple deleting

Select with [e,r,w,q] and press [h]. (Repeat.)

??? A check mark appears. Press [h] again to cancel.

4 Press [w,q] to select ???Delete??? and press [ENTER].

To return to the previous screen

Press [RETURN].

To exit the screen

Press [RETURN] several times.

Deleting title during play

A message appears when formatting is finished.
Press [w,q] to select ???Start??? and press [ENTER].
Press [w,q] to select ???Yes??? and press [ENTER].
4 Press [e,r] to select ???Format Disc 5 ( DVD )??? and press [ENTER].
6
Note
Formatting delete all contents (including computer data), and they cannot be restored. Check carefully before proceeding.
The contents are deleted when you format the disc even if you have set protection.
After performing steps 1???3 (?? left)
RAM +R

DVD Management

Preparation

RAM Release protection (?? below).

1 While stopped

Press [FUNCTIONS].

2 Press [e,r] to select ???Other Functions??? and press [ENTER].

3 Press [e,r] to select ???DVD Management??? and press [ENTER].

Select which step 4 to perform depending on what you want to do next.

To exit the screen

Press [RETURN] several times.

To return to the previous screen

Press [RETURN].

Providing a disc with a name ???Disc Name

RAM -R -R DL -RW(V) +R +R DL +RW

After performing steps 1???3 (?? above)

4 Press [e,r] to select ???Disc Name??? and press [ENTER].

?? page 33, Entering text

???The disc name is displayed in the DVD MANAGEMENT window.

???With a finalized disc and +RW the name is displayed in the Top Menu.

Setting the protection ???Disc Protection

RAM

After performing steps 1???3 (?? above)

4 Press [e,r] to select ???Disc Protection??? and press [ENTER].

5 Press [w,q] to select ???Yes??? and press [ENTER].

Deleting all titles and playlists ???Delete All Titles

RAM

After performing steps 1???3 (?? left)

4 Press [e,r] to select ???Delete All Titles??? and press [ENTER].

5 Press [w,q] to select ???Yes??? and press [ENTER].

6 Press [w,q] to select ???Start??? and press [ENTER].

A message appears when finished.

7 Press [ENTER].

Note

???Once deleted, the recorded contents are lost and cannot be restored. Make certain before proceeding.

???Deleting all video titles will result in all playlists also being deleted.

???Delete does not work if one or more titles are protected.

Deleting all contents of a disc ???Format Disc ( DVD )

-RW(V) +RW -RW(VR)

+R DL (New disc only)

??? -RW(V) -RW(VR) You can format only as DVD-Video format on this

unit.

???When a disc has been formatted using this unit, it may not be possible to use it on any other equipment.

RAM To stop formatting

Press [RETURN].

???You can cancel formatting if it takes more than 2 minutes. The disc must be reformatted if you do this.

34

PROTECT

Selecting whether to show the Top Menu first

???Playback will start with:

-R -R DL -RW(V) +R +R DL +RW

You can select whether to show the top menu after finalizing. Make selections before finalizing the disc.

After performing steps 1???3 (?? page 34)

4 Press [e,r] to select ???Playback will start with:??? and press [ENTER].

5 Press [e,r] to select items and press [ENTER].

DVD???s Top Menu: The top menu appears first.

First Title on DVD: The disc content is played without displaying the top menu.

Enabling discs to be played on other equipment

???Finalize

-R -R DL -RW(V) +R +R DL

Finalize the disc so you can play it on other DVD equipment. The equipment must be able to play finalized discs. To check compatibility with other equipment, refer to page 4.

After performing steps 1???3 (?? page 34)

4 Press [e,r] to select ???Finalize??? and press [ENTER].

5 Press [w,q] to select ???Yes??? and press [ENTER].

6 Press [w,q] to select ???Start??? and press [ENTER].

???Finalizing starts. You cannot cancel finalizing.

???Finalizing can take a few minutes, up to a maximum of 15 minutes, depending on the remaining space on the disc. ( -R DL +R DL up to 60 minutes.)

Note

Do not disconnect the AC power supply cord while finalizing. This will render the disc unusable.

7 Press [ENTER].

After finalizing

???Titles are divided into about 5-minute ( +R DL 8-minute) chapters. This time varies greatly depending on the condition and mode of recording.

???There is a pause of several seconds between titles and chapters during play.

???You cannot finalize discs recorded on other manufacturers??? equipment.

???Discs finalized on this unit may not be playable on other players due to the condition of the recording.

???When finalizing a high-speed recording compatible disc, it may take longer than displayed on the confirmation screen (approximately four times).

Creating Top Menu

???Create DVD Top Menu

???Recording or editing on the disc may delete the menu. In that case, create the menu again.

???You cannot use the title menu for playing on this unit.

Enabling the second layer on DL (dual- or double- layer on single side) discs to be recordable

???Close First Layer

-R DL +R DL

DVD-R DL and +R DL discs have two layers of recording surface on one side. This unit does not offer seamless recording on two layers. Recording stops when space on the first layer becomes full. You must close the first layer to start recording on the second layer. Closing makes the first layer unavailable for recording (editing is still available). You cannot cancel closing. Make certain before proceeding.

After performing steps 1???3 (?? page 34)

4 Press [e,r] to select ???Close First Layer??? and press [ENTER].

5 Press [w,q] to select ???Yes??? and press [ENTER].

6 Press [w,q] to select ???Start??? and press [ENTER].

Closing the layer starts. You cannot cancel closing.

Closing the layer can take several minutes, up to a maximum of 30 minutes, depending on the remaining space on the first layer.

Note

Do not disconnect the AC power supply cord while closing the layer. This will render the disc unusable.

7 Press [ENTER].

???You cannot close the first layer when it has no recording.

???By closing the layer, you can record or edit discs that have been recorded on the second layer by other equipment.

n To confirm the layer you can record

You can confirm the remaining recording time on the layer you can record.

Disc Name

Playback will start with: Top Menu

Finalize

RQT8314

35

To exit the screen

Press [SETUP].

Note

There may be differences in operation methods. If this happens, follow the on-screen instructions for the operation.

Summary of settings

The settings remain intact even if you switch the unit to standby.

Clock Settings

Press [ENTER] to show the following settings.

*1 You can set these menus only after ???Set Channels Automatically??? is completed. *2 You can set this menu only after ???Set Clock Automatically??? is completed.

RQT8314

36

Changing the unit???s settings

Audio Language

DVD-V

Subtitle

Language

DVD-V

Menu Language

DVD-V

???Some discs start in a certain language despite any changes you make here.

???Enter a code (?? page 44) with the numbered buttons when you select

???Other ???.

When the selected language is not available on the disc, the default language is played. There are discs where you can only switch the language from the menu screen (?? page 22).

???Original: The original language of each disc will be selected.

???Other

???Automatic:

If the language selected for ???Audio Language??? is not available, subtitles of that language will automatically appear if available on that disc.

Settings for Recording

Press [ENTER] to show the following setting.

Black Level Control

Select for adjusting the black level control to the desired setting for picture enhancement.

RQT8314

37

Changing the unit???s settings

Tabs

Audio

from the unit???s DV IN terminal, select the type of audio recording from ???Select Audio Channel for DV Input??? (?? below).

Digital Audio Output

Change the settings when you have connected equipment through this unit???s DIGITAL AUDIO OUT terminal (?? page 11).

??? Press [ENTER] to display the menu.

Dolby Digital

DTS

Select how to output the signal.

If ???Bitstream??? is selected, the connected equipment decodes the signal.

If ???PCM??? is selected, this unit decodes the signal and outputs it as 2 channel.

Note

Not making the proper settings may result in noise or some trouble for digital recording.

??? Bitstream: When connecting to equipment displaying the Dolby Digital logo.

??? PCM: When connecting to equipment not displaying the Dolby Digital logo.

??? Bitstream: When connecting to equipment displaying the DTS logo.

??? PCM: When connecting to equipment not displaying the DTS logo.

When recording MTS broadcast, select the type of audio in advance from ???Multi-channel TV Sound ( MTS )??? (?? above).

FL Display

Changes the brightness of the unit???s display.

???Automatic:

The display turns dark during play, and reappears momentarily when you press a button. When the unit is turned off all displays disappear. While using this mode the standby power consumption can be reduced.

Video recorded for a widescreen is played in the letterbox style.

4:3 TV Settings for DVD-RAM

Select how DVD-RAM widescreen picture is shown on a 4:3 standard aspect television.

???4:3 Aspect: Titles played as recorded.

???Pan and Scan (Stretch to fit):

Video recorded for a widescreen is played as Pan & Scan.

??? Letterbox (Shrink to fit):

Video recorded for a widescreen is played in the letterbox style.

RQT8314

38

Messages

On the unit???s display

The following messages or service numbers appear on the unit???s display when something unusual is detected during startup and use.

RQT8314

39

Frequently asked questions

RQT8314

40

Troubleshooting guide

Before requesting service, make the following checks. If you are in doubt about some of the check points, or if the remedies indicated in the chart do not solve the problem, refer to ???Customer Services Directory??? on page 46 if you reside in the U.S.A., or refer to ???Product information??? on page 43 if you reside in Canada.

The following do not indicate a problem with this unit:

Frequently asked questions/Troubleshooting guide

RQT8314

41

Troubleshooting guide

RQT8314

42

Product Service

1.Damage requiring service???The unit should be serviced by qualified service personnel if:

(a)The AC power supply cord or AC adaptor has been damaged; or

(b)Objects or liquids have gotten into the unit; or

(c)The unit has been exposed to rain; or

(d)The unit does not operate normally or exhibits a marked change in performance; or

(e)The unit has been dropped or the cabinet damaged.

2.Servicing???Do not attempt to service the unit beyond that described in these operating instructions. Refer all other servicing to authorized servicing personnel.

3.Replacement parts???When parts need replacing ensure the servicer uses parts specified by the manufacturer or parts that have the same characteristics as the original parts. Unauthorized substitutes may result in fire, electric shock, or other hazards.

4.Safety check???After repairs or service, ask the servicer to perform safety checks to confirm that the unit is in proper working condition.

Product information

For product information or assistance with product operation:

In the U.S.A., refer to ???Customer Services Directory??? on page 46.

In Canada, contact the Panasonic Canada Inc. Customer Care Centre at 1-800-561-5505, or visit the website (www.panasonic.ca), or an authorized Servicentre closest to you.

RQT8314

43

Glossary

Bitstream

This is the digital form of multi-channel audio data (e.g., 5.1 channel) before it is decoded into its various channels.

CPRM (Content Protection for Recordable Media)

CPRM is technology used to protect broadcasts that are allowed to be recorded only once. Such broadcasts can be recorded only with CPRM compatible recorders and discs.

Dolby Digital

This is a method of coding digital signals developed by Dolby Laboratories. Apart from stereo (2-channel) audio, these signals can also be multi-channel audio. A large amount of audio information can be recorded on one disc using this method.

Down-mixing

This is the process of remixing the multi-channel audio found on some discs into two channels for stereo output. It is useful when you want to listen to the 5.1-channel audio recorded on DVDs through your television???s speakers. Some discs prohibit down-mixing and this unit can then only output the front two channels.

DTS (Digital Theater Systems)

This surround system is used in many movie theaters. There is good separation between the channels, so realistic sound effects are possible.

Dynamic range

Dynamic range is the difference between the lowest level of sound that can be heard above the noise of the equipment and the highest level of sound before distortion occurs. Dynamic range compression means reducing the gap between the loudest and softest sounds. This means you can listen at low volumes but still hear dialog clearly.

Film and video

DVD-Videos are recorded using either film or video. This unit can determine which type has been used, then uses the most suitable method of progressive output.

Film:

Recorded at 24 or 30 frames per second. Generally appropriate for motion picture films.

Video:

Recorded at 30 frames/60 fields per second. Generally appropriate for TV drama programs or animation.

Finalize

A process that makes play of a recorded CD-R, CD-RW, DVD-R, etc. possible on equipment that can play such media. You can finalize DVD- R, DVD-R DL, DVD-RW (DVD-Video format), +R or +R DL on this unit. After finalizing, the disc becomes play-only and you can no longer record or edit. However, finalized DVD-RW can be formatted to become recordable.

Formatting

Formatting is the process of making media such as DVD-RAM recordable on recording equipment.

You can format DVD-RAM, DVD-RW (only as DVD-Video format), +R, +R DL or +RW on this unit.

When you use a new DVD-RW, +R, +R DL or +RW, it must be formatted.

Formatting irrevocably deletes all contents.

Frames and fields

Frames refer to the single images that constitute the video you see on your television. Each frame consists of two fields.

???A frame still shows two fields, so there may be some blurring, but picture quality is generally better.

???A field still shows less picture information so it may be rougher, but there is no blurring.

JPEG (Joint Photographic Experts Group)

This is a system used for compressing/decoding color still pictures. If you select JPEG as the storage system on digital cameras, etc., the data will be compressed to 1/10???1/100 of its original size. The feature of JPEG is less deterioration in picture quality considering the degree of compression.

MP3 (MPEG Audio Layer 3)

An audio compression method that compresses audio to approximately one tenth of its size without any considerable loss of audio quality. You can play MP3 you have recorded onto CD-R and CD-RW.

Pan & Scan/Letterbox

In general, DVD-Video are produced with the intention that they be viewed on a widescreen television (16:9 aspect ratio), so images often don???t fit regular (4:3 aspect ratio) televisions. Two styles of picture, ???Pan & Scan??? and ???Letterbox???, deal with this problem.

Pan & Scan: The sides are cut off so the picture fills the screen.

Letterbox: Black bands appear at the top and bottom of the picture so the picture itself appears in an aspect ratio of 16:9.

Playback control (PBC)

If a Video CD has playback control, you can select scenes and information with menus.

(This unit is compatible with version 2.0 and 1.1.)

Progressive/Interlace

NTSC, the video signal standard, has 480 interlaced (i) scan lines, whereas progressive scanning uses twice the number of scan lines. This is called 480p.

Using progressive output, you can enjoy the high-resolution video recorded on media such as DVD-Video. Your television must be compatible to enjoy progressive video.

Protection

You can prevent accidental deletion by setting writing protection or deletion protection.

Sampling frequency

Sampling is the process of converting the heights of sound wave (analog signal) samples taken at set periods into digits (digital encoding). Sampling frequency is the number of samples taken per second, so larger numbers mean more faithful reproduction of the original sound.

Thumbnail

This refers to a miniature representation of a picture used to display multiple pictures in the form of a list.

TIFF (Tag Image File Format)

This is a system used for compressing/decoding color still pictures. A common format for storing high quality images on digital cameras and other devices.

Specifications

Recordable discs:

DVD-RAM: Ver. 2.0

Ver. 2.1/3x???SPEED DVD-RAM Revision 1.0 Ver. 2.2/5x???SPEED DVD-RAM Revision 2.0

DVD-R:

for General Ver. 2.0

for General Ver. 2.0/4x???SPEED DVD-R Revision 1.0 for General Ver. 2.x/8x???SPEED DVD-R Revision 3.0 for General Ver. 2.x/16x???SPEED DVD-R Revision 6.0 for DL Ver. 3.0

for DL Ver. 3.x/4x???SPEED DVD-R for DL Revision 1.0 DVD-RW:

Ver. 1.1

Ver. 1.x/2x???SPEED DVD-RW Revision 1.0 Ver. 1.x/4x???SPEED DVD-RW Revision 2.0 Ver. 1.x/6x???SPEED DVD-RW Revision 3.0

+R:

Ver. 1.0

Ver. 1.1

Ver. 1.2

Ver. 1.3

for DL Ver. 1.0 +RW:

Ver. 1.1

Ver. 1.2/4x???SPEED

Recording system:

DVD-RAM: DVD Video Recording format

DVD-R: DVD-Video format DVD-R DL (Dual Layer):

DVD-Video format DVD-RW: DVD-Video format +R

+R DL (Double Layer) +RW

Recording time:

Max. 8 hours (using 4.7 GB disc)

Playable discs:

Optical pick-up:

System with 1 lens, 2 integration units

(662 nm wavelength for DVDs, 780 nm wavelength for CDs)

LASER Specification

Class 1 LASER Product

RF converter output:Not provided

The model number and serial number of this product can be found on either the back or the bottom of the unit.

Please note them in the space provided below and keep for future reference.

Power consumption in standby mode: approx. 2.0 W (Shipping condition)

approx. 6.1 W (User setting: Quick Start: On)

Note

Specifications are subject to change without notice.

Mass and dimensions are approximate.

User memo:

DATE OF PURCHASE

DEALER NAME

DEALER ADDRESS

TELEPHONE NUMBER

RQT8314

45

Instalaci??n b??sica

???Visite la p??gina inicial de Panasonic para obtener m??s informaci??n acerca de los m??todos de conexi??n. (S??lo est?? en ingl??s.) http://www.panasonic.com/consumer_electronics/dvd_recorder/dvd_connection.asp

???Antes de hacer la conexi??n, apague todos los equipos y lea los manuales de instrucciones apropiados.

???El equipo perif??rico y los cables opcionales se venden por separado a menos que se indique lo contrario.

n Terminal RF OUT de la unidad

La se??al de imagen y sonido de esta unidad no pasa por el terminal RF OUT hasta el televisor.

Aseg??rese de conectar al televisor uno de estos terminales de la unidad: el terminal AUDIO/VIDEO OUT, el terminal S VIDEO OUT o el terminal COMPONENT VIDEO OUT.

n Cuando la unidad no vaya a utilizarse durante mucho tiempo

Para ahorrar energ??a, desenchufe la unidad de la toma de corriente CA. Esta unidad consume una peque??a cantidad de energ??a aunque se encuentre apagada (aproximadamente 2,0 W).

n Conecte la unidad directamente al televisor

Las se??ales de v??deo enviadas a trav??s de videograbadoras se ver??n afectadas por los sistemas de protecci??n del copyright, y las im??genes no se mostrar??n correctamente en el televisor.

Conexi??n con un televisor y una videograbadora

Esta conexi??n permitir?? utilizar la videograbadora para reproducir y grabar cuando la unidad est?? apagada.

VHF/UHF

RF IN

Televisor

Cable coaxial de 75 ???

3

2

Si el televisor no tiene terminales de audio/v??deo, se necesita un modulador RF

Para disfrutar de una mejor calidad de imagen

n Terminal S VIDEO OUT

Los terminales S VIDEO OUT logran una imagen m??s viva que la del terminal VIDEO OUT. (Los resultados reales dependen del televisor.)

n Terminal COMPONENT VIDEO

OUT

Estos terminales se pueden utilizar para la salida entrelazada o progresiva y pueden proporcionar una imagen m??s clara que la del terminal S VIDEO OUT.

??? Con??ctelos a terminales del mismo color.

RQT8314

48

^ DVD

POWER

Sintonizaci??n autom??tica

Preparaci??n

???Encienda el televisor y seleccione la entrada de v??deo apropiada para las conexiones de esta unidad.

1 Pulse [^ DVD POWER].

Select Language

Seleccione el idioma

S??lection de Langue

English

Espa??ol

Fran??ais

Press ENTER

Pulse ENTER

Appuyer sur ENTER

2 Pulse [e,r] para seleccionar el idioma y pulse [ENTER].

Si se equivoca, pulse [RETURN] para volver a la pantalla anterior.

3 Pulse [e,r] para seleccionar ???TV de

4:3??? o ???TV ancho de 16:9??? y pulse [ENTER].

4 Pulse [e,r] para seleccionar

???Encendido??? o ???Apagado??? y pulse [ENTER].

5 Pulse [e,r] para seleccionar

???Sintonizador??? o ???Entrada??? y pulse [ENTER].

6 Pulse [ENTER] para empezar la sintonizaci??n autom??tica.

n Si el reloj va una hora adelantado o retrasado

1Pulse [SETUP].

2Pulse [e,r] para seleccionar ???Configuraci??n??? y pulse [q].

3Pulse [e,r] para seleccionar ???Fecha y Hora??? y pulse [ENTER].

4Pulse [e,r] para seleccionar ???Ajustar del huso horario??? y pulse [ENTER].

5Pulse [e,r] para seleccionar ??????1??? o ???+1??? y pulse [ENTER].

n Si aparece la pantalla ???Ajuste manual del reloj???

???Se ha producido un error al ajustar el reloj autom??ticamente.

???Se ha seleccionado ???Entrada??? en el paso 5 durante el ajuste. 1 Pulse [w,q] para seleccionar la opci??n que desee modificar y

pulse [e,r] para cambiar el ajuste. 2 Pulse [ENTER].

Selecci??n del tipo de televisor

Si tras haber elegido un tipo de televisor concreto durante el ajuste inicial, conecta un televisor progresivo u otro tipo de televisor distinto justo despu??s de encender la unidad por primera vez, siga los pasos que se indican a continuaci??n. Seleccione la opci??n que corresponda a su televisor.

1 Durante la parada

Pulse [SETUP].

2 Pulse [e,r] para seleccionar ???Pantalla TV??? y pulse [q].

3 Pulse [e,r] para seleccionar ???Tipo TV??? y pulse [ENTER].

??? 480p/480i:

Seleccione ???480p??? si el televisor es compatible con la salida progresiva.

4 Pulse [e,r] para seleccionar la opci??n y pulse [ENTER].

Para salir de la pantalla

Pulse [SETUP].

Para volver a la pantalla anterior

Pulse [RETURN].

RQT8314

49

Grabaci??n de programas de televisi??n

* REC

REC MODE

RAM -R -R DL -RW(V)

??? Puede grabar hasta 99 t??tulos en un disco.

+R +R DL +RW

??? Puede grabar hasta 49 t??tulos en un disco.

1 Pulse [; OPEN/CLOSE] para abrir la bandeja e introducir un disco.

??? Pluse de nuevo el bot??n para cerrar la bandeja.

Ins??rtelo completamente.

n Para hacer una pausa en la grabaci??n

Pulse [h].

Pulse de nuevo para reiniciar la grabaci??n. Tambi??n puede pulsar [* REC] para reiniciar. (El t??tulo no se divide en t??tulos separados.)

n Para detener la grabaci??n

Pulse [g].

??? La grabaci??n, desde el principio hasta el final, se denomina t??tulo.

Para especificar una hora para detener la grabaci??n

???Grabaci??n con una sola pulsaci??n

Durante la grabaci??n

Pulse [* REC] para seleccionar el tiempo de grabaci??n.

n Modo de grabaci??n

En funci??n del contenido que se grabe, los tiempos de grabaci??n pueden ser inferiores a los indicados.

*1 No es posible grabar ni reproducir continuamente desde una cara a la otra en un disco de dos caras.

*2 Cuando ???Tiempo de grab. en el modo EP??? se establece en ???EP- Repr. ??n ampliada (6H)??? en el men?? Setup.

La calidad de sonido es mejor cuando se utiliza ???EP-Repr. ??n ampliada (6H)??? que cuando se utiliza ???EP-Repr. ??n ampliada (8H)???.

*3 No es posible grabar continuamente desde la primera capa a la segunda.

RQT8314

50

2 Pulse [1 2 CH] para seleccionar el canal.

Para seleccionar con los botones numerados:

3 Pulse [REC MODE] para seleccionar el modo de grabaci??n (XP, SP, LP o EP).

4 Pulse [* REC] para iniciar la grabaci??n.

La grabaci??n se realizar?? en el espacio vac??o del disco. Los datos no se sobrescribir??n.

???Durante la grabaci??n no puede cambiar el canal ni el modo de grabaci??n. Durante la pausa puede cambiar el canal o el modo de grabaci??n. Sin embargo, la grabaci??n se realizar?? como un t??tulo separado.

???Puede grabar mientras la unidad est?? en modo de espera de una grabaci??n programada; sin embargo, tenga en cuenta que cuando llegue el momento en que deba iniciarse la grabaci??n programada, se detendr?? cualquier grabaci??n en curso y se iniciar?? esa grabaci??n programada.

Reproducci??n mientras est?? grabando

Puede reproducir un t??tulo grabado previamente.

1Pulse [DIRECT NAVIGATOR] durante la grabaci??n.

2Pulse [e,r,w,q] para seleccionar un t??tulo y

Grabaci??n y pulse [ENTER]. reproducci??n ??? Para detener la reproducci??n

simult??neas Pulse [g].

???Para detener la grabaci??n

Despu??s de parar la reproducci??n

Pulse [DIRECT NAVIGATOR] para salir de la pantalla y pulse [g].

Reproducci??n de discos

1 Inserte un disco (?? p??gina 50).

2 Pulse [q] (PLAY).

RAM -R -R DL -RW(V) +R +R DL +RW -RW(VR)

La reproducci??n se inicia a partir del t??tulo grabado m??s recientemente.

DVD-V DVD-A CD VCD

La reproducci??n se inicia desde el principio del disco.

nCuando aparece una pantalla de men?? en el televisor

DVD-V DVD-A

Pulse [e,r,w,q] para seleccionar la opci??n y pulse [ENTER].

Algunas opciones tambi??n pueden seleccionarse utilizando los botones numerados.

VCD

Pulse los botones numerados para seleccionar la opci??n.

Por ejemplo, 5: [0] ?? [5] 15: [1] ?? [5]

??? Para volver a la pantalla de men??

DVD-V Pulse [DIRECT NAVIGATOR] o [SUB MENU].

DVD-A Pulse [DIRECT NAVIGATOR].

VCD Pulse [RETURN].

Selecci??n de t??tulos grabados para reproducirlos ???Direct Navigator

RAM -R -R DL -RW(V) +R +R DL +RW -RW(VR)

Seleccione en el men?? los t??tulos grabados que desee reproducir.

1 Pulse [DIRECT NAVIGATOR].

2Pulse [e,r,w,q] para seleccionar el t??tulo y pulse [ENTER].

Tambi??n puede seleccionar t??tulos con los botones numerados.

Para salir de la pantalla

Pulse [DIRECT NAVIGATOR].

Operaciones durante la reproducci??n

+RW -RW(VR)

Pulse [AUDIO].

RAM -RW(VR) VCD

Est??reo Mono L Mono R

Principal???SAP

DVD-V DVD-A

Grabaci??n de programas de televisi??n/Reproducci??n de discos

RQT8314

51

Index

Angle. . . . . . . . . . . . . . . . . . . . . . . . . . . . .26

Audio

attribute . . . . . . . . . . . . . . . . . . . . . . .26 language . . . . . . . . . . . . . . . . . . . . . .26 receiving, recording . . . . . . . . . . .19, 38

Change Thumbnail . . . . . . . . . . . . . . . . .29

Channel

adding, deleting . . . . . . . . . . . . . . . . .13 audio . . . . . . . . . . . . . . . . . . . . . . . . .26 captions . . . . . . . . . . . . . . . . . . . . . . .14 Set Channels Automatically . . . . . . . .13

Chasing playback . . . . . . . . . . . . . . . . . .19

Cleaning

disc. . . . . . . . . . . . . . . . . . . . . . . . . . . .6 lens. . . . . . . . . . . . . . . . . . . . . . . . . . . .6 main unit. . . . . . . . . . . . . . . . . . . . . . . .6 Clock settings . . . . . . . . . . . . . . . . . . . . .15

Close First Layer . . . . . . . . . . . . . . . . . . .35 CM Skip. . . . . . . . . . . . . . . . . . . . . . . . . . .23

Connection

amplifier, system component . . . . . . .11 antenna . . . . . . . . . . . . . . . . . . .8, 9, 11 cable box, satellite receiver . . . . . .9, 10 DV IN terminal . . . . . . . . . . . . . . . . . .32 television . . . . . . . . . . . . . . . . . .8, 9, 10 video cassette recorder . . . .8, 9, 10, 32

Copy (playlist) . . . . . . . . . . . . . . . . . . . . .31

Copying

DV automatic recording . . . . . . . . . . .32 from a video cassette recorder. . . . . .32 Manual recording . . . . . . . . . . . . . . . .32 CPRM . . . . . . . . . . . . . . . . . . . . . . . . . . . .44

Create Chapter . . . . . . . . . . . . . . .23, 29, 31 Create DVD Top Menu . . . . . . . . . . . . . . .35 Create playlists . . . . . . . . . . . . . . . . . . . .30

Delete

all titles . . . . . . . . . . . . . . . . . . . . . . . .34 chapter . . . . . . . . . . . . . . . . . . . . .29, 31 chapter in playlist . . . . . . . . . . . . . . . .31 playlist . . . . . . . . . . . . . . . . . . . . . . . .31 title . . . . . . . . . . . . . . . . . . . . . . . . . . .33

Delete Navigator . . . . . . . . . . . . . . . . . . .33 Dialog Enhancer . . . . . . . . . . . . . . . . . . .27 Direct Navigator . . . . . . . . . . . . . . . . .22, 28

Divide Title. . . . . . . . . . . . . . . . . . . . . . . . 29

DNR . . . . . . . . . . . . . . . . . . . . . . . . . . . . . 27

DV automatic recording . . . . . . . . . . . . . 32

DVD-RAM, DVD-R, DVD-R DL, DVD-RW, +R, +R DL, +RW. . . . . . . . . . . . . . . . . . . . . 4

Enter name

disc . . . . . . . . . . . . . . . . . . . . . . . . . . 34 playlist . . . . . . . . . . . . . . . . . . . . . . . . 31 title. . . . . . . . . . . . . . . . . . . . . . . . 20, 29

Finalize. . . . . . . . . . . . . . . . . . . . . . . . 35, 44 Flexible Recording . . . . . . . . . . . . . . . . . 19 Format disc . . . . . . . . . . . . . . . . . . . . . . . 34

FR (Flexible Recording) Mode . . . . . . . . 17

FUNCTIONS window. . . . . . . . . . . . . . . . 27

JPEG . . . . . . . . . . . . . . . . . . . . . . . . . 25, 44

Language

audio . . . . . . . . . . . . . . . . . . . . . . . . . 26 on-screen . . . . . . . . . . . . . . . . . . . . . 38 soundtrack. . . . . . . . . . . . . . . . . . . . . 26 subtitle. . . . . . . . . . . . . . . . . . . . . . . . 26

Menu

MP3. . . . . . . . . . . . . . . . . . . . . . . . . . 24 on-screen . . . . . . . . . . . . . . . . . . . . . 26 Pictures . . . . . . . . . . . . . . . . . . . . . . . 25 Setup. . . . . . . . . . . . . . . . . . . . . . . . . 36

Mode

recording . . . . . . . . . . . . . . . . . . . . . . 17 still mode . . . . . . . . . . . . . . . . . . . . . . 37 MP3 . . . . . . . . . . . . . . . . . . . . . . . . . . 24, 44

Noise reduction (NR)

DNR . . . . . . . . . . . . . . . . . . . . . . . . . 27

Line-in NR . . . . . . . . . . . . . . . . . . . . . 27

On-screen

language . . . . . . . . . . . . . . . . . . . . . . 38 menus . . . . . . . . . . . . . . . . . . . . . . . . 26 status messages . . . . . . . . . . . . . . . . 27

PCM Down Conversion . . . . . . . . . . . . . .38

Picture . . . . . . . . . . . . . . . . . . . . . . . . . . .27

Playlist . . . . . . . . . . . . . . . . . . . . . . . . . . .30

Progressive . . . . . . . . . . . . . . . . . . . .27, 44

Properties

playlist . . . . . . . . . . . . . . . . . . . . . . . .31 title . . . . . . . . . . . . . . . . . . . . . . . . . . .29

Protection

cartridge. . . . . . . . . . . . . . . . . . . . . . .34 disc. . . . . . . . . . . . . . . . . . . . . . . . . . .34 title . . . . . . . . . . . . . . . . . . . . . . . . . . .29

Quick Start . . . . . . . . . . . . . . . . . . . . .12, 36

Quick View . . . . . . . . . . . . . . . . . . . . . . . .23

Ratings . . . . . . . . . . . . . . . . . . . . . . . . . . .37

Recording

Flexible Recording . . . . . . . . . . . . . . .19 from a video cassette recorder . . . . .32 mode . . . . . . . . . . . . . . . . . . . . . . . . .17 scheduled. . . . . . . . . . . . . . . . . . . . . .20 Repeat play. . . . . . . . . . . . . . . . . . . . . . . .26

Restore default settings . . . . . . . . . . . . .36 Resume play function . . . . . . . . . . . . . . .23

Scheduled recording . . . . . . . . . . . . . . . .20

Setup menu . . . . . . . . . . . . . . . . . . . . . . .36 Shorten Title. . . . . . . . . . . . . . . . . . . . . . .29

Signal Source (RF IN) . . . . . . . . . . . . . . .13 Simultaneous rec and play . . . . . . . . . . .19

Soundtrack . . . . . . . . . . . . . . . . . . . . . . . .26 Status messages . . . . . . . . . . . . . . . . . . .27 Subtitle . . . . . . . . . . . . . . . . . . . . . . . . . . .26

Thumbnail . . . . . . . . . . . . . . . . . . . . . . . .29

TIFF . . . . . . . . . . . . . . . . . . . . . . . . . . .25, 44

Time Slip. . . . . . . . . . . . . . . . . . . . . . . . . .23

Transfer. . . . . . . . . . . . . . . . . . . . . . . . . . .27

TV Type. . . . . . . . . . . . . . . . . . . . . . . . . . .14

V. Surround Sound. . . . . . . . . . . . . . . . . .27

Manufactured under license from Dolby Laboratories. ???Dolby??? and the double-D symbol are trademarks of Dolby Laboratories.

???DTS??? and ???DTS 2.0 + Digital Out??? are trademarks of Digital Theater Systems, Inc.

Apparatus Claims of U.S. Patent Nos. 4,631,603, 4,577,216, and 4,819,098, licensed for limited viewing uses only.

This product incorporates copyright protection technology that is protected by method claims of certain U.S. patents and other intellectual property rights owned by Macrovision Corporation and other rights owners. Use of this copyright protection technology must be authorized by Macrovision Corporation, and is intended for home and other limited viewing uses only unless otherwise authorized by Macrovision Corporation. Reverse engineering or disassembly is prohibited.

MPEG Layer-3 audio decoding technology licensed from Fraunhofer IIS and Thomson multimedia.

-If you see this symbol-

Information on Disposal in other Countries outside the

European Union

This symbol is only valid in the European Union. If you wish to discard this product, please contact your local authorities or dealer and ask for the correct method of disposal.