AAge limit for BD-Video viewing . . . . . . . . . . . . . . . . . . . . . . . 21 Angle . . . . . . . . . . . . . . . . . . . . . . . . . . . . . . . . . . . . . . . . . . . . 19
Audio
Attribute . . . . . . . . . . . . . . . . . . . . . . . . . . . . . . . . . . . . . . . . 19 Changing audio . . . . . . . . . . . . . . . . . . . . . . . . . . . . . . . . . . 13 Channel . . . . . . . . . . . . . . . . . . . . . . . . . . . . . . . . . . . . . . . . 19 Language . . . . . . . . . . . . . . . . . . . . . . . . . . . . . . . . . . . . 19, 21
AVCHD . . . . . . . . . . . . . . . . . . . . . . . . . . . . . . . . . . . . . . . . . . . 29 BBD-J . . . . . . . . . . . . . . . . . . . . . . . . . . . . . . . . . . . . . . . . . . . . . 29 CChapter. . . . . . . . . . . . . . . . . . . . . . . . . . . . . . . . . . . . . . . . . . . 15
Cleaning
Disc. . . . . . . . . . . . . . . . . . . . . . . . . . . . . . . . . . . . . . . . . . . . 27 Main unit . . . . . . . . . . . . . . . . . . . . . . . . . . . . . . . . . . . . . . . . 27
Connection
Amplifier/Receiver . . . . . . . . . . . . . . . . . . . . . . . . . . . . . . 9, 10
HDMI. . . . . . . . . . . . . . . . . . . . . . . . . . . . . . . . . . . . . . . . . . 8, 9
DDialog Enhancer . . . . . . . . . . . . . . . . . . . . . . . . . . . . . . . . . . . 20
Direct Navigator . . . . . . . . . . . . . . . . . . . . . . . . . . . . . . . . 15, 16
Dolby Digital . . . . . . . . . . . . . . . . . . . . . . . . . . . . . . . . . . . 19, 22
Dolby Digital Plus . . . . . . . . . . . . . . . . . . . . . . . . . . . . . . . 19, 22
Dolby TrueHD . . . . . . . . . . . . . . . . . . . . . . . . . . . . . . . . . . 19, 22
DTS . . . . . . . . . . . . . . . . . . . . . . . . . . . . . . . . . . . . . . . . . . . 19, 22
DTS-HD. . . . . . . . . . . . . . . . . . . . . . . . . . . . . . . . . . . . . . . . 19, 22
EEZ SyncTM ???HDAVI ControlTM??? . . . . . . . . . . . . . . . . . . . . . . . . . 18
FFinalize . . . . . . . . . . . . . . . . . . . . . . . . . . . . . . . . . . . . . . . . . 4, 29
HHDCP . . . . . . . . . . . . . . . . . . . . . . . . . . . . . . . . . . . . . . . . . . . . 29
HDMI. . . . . . . . . . . . . . . . . . . . . . . . . . . . . . . . . . . . . . . . . 8, 9, 29
JJPEG. . . . . . . . . . . . . . . . . . . . . . . . . . . . . . . . . . . . . . . . 5, 16, 29
LLanguage
Audio . . . . . . . . . . . . . . . . . . . . . . . . . . . . . . . . . . . . . . . 19, 21 Code list . . . . . . . . . . . . . . . . . . . . . . . . . . . . . . . . . . . . . . . . 28 On-screen. . . . . . . . . . . . . . . . . . . . . . . . . . . . . . . . . . . . . . . 22 Soundtrack . . . . . . . . . . . . . . . . . . . . . . . . . . . . . . . . . . . 19, 21 Subtitle . . . . . . . . . . . . . . . . . . . . . . . . . . . . . . . . . . . . . . 19, 21
LPCM . . . . . . . . . . . . . . . . . . . . . . . . . . . . . . . . . . . . . . . . . 19, 29
MMaintenance. . . . . . . . . . . . . . . . . . . . . . . . . . . . . . . . . . . . . . . 27
Menu
On-screen. . . . . . . . . . . . . . . . . . . . . . . . . . . . . . . . . . . . . . . 19
Pop-up . . . . . . . . . . . . . . . . . . . . . . . . . . . . . . . . . . . . . . . . . 15
Setup . . . . . . . . . . . . . . . . . . . . . . . . . . . . . . . . . . . . . . . . . . 21
Sub . . . . . . . . . . . . . . . . . . . . . . . . . . . . . . . . . . . . . . . . . 15, 17
MP3. . . . . . . . . . . . . . . . . . . . . . . . . . . . . . . . . . . . . . . . . 5, 16, 29
NNoise reduction (NR)
DNR . . . . . . . . . . . . . . . . . . . . . . . . . . . . . . . . . . . . . . . . . . . . 20 Integrated DNR . . . . . . . . . . . . . . . . . . . . . . . . . . . . . . . . 14, 20 3D-NR . . . . . . . . . . . . . . . . . . . . . . . . . . . . . . . . . . . . . . . 14, 20
OOff Timer . . . . . . . . . . . . . . . . . . . . . . . . . . . . . . . . . . . . . . . . . . 21
On-screen
Language . . . . . . . . . . . . . . . . . . . . . . . . . . . . . . . . . . . . . . . 22 Menu . . . . . . . . . . . . . . . . . . . . . . . . . . . . . . . . . . . . . . . . . . . 19 Status messages . . . . . . . . . . . . . . . . . . . . . . . . . . . . . . . . . . 13
PPCM Down Conversion . . . . . . . . . . . . . . . . . . . . . . . . . . . . . . 22 Picture quality adjustment . . . . . . . . . . . . . . . . . . . . . . . . 14, 20 Playlist . . . . . . . . . . . . . . . . . . . . . . . . . . . . . . . . . . . . . . . . . . . 15 Pop-up menu . . . . . . . . . . . . . . . . . . . . . . . . . . . . . . . . . . . . . . 15 Progressive . . . . . . . . . . . . . . . . . . . . . . . . . . . . . . . . . . . . 20, 29
Properties
Program. . . . . . . . . . . . . . . . . . . . . . . . . . . . . . . . . . . . . . . . . 15 Still picture. . . . . . . . . . . . . . . . . . . . . . . . . . . . . . . . . . . . . . . 17
RRatings level . . . . . . . . . . . . . . . . . . . . . . . . . . . . . . . . . . . . . . . 21 Re-master . . . . . . . . . . . . . . . . . . . . . . . . . . . . . . . . . . . . . . . . . 14 Remote control code . . . . . . . . . . . . . . . . . . . . . . . . . . . . . . . . 11 Repeat play. . . . . . . . . . . . . . . . . . . . . . . . . . . . . . . . . . . . . . . . 20 Restore Default Settings . . . . . . . . . . . . . . . . . . . . . . . . . . . . . 21 Resume play function . . . . . . . . . . . . . . . . . . . . . . . . . . . . . . . 12
SSetup menu. . . . . . . . . . . . . . . . . . . . . . . . . . . . . . . . . . . . . . . . 21
Slideshow
CD-R/RW . . . . . . . . . . . . . . . . . . . . . . . . . . . . . . . . . . . . . . . . 17 DVD-Audio. . . . . . . . . . . . . . . . . . . . . . . . . . . . . . . . . . . . . . . 19 DVD-RAM . . . . . . . . . . . . . . . . . . . . . . . . . . . . . . . . . . . . . . . 17
Soundtrack . . . . . . . . . . . . . . . . . . . . . . . . . . . . . . . . . . . . . . . . 19 Status messages . . . . . . . . . . . . . . . . . . . . . . . . . . . . . . . . . . . 13 Still pictures . . . . . . . . . . . . . . . . . . . . . . . . . . . . . . . . . . . . . . . 16 Subtitle . . . . . . . . . . . . . . . . . . . . . . . . . . . . . . . . . . . . . . . . . . . 19 TTime Slip . . . . . . . . . . . . . . . . . . . . . . . . . . . . . . . . . . . . . . . . . . 13 Transfer. . . . . . . . . . . . . . . . . . . . . . . . . . . . . . . . . . . . . . . . . . . 20 VV. Surround Sound . . . . . . . . . . . . . . . . . . . . . . . . . . . . . . . . . 20


 Packaged discs
 Recorded discs

 Regarding
 Regarding
 Note about using a DualDisc
 Tips for making MP3/JPEG files
 Discs that cannot be played

 Remote control
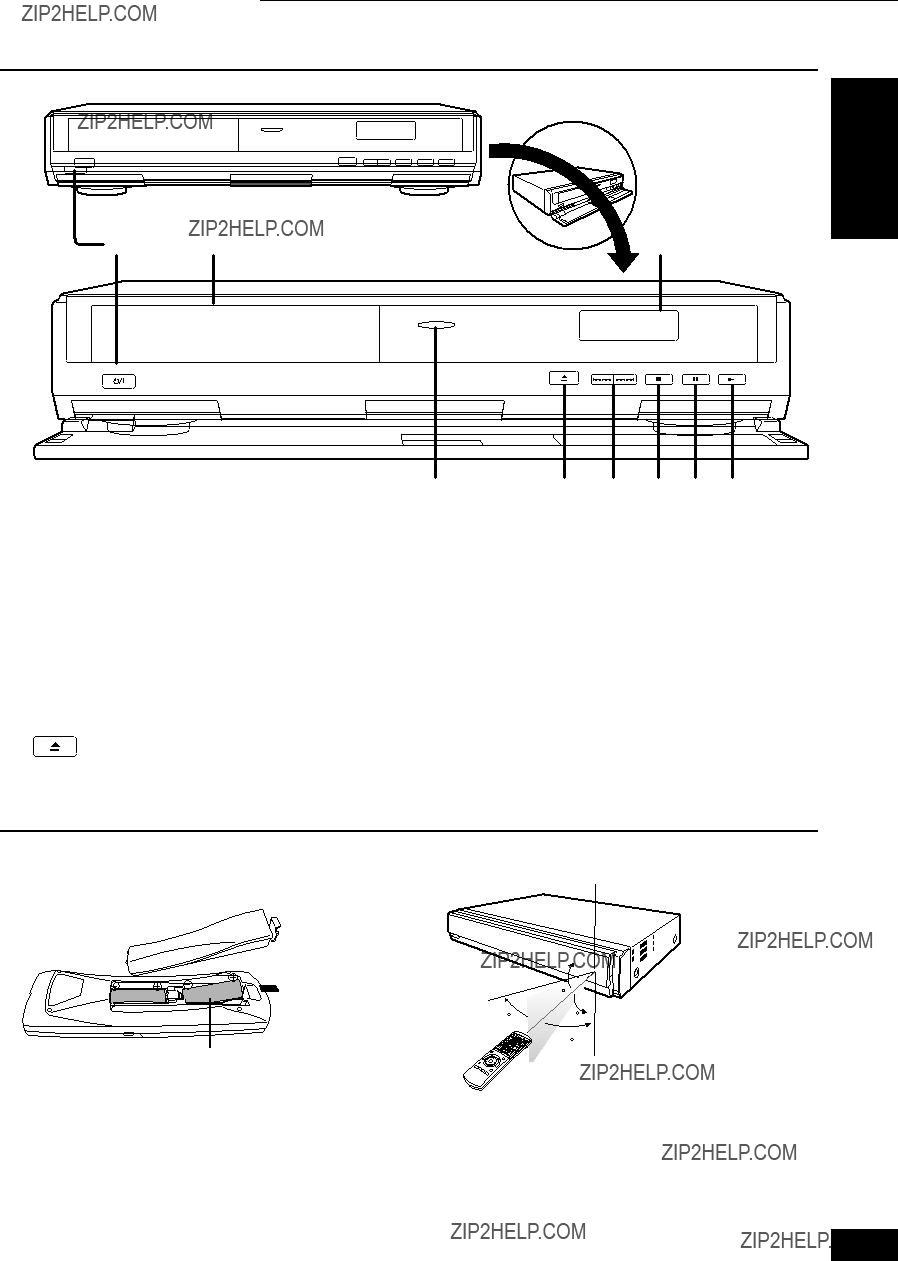

 Main unit
 POWER button (
 Search / Skip
 Stop (
 Pause (
 Start play (
 Using remote control
 ???
???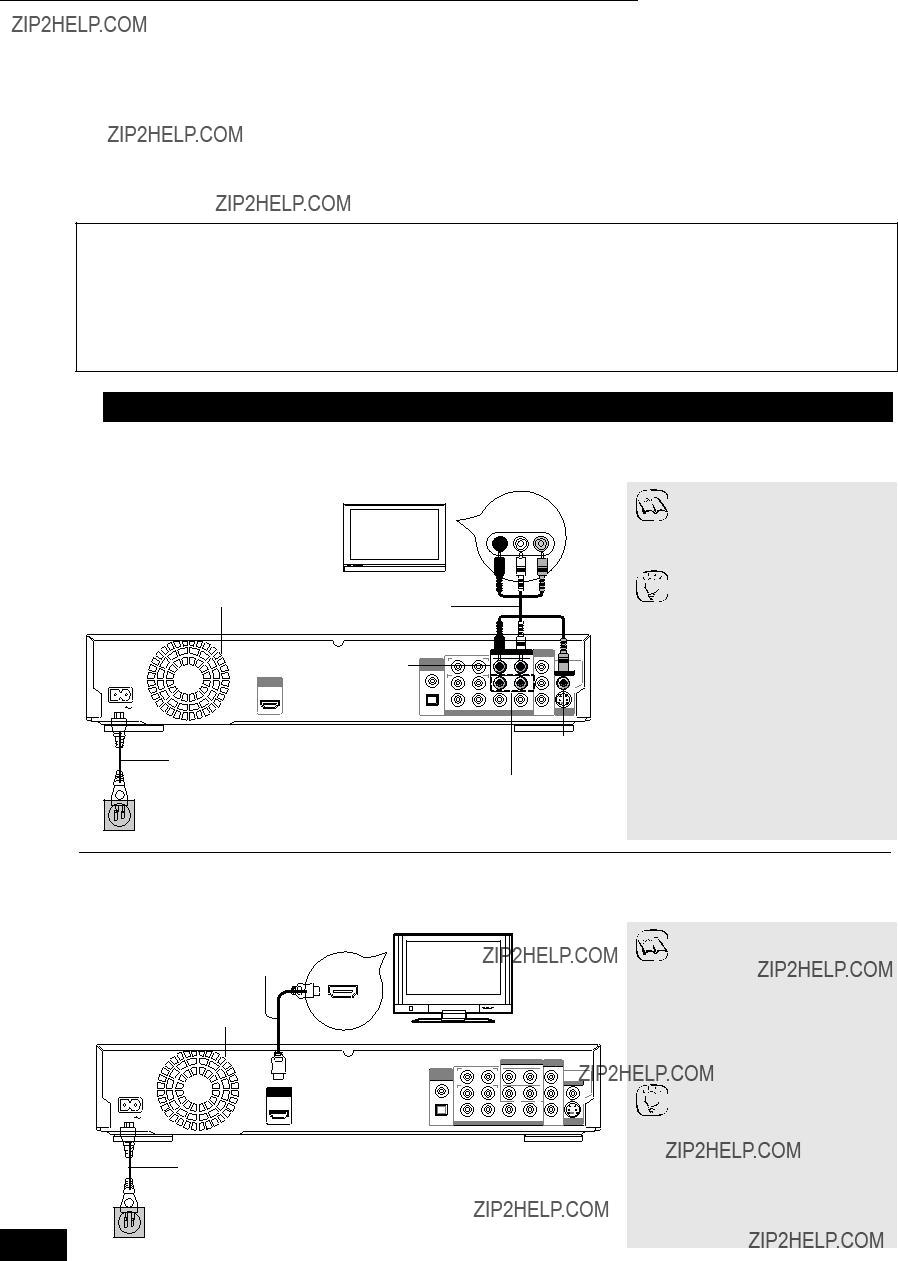

 Basic connections

 Connection methods for using other video terminals


 Connecting an amplifier/receiver (excluding HDMI connection)
 Setting the television operation
 When other Panasonic products respond to this remote control
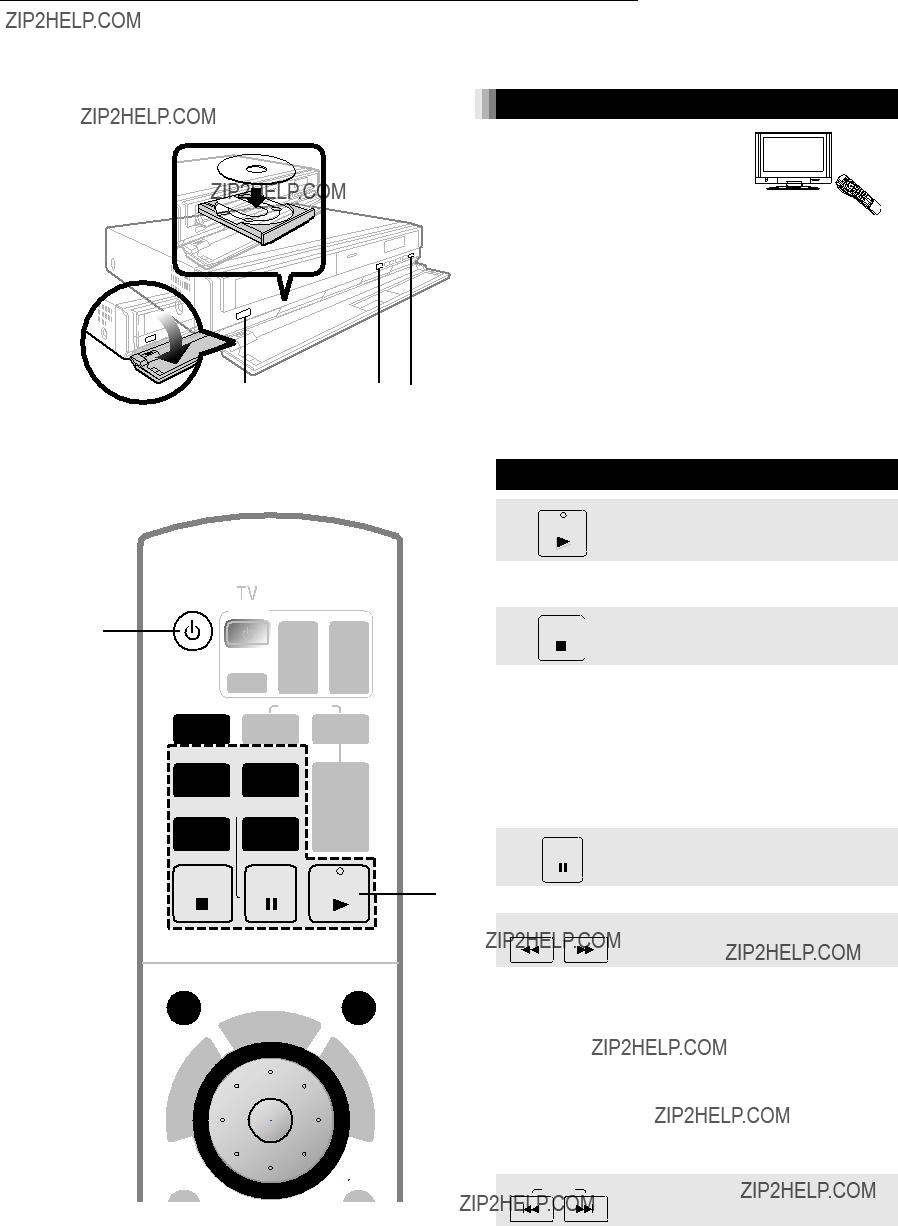

 Basic playback control
 SKIP
SKIP 


 Other operations during play

 Adjusting the picture
 Reproducing more natural audio

 Showing


 Playing programs with the menu screen
  To display the title properties (recording date, etc.)


 Playing MP3 files
 Playing still pictures

 Useful functions during still picture play

 What is EZ Sync ???HDAVI Control????
 What you can do with ???HDAVI Control???
 Easy control only with VIERA remote control
 ENTER
ENTER

 What is
 What you can change with

 Setup menu operations
 Summary of settings
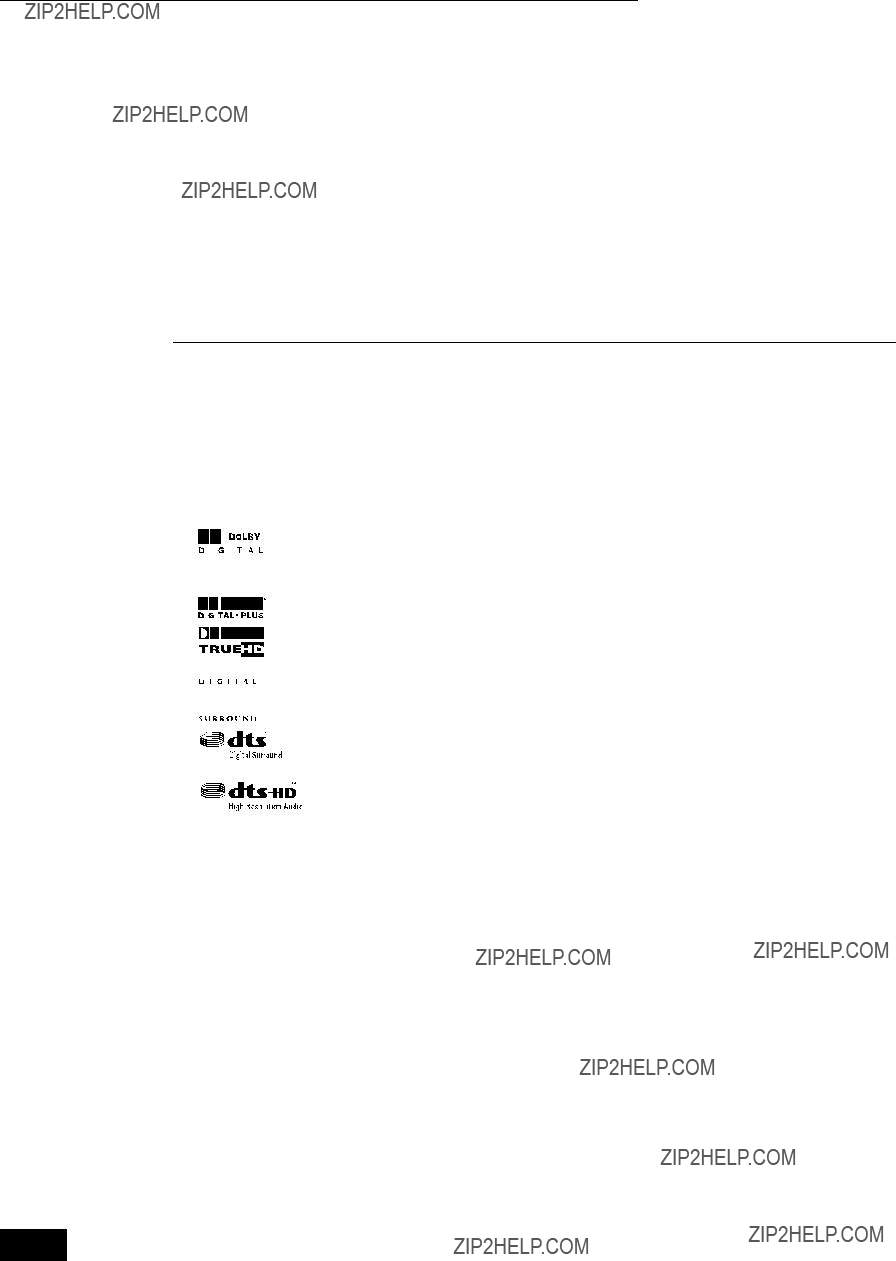


 Changing the speaker setting to suit your speakers


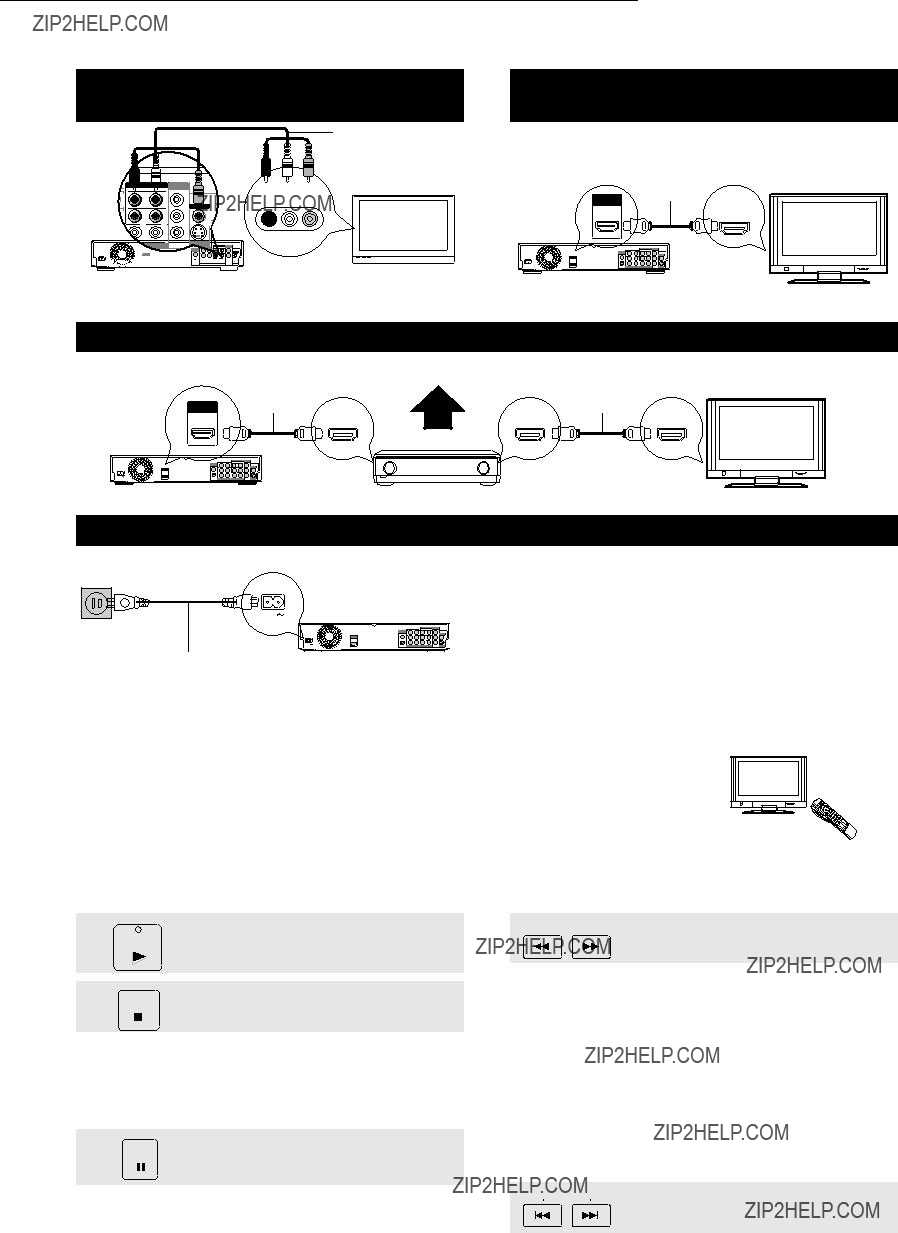


 AUDIO/VIDEO IN