U.S.A.
PANASONIC CONSUMER ELECTRONICS COMPANY,
DIVISION OF MATSUSHITA ELECTRIC CORPORATION OF AMERICA One Panasonic Way, Secaucus, New Jersey 07094
PANASONIC SALES COMPANY,
DIVISION OF MATSUSHITA ELECTRIC OF PUERTO RICO, INC.
Ave. 65 de infanteria, Km. 9.5, San Gabriel Industrial Park
Carolina, Puerto Rico 00985
PANASONIC AUTO PRODUCTS
LIMITED WARRANTY
LIMITED WARRANTY COVERAGE
If your product does not work properly because of defects in materials and workmanship.
Panasonic Consumer Electronics Company or Panasonic Sales Company (collectively referred to as ???the warrantor???) will, for the length of the peri- od indicated in the chart below, which starts with the date of original pur- chase (???warranty period???), at its option either (a) repair your product with new or refurbished parts, or (b) replace it with a new or refurbished product. The decision to repair or replace will be made by the warrantor.
During the ???Labor??? warranty period, there will be no charge for labor. During the ???Parts??? warranty period, there will be no charge for parts. You must carry-in or mail-in your product during the warranty period. If non- rechargeable batteries are included, they are not warranted. This warranty only applies to products purchased and serviced in the United States or Puerto Rico. This warranty is extended only to the original purchaser of a new product which was not sold ???as is???. A purchase receipt or other proof of the original purchase date is required for warranty service.
CARRY-IN OR MAIL-IN SERVICE
For Carry-In or Mail-In Service in the United States, call 1-800-211-PANA (7262) or visit
Panasonic Web Site: http://www.panasonic.com
For assistance in Puerto Rico, call Panasonic Sales Company (787)-750- 4300 or fax (787)-768-2910.
LIMITED WARRANTY LIMITS AND EXCLUSIONS
This warranty ONLY COVERS failures due to defects in materials and workmanship, and DOES NOT COVER normal wear and tear or cosmetic damage. The warranty ALSO DOES NOT COVER damages which occurred during shipment, failures which are caused by products not supplied by the warrantor, failures which result from accident, misuse, abuse, neg- lect, mishandling, misapplication, alteration, faulty installation, set-up adjustment, maladjustment of consumer control, improper maintenance, improper antenna, inadequate signal reception or pickup, power line surge, improper voltage supply, lightning, modification, commercial use (such as use in hotels, offices, restaurants, or other business uses) or rental use of the product, or service by anyone other than the technician from Factory Servicenter or other authorized service centers, or damage that is attributable to acts of God.
THERE ARE NO EXPRESS WARRANTIES EXCEPT AS LISTED UNDER
???LIMITED WARRANTY COVERAGE???. THE WARRANTOR IS NOT LIABLE
FOR INCIDENTAL OR CONSEQUENTIAL DAMAGES RESULTING FROM
THE USE OF THIS PRODUCT, OR ARISING OUT OF ANY BREACH OF THIS WARRANTY. (As examples, this excludes damages for lost time, cost of having someone remove or re-install an installed unit if applica- ble, travel to and from the sevicer, and loss of media, data or other mem- ory contents. The items listed are not exclusive, but are for illustration only.) ALL EXPRESS AND IMPLIED WARRANTIES, INCLUDING THE
WARRANTY OF MERCHANTABILITY, ARE LIMITED TO THE PERIOD OF
THE LIMITED WARRANTY.
Some states do not allow the exclusion or limitation of incidental or con- sequential damages, or limitations on how long an implied warranty lasts, so the exclusions may not apply to you.
This warranty gives you specific legal rights and you may also have other rights which vary from state to state. If a problem with this product develops during or after the warranty period, you may contact your deal- er or Servicenter. If the problem is not handled to your satisfaction, then write to warrantor???s Consumer Affairs Department at the addresses of the warrantor.
PARTS AND SERVICE WHICH ARE NOT COVERED BY THIS LIMITED
WARRANTY ARE YOUR RESPONSIBILITY.
Customer???s Record
Model
No.
Serial
No.
Dealer???s
No.
Code
No.
Dealer???s
Address
Date of
Purchase
CANADA
Panasonic Canada Inc.
5770 Ambler Drive, Mississauga Ontario L4W 2T3
PANASONIC PRODUCT LIMITED WARRANTY
Panasonic Canada Inc. warrants this product to be free from defects in materials and workmanship and agrees to remedy any such defect for a period as stated below from the date of original purchase.
CAR AUDIO PRODUCT ??? ONE (1) YEAR, PARTS AND LABOUR
(The labour to install or remove the product is not warranted)
LIMITATIONS AND EXCLUSIONS
This warranty does not apply to products purchased outside Canada or to any product which has been improperly installed, subjected to usage for which the product was not designed, misused or abused, damaged dur- ing shipping, or which has been altered or repaired in any way that affects the reliability or detracts from the performance, nor does it cover any product which is used commercially. Dry cell batteries are also excluded from coverage under this warranty.
This warranty is extended to the original end user purchaser only. A pur- chase receipt or other proof of the original purchase date is required before warranty service is performed.
THIS EXPRESS, LIMITED WARRANTY IS IN LIEU OF ALL OTHER WAR-
RANTIES, EXPRESS OR IMPLIED, INCLUDING ANY IMPLIED WAR-
RANTIES OF MERCHANTABILITY AND FITNESS FOR A PARTICULAR
PURPOSE.
IN NO EVENT WILL PANASONIC CANADA INC. BE LIABLE FOR ANY
SPECIAL, INDIRECT OR CONSEQUENTIAL DAMAGES.
In certain instances, some jurisdictions do not allow the exclusion or lim- itation of incidental or consequential damages, or the exclusion of implied warranties, so the above limitations and exclusions may not be applicable.
IF YOU SHIP THE PRODUCT TO A SERVICENTRE
Carefully pack and send prepaid, adequately insured and preferably in the original carton.
Include details of the defect claimed, and proof of the date of original purchase.
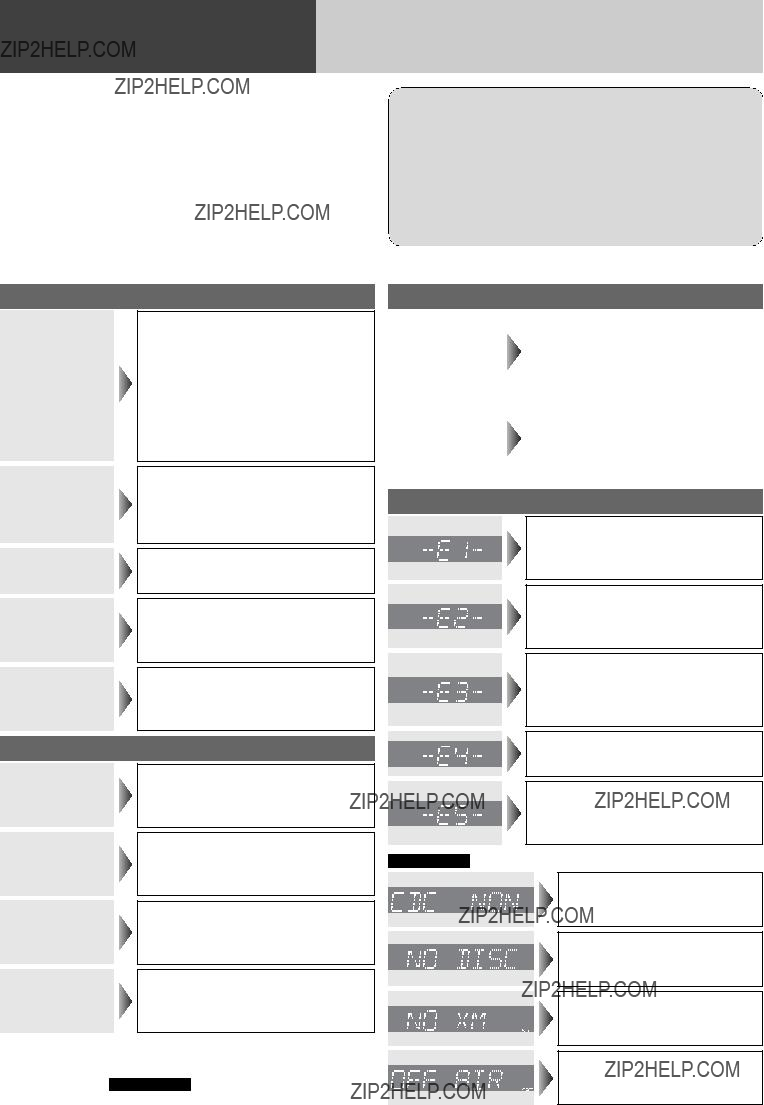
 Warning
 Caution
 Caution


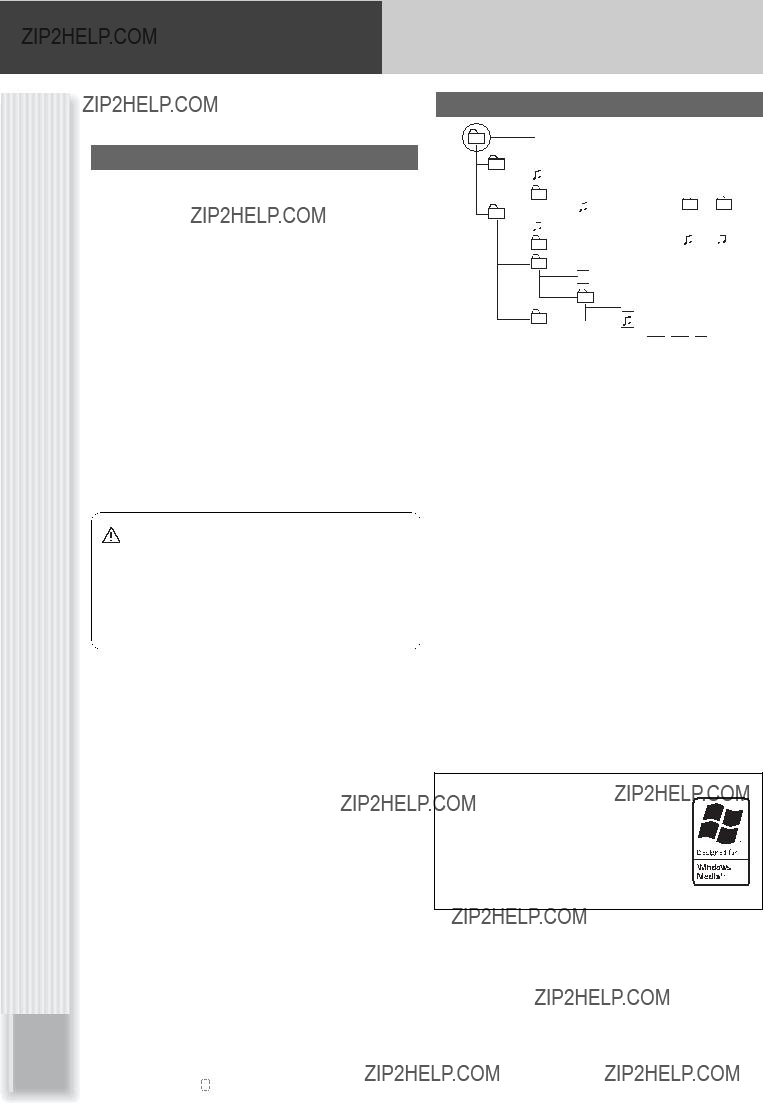
 Notes on CD/CD Media


 ).
). r
r t
t
 y
y
 ACC
ACC ON
ON (clock display)
 Minutes blinks
 w q
w q 2
2
 Warning
 Caution
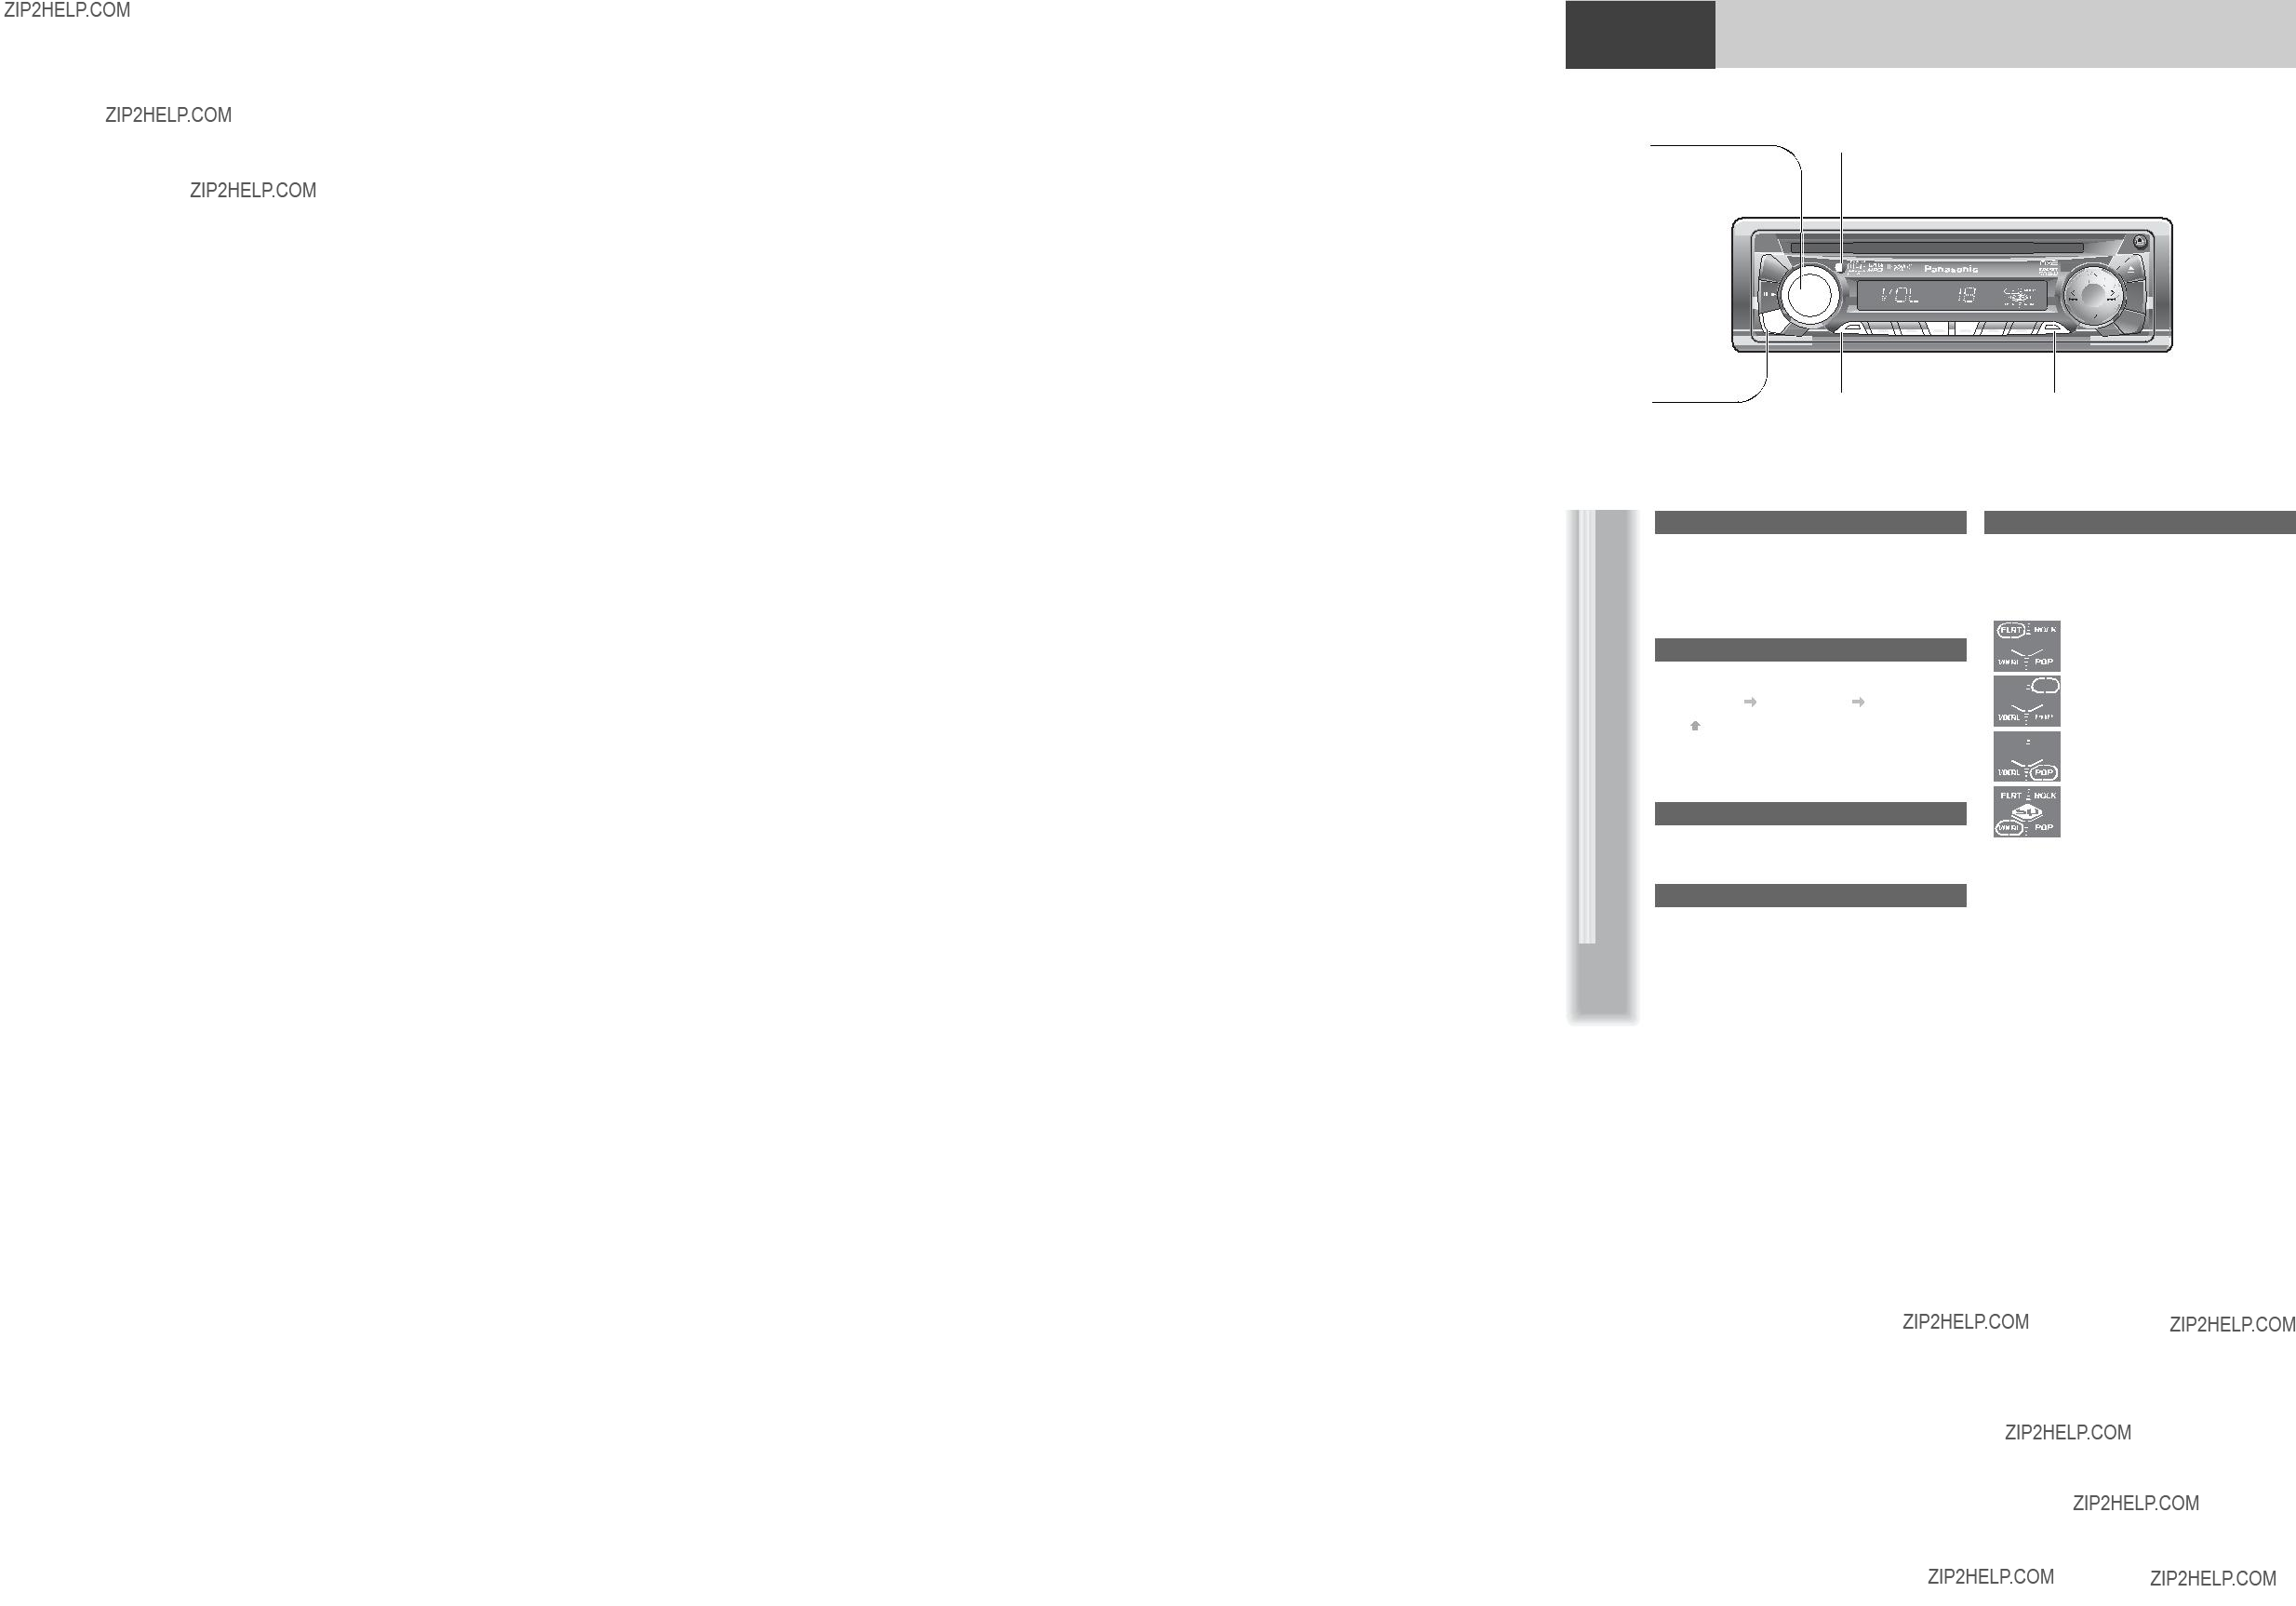

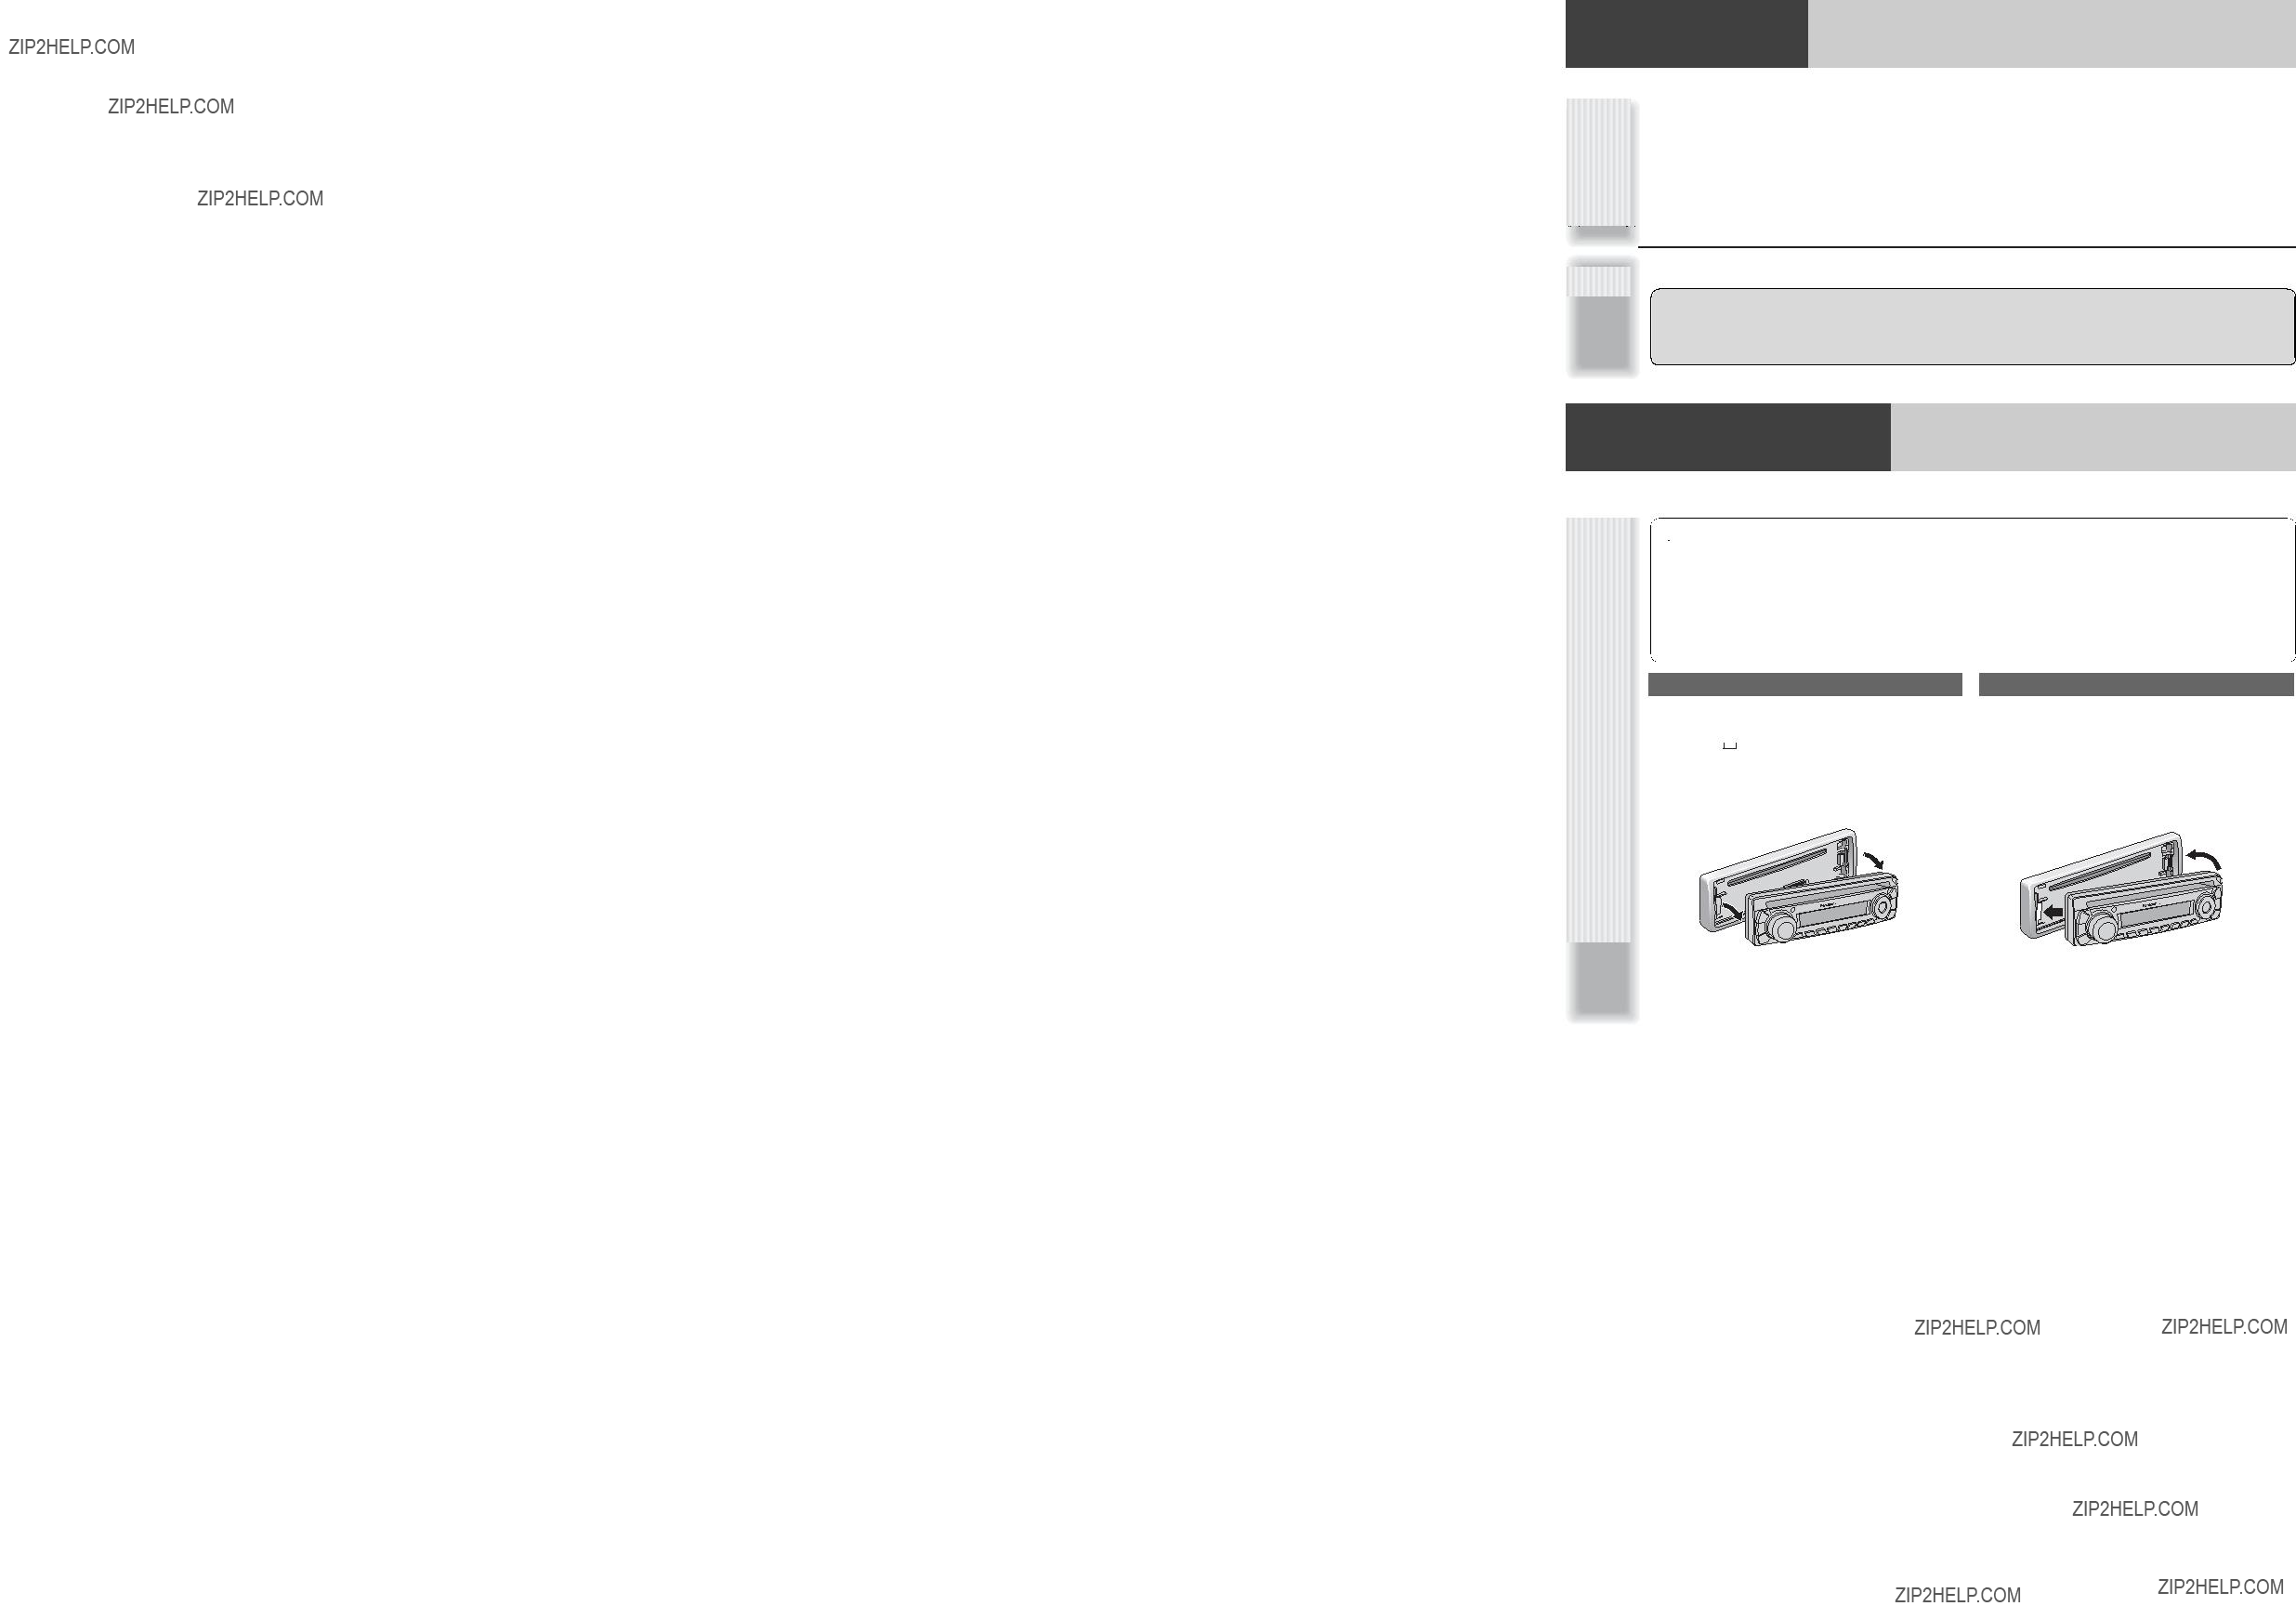
 General Operations


 does not emphasize any part. (Default)


 (ROCK) speedy and heavy sound:


 exaggerates bass and treble.


 (POP)
(POP) 


 slightly emphasizes bass and treble.


 emphasizes middle tone and slightly empha-
  sizes treble.

 Radio Source Display


 Caution

 indicator lights.
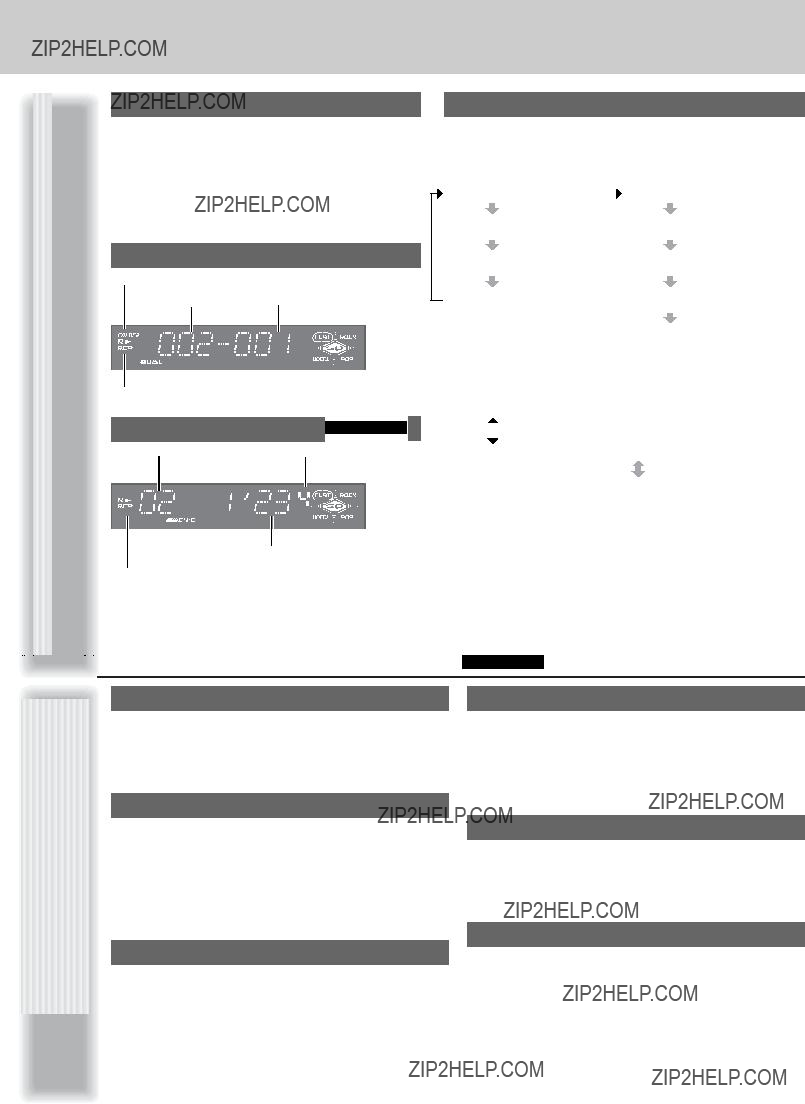

 Player Source Display


 Volume
 Bass
Bass Treble
 Balance
 Fader
Fader Subwoofer Level
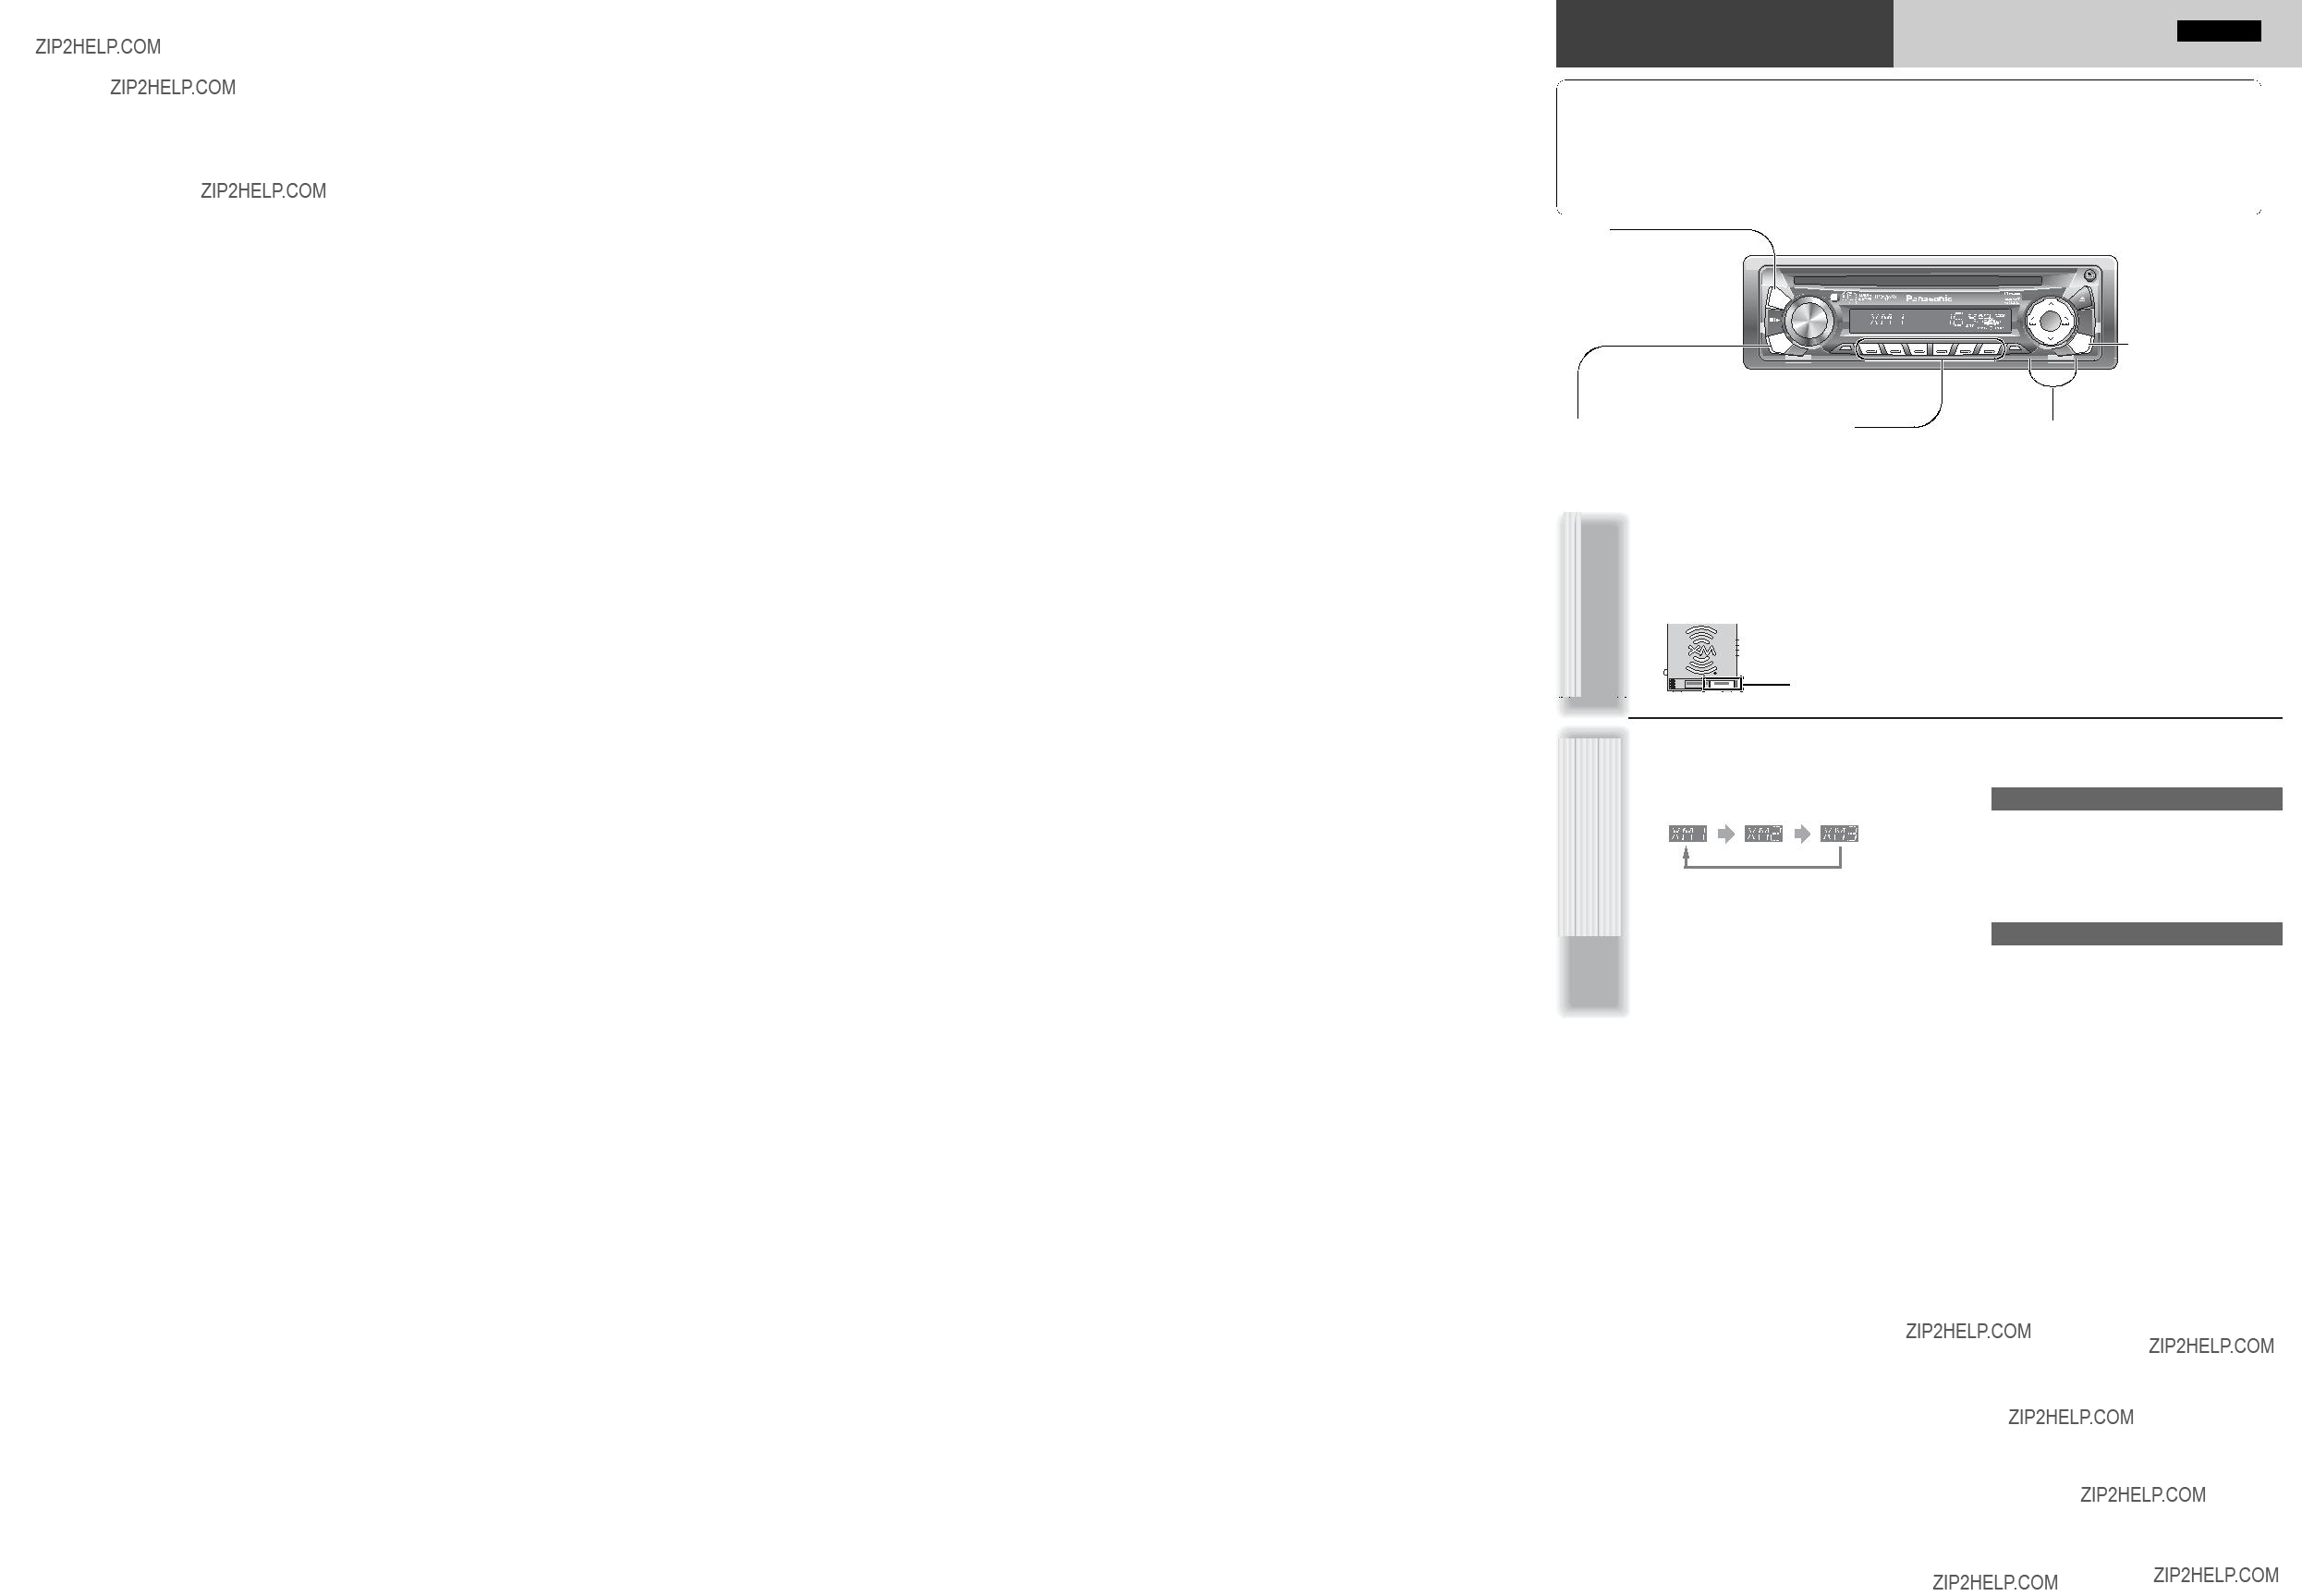
 Getting Started


 (RADIO ID display)

 XM Satellite Radio Source Display


 Category Setting


 Warning
 Caution


 Warning