Contents
Safety Information(Part 15 of the FCC Rules) . . . . . . . . . . . . . . . . . page 2 Accessories . . . . . . . . . . . . . . . . . . . . . . . . . . . . . . . . . . . . . . . . . . . . . . . 3 Customer Services Directory. . . . . . . . . . . . . . . . . . . . . . . . . . . . . . . . . . 4 Limited Warranty. . . . . . . . . . . . . . . . . . . . . . . . . . . . . . . . . . . . . . . . . . . 5 Contents . . . . . . . . . . . . . . . . . . . . . . . . . . . . . . . . . . . . . . . . . . . . . . . . . 6
??? Power and Sound Controls . . . . . . . . . . . . . . . . . . . . . . . . . . . . . . 7
Power, volume, mute, display change, AUX, SQ setting, audio modes (Bass/Treble/Balance/Fader)
??? Clock Adjustment . . . . . . . . . . . . . . . . . . . . . . . . . . . . . . . . . . . 10
Initial time, time reset
??? Radio . . . . . . . . . . . . . . . . . . . . . . . . . . . . . . . . . . . . . . . . . . . 11
Radio mode, band, manual tuning, seek tuning, preset station setting, preset station calling, Weather Band Stations
??? CD Player . . . . . . . . . . . . . . . . . . . . . . . . . . . . . . . . . . . . . . . . 14
Disc insert and playback, stop and disc eject, listening to a CD, CD player mode, display change, track selection, track search, random play, scan play, repeat play,pause
??? AUX (Auxiliary Input Mode) . . . . . . . . . . . . . . . . . . . . . . . . . . . . 16
Before using the portable audio device, connecting with the portable audio device, listening to the portable audio device, display change
??? Troubleshooting . . . . . . . . . . . . . . . . . . . . . . . . . . . . . . . . . . . . 18
Troubleshooting tips, Error Display Messages
??? Maintenance . . . . . . . . . . . . . . . . . . . . . . . . . . . . . . . . . . . . . . 21
Care of the unit, notes on discs, notes on CD-R/RW
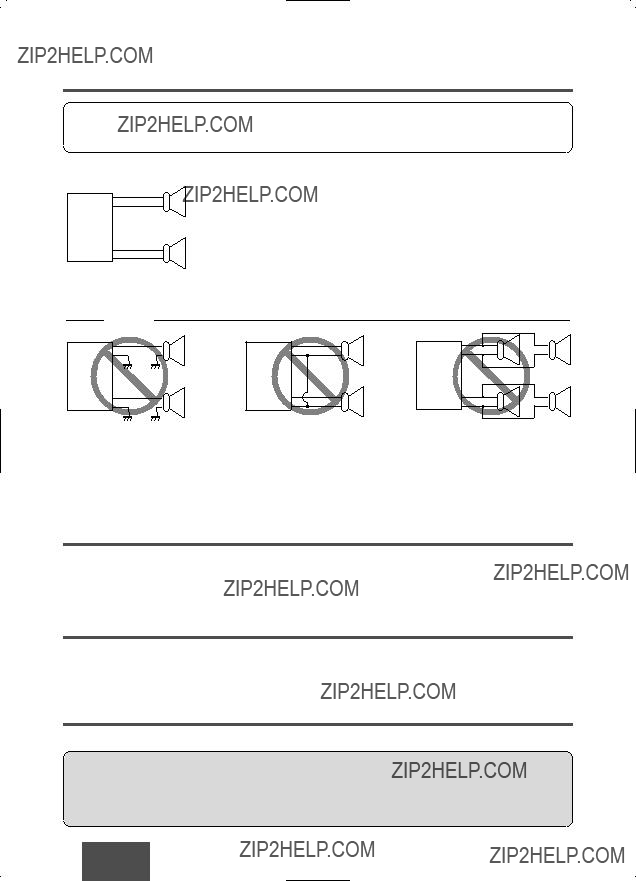
??? Speaker Connections. . . . . . . . . . . . . . . . . . . . . . . . . . . . . . . . . 22
??? Installation Guide . . . . . . . . . . . . . . . . . . . . . . . . . . . . . . . . . . . 23
Installation hardware, overview, required tools, dashboard specifications, identify all leads, connect all leads, final installation, final checks, preparation, to remove the unit
??? Electrical Connections . . . . . . . . . . . . . . . . . . . . . . . . . . . . . . . . 27
Cautions, wiring diagram
??? Specifications . . . . . . . . . . . . . . . . . . . . . . . . . . . . . . . . . . . . . 28
6
 Warning
 Caution
 Caution


 ACC
ACC ON
ON Caution


 (Hour blinks)
 (Hour set) Press
  (Minute blinks)
 (Minute set) Press
  (Completed)
 Caution
 Warning
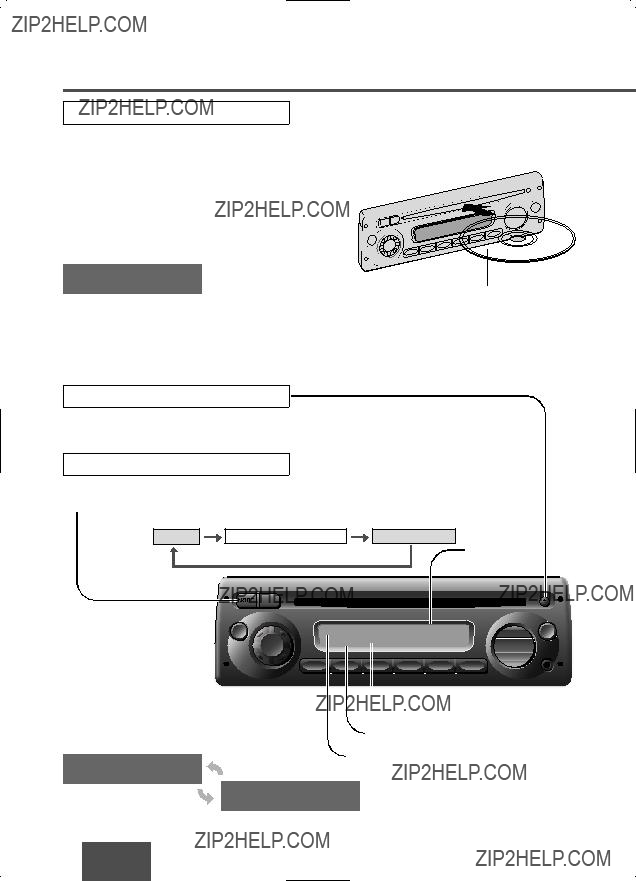

 Caution
 Track Search
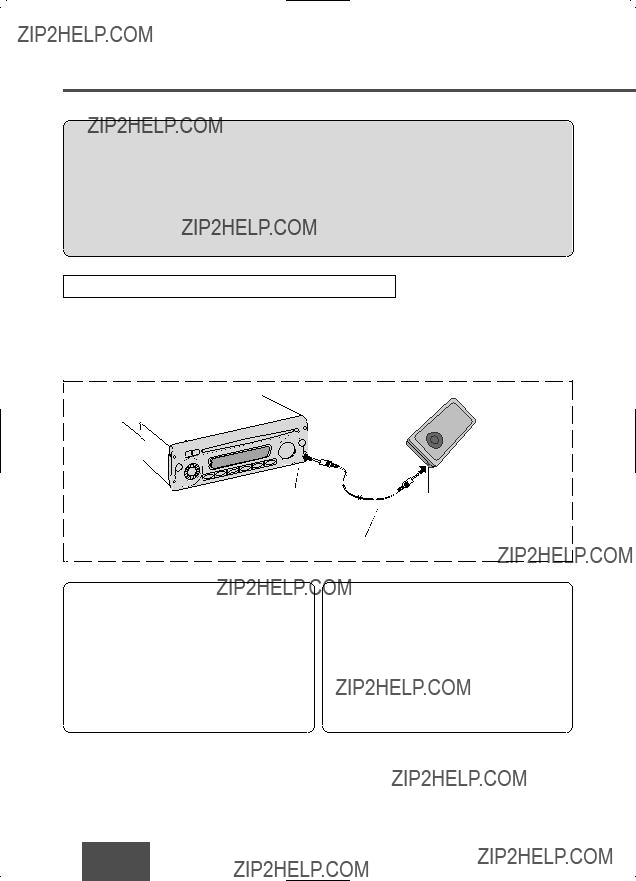
 Warning

 Caution

 Warning
 Caution
 Warning
 WARNING
 Warning
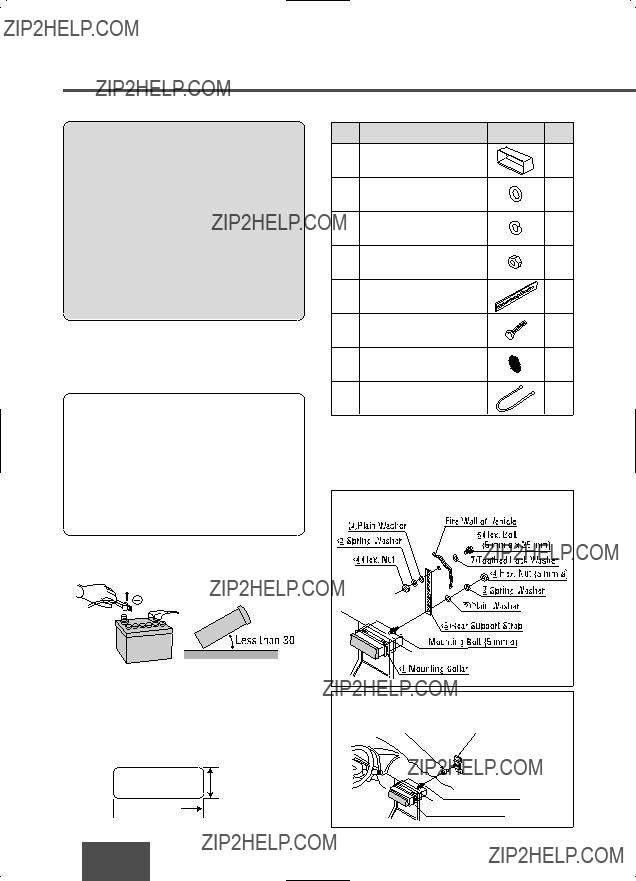
 Warning
 Caution
 182 mm
 Caution
 Mounting

 Caution