Operating Instructions

Blu-ray DiscTM Player

Model No. DMP-BDT330

DMP-BDT230

Unless otherwise indicated, illustrations in these operating instructions are of DMP-BDT330.

Firmware updates

Panasonic is constantly improving the unit???s firmware to ensure that our customers are enjoying the latest technology. Panasonic recommends updating your firmware as soon as you are notified.

For details, refer to ???Firmware updates??? (> 16) or http://panasonic.jp/support/global/cs/ (This site is in English only.)

Thank you for purchasing this product.

Please read these instructions carefully before using this product, and save this manual for future use.

Precautions

WARNING

Unit

To reduce the risk of fire, electric shock or product damage,

???Do not expose this unit to rain, moisture, dripping or splashing.

???Do not place objects filled with liquids, such as vases, on this unit.

???Use only the recommended accessories.

???Do not remove covers.

???Do not repair this unit by yourself. Refer servicing to qualified service personnel.

???Do not let metal objects fall inside this unit.

???Do not place heavy items on this unit.

AC mains lead

To reduce the risk of fire, electric shock or product damage,

???Ensure that the power supply voltage corresponds to the voltage printed on this unit.

???Insert the mains plug fully into the socket outlet.

???Do not pull, bend, or place heavy items on the lead.

???Do not handle the plug with wet hands.

???Hold onto the mains plug body when disconnecting the plug.

???Do not use a damaged mains plug or socket outlet.

The mains plug is the disconnecting device.

Install this unit so that the mains plug can be unplugged from the socket outlet immediately.

Small object

Keep the Memory Card out of reach of children to prevent swallowing.

CAUTION

Unit

???This unit utilizes a laser. Use of controls or adjustments or performance of procedures other than those specified herein may result in hazardous radiation exposure.

???Do not place sources of naked flames, such as lighted candles, on this unit.

???This unit may receive radio interference caused by mobile telephones during use. If such interference occurs, please increase separation between this unit and the mobile telephone.

[For[Australia[and[New[Zealand]

???This unit is intended for use in moderate climates.

[Except[Australia[and[New[Zealand]

???This unit is intended for use in tropical climates.

Placement

Place this unit on an even surface.

To reduce the risk of fire, electric shock or product damage,

???Do not install or place this unit in a bookcase, built-in cabinet or in another confined space. Ensure this unit is well ventilated.

???Do not obstruct this unit???s ventilation openings with newspapers, tablecloths, curtains, and similar items.

???Do not place the unit on amplifiers/receivers or equipment that may become hot. The heat can damage the unit.

???Do not expose this unit to direct sunlight, high temperatures, high humidity, and excessive vibration.

Batteries

Mishandling of batteries can cause electrolyte leakage and may cause a fire.

???Danger of explosion if battery is incorrectly replaced. Replace only with the type recommended by the manufacturer.

???When disposing the batteries, please contact your local authorities or dealer and ask for the correct method of disposal.

???Do not mix old and new batteries or different types at the same time.

???Do not heat or expose to flame.

???Do not leave the battery(ies) in a car exposed to direct sunlight for a long period of time with doors and windows closed.

???Do not take apart or short circuit.

???Do not recharge alkaline or manganese batteries.

???Do not use batteries if the covering has been peeled off.

Remove batteries if you do not intend to use the remote control for a long period of time. Store in a cool, dark place.

(For the AC mains plug of three pins)

How to replace the fuse

The location of the fuse differ according to the type of AC mains plug (figures A and B). Confirm the AC mains plug fitted and follow the instructions below.

Illustrations may differ from actual AC mains plug. 1. Open the fuse cover with a screwdriver.

Fuse cover

2. Replace the fuse and close or attach the fuse cover.

2 VQT4W95

Restriction on use of unauthorized copied content

This unit adopts the following technology for copyright protection.

Cinavia Notice

This product uses Cinavia technology to limit the use of unauthorized copies of some commercially-produced film and videos and their soundtracks. When a prohibited use of an unauthorized copy is detected, a message will be displayed and playback or copying will be interrupted.

More information about Cinavia technology is provided at the Cinavia Online Consumer Information Center at http:// www.cinavia.com. To request additional information about Cinavia by mail, send a postcard with your mailing address to: Cinavia Consumer Information Center, P.O. Box 86851, San Diego, CA, 92138, USA.

Wireless LAN connection

The following limits are in place regarding the usage of this unit. You must be aware of these limits before using this unit. Panasonic will in no way be responsible for any incidental damage which may arise due to a failure to obey these limits, or to any condition of use or disuse of this unit.

???Data transmitted and received over radio waves may be intercepted and monitored.

???This unit contains delicate electronic components.

Please use this unit in the manner in which it was intended and follow the following points:

???Do not expose this unit to high temperatures or direct sunlight.

???Do not bend, or subject this unit to strong impacts.

???Keep this unit away from moisture.

???Do not disassemble or alter this unit in any way.

[For[Singapore]

Complies with

IDA Standards

DB01017

To dispose or transfer this unit

The unit may keep the user settings information in the unit. If you discard this unit either by disposal or transfer, then follow the procedure to return all the settings to the factory presets to delete the user settings. (> 37, ???To return all settings to the factory preset.???)

???The operation history may be recorded in the memory of this unit.

Information on Disposal in other Countries outside the European Union

This symbol is only valid in the European Union.

If you wish to discard this product, please contact your local authorities or dealer and ask for the correct method of disposal.

VQT4W95 3

Table of contents

Precautions . . . . . . . . . . . . . . . . . 2

Reference

Troubleshooting guide . . . . . . . . 37

Messages . . . . . . . . . . . . . . . . . . 41

Specifications . . . . . . . . . . . . . . . 43

Limited Warranty (ONLY FOR

AUSTRALIA). . . . . . . . . . . . . . . 47

4 VQT4W95

Accessories

Check the supplied accessories before using this unit.

1Remote control

(N2QAYB000878)

2Batteries for remote control

1HDMI Cable

[For[Australia,[New[Zealand[and[India]

1AC mains lead

[For[the[Middle[East[and[South[East[Asia]

2AC mains lead*

* See page 11 for more information.

???Product numbers provided in these operating instructions correct as of February 2013. These may be subject to change.

???Do not use AC mains lead with other equipment.

???Using the remote control

Insert so the poles (i and j) match those in the remote control.

???

???

R6/LR6, AA

(Alkaline or manganese batteries)

Point it at the remote control signal sensor on this unit. (> 10)

Unit and media care

??? Irregularly shaped discs, such as heart

Reference

VQT4W95 5

Playable media

???See pages 7 and 43 for more information on the types of content that can be played.

6 VQT4W95

??? Discs that cannot be played by this unit

Any other disc that is not specifically supported or previously described.

???DVD-RAM

???Super Audio CD

???Photo CD

???DVD-Audio

???Video CD and Super Video CD

???HD DVD

???Region management information

??? Finalize

??? 3D

???3D videos and 3D still pictures can be played back when this unit is connected to a 3D compatible TV using a High Speed HDMI Cable.

???2D video can be enjoyed as 3D virtually. (> 29)

??? Music CD

Operation and sound quality of CDs that do not conform to CD-DA specifications (copy control CDs, etc.) cannot be guaranteed.

??? SD card

???miniSD Cards, microSD Cards, microSDHC Cards and microSDXC Cards can be used,

but must be used with an adaptor

card. These are usually supplied with such cards, or otherwise

customer provided.

???To protect the card???s contents,

move the record prevention tab (on the SD card) to ???LOCK???.

???This unit is compatible with SD Memory Cards that meet SD Card Specifications FAT12 and FAT16 formats, as well as SDHC Memory Cards in FAT32 format and SDXC Memory Cards in exFAT.

???If the SD card is used with incompatible computers or devices, recorded contents may be erased due to the card being formatted etc.

???Usable memory may be slightly less than the card capacity.

VQT4W95 7

??? USB device

???This unit does not guarantee connection with all USB devices.

???This unit does not support USB device charging.

???FAT12, FAT16, FAT32, and NTFS file systems are supported.

???This unit supports USB2.0 High Speed.

???This unit can support an HDD formatted to FAT32 and NTFS.

Some types of HDD may require the use of its external power supply unit.

??? BD-RE, BD-R

Discs recorded in DR mode using Panasonic Blu-ray Disc recorders may not play back the audio etc., correctly.

???It may not be possible to play the above media in some cases due to the type of media, the condition of the recording, the recording method, and how the files were created.

???The producers of the disc can control how discs are played, so you may not always be able to control play as described in these operating instructions. Read the disc???s instructions carefully.

8 VQT4W95

Control reference guide

1Turn the unit on and off

2TV operation buttons

You can operate the Panasonic TV using the unit???s remote control. Some buttons may not work depending on the TV.

[?? TV] : Turn the TV on and off

[AV] : Change input

[i j VOL] : Adjust the volume

3Select title numbers, etc./Enter numbers or characters

4Cancel

5Select audio (> 20)

6Basic playback control buttons (> 20)

7Show USB Sharing menu (> 27)

8Show Top menu (> 21)

9Show Option menu (> 28)

10Coloured buttons (red, green, yellow, blue) Used for various purposes depending on the display

11Transmit the remote control signal

12Open or close the disc tray (> 17)

13Show status messages (> 21)

14Show MiracastTM screen (> 24)

15Show the Home screen of the VIERA Connect (> 23)

16Exit the menu screen

17Show Pop-up menu (> 21)

18Show HOME menu (> 18)

19[3, 4, 2, 1] : Move the highlight for selection

[OK] : Confirm the selection

(;1) : Frame-by-frame (> 20)

20Return to previous screen

Getting started

VQT4W95 9

8 11

[BDT330]

Pull to flip down the front panel.

Pull to flip down the front panel.

[BDT230]

1Disc tray (> 17)

2Remote control signal sensor Distance: Within approx. 7 m

Angle: Approx. 20e up and down, 30e left and right

3[BDT330] Blue LED

It is possible to set the LED to turn on/off. (> 36)

4SD card slot (> 17, 27)

5[BDT330] V.OFF LED (Video off LED)

It is possible to set the LED to turn on/off. (> 36)

6USB ports (> 17, 27)

7Display

8Open or close the disc tray (> 17)

9Stop (> 20)

10Start play (> 20)

11Standby/on switch (??/I) (> 15)

Press to switch the unit from on to standby mode or vice versa. In standby mode, the unit is still consuming a small amount of power.

Rear panel terminals (> 11???14)

10 VQT4W95

Connecting to a TV

Connect the AC mains lead after making all connections.

???Before making any connections, we recommend that you temporarily disconnect all the units from AC power.

???Use the High Speed HDMI cables. Non-HDMI-compliant cables cannot be utilized.

It is recommended that you use Panasonic???s HDMI cable. When outputting 1080p signal, please use HDMI cables 5.0 meters or less.

The HDMI-compliant cable is supplied with this unit.

[For]the]Middle]East]

Use the AC mains lead that matches the socket for the area you live in. ??? In Saudi Arabia, always use the 3-pin AC mains lead.

[For[South[East[Asia]

AC mains lead with a label is for Thailand.

AC mains lead without a label is for areas other than Thailand.

[BDT330] Use HDMI AV OUT MAIN terminal.

To a household mains socket

HDMI cable (supplied)

HDMI IN

AC mains lead (supplied)

[BDT230]

Connections and settings Getting started

???This unit consumes a small amount of AC power (> 43) even when turned off. For the purpose of power conservation, the unit can be disconnected if you will not be using it for extended period of time.

VQT4W95 11

Connecting to an amplifier/receiver

Perform either one of the following connections in accordance with your amplifier/receiver input terminal.

HDMI AV OUT

[BDT330] Use HDMI AV OUT MAIN terminal.

???Set ???Digital Audio Output??? (> 31).

???When connecting to a non-3D compatible amplifier/receiver, connect this unit to a TV, then connect the TV and the amplifier/receiver. Please note, however, that the audio can only be up to 5.1ch.

???When using the TV or amplifier/receiver that does not have the indication of ???(ARC)??? (non-ARC-compatible) on the HDMI terminal, the amplifier/receiver and TV must also be connected using an optical digital cable in order to enjoy the TV???s sound through the amplifier/receiver.

HDMI AV OUT SUB [BDT330]

You can enjoy richer sound by using the HDMI AV OUT SUB terminal.

HDMI cable

HDMI IN

Amplifier/receiver

???Set ???HDMI(SUB) Output Mode??? to ???V.OFF(Video Off)???. (> 31)

??? Audio is output in high resolution regardless of compatibility of the amplifier/receiver with 3D.

???It is possible to play back 3D videos and 3D still pictures when the connected TV is 3D compatible, even if the amplifier/receiver is not 3D compatible.

???The HDMI connection using HDMI AV OUT MAIN supports HDMI CEC (> 27). The HDMI AV OUT SUB terminal is not compatible with the HDMI CEC.

12 VQT4W95

OPTICAL

[BDT330]

Optical digital cable

OPTICAL IN

[BDT230]

Amplifier/receiver

???Set ???HDMI Audio Output??? to ???Off??? (> 31).

???Set ???Digital Audio Output??? (> 31).

Connections and settings

VQT4W95 13

Connecting to the network

The following services can be used when this unit is connected to broadband.

???Firmware can be updated (> 16)

???You can enjoy BD-Live (> 22)

???You can enjoy VIERA Connect (> 23)

???You can access other devices (Home Network) (> 24)

???This unit supports Wi-Fi DirectTM and can make a wireless connection to wireless devices without router. You can use this function when enjoying Home Network feature, etc. Internet access is not available while connected via Wi-Fi DirectTM. (> 25, 33)

For details about connection method, refer to the instructions supplied with the connected equipment.

Wireless LAN connection

This unit has built-in Wi-Fi?? and can be connected to a wireless router.

[BDT330]

[BDT230]

???For up-to-date compatibility information on your wireless router, refer to http://panasonic.jp/support/global/cs/

(This site is in English only.)

???The unit is not compatible with public wireless LAN services provided in airports, stations, cafes, etc.

???See page 3 for the precautions for wireless LAN connection.

LAN cable connection
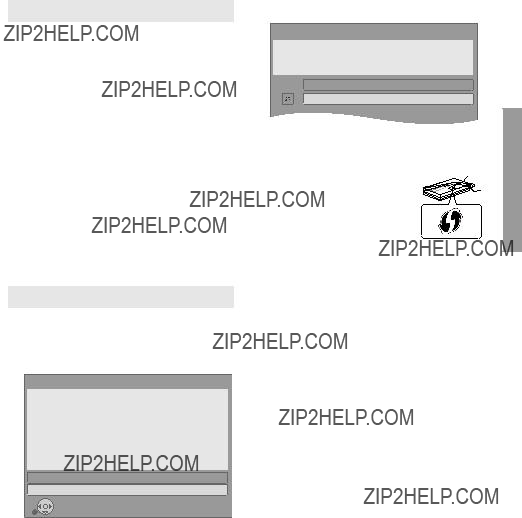
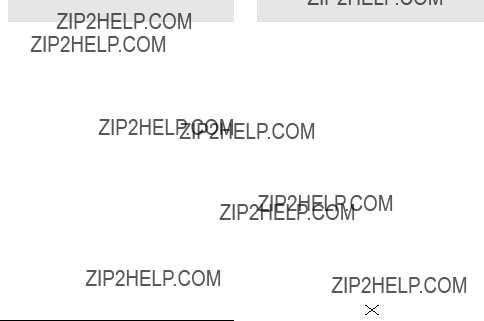
[BDT330]

???Use category 5 or above straight LAN cables (STP) when connecting to peripheral devices.

???Inserting any cable other than a LAN cable in the LAN port can damage the unit.

14 VQT4W95

Settings

Easy Settings

After connecting your new player for the first time and pressing [??], the basic settings screen will appear.

Preparation

Turn on the TV and select the appropriate video input.

1 Press [??].

Setup screen appears.

2 Follow the on-screen instructions to continue with the settings.

???You can perform this setup anytime by selecting ???Easy Settings??? in the Setup menu. (> 35)

Easy Network Setting

After completing ???Easy Settings???, you can perform ???Easy Network Setting???.

Select ???Wired??? or ???Wireless??? and press [OK].

Easy Network Setting

Select a connection mode.

Wired

Wireless

OK

RETURN

??? ???Wired??? connection

Follow the on-screen instructions to establish your connection settings.

??? ???Wireless??? connection

Before beginning wireless connection setup

???Obtain your network name (SSID*1).

???If your wireless connection is encrypted, please be sure that you know your encryption key.

Select ???Search for wireless network??? or ???WPS (PUSH button)??? and press [OK], then follow the on-screen instructions to continue with the settings.

Wireless Settings

Select a connection method to wireless access point. Please refer to the operating instructions of your wireless access point about connection methods.

is a standard that facilitates settings relating to the connection and security of wireless LAN devices.

1Press WPS button or corresponding button of the wireless router until the lamp starts flashing.

???For details, refer to the operating instruction

of the wireless router. 2 Press [OK].

Search for wireless network:

???When you select ???Search for wireless network???, the available wireless networks will be displayed. Select your network name and press [OK].

???If your network name is not displayed, search again by pressing the red button on the remote control.

???Stealth SSID will not be displayed when you select ???Search for wireless network???. Enter manually by using ???Manual setting???.

Press [HOME]

>press [OK] to select ???Setup???

>select ???Player Settings???

>select ???Network??? and press [OK]

>select ???Network Settings??? and press [OK]

>select ???Wireless Settings??? and press [OK]

>select ???Connection Setting??? and press [OK]

>select ???Manual setting??? and press [OK]

???If your wireless network is encrypted, Encryption Key input screen will be displayed. Input the encryption key of your network.

VQT4W95 15

???Refer to the operating instructions of the hub or router.

???You can perform this setup anytime by selecting ???Easy Network Setting??? in the Setup menu. (> 33)

???You can redo these settings individually using ???Network Settings???. (> 33)

???Do not use this unit to connect to any wireless network for which you do not have usage rights.

During automatic searches in a wireless network environment, wireless networks (SSID) for which you do not have usage rights may be displayed; however, using these networks may be regarded as illegal access.

???After performing network settings on this unit, the settings (encryption level, etc.) of the wireless router might change. When you have trouble getting online on your PC, perform the network settings on your PC in accordance with the settings of the wireless router.

???Please be aware that connecting to a network without encryption may result in the content of the communication being illegitimately viewed by a third party, or the leaking of data such as personal or secret information.

*1 SSID:

An SSID (Service Set IDentification) is a name used by wireless LAN to identify a particular network. Transmission is possible if the SSID matches for both devices.

*2 The wireless router compatible with Wi-Fi Protected SetupTM may have the mark.

Firmware updates

Occasionally, Panasonic may release updated firmware for this unit that may add or improve the way a feature operates. These updates are available free of charge.

This unit is capable of checking the firmware automatically when connected to the Internet via a broadband connection.

When a new firmware version is available, the following message is displayed.

New firmware is available.

Please update firmware in Setup.

To update the firmware

Press [HOME]

>press [OK] to select ???Setup???

>select ???Player Settings???

>select ???System??? and press [OK]

>select ???Firmware Update??? and press [OK]

>select ???Update Now??? and press [OK]

DO NOT DISCONNECT the unit from the AC power or perform any operation while the update takes place.

After the firmware is installed, ???FIN??? will be displayed on the unit???s display. Unit will restart and the following screen will be displayed.

The firmware has been updated.

Current Version:x.xx

???If downloading on this unit fails or this unit is not connected to the Internet, then you can download the latest firmware from the following website and burn it to a CD-R to update the firmware. http://panasonic.jp/support/global/cs/

(This site is in English only.)

To show the firmware version on this unit. (> 36, ???Firmware Version Information???)

???Downloading will require several minutes. It may take longer or may not work properly depending on the connection environment.

???If you do not want to check for the latest firmware version, set ???Automatic Update Check??? to ???Off???. (> 36)

16 VQT4W95

Reprogramming the remote control

If you have more than one Panasonic player/ recorder and the remote control operates both products at once, you will need to change the remote control code to prevent this occurrence. (> 36, ???Remote Control???)

Inserting or removing media

[BDT330]

USB1 USB2

SD CARD

CAUTION

Do not place objects in front of the unit. The disc tray may collide with objects when it is opened, and this may cause malfunction.

VQT4W95 17

HOME menu

Major functions of this unit can be operated from the HOME menu.

Preparation

Turn on the TV and select the appropriate video input on the TV.

1 Press [??] to turn on the unit.

???After network service introduction banner is shown, the HOME menu is displayed.

???When connected to the network, the banner content may be changed.

???You can disable the ???Start-up Banner??? (> 36).

2 Press [OK] or [3, 4, 2, 1] to select the item.

???If there are any other items, repeat this step.

HOME

Blu-ray Disc PlayerNetwork

Photos Setup Music

Videos

Register

1st user

Videos/Photos/Music

???Items to be displayed may vary with the media.

???Where necessary, set ???Mixed Data Disc Option??? when using a disc with both data files (MP3, JPEG, MKV, etc.) and Video (BDAV and AVCHD). (> 36)

18 VQT4W95

Press [HOME].

Multi User Mode

Multi User Mode allows individuals to customize settings and switch to their saved settings easily. Up to 4 people can use the unit with their own settings.

The following settings can be personalized:

???The user icon

???The wallpaper of HOME menu

???The audio and picture settings (> 28, 30)

A The user name and icon currently selected

BPersonalize a new user and switch between users with coloured buttons.

Personalizing a new user

1

2 Press the coloured button that indicates new user personalization.

3 Select an item and change the settings according to the indications.

The following items can be set.

To change the personalized user information

Select ???Edit User Information??? from Setup menu. (> 36)

Switching the user

Press the coloured buttons in the HOME menu to switch to the user corresponding to the button.

VQT4W95 19

Playback

1 Insert the media.

Playback starts depending on the media.

2 Select the item to play and press [OK].

Repeat this procedure if necessary.

???DISCS CONTINUE TO ROTATE WHILE MENUS ARE DISPLAYED. Press [???STOP] when you have finished playback to protect the unit???s motor, your TV screen and so on.

???MKV/Xvid: Successive play is not possible.

???It is not possible to play back AVCHD and MPEG2 videos which have been dragged and dropped or copied and pasted to the media.

???To save on electricity, this unit is turned off automatically if there is no button operation for about 30 minutes when not playing back (such as when paused or displaying the menu, displaying still pictures, etc.).

Operations during playback

The following functions may not work depending on the media and contents.

Stop

Press [???STOP].

The stopping point is memorized.

Resume play function

Press [1PLAY] to restart from this point.

???The point is cleared if the media is removed.

???On BD-Video discs including BD-J, the resume play function does not work.

Pause

Press [;PAUSE].

???Press [;PAUSE] again or [1PLAY] to restart play.

Search/Slow motion

Search

While playing, press [SEARCH6] or [SEARCH5].

Slow motion

While paused, press [SEARCH5].

The speed increases up to 5 steps.

???Music, MP3, etc.: The speed is fixed to a single step.

???Press [1PLAY] to revert to normal playback speed.

Skip

While playing or paused, press [:] or [9].

Skip to the title, chapter or track.

Frame-by-frame

While paused, press [1] (;1).

???Press and hold to change in succession forward.

???Press [1PLAY] to revert to normal playback speed.

Changing audio

Press [AUDIO].

You can change the audio channel number or soundtrack language, etc.

20 VQT4W95

Displaying menus and playback information

Show top menu/pop-up menu

Press [TOP MENU] or [POP-UP MENU].

Select the item and press [OK].

Show the status messages

While playing, press [STATUS].

The status messages give you information about what is currently being played. Each time you press [STATUS], the display information may change or will disappear from the screen.

???Depending on media and contents, the display may change or may not appear.

e.g., BD-Video

A B

BD-Video

T1 C1 0:05.14

Play

0:20.52

CD

A T: Title, C: Chapter, PL: Playlist

B Elapsed time in the title

C Current position

D Total time

e.g., JPEG

Manufacturer

Equipment

Enjoying 3D video and photos

Preparation

Connect this unit to a 3D compatible TV. (> 11, 12)

???Perform the necessary preparations for the TV.

???Play back following the instructions displayed on the screen.

???3D Settings (> 29, 32)

???Please refrain from viewing 3D images if you do not feel

well or are experiencing visual fatigue.

In the event that you experience dizziness, nausea, or other discomfort while viewing 3D images, discontinue use and rest your eyes.

???3D video might not output the way it is set in ???HDMI Video Format??? and ???24p(4K)/24p Output??? [BDT330] / ???24p Output???

[BDT230] (> 30).

???When playing back 3D photos from ???Photos??? screen, select from the ???3D??? list. (Still pictures in ???2D??? are played back in 2D.)

If ???2D??? and ???3D??? indications are not displayed, press the red button on the remote control to switch the view of playback contents.

Playback

VQT4W95 21

Enjoying BD-Live

With ???BD-Live??? discs, you can enjoy bonus contents that use Internet access.

For this BD-Live function, connection of a USB device is necessary along with Internet connection.

???When USB devices are connected to both USB ports, disconnect both of them first, and then connect only the one you want to use.

1 Perform network connection and settings. (> 14, 15)

2 Connect a USB device with 1 GB or more free space.

???The USB device is used as the local storage.

3 Insert the disc.

??? Deleting data on the USB device

Select ???USB Management??? in the HOME menu (> 18), then select ???BD-Video Data Erase??? and press [OK].

???The usable functions and the operating method may vary with each disc, please refer to the instructions on the disc and/or visit their website.

??????BD-Live Internet Access??? may need to be changed for certain discs (> 34).

Slideshow

Play a slideshow of photos and adjust various settings during the playback.

1 Insert the media.

2 Select ???Photos???.

3 Select an item and press the green button.

The following items can be set.

22 VQT4W95

VIERA Connect

(Enjoying Internet

Service)

VIERA Connect allows you to access some specific websites supported by Panasonic, and enjoy Internet contents such as photos, videos, etc. from VIERA Connect Home screen.

VIERA Connect provides a variety of selected Internet services such as the following.

???Online movie rental service

???Video browsing service

Internet

*Images are for illustration purposes, contents may change without notice.

Preparation

???Network connection (> 14)

???Network setting (> 15)

1 Press [INTERNET].

2 Select the item and press [OK].

To exit from VIERA Connect

Press [HOME].

???When playing content in the media, VIERA Connect cannot be accessed by pressing [INTERNET].

???In the following cases, settings are possible using the Setup menu items.

???When restricting the use of VIERA Connect (> 34, ???Network Service Lock???)

???When correcting the displayed time (> 34, ???Time Zone???, ???Summer Time???)

???If using slow Internet connection, the video may not be displayed correctly. A high speed Internet service with a speed of at least 6 Mbps is recommended.

???Be sure to update the firmware when a firmware update notice is displayed on the screen. If the firmware is not updated, you may not be able to use VIERA Connect function properly. (> 16)

???VIERA Connect Home screen is subject to change without notice.

???The services through VIERA Connect are operated by their respective service providers, and service may be discontinued either temporarily or permanently without notice. Therefore, Panasonic will make no warranty for the content or the continuity of the services.

???Some features of websites or content of the service may not be available.

???Some content may be inappropriate for some viewers.

???Some content may only be available for specific countries and may be presented in specific languages.

Playback

VQT4W95 23

Home Network feature

Using MiracastTM

You can enjoy the content you are viewing on a Miracast-compatible smartphone, etc. on the big screen of your TV.

???Compatible with AndroidTM device, ver. 4.2 and above and Miracast certified.

For information on whether the smartphone, etc. supports Miracast, contact the manufacturer of the device.

1

2

Press [MIRACAST].

Operate the Miracast compatible device.

???On the device, enable Miracast and select this unit (DMP-BDT330 or DMP-BDT230) as the device to be connected.

For details, refer to the instructions supplied with the device.

To exit from Miracast

Press [HOME].

24 VQT4W95

Playing back contents on the DLNA server

You can share photos, videos and music stored in the DLNA Certified media server (PC with Windows 7 installed, smartphone, etc.) connected to your home network, and enjoy the contents with this player.

You can also enjoy viewing the video and photos recorded in Panasonic DLNA compatible recorders (DIGA).

Refer to our website about the sales area, etc. (> 26)

???About support format of DLNA (> 44).

???Before using the DLNA feature, be sure to configure the DLNA server on your Home Network.

Player

Server

Preparation

1Perform network connection (> 14) and network settings (> 15) of this unit.

2 Perform Home Network settings of the connected equipment.

When connected to other than DIGA,

3Add the contents and folder to the libraries of the Windows Media?? Player or the smartphone, etc.

???Playlist of Windows Media?? Player can play back only the contents that are stored in the libraries.

When connected to DIGA,

3 Register this unit to your DIGA.

1 Press [HOME].

2 Select ???Network???.

3 Select ???Home Network???.

4 Select ???DLNA Client???.

???The list can be updated by pressing the red button on the remote control.

???The connection method can be switched to Wi-Fi Direct by pressing the green button on the remote control.

5 Select the equipment and press [OK].

6 Select the item to play and press [OK].

???You may be able to use convenient functions depending on the content by pressing [OPTION].

Playback

VQT4W95 25

Press [HOME]. Select ???Network???.
Select ???Home Network???. Select ???Media Renderer???.

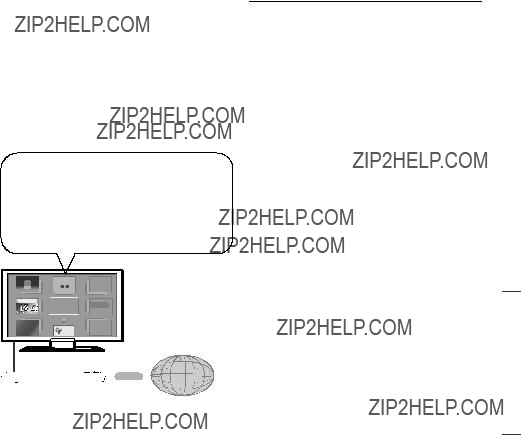
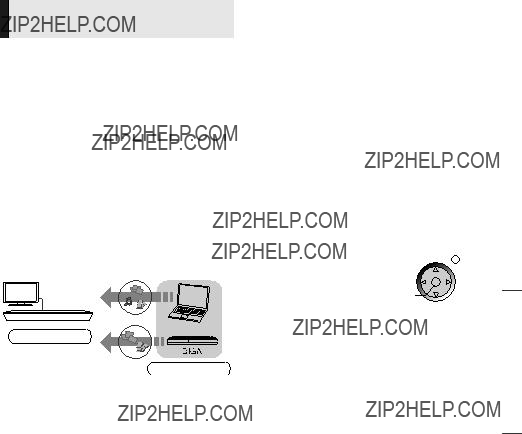
Using the Digital Media Controller

You can use a smartphone or tablet as the Digital Media Controller (DMC) to play back contents from DLNA server on the Renderer (this unit).

Possible applications:

Server *

Renderer

Controller *

1

2

3

4

5 Select ???Home Network??? or ???Wi-Fi Direct???

and press [OK], then follow the indications on the screen.

6 Operate the DMC compatible devices.

To exit from Media Renderer screen

Press [HOME].

About DLNA and Media Renderer

For more details, refer to the following website and the operating instructions for each of the equipment. http://panasonic.jp/support/global/cs/

(This site is in English only.)

Renderer

Server *

i

Controller

* DMC compatible software should be installed.

Preparation

Perform steps 1 and 2. (> 25)

3Add the contents and folder to the libraries of the Windows Media?? Player or the smartphone, etc.

???Playlist of Windows Media?? Player can play back only the contents that are stored in the

libraries.

4Perform the ???Remote Device Settings???. (> 34)

???You can register up to 16 devices.

26 VQT4W95

What is ???HDMI CEC??? (Consumer Electronics Control)?

???HDMI CEC??? (Consumer Electronics Control) is a convenient function which links the operations of this unit and other ???HDMI CEC??? compatible device.

You can use this function by connecting the equipment with an HDMI cable*.

See the operating instructions for connected equipment for operational details.

*[BDT330] Only when connecting via an HDMI AV OUT MAIN terminal on this unit.

Preparation

1 Set ???HDMI CEC??? to ???On??? (> 35). (The default setting is ???On???.)

2Set the ???HDMI CEC??? operations on the connected equipment (e.g., TV).

3Turn on all ???HDMI CEC??? compatible equipment and select this unit???s input channel on the connected TV so that the ???HDMI CEC??? function works properly.

Repeat this procedure when the connections or settings are changed.

Automatic input switching

Power on link

When play starts on the unit, the TV will automatically switch the input channel and the screen of this unit will be displayed. Additionally when the TV is off, the TV will automatically turn on.

Power off link

All connected equipment compatible with ???HDMI CEC???, including this unit, automatically turns off when you switch the TV off.

???This unit supports the ???HDMI CEC??? (Consumer Electronics Control) function. However, operation cannot be guaranteed on all HDMI CEC devices.

This function allows you to copy content between the following media.

SD card

USB1/

USB2

USB2/

USB1

Preparation

???Insert the media. (> 17)

???When the destination contains a folder or file with the same name, you can change the option for resolving the conflict by pressing [OPTION].

???You cannot set the media formatted to NTFS as a copy destination.

???Copying of files in all formats is not guaranteed.

???Panasonic does not accept any responsibility for damages directly or indirectly due to any type of problems that result in loss of copying content (data), and does not guarantee any content if copying does not work properly.

???The recording and playback of content on this or any other device may require permission from the owner of the copyright or other such rights in that content. Panasonic has no authority to and does not grant you that permission and explicitly disclaims any right, ability or intention to obtain such permission on your behalf. It is your responsibility to ensure that your use of this or any other device complies with applicable copyright legislation in your country. Please refer to that legislation for more information on the relevant laws and regulations involved or contact the owner of the rights in the content you wish to record or playback.

VQT4W95 27

Option menu

A variety of playback operations and settings can be performed from this menu.

Available options differ depending on the playing contents and the condition of the unit.

About Multi User Mode

: Settings of the items with this indication are saved by the respective users registered in the HOME menu.

Please refer to page 19 for details about user registration and switching.

1 Press [OPTION].

???When playing music, select ???Playback Settings??? and press [OK].

e.g., BD-Video

Operation Menu

2 Select an item and change the settings.

To exit the screen

Press [OPTION].

Regarding Language : (> 44)

Operation Menu

??? Soundtrack

Show or change the soundtrack.

??? Audio channel

Select the audio channel number.

??? Subtitle

Change the subtitle settings.

??? Angle

Select the number of the angle.

??? Repeat Play

Select the item that you want to repeat.

???The items displayed differ depending on the type of media.

???Select ???Off??? to cancel.

??? Random

Select whether or not to play random.

???Start Slideshow

Start the slideshow.

???Status

Show the status messages.

???Rotate RIGHT

???Rotate LEFT

Rotate the still picture.

???Wallpaper

Set the still picture to the wallpaper of HOME menu. (> 18)

??? Icon Registration

Set the still picture as your user icon. (> 19)

??? Video

The recording method of original video appears.

??? Primary Video

The recording method of original primary video appears.

??? Secondary Video

???Top Menu

Display Top Menu.

???Pop-up Menu

Display Pop-up Menu.

???Menu

Display Menu.

28 VQT4W95

Picture Settings

??? Picture Mode

Select the picture quality mode during play.

???If you select ???User???, you can change settings in ???Picture Adjustment???.

??? Picture Adjustment

Specific picture quality settings can be changed.

??? Progressive

Select the method of conversion for progressive output to suit the type of material being played.

???If the video is disrupted when ???Auto??? is selected, select either ???Video??? or ???Film??? depending on the material to be played back.

??? 24p

Movies and other material recorded on DVD-Video at 24p are output at 24p.

???This works only in the following cases:

???[BDT330] when ???24p(4K)/24p Output??? is set to ???24p(4K)??? or ???24p??? (> 30) and the disc recorded at a rate of 60 fields per second is played back.

???[BDT230] when ???24p Output??? is set to ???On??? (> 30) and the disc recorded at a rate of 60 fields per second is played back.

???This may not work with the PAL contents.

??? Reset to Default Picture Settings

Return picture settings to the factory preset.

Sound Settings

??? Dialogue Enhancer

The volume of the centre channel is raised to make dialog easier to hear.

???This function is effective for multi-channel audio from the HDMI AV OUT terminal only when ???Digital Audio Output??? is set to ???PCM??? (> 31).

3D Settings

??? Signal Format

??? Distance

Set the amount of depth perception.

??? Graphic Display Level

3D position for the Option menu or message screen, etc. can be adjusted during 3D playback.

Settings

VQT4W95 29

Setup menu

Change the unit???s settings if necessary. The settings remain intact even if you switch the unit to standby.

Some items in the Setup menu are common to the Option menu. You can get the same effect with both menus.

About Multi User Mode

: Settings of the items with this indication are saved by the respective users registered in the HOME menu.

Please refer to page 19 for details about user registration and switching.

1 Press [HOME].

2 Press [OK] to select ???Setup???.

3 Select ???Player Settings???.

Player Settings

3D

Language

Network

Ratings

System

OK

RETURN

4 Select an item and change the settings.

To exit the screen

Press [HOME].

Picture

???Picture Mode (> 29)

???Picture Adjustment (> 29)

??? HDMI Output

Press [OK] to show the following settings:

??HDMI Video Format

The items supported by the connected devices are indicated on the screen as ????????. When any item without ???????? is selected, the images may be distorted.

???If ???Automatic??? is selected, the best suited output resolution to the connected TV is automatically selected.

???To enjoy high-definition video up-converted to 1080p, you need to connect the unit directly to 1080p compatible HDTV (High Definition TV). If this unit is connected to an HDTV through other equipment, the other equipment must also be 1080p compatible.

??24p(4K)/24p Output [BDT330]

This setting is for selecting the output method for content recorded in 24p*1, such as movies.

???Connect the compatible TV for each (4K or 1080/24p) output to the HDMI AV OUT MAIN terminal of this unit.

??????24p(4K)??? works only when playing back in 2D.

???When playing DVD-Video, set this setting to ???24p(4K)??? or ???24p???, and then ???24p??? in ???Picture Settings??? (> 29) to ???On???.

???When BD-Video/DVD-Video images other than 24p are played, images are output at 60p.

??24p Output [BDT230]

When this unit is connected to a TV supporting 1080/24p output, movies and other material recorded at 24p*1 are output at 24p.

???When playing DVD-Video, set to ???On??? and then set ???24p??? in ???Picture Settings??? (> 29) to ???On???.

???When BD-Video/DVD-Video images other than 24p are played, images are output at 60p.

*1 A progressive image recorded at a rate of 24 frames per second (motion-picture film). Many BD-Video movie contents are recorded in 24 frames/second in accordance with the film materials.

*2 A high resolution image/display technology of approximately 4000 (width) k 2000 (height) pixels.

30 VQT4W95

??HDMI Colour Mode

This setting is for selecting colour-space conversion of the image signal.

??Deep Colour Output

This setting is for selecting whether to use Deep Colour output when a TV that supports Deep Colour is connected.

??Contents Type Flag

Depending on the playback content, the TV will output adjusting to the optimal method when a TV that supports this function is connected.

??HDMI(SUB) Output Mode [BDT330]

Set to output the video from the HDMI AV OUT SUB terminal or not.

Sound

???Dialogue Enhancer (> 29)

???Dynamic Range Compression

You can listen at low volumes but still hear dialog clearly.

(Dolby Digital, Dolby Digital Plus and Dolby TrueHD only)

??????Automatic??? is effective only when playing Dolby TrueHD.

??? Digital Audio Output

Press [OK] to show the following settings:

??Dolby D/Dolby D +/Dolby TrueHD

??DTS/DTS-HD

Select the audio signal to output.

???Select ???PCM???, when the connected equipment cannot decode the respective audio format. This unit decodes the audio format and transmits to the connected equipment.

???Not making the proper settings may result in noise.

??BD-Video Secondary Audio

Select whether or not to mix the primary and secondary audio (including the button click sound).

If ???Off??? is selected, the unit outputs the primary audio only.

??HDMI Audio Output

This setting selects whether or not to output audio from HDMI.

???Select ???Off??? when the TV is connected to this unit via HDMI AV OUT terminal, and this unit is also connected to other devices, such as an amplifier/receiver via an OPTICAL terminal.

Settings

VQT4W95 31

??? PCM Down Conversion

Select how to output audio with a sampling frequency of 96 kHz for the PCM output from the

OPTICAL.

???If ???On??? is selected, the signals that are converted to 48 kHz are output.

???If ???Off??? is selected, and the connected equipment does not support 96 kHz, the sound will not be output normally.

???Signals are converted to 48 kHz despite the settings in the following cases:

???when the signals have a sampling frequency of 192 kHz

???when the disc has copy protection

???when ???BD-Video Secondary Audio??? is set to ???On???

??? Downmix

Select the downmix system of multi-channel to 2-channel sound.

???Select ???Surround encoded???, when the connected equipment supports the virtual surround function.

???The downmix effect is not available when ???Digital Audio Output??? is set to ???Bitstream???.

???The audio will be output in ???Stereo??? in the following cases:

???AVCHD playback

???Playback of secondary audio (including the button click sound).

??? DTS Neo:6

2ch (2.1ch) audio is expanded to 7ch (7.1ch) before it is output.

???This function works when the following conditions are met:

???Audio is output from the HDMI AV OUT terminal.

???Audio recorded at 96 kHz or lower is output.

??????Digital Audio Output??? is set to ???PCM??? when audio other than PCM is output.

3D

??? 3D BD-Video Playback

Select the playback method of 3D compatible video software.

??? 3D AVCHD Output

Select the output method of 3D AVCHD videos.

??? 3D Playback Message

Set to display or hide the 3D viewing warning screen when playing back the 3D compatible video software.

??? Graphic Display Level (> 29)

32 VQT4W95

Language

??? Soundtrack Preference

Choose the language for audio.

???If ???Original??? is selected, the original language of each disc will be selected.

???Enter a code (> 44) when you select ???Other

???????????.

??? Subtitle Preference

Choose the language for the subtitle.

???If ???Automatic??? is selected and the language selected for ???Soundtrack Preference??? is not available, subtitles of that language will automatically appear if available on that disc.

???Enter a code (> 44) when you select ???Other

???????????.

??? Menu Preference

Choose the language for the disc menus.

???Enter a code (> 44) when you select ???Other

???????????.

[Except[South[East[Asia]

??? Subtitle Text

Select a suitable item according to the language used for MKV/Xvid subtitles text.

???This item is displayed only after playing back a file.

[For[South[East[Asia]

??? On-Screen Language

Choose the language for menus and on-screen messages.

Network

???Easy Network Setting (> 15)

???Network Settings

Perform network-related settings individually. Press [OK] to show the following settings:

??LAN Connection Mode

Select the LAN connection method.

???Select ???Wireless Master??? when you make a direct wireless connection between this unit and a Home Network device. Internet connection is not available when this item is selected.

??Wireless Settings

This allows the wireless router and connection settings to be set. Current connection settings and connection state can be checked.

Press [OK] to show the following settings:

Connection Setting

The wireless router connection wizard will be displayed.

Double Speed Mode Setting (2.4GHz)

Set the connection speed for a 2.4 GHz wireless format.

???If you connect using the ???Double Speed Mode (40MHz)???, 2 channels use the same frequency band, and there is consequently a greater risk of reception interference. This can cause the connection speed to drop or become unstable.

??IP Address / DNS Settings

This is for checking the state of the network connection and setting the IP address and DNS-related.

Press [OK] to show the respective setting.

??Proxy Server Settings

This is for checking the state of connection with the Proxy server and performing settings. Press [OK] to show the respective setting.

Settings

VQT4W95 33

??Network Service Settings (> 23)

(VIERA Connect)

Press [OK] to show the following settings:

Time Zone

Set the unit???s time to match your location.

???Some VIERA Connect contents require the time zone to be set. Set the time zone if necessary.

Summer Time

Select ???On??? when using summer time.

[Except[South[East[Asia]

??Network Drive Connection

It is possible to access the shared folder of equipment not compatible with DLNA, such as the Windows XP operating system, and play back video, still pictures, and music on this unit. For the setting and operation method of connected equipment, refer to the following website. http://panasonic.jp/support/global/cs/

(This site is in English only.)

??Remote Device Settings (> 26)

Press [OK] to show the following settings:

Remote Device Operation

Enable to operate by DMC.

???If ???On??? is selected, ???Quick Start??? will be activated.

Device Name Entry

Set the name of this unit to be displayed on the connected equipment.

Registration Type

Allow connection to all the Automatic equipment accessing this

unit.

Set the permission for Manual individual equipment

connections accessing this unit.

Remote Device List

Registering/deregistering of the displayed equipment can be performed when ???Manual??? in ???Registration Type??? is selected.

??BD-Live Internet Access (> 22)

You can restrict Internet access when BD-Live functions are used.

???If ???Limit??? is selected, Internet access is permitted only for BD-Live contents which have content owner certificates.

Ratings

The following items use the same password. Don???t forget your password.

??? DVD-Video Ratings

Set a ratings level to limit DVD-Video play.

??? BD-Video Ratings

Set an age limit of BD-Video play.

??? Network Service Lock

You can restrict the usage of VIERA Connect.

34 VQT4W95

System

??? Easy Settings

You can execute basic settings.

??? TV Settings

Press [OK] to show the following settings:

??TV Aspect

Set to match the type of TV connected.

When connected to a 4:3 aspect TV and playing 16:9 ratio image:

The sides are cut off so the

picture fills

4:3 Pan & Scan the screen.

When playing BD-Video, video is output as ???4:3 Letterbox???.

Black bands appear at

4:3 Letterbox the top and bottom of the picture.

When connected to a 16:9 widescreen TV and playing 4:3 ratio image:

Video is displayed as a 4:3 16:9ratio image in the centre of

the screen.

Video is displayed as a 16:9 full horizontally stretched 16:9

image.

??TV System

Perform the setup so it matches the TV System of the connected TV.

??Screen Saver Function

This is to prevent image retention on the screen.

???When this is set to ???On???:

If a list of playback content is displayed and there is no operation for 10 minutes or more, the screen switches to HOME menu automatically.

???While playing and pausing, etc., this function is not available.

??On-Screen Messages

Choose whether to show status messages automatically.

??HDMI CEC

Set to use ???HDMI CEC??? function when connected via HDMI cable to a device that supports ???HDMI CEC???.

???Select ???Off??? when you do not want to use ???HDMI CEC???.

Settings

VQT4W95 35

??? Unit Settings

Press [OK] to show the following settings:

??Mixed Data Disc Option

Select the playback contents on discs with both data files and Video.

???If ???MP3/JPEG/MKV??? is selected, the video menu function (except MKV/Xvid) cannot be played back.

???If ???BDAV/AVCHD??? is selected, data file cannot be played back.

??Front Panel Display

Changes the brightness of the unit???s display.

???If ???Automatic??? is selected, the display is set to bright and only dimmed during playback.

??Blue LED [BDT330]

Set whether to light the blue LED in the centre of this unit when turned ON.

??HDMI(SUB) V.OFF LED Control [BDT330]

Set to light the HDMI (SUB) V.OFF LED or not. (This will light when ???HDMI(SUB) Output Mode??? (> 31) is set to ???V.OFF(Video Off)???.)

??Edit User Information

Change the user information registered in the HOME menu.

??? Start-up Banner

Select whether to display the banner after turning on this unit. (> 18)

??? Quick Start

Speed of start-up from standby mode is increased.

???When set to ???On???, the internal control unit will be powered and the idle power consumption will increase so compared to when set to ???Off???. (About the power consumption > 43)

??? Remote Control

Change the remote control code if other Panasonic products react to this remote control.

??? Firmware Update (> 16)

Press [OK] to show the following settings:

??Automatic Update Check

When this equipment remains connected to the Internet, it will check for the latest firmware version when it is turned on and you can update it if necessary.

??Update Now

You can update the firmware manually if a firmware update is available.

??? System Information

Press [OK] to show the following settings:

??Software Licence

Information about the software used by this unit is displayed.

??Firmware Version Information

Display firmware version of this unit and wireless LAN module.

??? Default Settings

This returns all values in the Setup menu and the Option menu to the default settings, except for some settings of network, ratings, remote control code, on-screen language [For[South[East[Asia], etc.

36 VQT4W95

Troubleshooting guide

Before requesting service, please perform the following checks.

If the problem remains unresolved, consult your dealer for instructions.

Do you have the latest firmware installed?

Panasonic is constantly improving the unit???s firmware to ensure that our customers are enjoying the latest technology. (> 16)

The following do not indicate a problem with this unit:

???Regular disc rotating sounds.

???Image disturbance during search.

???Image disturbance when replacing 3D discs.

???Unit does not respond to remote control or front panel buttons.

Disconnect the AC mains lead, wait 1 minute, then reconnect the AC mains lead.

??? Cannot eject disc.

1 Turn the unit on.

2Press and hold [OK], the yellow button and the blue button on the remote control at the same time for more than 5 seconds.

??????00 RET??? is displayed on the unit???s display. 3 Press [1] (right) repeatedly on the remote

control until ???06 FTO??? is displayed on the unit???s display.

4 Press [OK].

General operation

To return to the factory preset.

??Select ???Yes??? in ???Default Settings??? in the Setup menu. (> 36)

To return all settings to the factory preset.

?? Reset the unit as follows: 1 Turn the unit on.

2Press and hold [OK], the yellow button and the blue button on the remote control at the same time for more than 5 seconds.

??????00 RET??? is displayed on the unit???s display. 3 Press [1] (right) repeatedly on the remote

control until ???08 FIN??? is displayed on the unit???s display.

4 Press and hold [OK] for more than 5 seconds.

The remote control does not work properly.

??Change the batteries in the remote control. (> 5)

??The remote control and this unit are using different codes.

If ???SET ?????? is displayed on the unit???s display when a button is pressed on the remote control, change the code on the remote control.

Press and hold [OK] and the displayed number (?????????) for more than 5 seconds.

The TV tuner mode is not displayed when the TV is switched on.

??This phenomenon may occur, depending on the TV setting, when ???Quick Start??? is set to ???On???.

??Depending on the TV, this phenomenon may be prevented by reconnecting the HDMI cable to a different HDMI input terminal or by changing the HDMI auto connection setting.

You have forgotten your ratings password. You want to cancel the ratings level.

?? The ratings level returns to the factory preset. 1 Turn the unit on.

2Press and hold [OK], the yellow button and the blue button on the remote control at the same time for more than 5 seconds.

??????00 RET??? is displayed on the unit???s display. 3 Press [1] (right) repeatedly on the remote

control until ???03 VL??? is displayed on the unit???s display.

4 Press [OK].

This unit does not recognize the USB connection correctly.

VQT4W95 37

Picture

The images from this unit do not appear on the TV.

Picture is distorted.

??An incorrect resolution is selected in ???HDMI Video Format???. Reset the setting as follows:

1 Turn the unit on.

2Press and hold [OK], the yellow button and the blue button on the remote control at the same time for more than 5 seconds.

??????00 RET??? is displayed on the unit???s display. 3 Press [1] (right) repeatedly on the remote

control until ???04 PRG??? is displayed on the unit???s display.

4 Press and hold [OK] for more than

5 seconds.

Set the item again. (> 30)

???When Dolby Digital Plus, Dolby TrueHD, and DTS-HD audio are not output properly, select ???Yes??? in ???Default Settings??? and make

proper settings. (> 36)

??The unit and TV are using different video systems.

1 Turn the unit on.

2Press and hold [OK], the yellow button and the blue button on the remote control at the same time for more than 5 seconds.

??????00 RET??? is displayed on the unit???s display. 3 Press [1] (right) repeatedly on the remote

control until ???05 P/N??? is displayed on the unit???s display.

4 Press and hold [OK] for more than

5 seconds.

The system switches from PAL to NTSC or vice versa.

?? The system used on the disc doesn???t match your TV.

???PAL discs cannot be correctly viewed on an

NTSC TV.

??When ???3D BD-Video Playback??? in the Setup menu is set to ???Automatic???, images may not be output depending on the connection method. After removing the disc from this unit, select ???Set before play??? in the Setup menu, and select ???2D Playback??? in the setup screen displayed when playing 3D discs. (> 32)

??[BDT330] When outputting in 24p (4K), images may be distorted depending on the HDMI cable. Use an HDMI cable that supports 4K output.

Video is not output. [BDT330]

??Video from the HDMI AV OUT SUB terminal is not output when the ???HDMI(SUB) Output Mode??? is set to ???V.OFF(Video Off)???. (> 31)

Video is not output in high-definition.

??Confirm that ???HDMI Video Format??? in the Setup menu is set properly. (> 30)

3D video is not output.

??Connect to a full high-definition TV.

??Is there a non-3D compatible amplifier/ receiver connected between this unit and a TV? (> 12)

??[BDT330] If there is a non-3D compatible amplifier/receiver connected to the HDMI AV OUT SUB terminal, set the ???HDMI(SUB) Output Mode??? to ???V.OFF(Video Off)???. (> 12)

??Are the settings on this unit and the TV correct? (> 21)

??Is the amplifier/receiver that is connected between this unit and TV on?

??Depending on the connected TV, the video being played back might switch to 2D video due to changes in resolution etc. Check the 3D setting on the TV.

3D video is not output correctly as 2D.

??Select ???Set before play??? in the Setup menu, and select ???2D Playback??? in the setup screen displayed when playing 3D discs. (> 32, ???3D BD-Video Playback???)

??Discs that have recorded titles with Side by side (2 screen structure) and that can be enjoyed in 3D are played back in accordance with the settings of the TV.

A black band is displayed around the edge of the screen.

The aspect ratio of the screen is abnormal.

??Confirm the ???TV Aspect??? is set properly. (> 35)

??Adjust the aspect setting on the TV.

38 VQT4W95

Audio

Cannot switch audio.

??The audio cannot switch, if ???Digital Audio Output??? is set to ???Bitstream???. Set ???Digital Audio Output??? to ???PCM???. (> 31)

Cannot hear the desired audio type.

??Check the connections and the ???Digital Audio Output??? settings. (> 12, 31)

??[BDT330] When connecting this unit to a TV via an HDMI AV OUT MAIN and to an amplifier/receiver via an HDMI AV OUT SUB, set ???HDMI(SUB) Output Mode??? to ???V.OFF(Video Off)???. (> 12)

??To output audio from a device connected with an HDMI cable, set ???HDMI Audio Output??? to ???On??? in the Setup menu. (> 31)

There is no sound coming out from the TV.

[BDT330]

??Audio may not output from the TV when the amplifier/receiver is connected to the HDMI AV OUT SUB, and ???HDMI(SUB) Output Mode??? (> 31) is set to ???V.OFF(Video Off)???. In such a case, output audio from the amplifier/ receiver. To output audio from the TV, set the ???HDMI(SUB) Output Mode??? to ???Normal???.

Playback

Disc cannot be played.

??The disc is dirty. (> 5)

??The disc is not finalized. (> 7)

Still pictures (JPEG) do not play back normally.

??The images that were edited on the PC, such as Progressive JPEG, etc., may not be played back.

I can???t play back BD-Live.

??Confirm that this unit is connected to the broadband Internet. (> 14)

??Confirm the ???BD-Live Internet Access??? settings. (> 34)

??Confirm a USB device is connected to the USB port. (> 17)

Reference

VQT4W95 39

Network

I can???t connect to the network.

??Confirm the network connection and settings. (> 14, 15, 33)

??There may be obstacles that prevent the unit from detecting your home network. Bring the unit and the wireless router closer to each other. This unit may be able to detect your network name (> 16, ???SSID???).

??Check the operating instructions for each device and connect accordingly.

Cannot play current title.

??Confirm the network connection and settings. (> 14, 15, 33)

When using wireless LAN connection, video from the DLNA Certified media server is not played back or video frames are dropped during playback.

??Higher transfer rate router such as 802.11n (2.4 GHz or 5 GHz) wireless router may solve the problem. If you use 802.11n (2.4 GHz or 5 GHz) wireless router, it is necessary to set the encryption type to ???AES???.

Simultaneous use with a microwave, cordless telephone etc. at 2.4 GHz may result in connection interruptions or other problems.

??On the ???Wireless Settings??? screen (> 33), the continuous lighting of at least 4 ???Reception??? indicators is the target for a stable connection. If 3 or fewer indicators are lit or the connection is being interrupted, change the position or angle of your wireless router and see if the connection state improves. If there is no improvement, connect to a wired network and perform the ???Easy Network Setting??? (> 15) again.

40 VQT4W95

Messages

Check the following when messages or service numbers are displayed on the screen or unit???s display.

On the TV

Cannot play.

?? You inserted an incompatible disc.

Cannot play on this unit.

??You tried to play a non-compatible image.

??Re-insert the media.

No disc inserted.

?? The disc may be upside down.

$ This operation is not available.

??Some operations are unsupported by the unit. (For example, reverse slow motion, etc.)

IP address is not set.

??The ???IP Address??? in ???IP Address / DNS Settings??? is ???---. ---. ---. ---???. Set the ???IP Address???, ???Subnet Mask???, and ???Gateway Address???. (Select the automatic address acquisition if necessary.)

The wireless access point currently has a low network security setting. It is recommended to change to a higher setting.

??Set a stronger network security level referring to the wireless router operating instructions.

On the unit???s display

NET

?? While connecting to a network.

No PLAY

??There is a viewing restriction on a BD-Video or DVD-Video. (> 34)

??The media is dirty or badly scratched. The unit cannot play.

REMOVE

??The USB device is drawing too much power. Remove the USB device.

SET ???

(??? ??? ??? stands for a number.)

??The remote control and this unit are using different codes. Change the code on the remote control.

Press and hold [OK] and the indicated number button at the same time for more than 5 seconds.

U59

??Temperature of this unit is hot and the unit switches to standby for safety reasons. Wait for about 30 minutes.

Select a position with good ventilation when installing the unit.

H??????or F??????

(??? ??? ??? stands for a number.)

??There is something unusual.

??Check the unit using the troubleshooting guide. If the service number remains displayed, do the following.

1 Disconnect the plug from the household mains socket, wait a few seconds, then

reconnect it.

2 Press [??/I] to turn the unit on.

If the service number remains displayed despite doing the above, request service from the dealer. Inform the dealer of the service number when requesting service.

Reference

VQT4W95 41

START

??The system is being restarted during the firmware update. Please do not turn off the unit.

UPD???/???

(??? ??? ??? stands for a number.)

??The firmware is being updated. Please do not turn off the unit.

FIN

??The firmware update is complete.

??Copying is complete.

42 VQT4W95

Specifications

General

??? Specifications are subject to change without notice.

File format

???With certain recording states and folder structures, the play order may differ or playback may not be possible.

Reference

VQT4W95 43

Audio information

The audio output differs depending on which terminals are connected to the amplifier/receiver, and the settings on the unit. (> 31, ???Digital Audio Output???)

???The number of channels listed is the maximum possible number of output channels when connected to amplifier/ receiver compatible with the respective audio format.

*1 When ???BD-Video Secondary Audio??? is set to ???On???, the audio will be output as Dolby Digital, DTS Digital Surround or 5.1ch PCM.

*2 [BDT230] The maximum possible number of Dolby sound is 5.1ch PCM.

*3 When ???DTS Neo:6??? is set to ???Cinema??? or ???Music???, 2ch (2.1ch) audio can be expanded to 7ch (7.1ch) and output. (> 32)

Supported format for DLNA

???File formats that are not supported by your DLNA server cannot be played.

Video

Photo

Audio

Display languages list

Display Language Display Language Display Language

Language code list

44 VQT4W95

???AVCHD???, ???AVCHD 3D???, ???AVCHD Progressive??? and ???AVCHD 3D/ Progressive??? are trademarks of Panasonic Corporation and Sony Corporation.

Java is a registered trademark of Oracle and/or its affiliates.

Manufactured under license from Dolby Laboratories. Dolby and the double-D symbol are trademarks of Dolby Laboratories.

Manufactured under license under U.S. Patent Nos: 5,956,674; 5,974,380; 6,226,616; 6,487,535; 7,212,872; 7,333,929; 7,392,195; 7,272,567 & other U.S. and worldwide patents issued & pending. DTS-HD, the Symbol, & DTS-HD and the Symbol together are registered trademarks & DTS-HD Master Audio is a trademark of DTS, Inc. Product includes software. ?? DTS, Inc. All Rights Reserved.

HDMI, the HDMI Logo, and High-Definition Multimedia Interface are trademarks or registered trademarks of HDMI Licensing LLC in the United States and other countries.

This product is licensed under the AVC patent portfolio license and VC-1 patent portfolio license for the personal and non-commercial use of a consumer to (i) encode video in compliance with the AVC Standard and VC-1 Standard (???AVC/VC-1 Video???) and/or (ii) decode AVC/VC-1 Video that was encoded by a consumer engaged in a personal and non-commercial activity and/or was obtained from a video provider licensed to provide AVC/VC-1 Video. No license is granted or shall be implied for any other use. Additional information may be obtained from MPEG LA, LLC. See http://www.mpegla.com.

VIERA Connect is a trademark of Panasonic Corporation.

MPEG Layer-3 audio coding technology licensed from Fraunhofer IIS and Thomson.

SDXC Logo is a trademark of SD-3C, LLC.

???DVD Logo??? is a trademark of DVD Format/Logo Licensing Corporation.

The Wi-Fi CERTIFIED Logo is a certification mark of the Wi-Fi Alliance.

The Wi-Fi Protected Setup Mark is a mark of the Wi-Fi Alliance.

???Wi-Fi???, ???Wi-Fi Protected Setup???, ???Wi-Fi Direct???, ???Miracast???, ???WPA??? and ???WPA2??? are marks or registered marks of the Wi-Fi Alliance.

DLNA, the DLNA Logo and DLNA CERTIFIED are trademarks, service marks, or certification marks of the Digital Living Network Alliance.

Windows is a trademark or a registered trademark of Microsoft Corporation in the United States and other countries.

Android is a trademark of Google Inc.

Copyright 2004-2010 Verance Corporation. CinaviaTM is a Verance Corporation trademark. Protected by U.S. Patent 7,369,677 and worldwide patents issued and pending under license from Verance Corporation. All rights reserved.

This product incorporates the following software:

(1)the software developed independently by or for Panasonic Corporation,

(2)the software owned by third party and licensed to Panasonic Corporation,

(3)the software licensed under the GNU General Public License, Version 2.0 (GPL V2.0),

(4)the software licensed under the GNU LESSER General Public License, Version 2.1 (LGPL V2.1), and/or

(5)open source software other than the software licensed under the GPL V2.0 and/or LGPL V2.1.

The software categorized as (3) - (5) are distributed in the hope that it will be useful, but WITHOUT ANY WARRANTY, without even the implied warranty of MERCHANTABILITY or FITNESS FOR A PARTICULAR PURPOSE. Please refer to the detailed terms and conditions thereof shown in the Player Settings menu.

At least three (3) years from delivery of this product, Panasonic will give to any third party who contacts us at the contact information provided below, for a charge no more than our cost of physically performing source code distribution, a complete machine-readable copy of the corresponding source code covered under GPL V2.0, LGPL V2.1 or the other licenses with the obligation to do so, as well as the respective copyright notice thereof.

Contact Information: oss-cd-request@gg.jp.panasonic.com

The source code and the copyright notice are also available for free in our website below.

http://panasonic.net/avc/oss/bdplayer/AWBPM13A.html

Adobe Flash Lite for Digital Home Software licensed by Adobe Systems Incorporated or its affiliates.

For Adobe Flash Lite for Digital Home Software (???Flash Software???), please be aware of the following.

(i)You are not permitted to distribute and copy this Flash Software to any third party,

(ii)You are not permitted to modify the Flash Software and create derivative works of the Flash Software,

(iii)You are not permitted to decompile, reverse engineer, disassemble and otherwise reduce the Flash Software to a human-perceivable form,

(iv)You are not permitted to claim any damages, including direct, indirect, special, incidental, punitive, and consequential damages arising out of or in connection with the Flash Software,

(v)You fully agree that the ownership of the Flash Software is that of Panasonic Corporation and/or its suppliers or licensors,

(vi)You agree and acknowledge that it is possible that you cannot access the contents unless you do not obtain and install the latest version of the Flash Software.

David M. Gay???s dtoa and strtod license

The author of this software is David M. Gay.

Copyright (c) 1991, 2000, 2001 by Lucent Technologies.

Permission to use, copy, modify, and distribute this software for any purpose without fee is hereby granted, provided that this entire notice is included in all copies of any software which is or includes a copy or modification of this software and in all copies of the supporting documentation for such software.

THIS SOFTWARE IS BEING PROVIDED ???AS IS???, WITHOUT ANY

EXPRESS OR IMPLIED WARRANTY. IN PARTICULAR,

NEITHER THE AUTHOR NOR LUCENT MAKES ANY

REPRESENTATION OR WARRANTY OF ANY KIND

CONCERNING THE MERCHANTABILITY OF THIS SOFTWARE

OR ITS FITNESS FOR ANY PARTICULAR PURPOSE.

???UNICODE, INC. LICENSE AGREEMENT - DATA FILES AND

SOFTWARE

Unicode Data Files include all data files under the directories http://www.unicode.org/Public/, http://www.unicode.org/reports/, and http://www.unicode.org/cldr/data/.

Unicode Software includes any source code published in the Unicode Standard or under the directories http://www.unicode.org/Public/, http://www.unicode.org/reports/, and http://www.unicode.org/cldr/data/.

NOTICE TO USER: Carefully read the following legal agreement.

BY DOWNLOADING, INSTALLING, COPYING OR OTHERWISE USING UNICODE INC.???S DATA FILES (??????DATA FILES??????), AND/OR

SOFTWARE (??????SOFTWARE??????), YOU UNEQUIVOCALLY

ACCEPT, AND AGREE TO BE BOUND BY, ALL OF THE TERMS

AND CONDITIONS OF THIS AGREEMENT. IF YOU DO NOT

AGREE, DO NOT DOWNLOAD, INSTALL, COPY, DISTRIBUTE

OR USE THE DATA FILES OR SOFTWARE.

COPYRIGHT AND PERMISSION NOTICE

Copyright (c) 1991-2009 Unicode, Inc. All rights reserved. Distributed under the Terms of Use in http://www.unicode.org/copyright.html.

Reference

VQT4W95 45

Permission is hereby granted, free of charge, to any person obtaining a copy of the Unicode data files and any associated documentation (the ??????Data Files??????) or Unicode software and any associated documentation (the ??????Software??????) to deal in the Data Files or Software without restriction, including without limitation the rights to use, copy, modify, merge, publish, distribute, and/or sell copies of the Data Files or Software, and to permit persons to whom the Data Files or Software are furnished to do so, provided that (a) the above copyright notice(s) and this permission notice appear with all copies of the Data Files or Software, (b) both the above copyright notice(s) and this permission notice appear in associated documentation, and (c) there is clear notice in each modified Data File or in the Software as well as in the documentation associated with the Data File(s) or Software that the data or software has been modified.

THE DATA FILES AND SOFTWARE ARE PROVIDED ??????AS IS??????,

WITHOUT WARRANTY OF ANY KIND, EXPRESS OR IMPLIED,

INCLUDING BUT NOT LIMITED TO THE WARRANTIES OF

MERCHANTABILITY, FITNESS FOR A PARTICULAR PURPOSE

AND NONINFRINGEMENT OF THIRD PARTY RIGHTS. IN NO

EVENT SHALL THE COPYRIGHT HOLDER OR HOLDERS

INCLUDED IN THIS NOTICE BE LIABLE FOR ANY CLAIM, OR

ANY SPECIAL INDIRECT OR CONSEQUENTIAL DAMAGES,

OR ANY DAMAGES WHATSOEVER RESULTING FROM LOSS

OF USE, DATA OR PROFITS, WHETHER IN AN ACTION OF

CONTRACT, NEGLIGENCE OR OTHER TORTIOUS ACTION,

ARISING OUT OF OR IN CONNECTION WITH THE USE OR

PERFORMANCE OF THE DATA FILES OR SOFTWARE.

Except as contained in this notice, the name of a copyright holder shall not be used in advertising or otherwise to promote the sale, use or other dealings in these Data Files or Software without prior written authorization of the copyright holder.???

(1) MS/WMA

This product is protected by certain intellectual property rights of Microsoft Corporation and third parties. Use or distribution of such technology outside of this product is prohibited without a license from Microsoft or an authorized Microsoft subsidiary and third parties.

(2) FLAC, WPA Supplicant

The software licenses are displayed when ???Software Licence??? in the Setup menu is selected. (> 36)

46 VQT4W95

Limited Warranty (ONLY FOR AUSTRALIA)

Panasonic Warranty

1.The product is warranted for 12 months from the date of purchase. Subject to the conditions of this warranty Panasonic or its Authorised Service Centre will perform necessary service on the product without charge for parts or labour, if in the opinion of Panasonic, the product is found to be faulty within the warranty period.

2.This warranty only applies to Panasonic products purchased in Australia and sold by Panasonic Australia or its Authorised Distributors or Dealers and only where the products are used and serviced within Australia or it's territories. Warranty cover only applies to service carried out by a Panasonic Authorised Service Centre and only if valid proof of purchase is presented when warranty service is requested.

3.This warranty only applies if the product has been installed and used in accordance with the manufacturer???s recommendations (as noted in the operating instructions) under normal use and reasonable care (in the opinion of Panasonic). The warranty covers normal domestic use only and does not cover damage, malfunction or failure resulting from use of incorrect voltages, incorrect installation, accident, misuse, neglect, build-up of dirt or dust, abuse, maladjustment of customer controls, mains supply problems, thunderstorm activity, infestation by insects or vermin, tampering or repair by unauthorised persons (including unauthorised alterations), introduction of sand, humidity or liquids, commercial use such as hotel, office, restaurant, or other business or rental use of the product, exposure to abnormally corrosive conditions or any foreign object or matter having entered the product.

4.This warranty does not cover the following items unless the fault or defect existed at the time of purchase:

5.Some products may be supplied with Ethernet connection hardware. The warranty is limited on such products and will not cover

(a)Internet and or DLNA connection / setup related problems

(b)Access fees and or charges incurred for internet connection

(c)The use of incompatible software or software not specifically stipulated in the product operations manual; and

(d)Any indirect or consequential costs associated with the incorrect use or misuse of the hardware, its connection to the internet or any other device.

6.To claim warranty service, when required, you should:

Telephone Panasonic???s Customer Care Centre on 132600 or visit our website referred to below and use the Service Centre Locator for the name/address of the nearest Authorised Service Centre.

Send or take the product to a Panasonic Authorised Service Centre together with your proof of purchase receipt as a proof of purchase date. Please note that freight and insurance to and / or from your nearest Authorised Service Centre must be arranged by you.

Note that home or pick-up/delivery service is available for the following products in the major metropolitan areas of Australia or the normal operating areas of the nearest Authorised Service Centres:

Plasma/LCD televisions / displays (screen size greater than 103 cm)

7.The warranties hereby conferred do not extend to, and exclude, any costs associated with the installation, de-installation or re-installation of a product, including costs related to the mounting, de-mounting or remounting of any screen, (and any other ancillary activities), delivery, handling, freighting, transportation or insurance of the product or any part thereof or replacement of and do not extend to, and exclude, any damage or loss occurring by reason of, during, associated with, or related to such installation, de-installation, re-installation or transit.

Panasonic Authorised Service Centres are located in major metropolitan areas and most regional centres of Australia, however, coverage will vary dependant on product. For advice on exact Authorised Service Centre locations for your product, please telephone our Customer Care Centre on 132600 or visit our website and use the Service Centre Locator.

In addition to your rights under this warranty, Panasonic products come with consumer guarantees that cannot be excluded under the Australian Consumer Law. If there is a major failure with the product, you can reject the product and elect to have a refund or to have the product replaced or if you wish you may elect to keep the goods and be compensated for the drop in value of the goods. You are also entitled to have the product repaired or replaced if the product fails to be of acceptable quality and the failure does not amount to a major failure.

If there is a major failure in regard to the product which cannot be remedied then you must notify us within a reasonable period by contacting the Panasonic Customer Care Centre. If the failure in the product is not a major failure then Panasonic may choose to repair or replace the product and will do so in a reasonable period of time from receiving notice from you.

THIS WARRANTY CARD AND THE PURCHASE DOCKET (OR SIMILAR PROOF OF PURCHASE)

SHOULD BE RETAINED BY THE CUSTOMER AT ALL TIMES

If you require assistance regarding warranty conditions or any other enquiries, please visit the Panasonic Australia

website www.panasonic.com.au or contact by phone on 132 600

If phoning in, please ensure you have your operating instructions available.

Reference

(Inside of product)