ORDERING REPLACEMENT PARTS
To order replacement parts, please see the front cover of this manual. To help us assist you, be prepared to provide the following information when contacting us:
???the model number and serial number of the product (see the front cover of this manual)
???the name of the product (see the front cover of this manual)
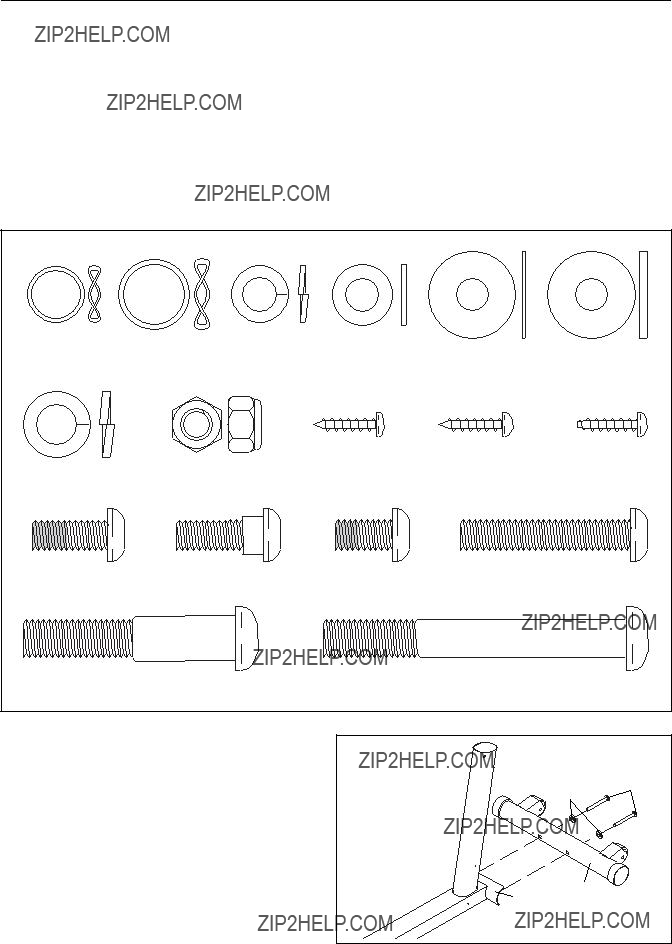
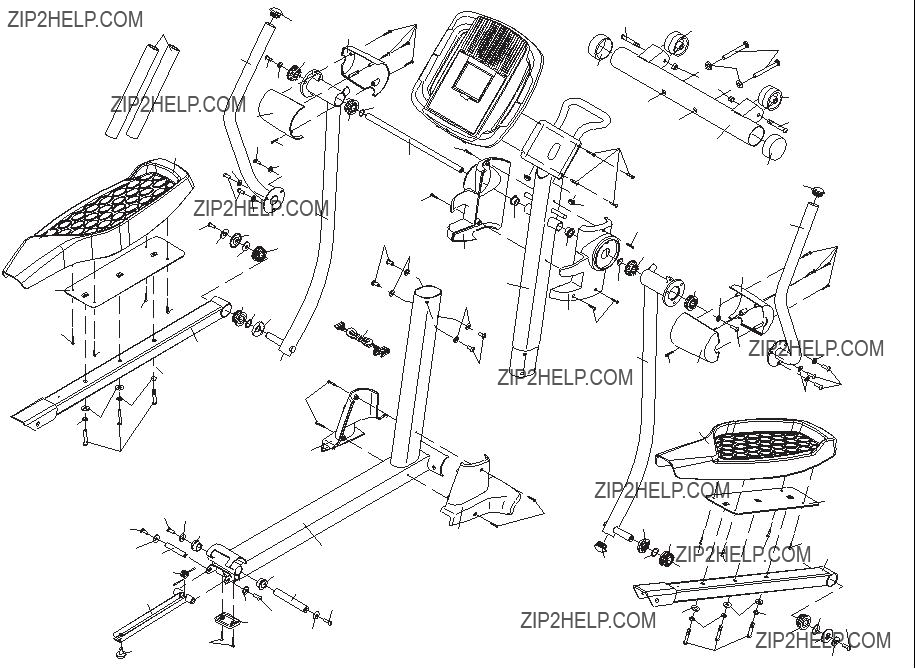
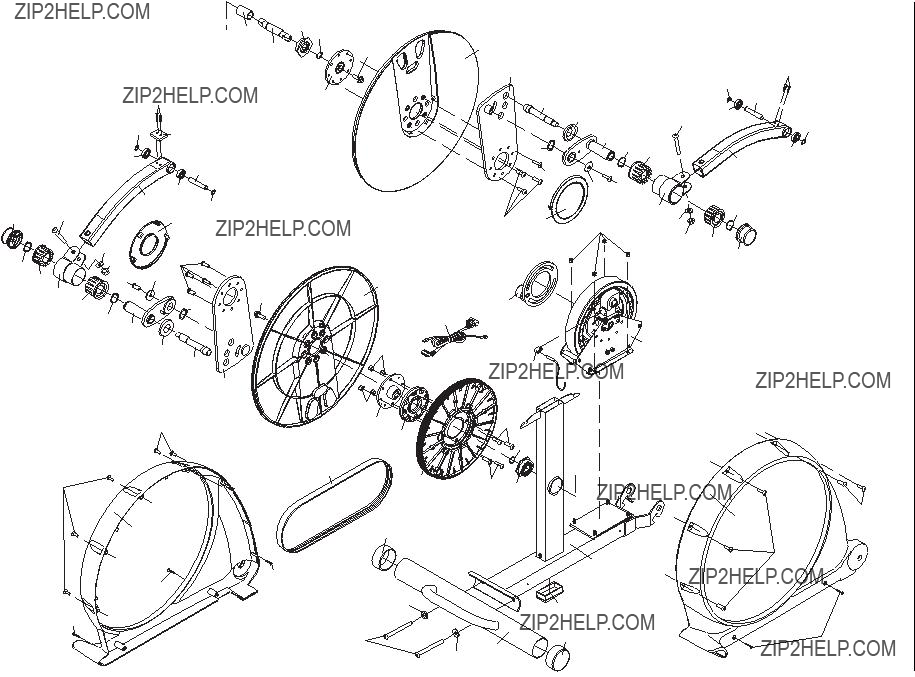
???the key number and description of the replacement part(s) (see the PART LIST and the EXPLODED DRAWING near the end of this manual)
LIMITED WARRANTY
WHAT IS COVERED???The entire NordicTrack elliptical exerciser (???Product???) is warranted to be free of all defects in material and workmanship.
WHO IS COVERED???The original purchaser or any person receiving the Product as a gift from the original purchaser.
HOW LONG IT IS COVERED???ICON Health & Fitness, Inc. (???ICON???) warrants the product for one year after the date of purchase. Labor is covered for one year. There is a lifetime warranty on the frame.
WHAT WE DO TO CORRECT COVERED DEFECTS???We will ship to you, without charge, any replacement part or component, pro- viding the repairs are authorized by ICON first and are performed by an ICON trained and authorized service provider, or, at our option, we will replace the Product.
WHAT IS NOT COVERED???Any failures or damage caused by unauthorized service, misuse, accident, negligence, improper assem- bly or installation, alterations, modifications without our written authorization or by failure on your part to use, operate, and maintain as set out in your User???s Manual (???Manual???).
WHAT YOU MUST DO???Always retain proof of purchase, such as your bill of sale; store, operate, and maintain the Product as spec- ified in the Manual; notify our Customer Service Department of any defect within 10 days after discovery of the defect; as instruct- ed, return any defected part for replacement or, if necessary, the entire product, for repair.
USER???S MANUAL???It is VERY IMPORTANT THAT YOU READ THE MANUAL before operating the Product. Remember to do the periodic maintenance requirements specified in the Manual to assure proper operation and your continued satisfaction.
HOW TO GET PARTS AND SERVICE???Simply call our Customer Service Department at 1-888-825-2588 and tell them your name and address and the serial number of your Product. They will tell you how to get a part replaced, or if necessary, arrange for service where your Product is located or advise you how to ship the Product for service. Before shipping, always obtain a Return
Authorization Number (RA No.) from our Customer Service Department; securely pack your Product (save the original shipping car- ton if possible); put the RA No. on the outside of the carton and insure the product. Include a letter explaining the product or prob- lem and a copy of your proof of purchase if you believe the service is covered by warranty.
ICON is not responsible or liable for indirect, special or consequential damages arising out of or in connection with the use or per- formance of the product or damages with respect to any economic loss, loss of property, loss of revenues or profits, loss of enjoy- ment or use, costs of removal, installation or other consequential damages of whatsoever nature. Some states do not allow the exclu- sion or limitation of incidental or consequential damages. Accordingly, the above limitation may not apply to you.
The warranty extended hereunder is in lieu of any and all other warranties and any implied warranties of merchantability or fitness for a particular purpose is limited in its scope and duration to the terms set forth herein. Some states do not allow limitations on how long an implied warranty lasts. Accordingly, the above limitation may not apply to you.
No one is authorized to change, modify or extend the terms of this limited warranty. This warranty gives you specific legal rights and you may have other rights which vary from state to state.
ICON HEALTH & FITNESS, INC., 1500 S. 1000 W., LOGAN, UT 84321-9813
 CAUTION
 Visit our website at

 , adjustable wrench
  , and rubber mallet
  .
.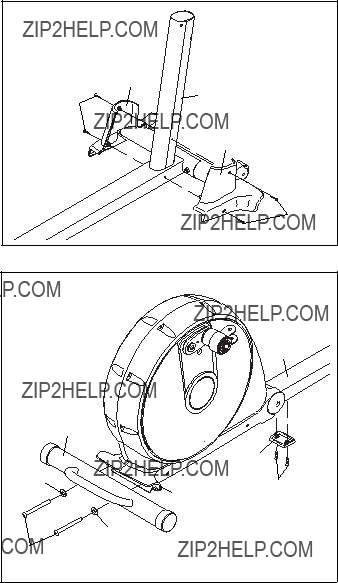

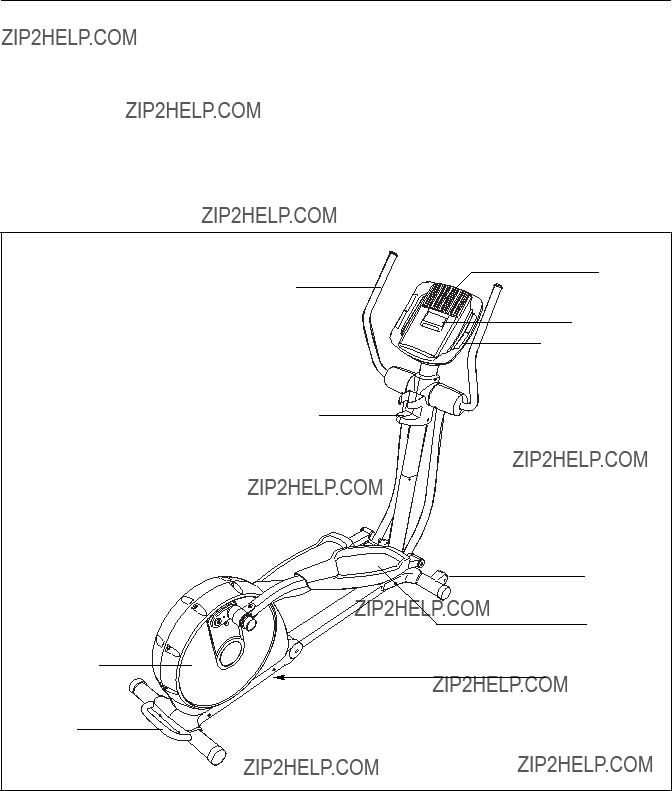
 Wire Harnesses (64, 65)

 92
92
 72
72


 97
97


 11
11 

 31
31 97
97
 43 54
43 54


 49
49