N

?????????

English

Deutsch

MACRO COOL-LIGHT SL-1

Jp ????????? ?????????

???????????????

En Macro light

Instruction Manual

De Makro-Ringleuchte

Bedienungsanleitung

Fr Eclairage macro

Manuel d???utilisation

Es Luz macro

Manual de instrucciones

Nl Macrolicht

Gebruiksaanwijzing

It Luce fredda per macro

Manuale istruzioni

?????????????????????

??????????????????????????????????????????????????????????????? ??????????????????????????????????????????

??????????????????????????????????????????????????????????????? ??????????????????????????????????????????????????????????????? ??????????????????????????????????????????????????????????????? ????????????????????????????????????

??????????????????????????????????????????????????????????????? ????????????????????????????????????????????????????????????

??????????????????????????????????????????????????????

??????????????????????????????????????? ?????? ??????????????????????????????????????? ??????????????????????????????????????? ??????????????????????????????????????????

??????????????????????????????????????? ??????????????????????????????????????? ?????? ??????????????????????????????????????? ??????????????????????????????????????? ??????????????????????????????????????????

??????????????????????????????????????????????????????????????? ?????????????????????????????????

???????????????

?????????????????????????????????????????????????????? ?????????????????????????????????????????????????????? ?????????????????????(????????????????????????????????? ???????????????????????????

??????????????????????????????????????????????????? ?????????????????????????????????????????????????????? ???????????????????????????(???????????????????????? ????????????????????????????????????

??????????????????????????????????????????(????????? ?????????????????????????????????????????????????????? ??????????????????????????????(????????????????????? ????????????????????????????????????????????????

??? ??????MACRO COOL-LIGHT SL-1???????????????

???????????????????????????????????????????????????????????? ?????????????????????????????????????????????

???????????? ???????????????????????????????????????????????????????????? ?????????

???????????????????????????????????????????????????????????? ??????????????????????????????????????????

????????????????????????

???????????????????????????????????????????????????????????? ?????????????????????????????????????????????

??????????????? ???????????????????????????????????????????????????????????? ????????????

???????????????????????????????????????????????????????????? ?????????????????????????????????????????????????????????

???????????????????????? ?????????????????????????????????????????????????????????

???????????????????????????????????????????????????????????? ??????????????????

??????????????? ????????????????????????????????????????????????

???????????????????????????????????????????????????????????? ?????????

???????????? ???????????????????????????????????????????????????????????? ???????????????????????????????????????????????????????????? ????????????????????????

MACRO COOL-LIGHT SL-1??????????????????

??????????????????????????????

???????????? ???????????????????????????????????????

???????????????????????????????????????1m??????????????? ???????????????

???????????????????????????????????????????????????????????? ????????????????????????????????????

???????????? ????????????????????????????????????????????????

???????????????????????????????????????????????????????????? ????????????

??? ??????MACRO COOL-LIGHT SL-1???????????????

????????????????????????????????????

????????????????????????????????????????????????

????????????

?????????????????????????????????????????????????????????

????????????????????????????????????????????????

????????????

???????????????????????????????????????????????????????????? ??????????????????

???????????????????????????????????????????????????????????? ?????????????????? ????????????????????????

???????????????????????????????????????????????????????????? ????????????????????????????????????

?????????????????????????????????????????????

????????????????????????????????????????????????????????????

???????????????

????????????????????????????????????????????????AC????????? ?????????????????????

?????? ???????????????????????????????????????????????????????????? ????????????????????????????????????????????????

AC?????????????????????????????????????????????????????? AC????????????????????????????????????????????????????????? ?????????????????? ????????????????????????????????????????????????????????????

?????????????????????????????????

????????????AC????????????????????????????????????????????? ???????????????????????????????????????

?????? ???????????????????????????????????????????????????????????? ???????????????????????????

???????????????????????????????????????????????????????????? ???????????????????????????????????????????????????????????? ??????????????????

????????????

???????????????????????????????????????????????????????????? ??????????????????????????????????????????

??? ???????????????????????????????????????

???????????????????????????????????????????????????

??????????????????????????????????????????????????????

??????

?????????????????????????????????????????????

??????????????????????????????????????????????????????

????????????

??????????????????????????????????????????????????????

??????????????????????????????????????????????????????

??????

????????????????????????????????????????????????????????????

??????????????????????????????????????????????????????

??????

???????????????????????????????????????????????????????????? ???????????????????????????????????????????????????

?????? ??????????????????????????????????????????????????????

???????????????????????????????????????????????????????????? ?????????????????????

?????? ??????????????????????????????????????????????????????

????????????????????????????????????????????????

??????????????????????????????????????????????????????

???????????????

???????????????????????????????????????????????????????????? ?????????????????????

?????? ???????????????????????????????????????????????????????????? ????????????????????????

???????????????????????????????????????????????????????????? ?????????????????????

Foreword

Thank you for purchasing the Nikon MACRO COOL- LIGHT SL-1, for use with Nikon digital cameras. Get to know your SL-1, and be sure to read this manual thoroughly before using the product.

Attaching the SL-1 to the front of the lens of compatible* Nikon COOLPIX cameras enables illumination of subjects in Macro close-up photography at a shooting distance of up to approximately 12cm (4.7 in.) ??? one thing your camera???s built-in Speedlight may not be able to do.

*The COOLPIX 775, 880, 885, 950, 990, 995, 4300, 4500 and 5000 can all accommodate the MACRO COOL-LIGHT SL-1.

NOTE: Please refer to ???Specifications??? for important information regarding the use of the SL-1 with the COOLPIX 5000 digital camera.

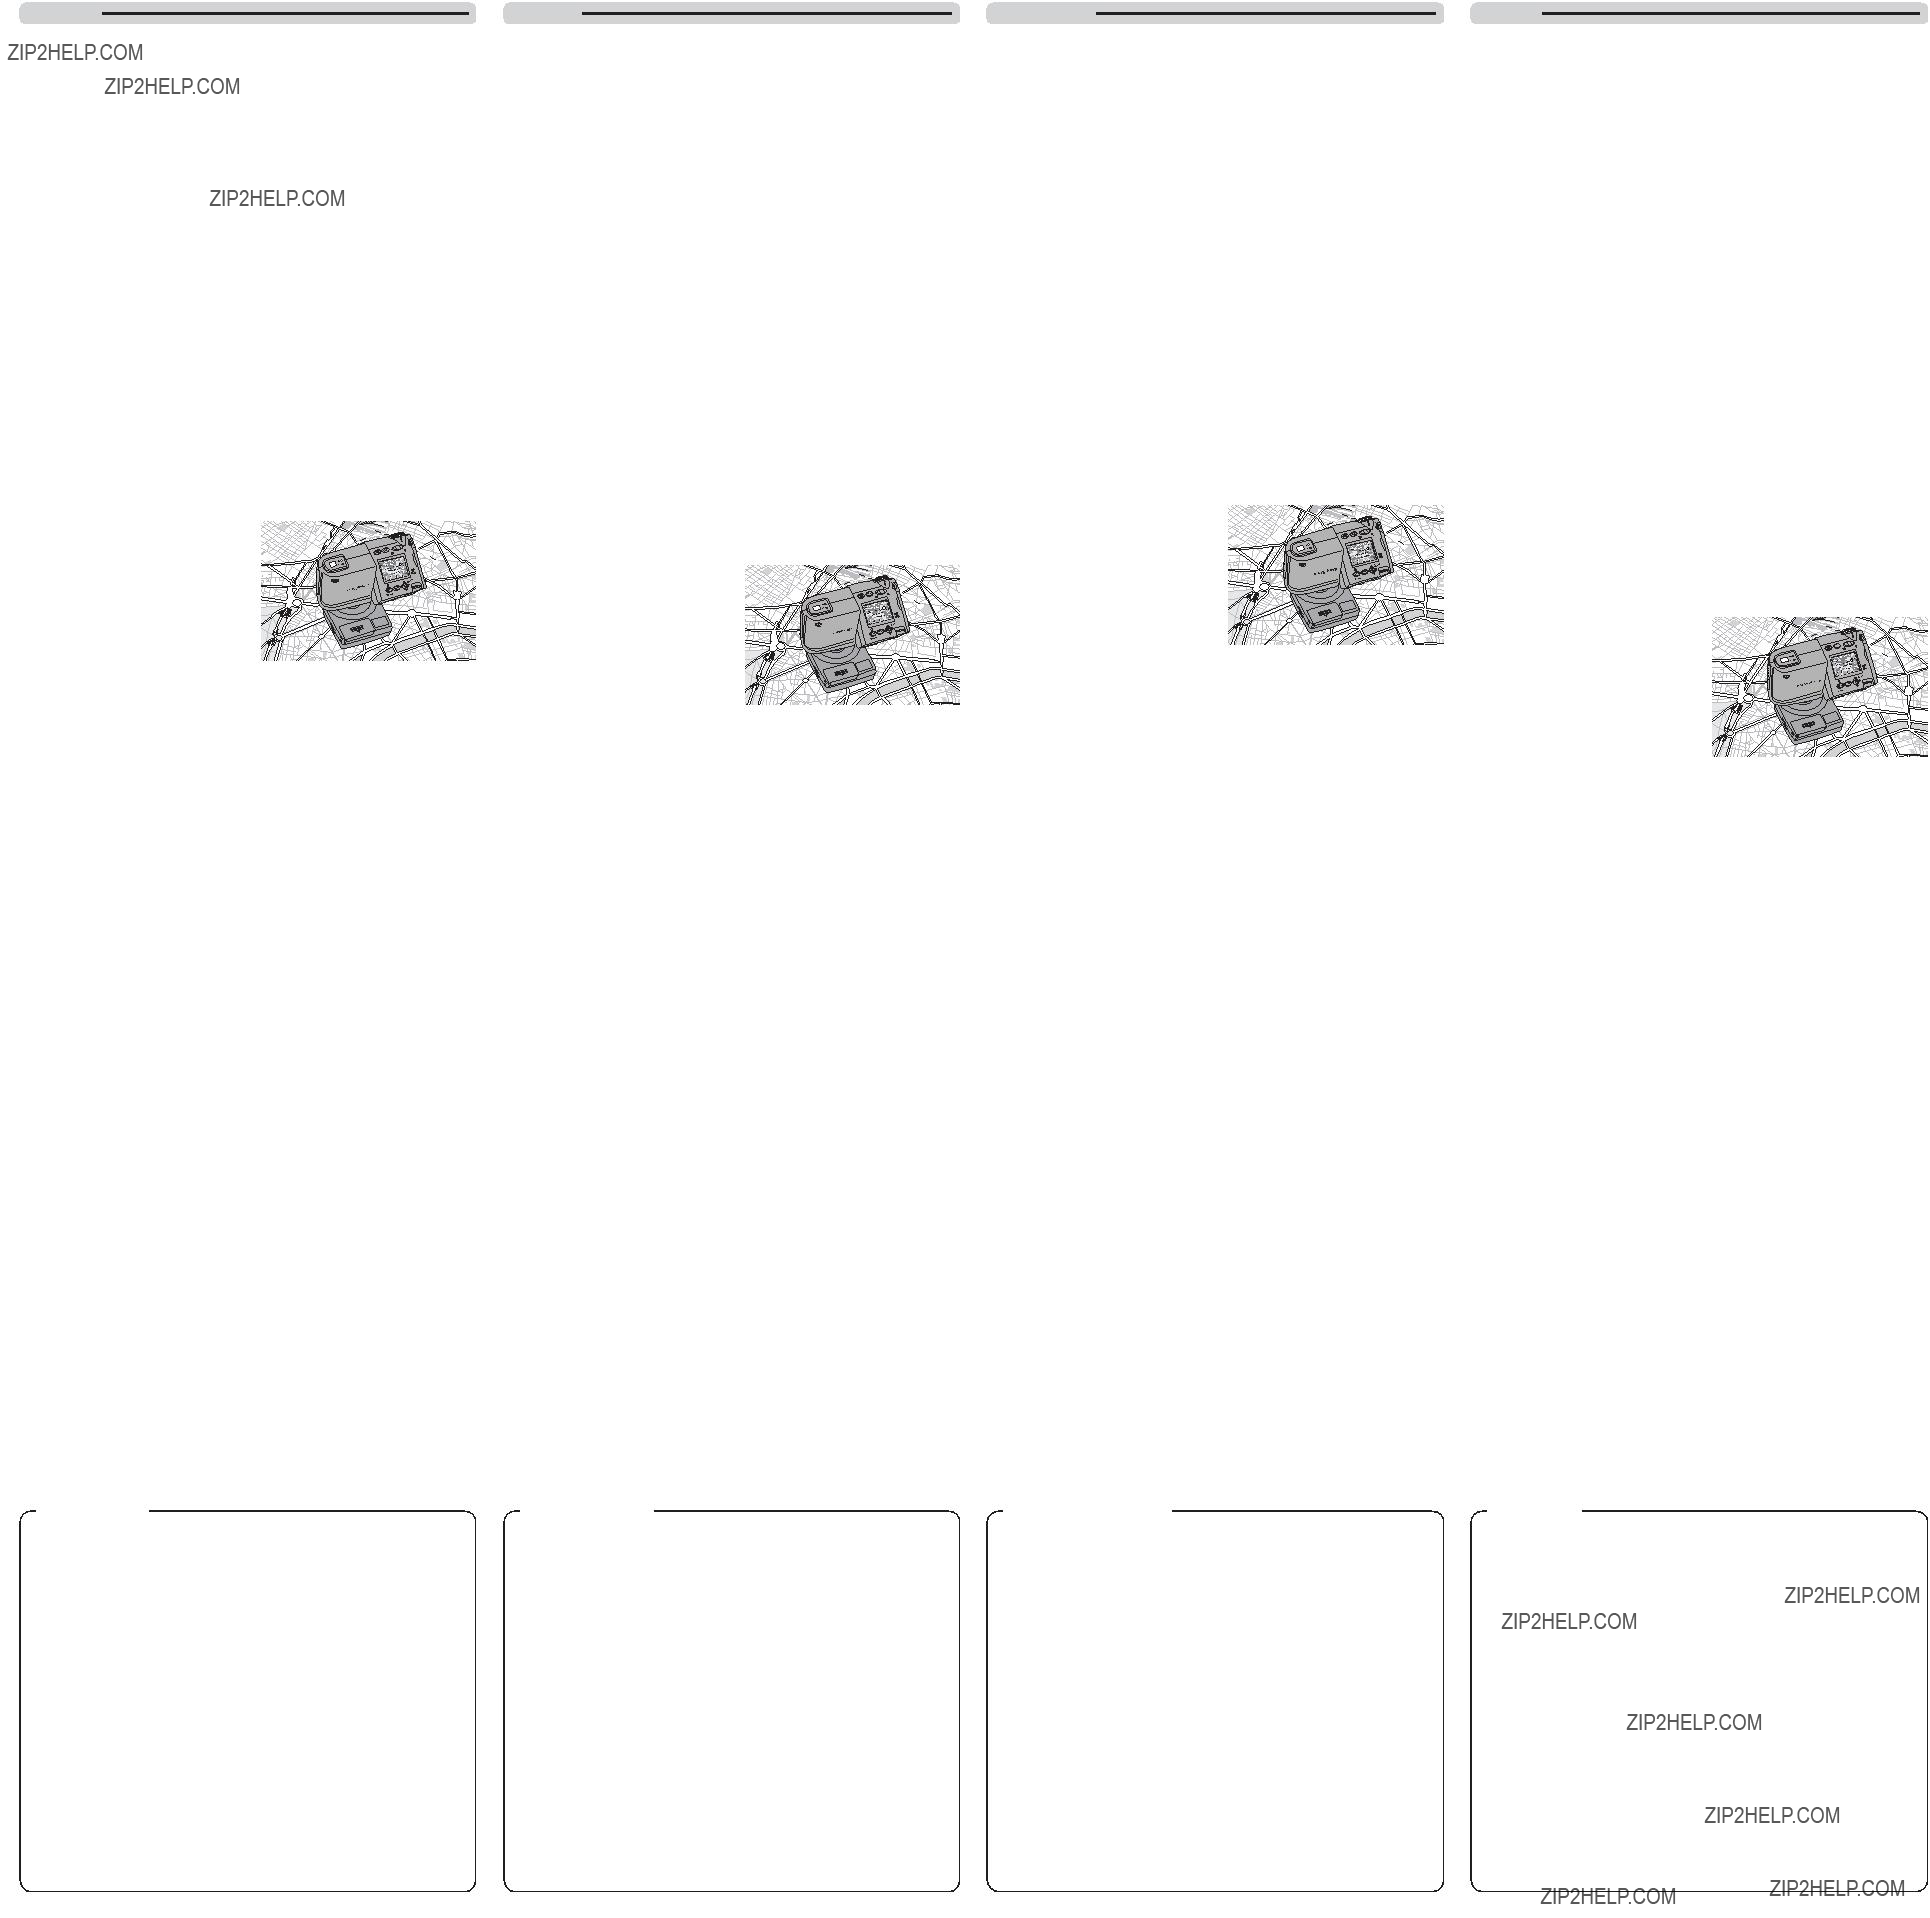
Nomenclature (Fig. A and B)

??? Attachment wheel lock ?? Lights

??? DC-in connector ??? Attachment wheel ??? Power switch

??? Strap eyelet

??? Battery-chamber cover

Power Sources

Use two CR2-type 3V lithium batteries (available separately) with the SL-1. To power the SL-1 continuously for an extended period of time, we recommend you use the optional AC Adapter EH-53, EH-31, EH-30 or EH-21.

???When Using CR2-type 3V Lithium Batteries

1Set the power switch on the SL-1 to OFF. (Fig. C)

2Slide the battery-chamber cover open. (Fig. D)

3Insert the batteries with the ???+??? and ????????? ends positioned as marked inside the battery chamber. Make sure that the tip of the flexible tab inside the battery chamber sticks out as shown. (Fig. E)

(The flexible tab is used when removing exhausted batteries from the chamber.)

4Set the power switch on the SL-1 to ON and confirm that the lights are on. (If you are not going to use the SL-1 right away, please turn the power off.)

Taking Pictures Using the

SL-1

For details on camera operation, refer to your camera???s instruction manual.

1Set the Focus mode to Macro Close-Up (???) and the Flash mode to Flash Cancel (???).

???When using a digital camera other than the COOLPIX 775, Manual Focus mode can also be selected.

???With the COOLPIX 880, 885, 4300 or 4500, Close Up (z) in the Scene mode can also be selected (Flash Cancel is selected automatically).

2Set the power switch on the SL-1 to ON, and select ???Auto??? from the White Balance menu on your camera.

3Press your camera???s shutter release button to take a picture.

???Use the Monitor to verify your subject. The camera body obstructs the view through the optical viewfinder.

???The shooting distance and zoom position you can select vary depending on the camera you are using. Refer to the table under ???Specifications??? for the shooting distance and zoom position for each compatible Nikon COOLPIX digital camera.

Tips

???When using the SL-1 with a camera that has a closest shooting distance of 2cm (0.8 in.), such as the COOLPIX 950, 990, 995, 4500 and 5000, close- up pictures can easily be taken by placing the SL-1 on a subject with a flat surface as shown below. (This is particularly effective when shooting close- ups of subjects such as maps or fabric.)

Ch.

Ga

Troubleshooting

Einf??hrung

Vielen Dank f??r Ihr Vertrauen in Nikon-Technik. Die MACRO COOL-LIGHT SL-1 ist eine Makroringleuchte f??r Nikon-Digitalkameras. Bitte lesen Sie vor der Verwendung der SL-1 diese Anleitung.

Wenn Sie die SL-1 am Objektiv einer kompatiblen* Nikon COOLPIX-Kamera montieren, k??nnen Sie bei Makroaufnahmen bis zu einem Aufnahmeabstand von ca. 12 cm ihr Motiv beleuchten ??? ein Bereich, in dem Sie das integrierte Blitzger??t der Kamera nicht einsetzen k??nnen.

*Die MACRO COOL-LIGHT SL-1 kann in Verbindung mit den COOLPIX-Kameras 775, 880, 885, 950, 990, 995, 4300, 4500 und 5000 eingesetzt werden.

WICHTIG: Weitere wichtige Informationen f??r die Verwendung der SL-1 an der COOLPIX 5000 entnehmen Sie bitte dem Abschnitt ??Technische Daten??.

Die Teile der SL-1 (Abb. A und B)

??? Feststellschraube des Befestigungsrings ?? Leuchtk??rper

??? Anschluss f??r Netzadapter ??? Befestigungsring

??? Ein-/Ausschalter

??? ??se f??r Trageriemen

??? Abdeckung des Batteriefachs

Stromversorgung

Verwenden Sie f??r die Stromversorgung der SL-1 zwei 3-Volt-Lithium-Batterien vom Typ CR-2 (separat erh??ltlich). Um die SL-1 f??r eine l??ngere Zeitspanne mit Strom zu versorgen, empfiehlt Nikon die Verwendung des Netzadapters EH-53, EH-31, EH-30 oder EH-21 (als Zubeh??r erh??ltlich).

???Verwendung von 3-Volt-Lithium- Batterien Typ CR-2

1Schalten Sie die SL-1 mit dem Ein-/Ausschalter aus. (Abb. C)

2Schieben Sie Abdeckung des Batteriefachs auf.

(Abb. D)

3Legen Sie die Batterien mit der richtigen Ausrichtung der Plus- und Minuspole entsprechend der ??+??- und ??-??-Markierungen in das Batteriefach ein. Achten Sie darauf, dass das Ende der im Batteriefach angebrachten Lasche wie gezeigt herausragt. (Abb. E)

(Sie ben??tigen das Laschenende beim Herausnehmen der verbrauchten Batterien aus dem Batteriefach.)

4Schalten Sie die SL-1 mit dem Ein-/Ausschalter ein und pr??fen Sie, ob alle Lampen leuchten.

(Wenn Sie die SL-1 nicht direkt verwenden wollen, sollten Sie sie wieder ausschalten.)

Fotografieren mit der SL-1

N??here Informationen zur Funktionsweise der Kamera entnehmen Sie bitte den Dokumentationen zur Kamera.

1W??hlen Sie als Fokuseinstellung ??Makro?? (???) und schalten Sie das integrierte Blitzger??t aus (??Blitz aus?? ???).

???Wenn gew??nscht k??nnen Sie auch die manuelle Scharfeinstellung aktivieren (nicht m??glich bei der COOLPIX 775).

???.Bei den Digitalkameras COOLPIX 880, 885, 4300

und 4500 k??nnen Sie auch das Motivprogramm ??Nahaufnahme?? (z) einstellen, bei dem das integrierte Blitzger??t automatisch ausgeschaltet wird.

2Schalten Sie die SL-1 mit dem Ein-/Ausschalter ein und w??hlen Sie im Men?? ??Wei??abgleich?? Ihrer Kamera die Option ??Automatik??.

3Zum Belichten einer Aufnahme dr??cken Sie den Ausl??ser bis zum zweiten Druckpunkt.

???Auf dem Monitor k??nnen Sie den Bildaufbau ??berpr??fen. Die Sicht durch den Sucher jedoch wird durch das Geh??use der Kamera behindert.

???Welchen Aufnahmeabstand und welche Zoomeinstellung Sie w??hlen k??nnen, h??ngt von der verwendeten Kamera ab. Aufnahmeabstand und Zoomeinstellung aller kompatiblen Nikon COOLPIX-Kameras entnehmen Sie bitte der Tabelle unter ??Technische Daten??.

Tipps

???Wenn Sie die SL-1 an einer Kamera mit einem minimalen Aufnahmeabstand von 2 cm verwenden (COOLPIX 950, 990, 995, 4500 und 5000), k??nnen Sie ganz einfach eine Makroaufnahme von einer flachen Objektoberfl??che machen, indem Sie die SL-1 wie in der Abbildung gezeigt auf die Oberfl??che stellen. (Dies ist beispielsweise sinnvoll f??r Aufnahmen von Landkarten oder Stoffen.)

Ch.

Ga

Probleml??sungen

?????????????????????????????????????????

????????????????????????????????????????????????MACRO

COOL-LIGHT???????????? ?????????????????????SL-1???

??????????????????????????????????????????????????????????????? ??????SL-1??????????????????????????????????????????????????? ??????????????????????????????????????????????????????????????? ???????????????????????????????????????12cm??????????????? ??????????????????????????????????????????????????????????????? ????????????????????????????????????????????????SL-1????????? ??????????????????????????????????????????????????????????????? ???????????????????????????

??????????????????????????????????????????????????????????????? ?????????????????????????????????????????????

?????????????????????????????????????????????

COOLPIX775???880???885???950??? 990???995???4300???4500???5000???1

??????????????????

??????SL-1?????????3V?????????????????????CR2???????????? ???2????????????????????????????????????????????????????????? ?????????????????????AC????????????EH-53???EH-31??? EH-30?????????EH-21?????????????????????????????? ???AC100V???????????????????????????????????????????????? ??????????????????????????????SL-1??????????????????????????? ????????????

???3V?????????????????????CR2??????????????????????????? ??????

1 SL-1????????????????????????OFF????????????????????? ????????????????????????

2???????????????????????????????????????????????????????????? ???????????????????????????????????????

3???????????????????????????????????????????????????????????? ???????????????????????????????????????????????????????????? ???????????? + - ??????????????????????????????????????? ???????????????????????????????????????????????????????????? ????????????????????????????????????????????????????????????

4SL-1????????????????????????ON????????????????????? SL-1??????????????????????????????????????????????????? ???????????????????????????????????????????????????????????? ???OFF????????????????????????????????????

????????????AC????????????EH-53???EH-31???EH-30

?????????EH-21??????????????????????????????????????? EH-53??????????????????????????????

???COOLPIX950???990???995???4500???

?????????

?????????????????????????????????SL-1?????????????????? ??????????????????????????????????????????????????????-2??????

???COOLPIX5000????????????

????????????????????????????????????UR-E6??????????????? ??????????????????????????????????????????????????????SL-1 ???????????????????????????????????????????????????

3SL-1??????????????????????????????????????????????????? ???1?????????????????????????????????????????????????????? ??????2??????????????????????????????????????????????????? ????????????????????????????????????

????????????

??????????????????????????????????????????????????????????????? ??????????????????????????????????????????????????????????????? ????????????

1????????????????????????????????????????????????????????????

?????????????????????

????????????????????????????????????????????????f????????? ???????????????????????????????????????????????????????????????

????????????????????????COOLPIX775?????????????????? ???????????????????????????????????????????????????????????? ???????????????????????????

???COOLPIX880???885???4300???4500

????????????

?????????????????????????????????????????????z????????? ???????????????????????????????????????????????????????????? ???????????????????????????????????????????????????????????? ??????????????????????????????

2SL-1????????????ON???????????????????????????????????? ?????????????????????????????????????????????

3 ????????????????????????

/????????????????????????????????????????????????????????? SL-1??????????????????????????????????????????????????? ???????????????????????????????????????????????????

/???????????????????????????????????????????????????????????? ???????????????????????????????????????????????????????????? ??????????????????

????????????

/COOLPIX950???990???995???4500??? 5000???????????????????????????????????????????????? 2cm?????????????????????????????????????????????????????? ???????????????????????????????????????????????????????????? ???????????????????????????????????????????????????????????? ???????????????????????????????????????????????????????????? ???????????????????????? ?????????????????????????????????

??????????????????

?????? ????????????

??????????????????????????? BSS????????????????????? ???????????????????????????????????????????????????ON ??????????????????????????? ?????????????????????

????????? ????????????????????????

??????????????????????????? ???????????????????????? ?????????

??????????????????????????? ??????????????????????????? ??????????????????????????? ????????????????????????

?????????????????????????????????????????????????????????

????????????SL-1???LED?????????????????????????????? ???????????????????????????????????????????????????

?????????

/??? ??? S L - 1 ??? ??? ??? ??? ??? ??? ??? ??? ??? ??? ??? ???

COOLPIX775???880???885???950???990???

995???4300???4500???5000???????????? ???COOLPIX800???900???910?????????????????? ???????????????????????????????????????????????????????????? ????????????????????????????????????????????????????????????

/SL-1??????????????????LED???????????????????????? ????????????????????????????????????????????????????????? ???????????????????????????????????????????????????

/SL-1??????????????????????????????????????????????????? ????????????????????????????????????????????????

/SL-1???????????????????????????????????????SL-1?????? ????????????????????????????????????SL-1??????????????? ???????????????????????????????????????????????????????????? ??????SL-1?????????????????????????????????

/SL-1??????????????????????????????????????????????????? ???????????????????????????????????????????????????????????? SL-1??????????????????????????????????????????????????? ????????????????????????SL-1??????????????????????????? ??????????????????????????????????????????????????????

/SL-1??????????????????????????????????????????????????? ???????????????????????????????????????????????????????????? ???????????????????????????????????????????????????????????? ???????????????????????????????????????????????????????????? ???????????????????????????????????????????????????????????? ???????????????????????????????????????????????????????????? ????????????????????????????????????????????????

The SL-1 must already be attached to the camera before the AC Adapter can be connected to the SL-1.

1Set the power switch on the SL-1 to OFF. (Fig. C)

2Insert the DC plug of the AC Adapter into the DC- in connector of the SL-1 ???, and insert the wall plug of the AC Adapter into a wall socket ??.

(Fig. H)

3Set the power switch on the SL-1 to ON and confirm that the lights are on. (If you are not going to use the SL-1 right away, please turn the power off.)

???When an AC Adapter is connected to the SL-1 while 3V lithium batteries are still in the chamber, power is supplied by the AC Adapter.

Attaching the SL-1 to Your Camera

(Illustration shows COOLPIX 4500)

1Turn the attachment wheel lock of the SL-1 clockwise and confirm that the lens attachment wheel is locked. (Fig. F-1)

2(For COOLPIX 775 users)

Attach the optional UR-E3 lens adapter to the camera, then attach the SL-1 by screwing it into the front of the UR-E3.

(For COOLPIX 880 users)

Attach the optional UR-E2 step down ring lens adapter to the camera, then attach the SL-1 by screwing it into the front of the UR-E2.

(For COOLPIX 885 and 4300 users)

Attach the optional UR-E4 step down ring lens adapter to the camera, then attach the SL-1 by screwing it into the front of the UR-E4.

(For COOLPIX 950, 990, 995 and 4500 users)

Attach the SL-1 by screwing it into the front of the camera lens. (Fig. F-2)

(For COOLPIX 5000 users)

Attach the optional UR-E6 step down ring lens adapter to the camera, then attach the SL-1 by screwing it into the front of the UR-E6.

3Turn the attachment wheel lock counterclockwise to disengage it 1, adjust the position of the battery chamber so it is best suited for taking pictures 2, then turn the attachment wheel lock clockwise to fix the SL-1 in place. (Fig. G)

Notes on Care and Usage

???The MACRO COOL-LIGHT SL-1 is designed specifically for use with Nikon COOLPIX 775, 880, 885, 950, 990, 995, 4300, 4500 and 5000 digital cameras. (The SL-1 can be attached to the COOLPIX 800, 900 and 910 as well, but proper lighting cannot be attained.)

???Since the SL-1 uses spot light source (LED), the image of the light source itself might be exposed depending on the subject

???Attaching the SL-1 increases the total weight of the camera, thus increasing the chance of picture blur occurring. Please take care to avoid camera shake.

???When the SL-1 is attached to the camera, do not attempt to hold the camera by the SL-1 alone. Damage may result to the SL-1 and the camera body. When carrying or transporting the camera, please make sure that the SL-1 is detached.

???Thin wrist straps such as those used with mobile phones can also be attached to the SL-1. Be careful not to pull on the strap when the SL-1 is attached to a camera, as this can result in damage to the SL-1 and the camera.

???Use a blower brush to remove dirt and dust from the SL-1 and clean it with a soft, dry cloth. After using the SL-1 near seawater, wipe the SL-1 with a soft, clean cloth slightly moistened with fresh, pure water, then dry it thoroughly with a dry cloth. NEVER use organic solvents such as thinner or benzene.

Bevor Sie einen Netzadapter an die SL-1 anschlie??en k??nnen, muss die SL-1 an der Kamera befestigt werden.

1Schalten Sie die SL-1 mit dem Ein-/Ausschalter aus. (Abb. C)

2Stecken Sie zuerst den Anschlussstecker des

Netzadapters in den Netzadapteranschluss der SL-1 ???. Schlie??en Sie dann das Netzger??t mit

dem Netzanschlusskabel an eine Netzsteckdose an ??. (Abb. H)

3Schalten Sie die SL-1 mit dem Ein-/Ausschalter ein und pr??fen Sie, ob alle Lampen leuchten.

(Wenn Sie die SL-1 nicht direkt verwenden wollen, sollten Sie sie wieder ausschalten.)

???Wenn Sie einen Netzadapter an die SL-1 anschlie??en w??hrend sich noch 3-Volt-Lithium- Batterien im Batteriefach befinden, erfolgt die Stromversorgung ??ber den Netzadapter.

Montieren der SL-1 an der Kamera

(Die Abbildungen zeigen eine COOLPIX 4500.)

Hinweise zur Verwendung und Pflege

/AC???????????????????????????????????????SL-1????????? ??????????????????????????????SL-1???AC??????????????? ???????????????????????????

1 SL-1????????????????????????OFF????????????????????? ????????????????????????

Ch. Ga

NIKON CORPORATION

Fuji Bldg., 2-3, Marunouchi 3-chome,

Chiyoda-ku, Tokyo 100-8331, JAPAN

K3A01000201 (76)

6MAW1076-01

Printed in Japan

3SL-1????????????????????????ON????????????????????? SL-1??????????????????????????????????????????????????? ???????????????????????????????????????????????????????????? ???OFF????????????????????????????????????

???3V???????????????????????????????????????AC????????? ??????????????????????????????AC???????????????????????? ????????????????????????

???????????????

????????????????????????????????????COOLPIX4500?????? ????????????

1SL-1??????????????????????????????????????????????????? ???????????????????????????????????????????????????????????? ????????????-1??????

2???COOLPIX775????????????

???????????????????????????????????????UR-E3???????????? ???????????????????????????????????????????????????????????? SL-1???????????????????????????????????????????????????

???COOLPIX880????????????

????????????????????????????????????UR-E2??????????????? ?????????????????????????????????????????????????????? SL-1???????????????????????????????????????????????????

???COOLPIX885???4300????????????

????????????????????????????????????UR-E4??????????????? ?????????????????????????????????????????????????????? SL-1???????????????????????????????????????????????????

????????????????????????????????????????????????????????????

??????

????????? 3V?????????????????????CR2????????2?????????????????????6???8.4V???0.2A???

????????????????????? ???6?????????3V?????????????????????????????????8cm??????????????????????????????????????????

???????????????????????????????????????

??????????????? 70???W?????91???H?????21???D???mm???????????????????????????

????????????????????? ???60g?????????????????????

???1??? COOLPIX5000????????????????????????2cm???????????????????????????????????????????????????????????????????????? ?????????????????????????????????SL-1??????????????????????????????????????????????????????-1??????????????????????????? ?????????????????????????????????????????????????????????????????????????????????????????????????????????????????????????????? ??????????????????????????????3.4cm??????????????????

???2??? ?????????????????????????????????????????????????????????????????????

Specifications

*1 The distance between the front of the lens and the subject.

*2 Normally you can use the wide-to-middle zoom range in Macro close-up photography up to 2cm (0.8 in.) with the COOLPIX 5000. However, when using the SL-1, you should use the middle-to-telephoto range for such picture-taking as the SL-1 itself obstructs your view when the zoom position is set to wide. When the UR-E6 step down ring lens adapter is attached, the closest shooting distance becomes approx. 3.4cm (1.3 in.).

Technische Daten

Stromversorgung: zwei 3-Volt-Lithium-Batterien vom Typ CR2; alternativ Stromversorgung ??ber Netzadapter (6 ??? 8,4 V; 0,2 A)

Betriebsdauer: etwa 6 Stunden (mit 3-Volt-Lithium-Batterien bei einem Aufnahmeabstand von 8 cm unter typischen Lichtverh??ltnissen gem???? Nikon-Testbedingungen)

Abmessungen: 91 x 70 x 21 mm (H x B x T)

Gewicht: ca. 60 g (ohne Batterien)

*1 Abstand zwischen der Frontlinse des Objektivs und dem Aufnahmegegenstand

*2 In der Regel k??nnen Sie bei der COOLPIX 5000 f??r Makroaufnahmen mit einem Abstand von 2 cm einen Zoombereich zwischen Weitwinkel und Mittel w??hlen. In Verbindung mit dem SL-1 sollten Sie jedoch im Zoombereich zwischen Mittel und Tele arbeiten, da bei einer Weitwinkeleinstellung m??glicherweise die SL- 1 mit aufgenommen wird. In Verbindung mit dem Vorsatzadapter UR-E6 erh??ht sich der minimale Aufnahmeabstand auf ca. 3,4 cm.

Fran??ais

Introduction

Nous vous remercions d'avoir choisi la lampe MACRO COOL-LIGHT SL-1 Nikon, compatible avec les bo??tiers num??riques Nikon*. Familiarisez-vous avec cette lampe macro et lisez enti??rement ce mode d'emploi avant d'utiliser le produit.

Le montage de la lampe macro SL-1 sur un objectif compatible COOLPIX* Nikon vous permet d'??clairer les sujets en macrophotographie jusqu'?? 12 cm ??? ce qu'un flash int??gr?? au bo??tier n'est pas capable de faire.

*Les COOLPIX 775, 880, 885, 950, 990, 995, 4300, 4500 et 5000 acceptent la lampe macro SL-1.

REMARQUE: Consultez le chapitre "Sp??cifications" pour les informations importantes concernant l'emploi de la lampe MACRO COOL-LIGHT SL-1 avec le bo??tier num??rique COOLPIX 5000.

Nomenclature (Fig. A et B)

??? Verrou de molette de fixation ?? Lampe

??? Fiche d'alimentation secteur ??? Pas de fixation

??? Interrupteur ON/OFF ??? ??illet pour courroie

??? Couvercle du logement piles

Alimentation

Utiliser deux piles au lithium de type CR2 3V (disponibles s??par??ment) avec la lampe macro SL-1. Pour alimenter la lampe macro SL-1 en continu pendant une p??riode prolong??e, nous recommandons le recours ?? un adaptateur secteur EH-53, EH-31, EH-30 ou EH-21 disponible en option.

???Utilisation de piles au lithium de type CR2 3V

1R??glez l'interrupteur de la lampe macro SL-1 sur OFF. (Fig. C)

2Faites glisser le couvercle du logement piles pour l'ouvrir. (Fig. D)

3Ins??rez les piles avec les p??les ???+??? et ????????? plac??s comme indiqu?? dans le logement piles.

V??rifiez que l'onglet flexible ?? l'int??rieur du logement piles est sorti comme indiqu??. (Fig. E) (Cet onglet flexible permet de retirer les piles usag??es du logement piles.)

4R??gler l'interrupteur de la lampe macro SL-1 sur ON pour confirmer qu'elle s'allume. (Mettez hors tension si la lampe macro SL-1 ne doit pas ??tre utilis??e imm??diatement.)

???Utilisation de l'adaptateur secteur EH-53, EH-31, EH-30 ou EH-21 en option (l'illustration montre le COOLPIX 4500 et l'adaptateur secteur EH-53)

La lampe macro SL-1 doit d??j?? ??tre mont??e sur le bo??tier avant de raccorder l'adaptateur secteur ?? la lampe macro SL-1.

1R??glez l'interrupteur de la lampe macro SL-1 sur OFF. (Fig. C)

2Ins??rer la fiche de l'adaptateur secteur dans la

fiche d'alimentation secteur de la lampe macro SL-1 ??? et branchez la prise d'alimentation de l'adaptateur secteur ??. (Fig. H)

3R??glez l'interrupteur de la lampe macro SL-1 sur ON pour confirmer qu'elle s'allume. (Mettez hors tension si la lampe macro SL-1 ne doit pas ??tre utilis??e imm??diatement.)

???Quand un adaptateur secteur est raccord?? ?? la lampe secteur SL-1 alors que les piles au lithium 3V sont encore dans le logement piles, l'alimentation se fait par l'adaptateur secteur.

Fixation de la lampe macro SL-1 sur le bo??tier

(l'illustration montre la fixation avec le COOLPIX 4500)

1Tournez la molette de fixation de la lampe macro SL-1 dans le sens horaire et v??rifiez que le pas de fixation sur l'objectif est bloqu??. (Fig. F-1)

2(Pour les utilisateurs du COOLPIX 775)

Montez la adaptateur d???objectif UR-E3 en option sur le bo??tier, puis la lampe macro SL-1en la vissant sur la adaptateur UR-E3.

(Pour les utilisateurs du COOLPIX 880)

Montez la adaptateur d???objectif UR-E2 en option sur le bo??tier, puis la lampe macro SL-1en la vissant sur la adaptateur UR-E2.

(Pour les utilisateurs des COOLPIX 885 et 4300)

Montez la adaptateur d???objectif UR-E4 en option sur le bo??tier, puis la lampe macro SL-1en la vissant sur la adaptateur UR-E4.

(Pour les utilisateurs des COOLPIX 950, 990, 995 et 4500)

Montez la lampe macro SL-1 en la vissant directement sur l'objectif. (Fig. F-2)

(Pour les usagers du COOLPIX 5000)

Montez la adaptateur d???objectif UR-E6 en option sur le bo??tier, puis la lampe macro SL-1 en la vissant sur la adaptateur UR-E6.

3Tournez la molette de fixation dans le sens anti-horaire pour la d??sengager 1, ajustez la position du logement piles pour qu'il soit le mieux adapt?? ?? la prise de photos 2, puis tournez la molette de fixation pour mettre en place la lampe macro SL-1. (Fig. G)

Prises de vues en utilisant la lampe macro SL-1

Consultez le mode d'emploi du bo??tier pour conna??tre les d??tails de son fonctionnement.

1R??glez le mode de mise au point sur macro (???) et le mode flash sur flash annul?? (???).

???Avec un bo??tier num??rique autre que COOLPIX 775, la mise au point manuelle est aussi s??lectionnable.

???Avec le COOLPIX 880, 885, 4300 ou 4500, la prise de vue gros plans (z) en mode Sc??ne est aussi s??lectionnable (le flash annul?? est automatiquement s??lectionn??).

2R??glez l'interrupteur de la lampe macro SL-1 sur ON, et s??lectionnez ???Auto??? pour la Balance des blancs du bo??tier.

3Appuyez sur le d??clencheur pour prendre la photo.

???Visualisez le sujet sur l'??cran. La lampe macro g??ne la prise de vue par le viseur optique.

???La distance de prise de vues et la position du zoom varient selon le bo??tier utilis??. Consultez le tableau ci-dessous depuis le chapitre "Sp??cifications" pour la distance de prise de vues et la position du zoom concernant chaque bo??tier num??rique COOLPIX.

Conseils

???Quand la lampe macro SL-1 est utilis??e sur un bo??tier avec un mode macro ?? 2 cm, par exemple sur un COOLPIX 950, 990, 995, 4500 ou 5000, la prise de vues rapproch??e est facilit??e en pla??ant la lampe macro SL-1 sur un sujet ?? surface plane comme indiqu?? ci-dessous. (Particuli??rement efficace pour la prise de vues rapproch??e de cartes ou de tissu.)

Ch.

Ga

D??pannage

Remarques sur l'entretien et l???utilisation

???La lampe macro SL-1 est con??ue pour ??tre utilis??e exclusivement avec les appareils num??riques COOLPIX 775, 880, 885, 950, 990, 995, 4300, 4500 et 5000 Nikon. (La lampe macro SL-1 peut aussi se monter sur un COOLPIX 800, 900 ou 910, mais l'??clairage ne sera pas optimum.)

???Monter la lampe macro SL-1 augmente le poids total du bo??tier, ce qui accro??t les possibilit??s de flou. Evitez tout boug?? involontaire de l'appareil.

???Quand la lampe macro SL-1 est mont??e sur le bo??tier, n'essayez pas de saisir le bo??tier uniquement par la lampe macro SL-1 car la lampe macro SL-1 et le bo??tier pourraient ??tre endommag??s. Retirez la lampe macro SL-1 de l'appareil pour porter ou transporter le bo??tier.

???De fines courroies comme celles utilis??es pour les t??l??phones portables peuvent aussi ??tre fix??es ?? la lampe macro SL-1. Prenez garde de ne pas tirer sur la courroie quand la lampe macro SL-1 est mont??e sur le bo??tier, cela pourrait endommager la lampe macro SL-1 et le bo??tier.

???Utilisez un pinceau soufflant pour ??liminer la salet?? ou la poussi??re sur la lampe SL-1 et nettoyez-la avec un chiffon doux et sec. Si la lampe macro SL-1 a ??t?? utilis??e en bord de mer, essuyez-la avec un chiffon doux propre humidifi?? d'eau douce propre, puis essuyez-la avec un chiffon sec pour la s??cher compl??tement. N'utilisez JAMAIS de solvants organiques tels que diluant ou benz??ne.

Espa??ol

Prefacio

Muchas gracias por su compra del MACRO COOL- LIGHT SL-1 de Nikon, para utilizar con las c??maras digitales de Nikon. Aprenda a usar su SL-1 y aseg??rese de leer a fondo este manual antes de utilizar el producto.

La instalaci??n del SL-1 en el frente del objetivo de las c??maras compatibles* COOLPIX de Nikon permite iluminar sujetos en la fotograf??a de primer plano macro con una distancia de fotograf??a de unos 12cm

??? algo que el Speedlight integrado en su c??mara no puede hacer.

*Los COOLPIX 775, 880, 885, 950, 990, 995, 4300, 4500 y 5000 pueden utilizar los MACRO COOL-LIGHT SL-1.

NOTA: Consulte las ???Especificaciones??? para informaci??n importante sobe el uso del SL-1 con la c??mara digital COOLPIX 5000.

Lista de piezas (Fig. A y B)

??? Bloqueo de rueda de fijaci??n ?? Luces

??? Conector de entrada de CC ??? Rueda de fijaci??n

??? Interruptor principal ??? Argolla para correa

??? Tapa del compartimento de las pilas

Interruptor principal

Utilice dos pilas de litio de tipo CR2 (de venta por separado) con el SL-1. Para alimentar continuamente el SL-1 durante un largo per??odo de tiempo, se recomienda utilizar el adaptador de CA opcional EH-53, EH-31, EH-30 o EH-21.

???Cuando se utilizan las pilas de litio de tipo CR2 de 3V

1SMueva el interruptor principal del SL-1 a OFF.

(Fig. C)

2Deslice la tapa del compartimento de las pilas para abrirla. (Fig. D)

3nserte la pila con los lados ???+??? y ????????? tal como aparecen en las marcas dentro del compartimento. Aseg??rese que la punta de la leng??eta flexible dentro del compartimento del las pilas tal como se indica. (Fig. E)

(Se utiliza la leng??eta flexible para sacar las pilas gastadas del compartimento.)

4Ajuste el interruptor principal del SL-1 a ON y confirme que las luces est??n encendidas. (Si no va a utilizar el SL-1 en seguida, desactive el interruptor principal.)

???Cuando se utiliza el adaptador de CA opcional EH-21, EH-30, EH-31 o EH-53 (La figura muestra la COOLPIX 4500 y el EH-53)

El SL-1 ya debe estar instalado en la c??mara antes de que pueda conectarse el adaptador de CA en el SL-1.

1Mueva el interruptor principal del SL-1 a OFF

(Fig. C)

2nserte el enchufe de CC en el adaptador de CA del conector de entrada de CC del SL-1 ??? e

inserte el enchufe de CA del adaptador de CA en el tomacorriente ??. (Fig. H)

3Ajuste el interruptor principal del SL-1 a ON y confirme que las luces est??n encendidas. (Si no va a utilizar el SL-1 en seguida, desactive el interruptor principal.)

???Cuando se conecta el adaptador de CA al SL-1 con las pilas de litio de 3V en el compartimento del las pilas, la alimentaci??n el??ctrica viene del adaptador de CA.

Instalaci??n del SL-1 en su c??mara

(la figura muestra la COOLPIX 4500)

1Gire el bloqueo de rueda de fijaci??n SL-1 en sentido horario y confirme que la rueda de fijaci??n del objetivo est?? bloqueado. (Fig. F-1)

2(Para usuarios de la COOLPIX 775)

Instale el adaptador del objetivo UR-E3 opcional en la c??mara e instale el SL-1 atornillando el lado delantero del UR-E3.

(Para los usuarios de la COOLPIX 880)

Instale adaptador de objetivo con anillo reductor UR-E2 opcional en la c??mara e instale el SL-1 atornill??ndolo en el lado delantero del UR-E2.

(Para usuarios de la COOLPIX 885 y 4300)

Instale adaptador de objetivo con anillo reductor UR-E4 opcional en la c??mara e instale el SL-1 atornill??ndolo en el lado delantero del UR-E4.

(Para los usuarios de las COOLPIX 950, 990, 995 y 4500)

Instale el SL-1 atornill??ndolo en el lado delantero del objetivo de la c??mara. (Fig. F-2)

(Para los usuarios de la COOLPIX 5000)

Instale adaptador de objetivo con anillo reductor UR-E6 opcional en la c??mara e instale el SL-1 atornill??ndolo en el lado delantero del UR-E6.

3Gire el bloqueo de rueda de fijaci??n en sentido antihorario para desengancharlo 1, ajuste la posici??n del portapilas para desengancharlo, ajuste la posici??n del portapilas para que est?? en la mejor posici??n para hacer fotograf??as 2 gire el bloqueo de la rueda de fijaci??n para fijar el SL-1 en su lugar. (Fig. G)

Para hacer fotograf??as utilizando el SL-1

Para m??s detalles sobre el funcionamiento de la c??mara, consulte el manual de instrucciones de la c??mara.

1Ajuste el modo de enfoque al primer plano macro (???) y el modo de flash a la flash cancelado (???).

???Cuando se utiliza otra c??mara digital que no sea la COOLPIX 775, puede seleccionar tambi??n el modo de enfoque manual.

???Con la COOLPIX 880, 885, 4300 ?? 4500, tambi??n puede seleccionar el primer plano (z) en el modo de escena (Se selecciona autom??ticamente la flash cancelado).

2Ajuste el interruptor principal en el SL-1 a ON, y seleccione ???Auto??? del men?? de balance de blancos en su c??mara.

3Presione el bot??n del obturador de su c??mara para hacer una fotograf??a.

???Utilice la pantalla para verificar su sujeto. El cuerpo de la c??mara obstruye la visi??n por el visor ??ptico.

???La distancia de fotograf??a y la posici??n de zoom seleccionado dependen de la c??mara utilizada. Consulte la tapa de ???Especificaciones??? para la distancia de fotograf??a y la posici??n del zoom para cada c??mara digital compatible COOLPIX de Nikon.

Sugerencias

???Cuando se utiliza el SL-1 con una c??mara que tenga una distancia de fotograf??a m??s cercana de 2cm (0,8 pulg.), tal como COOLPIX 950, 990, 995, 4500 y 5000, puede tomar f??cilmente fotograf??as de acercamiento colocando el SL-1 en un sujeto con una superficie plana tal como se observa a continuaci??n. (Esto es particularmente efectivo cuando se hacen acercamientos de mapas o tela.)

Ch.

Ga

Localizaci??n de aver??as

Notas para el cuidado y uso

???Se dise???? espec??ficamente el MACRO COOL-LIGHT SL-1 para utilizar con las c??maras digitales COOLPIX 775, 880, 885, 950, 990, 995, 4300, 4500 y 5000 de Nikon. (El SL-1 puede instalarse tambi??n en la COOLPIX 800, 900 y 910 pero no puede lograrse una iluminaci??n adecuada.)

???La instalaci??n del SL-1 aumenta el peso total de la c??mara, aumentando las posibilidades de que se borronee la imagen. Tenga cuidado con la vibraci??n de la c??mara.

???Cuando se instala el SL-1 en la c??mara, no trate de sujetar la c??mara s??lo por el SL-1.

Puede da??arse el SL-1 y el cuerpo de la c??mara. Cuando transporte la c??mara, aseg??rese que se ha desarmado el SL-1.

???Tambi??n puede instalar correas de mu??eca finas como las utilizadas en los tel??fonos m??viles en el SL-1. No tire de la correa cuando el SL-1 est?? instalado en una c??mara, puede da??ar el SL-1 y la c??mara.

???Utilice un cepillo soplador para eliminar la suciedad y polvo del SL-1 y limpie con un pa??o suave y seco. Despu??s de utilizar el SL-1 cerca del agua del mar, frote el SL-1 con un pa??o limpio ligeramente empapado con agua dulce y seque a fondo con un pa??o seco. NUNCA utilice disolventes org??nicos tales como diluyente o gasolina.

Nederlands

Voorwoord

Hartelijk dank voor de aanschaf van de Nikon MACRO COOL-LIGHT SL-1 die u kunt gebruiken met Nikon digitale camera's. Lees deze gebruiksaanwijzing zorgvuldig door voordat u de SL-1 in gebruik neemt. Door de SL-1 aan de voorkant van het objectief van compatibele* Nikon COOLPIX camera's te bevestigen, kunt u bij macro-close-up fotografie onderwerpen verlichten die zich tot 12 cm voor de lens bevinden ??? iets wat met de ingebouwde Speedlight van de camera wellicht niet mogelijk is.

*De COOLPIX 775, 880, 885, 950, 990, 995, 4300, 4500 en 5000 zijn alle geschikt voor gebruik met de MACRO COOL-LIGHT SL-1.

OPMERKING: Zie de ???Technische gegevens??? voor belangrijke informatie betreffende het gebruik van de SL-1 met de COOLPIX 5000 digitale camera.

Benaming van de onderdelen (Afb. A en B)

??? Vergrendelknopje voor bevestigingsring ?? Lampen

??? Gelijkstroomingang ??? Bevestigingsring ??? Aan/uit-schakelaar ??? Oogje voor riem

??? Deksel van batterijvak

Stroomvoorziening

Gebruik twee CR2-type 3V lithiumbatterijen (los verkrijgbaar) met de SL-1. Om de SL-1 voor langere tijd van stroom te voorzien, raden wij u aan de los verkrijgbare EH-53, EH-31, EH-30 of EH-21 lichtnetadapter te gebruiken.

???Bij gebruik van CR2-type 3V lithiumbatterijen

1Zet de aan/uit-schakelaar van de SL-1 op OFF.

(Afb. C)

2Schuif het deksel van het batterijvak open. (Afb. D)

3Plaats de batterijen met de ???+??? en ????????? polen zoals aangegeven in het batterijvak. Zorg dat het lintje onder de batterij loopt zoals aangegeven in de afbeelding. (Afb. E)

(Dit lintje wordt gebruikt om de lege batterijen uit het batterijvak te verwijderen.)

4Zet de aan/uit-schakelaar van de SL-1 op ON en controleer of de lampen branden. (Als u de SL-1 niet meteen gaat gebruiken, moet u deze weer uitschakelen.)

???Bij gebruik van de los verkrijgbare EH-53, EH-31, EH-30 of EH-21 lichtnetadapter (De afbeelding toont de COOLPIX 4500 en de EH-53)

De SL-1 moet op de camera bevestigd zijn voordat u de lichtnetadapter op de SL-1 kunt aansluiten.

1Zet de aan/uit-schakelaar van de SL-1 op OFF.

(Afb. C)

2Steek de gelijkstroomstekker van de lichtnetadapter in de gelijkstroomingang van de SL-1 ??? en steek daarna de netstekker van de lichtnetadapter in een stopcontact ??. (Afb. H).

3Zet de aan/uit-schakelaar van de SL-1 op ON en controleer of de lampen branden. (Als u de SL-1 niet meteen gaat gebruiken, moet u deze weer uitschakelen.)

???Wanneer een lichtnetadapter op de SL-1 wordt aangesloten terwijl er 3V lithiumbatterijen in het batterijvak zitten, zal de lichtnetadapter voor de stroomvoorziening zorgen.

De SL-1 op uw camera bevestigen

(de afbeelding toont de COOLPIX 4500)

1raai het vergrendelknopje voor de bevestigingsring van de SL-1 in de richting van de klok en controleer of de lensbevestigingsring is vergrendeld. (Afb. F-1)

2(Voor COOLPIX 775 gebruikers)

Bevestig de los verkrijgbare UR-E3 lensadapter op de camera en bevestig dan de SL-1 door deze in de voorzijde van de UR-E3 te schroeven.

(Voor COOLPIX 880 gebruikers)

Bevestig de los verkrijgbare UR-E2 lensadapter met verloopring op de camera en bevestig dan de SL-1 door deze in de voorzijde van de UR-E2 te schroeven.

(Voor COOLPIX 885 en 4300 gebruikers)

Bevestig de los verkrijgbare UR-E4 lensadapter met verloopring op de camera en bevestig dan de SL-1 door deze in de voorzijde van de UR-E4 te schroeven.

(Voor COOLPIX 950, 990, 995 en 4500 gebruikers)

Bevestig de SL-1 door deze in de voorzijde van het camera-objectief te schroeven. (Afb. F-2)

(Voor COOLPIX 5000 gebruikers)

Bevestig de los verkrijgbare UR-E6 lensadapter met verloopring op de camera en bevestig dan de SL-1 door deze in de voorzijde van de UR-E6 te schroeven.

3Draai het vergrendelknopje van de bevestigingsring tegen de richting van de klok in om de ring vrij te zetten 1, stel dan de positie van het batterijvak zo af dat er goed foto's gemaakt kunnen worden 2 en draai vervolgens het vergrendelknopje van de bevestigingsring in de richting van de klok om de SL-1 vast te zetten. (Afb. G)

Foto's maken met de SL-1

Zie de handleiding van de camera voor details betreffende de bediening van de camera.

1Stel de scherpstelling in op ???macro-close-up??? (???) en de flitsfunctie op ???flitser uitgeschakeld??? (???).

???Bij gebruik van een andere digitale camera dan de COOLPIX 775 kan ook handmatige scherpstelling gekozen worden.

???Bij de COOLPIX 880, 885, 4300 of 4500 kan ook ???close-up??? (z) in de sc??ne-modus geselecteerd worden ("flitser uitgeschakeld" wordt automatisch geselecteerd).

2Zet de aan/uit-schakelaar van de SL-1 op ON en kies ???Auto??? in het witbalansmenu van uw camera.

3Druk op de ontspanknop van de camera om de foto te maken.

???Gebruik de monitor om de beelduitkadering te controleren. De SL-1 belemmert namelijk het zicht door de optische zoeker.

???De opnameafstand en de zoompositie die u kunt selecteren vari??ren afhankelijk van de gebruikte camera. Zie de tabel in ???Technische gegevens??? voor de opnameafstand en de zoompositie voor elke compatibele Nikon COOLPIX digitale camera.

Tips

???Wanneer u de SL-1 gebruikt met een camera waarvan de minimale opnameafstand 2 cm is, zoals de COOLPIX 950, 990, 995, 4500 en 5000, kunt u gemakkelijk close-up foto's maken door de SL-1 op een vlakke ondergrond te plaatsen, zoals hieronder is aangegeven. (Dit is handig bij het maken van close-up opnamen van landkaarten of textiel.)

Ch.

Ga

Storingen verhelpen

Opmerkingen betreffende de verzorging en het gebruik

???De MACRO COOL-LIGHT SL-1 is speciaal ontworpen voor gebruik met de Nikon COOLPIX 775, 880, 885, 950, 990, 995, 4300, 4500 en 5000 digitale camera's. (De SL-1 kan ook op de COOLPIX 800, 900 en 900s worden bevestigd, maar dan zal niet de juiste verlichting worden verkregen.)

???Bij het aanbrengen van de SL-1 neemt het totale gewicht van de camera toe, zodat de kans op een onscherp beeld groter is. Zorg ervoor dat de camera niet beweegt bij het maken van de foto.

???Wanneer de SL-1 op de camera is bevestigd, mag u de camera niet bij de SL-1 vastpakken en dragen. Dit kan namelijk resulteren in beschadiging van de SL-1 en de camera. Haal de SL-1 van de camera af wanneer u de camera draagt of vervoert.

???Dunne polsriempjes, zoals riempjes die gebruikt worden met mobiele telefoons, kunnen ook aan de SL-1 worden bevestigd. Wees voorzichtig dat u niet aan het riempje trekt wanneer de SL-1 aan de camera is bevestigd, want dit kan resulteren in beschadiging van de SL-1 en de camera.

???Gebruik een blaasborsteltje om vuil en stof van de SL-1 te verwijderen en maak deze met een zachte, droge doek schoon. Nadat u de SL-1 in de buurt van zeewater hebt gebruikt, dient u de SL-1 schoon te maken met een zachte, schone doek die licht bevochtigd is met zuiver water. Veeg daarna met een droge doek na. Gebruik NOOIT organische oplosmiddelen zoals witte spiritus of benzine.

Italiano

Prefazione

Grazie per aver acquistato l???illuminatore anulare a luce fredda MACRO COOL-LIGHT SL-1, destinato all???impiego in abbinata alle fotocamere digitali Nikon. Prima di utilizzare questo prodotto si raccomanda una lettura attenta di questo documento al fine di prendere familiarit?? con l???SL-1.

Il fissaggio dell???SL-1 davanti all???obiettivo delle fotocamere compatibili* COOLPIX Nikon consente l???illuminazione anulare a luce fredda dei soggetti nella fotografia macro ravvicinata con una portata pari a circa 12cm ??? cosa che non pu?? fare il flash incorporato della fotocamera.

*Il MACRO COOL-LIGHT SL-1 pu?? essere montato sui modelli COOLPIX 775, 880, 885, 950, 990, 995, 4300, 4500 e 5000.

NOTA: Per informazioni importanti sull???uso della luce SL-1 con la fotocamera digitale COOLPIX 5000, fare riferimento alla sezione ???Dati tecnici???.

Nomenclatura (figure A e B)

??? Fermo della ghiera di fissaggio ?? Illuminatori

??? Presa di alimentazione a rete (DC in) ??? Ghiera circolare di fissaggio

??? Interruttore di accensione ??? Occhiello della cinghia

??? Coperchio del vano batterie

Sorgenti di alimentazione

Per alimentare l???illuminatore SL-1 utilizzare due batterie al litio da 3 V del tipo CR2 (in vendita separatamente). Per impieghi prolungati si raccomanda l???uso dell???adattatore a rete opzionale EH-53, EH-31, EH-30 o EH-21.

???Quando si utilizzano batterie al litio da 3 V di tipo CR2

1Posizionare l???interruttore di accensione posto sull???SL-1 in posizione OFF. (Fig. C)

2Sfilare il coperchio del vano batterie per aprirlo.

(Fig. D)

3Inserire le batterie con le estremit?? ???+??? e ????????? rispettando l???indicazione all???interno del vano batterie. Accertarsi che fascetta flessibile situata all???interno del vano batterie sporga nel modo indicato. (Fig. E)

(La fascetta flessibile serve per facilitare la rimozione delle batterie scariche dal vano.)

4Posizionare l???interruttore di accensione su ON e verificare l???avvenuta accensione degli illuminatori. (Se non si intende utilizzare la luce SL-1, spegnere l???interruttore.)

???Quando si utilizza l???adattatore a rete opzionale EH-53, EH-31, EH-30 o EH-21 (L???illustrazione mostra il modello COOLPIX 4500 e l???adattatore EH-53)

Prima di collegare l???alimentatore a rete all???illuminatore SL-1, ?? necessario che questo sia gi?? montato sulla fotocamera.

1Posizionare l???interruttore di accensione posto sull??? SL-1 in posizione OFF. (Fig. C)

2Inserire lo spinotto c.c. dell???adattatore a rete nella presa DC-in dell???illuminatore SL-1 ???

quindi inserire la spina a rete in una presa di corrente ??. (Fig H)

3Posizionare l???interruttore di accensione su ON e verificare l???avvenuta accensione degli illuminatori. (Se non si intende utilizzare la luce SL-1, spegnere l???interruttore.)

???Quando si collega all???illuminatore SL-1 un adattatore a rete mentre le batterie al litio da 3 V sono ancora nel vano batterie, l???alimentazione viene fornita dall???adattatore di rete.

Fissaggio dell???illuminatore SL-1 sulla fotocamera

(l???illustrazione mostra il modello COOLPIX 4500)

1Avvitare il fermo della ghiera di fissaggio dell???illuminatore SL-1 in senso orario verificando il conseguente bloccaggio della ghiera di fissaggio. (Fig. F-1)

2(Per gli utenti del modello COOLPIX 775)

Montare sulla fotocamera l???adattatore opzionale per obiettivo UR-E3 e poi fissare l???illuminatore SL-1 avvitandolo nella parte anteriore dell???anello UR-E3.

(Per gli utenti del modello COOLPIX 880)

Montare sulla fotocamera l???adattatore opzionale per obiettivo UR-E2 e poi fissare l???illuminatore SL-1 avvitandolo nella parte anteriore dell???anello UR-E2.

(Per gli utenti del modello COOLPIX 885 e 4300)

Montare sulla fotocamera l???adattatore opzionale per obiettivo UR-E4 e poi fissare l???illuminatore SL-1 avvitandolo nella parte anteriore dell???anello UR-E4.

(Per gli utenti dei modelli COOLPIX 950, 990, 995 e 4500)

Fissare l???illuminatore SL-1 avvitandolo nella parte anteriore filettata dell???obiettivo della fotocamera.

(Fig. F-2)

(Per gli utenti del modello COOLPIX 5000)

Montare sulla fotocamera l???anello opzionale per obiettivo UR-E6 quindi fissare l???illuminatore SL-1 avvitandolo nella parte anteriore dell???UR-E6.

3Svitare il fermo della ghiera di fissaggio (in senso antiorario) per sbloccarne la rotazione 1, orientare la sporgenza del vano batterie in modo compatibile alle esigenze di ripresa 2 e poi avvitare il fermo per bloccare la rotazione di regolazione. (Fig. G)

Fotografare con l???illuminatore SL-1

Per ulteriori dettagli sul funzionamento della fotocamera, fare riferimento al manuale di istruzioni della fotocamera.

1Impostare la modalit?? di messa a fuoco sul macro/primi piani (???) e disabilitare il flash (???).

???Se si utilizza una fotocamera digitale diversa dal modello COOLPIX 775, ?? anche possibile selezionare l???idonea modalit?? di messa a fuoco manuale.

???Con i modelli COOLPIX 880, 885, 4300 o 4500, ?? anche possibile selezionare la funzione soggetti ravvicinati (z) dalla modalit?? scene (viene selezionata automaticamente la disattivazione del flash).

2Posizionare l'interruttore dell???illuminatore SL-1 su ON e selezionare ???Auto??? nel menu White Balance (Bilanciamento del bianco) della fotocamera.

3Premere il pulsante di scatto della fotocamera per effettuare la ripresa fotografica.

???Per inquadrare il soggetto fate uso del Monitor della fotocamera perch?? l???accessorio ostacoler?? la visione attraverso il mirino ottico.

???La distanza di ripresa e la posizione di zoom selezionabili variano a seconda della fotocamera utilizzata. Per conoscere la distanza minima di ripresa e la posizione di zoom di ogni fotocamera digitale compatibile COOLPIX Nikon, fare riferimento alla tabella riportata nella sezione "Dati tecnici".

Suggerimenti

???Quando si utilizza l???illuminatore SL-1 abbinato ad una fotocamera che consente la distanza minima di ripresa a 2cm come i modelli COOLPIX 950, 990, 995, 4500 e 5000, ?? possibile effettuare riprese macro anche appoggiando l???illuminatore SL-1 sul soggetto con superficie piana come illustrato qui sotto. (Questa procedura ?? particolarmente efficace quando si effettuano riprese macro di cartine, stampati o di tessuti).

Ch.

Ga

Risoluzione dei problemi

Note sulla cura e sull???uso

???L???illuminatore a luce fredda MACRO COOL-LIGHT SL-1 ?? destinato in modo specifico all???uso con le fotocamere digitali Nikon COOLPIX 775, 880, 885, 950, 990, 995, 4300, 4500 e 5000. (L???illuminatore SL-1 pu?? anche essere montato sui modelli COOLPIX 800 e 900, ma non ?? possibile ottenere un???illuminazione corretta).

???L???impiego dell???illuminatore SL-1 aumentando la massa ed il peso totale della fotocamera facilita la possibilit?? di ottenere un???immagine mossa. Per ridurre tali possibilit?? impugnate la fotocamera in modo ben saldo.

???Quando sulla fotocamera ?? montato l???illuminatore SL-1, non tentare di sostenere la fotocamera solo per mezzo dell???illuminatore SL-1.

In questo caso si potrebbe danneggiare l???illuminatore SL-1 ed il corpo della fotocamera. Quando si sposta o si trasporta la fotocamera accertarsi che la luce SL-1 sia smontata.

????? anche possibile attaccare all???illuminatore SL-1 cinghiette da polso come quelle usate per i telefoni cellulari. Fare attenzione a non tirare la cinghietta quando la luce SL-1 ?? montata sulla fotocamera perch?? in questo modo si potrebbe danneggiare sia l???illuminatore SL-1 che la fotocamera.

???Utilizzare una pompetta con pennellino per rimuovere lo sporco e la polvere dall???illuminatore SL-1 e pulirlo con un panno morbido asciutto. Nel caso di utilizzo vicino ad acqua di mare, pulirlo con un panno morbido inumidito con acqua (non salata) poi asciugarlo completamente con un panno asciutto. Non usare MAI solventi organici come diluente o benzene.

Sp??cifications

Alimentation: Deux piles au lithium de type CR2 3 V; alimentation ext??rieure en option (6-8,4 V, 0,2 A)

Utilisation en continu: Env. 6 heures (avec les piles au lithium 3V ?? une distance de prise de vues d'env.

*1 Distance entre l'avant de l'objectif et le sujet.

*2 Normalement, la gamme de zoom de large ?? moyenne est utilisable en macro jusqu'?? 2 cm avec le COOLPIX 5000. Mais avec la lampe macro SL-1, il vaut mieux utiliser la plage de moyenne ?? t??l??objectif parce que la lampe macro SL-1 g??ne la vision quand le zoom est en position large. Quand la adaptateur d???objectif UR-E6 est mont??e, la distance de prise de vues minimale est de env. 3,4 cm.

Especificaciones

Alimentaci??n el??ctrica:Dos pilas de litio de tipo CR2 de 3V; alimentaci??n externa opcional (6-8,4V, 0,2A)

*1 La distancia entre el frente del objeto y el sujeto.

*2 Normalmente puede utilizar un zoom de alcance ancho a medio en la fotograf??a de primer plano macro de hasta 2cm con la COOLPIX 5000. Sin embargo, cuando utilice el SL-1, debe utilizar un objetivo de alcance medio a teleobjetivo para hacer fotograf??as ya que el SL-1 en s?? obstruye su visi??n cuando se ajusta la posici??n del zoom a ancho. Cuando se instala el adaptador de objetivo con anillo reductor UR-E6, la distancia de fotograf??a m??s cercana pasa a ser aprox. 3,4cm.

Technische gegevens

Stroomvoorziening: Twee CR2-type 3V lithiumbatterijen; los verkrijgbare externe voeding (6-8,4 V, 0,2 A)

Continugebruik: Ca. 6 uur (bij gebruik van 3V lithiumbatterijen en een opnameafstand van ca. 8 cm, met handhaving van redelijke helderheid, gemeten door Nikon)

Afmetingen (B x H x D): 70 x 91 x 21 mm

Gewicht:Ca. 60 gram (zonder batterijen)

*1 De afstand tussen de voorzijde van de lens en het onderwerp.

*2 Gewoonlijk kunt u het groothoek-tot-middenstand zoombereik gebruiken bij macro-close-up fotografie tot 2 cm met de COOLPIX 5000. Wanneer echter de SL-1 wordt gebruikt, dient u het middenstand-tot-tele bereik voor zulke foto's te gebruiken aangezien uw zicht door de SL-1 wordt belemmerd wanneer de zoompositie op groothoek staat. Wanneer de UR-E6 lensadapter met verloopring is aangebracht, is de kortste opnameafstand ca. 3,4 cm.

Dati tecnici

Sorgente di alimentazione: Due batterie al litio da 3 V di tipo CR2; alimentatore esterno opzionale (6-8,4 V, 0,2 A)

*1 Distanza dalla parte anteriore dell???obiettivo al soggetto.

*2 Normalmente si pu?? utilizzare l???escursione zoom da grandangolo whide a media nella ripresa macro/primi piani fino a 2cm con il modello COOLPIX 5000. Tuttavia, quando si utilizza l???illuminatore SL-1, si deve usare una escursione zoom da media a tele per riprese macro, poich?? lo stesso illuminatore SL-1 ostruisce il campo visivo impostando lo zoom su grandangolo Whide. Quando si monta l???anello opzionale per obiettivo UR-E6, la distanza minima di ripresa diventa circa 3,4cm.