On Installation
Do not allow anything to rest upon or roll over the power cord, and do not place the display where the power cord is subject to damage.
Do not use this display near water such as near a bathtub, washbowl, kitchen sink, laundry tub, in a wet basement, or near a swimming pool.
Displays are provided with ventilation openings in the cabinet to allow the release of heat generated during operation. If these openings are blocked, built-up heat can cause failures which may result in a fire hazard. Therefore, NEVER:
 Block the bottom ventilation slots by placing the display on a bed, sofa, rug, etc.
 Place the display in a built-in enclosure unless proper ventilation is provided.
  Cover the openings with cloth or other material.
 Place the display near or over a radiator or heat source.
 Main power breaker is the power cord and this breaking device must be located at a location where it is easy to operate.
Do not rub or strike the Active Matrix LCD with anything hard as this may scratch, mar, or damage the Active Matrix LCD permanently.
Do not press the LCD screen with your finger for a long time as this may cause some afterimages.
Some dot defects may appear as Red, Green or Blue spots on the screen. However, this will have no impact or effect on the display performance.
If possible, use the recommended resolution to obtain the best image quality for your LCD display. If used under any mode except the recommended resolution, some scaled or processed images may appear on the screen. However, this is characteristic of the fixed-resolution LCD panel.
On Cleaning
 Unplug the display before cleaning the face of the display screen.
 Use a slightly damp (not wet) cloth. Do not use an aerosol directly on the display screen because over-spraying may cause electrical shock.
On Repacking
 Do not throw away the carton and packing materials. They make an ideal container in which to transport the unit. When shipping the unit to another location, repack it in its original material.
On Disposal
 The fluorescent lamp used in this product contains a small amount of mercury.
 Do not dispose of this product with general household waste.
Disposal of this product must be carried out in accordance to the regulations of your local authority.

 There are no user serviceable components inside.
 There are Dangerous High Voltages inside, even when the power is OFF.
  Contact your dealer if the display is not operating properly.
 Do not place the display on a sloping shelf unless properly secured.
 Use only a stand recommended by the manufacturer.
 Do not drop an object on or apply impact to the product. Do not throw any toys or objects on the product screen.
 Always turn the display OFF if you leave the room for more than a short period of time. Never leave the display ON when leaving the house.
 Keep children from dropping or pushing objects into the display's cabinet openings. Some internal parts carry hazardous voltages.
 Do not add accessories that have not been designed for this display.
 When the display is to be left unattended for an extended period of time, unplug it from the wall outlet.
 In the presence of thunder and lightning, never touch the power cord and signal cable because it can be very dangerous. It can cause electric shock.

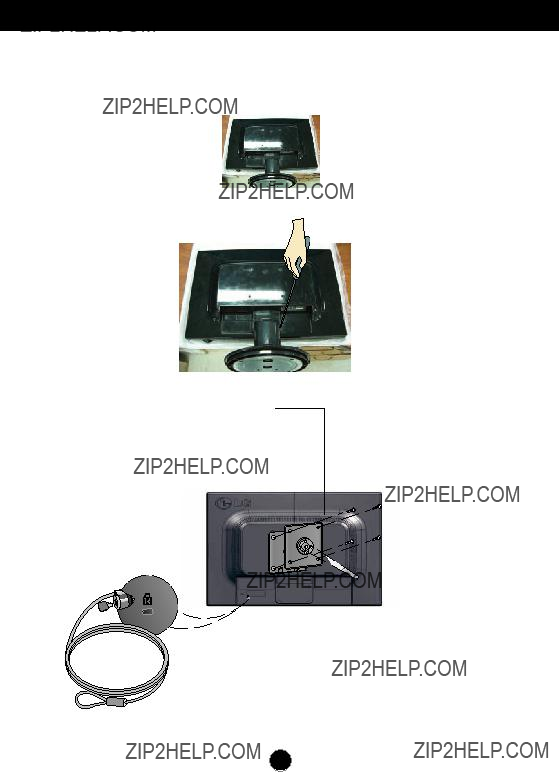
 Before setting up the monitor, ensure that the power to the monitor, the computer system, and other attached devices is turned off.
 This illustration depicts the general model of connection. Your monitor may differ from the items shown in the picture.
 Do not carry the product upside down holding only the stand base. The product may fall and get damaged or injure your foot.
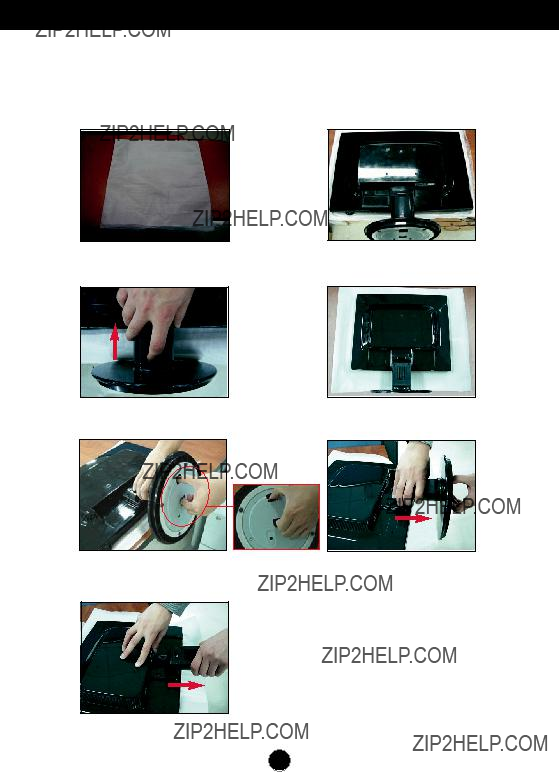

 Before setting up the monitor, ensure that the power to the monitor, the computer system, and other attached devices is turned off.
 Tilt Range:
  Swivel :


 Mac adapter
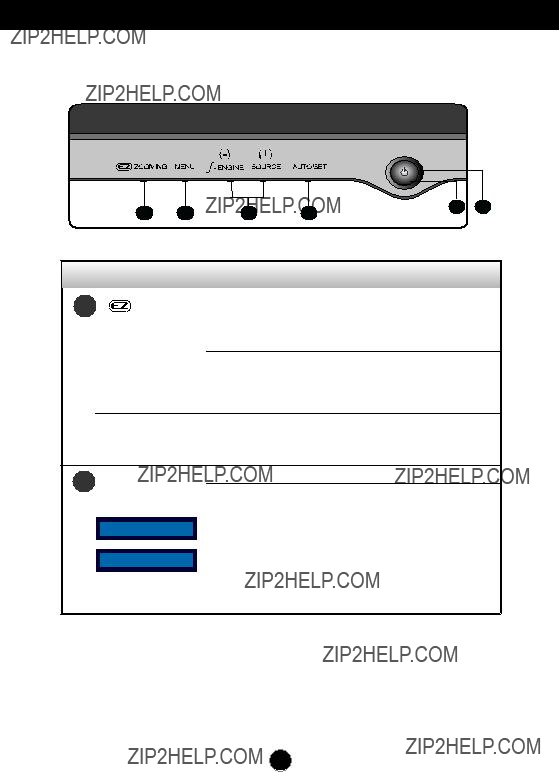
 Recommend resolution are 1680
  The setting method can differ by O/S or video card. In this case, Please ask to the computer or the video card manufacturer.
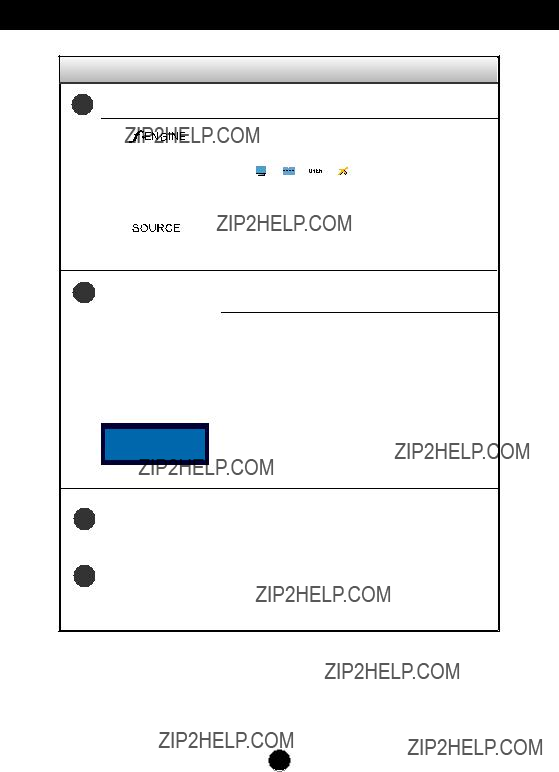


 - +
- + 


 - +
- + 


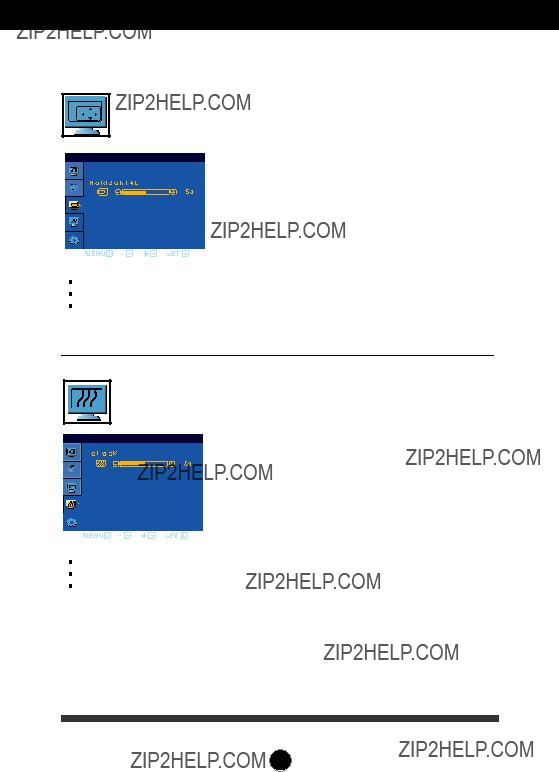
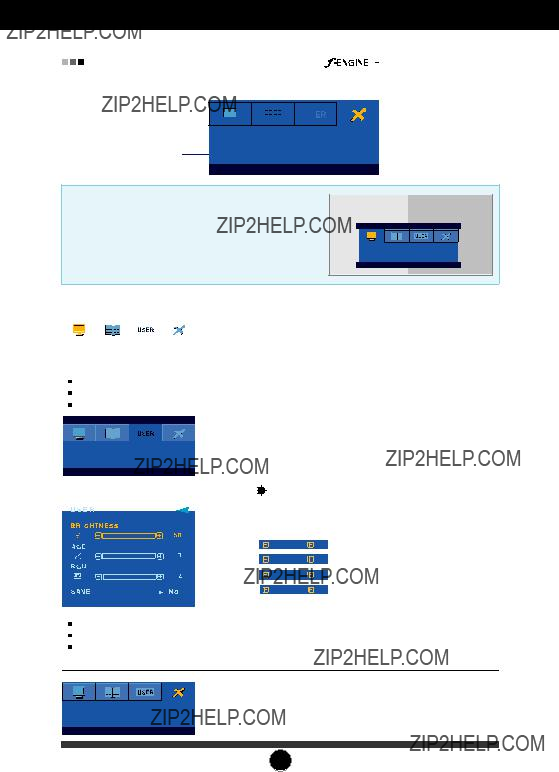
 : Adjustable
 The order of icons may differ depending on the model (A10~A15).
 MENU
MENU 

 : Exit
 SET
SET 

 : Enter

 : Select another
  OSD (On Screen Display) menu languages on the monitor may differ from the manual.


 Reasons for Recommending Optimal Resolution :
  The setting method can differ by computer and O/S (Operation System), and resolution mentioned above may not be supported by the video card performance. In this case, please ask to the computer or the video card manufacturer