LCD Projection TV
OWNER???S MANUAL
MODEL: RU-48SZ40
Please read this manual carefully before operating your set. Keep the manual with the TV for future reference.
Record model number and serial number of the set.
See the label attached on the back cover and relay the infor- mation to an authorized service center if you require service.
LG Electronics U.S.A., Inc.

WARNING
RISK OF ELECTRIC SHOCK
DO NOT OPEN
WARNING:
TO REDUCE THE RISK OF ELECTRIC SHOCK DO NOT REMOVE COVER (OR BACK). NO USER SERVICEABLE PARTS INSIDE.
REFER TO QUALIFIED SERVICE PERSONNEL.
The lightning flash with arrowhead symbol, within an equilateral triangle, is intended to alert the user to the presence of uninsulated ???dangerous voltage??? within the product???s enclosure that may be of sufficient magnitude to constitute a risk of electric shock to persons.
The exclamation point within an equilateral triangle is intended to alert the user to the presence of important operating and maintenance (servicing) instructions in the literature accompanying the appliance.
WARNING:
TO PREVENT FIRE OR SHOCK HAZARDS, DO NOT EXPOSE THIS PRODUCT TO RAIN OR MOISTURE.
POWER CORD POLARIZATION:
CAUTION: TO PREVENT ELECTRIC SHOCK, MATCH WIDE BLADE OF PLUG TO WIDE SLOT, FULLY INSERT.
ATTENTION: POUR ??VITER LES CHOCS ??LECTRIQUES, INTRODUIRE LA LAME LA PLUS LARGE DE LA FICHE DANS LA BORNE
CORRESPONDANTE DE LA PRISE ET POUSSER JUSQU???AU FOND.
NOTE TO CABLE/TV INSTALLER:
This reminder is provided to call the CATV system installer???s attention to Article 820-40 of the National Electric Code (U.S.A.). The code provides guidelines for proper grounding and, in particular, specifies that the cable ground shall be connected to the grounding system of the building, as close to the point of the cable entry as practical.
REGULATORY INFORMATION:
This equipment has been tested and found to comply with the limits for a Class B digital device, pursuant to Part 15 of the FCC Rules. These limits are designed to provide reasonable protection against harmful interference when the equip- ment is operated in a residential installation. This equipment generates, uses and can radiate radio frequency energy and, if not installed and used in accordance with the instruction manual, may cause harmful interference to radio com- munications. However, there is no guarantee that interference will not occur in a particular installation. If this equip- ment does cause harmful interference to radio or television reception, which can be determined by turning the equip- ment off and on, the user is encouraged to try to correct the interference by one or more of the following measures:
???Reorient or relocate the receiving antenna.
???Increase the separation between the equipment and receiver.
???Connect the equipment into an outlet on a circuit different from that to which the receiver is connected.
???Consult the dealer or an experienced radio/TV technician for help.
Any changes or modifications not expressly approved by the party responsible for compliance could void the user???s authority to operate the equipment.
CAUTION:
Do not attempt to modify this product in any way without written authorization from LG Electronics Corporation. Unauthorized modification could void the user???s authority to operate this product.
The responsible party for this device compliance is: LG Electronics U.S.A., Inc
1000 Sylvan Avenue, Englewood Cliffs, NJ 07632
1-201-816-2000 http://www.lgusa.com
IMPORTANT SAFETY INSTRUCTIONS
Important safeguards for you and your new product
Your product has been manufactured and tested with your safety in mind. However, improper use can result in electrical shock or fire hazards. To avoid defeating the safeguards that have been built into your new product, please read and observe the following safety points when installing and using your new product, and save them for future reference.
Observing the simple precautions discussed in this manual can help you get many years of enjoyment and safe operation that are built into your new product.
This product complies with all applicable U.S. Federal safety requirements, and those of the Canadian Standards Association.
1. Read Instructions
All the safety and operating instructions should be read before the product is operated.
2. Follow Instructions
All operating and use instructions should be followed.
3. Retain Instructions
The safety and operating instructions should be retained for future reference.
4. Heed Warnings
All warnings on the product and in the operating instruc- tions should be adhered to.
5. Cleaning
Unplug this product from the wall outlet before cleaning. Do not use liquid cleaners or aerosol cleaners. Use a damp cloth for cleaning.
6. Water and Moisture
Do not use this product near water, for example, near a bath tub, wash bowl, kitchen sink, or laundry tub, in a wet basement, or near a swimming pool.
7. Accessories, Carts, and Stands
Do not place this product on a slippery or tilted surface, or on an unstable cart, stand, tripod, bracket, or table. The product may slide or fall, causing serious injury to a child or adult, and serious damage to the product. Use only with a cart, stand, tripod, bracket, or table recom- mended by the manufacturer, or sold with the product. Any mounting of the product should follow the manufac- turer???s instructions, and should use a mounting accessory recommended by the manufacturer.
8. Transporting Product
A product and cart combination should be moved with care. Quick stops, excessive force, and uneven surfaces may cause the product and cart combination to overturn.
9. Attachments
Do not use attachments not recommended by the product manufacturer as they may cause hazards.
10. Ventilation
Slots and openings in the cabinet are provided for ventila- tion and to ensure reliable operation of the product and to protect it from overheating, and these openings must not be blocked or covered. The openings should never be blocked by placing the product on a bed, sofa, rug, or other similar surface. This product should not be placed in a built-in installation such as a bookcase or rack unless proper ventilation is provided or the manufacturer???s instructions have been adhered to.
11. Power Sources
This product should be operated only from the type of power source indicated on the marking label. If you are not sure of the type of power supply to your home, con- sult your product dealer or local power company. For prod- ucts intended to operate from battery power, or other sources, refer to the operating instructions.
12. Power-Cord Polarization
This product is equipped with a polarized alternating-cur- rent line plug (a plug having one blade wider than the other). This plug will fit into the power outlet only one way. This is a safety feature. If you are unable to insert the plug fully into the outlet, try reversing the plug. If the plug should still fail to fit, contact your electrician to replace your obsolete outlet. Do not defeat the safety pur- pose of the polarized plug.
13. Power-Cord Protection
Power-supply cords should be routed so that they are not likely to be walked on or pinched by items placed upon or against them, paying particular attention to cords at plugs, convenience receptacles, and the point where they exit from the product.
IMPORTANT SAFETY INSTRUCTIONS
(Continued from previous page)
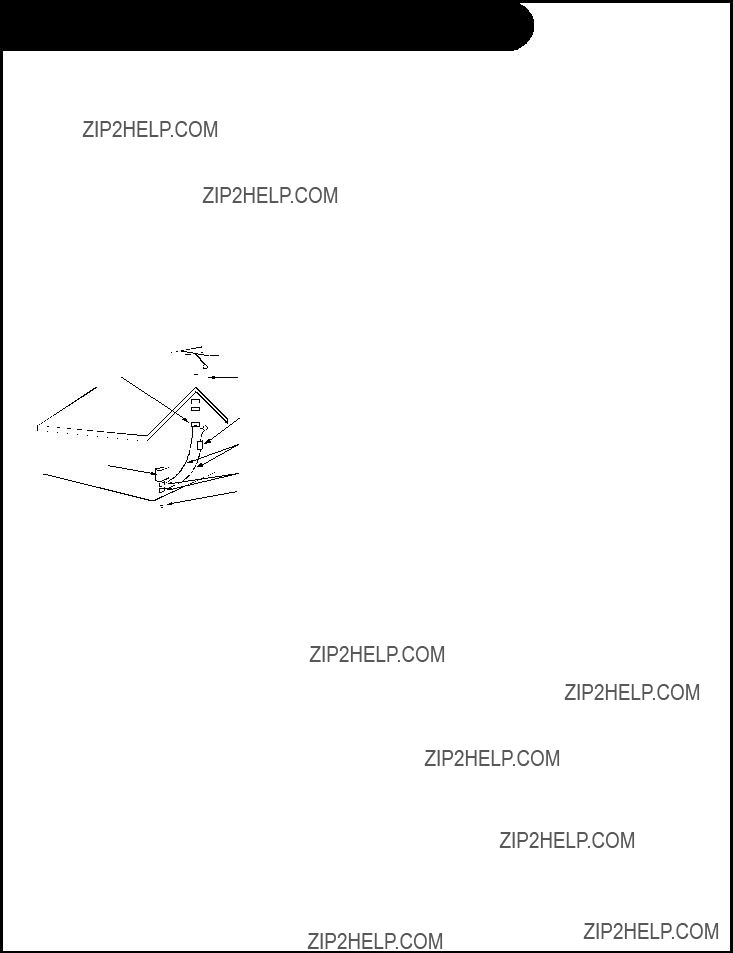
14. Outdoor Antenna Grounding
If an outside antenna or cable system is connected to the product, be sure the antenna or cable system is grounded to provide protection against voltage surges and built-up static charges. Article 810 of the National Electrical Code (U.S.A.), ANSI/ NFPA 70 provides information with regard to proper grounding of the mast and supporting structure, grounding of the lead-in wire to an antenna discharge unit, size of grounding conductors, location of antenna- discharge unit, connection to grounding electrodes, and requirements for the grounding electrode.
Example of Grounding According to National Electrical Code Instructions
Art 250, Part H)
NEC - National Electrical Code
openings as they may touch dangerous voltage points or short-out parts that could result in a fire or electric shock. Never spill liquid of any kind on the product.
19. Servicing
Do not attempt to service this product yourself as opening or removing covers may expose you to dangerous voltage or other hazards. Refer all servicing to qualified service personnel.
20. Damage Requiring Service
Unplug this product from the wall outlet and refer servic- ing to qualified service personnel under the following con- ditions:
a.If the power-supply cord or plug is damaged.
b.If liquid has been spilled, or objects have fallen into the product.
c.If the product has been exposed to rain or water.
d.If the product does not operate normally by following the operating instructions. Adjust only those controls that are covered by the operating instructions as an improper adjustment of other controls may result in damage and will often require extensive work by a qualified technician to restore the product to its normal operation.
e.If the product has been dropped or the cabinet has been damaged.
f.If the product exhibits a distinct change in perfor- mance.
15. Lightning
For added protection for this product (receiver) during a lightning storm, or when it is left unattended and unused for long periods of time, unplug it from the wall outlet and disconnect the antenna or cable system. This will prevent damage to the product due to lightning and power-line surges.
16. Power Lines
An outside antenna system should not be located in the vicinity of overhead power lines or other electric light or power circuits, or where it can fall into such power lines or circuits. When installing an outside antenna system, extreme care should be taken to keep from touching such power lines or circuits as contact with them might be fatal.
17. Overloading
Do not overload wall outlets and extension cords as this can result in a risk of fire or electric shock.
18. Object and Liquid Entry
Never push objects of any kind into this product through
21. Replacement Parts
When replacement parts are required, be sure the service technician has used replacement parts specified by the manufacturer or have the same characteristics as the origi- nal part. Unauthorized substitutions may result in fire, electric shock, or other hazards.
22. Safety Check
Upon completion of any service or repairs to this product, ask the service technician to perform safety checks to determine that the product is in proper operating condi- tion.
23. Wall or Ceiling Mounting
The product should be mounted to a wall or ceiling only as recommended by the manufacturer. The product may slide or fall, causing serious injury to a child or adult, and seri- ous damage to the product.
24. Heat
The product should be situated away from heat sources such as radiators, heat registers, stoves, or other products (including amplifiers) that produce heat.

Table of Contents
Safety Warnings . . . . . . . . . . . . . . . . . . . . . . . . . . . .2
Important Safety Instructions . . . . . . . . . . . . . . . . .3-4
Function Status Indicators . . . . . . . . . . . . . . . . . . . . .6
Step 1. Hook Up TV
Rear Connections Panel . . . . . . . . . . . . . . . . . . . . . . .7
Front Connections Panel . . . . . . . . . . . . . . . . . . . . . .8
ANT/Cable Service Hookup . . . . . . . . . . . . . . . . . . . . .9
Cable Box Connections . . . . . . . . . . . . . . . . . . . . . . .10
VCR Connections . . . . . . . . . . . . . . . . . . . . . . . . . . .11
DVD Player . . . . . . . . . . . . . . . . . . . . . . . . . . . . . .12
RGB/DVI-HD/STB Input . . . . . . . . . . . . . . . . . . . . . .13
RGB-PC/DVI-PC Input . . . . . . . . . . . . . . . . . . . . . . .14
External Stereo Connections . . . . . . . . . . . . . . . . . . .15
Speaker Connection . . . . . . . . . . . . . . . . . . . . . . . . .16
Monitor Out Setup . . . . . . . . . . . . . . . . . . . . . . . . .17
Remote Control Functions In TV Mode . . . . . . . . . . .18-19
On-Screen Displays . . . . . . . . . . . . . . . . . . . . . . . . .20
Front Panel Controls . . . . . . . . . . . . . . . . . . . . . . . .21
Step 2. Customize your TV???s Features
SETUP Menu Options
EZ Scan (Channel Search) . . . . . . . . . . . . . . . . . . . .22
Channel Add/Del/Surf Setup . . . . . . . . . . . . . . . . . .23
Channel Label Setup . . . . . . . . . . . . . . . . . . . . . . .24
Main Picture Source Selection . . . . . . . . . . . . . . . . . 25
PIP (Picture-in-Picture) . . . . . . . . . . . . . . . . . . . . .26
PIP (Picture-in-Picture) Operation . . . . . . . . . . . . . .27
POP (Picture-out-of-Picture) . . . . . . . . . . . . . . . . . .27
Twin Picture . . . . . . . . . . . . . . . . . . . . . . . . . . . .28
VIDEO Menu Options . . . . . . . . . . . . . . . . . . . . .29-30
AUDIO Menu Options . . . . . . . . . . . . . . . . . . . . .31-32
TIME Menu Options
Auto Clock Setup . . . . . . . . . . . . . . . . . . . . . . . . .33
Manual Clock Setup . . . . . . . . . . . . . . . . . . . . . . . .34
TV Turn Off Time Setup . . . . . . . . . . . . . . . . . . . . .35
TV Turn On Time Setup . . . . . . . . . . . . . . . . . . . . . .36
Sleep Timer Setup . . . . . . . . . . . . . . . . . . . . . . . . .37
Auto Off . . . . . . . . . . . . . . . . . . . . . . . . . . . . . . .38
SPECIAL Menu Options
Aspect Ratio . . . . . . . . . . . . . . . . . . . . . . . . . . . .39
Captions Setup . . . . . . . . . . . . . . . . . . . . . . . . . . .40
Caption/Text Mode Selection . . . . . . . . . . . . . . . . . .41
On-Screen Menus Language . . . . . . . . . . . . . . . . . . 42
EZ Demo (Menu Review) . . . . . . . . . . . . . . . . . . . . .43
LOCK Menu Options
Parental Lock Setup . . . . . . . . . . . . . . . . . . . . .44-46
Step 3. Miscellaneous
Programming the Remote . . . . . . . . . . . . . . . . . . . . .47
Programming Codes . . . . . . . . . . . . . . . . . . . . . .48-59
Maintenance . . . . . . . . . . . . . . . . . . . . . . . . . . .50-51
Troubleshooting . . . . . . . . . . . . . . . . . . . . . . . . .52-53
Glossary . . . . . . . . . . . . . . . . . . . . . . . . . . . . . .54-55
Product Specifications . . . . . . . . . . . . . . . . . . . . . .56
Notes . . . . . . . . . . . . . . . . . . . . . . . . . . . . . . .57-58
Warranty . . . . . . . . . . . . . . . . . . . . . . . . . . . . .59-60
Setup Checklist
Step 1. Make all equipment and source connections.
See pages 6-17.
Step 2. Install batteries in remote control and do a channel search. See page 22.
Step 3. Adjust and fine-tune TV features and options to your preference. See contents above.
Function Status Indicators
Lamp indicator, operation indicator, and temperature indicator located below the front panel controls, reveal the operating status of the LCD projection TV.
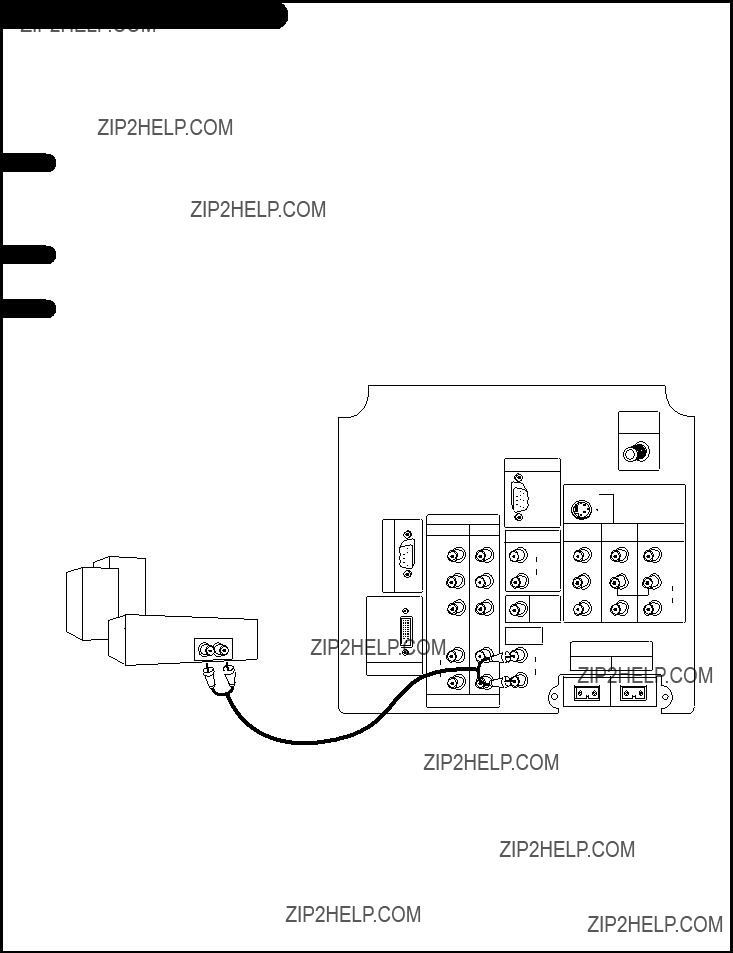
Rear Connections Panel
Connecting cables and external equipment to your TV.
ANT IN +75 ???
your DVD manual for further information.
RF Connector: Antenna
Used to connect analog cable or antenna signals to the television, either directly or through your cable box.
S-VIDEO In
A connection available with some high-end equipment that provides even better picture quality for Video 2.
Video 1 or 2
Connects the video sig- nals from various types of equipment.
Left/Right Audio
Used for stereo sound from various types of equipment.
Monitor Out
Connects to a second TV or Monitor.
EXTERNAL SPEAKER (8 ohm output)
Connect to the exter- nal speaker(s). For further information, refer to Speaker man- ual.
Front Connection Panel
There are four jacks on the right front side behind the screen on your projection TV that make connecting Audio/Video devices like video games and camcorders very simple.
The jacks are like those found on the back jack connection panel. This means that most equipment that connects to those types of jacks on the rear jackpack, may be connected to the front con- nection panel.
To use the front jacks as the signal source, select them using Main Input menu as described on page 25. They will be named ???Front Video??? in the Main Input menu.
If you select either Front Video or Front S-Video, the Front audio inputs are automatically selected as well.
If you???re connecting a video game device, make sure to change the picture settings with the EZ Picture option in the Video menu (see page
 Front A/V Panel
FRONT A/V
 S-Video
A connection available on some very high-end equipment
Video
Connects the video signals from any piece of equipment.
Left/Right Audio 
Used for stereo sound from various types of equipment.
that provides better picture quality than video input.
ANT / Cable Service Hookup
Cable TV
Wall Jack Panel
If you receive your RF signal through an antenna that is several years old and connects with two small prongs, you will need to pur- chase a 300 to 75 ohm adapter. It should be available from your local electronics dealer.
We recommend using a 75 ohm cable for your antenna connections in order to prevent
interference.
For best signal reception, it is recommended to have your Antenna professionally adjusted.
Or find the composite video and audio jacks on the back of your cable box, and connect them following the instructions provided with your equipment.
This can be combined with any other equipment you may want to hook up.
If you???re using a cable box, leave the TV on channel 3 or 4 and use your cable box to change channels.
Back AV Panel
A/V cables not included
with TV
VCR
To hear stereo sound from cable or your VCR, you will need to connect A/V cables as well as the wire that runs from the VCR to your TV.
If you want to receive your signals on Channel 3 or 4, locate the Out to TV jack on your VCR. Connect a cable from the Out to TV jack to the Antenna In jack on the back of your TV.
After connecting external equipment to the TV, don???t display a still picture for a long time on the screen. Doing so may damage the TV screen.
DVD Player
Find the audio and component or 1 S-Video jacks on the back of your DVD Player and connect them fol-
lowing the instructions provided with your equipment.
DVD Player
Some high-end DVD players use a picture reproduction system called ???component video.??? If your DVD player has component output, use the connectors marked ???Component 1/2??? on the jack panel. Please refer to your DVD manual for proper installa- tion.
Back AV Panel
A/V Cables Not included with TV
Component 1 (or 2) Input
Y PB PR
1920X1080i
1280X720p
720X480p
720X480i
???Component Input ports
Connect DVD player jacks to Monitor Component input jacks as indicated below.
RGB/DVI-HD/STB Input
The DTV shows the sharpest picture in 720p mode.
DBS Receiver
DBS Receiver
DTV/DVD INPUT
This TV supports HDCP (High-bandwidth Digital Contents
Protection) protocol for DVI-DTV (480p, 720p, 1080i) mode.
Select RGB-DTV Source and press ENTER. Use UP/DOWN arrows to select the desired options (V-position/H-position/Phase) and then use LEFT/RIGHT arrows to make appropriate adjustments.
In RGB-DTV mode, V-position/H-position/Phase are not adjustable if you choose either the POP or Twin picture modes.
P A G E 1 3
External Stereo Connections
Connect Left/Right Variable Audio Output to an external Audio Amplifier System.
Locate both Variable Audio Out jacks on the back of your TV and the Left/Right audio input jacks on the back of your stereo's amplifier.
Connect these jacks, making sure that they are connected correctly (red=Right, white=Left.)
Adjust the sound on your stereo, according to directions provided with the amplifier.
ANT IN +75 ???
A/V Cables not included with TV
Speaker Connection
Connect the external speakers to TV???s ???EXTERNAL SPEAKER??? jack. Be sure to connect the positive ???+??? wire to the ???+??? input and the negative ???-??? wire to the ????????? input.
EXTERNAL SPEAKER(8???)
(-)R(+) (-)L(+)
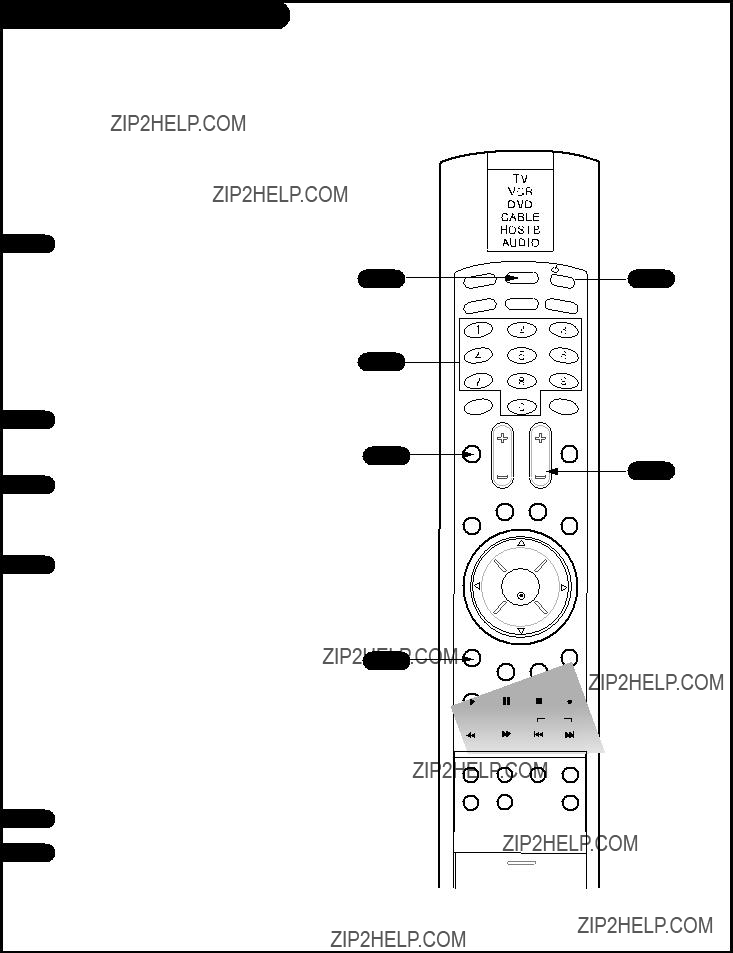
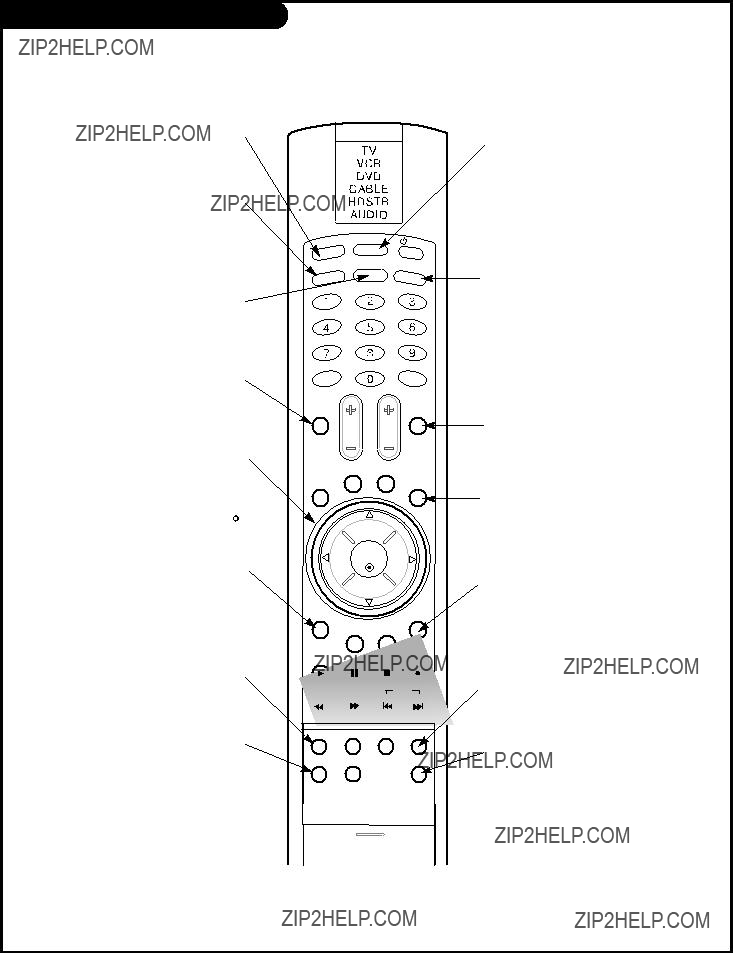
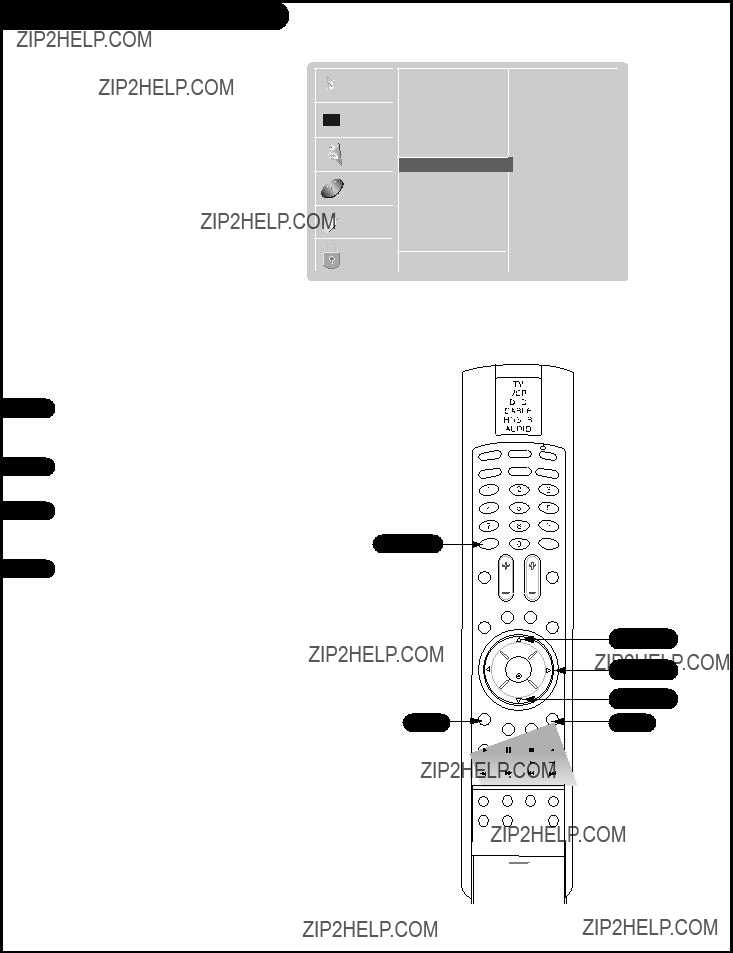
Remote Control Functions in TV Mode
LIGHT
Illuminates the remote control keys.
TV/VIDEO
Selects: Analog, Video1, Video2, Front video, Component1-2, RGB, and DVI input sources.
FRONT
Selects the front video signal if a device, such as a camcorder or game player, is connected to the front video input jack.
MUTE
Switches the sound on or off
THUMBSTICK
Allows you to navigate the on-screen menus and to adjust the system set- tings and preferences, by moving to an option withF ED G and selecting the highlighted option with  .
.
MENU
Brings up the main menu to the screen.
PIP
Toggles between PIP, POP (Picture-out-of-Picture) and Twin picture mode.
FREEZE
Captures and freezes the cur- rently-viewed main picture in PIP mode.
MODE
Selects the remote operating mode: TV, VCR, DVD, Cable, HDSTB, or Audio. Select other operating modes, for the remote to control external devices.
COMP/DVI
Selects: Component1-2, RGB, and DVI input sources.
SURF
Scrolls the Surf channel list.
SLEEP
Selects the amount of time before your TV turns itself off automatically.
EXIT
Clears all on-screen displays and returns to TV viewing from any menu.
PIP INPUT
Selects the input source for the sub picture.
SWAP
Switches the picture from PIP, POP, or twin picture to the main screen.
Remote Control Functions in TV Mode
LIGHT
TV/VIDEO
NUMBER KEYPAD
For direct channel selection and programming functions.
 POWER COMP/DVI
POWER
Turns your TV or any other programmed equipment on or off, depending on mode.
ENTER
When in the menu system and other on-screen displays, selects highlighted options.
VOLUME UP/DOWN
Increases/decreases the sound level.
RATIO
Changes the screen format or aspect ratio.
CC
Selects a closed caption mode for displaying captioning information if available on program.
VIDEO
Adjusts the factory preset pic- ture according to the room.
RECORD, PAUSE, REW, FFWD,
PLAY, STOP
Control the functions on your VCR.
FLASHBK
Tunes to the last channel viewed.
CHANNEL UP/DOWN
Scrolls through available channels in EZ Scan memory.
AVL
To keep an equal volume level of each channel.
AUDIO
Selects the sound appropriate for the pro- gram's character.
SKIP
Playing CDs: Selects songs.
Playing DVDs: Selects movie chapters.
PIPCH+
SAP
Selects: Mono, Stereo, and SAP.
Changes to next higher PIP channel.
PIPCH-
Changes to next lower PIP channel
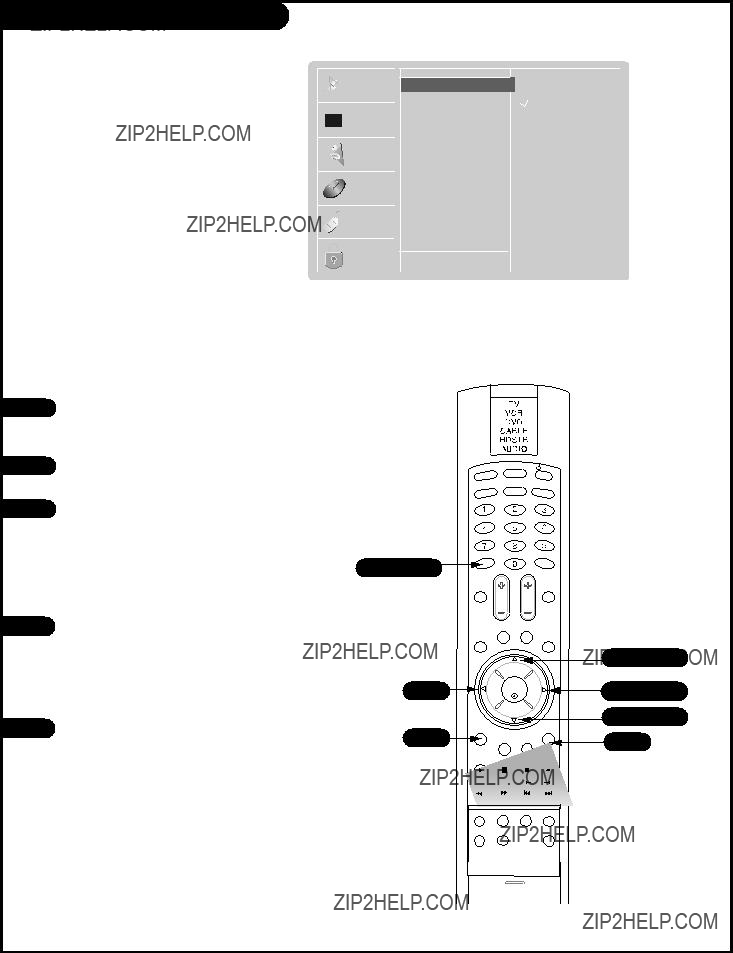
PIP (Picture-in-Picture)
PIP lets you view 2 different inputs (sources) on your monitor screen at the same time. One source will be large, and the other source (PIP) will show a smaller inset image.
Watching PIP
Press the PIP button to show the sub picture.
Each press of PIP changes the PIP options as shown below.
PIP Source Selection
Changes the picture source for the Picture-in-Picture image so you can watch your off-air TV, cable TV, VCR, or any other devices that are connected to your TV.
Using the menu
Each time you press PIP INPUT button, you toggle between Ant/Cable, Video 1, Video 2, and Front Video.
Do not display a fixed image on the screen for long periods of time. Doing so may cause image burn-in.
Not all sources are available for PIP.
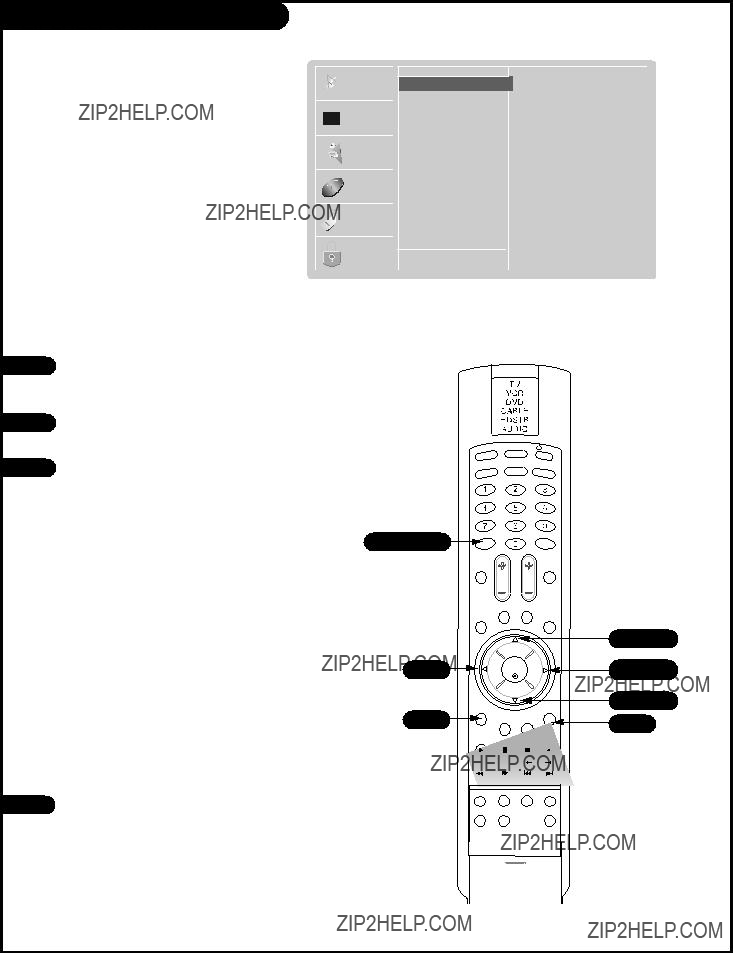
PIP (Picture-in-Picture) Operation
Selecting PIP Channels
Select the Ant/Cable source with the PIP INPUT button.
Use the PIPCH-/PIPCH+ button to select a channel for the sub picture.
Swapping Pictures
Press the SWAP button.
Each time you press the SWAP button, you switch the Main and PIP pictures.
Moving the Sub Picture
In the PIP mode, each press of the UP/DOWN/LEFT/RIGHT arrow buttons will move the sub picture to a different position on the screen.
POP (Picture-outside-Picture)
Use POP to search the pictures for all the programmed chan- nels one-by-one on the 3 PIP screen display, while the main screen remains the current channel.
Press PIP on the remote control with the PIP image on the screen to activate POP (Picture-outside-Picture) mode.
The pictures of all the programmed chan- nels are searched with the 3 PIP screen, as shown to the right.
???Press SWAP, to enlarge the selected channel being searched on the PIP screen to view it on the Main screen. (Main and sub pictures can be swapped if main picture source is Ant/Cable.)
Press the EXIT button to exit POP mode.
Run EZ Scan channel search before using POP mode.
Twin Picture
Twin Picture splits the screen into 2, allowing 2 pictures to be shown on the TV screen at the same time. Each source is given half the screen.
Watching Twin Picture
Press the PIP button on the remote control in POP mode to activate twin picture mode. Select the Ant/Cable source with the PIP INPUT button.
Use the PIPCH-/PIPCH+ button to select the desired channel for the sub picture.
Swapping Pictures
Press the SWAP button.
Each time you press SWAP, you switch the PIP and Main screen pictures.
Selecting an Input Signal Source for Sub Picture
Use the PIP INPUT button to select the input source for the sub picture.
Each time you press PIP INPUT, you toggle between Ant/Cable, Video 1,
Video 2, and Front Video.
Video Menu Options
Adjust the picture's appearance to suit your preference and viewing situations.
You can manually adjust the levels for the picture quality settings, such as Contrast, Brightness, Color, etc.
You can also select a preset value from the EZ Picture menu based on the category of the program.
Video Menu Options
 SETUP
SETUP
Contrast F 90 G
AUDIO
 TIME
TIME
SPECIAL
LOCK
???Contrast Adjusts the difference between the light and dark levels of the picture. Press the right arrow button to activate adjusting.
???Brightness Adjusts the white or light level of the overall picture.
???Color Adjusts the intensity of all colors.
???Sharpness Adjusts the level of crispness in the edges between the light and dark areas of the picture. The lower the level, the softer the image.
???Tint Adjusts the balance between the red and green levels.
???EZ Picture Offers the following preset options for the picture settings. Off Lets you adjust the picture manually to your preferences.
Daylight Increases the levels of all picture settings to fit daylight conditions.Normal Restores the picture lev- els to their original settings.
Normal Restores the picture levels back to their original settings.
Night Time: Increases the levels of all picture settings to fit daylight conditions.
Movie Adjusts Video settings to enhance Movie viewing. Contrast and Sharpness levels are lowered so that the picture looks warm and soft.
Video Game Sets the picture settings to the levels that are more suitable to enjoy games. Color, Contrast and Sharpness levels are lowered to reduce the amount of glare.
Sports Sets the picture settings to the levels that are more suitable to view sporting events. Contrast and Color levels are raised so that an action scene appears clear and brilliant.
???Color Temperature Adjusts levels of all colors in the TV picture: Warm, Medium, or cool.
???Cinema Adjust the TV for the best picture for watching movies. To use Cinema, you must choose the Movie option in EZ Picture.

 TIME
TIME
SPECIAL
LOCK
???EZ SoundRite Scans for changes in sound level during commercials, then adjusts the sound to match the current audio level of the TV program you are watching. You can also use this function with AVL button.
???EZ Sound Chooses the sound options manually.
Off Lets you adjust the Audio menu sound options manually. Normal Restores the sound settings to their original levels.
Stadium Stresses high frequency sounds and front surround sound to create the sensation you would experience in a stadium.
News Increases high frequency sounds to emphasize the human voice.
Music Increases both high and low frequency sounds to stress the sounds of musical instruments. Theater Stresses both high and low frequency sounds, in addition to the front surround sound, to create the sensation you would experience in a theater.
???Balance Adjusts the sound more to the left or right for the TV speakers.
???Treble Increases or decreases the higher frequency sounds from the TV speakers. Increases in treble, for example, make voice or string sounds stand out.
???Bass Increases or decreases the lower frequency sounds from the TV speakers.
???Front Surround Increases the front surround sound to create more open and expanded sound.
???TV Speaker Allows you to toggle the TV internal speakers Stereo, Center or off. If you want to use your external hi-fi stereo system, turn off the internal TV speakers. However, you may use the internal TV speak- ers as a center speaker to create a surround effect.
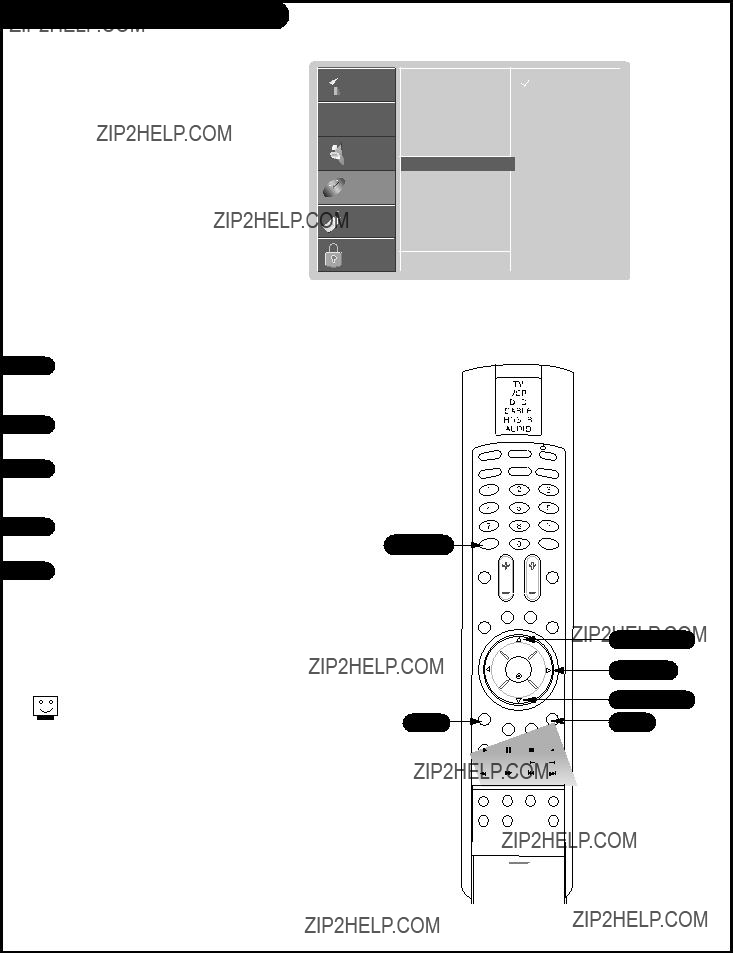
Caption/Text Mode Selection
Select a closed caption mode for displaying captioning information if provided on the program.
Captions displays information at any position on the screen usually the program's dialog.
Text displays information, usually at the bottom portion of the screen and is used for a data service, generally not program related.
CC 1, CC 2, CC 3, CC 4, Text 1, Text 2, Text 3, or Text 4.

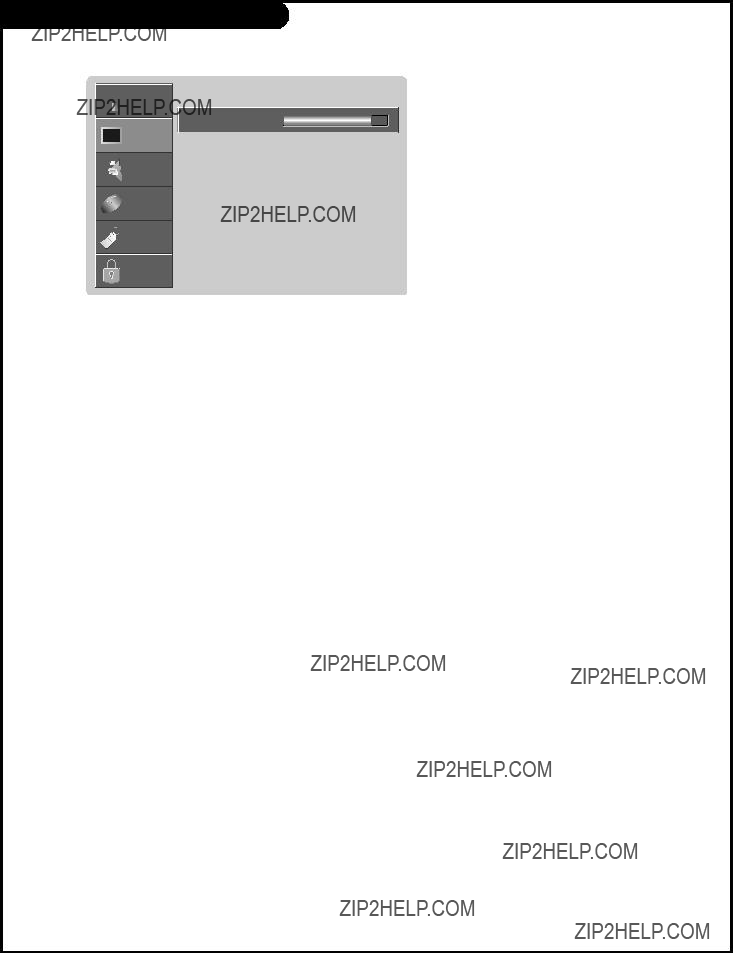
Parental Lock (Ratings Overview)
Parental Lock Rating Descriptions
TV-Y7 (Children 7 Years & Older): Program is designed for children age 7 and above.
TV-G (General Audiences): Most parents would find this program suitable for all ages.
TV-PG (Parental Guidance Suggested): Program contains material that parents may find unsuitable for younger children.
TV-14 (Parents Strongly Cautioned): Program contains some material that many parents would find unsuitable for chil- dren under 14 years of age.
TV-MA (Mature Audience Only): Program is specifically designed to be viewed by adults and therefore may be unsuitable for children under 17.
G (General Audience): Suitable for all ages.
PG (Parental Guidance Suggested): Some program content may not be suitable for children.
PG-13 (Parents strongly cautioned): Some program content may not be appropriate for children under 13.
R (Restricted): Children under 17 requires accompanying parent or adult guardian.
NC-17: Not suitable for persons 17 and younger.
TV-Y (All Children): Program is determined to be appropriate for all children.
X: Adult only.
Blocking Off: Permits all programs.

Maintenance
Early malfunctions can be prevented. Please read pages 2, 3, and 4 in the front of the manual and follow the recommendations provided. Careful and regular cleaning can enhance the appearance of your new TV. Be sure to turn the power off and pull the plug out of the power outlet before you begin any cleaning.
SCREEN CLEANING
1.Here???s a great way to keep the dust off your screen for a while. Wet a soft cloth in a mixture of lukewarm water and a little fabric softener or dish washing detergent. Wring the cloth until it???s almost dry, and then use it to wipe the screen.
2.Make sure the excess water is off the screen, and then let it air-dry before you turn on your TV.
CABINET CLEANING
1.Use a soft cloth with a mild soap solution to wipe the cabinet.
2.Rinse the cloth and wipe the cabinet again.
3.Let the cabinet air-dry before turning the TV on.
WOOD CABINETS
Use a quality wood cleaner and polish. This will protect the TV from dirt and dust, as well as keep the cabinet looking new.
EXTENDED ABSENCE
If you intend to leave your TV dormant for a long time (such as a vacation), it???s a good idea to unplug the power cord to protect against possible damage from lightning or power surges. If you use an off-air antenna, you may also want to disconnect it from the back of your TV before leaving.

Maintenance (Contd.)
PICTURE INTERFERENCE
Even though you may be getting cable service, the signal may be weak, which means the quality of your picture may suffer due to other factors. If there are problems with the image on your TV, consult the Troubleshooting guide on the following pages. You may also want to contact your cable service provider to determine if the problem is from the cable service.
VIDEO GAMES AND OTHER FIXED-PATTERN DISPLAYS
If you use your TV to play video games or for other uses that have single,
fixed images, such as a photo-CD player, you should avoid setting the Brightness level too high. If static images, like network identification patterns, are left on the screen for too long, they can leave a permanent impression on the TV screen. You can reduce the chance of this happening by limiting the amount of time you use the fixed-image display, and by reducing the contrast and brightness levels.
If you unplug your TV from a wall power outlet, you may have to reset the clock using the Time menu described earlier.
Troubleshooting
Some quick and easy tips to fixing problems yourself.
Snowy picture and unclear sound.
???Check your antenna connection or location.
???Check your cable input.
???Check to see if the TV/VCR button on your VCR has the TV selected.
Interference: Sharp lines across the screen and unclear sound.
The following may cause image problems or distortion: Electrical appliances, powerful lights, cars, trucks; computers or portable phones; medical equipment
??? If possible increase the distance between your TV and the offending appliance or shut one of them off.
Normal picture but no sound.
???Check sound level.
???Make sure the TV sound is not muted.
???Try another channel. The problem may be with the broadcast, not your TV.
???Are the Audio cables connected properly?
???Are the wires for external speakers (if you have external speakers) connected properly?
???Make sure your speakers are turned on inthe Audio menu.
???If your audio mode is set to SAP, that channel may not have an SAP program.
No picture and unclear sound.
???Are you in TV or cable tuning mode, and should be in the other?
???Make sure output channels on all A/V equipment are on the same channel (3 or 4).
???Check that all connections are tight.
???Is the AC power cord plugged in?
???Check that your AC power outlet works. (Test it by plugging in something else or try another outlet.)
???Make sure your brightness and audio controls are set properly.
???Try another channel. The problem may be with the broadcast.
No color, but the sound is O.K.
???Check the color settings in the Video menu.
???Try another channel. The problem may be with the broadcast.
Picture has a big black box on it, but the sound is O.K.
???The Caption option may be in Text mode. Select Caption 1, or OFF in the Captions/Text menu.
Picture has two horizontal black bars, one on top and one on bottom.
???Your program is in letterbox. This means that the shape of your TV is a square, but the program is a rectangle. Think of the bars as empty space the program doesn???t fill; not picture that???s blocked out. Because this format is a
direct representation of film as you see it in the movies, you are actually seeing MORE of the program when you see those bars.
Glossary
A list of definitions for some of the words found in this guide as they relate to these TVs.
COMPONENT INPUT (PR PB Y) Series of input jacks provided for extremely accurate picture reproduction yielding a higher quality pic- ture than standard video inputs.
DVD
DVI INPUT
DTV
DTV FORMATS
480I
480p
720p/1080i
Optical disc storage technology. Digital video disc player. A disc that contains movies etc. in digital format.
Digital video interface. Video multimedia standard for computer text and graphics. Port for DVI connector.
Digital television source, (set-top box).
Standard DTV format. Enhanced DTV format.
(HDTV) High definition video formats.
Glossary (Contd.)
A list of definitions for some of the words found in this guide as they relate to these TVs.
POP (PICTURE-OUTSIDE-PICTURE) Additional PIP-type viewing feature.
Product Specifications
RGB input (1)
DVI input (1)
RGB/DVI audio input (1 set)
Variable audio output (1 set)
Audio center mode input (1)
Calibration port (1)
External Speaker output (1 set)
Design and specifications are subject to change without prior notice.
(Warranty Contd.)
CONCERNING PIXEL FUNCTIONALITY: Your LCD Rear Projection Television contains about 921600 individual pixels. LCD Projection displays typically contain a small number of pixels that do not function normally. Your display has been inspected and is in compliance with manufacturer???s specifications, indicating that any pixel defects do not effect the operation or use of your display.
READ YOUR OPERATING GUIDE CAREFULLY SO THAT YOU UNDERSTAND THE OPERATION OF YOUR LCD REAR PRO-
JECTION DISPLAY AND HOW TO ADJUST THE CONSUMER CONTROLS.
IMPORTANT: Please fill out and mail in your Product Registration Card or go to www.lgservice.com to register your product online. This information allows us to reach you promptly should we discover a safety or reliability problem that could affect you.
CUSTOMER ASSISTANCE NUMBERS
FOR SERVICE:
For warranty service information, please contact the LG??Brand Customer Support telephone number listed below.
When calling for service, please have your product model number, serial number and the date of purchase or the date of original installation available.
If a replacement unit is required, under some circumstances you may be asked to provide a reserve deposit to the LG??Brand Service Center against a credit card number as surety for advanced shipment. Your credit card will not be charged if you return the defective unit within 10 working days.
If a replacement unit is received, please use the carton and packaging from that unit in returning the defective unit to the LG??Brand Service Center.
Parts and service in accordance with the LG??Brand warranty is our responsibility and will be provided without charge. Other service requirements will be at the owner???s expense. If you have problems in obtaining satisfactory warranty ser- vice, write or call the LG??Brand Customer Interactive Service.
To assure proper credit and avoid unnecessary charges, you must obtain a Return Authorization before returning any product to the Factory Service Center. Contact the number below or your authorized LG??Brand repair facility for details.
Before you call for warranty service, check your operating guide ??? you may avoid a service call.
LG Customer Interactive Center
P. O. Box 240007
201 James Record Road
Huntsville, Alabama 35824
ATTN: CIC
Telephone number: 1-201-816-2000
This number is a toll-free number
Follow menu prompts when the call is answered
Web address: www.lgservice.com
Telephone Center Hours of Operation: 24 hours a day, 365 days per year
Service for your LG??Brand Rear Projection Television is provided through LG Electronics Alabama, Inc., the authorized LG??Brand Service Center for the United States.
LG??Brand LCD Rear Projection Televisions are marketed and distributed in the United States by LG Electronics Corporation, 201 James Record Road Huntsville, Alabama 35824.
LG?? Brand
LCD Rear Projection Television
U.S. Limited Warranty
Your LG?? brand LCD Rear Projection Television will be repaired or replaced as set forth below, if it proves to be defec- tive in material or workmanship under normal use, during the warranty period ("Warranty Period") listed below, effec- tive from the date ("Date of Purchase") of original consumer purchase of the product. This warranty is good only to the original purchaser of the product and effective only when used in the United States, excluding U.S. Territories.
THIS WARRANTY IS IN LIEU OF ANY OTHER WARRANTY, EXPRESS OR IMPLIED, INCLUDING WITHOUT LIM-
ITATION, ANY WARRANTY OF MERCHANTABILITY OR FITNESS FOR A PARTICULAR PURPOSE. TO THE
EXTENT ANY IMPLIED WARRANTY IS REQUIRED BY LAW, IT IS LIMITED IN DURATION TO THE EXPRESS
WARRANTY PERIOD ABOVE. NEITHER THE MANUFACTURER NOR ITS U.S. DISTRIBUTOR SHALL BE LIABLE
FOR ANY INCIDENTAL, CONSEQUENTIAL, INDIRECT, SPECIAL, OR PUNITIVE DAMAGES OF ANY NATURE,
INCLUDING WITHOUT LIMITATION, LOST PROFITS, LOST OR CORRUPTED PROGRAMMING OR DATA, OR ANY OTHER DAMAGE WHETHER BASED IN CONTRACT, TORT, OR OTHERWISE. Some states do not allow the exclusion or limitation of incidental or consequential damages or limitations on how long an implied warranty lasts, so the above exclusion or limitation may not apply to you. This warranty gives you specific legal rights and you may also have other rights that vary from state to state.
THIS LIMITED WARRANTY DOES NOT APPLY TO:
The cost of repair or replacement under these excluded circumstances shall be borne by the consumer.
P/N : 3828VA0480B


 10
10
 TIME
TIME

 (Enter). Once a channel is highlighted, you will be able to see whether the channel is currently added or deleted by referring to the small window at the
  POWER COMP/DVI

 TIME
TIME to attach the label to the selected channel.


 SETUP
SETUP


 VIDEO
VIDEO TIME
TIME

 TIME
TIME
 TIME
TIME


 LOCK
LOCK