MONITOR WITH DVD RECEIVER
DDX6017
INSTRUCTION MANUAL
??
MONITOR WITH DVD RECEIVER
DDX6017
INSTRUCTION MANUAL
??

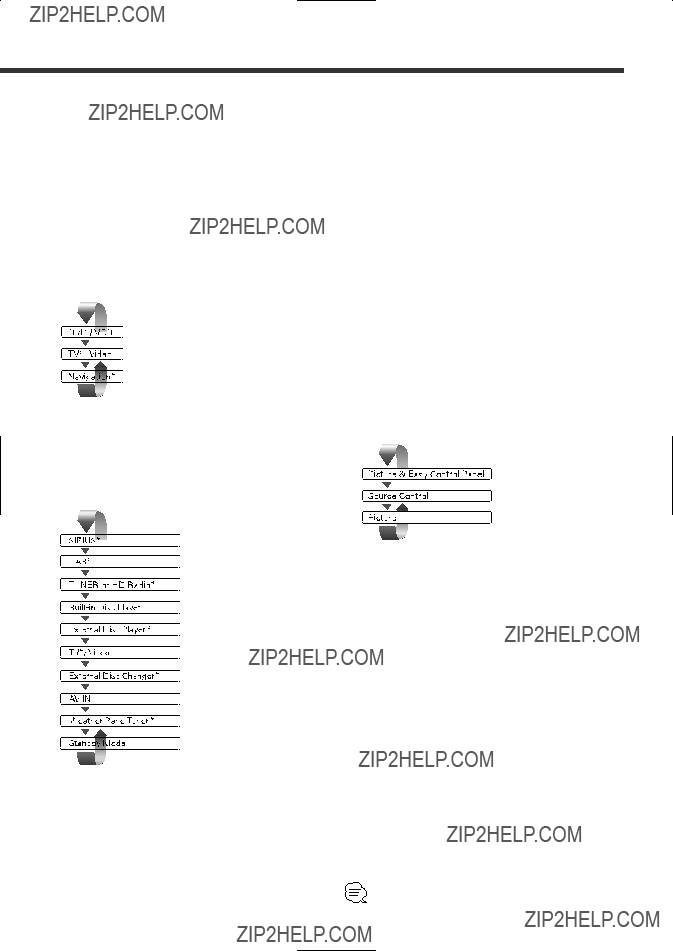
Contents
English
???Displaying the DVD/VCD Playback screen
???Displaying the Easy Control Panel
???Displaying the DVD/VCD Control screen
???DVD Disc Menu
???VCD Zoom Control
???Information Display
???Direct Search
???Displaying the Easy Control Panel
???Displaying the CD/MP3/WMA/Disc Changer Control screen
???Displaying the CD/MP3/WMA/Disc Changer Menu screen
???Set Disc Name
???Directory List (during MP3/WMA play)
???ID3/WMA TAG Display (during MP3/WMA play)
???Disc Select (during play by disc changer)
???Direct Search
??? Mute Telephone
???Displaying the TV Picture screen
???Displaying the Easy Control Panel
???Displaying the TV Control screen
???Displaying the TV Menu screen
???Seek Mode
???Auto Memory
???Manual Memory
???Preset Select
???Set Station Name
???Direct Search
???Displaying the Easy Control Panel
???Displaying the SIRIUS Tuner Control screen
???Displaying the SIRIUS Tuner Menu screen
???Channel Search
???Channel Memory
???Direct Channel Search
???Information Display
???Displaying the Easy Control Panel
???Displaying the HD Radio Control screen
???Displaying the HD Radio Menu screen
???Seek Mode
???Auto Memory
???Manual Memory
???Receive Mode
???Title Display
???Displaying the Easy Control Panel
???Displaying the DAB Tuner Control screen
???Displaying the DAB Tuner Menu screen
???Seek Mode
???Auto Ensemble Memory
???Service Preset Memory
???Service Select
???Language Filter
???Search for Program Type
???DAB Information
???DAB Announcement
???Displaying the Easy Control Panel
???Displaying the Weather Band Tuner Control screen
2 English

Setup Menu
???Displaying the Control screen
???Displaying the Setup Menu screen
???Displaying the Audio Set Up screen
???Crossover Network Setup
???Displaying the DVD SETUP 1 screen
???Displaying the DVD SETUP 2 screen
???Language Setup
???Parental Level Setup
???Displaying the System Set Up 1 screen
???Displaying the System Set Up 2 screen
???Displaying the AV I/F 1 screen
???Displaying the AV I/F 2 screen
???Displaying the User I/F 1 screen
???Displaying the User I/F 2 screen
???Touch Panel Adjust
???Clock
???Security Code Setup
SIRIUS Setup <North American sales only> ..74
Sound Effects Menu
???Displaying the Control screen
???Displaying the Sound Effects Menu screen
???Displaying the Audio Control 1 screen
???Displaying the Audio Control 2 screen
English 3
Before Use
English
2WARNING
To prevent injury and/or fire, take the following precautions:
???Ensure that the unit is securely installed. Otherwise it may fly out of place during collisions and other jolts.
???When extending the ignition, battery or ground wires, make sure to use
???To prevent short circuits, never put or leave any metallic objects (e.g., coins or metal tools) inside the unit.
???If the unit starts to emit smoke or strange smells, turn off the power immediately and consult your Kenwood dealer.
???Do not touch the liquid crystal fluid if the LCD is damaged or broken due to shock. The liquid crystal fluid may be dangerous to your health or even fatal.
If the liquid crystal fluid from the LCD contacts your body or clothing, wash it off with soap immediately.
2CAUTION
To prevent damage to the machine, take the following precautions:
???Make sure to ground the unit to a negative 12V DC power supply.
???Do not open the top or bottom covers of the unit.
???Do not install the unit in a spot exposed to direct sunlight or excessive heat or humidity. Also avoid places with too much dust or the possibility of water splashing.
???Do not subject the faceplate to excessive shock, as it is a piece of precision equipment.
???When replacing a fuse, only use a new one with the prescribed rating. Using a fuse with the wrong rating may cause your unit to malfunction.
???To prevent short circuits when replacing a fuse, first disconnect the wiring harness.
???Do not use any screws except for the ones provided. The use of improper screws might result in damage to the main unit.
???You cannot view video pictures whilst the vehicle is moving. To enjoy TV/video pictures, find a safe place to park and engage the parking brake.
NOTE
???If you experience problems during installation, consult your Kenwood dealer.
???If the unit does not seem to be working right, try pressing the reset button first. If that does not solve the problem, consult your Kenwood dealer.
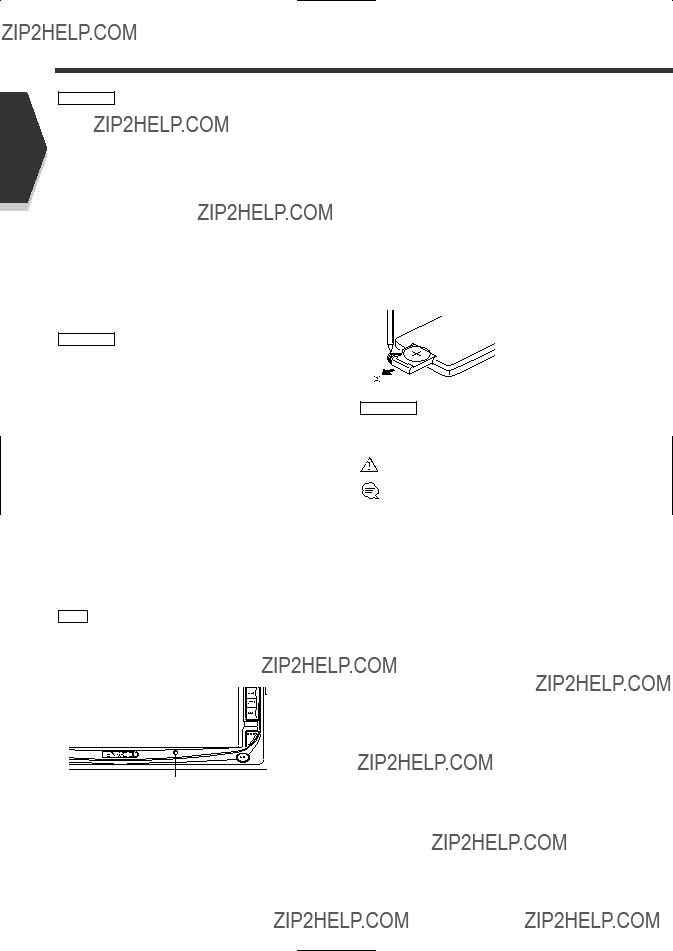
AUTO
Reset button
Screen brightness during low temperatures
When the temperature of the unit falls such as during winter, the liquid crystal panel's screen will become darker than usual. Normal brightness will return after using the monitor for a whilst.
Audio units you can control from the DDX6017 Receiver (in November of 2004):
(Set the
Navigation units you can control from the DDX6017 Receiver (in November of 2004):
Loading and Replacing the battery
Use one lithium battery (CR2025).
Insert the batteries with the + and - poles aligned properly, following the illustration inside the case.
 Keep on slide
Pull out
2WARNING
Store unused batteries out of the reach of children. Contact a doctor immediately if the battery is accidentally swallowed.
Do not set the remote on hot places such as above the dashboard.
???The provided batteries are intended for use in operation checking, and their service life may be short.
???When the remote controllable distance becomes short, replace both of the batteries with new ones.
Cleaning the panel and monitor
When the operator panel and monitor panels are dirty, wipe and clean them using a soft cloth (such as a commercially available silicon coated cloth). When contaminated excessively, clean them using a cloth dipped in a neutral detergent first, then remove the detergent using a dry cloth.
Do not use a hard cloth and a volatile chemical (such as an alcohol). If used, the panel surface may be scratched or printed letters may be erased.
Cleaning the disc slot
As dust can accumulate in the disc slot, clean it occasionally. Your discs can get scratched if you put them in a dusty disc slot.
Lens Fogging
Right after you turn on the car heater in cold weather, dew or condensation may form on the lens in the disc player of the unit. Called lens fogging, discs may be impossible to play. In such a situation, remove the disc and wait for the condensation to evaporate. If the unit still does not operate normally after a whilst, consult your Kenwood dealer.
4 English
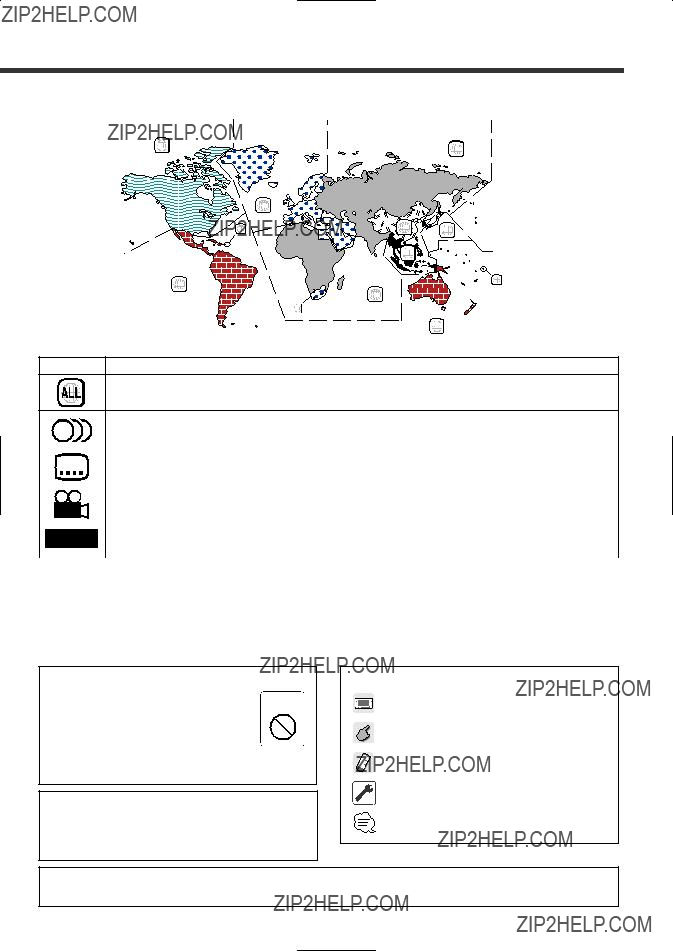
Region codes in the world
The DVD players are given a region code according to the country or area it is marketed, as shown in the following map.
Icons on the DVD discs
Indicates the region code where the disc can be played.
Also, you cannot play back the
Restrictions due to difference between discs
The illustrations of the display and the panel appearing in this manual are examples used to explain more clearly how the controls are used. Therefore, what appears on the display in the illustrations may differ from what appears on the display on the actual equipment, and some of the illustrations on the display may represent something impossible in actual operation.
Explanation of icons used on this manual
Indicates the key operation on the receiver.
Indicates the button you must touch.
Indicates the key or joystick operation on the remote controller.
The initial value of each setup is shown.
Gives an additional information or an operation advice.
Time is displayed on each control screen in the 12 hour clock display type (with AM/PM displayed) or in the 24 hour clock display type (without AM/PM displayed) depending on the sales area. The display type cannot be changed. In this instruction manual, screens of the 24 hour display type are used as examples.
English 5
About discs
English
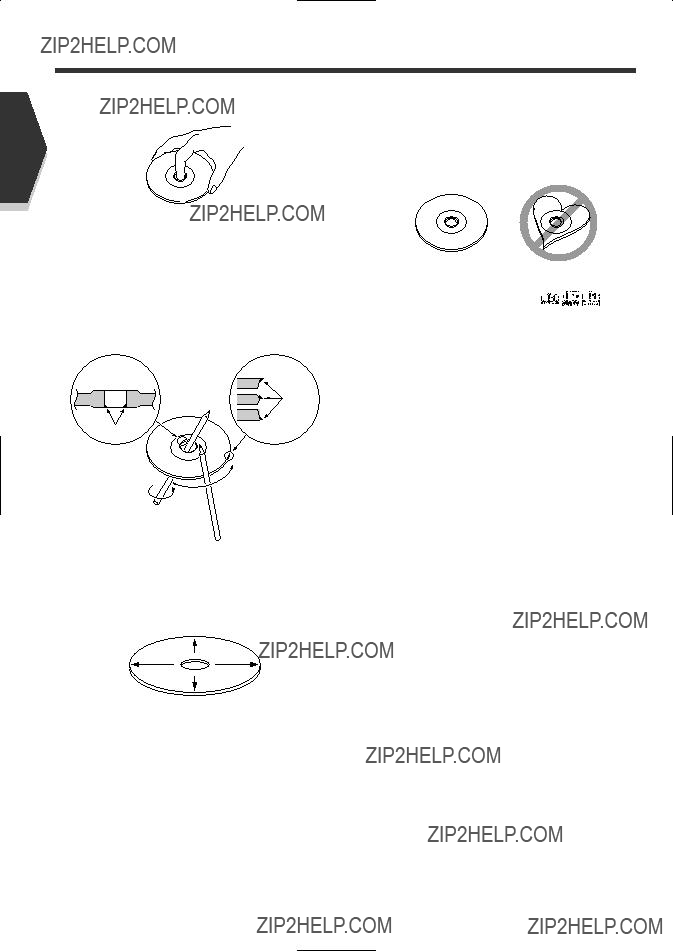
Handling discs
??? Don???t touch the recording surface of the disc.
???
???Don???t stick tape etc. on the disc.
Also, don???t use a disc with tape stuck on it.
When using a new disc
If the disc center hole or outside rim has burrs, use it after removing them with a ball pen etc.
Burrs
Burrs
Disc accessories
Don???t use disc type accessories.
Disc cleaning
Clean from the center of the disc and move outward.
Removing discs
When removing discs from this unit pull them out horizontally.
Discs that can???t be used
??? Discs that aren???t round can???t be used.
???Discs with coloring on the recording surface or that are dirty can???t be used.
It may not correctly play discs which do not have the mark.
???A
Disc storage
???Don???t place them in direct sunlight (On the seat or dashboard etc.) and where the temperature is high.
???Store discs in their cases.
6 English

Notes on playing MP3/WMA
This unit can play MP3 (MPEG1 Audio Layer 3)/WMA. Note, however, that the MP3/WMA recording media and formats acceptable are limited. When writing MP3/WMA, pay attention to the following restrictions.
Acceptable media
The MP3/WMA recording media acceptable to this unit are
When using
Acceptable medium formats
The following formats are available for the media used in this unit. The maximum number of characters used for file name including the delimiter (".") and
???ISO 9660 Level 1 (12 characters)
???ISO 9660 Level 2 (31 characters)
???Joliet (64 characters)
???Romeo (128 characters)
Up to 170 characters can be displayed in the long file name format. For a list of available characters, see the instruction manual of the writing software and the section Entering file and folder names below.
The media reproducible on this unit has the following limitations:
???Maximum number of directory levels: 8
???Maximum number of files per folder: 255
???Maximum number of characters for folder name: 64
???Maximum number of folders: 100
MP3/WMA written in the formats other than the above may not be successfully played and their file names or folder names are not properly displayed.
Settings for your MP3/WMA encoder and CD writer
Do the following setting when compressing audio data in MP3/WMA data with the MP3/WMA encoder.
??? Transfer bit rate: MP3: 32
??? Sampling frequency: MP3: 32, 44.1, 48 kHz WMA: 32, 44.1, 48 kHz
When you use your CD writer to record MP3/WMA up to the maximum disc capacity, disable additional writing. For recording on an empty disc up to the maximum capacity at once, check Disc at Once.
Play mode may not be possible when portions of the functions of Windows Media Player 9 or higher are used.
Entering ID3 tag
The Displayable ID3 tag is ID3 version 1.x.
For the character code, refer to the List of Codes.
Entering file and folder names
The code list characters are the only file names and folder names that can be entered and displayed.
If you use any other character for entry, the file and folder names are not displayed correctly. They may neither be displayed correctly depending on the CD writer used.
The unit recognizes and plays only those MP3/WMA which have the MP3/WMA extension (.MP3/.WMA).
A file with a name entered with characters not on the code list may not play correctly.
Writing files into a medium
When a medium containing MP3/WMA data is loaded, the unit checks all the data on the medium. If the medium contains a lot of folders or
Loading such a medium may produce loud noise to damage the speakers.
???Do no attempt to play a medium containing a non- MP3/WMA file with the MP3/WMA extension.
The unit mistakes
???Do not attempt to play a medium containing non MP3/WMA.
MP3/WMA playing order
When selected for play, Folder Search, File Search, or for Folder Select, files and folders are accessed in the order in which they were written by the CD writer.
Because of this, the order in which they are expected to be played may not match the order in which they are actually played. You may be able to set the order in which MP3/WMA are to be played by writing them onto a medium such as a
English 7
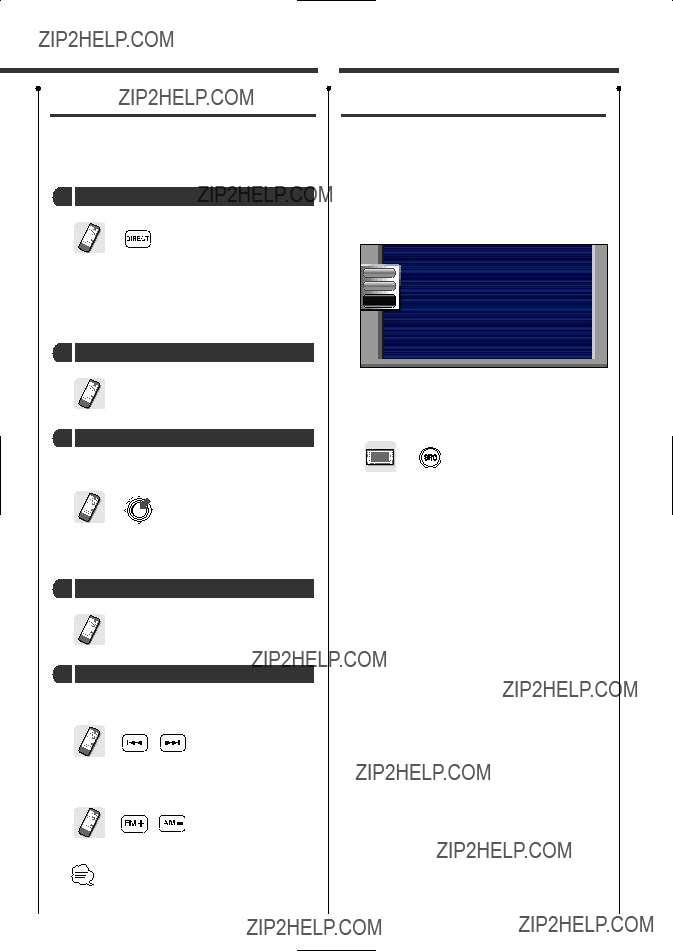
DDX6017 Basic operations
English
AUTO
8 English
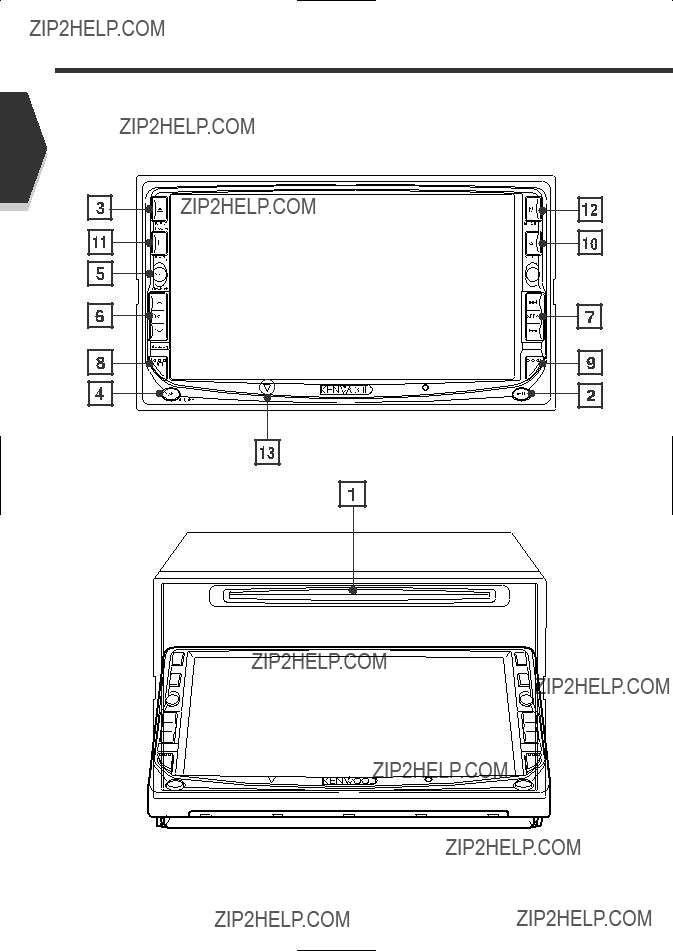
1Play Disc
[Disc insertion slot]
A disc is played when you insert it.
2Play/Pause [38] key
Pauses and replays a disc.
3Eject Disc [EJECT] key
The disc is ejected.
4Switch Video Sources [V.SEL] key
The video sources are switched each time you press the key.
* Optional accessory
Clears the video image when pressed more than one second. When pressed again, the original image is redisplayed.
5Switch Audio Source/Power Supply [SRC] key
The audio sources are switched each time you press the key.
* Optional accessory
Hold down more than 1 second to turn the power supply Off.
Push it again to turn power supply On.
6Volume Controls [VOL] key
7Track/Station Selectors [SEEK] key
Selects a music or chapter, track, or frequency.
8Attenuator/Loudness [ATT]/[LOUD] key
Attenuates the volume.
Press it again to cancel muting.
Press it for more than one second to turn the Loudness function on or off. (see page 79)
If turned on, high and low tones are enhanced during low volume.
9Select Seek Mode [AUTO] key
Selects the Seek mode. (see pages 22/36 for the <Seek Mode>)
pScreen Setup [SCRN] key
Displays the Screen Control or Tilt Control screen. (see page 56)
qFunction [FNC] key
The video sources are switched each time you press the key.
Switches the source that is output at the AV OUTPUT terminal when it is pressed more than 1 second.
wSwitch Screen Mode [MODE] key
The screen mode is switched. (see page 12)
eSI (Security Indicator)
If the SI function is ON, this indicator flashes when the vehicle ignition is turned off. (see page 72)
The display turns on when you put the parking brake, except for the navigation system.
English 9
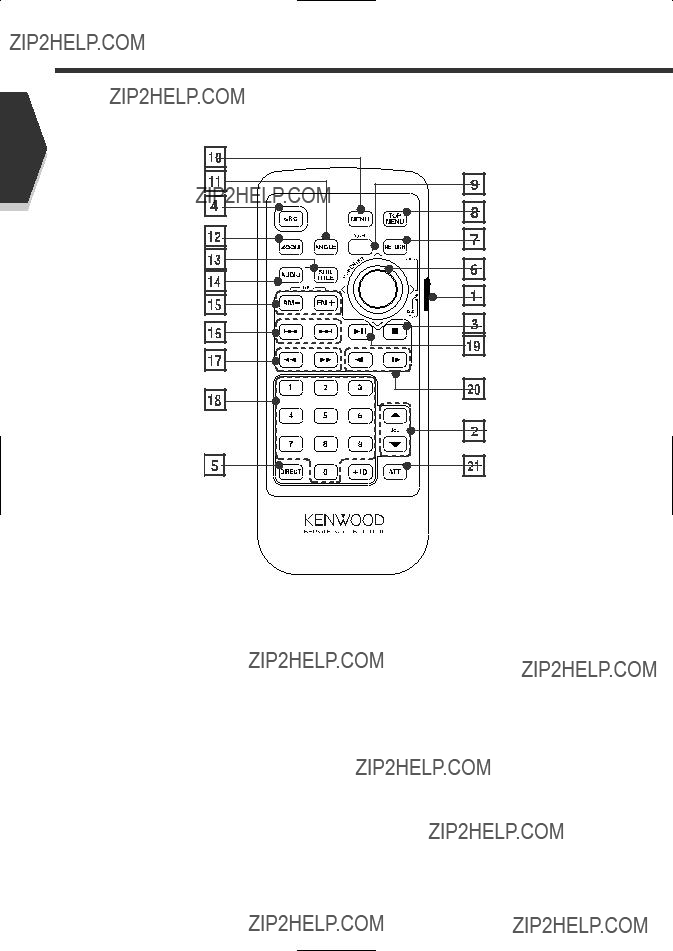
Basic Operations of Remote Controller
English
1Remote Control Mode selector
Selects one of the following remote control modes. TV: TV source
DVD:
AUD: Tuner source or attached disc changer/disc player source
2Volume Control
Adjusts the volume.
3[DISC]
Stops to play the
4Switches over the sound source each time it is pressed.
5Selects the Direct Search mode.
(see pages 19/24/33/37 for <Direct Search>)
10 English
6Joystick [DVD]
Enters your selection from the DVD Disc Menu.
7[DVD] [VCD]
Returns to the previous screen when the DVD/VCD Disc Menu is used.
8[DVD]
Calls the Top menu of DVD Disc Menu.
9Switch Video Sources
[V.SEL] key (When 1 is set to "TV")
The video sources are switched each time you press the key.
* Optional accessory
p[DVD]
Calls the DVD Disc Menu.
[VCD]
Turns the PBC function of VCD On or Off.
q[DVD]
Each time you press the button, the angle switches.
w[DVD] [VCD]
Each time you press the button, the zoom ratio switches.
e[DVD]
Switches a subtitle language.
r[DVD]
Switches an audio language.
t[DISC]
Select a folder or a disc.
[TV]
FM: Switches to TV1, TV2, or VIDEO.
[TUNER]
FM: Switches to the FM1, FM2, or FM3 band.
AM: Switches to the AM band.
y[DISC]
Selects a chapter, a track or a song.
[TV]
Select a channel.
[TUNER]
Selects a station.
u[DVD] [VCD]
1: Fast Backward (Rewind). The speed changes each
time it is pressed.
??: Fast Forward. The speed changes each time it is pressed.
i[TV] [TUNER]
 ???
???  : Call the stations from memory.
o[DISC]
Plays or pauses.
[TUNER]
Selects the Seek mode. (see page 22/44 for the <Seek Mode>)
;[DVD]
 : Slow Backward.
 : Slow Forward.
aAttenuator [ATT] key
Attenuates the volume.
Press it again to cancel muting.
English 11
English
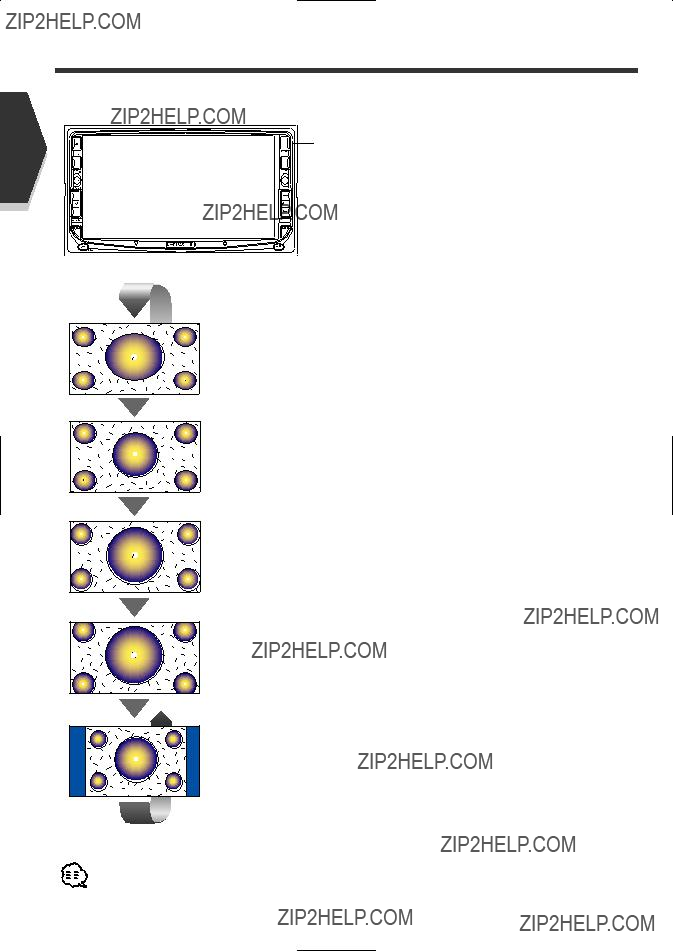
Switch Screen Mode
The Screen mode of the monitor changes each time the [MODE] key is pressed.

 [MODE] key
AUTO
Full picture mode [FULL]
Justify picture mode [JUST]
Cinema picture mode [CINEMA]
Zoom picture mode [ZOOM]
Normal picture mode [NORMAL]
???When the Menu, Easy Control screen, or Navigation is selected, it is shown in the
???The Screen mode can be set for each of DVD/VCD, TV, and video images.
12 English

English 13
English
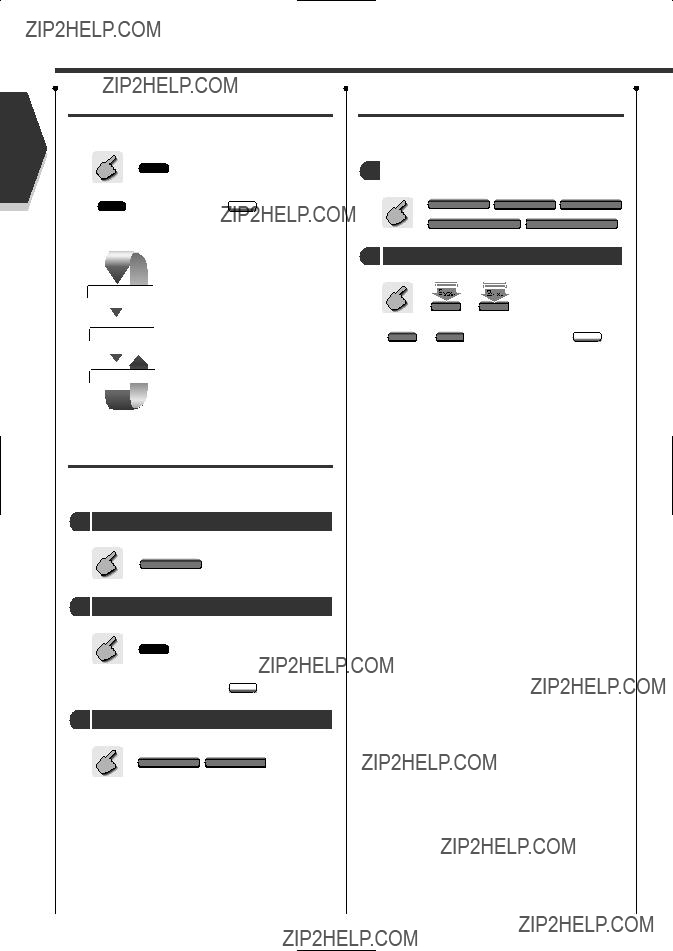
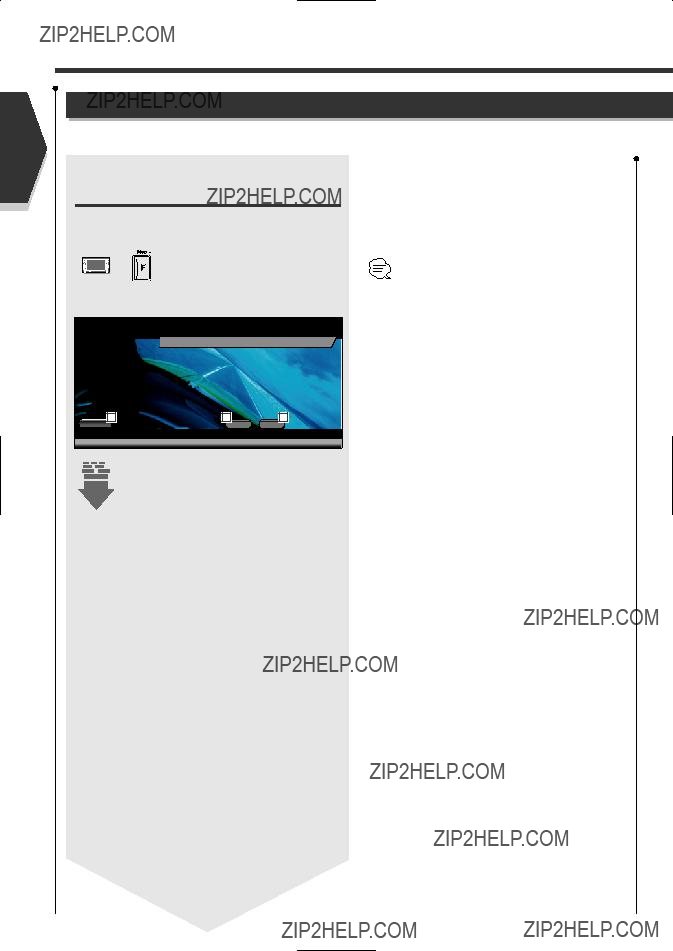
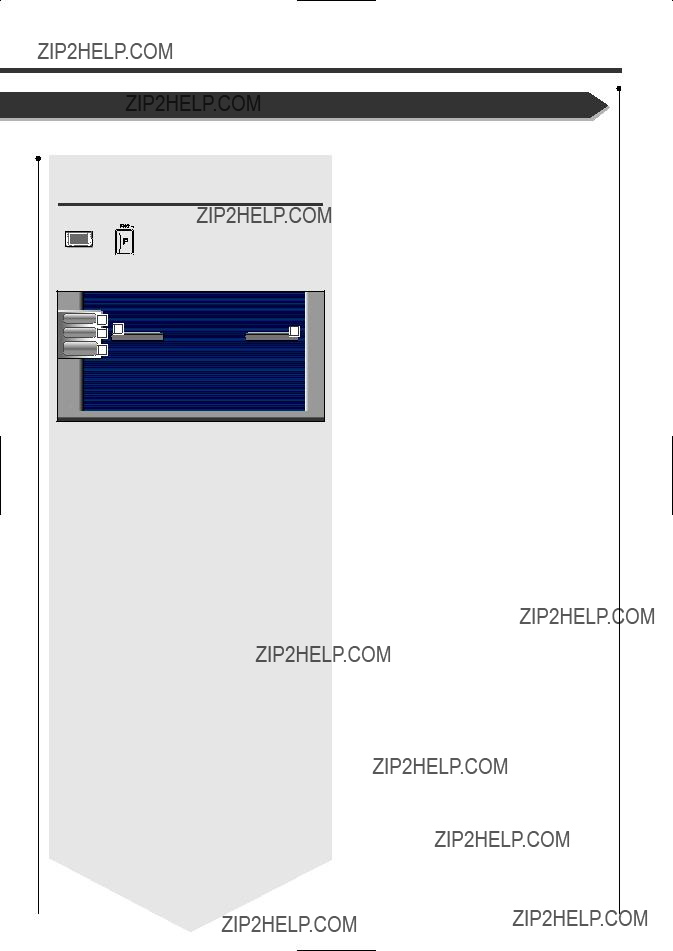
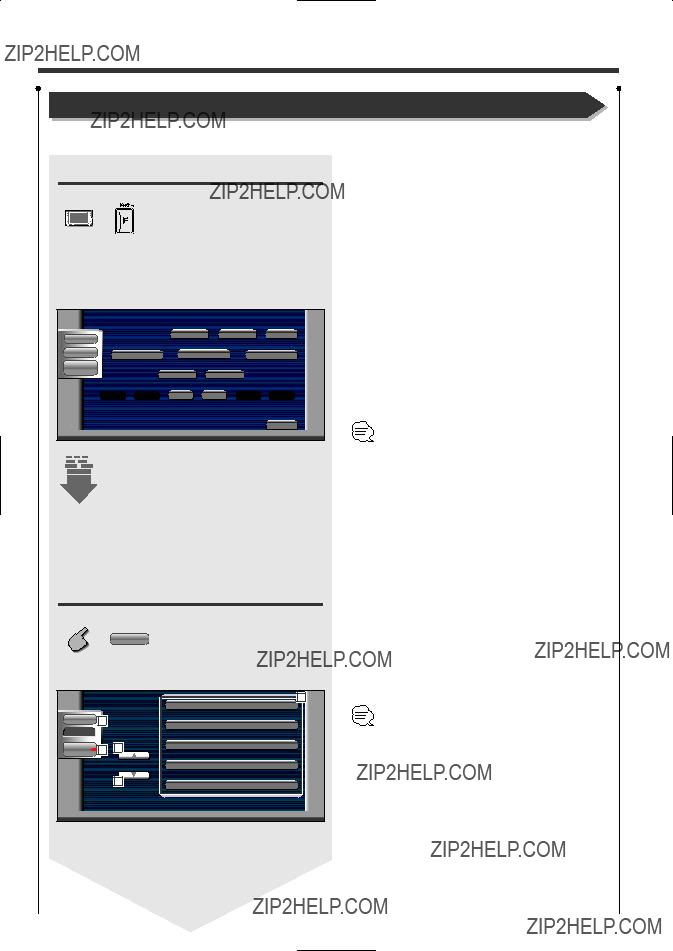
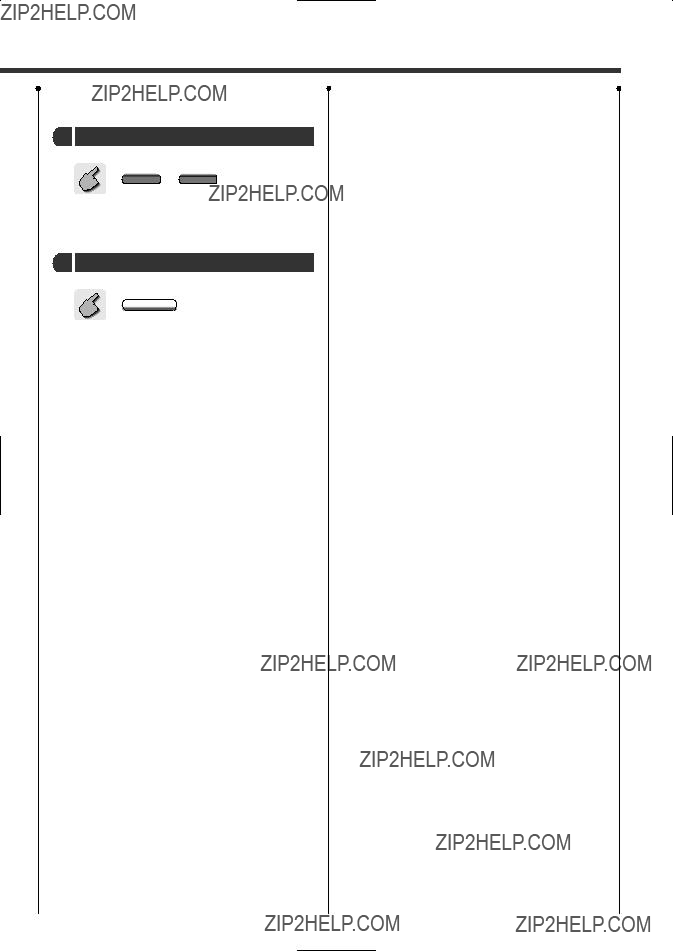
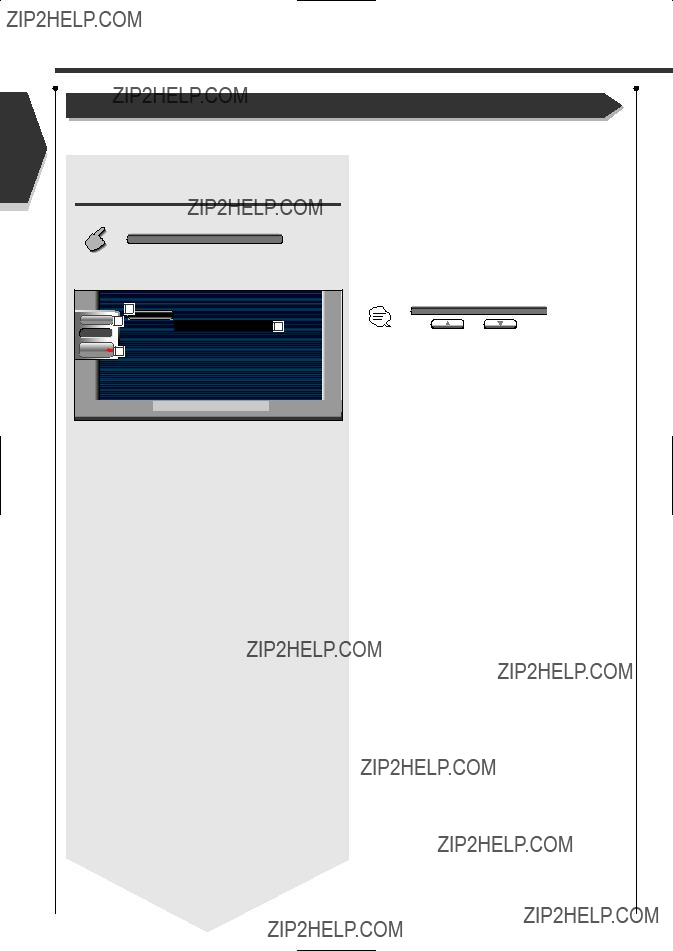
Control during DVD Video or Video CD Playback
Control during DVD Video or Video CD Playback
Various control screens appear when you play back a DVD Video (DVD) or a Video
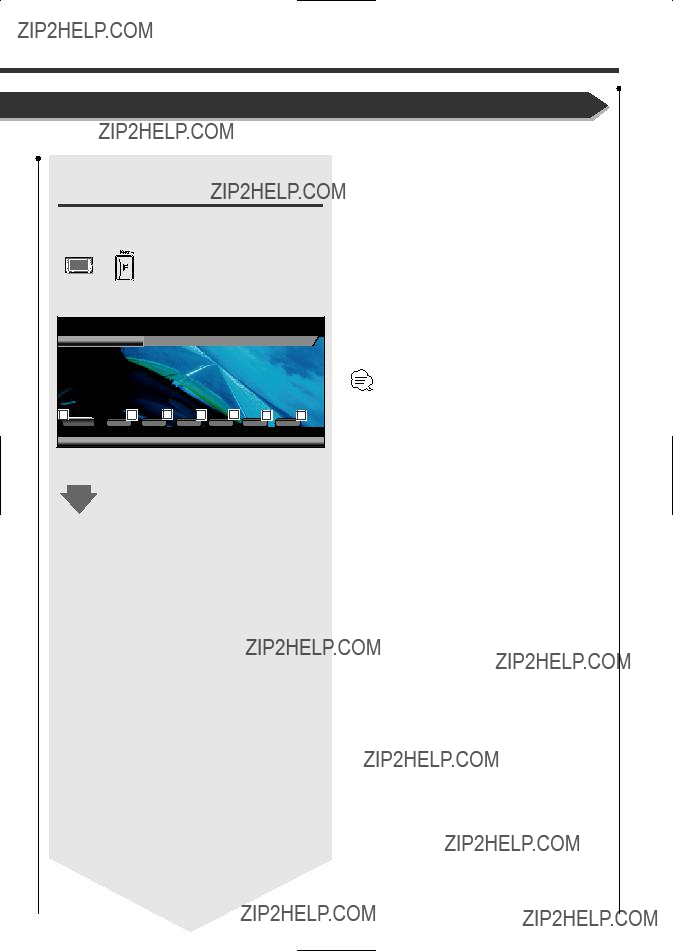
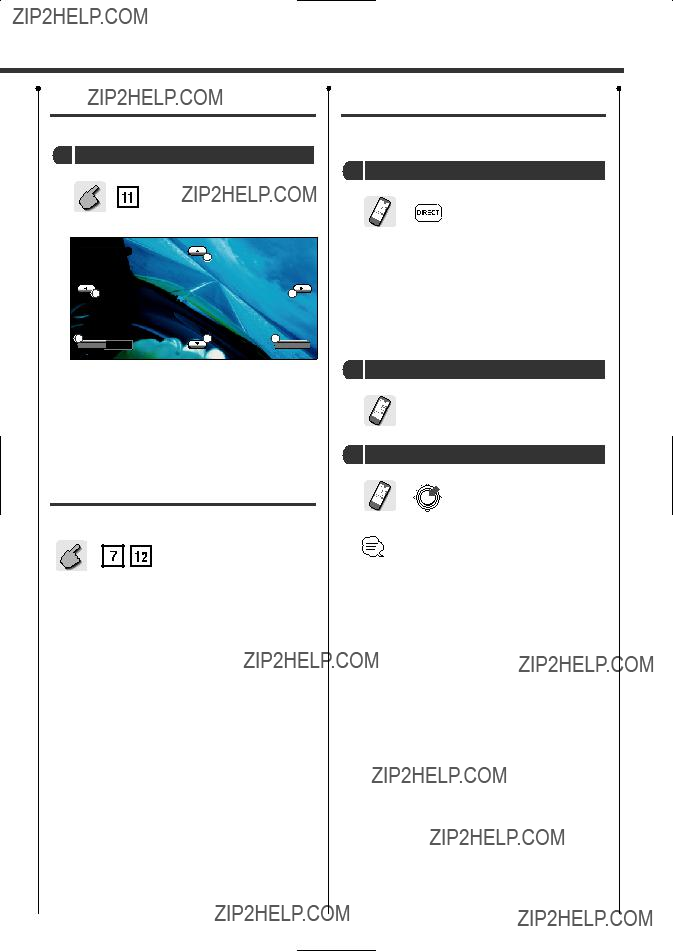
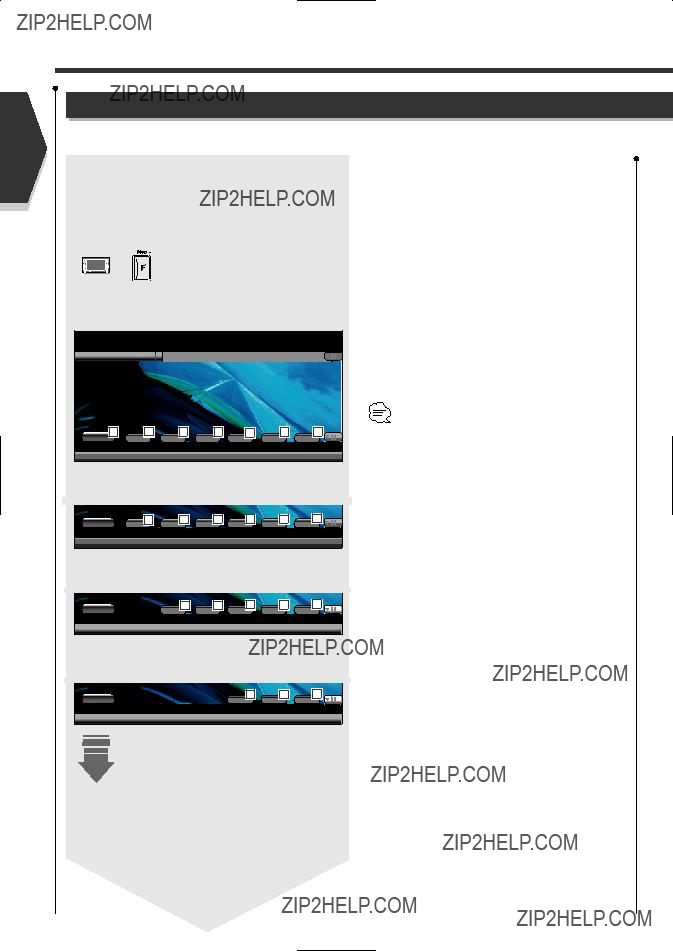
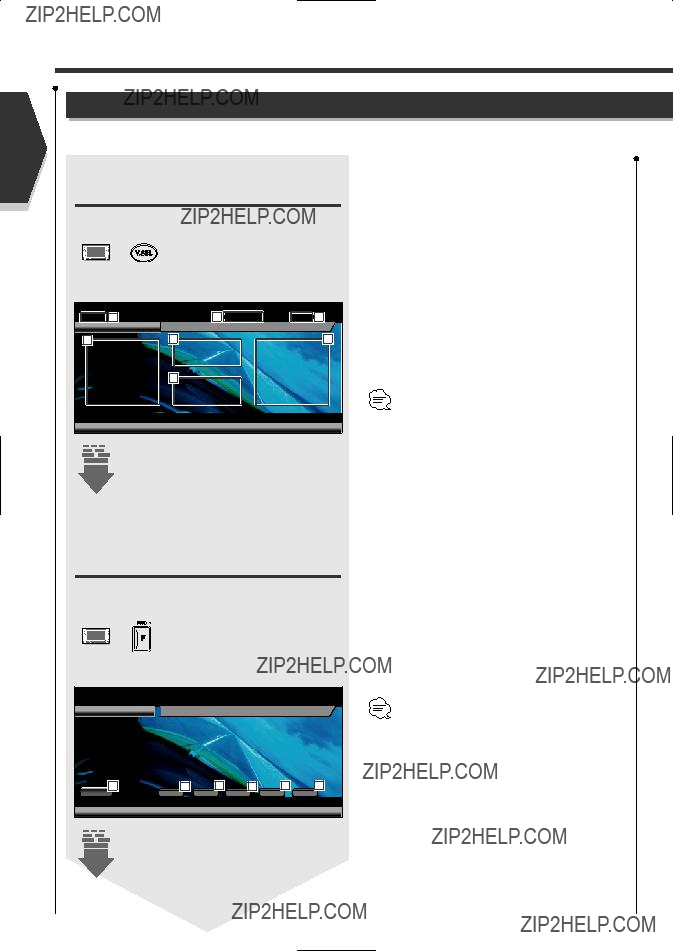
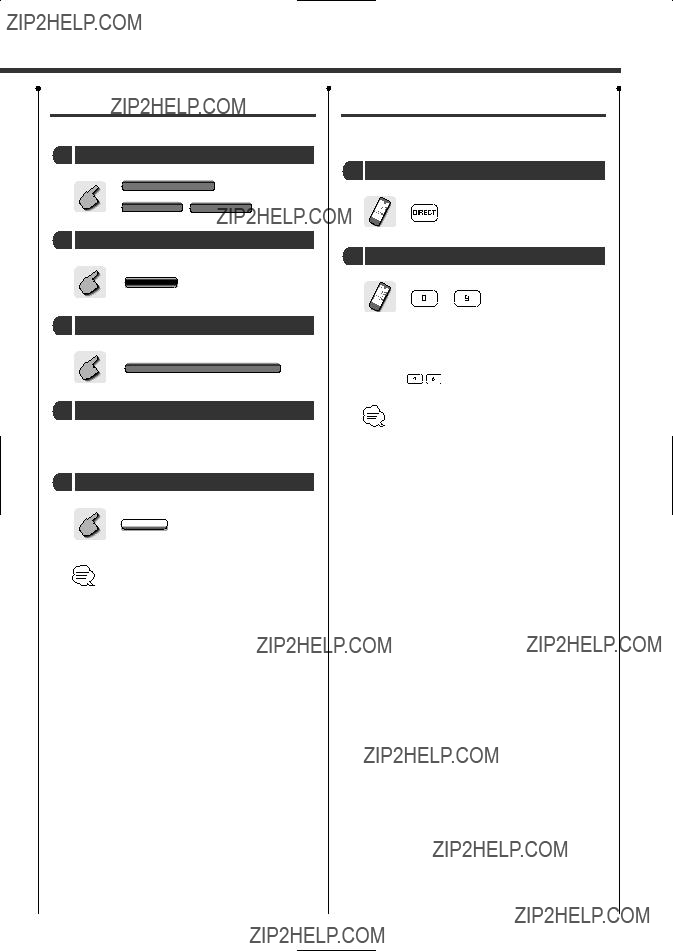
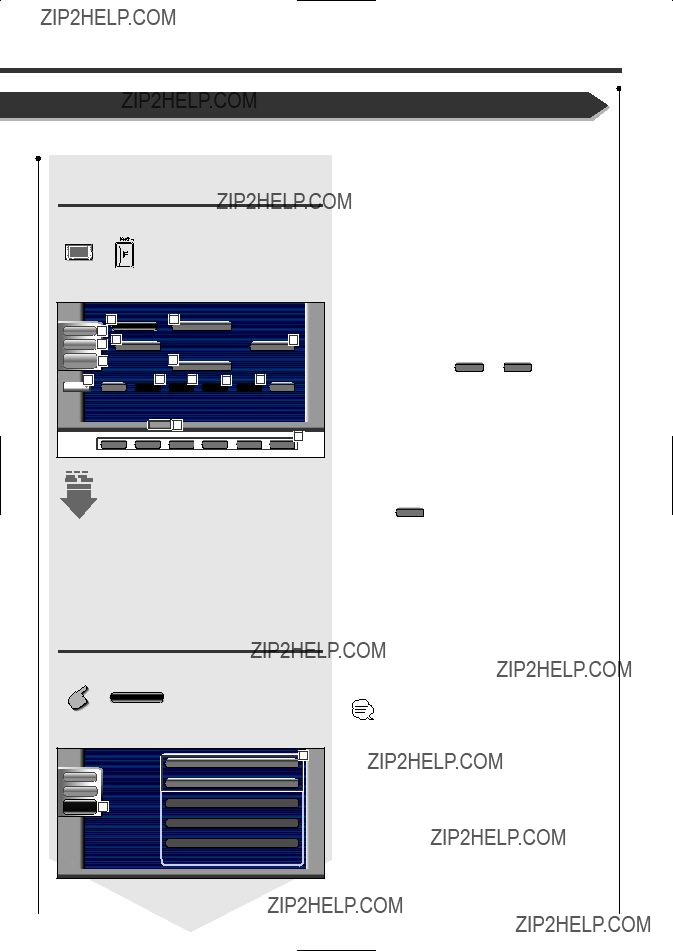
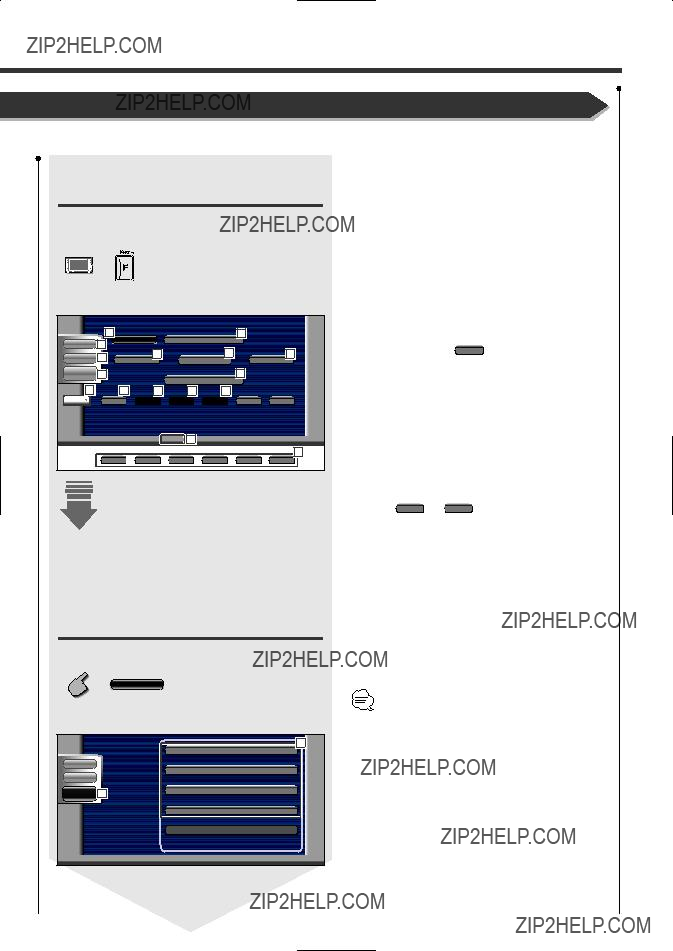
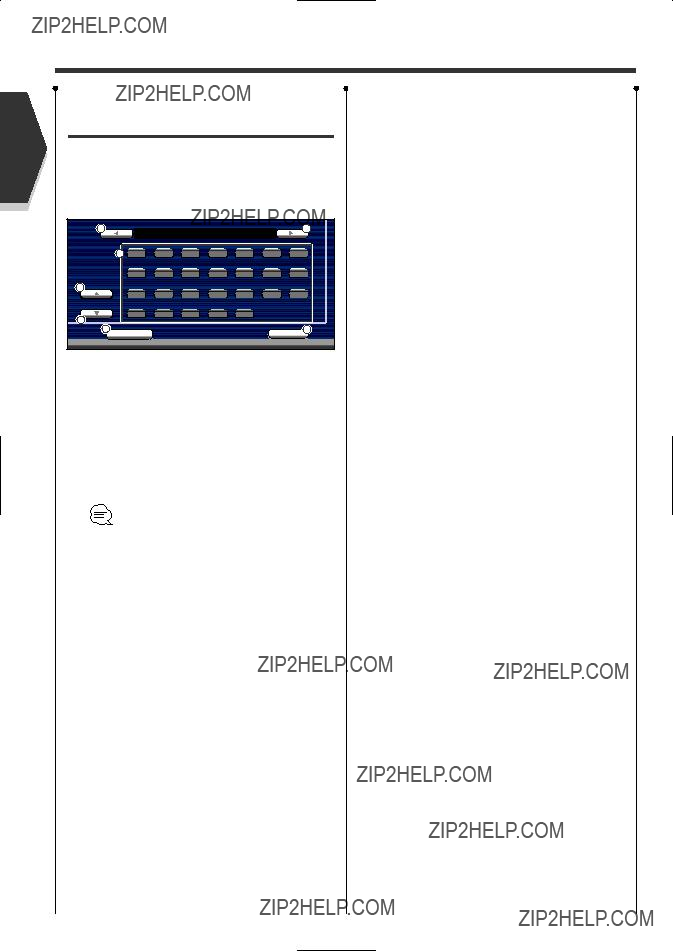
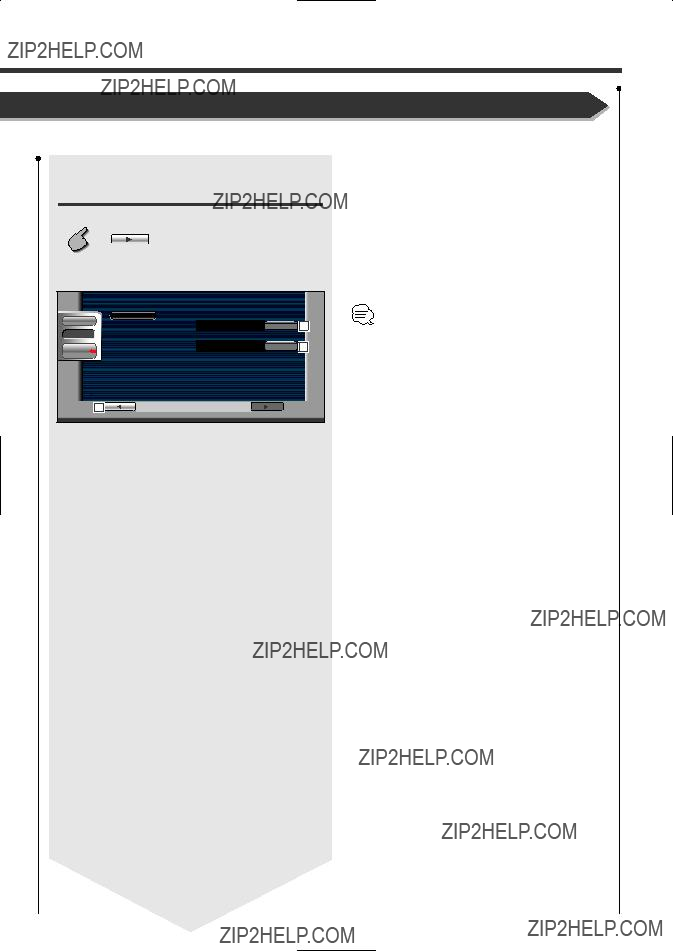
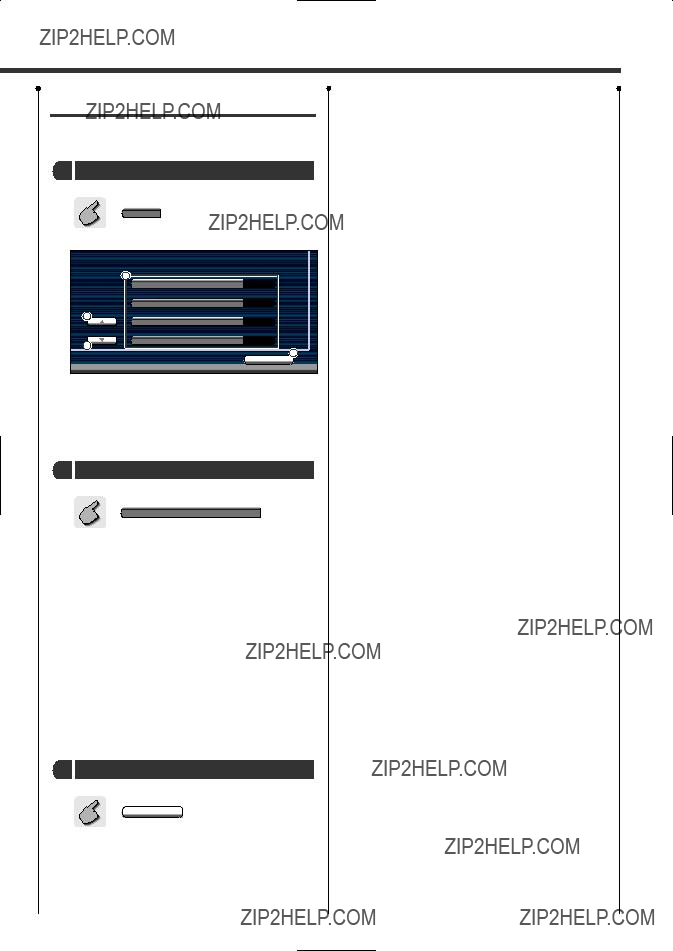
Displaying the DVD/VCD Playback screen
You can use the following operations when displaying DVD/VCD images.
Plays back the
DVD or VCD.
1 Title Number Display
2 Chapter Number Display
3 Play Time Display
4Forward Chapter Search Area
Selects the next chapter.
7 Information Display Button Area (see page 19)
8 Scene/Track Number Display
9Forward Scene/Track Search Area
Selects the next scene (when PBC is On) or track (when PBC is Off).
pBackward Scene/Track Search Area
Selects the previous scene (when PBC is On) or track (when PBC is Off).
qZoom Control Button Area
Displays the Zoom Control buttons (see page 19).
wInformation Display Button Area (see page 19)
???For DVD/VCD playback, DVD/VCD picture selection, or controller key operations, see <DDX6017 Basic Operations> (see page 8).
???The information display is cleared automatically after approximately 5 seconds. Also, the information can be displayed automatically when it is updated (see page 69).
14 English
CD (VCD) disc.
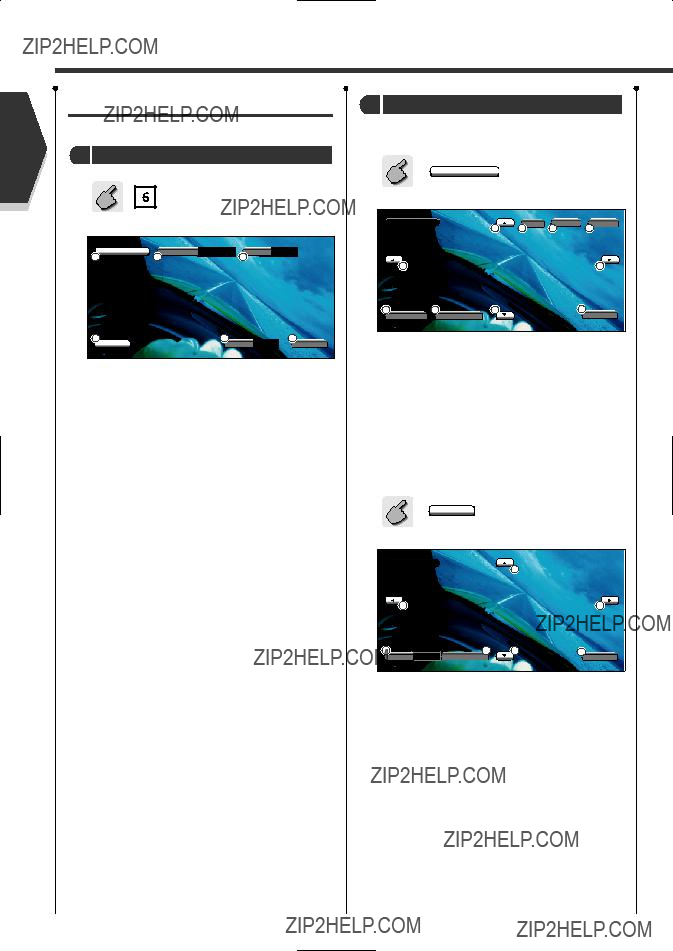
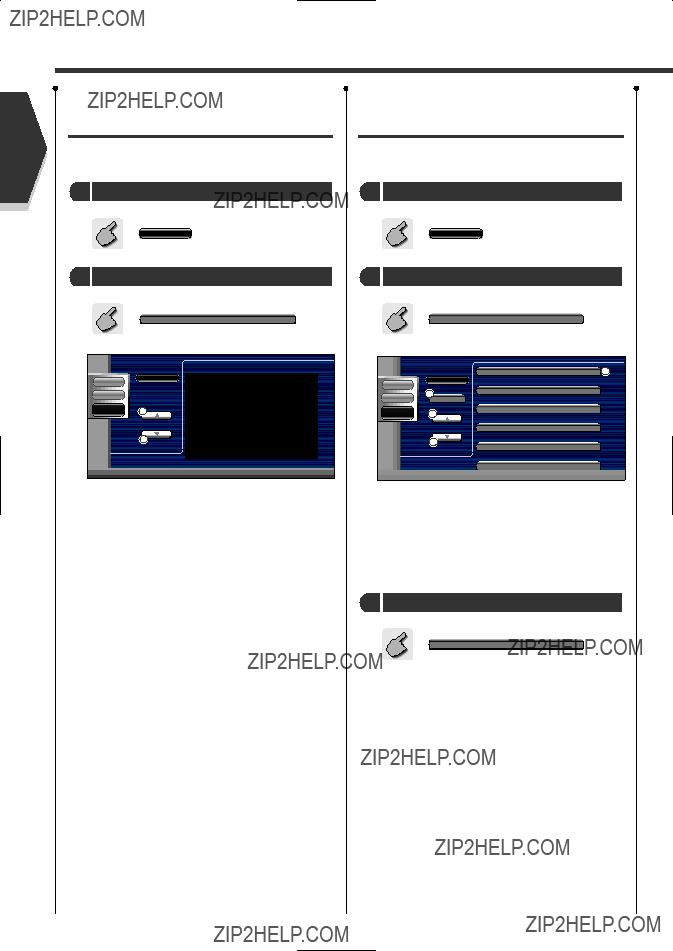
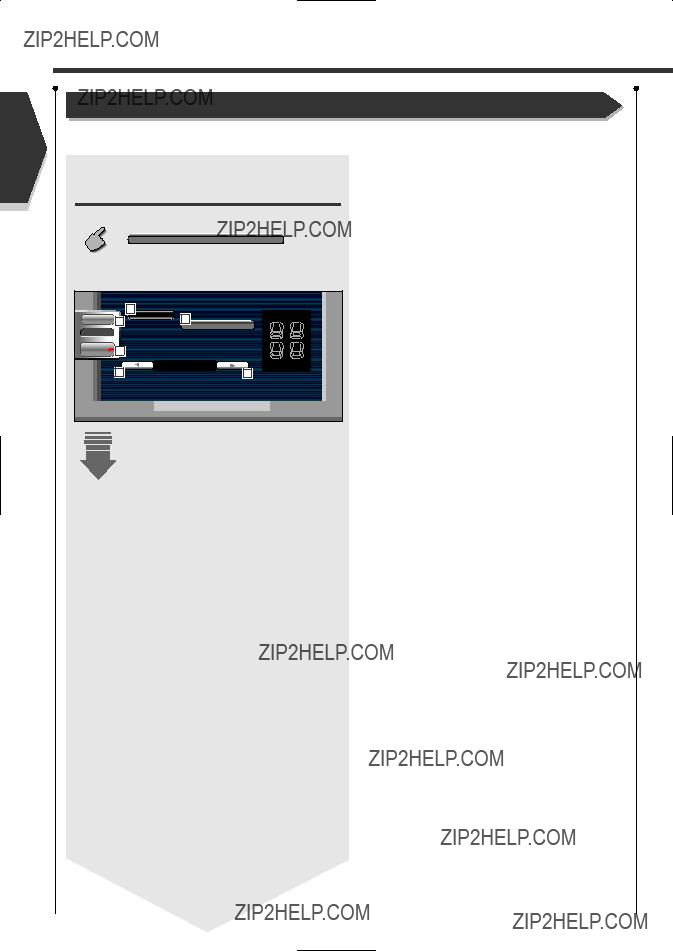
Displaying the Easy Control
Panel
The Control Panel is displayed in a floating position of the DVD/VCD screen.
e Switches the source. r Stops to play.
t Rewinds or fast forwards.
yChapter Search (DVD)
Searches for a chapter.
English 15
English
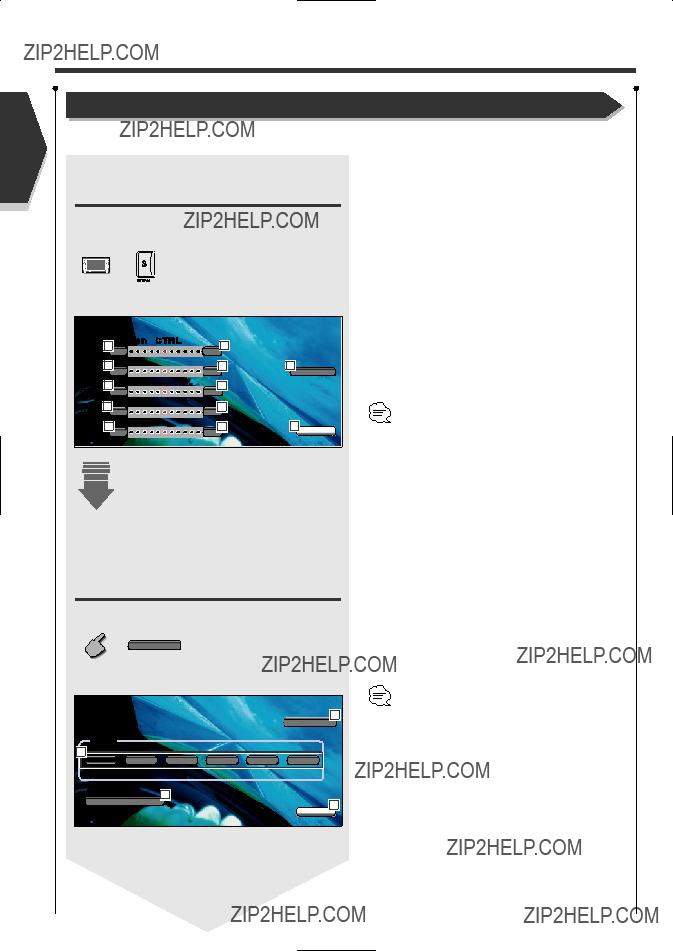
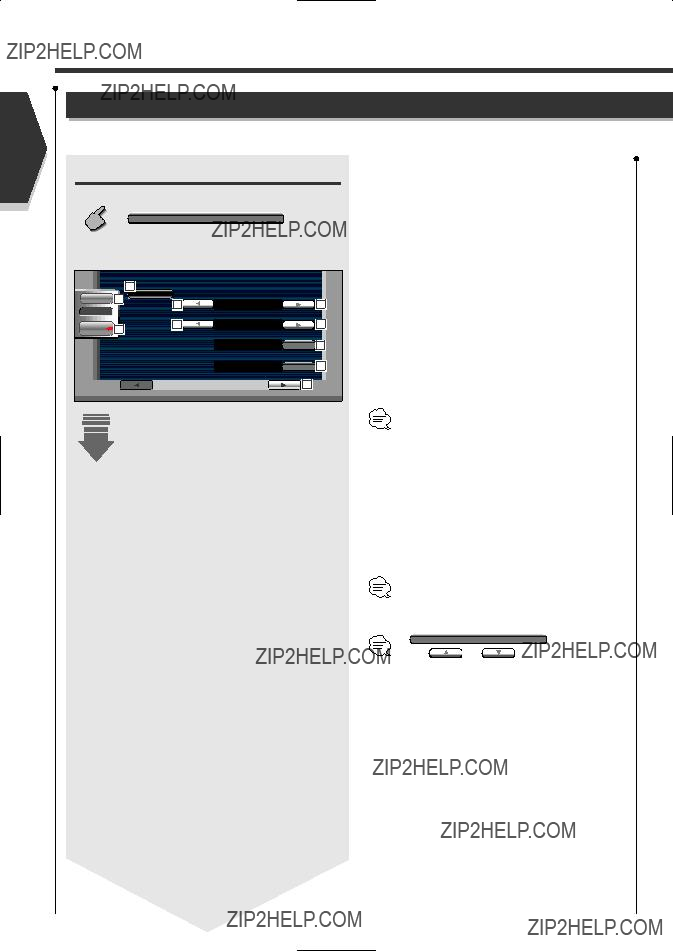
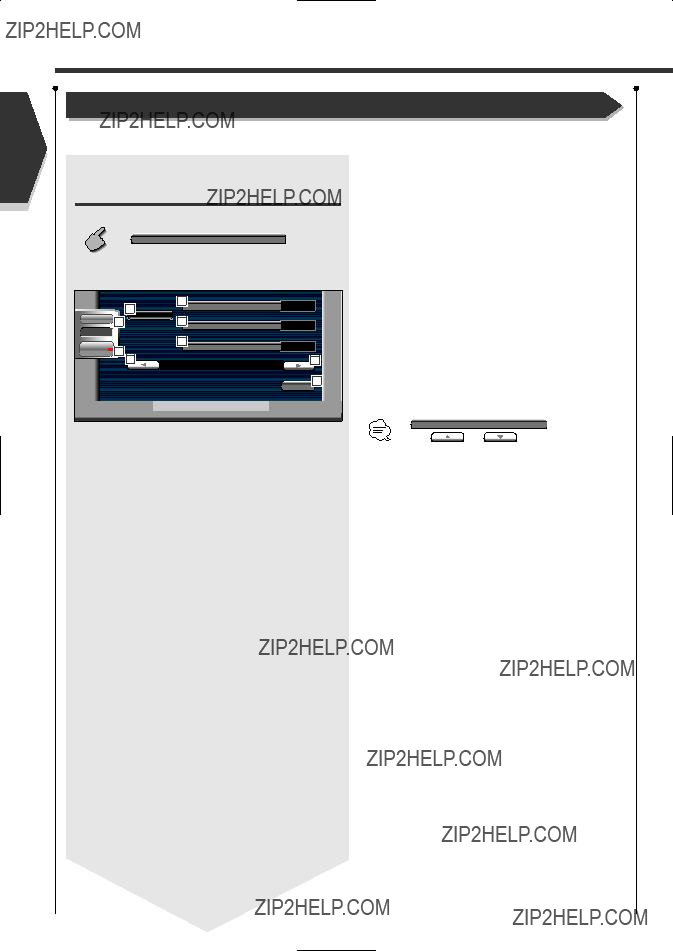
Control during DVD Video or Video CD Playback
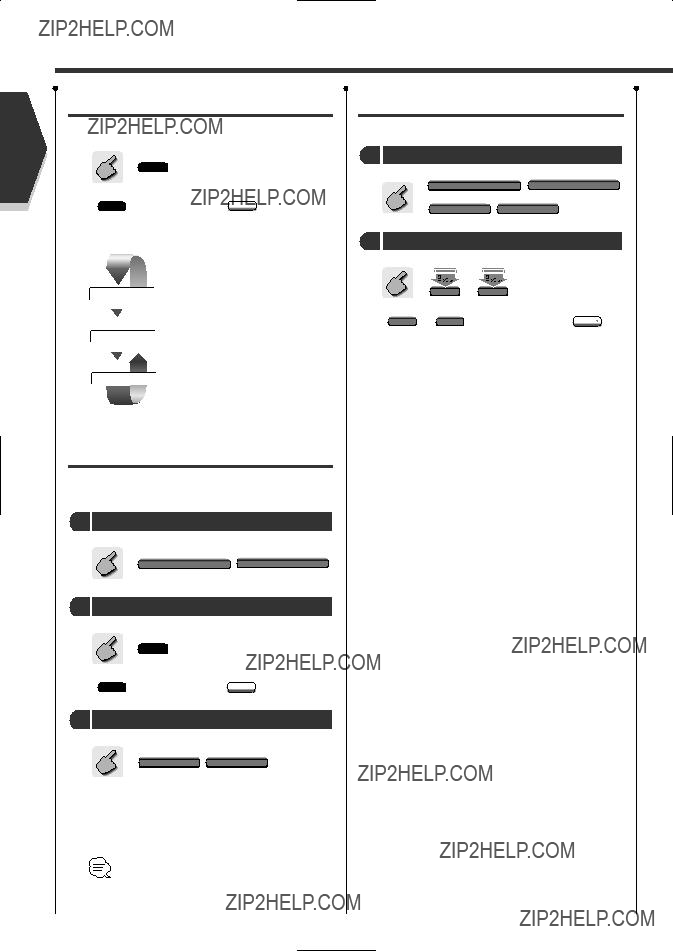
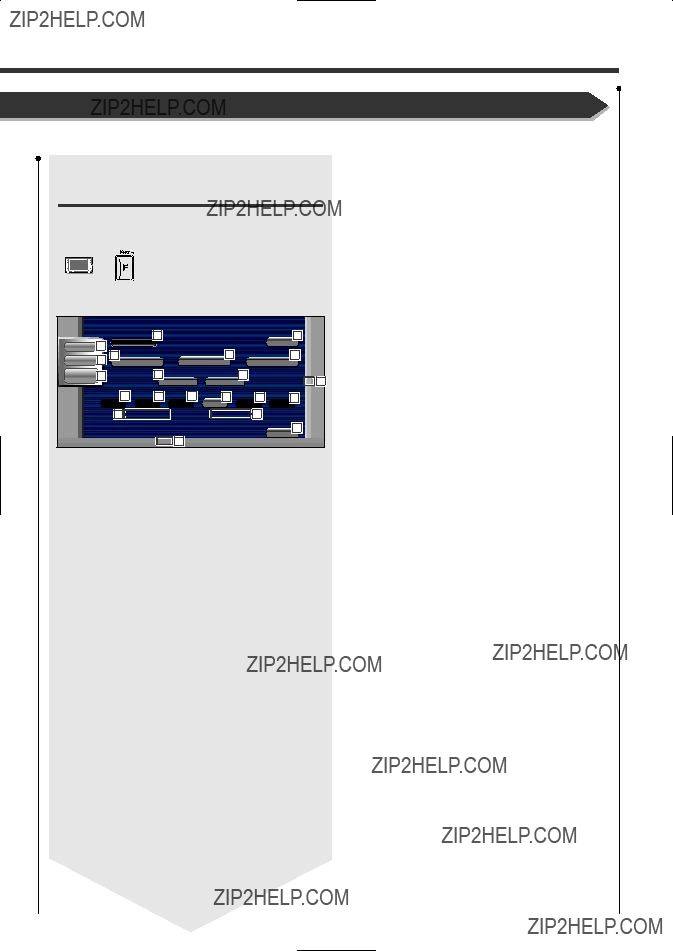
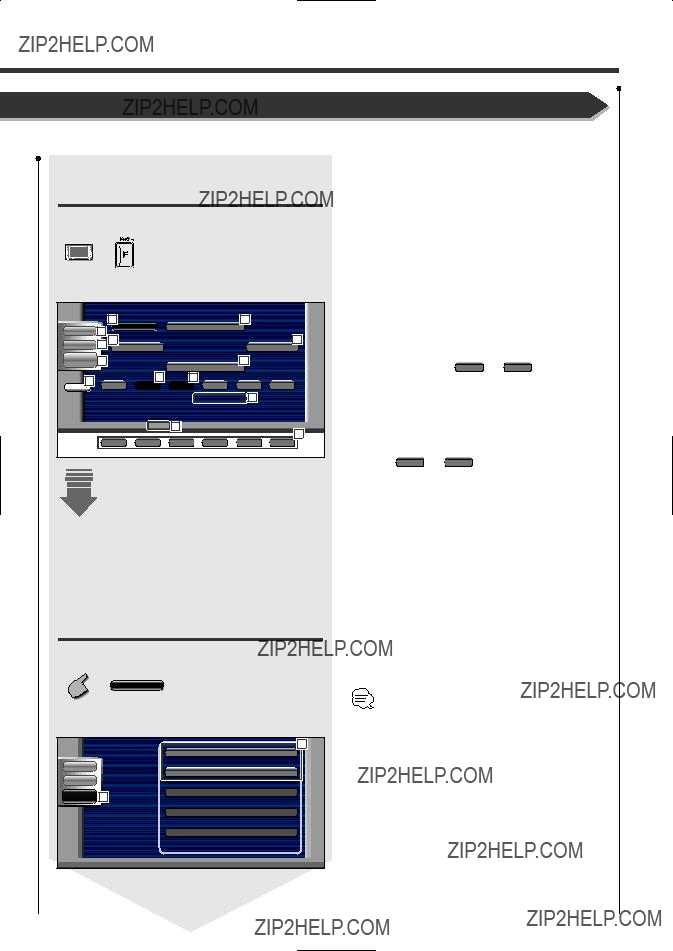
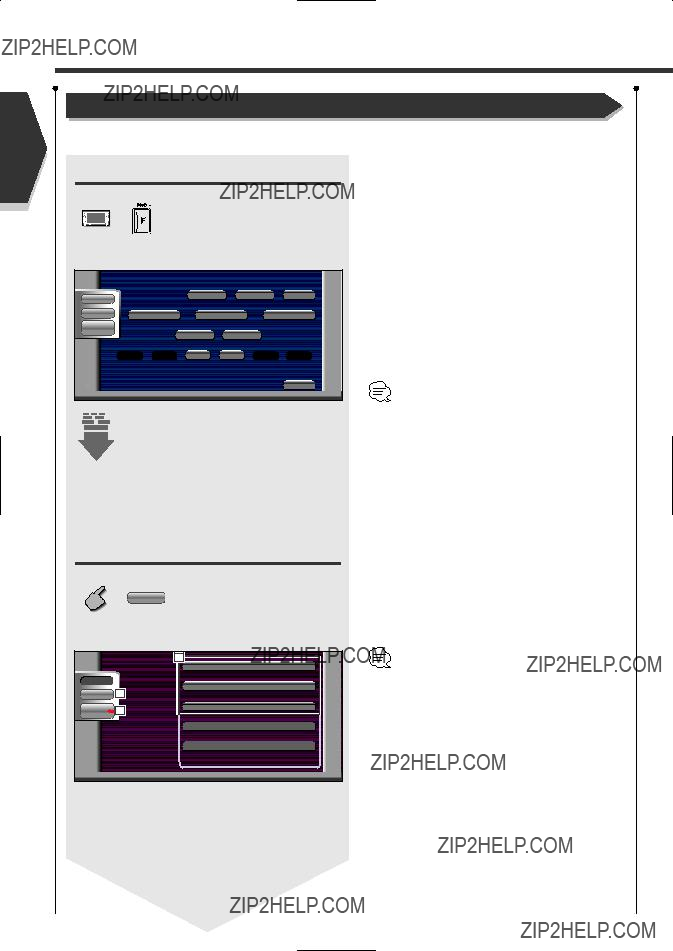
Displaying the DVD/VCD
Control screen
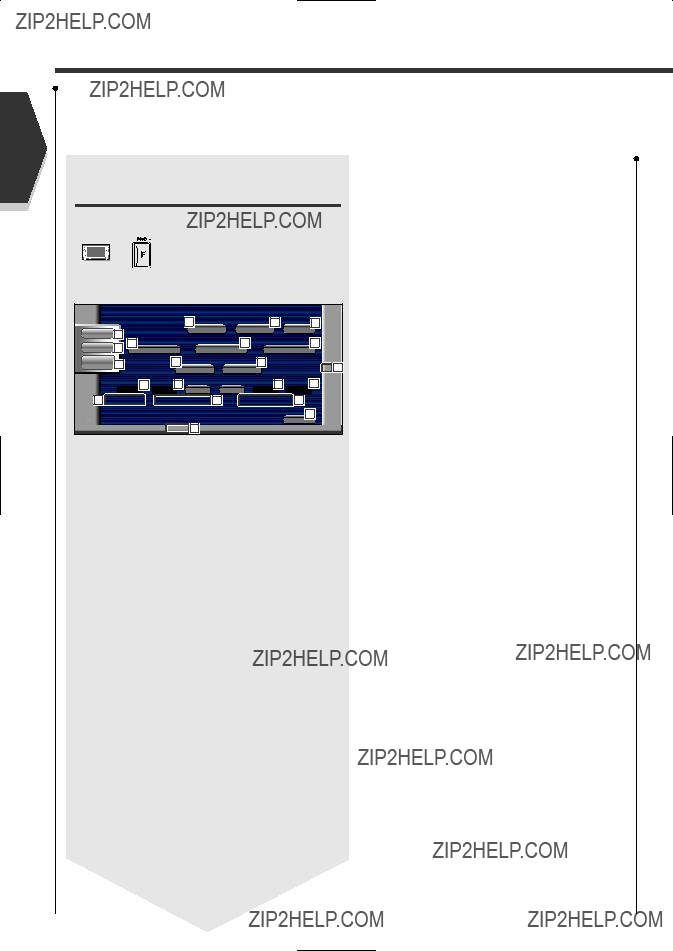
Plays a DVD/VCD using various functions.
i Ejects the disc from the
; Calls the Setup Menu. (see page 57)
a Displays the Source Select screen. (see page 55) s Fast Forwards or Rewinds.
dStops to play.
When pressed twice, the disc is played from its beginning when you play it in the next time.
fSelects a chapter, a scene or a track.
When the DVD is paused, touch this button to start
g Plays or pauses.
hSlow Forwards or Backwards. (during DVD playback only)
jTurns the PBC function of VCD On or Off. (when VCD Ver 2.0 is in use only)
kSwitches the Repeat Play operations in the following sequence.
DVD: Title Repeat, Chapter Repeat, Repeat Off
VCD: Track Repeat, Repeat Off (Available when the PBC is off)
l Scrolls the display text.
/Switches the play time display in the following sequence.
DVD: Title, chapter, remaining titles
VCD: Track, disc, remaining discs (Effective only when the PBC function is off)
z Title Number Display (DVD)
x Chapter/Scene/Track Number Display
c Play Time Display
v Appears when a disc is inserted. b Function Indicator
16 English
English 17
Control during DVD Video or Video CD Playback
English
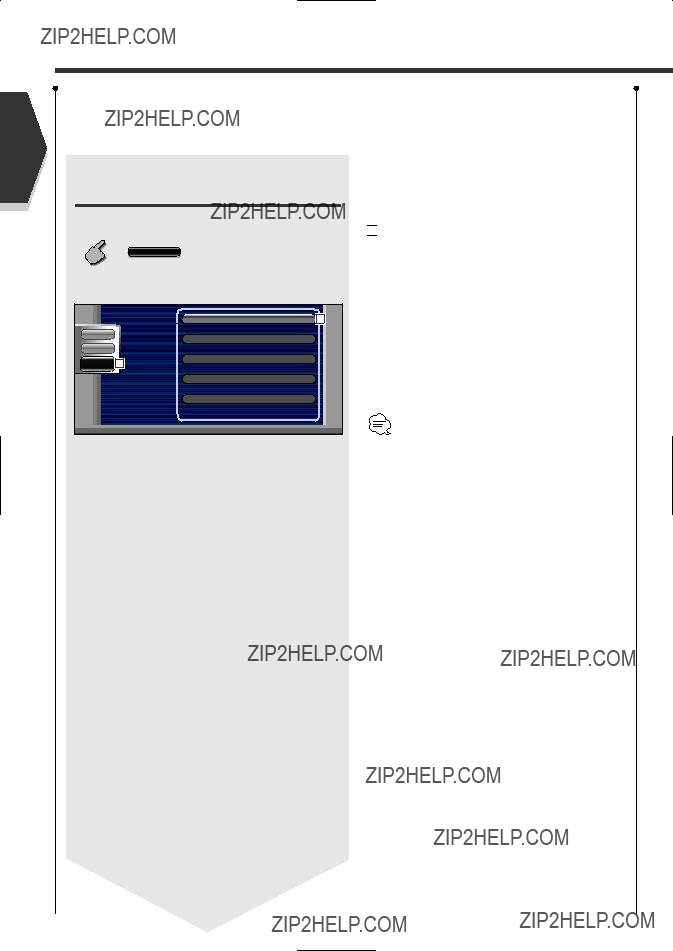
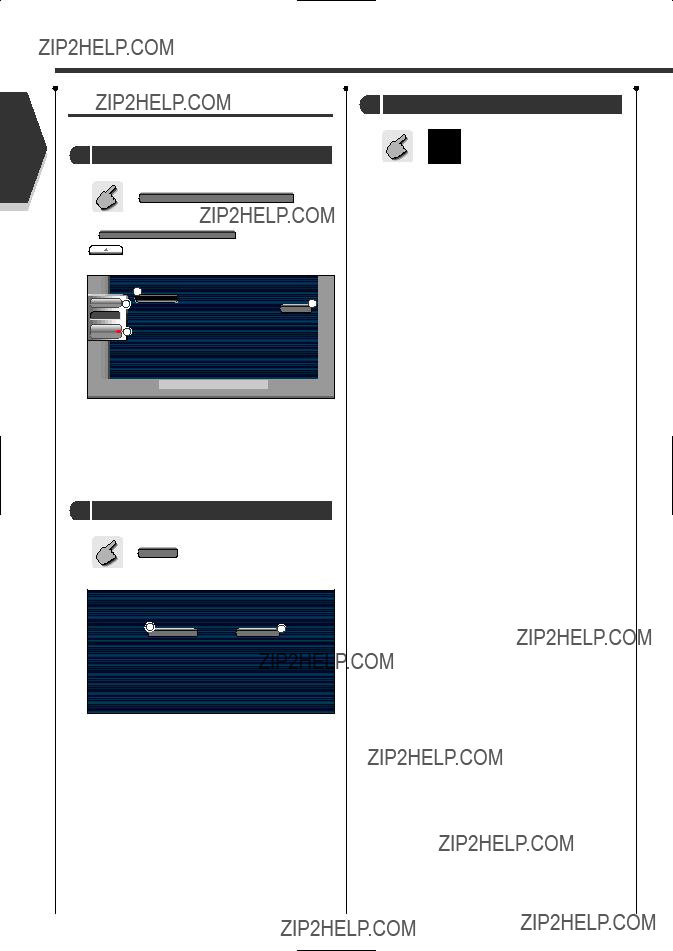
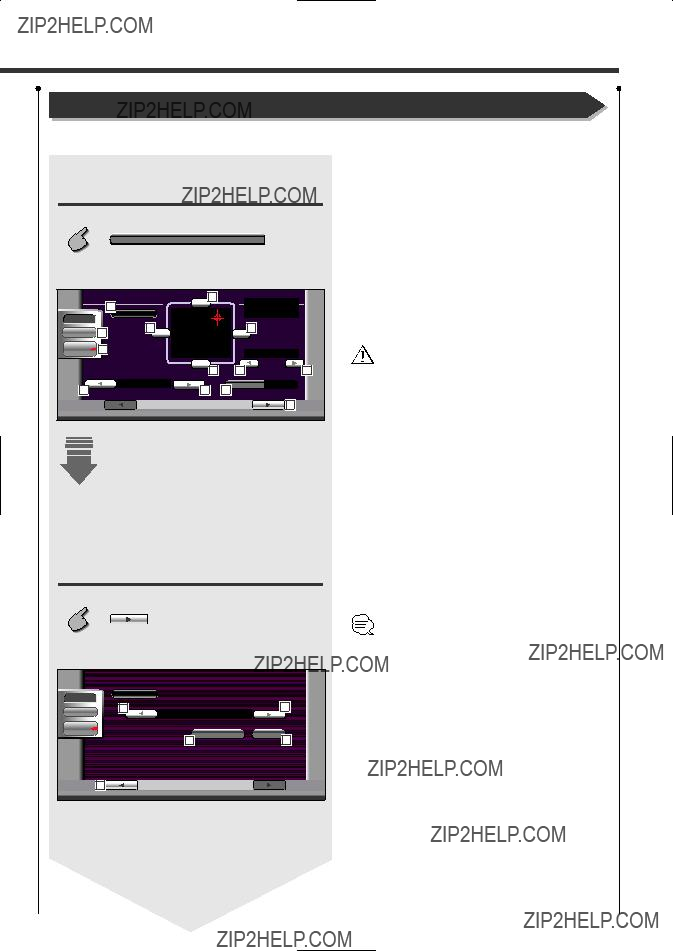
DVD Disc Menu
Selects an option from the DVD Disc Menu.
1 Displays the Disc Menu Control screen
DVD Disc Menu Control Buttons
Area (page 14)
1 Calls the Menu Control.
2Switches the picture angle. (during program playback only)
3Switches the caption language. (during program playback only)
4Switches the voice language. (during program playback only)
5 Displays the Zoom Control screen.
6 Clears the Disc Menu Control.
2 Select Disc Menu options
Disc Menu
M e nu C t r l
1 Calls the Menu.
2 Returns to the Disc Menu Control screen.
3 Selects a menu option.
4 Enters your menu selection.
5 Returns to the previous menu screen.
6 Displays the Top Menu.
7 Clears the Disc Menu Control.
Zoom Control
Z o o m
Z o o m C t r l
1Changes the zoom ratio at 4 levels (2 times, 3 times, 4 times, or off) each time you touch.
2 Scrolls the screen in the direction you touch.
3 Returns to the Disc Menu Control screen.
4 Clears the Disc Menu Control.
18 English
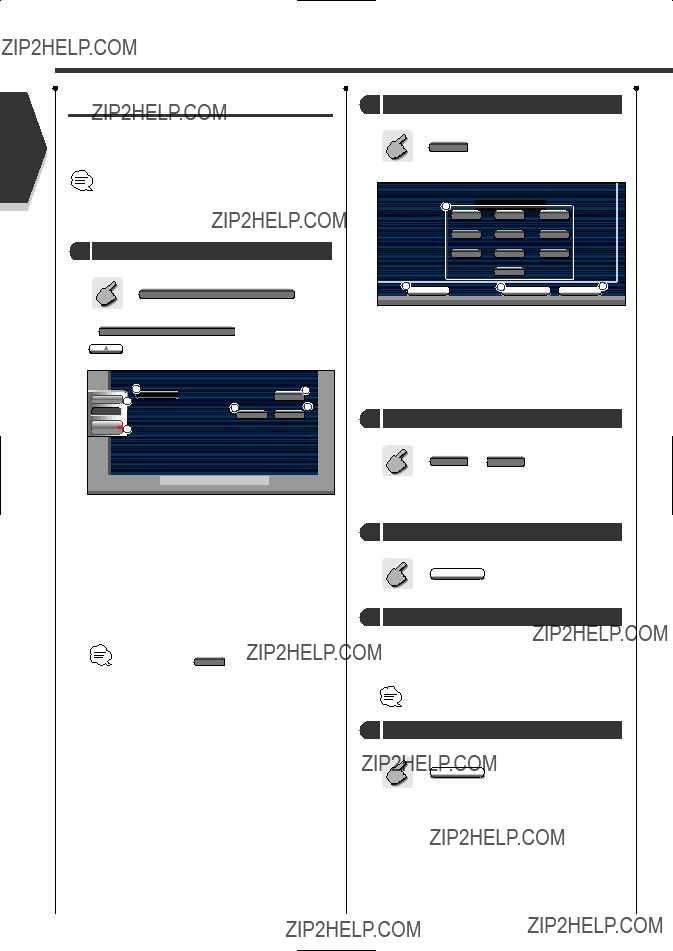
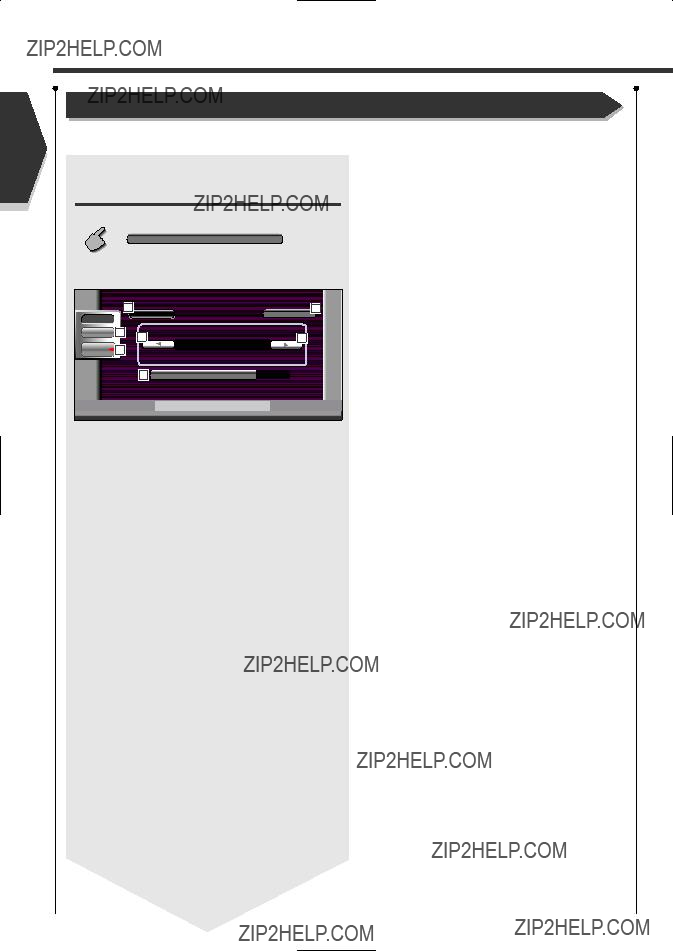
VCD Zoom Control
Displays an enlarged VCD screen.
1 Displays the Zoom Control screen
Zoom Control Button Area (page 14)
Z o o m C t r l
1Changes the zoom ratio at 4 levels (2 times, 3 times, 4 times, or off) each time you touch.
2 Scrolls the screen in the direction you touch.
3 Clears the Zoom Control button.
Information Display
Displays the DVD and AV information.
Information Display Button Area (Page 14)
The information is displayed for 5 seconds.
Direct Search
You can search for a DVD/VCD chapter, scene or track by entering its number.
1 Selects the Direct Search mode
The following items can be searched directly each time it is pressed.
DVD: Title, Chapter, Time, Direct number
VCD (when PBC is On): Scene, Direct number
VCD (when PBC is Off): Track, Time
However, the direct search may not be supported for some discs.
2 Enter a number or time
 ???
??? 
3 Search
The operation ends automatically if you do not operate within 10 seconds.
English 19

English
Tuner Control
Tuner Control
Various control screens appear in the Tuner Source mode.
Displaying the Easy Control
Panel
The Tuner Control Panel is displayed in a floating position of the selected picture.
Displaying the Easy Control Panel

 MODE: F U L L
1 Switches the source.
2 Switches the band (to AM or FM1/2/3).
3 Tunes in a station
4Switches the Seek mode.
(see page 22 for the <Seek Mode>)
???For receiver key operations, see <DDX6017 Basic Operations> (see page 8).
???The Easy Control Panel display is cleared when you touch the center of image display area.
20 English
Displaying the Tuner Control screen
You can tune in a station using various functions.
Displaying the Tuner Menu screen
You can select menu options using various functions.
M e nu
Tuner Menu screen
5 Calls the Tuner Menu.
6 Calls the Sound Effects Menu. (see page 78)
7 Displays the Source Select screen. (see page 55)
8 Calls the Setup Menu. (see page 57)
9Turns the Traffic Information function On or Off. (see <Traffic Information>, page 24)
p Switches to the FM1/2/3 band. q Switches to the AM band.
wTunes in a station.
Use the <Seek Mode> to change the frequency switching.
e Switches between 1 to 6 buttons and
Function buttons to use.
rTurns the CRSC function On or Off. (Only when receiving the FM broadcast)
tSelects the Auto Memory mode.
(See page 22 for the <Auto Memory>)
ySwitches the Seek mode.
(see page 22 for the <Seek Mode>)
uSelects the Program Service Name, Station Name, or Radio Text mode for text display.
i Scrolls the display text. o When 1 to 
call up the stations from memory.
For memory of broadcasting stations, see <Auto Memory> (see page 22) or <Manual Memory> (see page 22).
; Seek Mode Indicator
a Memory Number Display
s Selects options from various function menus. d Returns to the Tuner Control screen.
The available functions vary depending on the model used (the tuner specifications and the broadcasting system that can be received).
English 21
Tuner Control
English
Seek Mode
Sets a station selection.
SEEK
If SEEK is not shown, touch Next  .
.
The mode is switched each time you touch the button.
Auto Memory
Stores stations with good reception in memory automatically.
1 Select a band you wish to store in memory
2 Select the Auto Memory mode
AME
If AME is not shown, touch Next  .
.
3 Start Auto Memory
Touch  or
or  .
.
Auto Memory terminates when 6 stations are stored or when all stations are tuned in.
The operation ends automatically if you do not operate within 10 seconds.
Manual Memory
Stores the current receiving station in memory.
1 Select a station you wish to store in memory
Continue to touch until the memory number appears.
22 English

M e nu
English 23
Tuner Control
English
Direct Search
Tunes in a station when its frequency is entered.
1Select a band
2Selects the Direct Search mode
3Enter a frequency
 ???
??? 
When you enter them, signal reception starts. Example: When you receive FM 92.1 MHz
Example: When you receive AM 810 kHz
The operation ends automatically if you do not operate within 10 seconds.
Traffic Information
When a traffic bulletin starts, any source is switched to the traffic information and it is displayed automatically.
When the traffic bulletin starts...
The Traffic Information screen appears automatically.
Traffic Information screen
Tr a f f i c I n f o m a t i o n
1 Calls the Sound Effects Menu. (see page 78)
2 Calls the Setup Menu. (see page 57)
3 Turns the Traffic Information function on or off.
During reception of traffic information the adjusted volume is automatically remembered, and the next time it switches to traffic information it's automatically the remembered volume.
24 English
Search for Program Type
A program is tuned when you set its program type.
1 Call the Tuner Menu
M e nu
2 Call the PTY Search Menu
1 Selects a program type.
2 Scrolls the program type list.
3Searches for the program type.
It is displayed when the Program Type is selected.
4Continue to touch more than 2 seconds, the currently receiving station is registered to have the selected program type. (The registered program type is displayed.)
If you touch it the program type registered in the currently receiving station is displayed.
5 Returns to the Tuner Menu.
3 Select a program type
4Search for the program type
 SRCH
SRCH
Radio Text
You can display the radio text.
1 Call the Tuner Menu
M e nu
2 Display the Radio Text
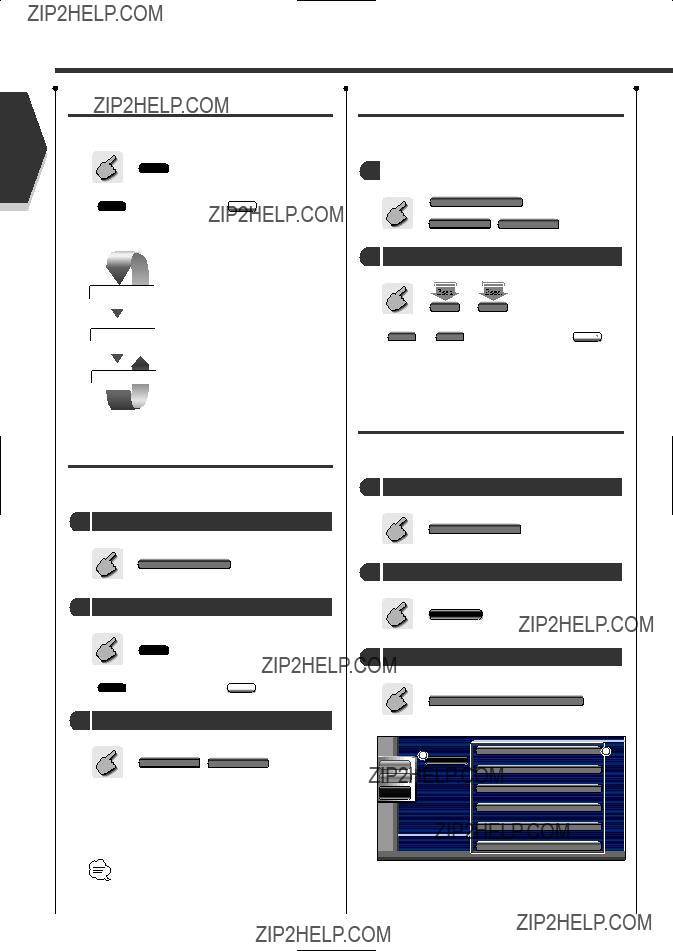
Audio
Set Up
SRC
1 Displays the Radio Text.
2 Returns to the Tuner Menu.
English 25
English
CD/MP3/WMA/Disc Changer Play Control
CD/MP3/WMA/Disc Changer Play Control
You can call various control screens during CD/MP3/WMA/Disc Changer playback.
Displaying the Easy Control
Panel
26 English
Displaying the CD/MP3/WMA/ Disc Changer Control screen
You can play the CD/MP3/WMA/disc changer using various functions.
During CD playback
8 Calls the CD Menu.
9 Calls the Sound Effects Menu. (see page 78)
p Displays the Source Select screen. (see page 55) q Calls the Setup Menu. (see page 57)
w Ejects the disc from the
r Fast Forwards or Rewinds. t Plays or pauses.
yStarts or stops Scan Play (that plays the beginning of each song one after the other).
u Repeats to play (the present track).
iStarts or stops Random Play (to play songs in random order).
oSelects the Disc Name (see <Set Disc Name>, page 31), Disc Text, or Track Text mode for text display.
; Scrolls the display text.
aSwitches the play time display between Track, Disc, and Disc Remaining Time.
s Track Number Display
d Play Time Display
f Appears when a disc is inserted.
gStops to play the
When pressed twice, the disc is played from its beginning when you play it in the next time.
h Function Indicator
English 27

English
CD/MP3/WMA/Disc Changer Play Control
MP3/WMA Control screen
During MP3/WMA play
Set Up
DISP SCRL
j Calls the MP3/WMA Menu.
k Fast Forwards.
lStops to play.
When pressed twice, the disc is played back from its beginning in the next time.
/ Selects a song.
z Plays or pauses. x Selects a folder.
cStarts or stops Scan Play (that plays the beginning of each song one after the other).
v Repeats to play (the present song).
bStarts or stops Random Play (to play songs of the present folder in random order).
nSelects the Folder name, File name, Title (ID3/WMA tag), Artist name (ID3/WMA tag), or Album name (ID3 tag) for text display.
m Scrolls the display text.
, Switches the button display.
. Repeats to play the song of the present folder.
P Folder and File Number Display
Q Play Time Display
W Appears when a disc is inserted.
E Function Indicator
R Ejects a disc.
28 English

Disc Changer/CD player Control screen
During play by the disc changer/CD player
T Calls the Disc Changer/CD player Menu.
YSelects a track.
Starts Fast Forward or Fast Rewind when it is held down.
U Selects a disc. (Function of Disc Changer)
I Plays or pauses.
OStarts or stops Scan Play (that plays the beginning of each song one after the other).
: Repeats to play (the present track).
AStarts or stops Random Play (to play songs in random order).
SRepeats to play disc (the present disc). (Function of Disc Changer)
DStarts or stops Magazine Random Play (to play songs of the disc changer in random order). (Function of Disc Changer)
F Switches the button display.
GSelects the Disc Name (see <Set Disc Name>, page 31), Disc Text, or Track Text mode for text display.
H Scrolls the display text.
JSwitches the play time display between Track, Disc, and Disc Remaining Time.
K Disc Number Display (Function of Disc Changer)
L Track Number Display

 Play Time Display

 Function Indicator
The functions that can be used and the information that can be displayed will differ depending on the models being connected.
English 29
CD/MP3/WMA/Disc Changer Play Control
English
Displaying the CD/MP3/WMA/ Disc Changer Menu screen
You can select menu options using various functions.
M e nu
CD Menu screen
Audio

 Selects options from various function menus.

 Returns to the CD/MP3/WMA/Disc Changer Control screen.
The available functions vary depending on the source used.
30 English
3 Select a song
F i l e Name
Display the desired song and touch the file display.
English 31
CD/MP3/WMA/Disc Changer Play Control
English
ID3/WMA TAG Display (during MP3/WMA play)
The ID3/WMA TAG information of MP3/WMA file is listed.
1 Call the MP3/WMA Menu
M e nu
2 Display the ID3/WMA TAG
1 Scrolls the list.
Disc Select (during play by disc changer)
The discs loaded on the disc changer are listed for quick disc selection.
1 Calls the Disc Changer Menu
M e nu
2 Call the Disc Select Menu
Disc Select
1 Plays the displayed disc.
2Selects the Disc Name or Disc Text mode for text display.
3Scrolls the list.
(It is not displayed when a disc changer having 6 or less discs is used.)
3 Select the desired disc
1 . D i s c N a me
Touch the desired disc display.
32 English
Direct Search
Searches for a disc or a song when its number is entered.
During play on the
1 Select the Direct Search mode
The following items can be searched directly each time it is pressed.
CD: Track number, Total play time
MP3/WMA: Folder, File
2 Enter a disc or track number
 ???
??? 
3 Search
When searching for a song:
During play on an external in disc player or disc changer
1 Enter a disc or track number
 ???
??? 
2 Search
When searching for a song:
When searching for a disc:
The operation ends automatically if you do not operate within 10 seconds.
Mute Telephone
Mute Telephone
When the telephone is called, the system is paused automatically.
When the telephone is called...
The Phone Call ("CALL") screen appears, and system is paused.
Phone Call ("CALL") screen
Audio
Set Up
Direct
SRC
If you continue to listen the source audio
during phone call...
The system restarts to play while the phone call is continued.
When the call ends...
Hang up the phone.
The system restarts to play.
English 33
English
TV Control
TV Control (with the optional accessory TV Tuner connected only)
Various control screens appear in the TV Source mode.
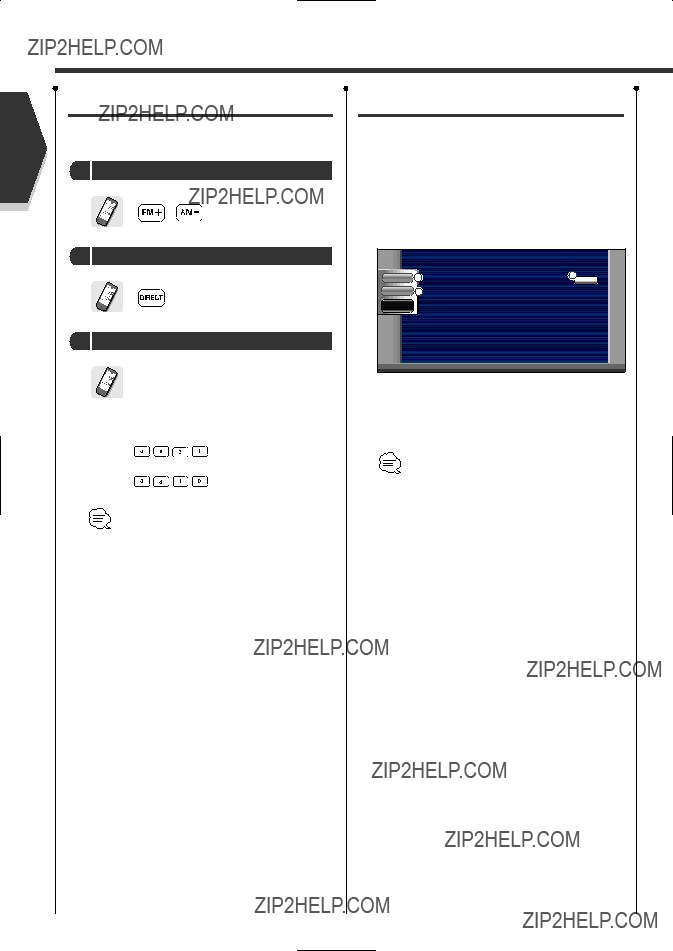
Displaying the TV Picture screen
Various control screens appear in the TV Source mode.
Selects the
TV Pictures.
TV Picture screen
MODE: F U L L
1 TV Band Number Display
2 Memory Number Display
3 Channel Number Display
4Channel Up Area
Increase the channel.
5Channel Down Area
Decrease the channel.
6Band/Video Switch Area
Switches to TV1, TV2, or VIDEO.
7Information Display Button Area
???For TV picture selection and receiver key operations, see <DDX6017 Basic Operations> (see page 8).
???The information display is cleared automatically after approximately 5 seconds. Also, the information can be displayed automatically when it is updated (see page 69).
Displaying the Easy Control
Panel
The Control Panel is displayed in a floating position of the TV picture.
Displaying the Easy Control Panel
TV 1
 MODE: F U L L
8 Switches the source.
9 Switches to Video (VIDEO).
p Switches the TV band (to TV1 or TV2). q Calls up a channel.
w Switches the Seek mode.
(see page 36 for the <Seek Mode>)
The Easy Control Panel display is cleared when you touch the center of image display area.
34 English
Displaying the TV Control screen
You can tune in a TV station using various functions.
e Calls the TV Menu.
r Calls the Sound Effects Menu. (see page 78)
t Displays the Source Select screen. (see page 55) y Calls the Setup Menu. (see page 57)
u Switches to VIDEO.
i Switches to TV1 or TV2.
oSelect a channel.
Use the <Seek Mode> (see page 36) to change the channel tuning sequence.
; Switches between 1 to 6 buttons and
Function buttons to use.
aSelects the Auto Memory mode.
(see page 36 for the <Auto Memory>)
sSwitches the Seek mode.
(see page 36 for the <Seek Mode>)
d When 1 to 6 buttons appear, you can
call up the channels from memory.
For memory of broadcasting stations, see <Auto Memory> (see page 36) or <Manual Memory> (see page 36).
f Seek Mode Indicator
g Memory Number Display
Displaying the TV Menu screen
You can select menu options using various functions.
M e nu
TV Menu screen
h Selects options from various function menus. j Returns to the TV Control screen.
The available functions vary depending on the model used (the tuner specifications and the broadcasting system that can be received).
English 35
TV Control
English
Seek Mode
Sets a TV station selection.
SEEK
If SEEK is not shown, touch Next  .
.
The mode is switched each time you touch the button.
Auto Memory
Stores stations with good reception in memory automatically.
1 Select a band you wish to store in memory
TV
2 Select the Auto Memory mode
AME
If AME is not shown, touch Next  .
.
3 Start Auto Memory
Manual Memory
Stores the current receiving channel in memory.
1 Select a channel you wish to store in memory
TV
2 Store in memory
Continue to touch until the memory number appears.
Preset Select
Lists and tunes in stations in memory one after the other.
1 Select a band you wish to call
TV
2 Call the TV Menu
Menu (P 35 e)
3 Call the Preset Select Menu
P r e s e t Se l e c t
TV 2TV1 1) 1ch1
M e nu
Audio
TV1 2) 1ch
Set Up
Touch  or
or  .
.
Auto Memory terminates when 6 stations are stored or when all stations are tuned in.
SRC
TV1 3) 1ch
TV1 4) 1ch
TV1 5) 1ch
The operation ends automatically if you do not operate within 10 seconds.
1Tunes in the displayed station.
If the station name is displayed if it has been set.
2 Returns to the TV Menu.
36 English
For character entry details, see <Character Entry> (see page 54).
5 Exit the Set Name mode
Ok
???You can store up to 20 stations in memory.
???You can set a station name only after you have applied the parking brake.
English 37
English
SIRIUS Tuner Control
SIRIUS Tuner Control <North American sales only> (with the optional accessory
Various control screens appear in the SIRIUS Tuner source mode.
Displaying the Easy Control
Panel
38 English
SIRIUS Tuner connected only)
Displaying the SIRIUS Tuner Control screen
SIRIUS Tuner Control screen
5 Calls the SIRIUS Tuner Menu.
6 Calls the Sound Effects Menu. (see page 78)
7 Displays the Source Select screen. (see page 55)
8 Calls the Setup Menu. (see page 57)
9 Tunes in a station.
Function button to use.
wStarts or stops Channel Scan (that tunes channels one after the other).
eSwitches the Seek mode.
SEEK 1: Tunes channels one after the other.
SEEK 2: Selects channels in memory one after the other.
rChanges the display from Song Title & Artist Name, Composer Name, Channel Name, to Category Name.
t Scrolls the display text. y When 1 to
Displaying the SIRIUS Tuner Menu screen
You can select menu options using various functions.
call up the channel from memory.
For memory of channel stations, see <Channel Memory> (see page 40) .
u Seek Mode Indicator
i Selects options from various function menus.
o Returns to the SIRIUS Tuner Control screen.
M e nu
For SIRIUS Tuner function details, see the Instruction Manual of SIRIUS Satellite Radio Tuner (optional accessory).
SIRIUS Tuner Menu screen
English 39

English
3 Returns to the SIRIUS Tuner Menu.
Channel Memory
Stores the current receiving channel in memory.
1 Select a channel you wish to store in memory
Continue to touch until the memory number appears.
40 English
Direct Channel Search
A channel is tuned when you enter its number.
1 Call the SIRIUS Tuner Menu
M e nu
2 Display the Direct Search screen
10Key Di r e c t
1 Enters a channel number.
2 Returns to the SIRIUS Tuner Menu.
3 Tunes in a channel when you enter is number.
3 Enter a channel number
0 ??? 9
4 Tuning
En t e r
Information Display
The tuned program information is displayed.
1 Call the SIRIUS Tuner Menu
M e nu
2 Display the Information screen
S I R I US I n f o rma t i o n
Information screen
1Displays the information (such as Channel Name, Category Name, Artist Name, Song Title, and Composer).
2 Scrolls the information display.
3 Returns to the SIRIUS Tuner Menu.
English 41
English
HD Radio Control
HD Radio Control <North American sales only> (with the optional accessory HD Radio
Various control screens appear in the HD Radio Source mode.
Displaying the Easy Control
Panel
The HD Radio Control Panel is displayed in a floating position of the selected picture.
Displaying the Easy Control Panel

 MODE: F U L L
1 Switches the source.
2 Switches the band (HD FM1/2/3, HD AM).
3 Tunes in a station.
4Switches the Seek mode.
(see page 44 for the <Seek Mode>)
???For receiver key operations, see <DDX6017 Basic Operations> (see page 8).
???The Easy Control Panel display is cleared when you touch the center of image display area.
42 English
tuner connected only)
Displaying the HD Radio Control screen
You can tune in a station using various functions.
Displaying the HD Radio Menu screen
You can select menu options using various functions.
5 Calls the HD Radio Menu.
6 Calls the Sound Effects Menu. (see page 78)
7 Displays the Source Select screen. (see page 55)
8 Calls the Setup Menu. (see page 57)
9 Switches to the HD FM1/2/3 band. p Switches to the HD AM band.
qTunes in a station.
Use the <Seek Mode> to change the frequency switching.
w Switches between 1 to 6 buttons and
Function buttons to use.
eSelects the Auto Memory mode.
(See page 44 for the <Auto Memory>)
rSwitches the Seek mode.
(see page 44 for the <Seek Mode>)
tSwitches between Station Name and Song Title display modes.
y Scrolls the display text. u When 1 to 
call up the stations from memory.
For memory of broadcasting stations, see <Auto Memory> (see page 44) or <Manual Memory> (see page 44).
i Seek Mode Indicator
o Selects options from various function menus.
; Returns to the HD Radio Control screen.
For HD Radio function details, see the Instruction Manual of HD Radio tuner (optional accessory).
English 43
HD Radio Control
English
Seek Mode
Sets a station selection.
SEEK
If SEEK is not shown, touch Next .
.
The mode is switched each time you touch the button.
Auto Memory
Stores stations with good reception in memory automatically.
1 Select a band you wish to store in memory
2 Select the Auto Memory mode
AME
If AME is not shown, touch Next .
.
3 Start Auto Memory
Touch  or
or  .
.
Auto Memory terminates when 6 stations are stored or when all stations are tuned in.
Manual Memory
Stores the current receiving station in memory.
1 Select a station you wish to store in memory
HD FM HD AM
Continue to touch until the memory number appears.
44 English
Receive Mode
The digital or analog program is selected and received.
1 Call the HD Radio Menu
M e nu
2 Call the Receive mode Menu
1 Switches the Receive mode.
2 Receive mode Display.
3 Returns to the HD Radio Menu.
3 Select the Receive mode
AUTO: Automatically switches between the Digital and Analog Receive modes depending on the broadcasting type. If programs are broadcasted in both modes, the digital program is received. Also, if a program is received in the Ball Game mode (the
DIGITAL: Receives the digital program only.
ANALOG: Receives the analog program only.
Title Display
An information about the received song is displayed.
1 Call the HD Radio Menu
M e nu
2 Display the Title screen
T i t l e
Title screen
1 Displays the information.
2 Scrolls the information display.
3 Returns to the HD Radio Menu.
English 45

English
DAB Tuner control
DAB Tuner control (with the optional accessory DAB tuner connected only)
Various control screens appear in the DAB Tuner source mode.
Displaying the Easy Control
Panel
46 English
Displaying the DAB Tuner Control screen
You can select the Ensemble and services using various functions.
6 Calls the DAB Tuner Menu.
7 Calls the Sound Effects Menu. (see page 78)
8 Displays the Source Select screen. (see page 55)
9 Calls the Setup Menu. (see page 57)
p Switches the band (to DAB1/2/3). q Selects a service.
w Selects the Ensemble.
e Switches between 1 to  Function button to use.
r Selects the primary or secondary operation.
tSelects the Auto memory mode. (see page 48 for the <Auto Ensemble memory>)
ySwitches the Seek mode.
(see page 48 for the <Seek Mode>)
uChanges the display between Ensemble label, PTY label, Component label, Region label, and Audio quality.
i When 1 to 6 buttons appear, you can call a service from memory.
o Seek Mode Indicator
Displaying the DAB Tuner Menu screen
You can select menu options using various functions.
M e nu
DAB Tuner Menu screen
; Selects options from various function menus. a Returns to the DAB Tuner Control screen.
For DAB Tuner function details, see the Instruction Manual of DAB Tuner (optional accessory).
English 47
DAB Tuner control
English
Seek Mode
A service selection method can be set.
SEEK
If SEEK is not shown, touch Next .
.
The mode display is switched each time you touch the button.
MANUAL Switches to the next channel manually.
Auto Ensemble Memory
An ensemble with good reception is stored in memory automatically.
1 Select a band you wish to store in memory
Band
2 Select the Auto Memory mode
AME
If AME is not shown, touch Next .
.
3 Start Auto Memory
Touch  or
or  .
.
Auto Memory terminates when 6 ensembles are stored or when all ensembles are tuned in.
Service Preset Memory
The current receiving service is stored in memory.
1 Select a service you wish to store in memory
Band
2 Store in memory
1 ??? 6
If 1 to 6 are not shown, touch Next .
.
48 English

Service Select
The service list of the currently receiving ensemble is displayed for your selection.
1 Call the DAB Tuner Menu
M e nu
2 Call the Service Select Menu
Service Select
1 Selects a service.
2 Scrolls the service list.
3 Returns to the DAB Tuner Menu.
3 Select a service
Se r v i c e Name
Language Filter
The languages are list for your selection.
1 Call the DAB Tuner Menu
M e nu
2 Call the Language Filter Menu
1 Selects a language.
2 Searches for the selected language.
3 Returns to the DAB Tuner Menu.
3Select a language you wish to use
4Search for the language
SRCH
English 49
English
1 Selects a program type.
2 Searches for the program type.4 Search for the program type 3 Displays the Language select screen.
4 Returns to the DAB Tuner Menu.
SRCH
3 Select a program type
50 English
DAB Information
The DAB information is displayed.
1 Call the DAB Tuner Menu
M e nu
2 Display the DAB Information screen
1Displays the DAB information (such as Service label, Ensemble label, Component label, Audio quality, Region label, and Dynamic label).
2 Scrolls the information display.
3 Returns to the DAB Tuner Menu.
DAB Announcement
When the Announcement you have turned on starts, any source is switched to the Announcement automatically.
When the announcement starts...
The Announcement screen appears automatically.
Announcement screen
Audio 1
Set Up 2
Direct
SRC
Tr a f f i c N e w s
1 Calls the Sound Effects Menu. (see page 78)
2 Calls the Setup Menu. (see page 57)
English 51
English
Weather Band Tuner Control
Weather Band Tuner Control (with the optional accessory Weather Band Tuner
Various control screens appear in the Weather Band Tuner source mode.
Displaying the Easy Control
Panel
The Weather Band Tuner Control Panel is displayed in a floating position of the selected picture.
Display of Easy Control Panel
1 Switches the source.
2Tunes in a station.
???For system key operations, see <DDX6017 Basic Operations> (see page 8).
???The Easy Control Panel display is cleared when you touch the center of image display area.

 MODE: F U L L
52 English
connected only)
Displaying the Weather Band Tuner Control screen
Weather Band Tuner Control screen
3 Calls the Sound Effects Menu. (see page 78)
4 Displays the Source Select screen. (see page 55)
5 Calls the Setup Menu. (see page 57)
6 Tunes in a station.
English 53
English
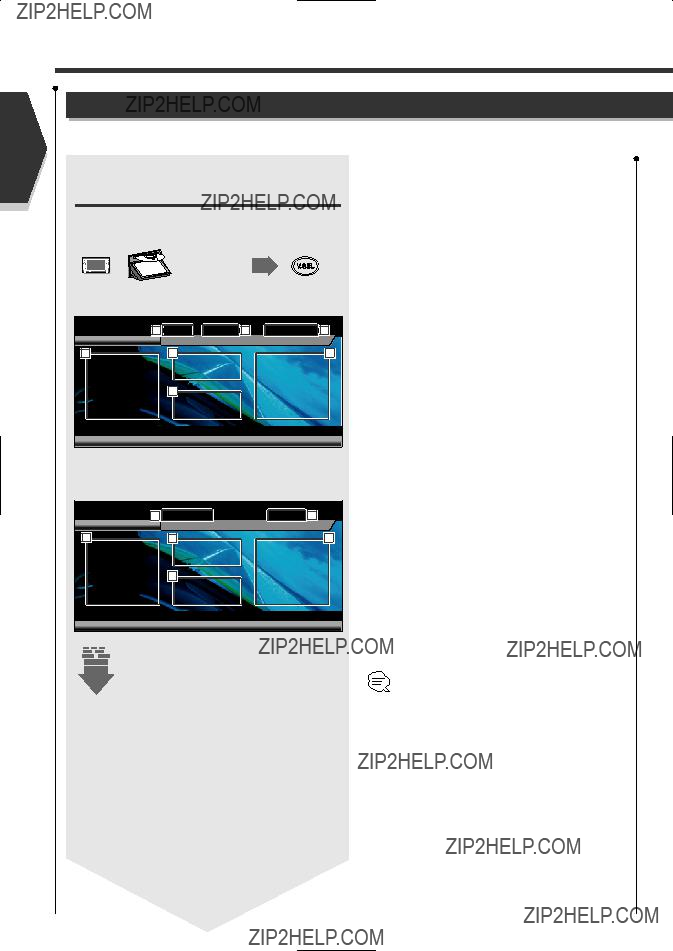
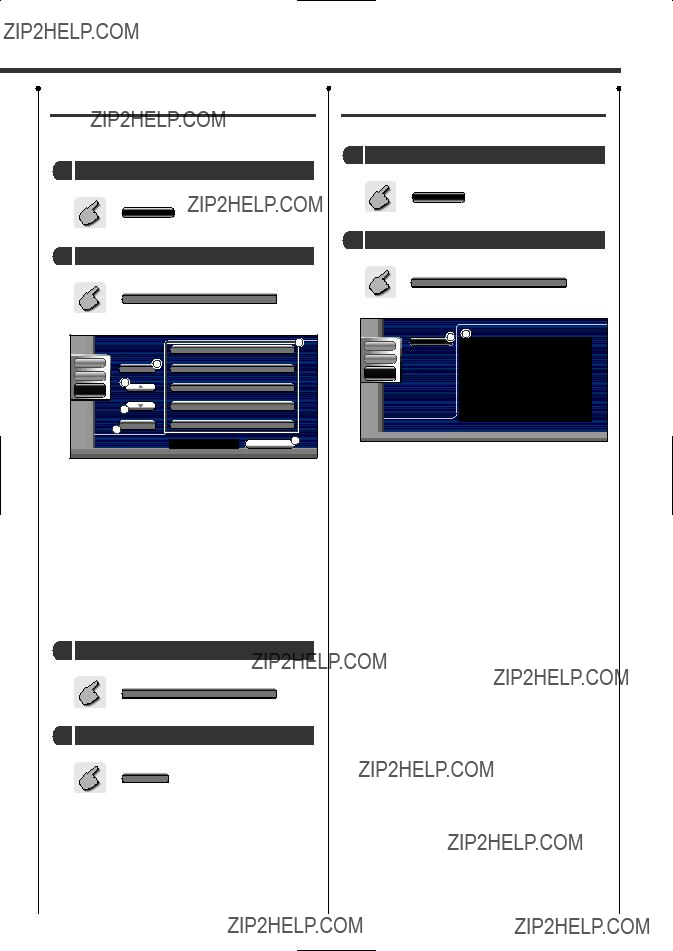
Character Entry
How To Use the Character Entry screen
When you select the Set Disc Name mode or others, the following screen appears for character entry.
Character Entry screen
1 Shifts the cursor.
2Enters a space.
If you erase a character, locate the cursor on it and touch this button.
3 Enters characters.
4 Scrolls up or down the character button display.
5Exits the Character Entry mode and returns to the previous screen.
You can enter characters only after you have applied the parking brake.
54 English

Source Select
Source Select
The source you wish to listen to can be selected quickly.
Displaying the Control screen
Press this key several times unit the Control screen appears.
Control screen
Displaying the Source Select screen
1 Select the source.
2 Returns to the Control screen previously displayed.
English 55
English
Adjusting the Monitor Display Position and Quality
Adjusting the Monitor Display Position and Quality
You can adjust the position and picture quality of the monitor.
Displaying the Screen Control screen
You can adjust the picture quality using the following keys.
Screen Control screen
1 Brightness Control
2Tint Control
Displayed for an NTSC system image on TV or Video.
3Color Control
Displayed on the TV and Video screen only.
4 Contrast Control
5 Black Level Adjustment
6
T i l t
7
O K
6Displays the Adjust Monitor Position screen.
(see <Displaying the Tilt Adjust screen>, page 56)
7Returns to the previous screen.
???The Screen Control screen is displayed only when you have applied the parking brake.
???The Screen Control screen can be set for each of TV, video, DVD and navigation systems.
In addition, it can be set for each source when the vehicle's light switch is turned on or off.
Displaying the Tilt Adjust screen
You can set the monitor tilt.
T i l t
Tilt Adjust screen
T i l t A d j u s t
10
S c r e e n
T i l t
8 Monitor Tilt Adjustment
9 The monitor fully closes.
p Returns to the Screen Control screen. q Returns to the previous screen.
If you turn the power off, the panel will close. However, if you turn the power back on, it will return to the adjusted tilt.
56 English
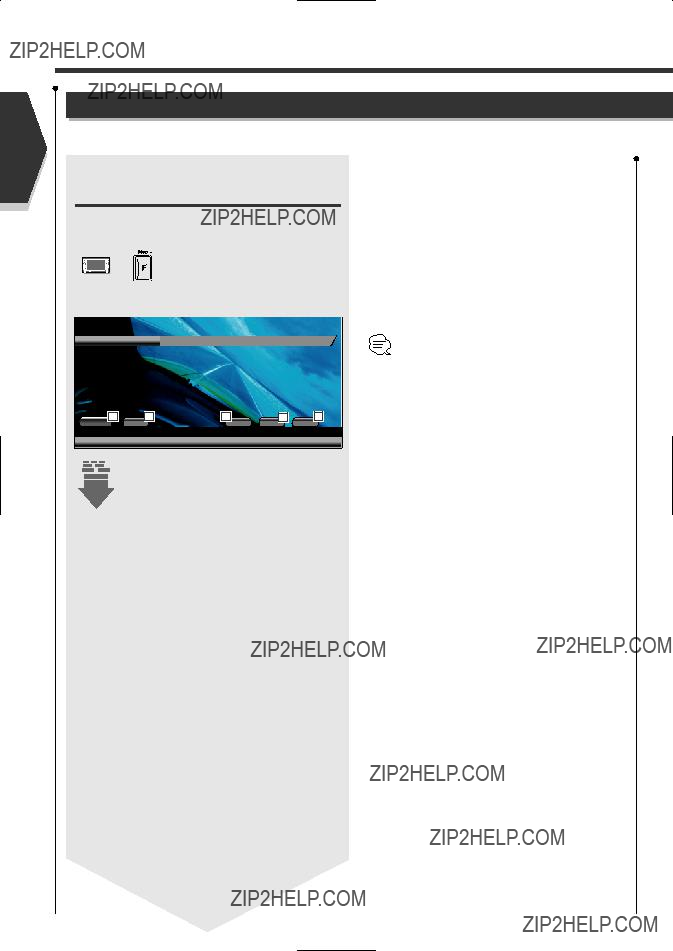
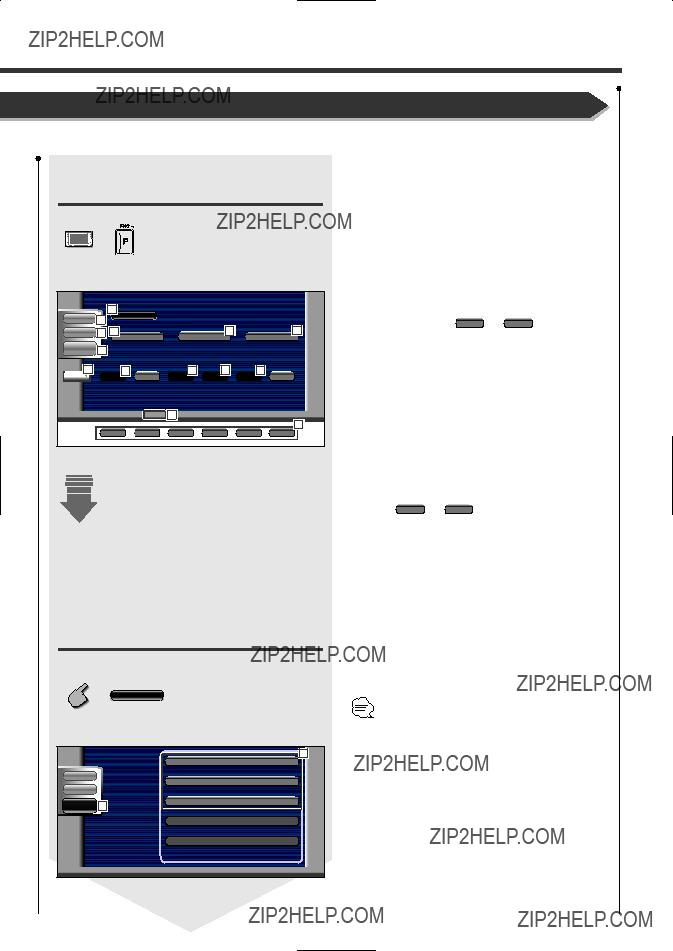
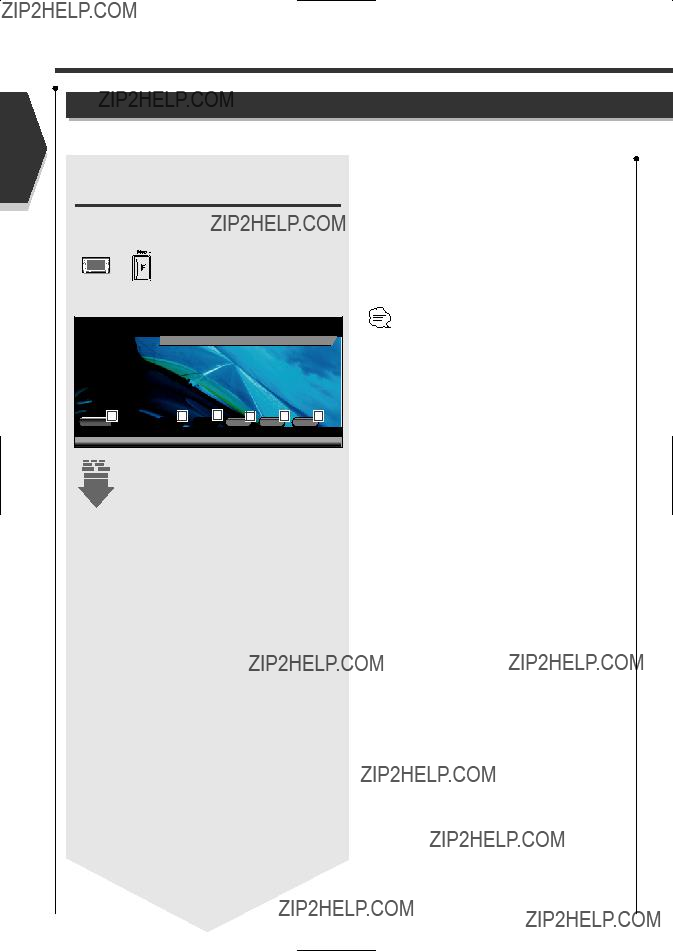
Setup Menu
Setup Menu
You can set up various receiver parameters.
Displaying the Control screen
Press this key several times until the Control screen appears.
Control screen
You can call the same Setup Menu for the Control screen of each source.
Displaying the Setup Menu screen
Set Up
Setup Menu screen
1 Scrolls the Setup Menu.
2 Calls each Setup Menu.
3 Calls the Sound Effects Menu. (see page 78)
DVD SETUP
Sys t em S e t U p
AV I / F S e t Up
User I / F S e t Up
English 57
English
Setup Menu
Audio Set Up
You can setup a speaker network, etc.
Displaying the Audio Set Up screen
58 English
Crossover Network Setup
You can set a crossover frequency of speakers.
X'Over setup screen
X ' O v e r
5
R e t u r n
1Sets a Front High Pass Filter frequency.
You can select any of the following frequency. Through, 40, 60, 80, 100, 120, 150, 180, 220 Hz
2Sets a Rear High Pass Filter frequency.
You can select any of the following frequency. Through, 40, 60, 80, 100, 120, 150, 180, 220 Hz
3Sets a Sub woofer Low Pass Filter frequency. You can select any of the following frequency. 50, 80, 120, Through Hz
4Sets the phase of subwoofer output.
The phase is reversed 180 degrees when set to "Reverse".
5 Returns to the Speaker setup screen.
English 59

Setup Menu
English
DVD Setup
You can set up the DVD play.
Displaying the DVD SETUP 1 screen
1Returns to the Control screen of the previous source.
2 Calls the Sound Effects Menu. (see page 78)
3 Calls the Setup Menu.
4Selects a disc menu language.*1 (See <Language Setup>, page 62)
5Selects a subtitle language.*1 (See <Language Setup>, page 62)
6Selects an audio language.*1
(See <Language Setup>, page 62)
7Sets the dynamic range.*2 ( Wide)
Wide)
The dynamic range is reduced by changing from "Wide" to "Normal" and from "Normal" to "Midnight". You can easy to listen a small sound when the dynamic range is narrow.
This is effective only when you are using a Dolby Digital software.
8 Displays the DVD SETUP 2 screen.
touch  or
or  to display it.
60 English
Displaying the DVD SETUP 2 screen
DVD SETUP 2 screen
9 Sets an angle mark display. ( On)
On)
qDisplays the Parental Lock screen.*1 ( Off) (See <Parental Level Setup>, page 63)
w Keep "Auto" to use.
e Displays the DVD SETUP 1 screen.
*1 Disabled when a DVD is being played.
*2 Disabled when the Zone function is On.
English 61
Setup Menu
English
Language Setup
Select a language you use for the speech and menus.
1 Display the Language Setup screen
See <Displaying the DVD SETUP 1 screen> (see page 66) and select a language you wish to use.
1 Enters a language code.
2Cancels the language setup and returns to the DVD SETUP 1 screen.
3 Clears the language code.
4Sets the original audio language.
(It appears during audio language setup.)
5Sets the language and returns to the DVD SETUP 1 screen.
(It appears after you have entered a language code.)
2 Enter a language code
See the Language Code Table shown at right to select the desired language.
3 Set the language you use
E n t e r
Language Code Table
62 English
Parental Level Setup
Sets a parental level.
1 Display the Parental Level code number screen
1 Enters a code number.
2Cancels the current setup and returns to the DVD SETUP 2 screen.
3 Clears the code number.
4 Displays the present parental lock level.
5Determines the code number and displays the Parental Level Setup screen.
2 Enter the code number
0 ??? 9
???The number you enter first is set as your code number.
???You can clear the code number by pressing the Reset button.
3 Display the Parental Level Setup screen
E n t e r
P a r e n t a l L e v e l
R e t u r n 2
1 Sets a parental level.
2 Returns to the DVD SETUP 2 screen.
4 Set a parental level
5 Enter the parental level setup
R e t u r n
???If a disc has a higher parental lock level, the audience needs to enter the code number.
???The parental lock level varies depending on a loaded disc.
???If a disc has no parental lock, any audience can play it back even when you have set the parental lock.
English 63
Setup Menu
English
System Setup
You can set up the system parameters.
Displaying the System Set Up 1 screen
S y s t em S e t U p
1Returns to the Control screen of the previous source.
2 Calls the Sound Effects Menu. (see page 78)
3 Calls the Setup Menu.
4 Turns the key touch tone On or Off. ( On)
On)
5Allows scrolling of text display on the Source Control screen. ( Auto)
Auto)
"Auto": Scrolls the screen automatically.
"Manual": Allows you to scroll the screen manually.
6Selects a remote control signal. ( On) When turned "Off", the remote control of TV reception is rejected.
7 Displays the System Set Up 2 screen.
touch  or
or  to display it.
64 English
Displaying the System Set Up 2 screen
8 Sets a music CD playback. ( 1)
1)
"1": Automatically recognizes and plays back an MP3/WMA disc, a DVD or a music CD.
"2": Forcibly plays back a disc as a music CD. Select "2" if you wish to play a music CD having a special format or if you cannot play a disc in the "1" position.
???You cannot play an MP3/WMA/VCD disc in the "2" position. Also, you may not play some music CDs in the "2" position.
???Your setup is disabled when the disc is being played.
9Selects an illumination color of receiver keys. (  Red)
Red)
"Green": Green
"Red": Red
p Displays the System Set Up 1 screen.
English 65
English
Setup Menu
AV Interface
You can set audio and visual (AV) interface parameters.
Displaying the AV I/F 1 screen
AV I / F S e t Up
1Returns to the Control screen of the previous source.
2 Calls the Sound Effects Menu. (see page 78)
3 Calls the Setup Menu.
4Selects a navigation system connection. ( RGB) "RGB": Allows the Kenwood???s Navigation System to connect via its interface cable.
"OFF": Must be used if no navigation system is connected. (The navigation display is cancelled when the AV source is switched.)
5Sets a name to be displayed when you select a
system that is connected via the AV INPUT port. ( VIDEO)
If you have set the navigation system connection to
6Sets an image display of the system that is connected via the AV INPUT port. ( Normal) "Normal": When the image source is switched, an
image entered via the AV INPUT port is displayed.
"AUTO": When an image signal is entered via the AV INPUT port, this image is displayed.
7Sets how the rear camera image is displayed. "Reverse": Displays with left and right reversed. "Normal": Displays as it is.
8 Displays the AV I/F 2 screen.
66 English

Displaying the AV I/F 2 screen
9Selects an AV source to be output at the AV OUTPUT port. ( 
pSelects speakers used for voice guidance of the navigation system. ( 
guidance.
qAdjusts the volume for voice guidance of the navigation system. (  19)
19)
wMutes the volume during voice guidance of the navigation system. (  On)
On)
When turned "On", the volume level drops for voice guidance.
e Displays the AV I/F 1 screen.
English 67

English
Setup Menu
User Interface
You can set up user interface (IF) parameters.
Displaying the User I/F 1 screen
68 English

Displaying the User I/F 2 screen
6Sets an  Auto)
Auto)
If you set to "Auto", an information is displayed for 5 seconds when updated.
7Sets an  Auto)
Auto)
If you set to "Auto", an information is displayed for 5 seconds when updated.
8Sets an  MANU)
MANU)
If you set to "Auto", an information is displayed for 5 seconds when updated.
9Sets an
(  Auto) (optional accessory) (with the optional accessory TV tuner connected only)
If you set to "Auto", an information is displayed for 5 seconds when updated.
p Displays the User I/F 1 screen.
English 69
Setup Menu
English
Touch Panel Adjust
You can adjust the touch panel operations.
1 Display the Touch Panel Adjust screen
Touch Adjust
or  to display it.
T ouch
1Returns to the Control screen of the previous source.
2 Calls the Sound Effects Menu. (see page 78)
3 Calls the Setup Menu.
4 Allows you to start touch panel adjustment.
2 Start to adjust the touch panel
S e t
3 Adjustment
Touch the center of left lower and right upper  when requested.
1Cancels the adjustment and returns to the Touch Panel Adjust screen.
2 Resets to the initial status.
70 English
Clock
Adjusts the clock time
1 Display the Clock Screen
Clock Adjust
or  to display it.
Set Up
C l o ck
1Returns to the Control screen of the previous source.
2 Calls the Sound Effects Menu. (see page 78)
3 Calls the Setup Menu.
4 Clock time display.
5 Adjusts hours.
6 Adjusts minutes.
7Sets "00" minute.
Setup examples: 3:00~3:29 ??? 3:00
3:30~3:59 ??? 4:00
8Sets the clock time in synchronous with the time data sent from the RDS station. ( Off)
Off)
When turned "On", the synchronous mode starts and the clock cannot be adjusted manually.
2 Adjust the clock time
English 71
Setup Menu
English
Security Code Setup
You can set a security code to protect your receiver system against theft.
When the Security Code function is activated, the code can't be changed and the function can't be released.
Note, the Security Code can be set as the 4 digit number of your choice.
1 Display the Security Code Setup screen
Security Set up
or  to display it.
Se c ur i t y
1Returns to the Control screen of the previous source.
2 Calls the Sound Effects Menu. (see page 78)
3 Calls the Setup Menu.
4 Allows you to start security code registration.
5Turns the SI function On or Off.
If turned "On", the burglar alarm lamp flashes when the vehicle ignition is off.
If you have already completed the code registration, the S e t is not displayed.
2 Start the security code registration
S e t
Pa s s Wor d
1 Enters a security code.
2 Clears your entry.
3Cancels the registration and returns to the Security Code Setup screen.
4 Enters the security code.
3 Enter a security code
0 ??? 9
Input a
4 Register your security code
E n t e r
5 Reenter the security code
Reenter the same security code as that you have entered in Step 3 for confirmation.
If you enter a different security code, the screen returns to Step 3 (for the first code entry).
6 Register the security code again
E n t e r
Your security code has been registered.
If you press the Reset button or if you disconnect your Receiver from the battery after the code registration, you need to enter the registered security code.
See below for details.
72 English
If you have pressed the Reset button or if you
have disconnected the Receiver from battery...
1 Enter the correct security code
0 ??? 9
You must enter the same security code as that you have entered in Step 3 above.
2 Enter the security code
E n t e r
Now, you can use your Receiver.
English 73
Setup Menu
English
You can display the SIRIUS ID.
Displaying the SIRIUS Set Up screen
SIRIUS Set Up
SIRIUS Set Up screen
1 Calls the Sound Effects Menu. (see page 78)
2Returns to the Control screen of the previous source.
3 Calls the Setup Menu.
4 Displays the SIRIUS ID
S I R I US Se t Up
74 English
English 75
English
Setup Menu
DAB Set Up (with the optional accessory DAB Tuner connected only)
The DAB reception can be set.
Displaying the DAB Set Up screen
DAB Set Up
DAB Set Up screen
1 Calls the Sound Effects Menu. (see page 78)
2 Calls the Setup Menu.
3Returns to the Control screen of the previous source.
4 Turns the DAB Priority On or Off.
5Turns the Dynamic Range Control function On or Off.
6Turns the Regional Announcement function On or Off.
7Sets a program type to be selected automatically when the receiving ensemble starts.
8 Displays the Announcement Selection screen.
DAB Se t Up
76 English
Announcement Selection
Various announcement reception parameters can be set.
1 Displays the Announcement Selection screen
1Turns the Announcement Reception function On or Off.
2 Scrolls the Announcement items.
3 Returns to the DAB Set Up screen.
2 Set the announcement parameters
Transport News: Time table information of public transportation services
Sports news: Sports news
Financial news: Financial news
3 Terminate the setup
R e t u r n
English 77
English
Sound Effects Menu
Sound Effects Menu
You can set up the receiver sound effects.
Displaying the Control screen
Control screen
You can display the same Sound Effects Menu on the Control screen of any source.
Displaying the Sound Effects Menu screen
Audio
Sound Effects screen
1 Calls the Sound Effects Menu.
2 Calls the Setup Menu. (see page 57)
3Returns to the Control screen of the previous source.
???Your setup on the <Sound Effects Menu> is adjusted automatically according to your <Audio Set Up> (see page 58) on the Setup menu. We recommend you to complete the <Audio Set Up> first, then set up the <Sound Effects Menu>.
???Displayed items vary depending on the optional accessory connected.
78 English
Audio Control
You can adjust the front and rear and right and left audio balance.
Displaying the Audio Control 1 screen
Aud i o Co n t r o l
Audio Control 1 screen
1Returns to the Control screen of the previous source.
2 Calls the Setup Menu. (see page 57)
3 Calls the Sound Effects Menu.
4 Adjusts the right and left volume balance.
SUB
5 Adjusts the front and rear volume balance.
6Adjusts the volume of the present source based on the difference level of original volume.
If you have increased the volume first, then reduced it using the "Vol. Offset", the big sound may suddenly be generated when you switch to another source.
7 Adjusts the subwoofer volume.
8Turns the Loudness control function On or Off. (Does not appear when the optional accessory DSP unit is connected.)
If turned "On", high and low tones are automatically enhanced during low volume. ( On)
On)
9 Displays the Audio Control 2 screen.
Displaying the Audio Control 2 screen
pAdjusts the bass boost of the B.M.S power amplifier (optional accessory).
You may not set some models of power amp boost to "+18". See the catalog or instruction manual of power amplifier.
qSet the center frequency of bass boost you have set for the "AMP Bass".
If you set it to "Low", the center frequency is dropped for 20 to 30%.
w Displays the Audio Control 1 screen.
English 79
English
Sound Effects Menu
Equalizer
You can set up the equalizer.
80 English
Tone curve setup
You can set a Tone curve.
1 Display the Tone setup screen
Re t u r n
1 Bass adjustment items are displayed.
2 Middle adjustment items are displayed.
3 Treble adjustment items are displayed.
5
5 Set a Q factor
Q Factor
You can set it up only when Bass or Middle is adjusted.
6 Close the Tone setup screen
R e t u r n
4Bass DC Extend settings
If turned "On", it extends the bass center frequency to the low register by approximately 20%.
5 Returns to the Equalizer screen.
Tone curve can be set for each source.
2 Select a frequency band you wish to adjust
You can adjust the following frequency bands. Bass: 60, 70, 80, 100/150 (When "Q Factor" is
"2.00") Hz
Middle: 500, 1k, 1.5k, 2k Hz
Treble: 10k, 12.5k, 15k, 17.5k Hz
3 Set a center frequency
FREQ
4 Set a level
Level
English 81

English
Sound Effects Menu
Zone Control
You can set the front and rear audio source.
Displaying the Zone Control screen
Zone C on t r o l
Zone Control screen (when the Zone function is On)
1Returns to the Control screen of the previous source.
2 Calls the Setup Menu. (see page 57)
3 Calls the Sound Effects Menu.
4 Turns the Zone Function (that sets different source
sounds for front and rear speakers) On or Off. When turned On, F and R are shown.
5Sets the front and rear audio source separately. (This button appears when the Zone function is On.)
When the rear speaker sound is switched, the audio source that is output at the AV OUTPUT terminal is also switched to the same source.
However, if you have set the "Area" to "Reverse", the audio source that is output at the AV OUTPUT terminal is switched depending on the front sound source.
6Switches the front and rear audio sources.
(This button appears when the Zone function is On.) Use "Reverse" to change over the front and rear audio sources.
If the zone function is turned on, the F / R button appears on each source control screen, with which you can adjust the volume balance between the front and rear sources.
82 English
English 83

Glossary
English
A type of disc which contains recording of audio/video packaged media with high video and audio quality, such as a movie, featuring large recording capacity and digital signal processing capability.
VCD: VIDEO CD
A type of CD which contains the recording of moving images. It compresses image information by about 1/120 and audio information by about 1/6 and accommodates up to 74 minutes of recording in a disc with the same diameter as ordinary music CD of 12 cm.
Some VCDs do not have the P.B.C. compatibility and are capable of playback only, while some are
MPEG: Moving Picture Expert Group (DVD, VCD)
This is an international standard for digital video and audio compression and decompression in media.
Dolby Digital
This is a digital audio compression technology developed by Dolby Laboratories. It is compatible with
DTS
Name of a digital surround system developed by Digital Theater Systems, Inc.
Top menu/menu (DVD)
Some DVDs display more than one title in a screen. This screen is referred to as the top menu.
The menu is the item display (menu screen) for use in setting operations. The menu can be recalled any time during playback to perform settings according to the current software, including the audio switching between Dolby Digital and PCM, switching of language used in the subtitles and spoken voice.
The title is the largest unit of video and audio recorded in a DVD. It usually corresponds to a single movie of video software or an album (sometimes a piece of music) of music software. The numbers assigned to individual titles are referred to as the title numbers.
Chapter number (DVD)
The chapter is a section of video and audio recorded in a DVD. A title is composed of several chapters. The numbers assigned to individual chapters are referred to as the chapter numbers.
Subtitles (DVD)
Some DVD discs contains the recording of more than one subtitle language. This player allow you to select one of the recorded subtitle languages during playback.
Track number (CD, VCD)
A track is also a section of video and audio recorded in a disc. The numbers assigned to individual tracks are referred to as the track numbers.
With most of music CDs, a track is assigned to a piece of music. However, with a VCD, the sections of the contents do not always correspond to the assigned tracks.
As (special) playback functions such as skipping and programming of ordinary CDs are based on track number data, such playback functions are sometimes impossible with some VCDs.
P.B.C.:
When a VIDEO CD carries "Play Back Control capable" or similar message on the disc or jacket, desired scenes and information can be played back in an interactive manner using a hierarchical structure while viewing the menu screens displayed on the TV screen.
84 English

English 85
English
Troubleshooting Guide
What might appear to be a malfunction in your unit may just be the result of slight misoperation or miswiring. Before calling service, first check the following table for possible problems.
??? General
The power does not turn on.
The desired source is NOT selected although you pressed the SRC button.
Nothing happens when the buttons are pressed.
???The computer chip in the unit is not functioning normally.
No television/video image appears.
???The unit is not connected to the parking brake detection switch.
???The parking brake is not engaged.
The screen is dark.
??? The unit is in a location where temperature is low.
???Press the reset button on the unit (see page 4).
???Make proper connections according to <INSTALLATION MANUAL>.
???For safety reasons no television/video images are displayed while the vehicle is moving. Engaging the parking brake will cause images to be displayed.
???If the temperature of the monitor unit drops, the screen may appear darker when power is first turned on due to the characteristics of a liquid crystal panel. Wait a while after turning power on for the temperature to rise. Normal brightness will return.
The screen does not darken when the vehicle???s lights are turned on.
AM/FM radio reception is poor and/or there is noise.
86 English
No sound can be heard, or the volume is low.
???Attenuator is turned on.
???The fader or balance settings are set all the way to one side.
???The input/output wires or wiring harness are connected incorrectly.
The sound quality is poor or distorted.
???Turn off Attenuator.
???Reset the fader and/or balance settings.
???Reconnect the input/output wires or the wiring harness correctly. See the section on <INSTALLATION MANUAL>.
???One of the speaker wires is being pinched by a screw in the car.
???The speakers are not wired correctly.
Radio reception is poor.
???Check the speaker wiring.
???Reconnect the speaker wires so that each output terminal is connected to a different speaker.
??? The car antenna is not extended.
??? The antenna control wire is not connected.
The memory is erased when the ignition is turned off.
???Pull the antenna out all the way.
???Connect the wire correctly, referring to the section on
<INSTALLATION MANUAL>.
The sound/picture skips on a DVD/VCD/CD.
??? The disc is scratched or dirty.
A track will not play.
???Clean the disc, referring to the section on <Disc cleaning> (see page 6).
??? Random play has been selected.
A VCD cannot be played using menus.
??? Turn off random play.
??? The VCD disc being played is not compatible with P.B.C.
The subtitle is not displayed.
??? The DVD disc being played does not contain the recording of subtitles.
The voice (or subtitle) language cannot be changed.
???The DVD disc being played does not contain the recording of more than one audio (or subtitle) language.
???Menu playback is available only with VCD discs recorded with P.B.C.
???The subtitle cannot be displayed when the DVD disc being played does not contain the recording of subtitles.
???The voice (or subtitle) language cannot be changed when the DVD disc being played does not contain the recording of more than one voice (or subtitle) language.
English 87
Troubleshooting Guide
English
The viewing angle cannot be changed.
???The DVD disc being played does not contain the recording of more than one angle.
???You are attempting to switch the angle in a DVD section where more than one angle is not recorded.
Playback will not start even after a title is selected.
???A viewing restriction (RATING) has been set for the disc.
???The viewing angle cannot be changed when the DVD disc being played does not contain the recording of more than one angle.
???More than one viewing angle may be recorded only in limited sections in a disc.
???Check the viewing restriction level (RATING) setting.
The voice or subtitle language selected in the initial setting is not played.
??? Disc source
The disc control mode cannot be selected.
The specified disc does not play, but another one plays instead.
The display shows that the changer is being played, but no sound can be heard.
Track repeat, disc repeat, track scan, disc scan, random play, and magazine random play start by themselves.
??? The setting is not cancelled.
Can???t remove disc.
???The cause is that more than 10 minutes has elapsed since the vehicle ACC switch was turned OFF.
???The settings for these functions remain on until the setting to off or the disc ejected, even if the power is turned off or the source changed.
???The disc can only be removed within 10 minutes of the ACC switch being turned OFF. If more than 10 minutes has elapsed, turn the ACC switch ON again and press the Eject button.
88 English
??? MP3/WMA source
Cannot play an MP3/WMA.
??? The media is scratched or dirty.
The sound skips when an MP3/WMA is being played.
??? The media is scratched or dirty.
??? The recording condition is bad.
The MP3/WMA track time isn???t displayed correctly.
???
Can???t display the ID3 tag information correctly.
??? Record is not made in conformity with the ID3 tag version 1.x.
???Clean the media, referring to the CD cleaning of the section on <About discs> (see page 6).
???Clean the media, referring to the CD cleaning of the section on <About discs> (see page 6).
???Record the media again or use another media.
???There are times when it isn???t displayed correctly according to the MP3/WMA recording conditions.
???Record in conformity with the ID3 tag version 1.x. Also, the display may be incorrect if an MP3/WMA file uses the ID3 tag v1.x standard and if this standard has
been expanded after production of the machine software.
The following messages are displayed when certain problems are occurring in your system. Take the recommended actions.
Hot Error
Hold Error
Mecha Error
Disc Error
Read Error
Region code Error Parental level Error Error 07 ??? 67
The protective circuit in the unit activates when the temperature inside the unit exceeds 60??C (140??F), stopping all operation.
]Cool down the unit by opening the windows or turning on the air conditioner. As the temperature falls below 60??C (140??F), the disc will start playing again.
The protective circuit in the unit activates when the temperature inside the automatic disc changer exceeds 60??C (140??F), stopping all operation.
]Cool down the unit by opening the windows or turning on the air conditioner. As the temperature falls below 60??C (140??F), the disc will start playing again.
The disc player is malfunctioning.
]Eject the disc and try inserting it again. Contact the Kenwood dealer if this indicator continues blinking or the disc cannot be ejected.
The unplayable discs is inserted.
The disc is
] Load the disc with the labeled side up. The disc is quite dirty.
] Clean the disc, referring to the section on <Disc cleaning> (see page 6).
The DVD software encoded for other region code.
The parental level is set to high levels.
The unit is malfunctioning for some reason.
]Press the reset button on the unit. If the "Error ##" code does not disappear, consult your nearest service center.
English 89

English
Specifications
Although the effective pixels for the liquid crystal panel is given as 99.99% or more, 0.01% of pixels may not light or may light incorrectly.
90 English
2CAUTION
Use of controls or adjustments or performance of procedures other than those specified herein may result in hazardous radiation exposure.
In compliance with Federal Regulations, following are reproductions of labels on, or inside the product relating to laser product safety.
KENWOOD CORPORATION
TOKYO, JAPAN
KENWOOD CORP. CERTIFIES THIS EQUIPMENT
CONFORMS TO DHHS REGULATIONS N0.21 CFR 1040. 10, CHAPTER 1, SUBCHAPTER J.
Location : Bottom Panel
FCC WARNING
This equipment may generate or use radio frequency energy. Changes or modifications to this equipment may cause harmful interference unless the modifications are expressly approved in the instruction manual. The user could lose the authority to operate this equipment if an unauthorized change or modification is made.
NOTE
This equipment has been tested and found to comply with the limits for a Class B digital device, pursuant to Part 15 of the FCC Rules. These limits are designed to provide reasonable protection against harmful interference in a residential installation. This equipment may cause harmful interference to radio communications, if it is not installed and used in accordance with the instructions. However, there is no guarantee that interference will not occur in a particular installation. If this equipment does cause harmful interference to radio or television reception, which can be determined by turning the equipment off and on, the user is encouraged to try to correct the interference by one or more of the following measures:
???Reorient or relocate the receiving antenna.
???Increase the separation between the equipment and receiver.
???Connect the equipment into an outlet on a circuit different from that to which the receiver is connected.
???Consult the dealer or an experienced radio/TV technician for help.
NOTE
This Class B digital apparatus complies with Canadian
 is a trademark of DVD Format/Logo Licensing Corporation registered in the U.S., Japan and other countries.
This product incorporates copyright protection technology that is protected by U.S. patents and other intellectual property rights. Use of this copyright protection technology must be authorized by Macrovision, and is intended for home and other limited viewing uses only unless otherwise authorized by Macrovision. Reverse engineering or disassembly is prohibited.
Manufactured under license from Dolby Laboratories.
"Dolby" and the
"DTS" and "DTS 2.0 + Digital Out" are trademarks of Digital Theater Systems, Inc.
English 91