Owner's Manual
Manual Del Propietario
Vacuum Cleaner
Aspiradora
Model, Modelo 116.23512
116.23513
CAUTION:
Read and follow all
safety and operating instructionsbefore first
use of this product.
CUIDADO:
Lea y siga todas las instruccionesde operaci6n y seguridadantes del use de este producto.

Please read this guide. It will help you assemble and operate your new Kenmore vacuum in the safest and most effective way.
For more information about vacuum cleaner care and operation, call your nearest Sears store. You will need the complete model and serial numbers when requesting information. Your vacu- um's model and serial numbers are located on the Model and Serial Number Plate.
Use the space below to record the model number and serial number of your new Kenmore vacuum.
Model No.
Serial No.
Date of Purchase
Keep this book and your sales check (receipt) in a safe place for future reference.
LIMITED ONE YEAR WARRANTY ON KENMORE VACUUM CLEANER
This warranty is for one year from the date of purchase, and includesonly private household vacuum cleaner use. Duringthe warranty year, when this vacuum cleaner is operated and maintainedaccordingto the owner'smanual instructions,Sears will repair any defectsin materialor workmanshipfree of charge.
This warranty excludes vacuum bags, belts, light bulbs, and filters, which are expendable parts and become worn during normal use.
For warranty service, return this vacuum cleaner to the nearest Sears Service Center in the United States.
This warranty applies only while this product is in use in the United States. This warranty gives you specific legal rights, and you may also have other rights which vary from state to state.
Sears, Roebuck and Co., D/817 WA, Hoffman Estates, IL 60179
Yoursafety is importantto us.Toreducethe risk of fire, electrical shock,injury to personsor damagewhenusing your vacuumcleaner,follow basic safetypre- cautions including the following:
Read this manual before assembling or using your vacuum cleaner.
Use your cleaner only as described in this manual, Use only with Sears recommended attachments.
To reduce the risk of electrical shock - Do
not use outdoors or on wet surfaces.
Disconnect electricalsupplybeforeservic-
ingor cleaningout agitatorarea. Failureto do so could resultin electricalshockor
brush suddenlystarting.
Do not use cleaner without dust bag and/or filters in place.
Always turn cleaneroff beforeconnectin_ or disconnectingthe hose or Power-Mate.
Always turn cleaner off before unplugging.
Do not unplug by pulling on cord. To unplug, grasp the plug, not the cord.
Hold plug when rewinding onto cord reel. Do not allow plug to whip when rewinding.
Do not use with damaged cord or plug. If cleaner is not working as it should, has been dropped, damaged, left outdoors, or
dropped into water, return it to a Sears Service Center,
Do not pull or carry by cord, use cord as a handle, close door on cord, or pull cord
aroundsharpedges or corners. Do not run cleanerover cord.Keep cord awayfrom heated surfaces.
Do not leavecleanerwhen plugged in. Unplugfrom outlet when not in use and beforeservicing.
Always change the dust bag after vacuum- ing carpet cleaners or freshener, powders and fine dust. These products clog the bag, reduce airflow and can cause the bag to burst. Failure to change bag could cause permanent damage to the Kleaner.
Do not use the cleaner to pick up sharp hard objects, small toys, pins, paper clips, etc. They may damage the cleaner or dust bag.
Do not pick up anything that is burning or
smoking, such as cigarettes, matches, or hot ashes.
Do not use cleaner to pick up flammable or combustible liquids (gasoline, cleaning flu- ids, perfumes, etc.), or use in areas where
they may be present. The fumes from these substances can create a fire hazard or
explosion.
Do not allowto be used as a toy. Close
attentionis necessarywhen used by or near children.
Do not handleplug or cleanerwith wet hands.
Do not putany objectsintoopenings. Do not operatethe cleanerwitha punc-
Use extra care when cleaning on stairs. Do not put on chairs, tables, etc. Keep on floor.
You are responsible for making sure that your vacuum cleaner is not used by anyone unable to operate it properly.
Do not operate without exhaust filter or exhaust filter cover installed.
SAVE THESE INSTRUCTIONS
Proper assemblyand safe use of your vacuumcleanerare your responsibilities. Yourcleaner is intended only for household use. Read this Owner'sManual carefully for importantuse and safety information. This guide contains safety statements under warning and caution symbols. Please pay special attention to these boxes and follow any instructions given. WARNING statements alert you to such hazards as fire, electrical shock, burns and personal injury. CAU. TION statements alert you to such hazards as personal iniurY and/or property dama,fle.
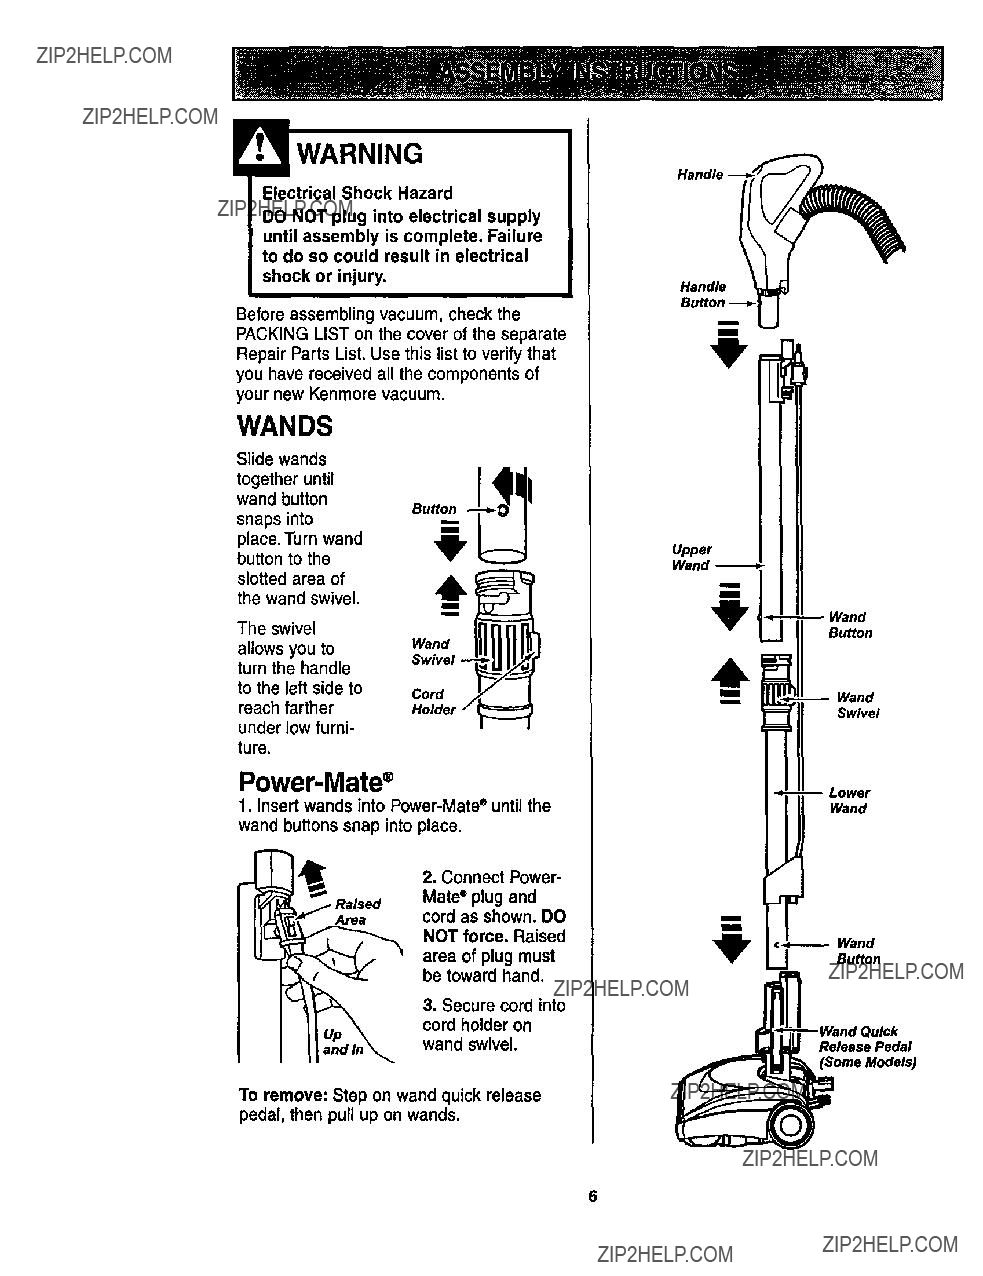
Before assembling vacuum, check the PACKING LIST on the cover of the separate
Repair Parts List. Use this list to verify that you have received all the componentsof your new Kenmore vacuum.
Handle __
Handle
Bu.??n u
"9"
WANDS
Slide wands
together until wand button
snaps into
place. Turn wand button to the slotted area of the wand swivel.
The swivel
allows you to turn the handle to the left side to reach farther under low furni- ture.
I
i
wo??,IIIII
Cord
SwivelHolder --/
Upper
Wand
Wand
Button
Wand
Swivel
Power-Mate??
1. Insert wands into Power-Mate e until the
wand buttons snap into place.
2. Connect Power-
Mate??? plug and
Areacord as shown. DO
NOT force. Raised
area of plug must be toward hand.
3. Secure cord into cord holder on wand swivel.
Lower
Wand
Wand
Button
}ulek
Release Pedal
To remove: Step on wand quick release pedal, then pull up on wands.
*Always clean attachments beforeusingon fabrics. ** 3-way Orv'Offswitchshourdbe in FLOOR position.
*** Handi-MateJr.." and Power-MateJr.?? attachment instructionsare includedwith the products.
NOTE: When separating wands, depress lock button completely before pullingwands apart. If wand lock button is difficult to depress push the two wands more tightly together to line up
the ock button with the h, e. Depress ock button and then pu wands apart.
EDGE CLEANER
Active brush edge cleaners are on both sides of the Power-
Mate??. Guide either side of the Power-
Mate* along base- boards or next to
furniture to help remove dirt trapped at carpet edges.
OVERLOAD PROTECTOR
The Power-Mate* has
built-inprotectionOvedoadProtector againstmotor and belt ResetBu_on
damage should the agitatorjam. If the agitatorslows down or stops, the overload protectorshuts off the Power-Mate".The
canistermotor willcontinue to run.
To correct problem: Turn off vacuum, remove obstruction, then press reset button.
To reset: Push in the overload protector button.
SUCTION CONTROL
The suction control allows
you to change the vacuum suction for
different fabric SuctionSuction
and carpet
weights. Opening the control decreases suction for draperies and lightweight rugs, while closing the control increases suction for upholsteries and carpets.
Personal Injury Hazard
Always unplug the vacuum cleaner before cleaning the agitator area as brush may suddenly restart. Failure to do so can result in personal injury.

Porfavor lea esta guia que le ayudara a assemblar y operarsu aspiradoranuevade Kenmore en una manera m&ssegura y effectiva.
Paramas informaci6n acerca del cuidado y operaci6nde esta aspirador,Ilame a su tien_iaSears mas cercana. Cuando prequnte pot informaci6n usted necisitard el nlJmerocompleto de serie y modelo de la aspiradora que esta.Iocado en la placa de los nl_merosde modelo y serie.
Use el espacio de abajo para registrar el n_mero de modelo y serie para su nueva aspiradorade Kenmore.
Numero de Modelo
N_mero de Serie.
Fecha de Compra
Matengaeste libro y su reciboen u lugar seguropara mferencias futuras.
GARANT|A LIMITADA DE UN ANO DE LA ASPIRADORA KENMORE
Esta garantfa es por un a._odesde la fecha de compra, e incluyesolamenteel use de la aspiradoraen hogares privados. Durante el aSo de garantia, cuando la aspiradora es operada y mantenidade acuerdoal manual de instrucciones del dueSo, Sears reparar_ cualquier defectoen materiales o fabricaciSnlibre de cargo.
Esta garantfa excluye las bolsas de colacci6n,correas,lamparillas, y filtros, las cuales son partes gastables que se deterioran con el uso normal.
Para el servlcio de garanfia, retorne esta aspiradora al Centro de Servlclo Sears mds cercano en los
Estados Unidos.
Estagarantia se aplicasolamentemientras este producto est_ en uso en los EstadosUnidos.Esta garantia le
da a ustedderechoslegalesespecfficos,y ustedpuedetenet tambi_notrosderechoslos cualesvariande estadoa estado.
Sears, Roebuck and Co., D/817 WA, Hoffman Estates, IL 60179
SuaeguridadesmuyimportanteparanosotrosPara. reducir el rlesgo de Incendio, choque
eldctrico, lesibn corporal o dafios al uUlizar su aspiradora, actde de acuerdo con precauciones bdsicas de seguridad, entre elias:
Lea estemanualantesde armaro utilizarsuaspira- No use la aspiradorasi la mangueraesta rota.La dora.mangueracontienealambresel6ctrices.Cambielasi
Use suaspiraderaOnicamanteen la forma descrita esta rotao desgastadaEvite.aspirar objetos an estamanual.Use _nicamenteconacoesories agudes.
recomendadosporSears.
Para reducirel riesgodechoqueel_ctrico,no use
suaspiradoraalaire librani sobrasuperficiesmoja- das.
Desconecteel cordenel_ctricoantesde componer o limpiar el &readel cepinoDe. Io contrario,el cepillo )odriaarrancardeform imprevistao podria
)roducirseunchoquealectrico.
Siempredebeapagarla aspiradoraantesde conectaro desconectarla manguerade la Power- Mate??.
Siempre debe apagarsu aspiradoraantes de des- conectarla.
No desconectela aspiradoratirandodel cord6n el_ctrico. Paradesconectarla,haleel enchufe,no el
,'ord6n.
Sujeteel enchufeconla mano al enrollarel cord6n eldctrico.Paradesconectarla,haleen enchufe,no el cord6n.
No usela aspiradorasi el cord6no el enchufeesta daSado.Si laaspiradorano estafuncionandoade- cuadamenteo sise ha dejadecaer,estddaSada,se ha dejadoexpuestaa la intemperieo se ha dejado caeren agua,devublvala un Centrade serviciode
Sears.
No hale ni transportelaespiradoraporel cord6n;no
use el cord6ncomo mango;no cierrepuertassobra
el corden; no haleel cordensobrerebordesagudes ni esquinas.No paselaaspiradorasobreel cord6n. Mantengael cord6n alejadode superficiescalientes. No abandenelaaspiradoracuandoest6conectada.
Descondctelacuandono la est6usandoy antesde darleservicio.
No permitaque sea utilizadacomo juguete.Se requieratenermayorcuidadocuandosea utilizada en laproximidadde nihoso pot niSos.
No toquelaaspiraderani el enchufecon lasmanes rnojadas.
No coloqueobjatosen lasaberturas.
No utilicela aspiradorasialgunaaberturaesta blo- quaada;mantdngalalibrade polvo,pelusa,cabellos
y cualquieracosaque podrfadisminuirel flujode aire.
Mantenga el cabello,rope suelta,dedos y todaslas
partesdel cuerpoalejadosde lasaberturasy piezas mec_nicas.
No use [a aspiradorasin tenerinstaladalabolsa para polvo y/o los filtros.
Cambie siemprela bolsaparapolvodespuds de espirar limpiaderasde alfombras desodomntes, talcosy polvosficos. Estesproductesatascanla bolsa,reducenel flujo de aire y pueden causarque _sta se rompa. Si nocambiala bolsapodrfaocesio- nar daSopermanentea la aspiradera.
No usela espiraderaparalevantarobjetosagudes, juguetespoqueSes,alfileras,sujetapapeles,etc. PodrfandaSarlaespiraderao la bolsaparapelvo.
No levantaninguna cosaque se estequemandoo
emitiendohumo,comocigarrillos,ceriUos cenizas calientes.
No uselaaspiradorapara aspirarliquidesinflama- bleso combustibles(gesolina,liquides paralim-
pieza, perfumes,etc.)ni la useen lugaresdonde 6stospodrianestarpresentesLosvaporesde. estas sustanciespuedencrearun peligro de incendioo explosibn.
Tengaculdadoespecialal utilizarla aspiradoraen escalonesNo. la coloquesobresillas,mesas, etc. Mant_ngalaen el piso.
Usted es responsablede aesgurarque su aspira- doranosea utilizadapot ningunapersonaque no puedamanejarlacorrectamente.
No operesinel filtra de escapeni la cubiertadel ill- tro de escapeinstalades.
GUARDE ESTAS INSTRUCCIONES
El armado y uso seguro de su aspiradorason su rasponsabilidadEsta. aspiradoraha side diseSada exclusivamentepara usodom_sticoLa. aspiradora deharaalmacenarseen un lugarsecoyen el interior.
Lea este Manualdel propietariodetenidamente,puescontieneinformaci6nirnportantesobreseguridady uso.Esta quiacontieneinformacionsobreseguridaddebajode simbolosde advertiencia cuidado.Por favorpongaatenci6nespeciala estasinstrucoionesdadas. Advertenela:Este informaci6nle alertard con el poligrode fuego, choqueselectricos,quemadas y lesiones.Culdado: Este informaci6nle alertaraa
31i_roscome lesiones;/dafios de propiedad.
Es importante conocer las piezas y caracter{sticas de su aspiradora para asegurar su uso adecuado y seguro. Exam{nelas antes de usar su aspiradora.
Dispositivo giratorio del mango (Algunos
modelos) _-------._
Sujetador I_,:,_Illn
del cord6n "'''"__i
Reborde __
Pedal de liberaci6n rdpida del tubo
N_meros de serie del modelo Power-Mate" (Parte inferior)
Pedal de liberaci6n
Pedal de seleccibn de nivel de pelo de la affombra (Algunos modelos)
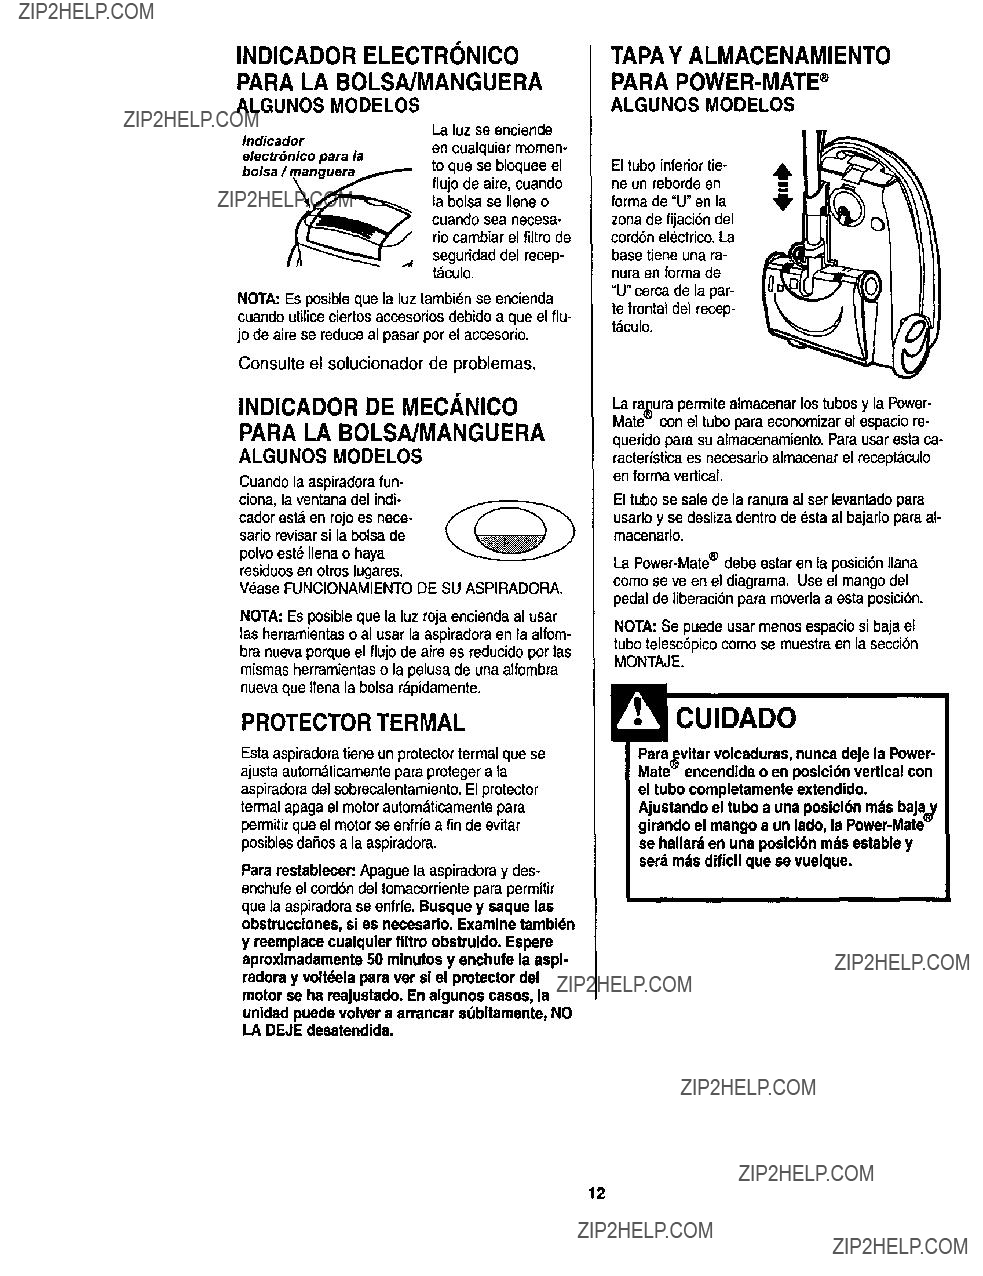
Indicador de polvo (Algunos modelos_
Power-Mate Jr.." I I
(Alg uYnbsand:_aelos) [_Tub??.r
I I supe.o
Cord6n el6ctrico I I
Power-Mate )
Correa
(Algunos modelos)
de pelo de la alfombra (Algunos modelos)
Protector contra
sobrecargas Bot6n de
restauraci6n "Reset"
Limpiador de orillas (No se muestra)
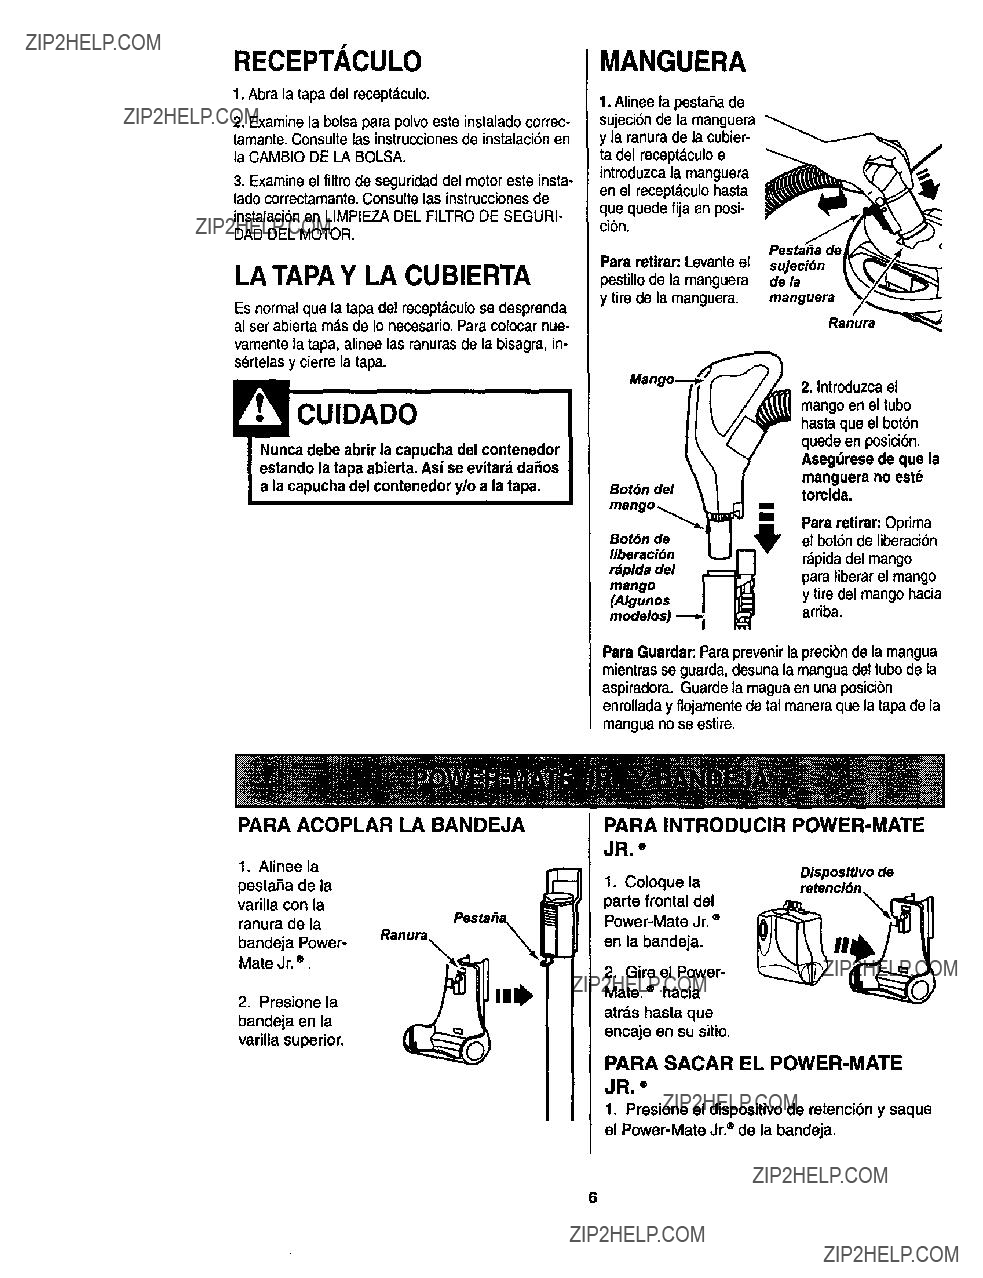
MANGUERA
Interruptor de encendido/ apagado de tres poslciones (Apagado/PIso/Alfombra) (Algunos modelos)
Mango
Dispositivo giratorio de la manguera
ACCESORIOS
Power-Mate Jr.."
Herramienta
(Algunos modelos)
para hendiduras _
Cepillo para _
Cepiflo
Cepillo para pisos ___
.aratelas
(Algunos modelos)--_ _
HandI-Mate Jr.." (Algunos modelos)
NOTA:Todoslos modelos cuentan con unjuego de accesorios en el recept_,cu- Io.Unosmodelos tienenun luego adi- cionalque se puedeguardaren la bolsa accesariapara el uso para la basurau otroslugaressucios.
RECEPTACULO
Almacenamiento para accesorios
Tapa del
electr6nico para fa bolsa/manguera
Pestillo
ADVERTENCIA
Peligm de choque eldctrico
No conecte la aspiradora hasta que termine de armada. De Io contrado podrfa causar un choque el_ctdco o lesi6n corporal,
Antes de armar la aspiradora, chequeela LISTA DE EMBALAJE en la cubiertaseparada de la Lista de Partespara Reparaci6n. Use esta lista para veri- ficar que ha recibido todas las componentes de su nueva aspiradora Kenmore.
TUBOS
Una los tubos deslizandolos hasta
que el bot6n quede fijo en posici6n. Gire el bot6n del tubo hacia la zona ranurada del dis-
positivo giratorio del tubo.
El dispositivo giratorio le permitegirar el mango hacia la izquierda para limpiar mejor debajo de los muebles bajos.
Dispositive
giratofio
del mango --
Sujetador del cord6n /
POWER-MATE??
1. Introduzca los tubosen la Power-Mate?? hasta que el bot6n del tuboquede fijo en posici6n.
2. Conecteel enchufey cord6nde
??? Areala Power-Mate??? elevada como se muestra,
NO LO fueme. El area elevadadel
enchufe tiene que estarhacia la mano.
3. Assegurael cordbndentrodel
sujetadordel cord6n
en el giratoriode la hacla dentro mango.
Para retirar: Pise el pedal de liberaci6n rapidadel tuboy tim del tuboshacia arriba.arriba.
liberecl6n
r_plda del tubo (Algunos
modelos)
??? Siempre limpie los accesorios antes de usar sobre lelas. ??* El interfuptor de 3 posloiones debe estar en la posicibn FLOOR (piso descubiedo) "*" La Handi-Mate Jr," y la Power-Mate Jr2 incluy_n sus propias instrucclones para uso de accesodes.
NOTA: Cuand.osepare los tubos optimacomp!etamenteel bot,o.'nde bk_lueoantes,desepararlospor comple- to. bi se le diTicultaoprimirel bot6n juntem_s los tubespara alinear el bot6ncon el oriricio,uprima el bot6ny
despuds separe os tubos.
LIMPIADOR DE ORILLAS
Active los cepillos limpia- dores de oriltasa cada ladode la Power-Mate??.
Pose la Power-Mate?? junto alas paredeso juntoa los muebies para ayudara eli- minar la tierraacumulada en las orillasde la alfom-
bra.
PROTECTOR CONTRA
SOBRECARGAS
La Power-Mate??cuenta
con proteecionincorpo- rada contra daho del
motor y la correa en caso de atascamiento
del agitador. Si el agita- dor funciona m._s
despacio o para, el pro- tector de sobrecarga para la Power-Mate??.
El motor del recept_culo continuar&funcionando.
ProtectOr contra sobrecargas Bot6n de restauracidn "Reset"
Peligro de lesiones personales Desconecte slempre la aspiradora antes de limplar las _imas de la agltador pues dstos poddan arrancar de manera
Imprevista. El ho hacerlo, podrfa resul- tar en lesiones personales.
Para resolver el problema: Apaguela aspiradora, quiteel residuey aprieteel bot6npara encenderde
Ruevo,
Para restablecer: Oprimael bot6ndel protector contrasobrecarga.
!ADVERTENCIA
Peligro de choque el6ctrico
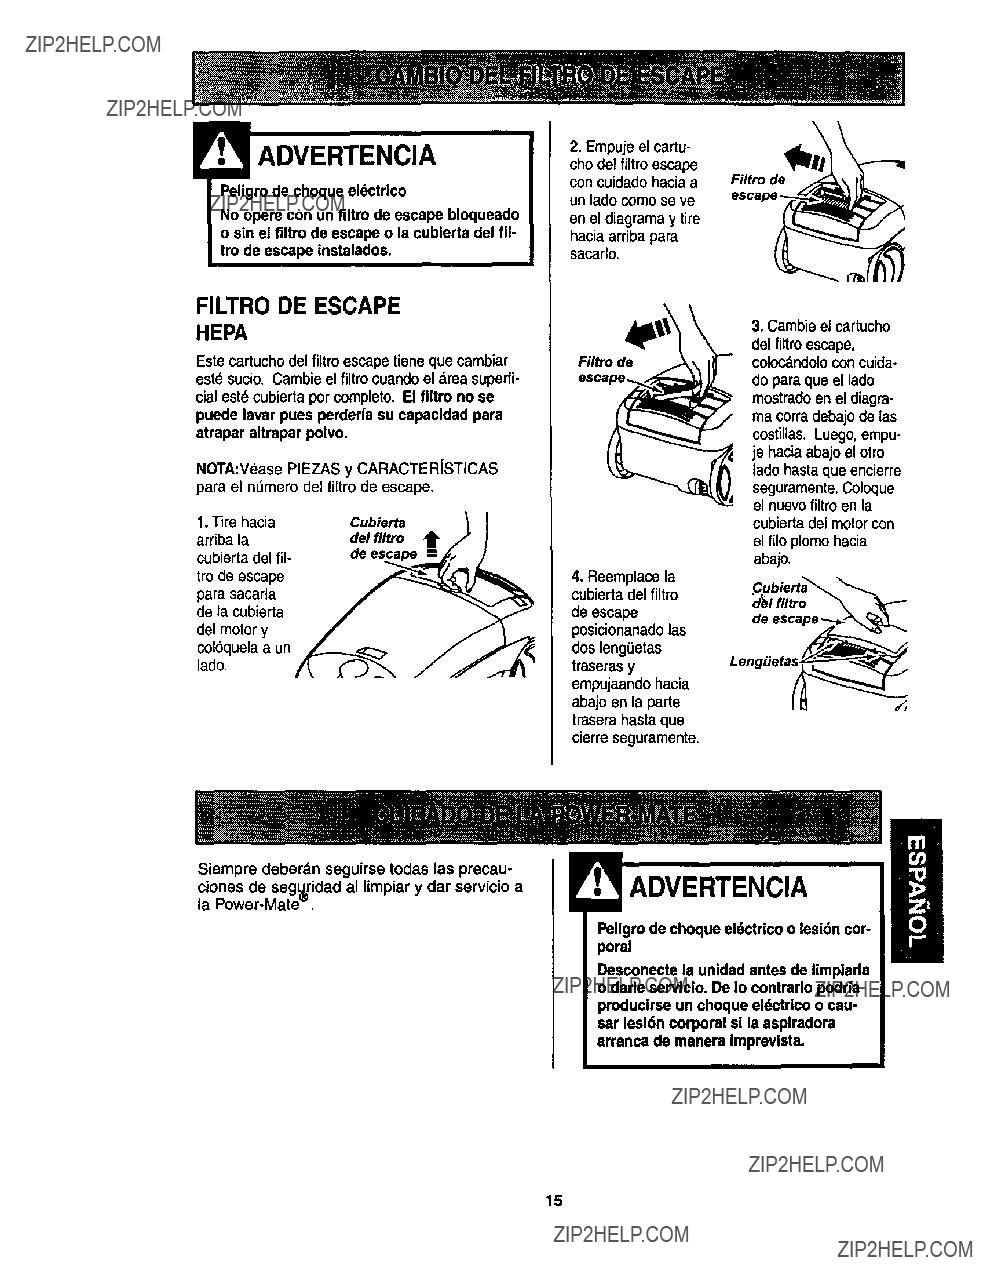
No opere con un filtro de escape bloqueado o sin el filtro de escape o la cubierta del ill- tro de escape instalados.
2. Empuje el cartu-
cho del filtro escape
con cuidadohacia a Fil_ode un lado comose ve
en el diagramay tire
hacia arribapara sacarlo.
FILTRO DE ESCAPE
HEPA
Este cartucho del fiitro escape tiene que cambiar este sucio. Cambie el filtro cuandoel drea superfi- cial est_ cubierta por completo. El flltro no se puede lavar pues perderia su capacidad para atrapar altrapar polvo.
NOTA:Vease PIEZAS y CARACTERfSTICAS para el nL_merodel liltro de escape.
Rl_ode
4. Reemplace la cubiertadel fUtro
de escape
posicionanadolas
dos leng,,etas traseras y empujaando hacia abajo en la parte trasera hasta que cierre seguramente.
3. Cambie el cartucho
del filtro escape, coloc_ndolocon cuida-
do para que el lado mostrado en el diagra- ma corradebajode las costillas. Luego, empu- je hacia abajo el otro lado hasta que encierre seguramente.Coloque el nuevofiltro en la cubierta del motor con el filo plomo hacia abajo.
._ubierta_
I filtro
Siempre deberdn seguirse todas las precau-
clones de seg_ridad al limpiar y dar servicio al B la Power-Mate _
llraglrode choque el6ctrico o lesi6n car-
Desconecte la unidad antes de limplarla o darle aervlcio. De Io contrario podria producirse un choque eldctrlco o cau- sar lesi6n corporal sl la asplradora arranca de manera Imprevista.
i???
Consulte este tabla para encontrar soluciones que usted mismo puede realizarcuando tenga problemas menores de rendimiento. Cualquier servicio que necesite aparte de otros descfitos en este manual tienen que ser hechos por un Centrode servicio de Sears.
La aspiradora no arranca,
NO aspira
=atisfactorlamente.
1.Est_ desconeclade.
2.Cortacirceltosbotadeo lusibie quemado en el taelero de serviciode la resider_a.
3.Conexionesel_tricas de la manguera sueltas.
1.Bolsa para polvoIlena o atascade.
2.Vias de flujode aire atascadas.
3.Fillrossucios.
4.A_usleincorreclode niseide pelode la allo_.
1.Conectebien, optimaselector de encendidof apagade a la posici6n ON.
2.Restablezcael cortacircuitoso cambie el lusil_e.
3.Vuelva a cone_ar Io_ extmrno_de la manguera, (p_gina 6).
1.Cambie la bolsa, (pdgina 13),
2, Limpielasvlasdefluiodeaim,(pdgina13 )
3.Cambie el filtros.(pdglna14-t 5).
4.Ajuste el nive_,(p_girm8).
La asplradora arranca, peru se apaga.
5.Controlde aspiracideabierto.
6.Manguera rota.
7.Ag_der de la Power-Mate?? desgastados.
8.Correa desgaslada o rota.
9.Ag_ladoro tapasdel extmmode _ste sucios.
10.Tapa del recepldculoabierta.
t.Conexioneseldctricasde la manguerao
de la tapa
2.Protsctorcontra sobmcargasde la Pov_r.Matee botade
3.Protectorterrr_f botado en el recept_u]o.
5, Ajuste el contrel, (p_gina 11).
6.Cambie ta rna_3uera.
7.Cambie _aagi_der, (pdgi_ 18).
8.&9. ConsulteCAMBIO DE LA CORREA Y LIMPIEZA
DEL AGITADOR, Lo_ginas 16-17). 10. Cierre bien la tapa
1.Examine las cor_exioneseldctricas,vuelvaa con- ectar losextremosde la manguera, (pdgir_ 6).
2.Retire cualquiero_etoLelatorade o atascado, luego restablezca._. la aspiradoraatran_z pero se vuelvea apagar, limpie el agitader y los lapas del exlrernosde _ste, luego reslab_ezca,
(p_ginas 11, 16-17).
3.Apague la aspiradoray desenchufe el cordbn del tornacorrientey espem aproximadarnente50 relnutosy er'_chulela aspiladom y voltdela para ve_ si el proteclor del motorse ha reajustade, (p_gina 12). Carnb_e_abo4saparapoivo,desblo que las via de IlujOde aim, (pdgina 13).
1. Conecte bien, (_gina 5)
2 & 3. ConsulteCAMBIO DE LA CORREA y LIMPIEZA DEL AGITADOR, (l_ginas 16-17).
4.Examineel drea del agitade_para determinar si hay acumu_aci6nexcesivao bioqueode pelusa. Limpie el agitado( y los tapas del extremos, luogo reelablezca, (l_ginas 11, 16-17}.
5.Ponga el interruptora [a posicibnCARPET,
Lo_tgina7).
1.Determine si eel&ntY_oqueadeslas v(as de aim, (p_gina 13).
2.Limpie las lentes, (pdgina9).
1.Determinesi est_neloqueades las vfas de aim.
(p_gir_ 14),
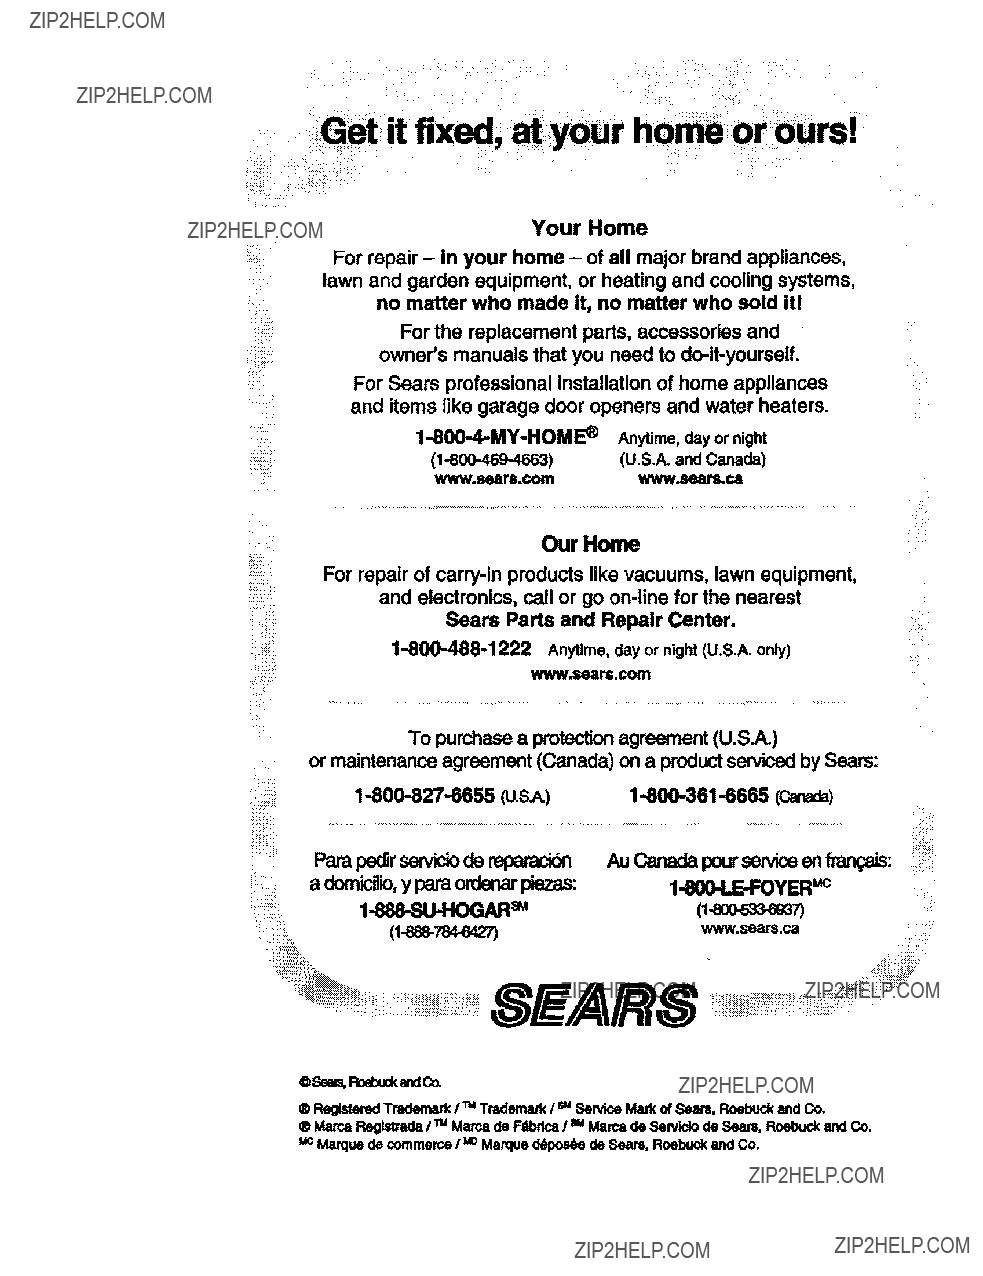
Your Home
For repair - in your home - of all major brand appliances, lawn and garden equipment, or heating and cooling systems, no matter who made it, no matter who sold it!
For the replacement parts, accessories and owner'smanuals that you need to do-it-yourself.
For Sears professional Installation of home appliances and items like garage door openers and water heaters.
1-800-4-MY-HOME _ Anytime,dayornight
www._ars.comwwwJNwJ'8._
Our Home
For repair of carry-in products like vacuums, lawn equipment, and electronics, call or go on-line for the nearest
Sears Parts and Repair Center.
1-800-488-1222 Anytime, day or night (U.S.A. only)
ww,N,tearll;,com
To pumhase a protecl_n agreement (U.S.A.)
or maintenance agreement (Canada) on a product serviced by Sears:
8EAR8
OSa_ RoabuandC_
?? Registered Trademark/'ra Trademark / _ Service Mad( of Sears, Roebuck and Co.
"rM
??MarcaReg_alMarcadeFdbdca/ Msrca de Sen/iclo de Seam, Roebuck and Co. MCMan:lUede commerce / uo Marque d6posde de Sears, Roebuck and Co.