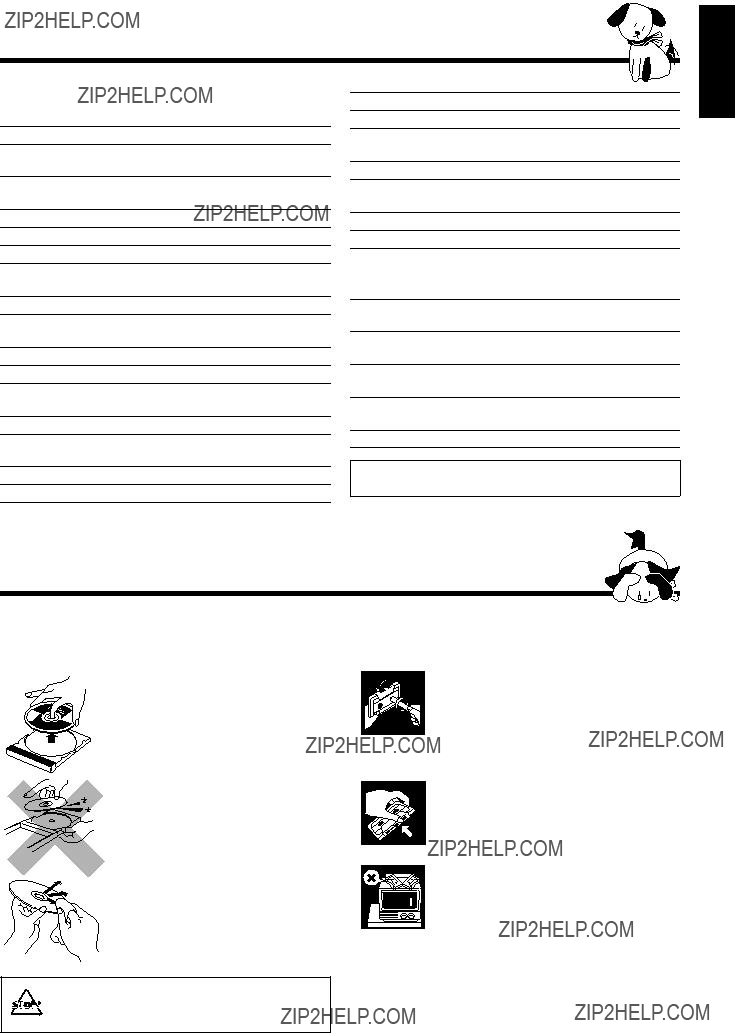
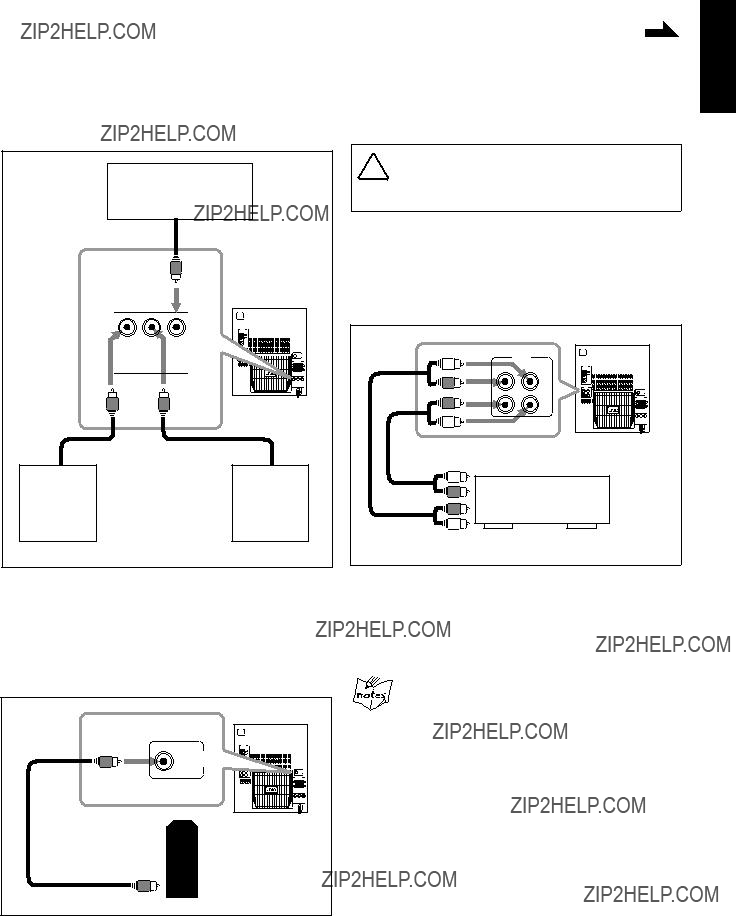
See pages in the parentheses for details.
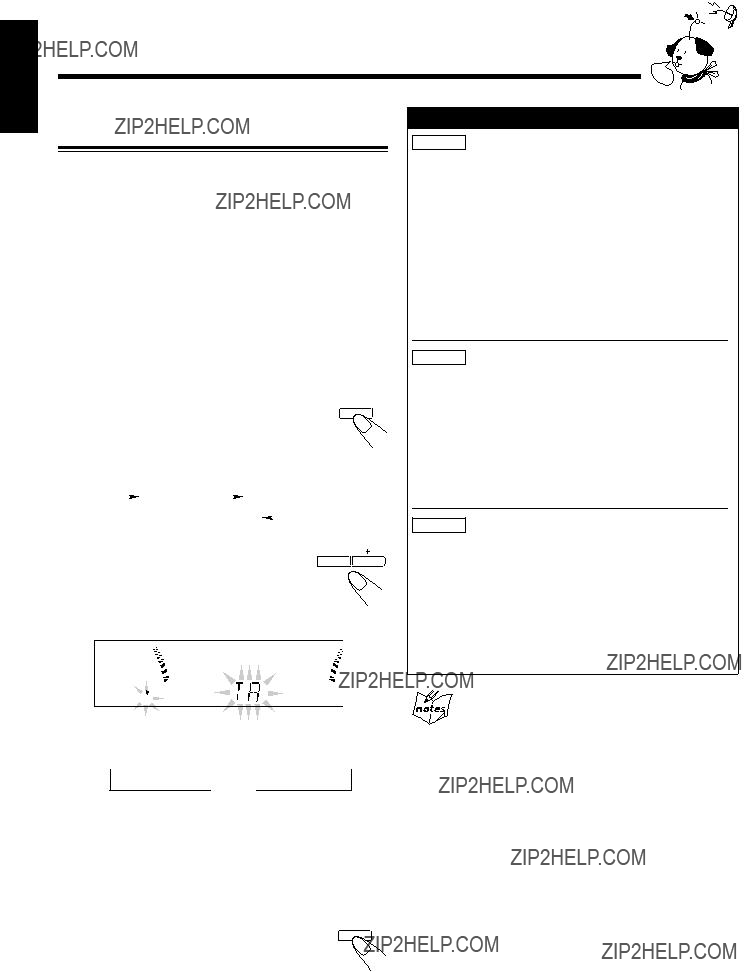
Front Panel
1 Disc trays
2  (standby/on) button and STANDBY lamp (10) 3 Display window
4 Remote sensor
5PANEL OPEN/CLOSE button (10)
Pressing this button also turns on the unit.
6 PHONES jack (10)
7TAPE 23button and lamp (19)
Pressing this button also turns on the unit.
8AUX button and lamp (10)
Pressing this button also turns on the unit.
9 Deck A cassette holder (19)
p 0EJECT button for deck A (19)
q0(CD tray open/close) buttons (16)
Pressing one of these buttons also turns on the unit.
wDisc number buttons and lamps (CD 1, CD 2, and CD 3) (16)
Pressing one of these buttons also turns on the unit.
e VOLUME control (10)
rCD 6(play/pause) button and lamp (16)
Pressing this button also turns on the unit.
tFM/AM button and lamp (13)
Pressing this button also turns on the unit.
y Deck B cassette holder (19)
u EJECT 0button for deck B (19)
Powered Rolling Panel
iPRESET ??? / + buttons (13)
4/ ??(reverse search/forward search) buttons (10, 12, 17, 24, 25)
o REVERSE MODE button (19, 23, 24) ; REC START/STOP button (22, 24) a DUBBING button (23)
s CD REC START button (23, 24) d DECK A/B button (19)
f TIMER/CLOCK button (10, 25)
gSET button (10, 25)
SEA CONTROL button (12)
h 7(stop) button (16, 19)
jTUNING ??? / + buttons (13)
1/ ??(fast left/fast right) buttons (12, 17, 19) k PRO LOGIC/3 STEREO button (20)
l PROGRAM/RANDOM button (17, 18, 23) / EDIT button (24)
z REPEAT button (18)
x S.A.BASS (Signal Adaptive Bass) button and lamp (11) c SOUND MODE button (11)
v CANCEL button (10, 18, 25 ??? 27) DEMO button (9)
b RDS operation buttons (14)
??? DISPLAY MODE, PTY/EON, and SELECT ??? / + buttons
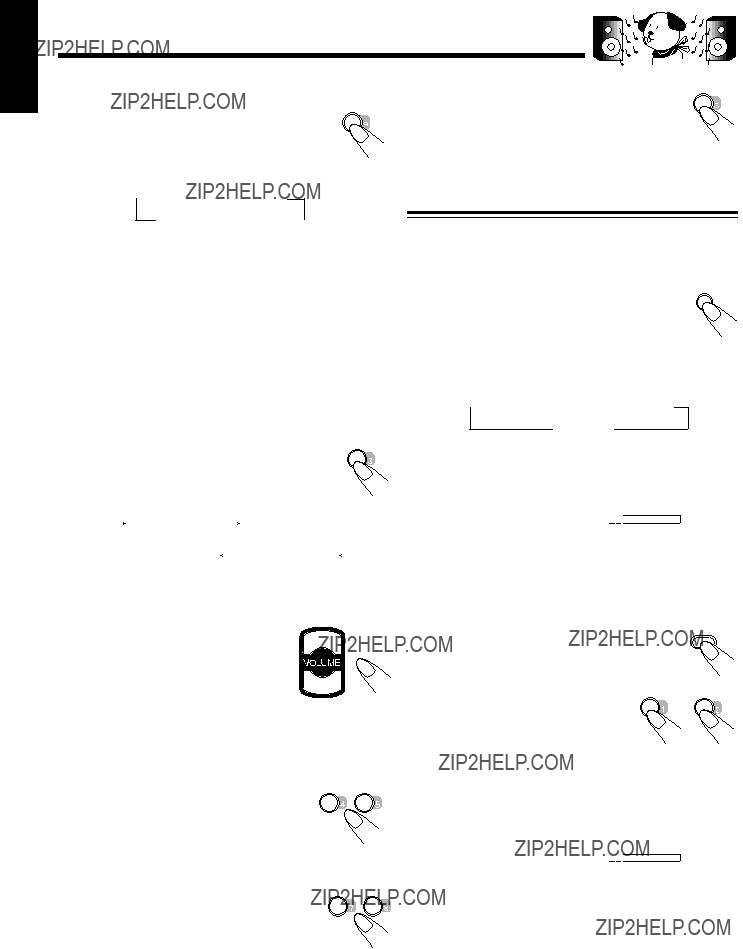
Display window
1Timer indicators
??? , SLEEP, REC, and DAILY indicators 2 Surround mode indicators
???PRO LOGIC and 3 STEREO indicators 3 Tuner operation indicators
???STEREO and MONO indicators
4Audio level indicator
SEA (Sound Effect Amplifier) pattern indicator
5 SOUND MODE indicator
6 Disc indicators
7 CD track number indicators
8 CD play mode indicators
??? REPEAT (ALL/1CD/1), PROGRAM, and RANDOM indicators
9Main display
???Shows the source name, frequency, etc. p RDS operation indicators
???RDS, EON, and TA/NEWS/INFO indicators q Tape operation indicators
???A/B (operating deck), ,
, 
 (reverse mode), and 23(tape direction) indicators


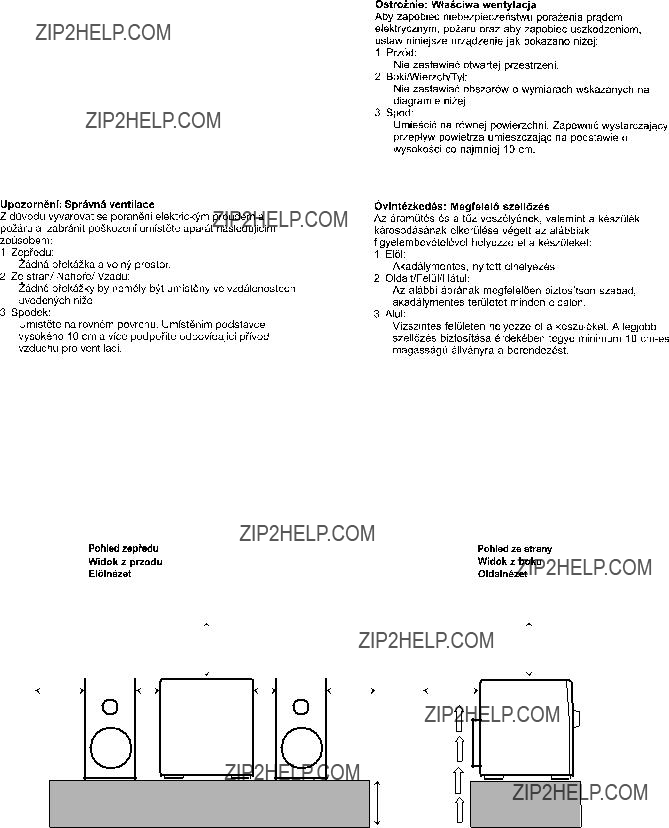
 switch in any position does not disconnect the mains line.

 /
/ 


 sources, or in a place subject to direct sunlight,


 (standby/on) button (10)

 is on.


 DAILY
DAILY  ON TIME
  REC
REC Clock
Clock ON TIME

 For private listening
 volume set to an extremely high level; otherwise, a sudden blast of sound can damage your hearing, speakers and/or headphones when you turn on the unit or start playing any source next time. REMEMBER you cannot adjust the volume level while the unit is on standby.
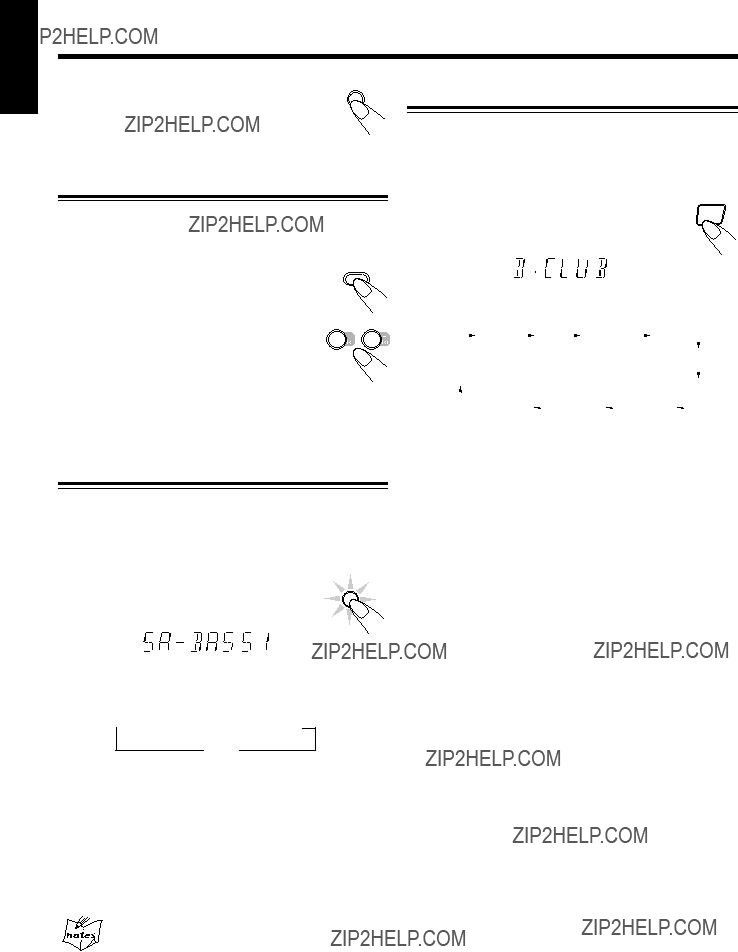
 SA-BASS1
 SA-BASS2


 the previously tuned station (either FM or
 AM ??? MW/LW). The Powered Rolling

 MHz
MHz
 TA
TA
 EON
EON TA
TA
 NEWS
NEWS
 INFO
INFO
 OFF
OFF (Canceled)
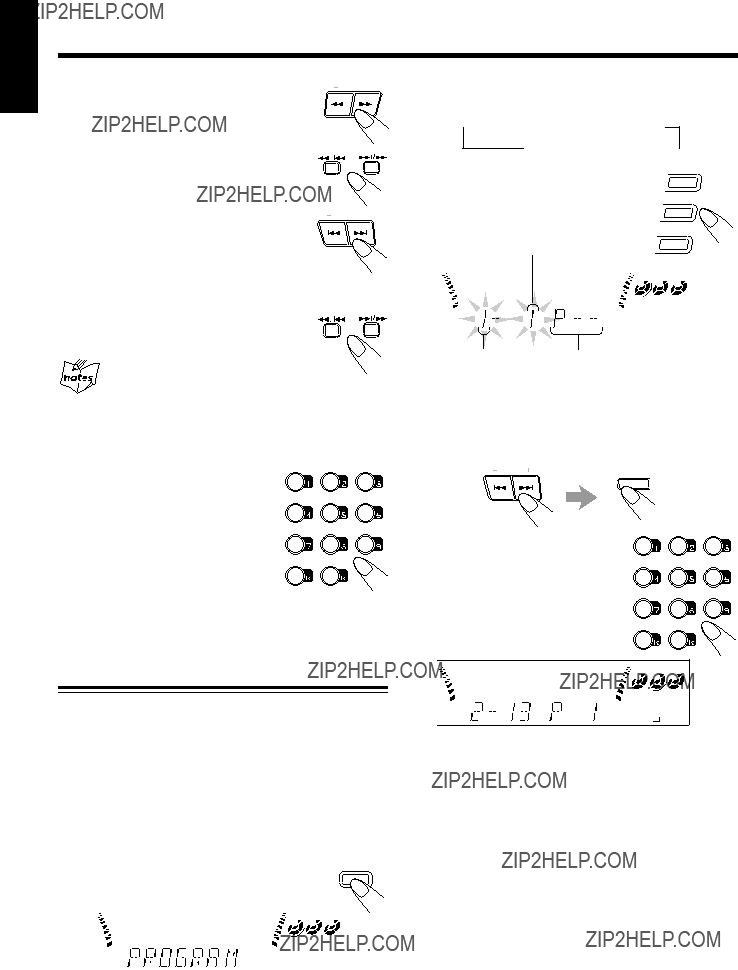


 Program Play
  Random Play

 Program Play
  Random Play
 REPEAT ALL
  REPEAT 1CD
 REPEAT 1


 recommended, since characteristic deterioration may occur and this tape easily jams in the pinch- rollers and the capstans.


 PHANTOM
 WIDE
WIDE
 DELAY1
  DELAY2
 DELAY3
 PRO LOGIC
  3 STEREO


 indicator lights up on the display and recording starts.
 indicator starts flashing on the display.
 indicator stops flashing and remains lit, and recording starts.


 CUT1
CUT1 CUT2
CUT2  CUT3
CUT3  CUT4
CUT4 


 .
.
 ), recording will stop when the front side of the tape is recorded.
 2
2 3
3 2
2 3
3 2
2 3
3 indicator lights up on the display.
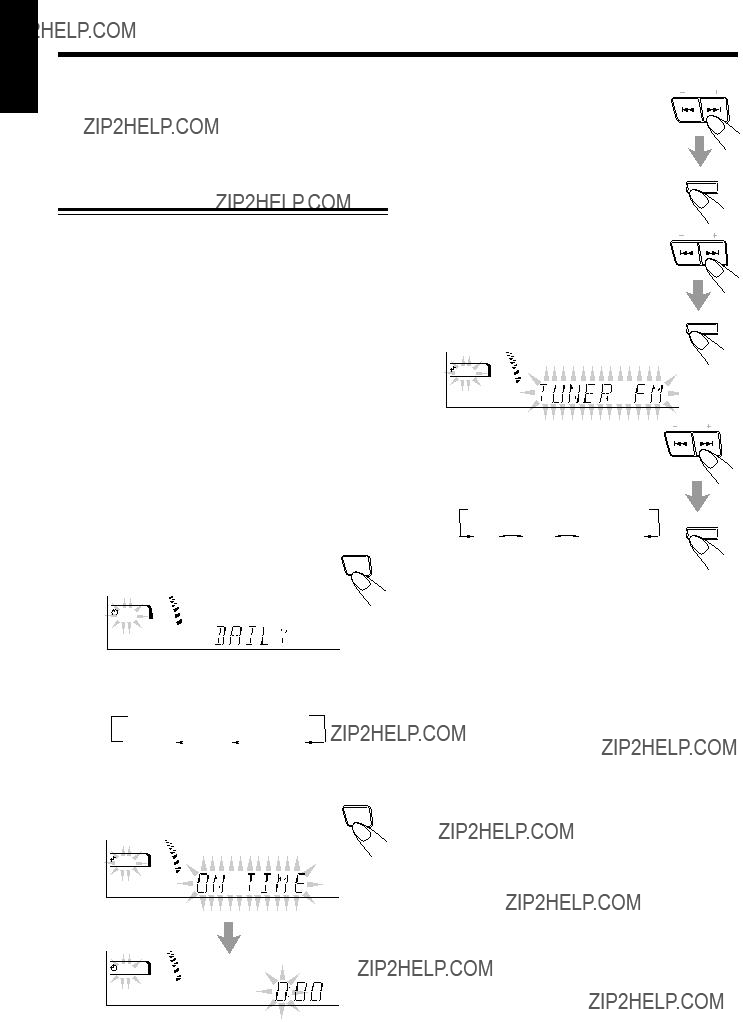
 indicator flashes just before the on- time, and continues flashing while the timer is operating). Then, when the
  DAILY
DAILY  ON TIME
  REC
REC TUNER FM
 TUNER AM
 DAILY
DAILY


 indicator flashes just before the
  DAILY
DAILY 
 to turn off the unit (on standby) if you have set the Daily Timer with the unit turned on.
 REC
REC 
 DAILY
DAILY  ON TIME
  REC
REC
 REC
REC


 20
20 30
30 60
60 90 120

 to turn off the unit (on standby) if necessary.