TV/VCR COMBO
USER???S GUIDE
FOR MODEL
TV-20240
(MONO)
(Illustration of TV-20240 and RM-C139)
IMPORTANT NOTE TO THE CUSTOMER:
Enter the serial number for your television
(located on the rear of the television cabinet) on the space below. Staple your sales receipt or invoice to the inside cover of this guide. Keep this user???s guide in a convenient place for future reference. Keep the carton and original packaging for future use.
5 C O N N E C T I O N S
CONNECTIONS CHECKLIST ??? READ ME FIRST!
The Connections Checklist ??? Read Me First! section of this guide is a list of ideas to keep in mind when you set out to perform your connections. It is designed to help us not-so-technically- advanced individuals. If you read this section, and can???t identify the plugs, connectors, and components you have, do not be afraid to seek help.
1)Always refer to the connection instructions in the user???s guide for your components ???rst! The manufacturer will provide the most detailed information about their products.
2)Know your jacks and plugs ??? most are color coded:
???Yellow plugs are Video connections
???Red plugs are Right Audio connections
???White or black plugs are Left Audio (Mono) connec- tions (if your camcorder is a stereo model, use a stereo-to-monaural conversion cable to connect to the Combo unit. Conversion cables may be purchased separately.)
3)Perform one hookup at a time. If you have many accessories to connect, make sure each connection is correct by checking to see that it works properly before attempting the next connection.
4)Unplug the power cord between each connection.
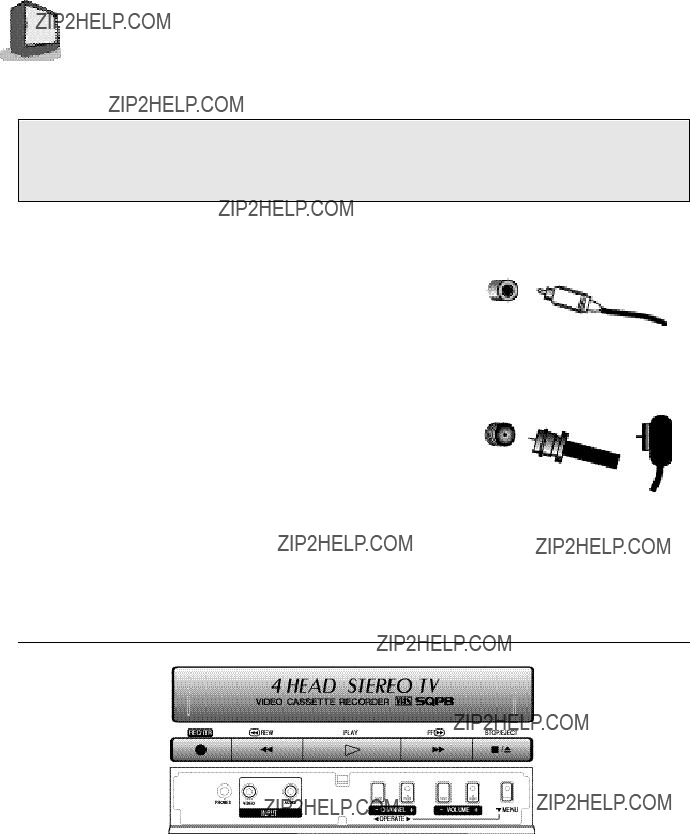
A/V input plug
RF Connectors
C O N N E C T I O N S 6
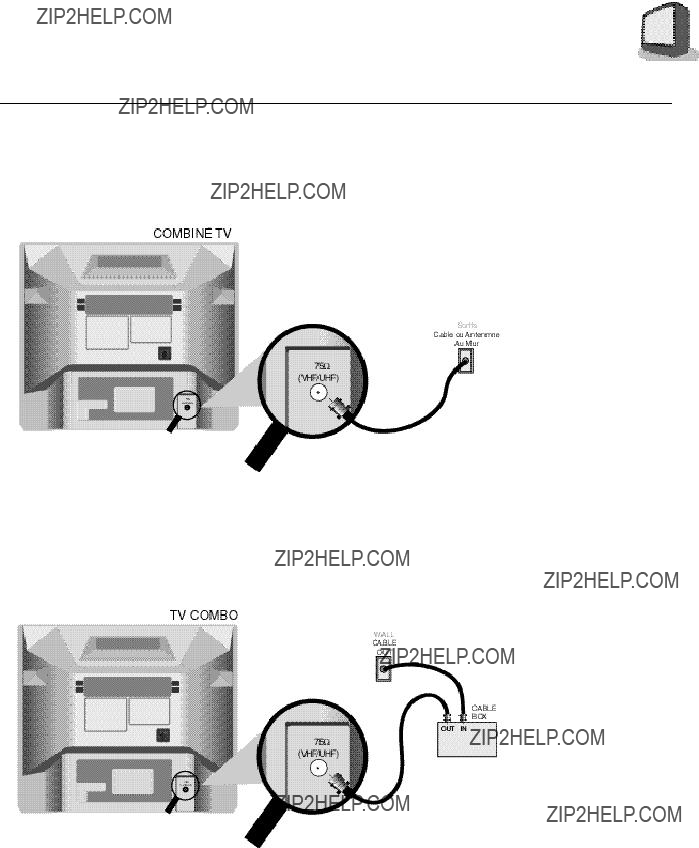
CABLE BOX CONNECTION
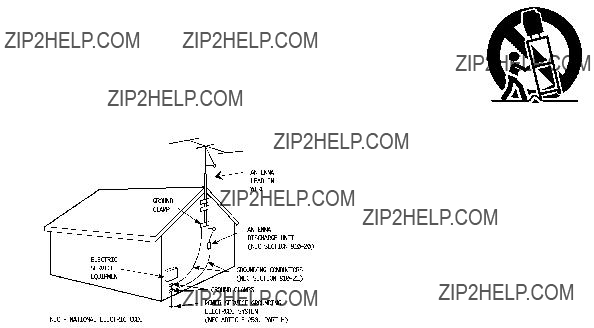
There are two basic types of antenna/cable hook-ups. They are easy to distinguish.
Type 1:
If you use an antenna or have a cable television system that does not require the use of a decoder box to receive signals, use the diagram below to connect your TV/VCR combo.
1)Connect the cable or antenna wire out from the wall in to the TV VHF/UHF input at the rear of the combo unit.
2)Plug the power cord into a nearby AC outlet.
Type 2:
If you use an cable box to access any or all channels, use the diagram below.
1)Connect the cable wire out from the wall in to the cable box RF input.
2)Connect an RF cable out from the cable box in to the TV VHF/UHF input.
3)Plug the power cord into a nearby AC outlet.
7 C O N N E C T I O N S
CONNECTING TO A CAMCORDER
You can connect a camcorder right to your TV/VCR combo using the input jacks located at the front of the unit.
1)Press on the PUSH mark on the front panel door to open it.
2)Connect a yellow video cable from the cam-corder output into the TV???s Video input jack.
3)Connect a white (or Black) Mono audio cable from the camcorder output into the TV???s audio input jack.
???Refer to the camcorder???s instructions for further information about the camcorder.
CONNECTING TO HEADPHONES/EARPHONES
You can connect earphones or headphones to your TV/VCR combo using the input jack at the front of the unit.
1)Press on the PUSH mark on the front panel door to open it.
2)Insert the earphone/headphone plug into the phones input jack.
??? Refer to the headphones or earphones instructions for further information.
G E T T I N G S T A R T E D 8
REMOTE CONTROL
RMRM-C139 -C139
TV-20240
CHANGING THE BATTERIES
Be sure to use only size AA batteries.
Push down on the remote's back cover and slide towards the bottom to remove it.
Insert the two supplied AA batteries, carefully noting the ???+??? and ????????? markings on the batteries and remote control. To avoid a short circuit, insert ????????? end ???rst.
Snap the cover back into place.
???If the remote control acts erratically, replace the batteries. Typical battery life is usually about one year.
???We recommend alkaline batteries for a longer battery life.
NOTE:
When you change the batteries, try to complete the task within 3 minutes. If it takes longer than 3 minutes, the remote control codes for your Cable box will have to be reset (page 10).
9 G E T T I N G S T A R T E D
POWER
???Press the POWER button on the remote control or the TV/VCR combo front panel. The On Timer lamp will glow red.
???Make sure that the TV/CATV switch on the remote is set to TV. Switch to CATV only if you plan to operate a cable box. If you switch to CATV you will not be able to operate the TV/VCR combo functions with the remote, only the cable box functions!
???To turn the power off, press the POWER button again. The On Timer lamp will go out.
???The On Timer lamp will glow green when the On/Off Timer is set to yes, even when the TV power is off.
ADJUSTING VOLUME
1Adjust the volume with the VOLUME ???/+ buttons on the TV/VCR combo front panel or on the remote control. Press the VOLUME ??? button to lower the volume. Press the VOLUME + button to raise the volume.
VOLUME 13
|||||||-------------------
2Press the MUTING button to instantly turn the volume off to zero. To restore the volume to the previous volume level, simply press the MUTING button again.
CHANGING CHANNELS
1 10 key direct access.
Press the numbers on the remote???s 10 key pad. For single-digit channel numbers press 0 then the number. For channels above 100, press the 100+ button plus the 2-digit number.
2 CHANNEL ???/+ button.
Press the CHANNEL ???/+ button, to scan the channels in order.
??? After you operate the Auto Tuner Setup (page 12), all of the blank, or empty, channels will be removed from scanning so that there is no noise or channel snow when you scan, only active channels.
3 Return.
Press the RETURN button to return to the previous channel. First, select a channel
(game #1). Then, select another channel (game #2) with the 10 key pad and push the RETURN button to ???ip directly back and forth.
R E M O T E P R O G R A M M I N G 10
SETTING THE CATV CODES
Many CATV brands have more than one code. If the ???rst code in the list does not work, try the other codes listed. If your CATV box does not respond to any of the codes listed for the manufacturer, use the remote control for theCATV box to operate it.
CABLE BOX OR SATELLITE SETUP
The remote is programmed with the CATV and Satellite codes for power on and off, 10 key, and channel up and down.
1)Determine the correct code from the ???CATV & Satellite Codes??? chart below.
2)Slide the 2-Way Mode Selector Switch to CATV.
3)Press and hold down the DISPLAY button.
4)Enter the 3-digit code with the 10 key pad while continuing to hold down the DISPLAY button.
5)Release the DISPLAY button.
6)Con???rm the operation of the cable box.
CATV & Satellite Codes
I N I T I A L S E T U P 12
AUTO TUNER SETUP
During Auto Tuner Setup, the TV will automatically scan through all available channels and memorize the active ones so that when you scan, you do not pick up weak or noisy channels.
Press any MENU button
To AUTO TUNER SETUP
To operate
TUNER MODE : CABLE AIR
START
To choose CABLE or AIR
To move to START
To start Auto Tuner Setup
NOW
PROGRAMMING!
48
The Programming takes approximately 1 to 2 minutes
PROGRAMMING OVER!
Note: Noise Muting will not work while Auto Tuner Setup is working.
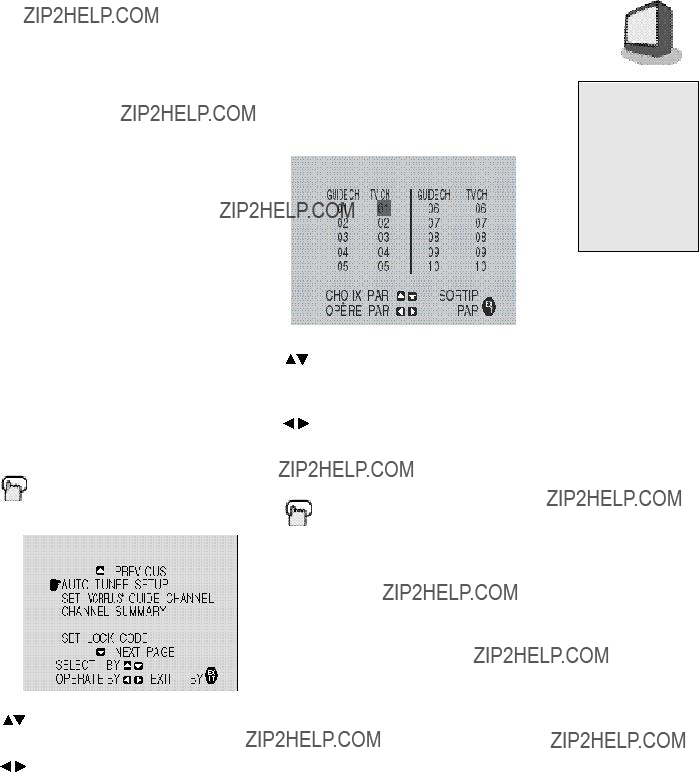
CHANNEL SUMMARY
You can add or delete channels from channel scanning. You can also lock out any ???unauthorized??? viewers from one or up to all 181 channels.
Press any MENU Button
To CHANNEL SUMMARY
To operate
Note: Noise Muting will not work while you are in the Channel Summary menu.
SCAN
You can manually set channels to scan that were too weak to be picked up during Auto Tuner Setup. Conversely, if a channel was too weak to receive a good picture but was picked up anyway, delete it by removing the ???. (If you have not performed the Auto Tuner Setup described in the previous column, please do so now.)
NOTES:
During Initial Setup, the TV will be programmed to only receive active channels. Once the channels are activated by the Auto Tuner Setup they will be includ- ed in Scan.
Some weak channels may be included or omitted during this procedure. You can add or delete any channels from scanning in the Channel Summary.
CHANNEL -/+ to select the channel
To the SCAN column
To add or delete from scan
EXIT when ???nished
Note: Channels set to scan will be marked with an ???.
Note: Some cable systems experience interference from radio frequencies on Cable Channel 95. If you like, you can delete this channel from scanning by removing the ???
15 P I C T U R E S E T T I N G S
NOTES:
If you do not move to the next setting with the up and down arrows, in approximately three seconds the screen will disappear and your preferences will be stored.
You can exit the Picture Settings menu at any time by pressing the EXIT button on the remote control.
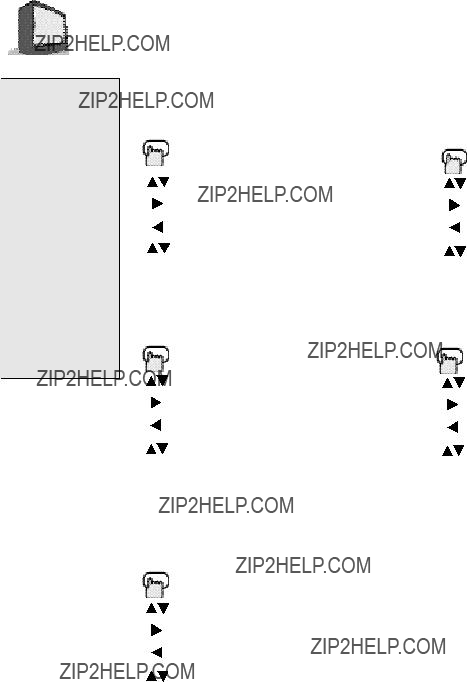
TINT
Tint allows you to adjust the levels of red and green in the picture.
Press any MENU button
To TINT
To accentuate green
To accentuate red
To move to the next
COLOR
Color allows you to adjust both the vividness and subtlety of the color.
Press any MENU button
To COLOR
To make colors more vivid
To subdue colors
To move to the next or previous
BRIGHT
Adjust the degree of light and dark in the picture.
Press any MENU button
To BRIGHT
To lighten the picture
To darken the picture
To move to the next or previous
DETAIL
Detail allows you to adjust the level of detail within the picture.
Press any MENU button
To DETAIL
To make the picture sharper
To make the picture smoother
To move to the previous
PICTURE
Picture allows you to adjust the range between black and white in the picture.
Press any MENU button
To PICTURE
To increase contrast
To decrease contrast
To move to the next or previous
S O U N D S E T T I N G S 16
BASS
The Bass level adjustment feature allows you to raise or lower the level of lower frequencies in the TV???s sound.
Press any MENU button
To BASS
To emphasize bass
To reduce bass
To move to next
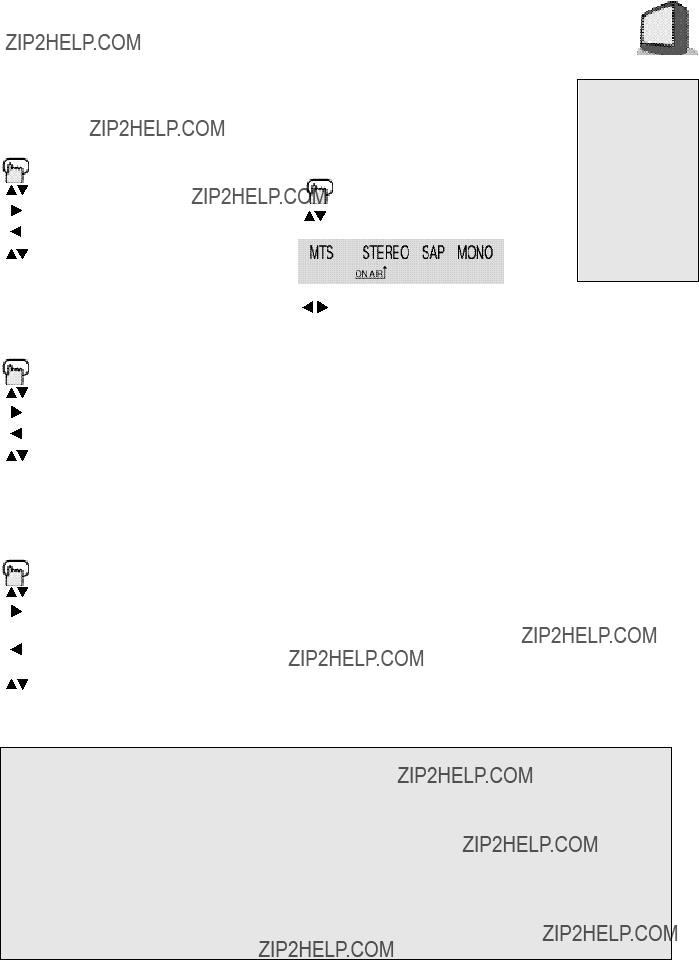
MTS (Multi-Channel
Television Sound)
MTS technology gives you a choice among stereo, mono, and Second Audio Programs (SAP).
Press any MENU button
To MTS
NOTES:
MTS has no effect on normal sound broadcasts.
You can exit the Sound Settings menu at any time by pressing the EXIT button.
TREBLE
The Treble level adjustment feature allows you to raise or lower the level of higher frequencies in the TV???s sound.
Press any MENU button
To TREBLE
To increase treble
To decrease treble
To move to next
BALANCE
The Balance adjustment feature allows you to center the TV???s sound to your needs.
Press any MENU button
To BALANCE
To shift the speaker balance to the right
To shift the speaker balance to the left
To move to next
Select the mode
(The ON AIR arrow tells you if the current signal contains Stereo or SAP)
Note: Keep the TV in STEREO mode to get the fullest sound quality.
Note: SAP will allow you to hear an alternative soundtrack, if available.
Note: Choose MONO to reduce excess noise in a program or channel.
Some Sound Advice
You can tell if a program is broadcast in stereo by the position of the ON AIR arrow in the MTS menu. Unfortunately, it is common for some cable companies to squash the transmission of stereo programs to mono because they only have mono equipment. If connected to a cable system, the sound is at the mercy of that cable company ??? if they broadcast in mono, you receive mono sound regardless of the original stereo programming.
Fortunately, most programs that are broadcast in stereo are aired on the major television networks. If you connect your TV to an antenna instead of cable, and set the tuner mode in the Auto Tuner Setup to ???Air??? instead of ???Cable,??? you will be able to pick up stereo broadcasts in stereo.
31 L I M I T E D W A R R A N T Y
For Canadian model televisions, see separate sheets for Warranty/Garantie and
JVC Authorized Service Centers in Canada.
JVC COMPANYOF AMERICAwarrants this product and all parts thereof, except as set forth below ONLYTO THE ORIGINALPURCHASER AT RETAIL to be FREE FROM DEFECTIVE MATERIALS AND WORKMANSHIPfrom the date of original retail purchase for the period shown below (the ???Warranty Period???) (PICTURE TUBE is covered for Two (2) years.)
THIS LIMITED WARRANTY IS VALID ONLY IN THE FIFTY (50) UNITED STATES,THE DISTRICT OF COLUMBIA AND COMMONWEALTH OF
PUERTO RICO.
WHAT WE WILL DO:
If this product is found to be defective within the warranty period, JVC will repair or replace defective parts at no charge to the original owner. Such repair and replacement services shall be rendered by JVC during regular business hours at JVC authorized service centers. Parts used for replacement are warranted only for the remainder of this Warranty Period. All products and parts thereof may be brought to a JVC authorized service center on a carry-in basis. Televisions with a screen size of 25 inches and larger may be covered on an in-home basis where such service is available.
WHAT YOU MUST DO FOR WARRANTY SERVICE:
To determine if in-home service is available in your area, either contact the selling dealer (retailer) or call 1-800-537-5722 to locate the nearest JVC authorized service center. Service locations can also be obtained from our website http://www.jvcservice.com. In-home service, if available, will require clear access to the Television by the service representatives. If in-home service is not available, carry in service will be provided.
If service is not locally available, box the product carefully, preferably in its original carton,and ship, insured,with a copy of your bill of sale plus a letter of explanation of the problem to the nearest JVC Factory Service Center, the name and location which will be given to you by the toll free number.
If you have any questions concerning your JVCProduct,please contact our Customer Relations Department.
render such service, or if affixed to any attachment not provided with the products, or if the model or serial number has been altered, tampered with,defaced or removed;
2)Initial installation, installation and removal from "built-in" entertainment centers and other mounting systems;
3)Operational adjustments covered in the Owner???s Manual,normal maintenance, video and audio head cleaning;
4)Damage that occurs in shipment,due to an act of God,and cosmetic damage;
5)Signal reception problems and failures due to line power surge;
6)Video Pick-up Tubes/CCD Image Sensor, Cartridge, Stylus (Needle) are covered for 90 days from the date of purchase;
7)Accessories;
8)Batteries (except that Rechargeable Batteries are covered for 90 days from date of purchase.)
There are no express warranties except as listed above.
THE DURATION OF ANY IMPLIED WARRANTIES,INCLUDING THE IMPLIED WARRANTY OF MERCHANTABILTY, IS LIMITED TO THE DURATION
OF THE EXPRESS WARRANTY HEREIN.
JVC SHALL NOT BE LIABLE FOR THE LOSS OF USE OF THE PRODUCT, INCONVENIENCE,OR ANY OTHER DAMAGES,WHETHER DIRECT,
INCIDENTAL OR CONSEQUENTIAL (INCLUDING,WITHOUT LIMITATION, DAMAGE TO TAPES, RECORDS OR DISCS) RESULTING FROM THE
USE OF THIS PRODUCT, OR ARISING OUT OF ANY BREACH OF THIS WARRANTY, ALL EXPRESS AND IMPLIED WARRANTIES, INCLUDING
THE WARRANTIES OF MERCHANTABILITY AND FITNESS FOR PARTICULAR PURPOSE, ARE LIMITED TO THE WARRANTY PERIOD SET
FORTH ABOVE.
Some states do not allow the exclusion of incidental or consequential damages or limitations on how long the warranty lasts, so these exclusions or limitations may not apply to you.This warranty gives you speci???c legal rights and you may also have other rights which vary state to state.
http://www.jvcservice.com
REFURBISHED PRODUCTS CARRY A SEPARATE WARRANTY. THIS WARRANTY DOES NOT APPLY FOR DETAILS OF
REFURBISHED PRODUCT WARRANTY. PLEASE REFER TO THE REFURBISHED PRODUCT WARRANTY INFORMATION
PACKAGED WITH EACH REFURBISHED PRODUCT.
For customer use:
Enter below the Model No.and Serial No. which is located either on the rear, bottom or side of the cabinet. Retain this information for future reference .
HOW TO LOCATE YOUR JVC SERVICE CENTER
TOLL FREE: 1 (800) 537-5722
http://www.jvcservice.com
Dear Customer;
In order to receive the most satisfaction from your purchase, read the instruction booklet before operating the unit. In the event that repair is necessary, or for the address nearest your location, please refer to the factory service center list below or within the Continental United States, call 1-800-537-5722 for your authorized servicer. Remember to retain your Bill of Sale for Warranty Service.
??? JVC
JVC SERVICE & ENGINEERING
COMPANY OF AMERICA
DIVISION OF JVC AMERICAS CORP.
FACTORY SERVICE CENTER LOCATIONS
A U T H O R I Z E D S E R V I C E C E N T E R S 32
QUALITYSERVICE
Dear customer;
In order to receive the most satisfaction from your purchase, read this guide before operating the unit, and before calling for service make sure you check the Troubleshooting pages at the end of this book. In the event that repair is necessary, or for the address nearest you, please refer to the factory service center list below, or within the continental United States, call the toll free number above for an authorized service center. Remember to retain your bill of sale for warranty service.
Sophisticated electronic products may require occasional service. Just as quality is a keyword in the engineering and production of the wide array of JVC products, service is key to maintaining the high level of performance for which JVC is world famous. The JVC service and engineering organization stands behind our products.
NATIONAL HEADQUARTERS
JVC SERVICE & ENGINEERING COMPANY OF AMERICA
DIVISION OF JVC AMERICAS CORP.
1700 Valley Road
Wayne, New Jersey 07470
IF YOU SHIP THE PRODUCT
Pack your JVC unit in the original carton or one of equivalent size and strength. Enclose, with the unit, a letter stating the problem or symptom that exists and also a copy of the receipt or bill of sale you received when you purchased your JVC unit. Print your home return address on the outside and inside of the carton, Send to the appropriate JVC Factory Service Center as listed above.
Don???t service it yourself.
CAUTION
To prevent electrical shock, do not open the cabinet. No user serviceable parts inside. Refer to quali???ed service personnel.
To purchase accessories for your JVC product, you may contact your local JVC Dealer. Or from the 48 Continental United States call toll free : 1 (800) 882-2345


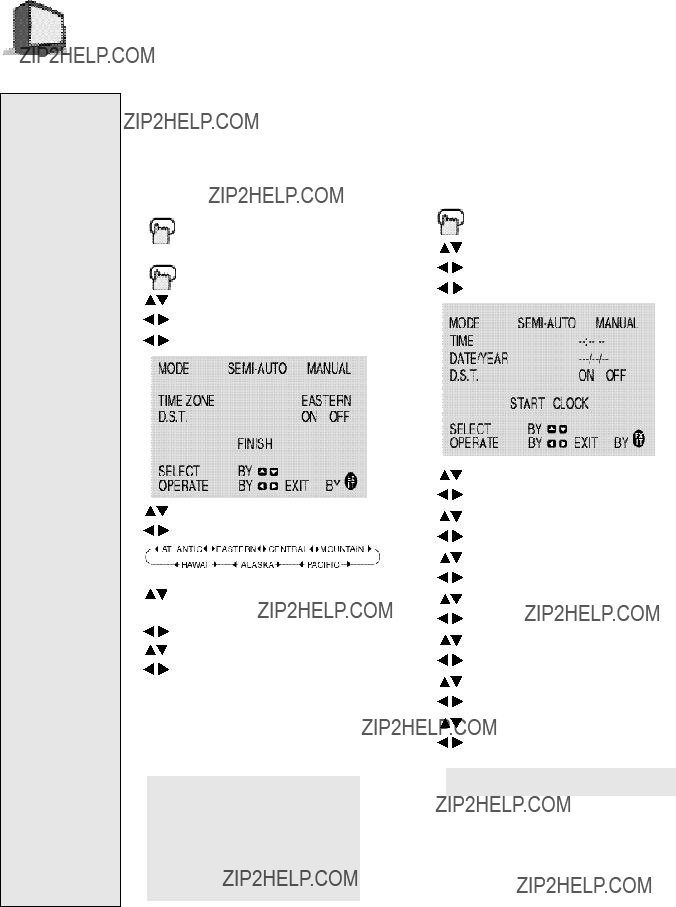

 Display
 ) buttons to move to the item and the (
 ) buttons to correct. Once corrected press VCR P


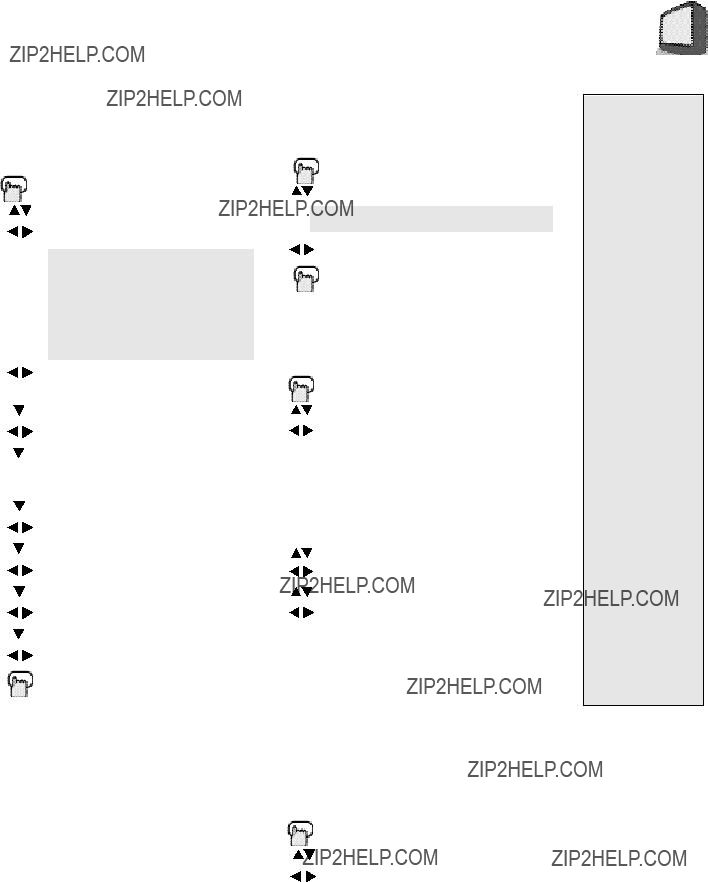
 DISPLAY
 TIME
TIME  CHANNEL
  VCR
VCR  OFF
OFF


 CINEMA
  GAME
GAME  STANDARD


 )
)
 CC
CC  TEXT
TEXT  OFF
OFF
 TV
TV  LINE
LINE