(or ??/ ??
on the remote control).
played once.
To skip the currently playing track, press ??
SELECT
The tracks are played at random. Random play ends when all the tracks are
Press CD
????8.
3
Continuous Play
Program Play
Random Play
???
Load CDs.
1
(Continuous play)
Each time you press the button, CD play mode changes as follows:
??? If the current playing source is not the CD player, press CD ????8, then 7 before going to the next step.
2 Press PROGRAM/RANDOM repeatedly until ???RANDOM??? appears on the display.
1 2 3
You have tried to program a track from an empty tray, or a track number that does not exist on the CD (for example, selecting track 14 on a CD that only has 12 tracks). Such entries are ignored.
Playing at Random ??? Random Play
The tracks of all loaded CDs will play at random.
??? To use Repeat play for Random play, press REPEAT after starting Random play.
To erase the entire program before or after play, press 7
???PROGRAM??? appears on the display.
??? Ejecting a CD will also erase the track numbers programmed from the ejected CD.
If you try to program a 33rd track
???FULL??? will appear on the display.
If your entry is ignored
To check the program contents
To modify the program
Before playing, you can erase the programmed tracks shown on the display by pressing CANCEL.
???Each time you press the button, the programmed track shown on the display is erased from the program.
To add tracks in the program before play, simply select the track numbers you want to add by following step 4 of the programming procedure on page 14.
To stop during play, press 7 .
.
???Random play also stops when one of the disc trays is opened.
To exit from Random play mode, press PROGRAM/
RANDOM repeatedly again before or after play so that the unit enters another play mode.
Even if you press 4(or 1 / 4on the remote control)
You cannot go back to the previous tracks during Random play.
???If you press ??(or ?? / ?? on the remote control), you can go to next random tracks.
???RANDOM PLAY starts playing from the current tray and then subsequently to the next tray when all the tracks from the current tray are finished.
Repeating Tracks or CDs ??? Repeat Play
 . You can have all the CDs, the program or the individual track currently playing repeat as many times as you like.
To repeat play, press REPEAT during or before playing. To use Repeat play for Program play and Random play, press the button after starting playback.
??? Each time you press the button, Repeat play
mode changes as follows, and the following indicator lights
REPEAT ALL: Repeats all the tracks on all the CDs (continuously or at random), or all the tracks in the program.
REPEAT 1CD*: Repeats all the tracks on one CD.
REPEAT 1: Repeats one track on one CD.
* REPEAT 1CD is not used for Program play and Random play.
To cancel Repeat play, press REPEAT repeatedly until the REPEAT indicator (REPEAT ALL, REPEAT 1CD, or REPEAT 1) goes off from the display.
??? Repeat play is also canceled when you select Program play or Random play.
Prohibiting Disc Ejection ??? Tray Lock
You can prohibit CD ejection from the unit and can lock CDs.
??? This operation is possible only using the buttons on the unit.
To prohibit disc ejection, press 0for any disc tray while holding 7 . (If there is any disc tray opened, close it first.) ???LOCKED??? appears for a while, and the loaded CDs are locked.
To cancel the prohibition and unlock the CDs, press 0for any disc tray while holding 7 .
.
???UNLOCKED??? appears for a while, and the loaded CDs are unlocked.
If you try to eject CDs
???LOCKED??? appears to inform you that the Tray Lock is in use.
??? 17 ???
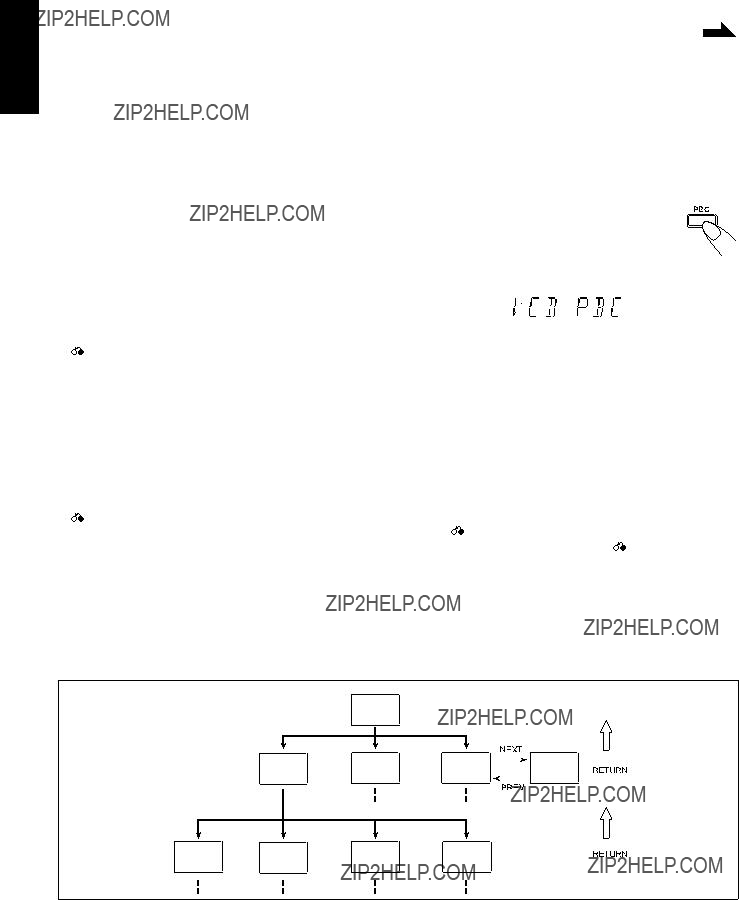
PBC (Playback Control) allows you to enjoy menu -driven operation and high resolution still images having a resolution four times greater than video pictures.
Menu-driven playback
You can interact with the screen using a menu display to select and play an entry.
High -resolution still image display
You can display high-quality images four times clearer than video pictures.
TV Screen
Main menu
1. ......
2. ......
3. ......
Basic flow of Menu Play Operation
A selection menu is shown when you start playing a video CD with PBC. The menu shows a list of items to select. Some discs may show moving pictures or a divided screen.
???When a list of items appears, you can select the number of the item you want to play back.
???When moving pictures appear, you can select a moving picture by pressing 1/4/??/?? or number buttons while the moving picture you want to view is being played back.
???When the menu appears after the item you have selected finishes playing, you can select another item that you want to view next.
???After playback, press 7 to go back to the previous screen. Each time you press the button, you will go back by one screen.
???If you want to stop Menu Play, press and hold 7 for more than 2 seconds. Some discs may return you to the menu screen shown before playback.
Maintenance
To get the best performance from the unit, keep your discs, tapes, and mechanism clean.
Handling discs
??? Remove the disc from its case by holding it at the edge while pressing in the center hole lightly.
??? Do not touch the shiny surface of the disc, or bend the disc.
??? Put the disc back in its case after use to prevent warping.
??? Be careful not to scratch the surface of the disc when placing it back in its case.
??? Avoid exposure to direct sunlight, temperature extremes, and moisture.
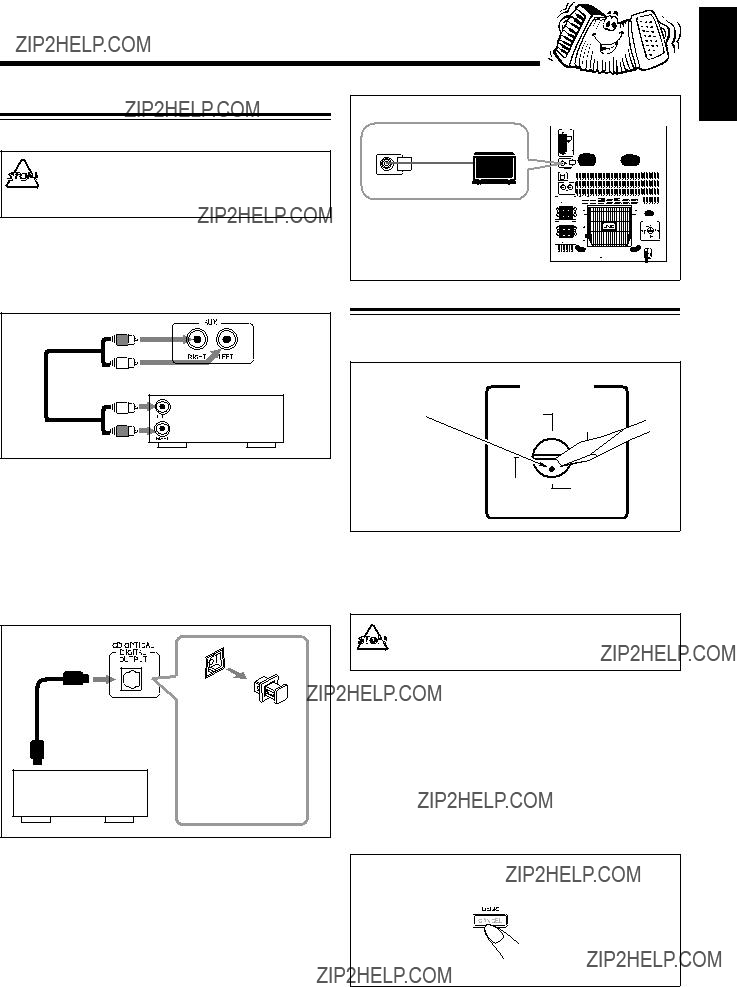
To clean the disc
Wipe the disc with a soft cloth in a straight line from center to edge.
Handling cassette tapes
??? If the tape is loose in its cassette, take up the slack by inserting a pencil in one of the reels and rotating.
???If the tape is loose, it may get stretched, cut, or caught in the cassette.
??? Be careful not to touch the tape surface.
??? Avoid storing tapes in the following places:
??? In dusty places
???In direct sunlight or heat
???In moist areas
???Near a magnet
DO NOT use any solvent ??? such as conventional 

 record cleaner, spray, thinner, or benzine ??? to clean the disc.
??? 29 ???
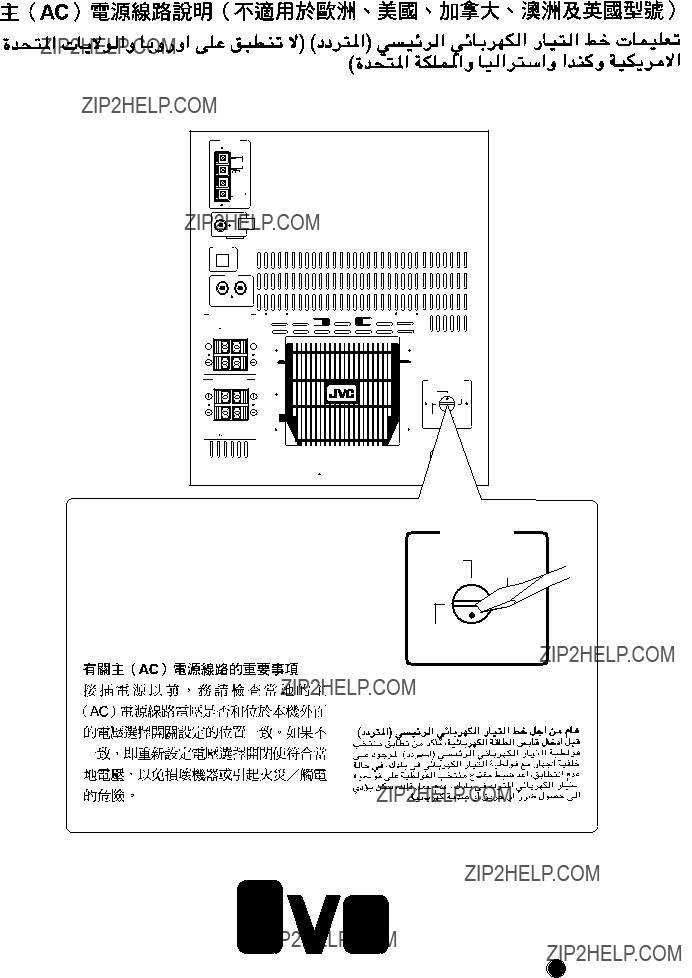
Mains (AC) Line Instruction (not applicable for Europe, U.S.A., Canada, Australia, and U.K.)
IMPORTANT for mains (AC) line
BEFORE PLUGGING IN, do check that your mains (AC) line voltage corresponds to the position of the voltage selector switch provided on the outside of this equipment and, if different, reset the voltage selector switch, to prevent damage or risk of fire/electric shock.
VOLTAGE
SELECTOR
127V 230V -240V
110V  220V
220V
 EN, CH, AR
VICTOR COMPANY OF JAPAN, LIMITED
JVC XX00MWMFLEJEM
 ON SCREEN

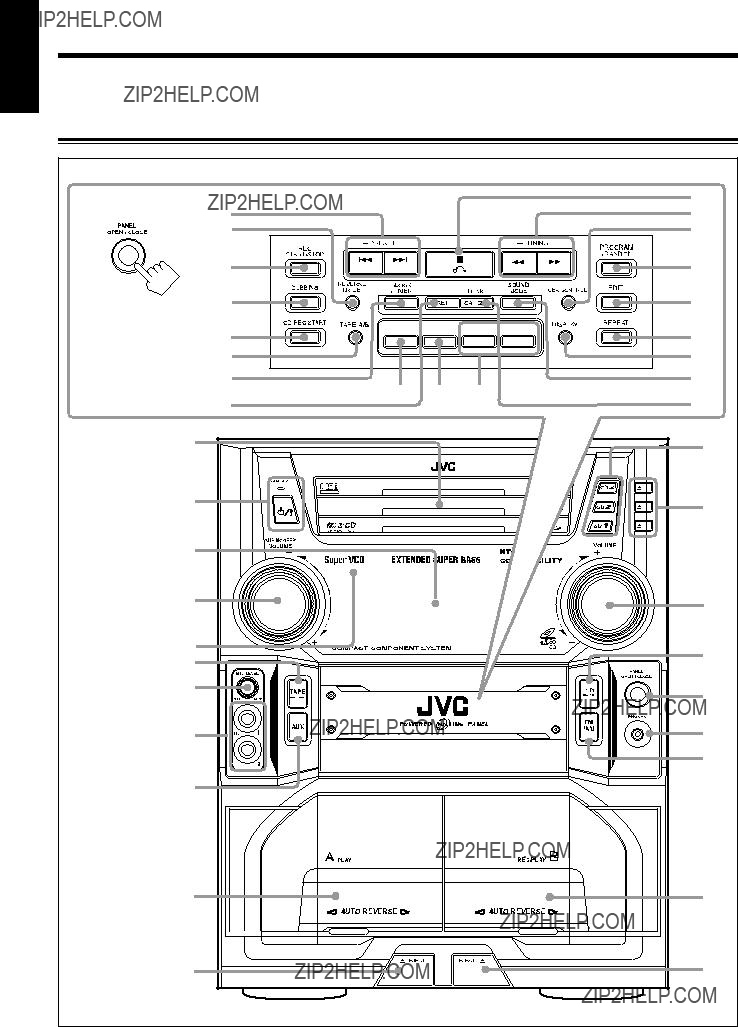
 (On/Standby) button and STANDBY lamp (9)
  (stop) button (13 ??? 23)
 (Timer) indicators
 (reverse mode), A/B (operating deck),
 buttons (13 ??? 19)


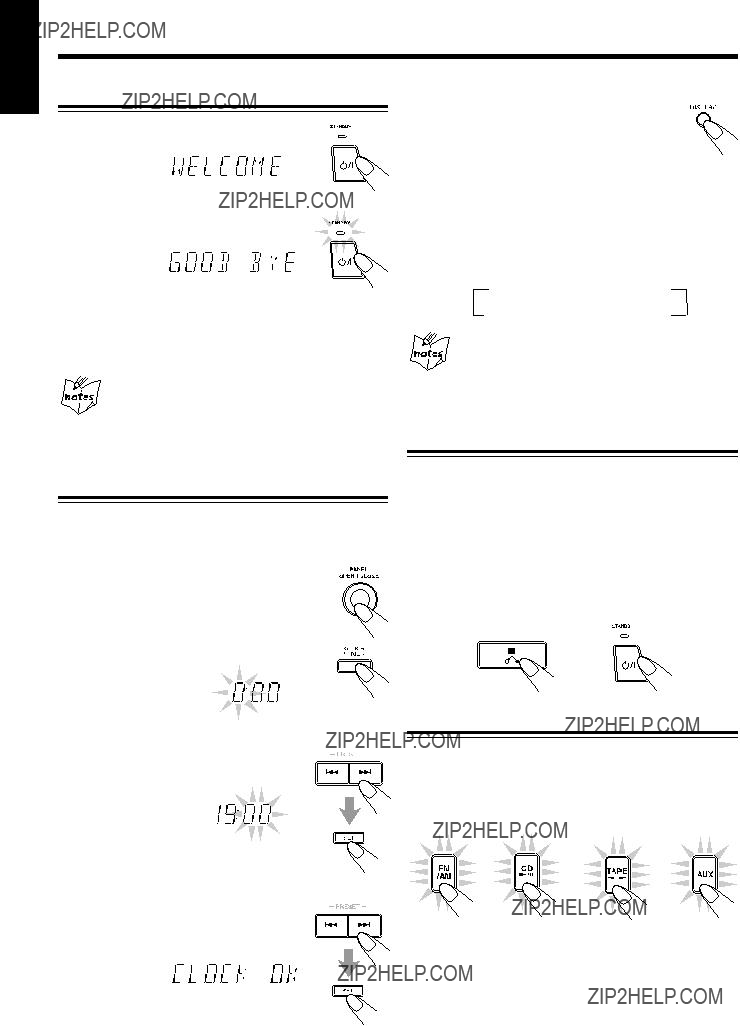


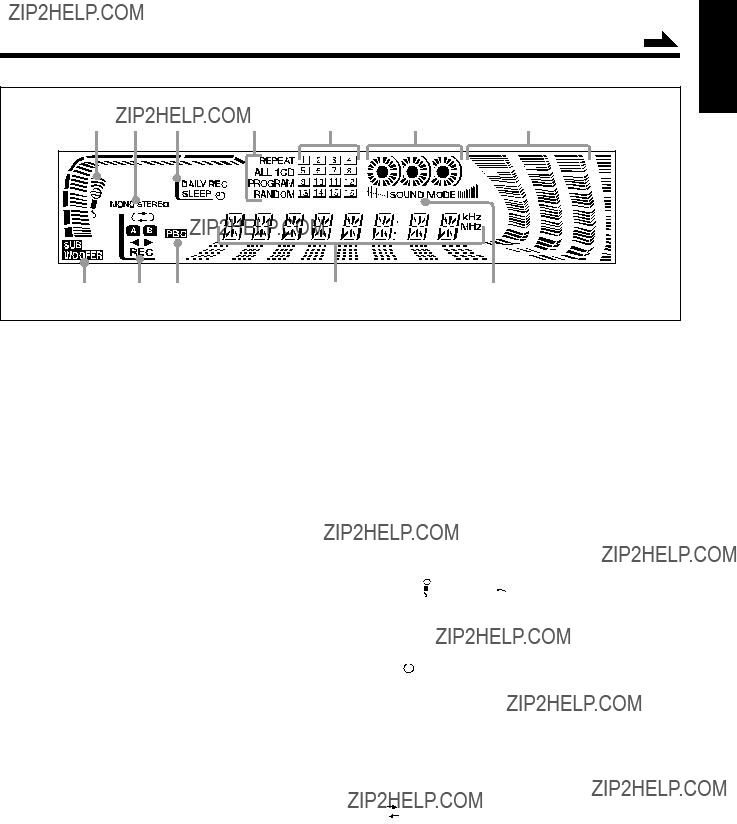
 DAILY
DAILY  ON TIME
  REC
REC Clock
Clock ON TIME
 while holding down
  .
.

 volume set to an extremely high level; otherwise, a


 MHz
MHz


 Program Play
  Random Play
 before going to the next step.
 1
1  2
2  3
3 
 1
1  2
2  3
3 


 \
\


 button to stop playing.
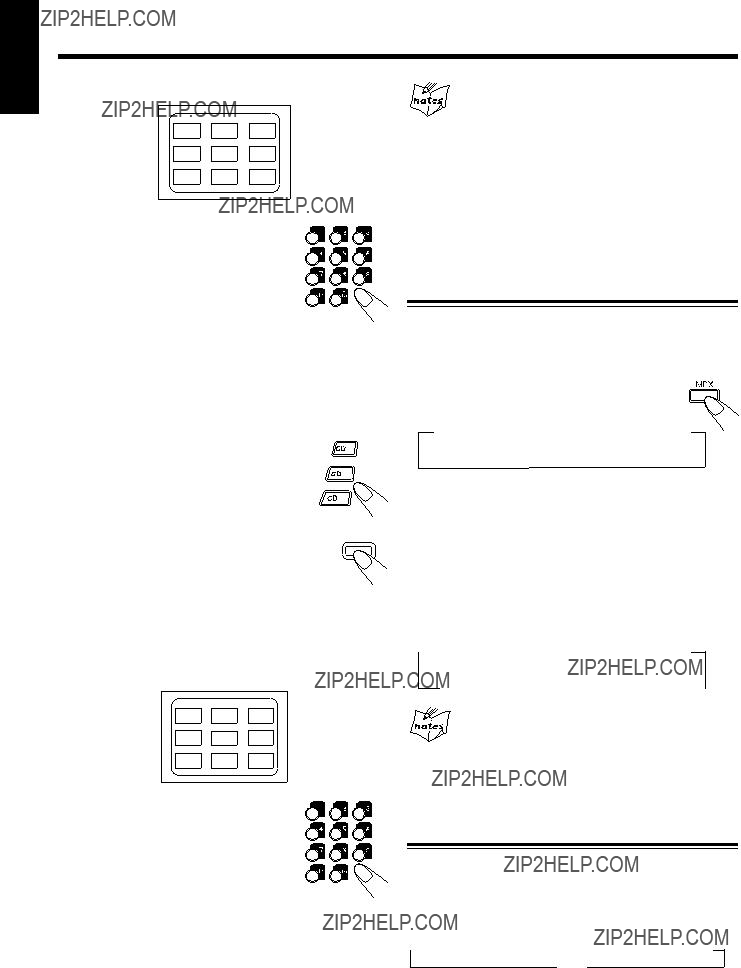
 .
. button.
 NORMAL
  Lch MONO
  Rch MONO
 STEREO 1
  STEREO 2
  MONO 1
 MONO 3
 MONO 2
 SUBTITLE 1
  SUBTITLE 2
  SUBTITLE 3
  SUBTITLE 4


 recommended, since characteristic deterioration may occur and this tape easily jams in the pinch- rollers and the capstans.
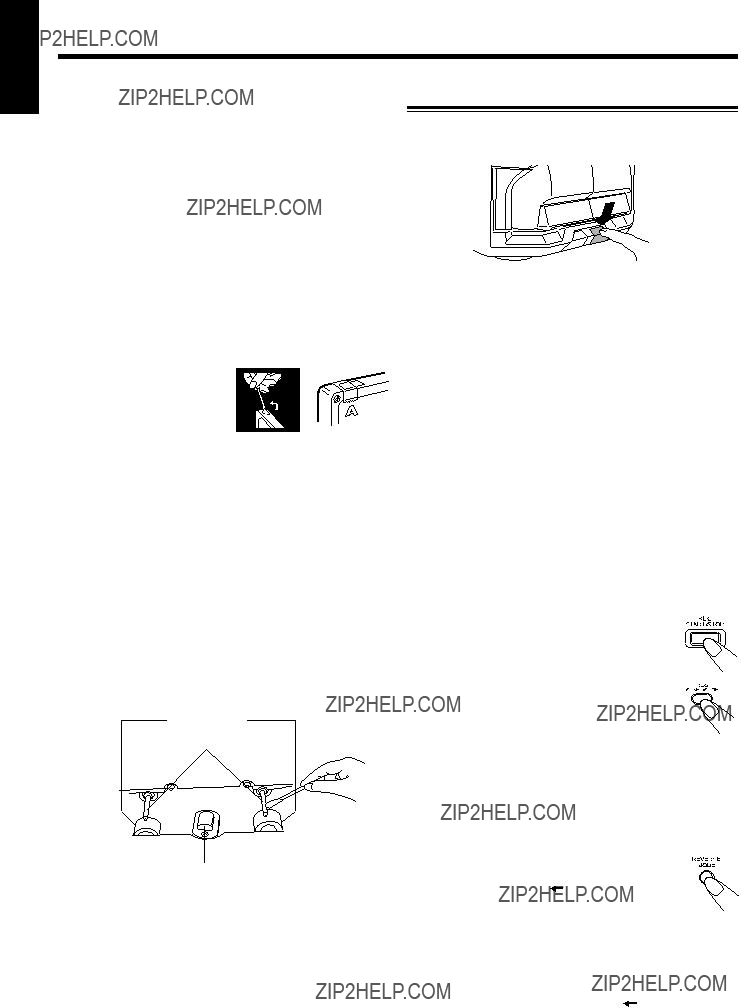
 to change the tape direction.
 .
.


 CUT1
CUT1 CUT2
CUT2  CUT3
CUT3 
 .
.


 before going to the next step.
 1
1  2
2  3
3 
 1
1  2
2  3
3 
 1
1  2
2  3
3 

 .
.
 ), recording will stop when the front side of the tape is recorded.
 or REC START/STOP so that a
  and REC START/STOP.
 ) lights up on the display.
 VOLUME controls as you sing into


 ) indicator lights up on the display.
 Each time you press the button, the echo level
 ECHO 1
 ECHO 2
  ECHO 3
 (Canceled)
 .
.
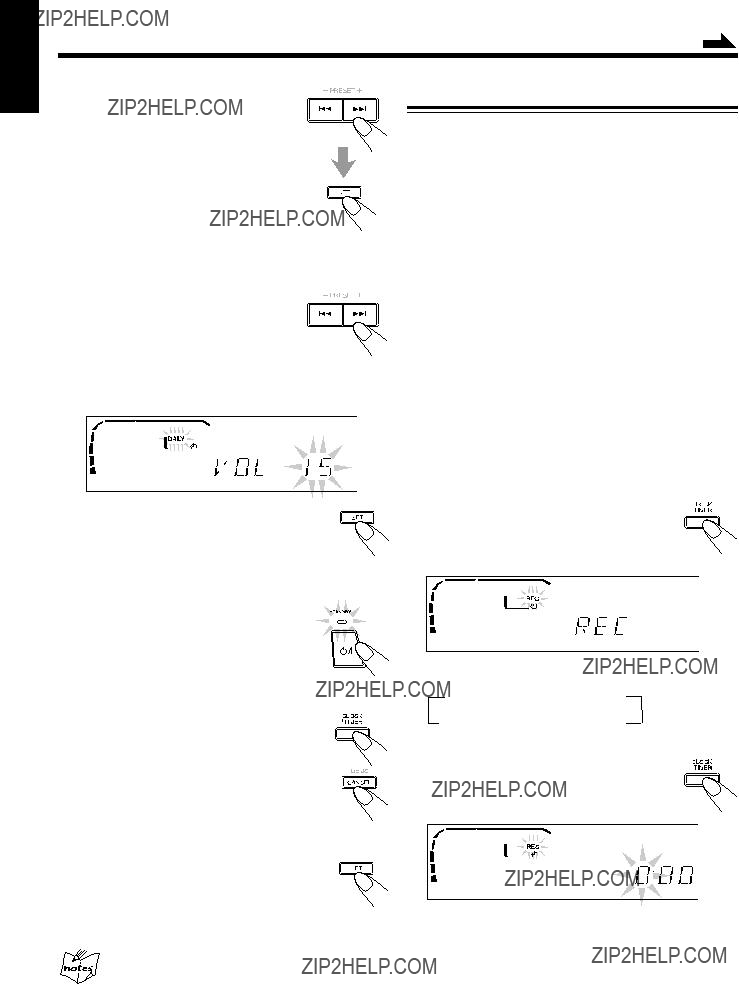
 indicator flashes just before the
  DAILY
DAILY  ON TIME
  REC
REC Clock
Clock ON TIME
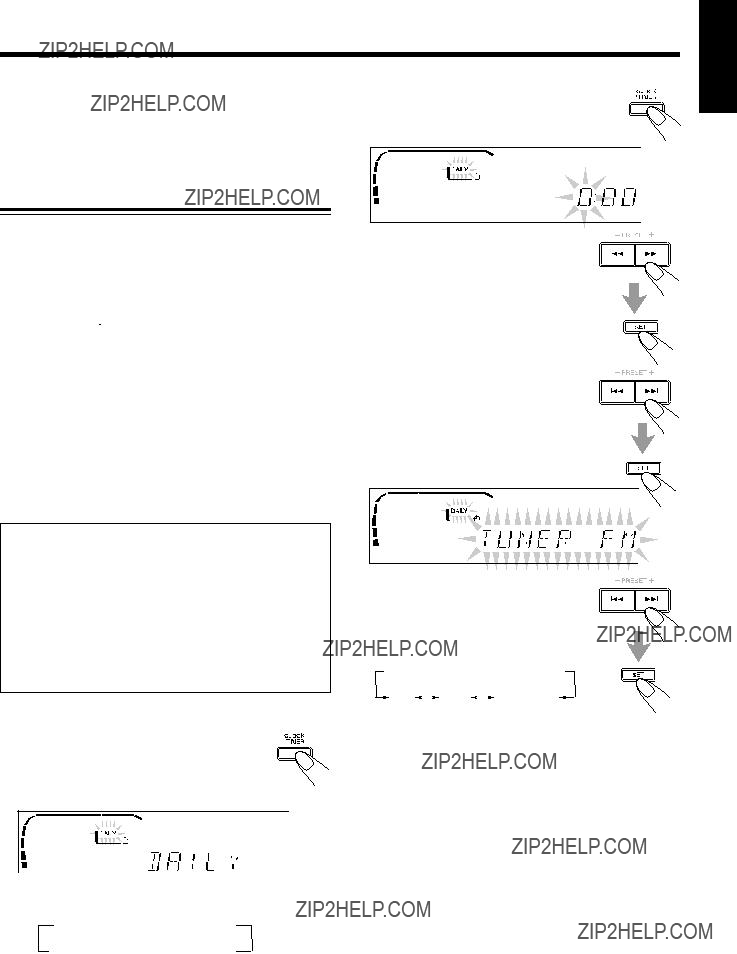
 TUNER FM
 TUNER AM
 to turn off the unit (on standby) if you have set the Daily Timer with the unit turned on.
 indicator flashes just before the
  DAILY
DAILY  ON TIME
  REC
REC Clock
Clock ON TIME

 The REC (Recording Timer) indicator stops flashing and remains lit. The settings you
 to turn off the unit (on standby) if necessary.
 10
10 20
20 30
30 60
60  90
90  120
120