i
IBM SPSS Modeler 15 User???s Guide
i
IBM SPSS Modeler 15 User???s Guide
Note: Before using this information and the product it supports, read the general information under Notices on p. 249.
This edition applies to IBM SPSS Modeler 15 and to all subsequent releases and modi???cations until otherwise indicated in new editions.
Adobe product screenshot(s) reprinted with permission from Adobe Systems Incorporated.
Microsoft product screenshot(s) reprinted with permission from Microsoft Corporation.
Licensed Materials - Property of IBM
?? Copyright IBM Corporation 1994, 2012.
U.S. Government Users Restricted Rights - Use, duplication or disclosure restricted by GSA ADP Schedule Contract with IBM Corp.

Preface
IBM?? SPSS?? Modeler is the IBM Corp.
SPSS Modeler???s visual interface invites users to apply their speci???c business expertise, which leads to more powerful predictive models and shortens
About IBM Business Analytics
IBM Business Analytics software delivers complete, consistent and accurate information that
As part of this portfolio, IBM SPSS Predictive Analytics software helps organizations predict future events and proactively act upon that insight to drive better business outcomes. Commercial, government and academic customers worldwide rely on IBM SPSS technology as a competitive advantage in attracting, retaining and growing customers, while reducing fraud and mitigating risk. By incorporating IBM SPSS software into their daily operations, organizations become predictive enterprises ??? able to direct and automate decisions to meet business goals and achieve measurable competitive advantage. For further information or to reach a representative visit http://www.ibm.com/spss.
Technical support
Technical support is available to maintenance customers. Customers may contact Technical Support for assistance in using IBM Corp. products or for installation help for one of the supported hardware environments. To reach Technical Support, see the IBM Corp. web site at http://www.ibm.com/support. Be prepared to identify yourself, your organization, and your support agreement when requesting assistance.

Contents
IBM SPSS Modeler Products . . . . . . . . . . . . . . . . . . . . . . . . . . . . . . . . . . . . . . . . . . . . . . . . . . . . 1 IBM SPSS Modeler . . . . . . . . . . . . . . . . . . . . . . . . . . . . . . . . . . . . . . . . . . . . . . . . . . . . . . . . 1 IBM SPSS Modeler Server . . . . . . . . . . . . . . . . . . . . . . . . . . . . . . . . . . . . . . . . . . . . . . . . . . 2 IBM SPSS Modeler Administration Console . . . . . . . . . . . . . . . . . . . . . . . . . . . . . . . . . . . . . . 2 IBM SPSS Modeler Batch . . . . . . . . . . . . . . . . . . . . . . . . . . . . . . . . . . . . . . . . . . . . . . . . . . . 2 IBM SPSS Modeler Solution Publisher. . . . . . . . . . . . . . . . . . . . . . . . . . . . . . . . . . . . . . . . . . 2 IBM SPSS Modeler Server Adapters for IBM SPSS Collaboration and Deployment Services . 2
IBM SPSS Modeler Editions . . . . . . . . . . . . . . . . . . . . . . . . . . . . . . . . . . . . . . . . . . . . . . . . . . . . . 3 IBM SPSS Modeler Documentation . . . . . . . . . . . . . . . . . . . . . . . . . . . . . . . . . . . . . . . . . . . . . . . 4 SPSS Modeler Professional Documentation. . . . . . . . . . . . . . . . . . . . . . . . . . . . . . . . . . . . . . 4 SPSS Modeler Premium Documentation . . . . . . . . . . . . . . . . . . . . . . . . . . . . . . . . . . . . . . . . 5 Application Examples . . . . . . . . . . . . . . . . . . . . . . . . . . . . . . . . . . . . . . . . . . . . . . . . . . . . . . . . . . 5 Demos Folder . . . . . . . . . . . . . . . . . . . . . . . . . . . . . . . . . . . . . . . . . . . . . . . . . . . . . . . . . . . . . . . . 6
New and Changed Features in IBM SPSS Modeler 15 . . . . . . . . . . . . . . . . . . . . . . . . . . . . . . . . . . 7 New features in IBM SPSS Modeler Professional . . . . . . . . . . . . . . . . . . . . . . . . . . . . . . . . . 7 New features in IBM SPSS Modeler Premium . . . . . . . . . . . . . . . . . . . . . . . . . . . . . . . . . . . . 10 New Nodes in This Release . . . . . . . . . . . . . . . . . . . . . . . . . . . . . . . . . . . . . . . . . . . . . . . . . . . . . 10
Getting Started . . . . . . . . . . . . . . . . . . . . . . . . . . . . . . . . . . . . . . . . . . . . . . . . . . . . . . . . . . . . . . . 12 Starting IBM SPSS Modeler . . . . . . . . . . . . . . . . . . . . . . . . . . . . . . . . . . . . . . . . . . . . . . . . . . . . . 12 Launching from the Command Line . . . . . . . . . . . . . . . . . . . . . . . . . . . . . . . . . . . . . . . . . . . . 13 Connecting to IBM SPSS Modeler Server . . . . . . . . . . . . . . . . . . . . . . . . . . . . . . . . . . . . . . . 13 Changing the Temp Directory . . . . . . . . . . . . . . . . . . . . . . . . . . . . . . . . . . . . . . . . . . . . . . . . . 16 Starting Multiple IBM SPSS Modeler Sessions . . . . . . . . . . . . . . . . . . . . . . . . . . . . . . . . . . . 17 IBM SPSS Modeler Interface at a Glance . . . . . . . . . . . . . . . . . . . . . . . . . . . . . . . . . . . . . . . . . . . 17 IBM SPSS Modeler Stream Canvas . . . . . . . . . . . . . . . . . . . . . . . . . . . . . . . . . . . . . . . . . . . . 18 Nodes Palette . . . . . . . . . . . . . . . . . . . . . . . . . . . . . . . . . . . . . . . . . . . . . . . . . . . . . . . . . . . . 18 IBM SPSS Modeler Managers . . . . . . . . . . . . . . . . . . . . . . . . . . . . . . . . . . . . . . . . . . . . . . . . 19 IBM SPSS Modeler Projects . . . . . . . . . . . . . . . . . . . . . . . . . . . . . . . . . . . . . . . . . . . . . . . . . 20 IBM SPSS Modeler Toolbar . . . . . . . . . . . . . . . . . . . . . . . . . . . . . . . . . . . . . . . . . . . . . . . . . . 21 Customizing the Toolbar . . . . . . . . . . . . . . . . . . . . . . . . . . . . . . . . . . . . . . . . . . . . . . . . . . . . . 23 Customizing the IBM SPSS Modeler Window. . . . . . . . . . . . . . . . . . . . . . . . . . . . . . . . . . . . . 23
Changing the icon size for a stream . . . . . . . . . . . . . . . . . . . . . . . . . . . . . . . . . . . . . . . . . . . . 24 Using the Mouse in IBM SPSS Modeler . . . . . . . . . . . . . . . . . . . . . . . . . . . . . . . . . . . . . . . . . 26 Using Shortcut Keys . . . . . . . . . . . . . . . . . . . . . . . . . . . . . . . . . . . . . . . . . . . . . . . . . . . . . . . 26 Printing. . . . . . . . . . . . . . . . . . . . . . . . . . . . . . . . . . . . . . . . . . . . . . . . . . . . . . . . . . . . . . . . . . . . . 27 Automating IBM SPSS Modeler . . . . . . . . . . . . . . . . . . . . . . . . . . . . . . . . . . . . . . . . . . . . . . . . . . 27
Data Mining Overview . . . . . . . . . . . . . . . . . . . . . . . . . . . . . . . . . . . . . . . . . . . . . . . . . . . . . . . . . 29 Assessing the Data . . . . . . . . . . . . . . . . . . . . . . . . . . . . . . . . . . . . . . . . . . . . . . . . . . . . . . . . . . . . 30 A Strategy for Data Mining . . . . . . . . . . . . . . . . . . . . . . . . . . . . . . . . . . . . . . . . . . . . . . . . . . . . . . 32 The
Overview of Missing Values . . . . . . . . . . . . . . . . . . . . . . . . . . . . . . . . . . . . . . . . . . . . . . . . . . . . . 99 Handling Missing Values. . . . . . . . . . . . . . . . . . . . . . . . . . . . . . . . . . . . . . . . . . . . . . . . . . . . . . . 100 Handling Records with Missing Values . . . . . . . . . . . . . . . . . . . . . . . . . . . . . . . . . . . . . . . . 101 Handling Fields with Missing Values . . . . . . . . . . . . . . . . . . . . . . . . . . . . . . . . . . . . . . . . . . 101 Imputing or Filling Missing Values . . . . . . . . . . . . . . . . . . . . . . . . . . . . . . . . . . . . . . . . . . . . . . . . 102 CLEM Functions for Missing Values . . . . . . . . . . . . . . . . . . . . . . . . . . . . . . . . . . . . . . . . . . . . . . 102
v
About CLEM . . . . . . . . . . . . . . . . . . . . . . . . . . . . . . . . . . . . . . . . . . . . . . . . . . . . . . . . . . . . . . . . 105 CLEM Examples . . . . . . . . . . . . . . . . . . . . . . . . . . . . . . . . . . . . . . . . . . . . . . . . . . . . . . . . . . . . . 108 Values and Data Types . . . . . . . . . . . . . . . . . . . . . . . . . . . . . . . . . . . . . . . . . . . . . . . . . . . . . . . . 110 Expressions and Conditions . . . . . . . . . . . . . . . . . . . . . . . . . . . . . . . . . . . . . . . . . . . . . . . . . . . . 111 Stream, Session, and SuperNode Parameters. . . . . . . . . . . . . . . . . . . . . . . . . . . . . . . . . . . . . . . 112 Working with Strings . . . . . . . . . . . . . . . . . . . . . . . . . . . . . . . . . . . . . . . . . . . . . . . . . . . . . . . . . 112 Handling Blanks and Missing Values. . . . . . . . . . . . . . . . . . . . . . . . . . . . . . . . . . . . . . . . . . . . . . 113 Working with Numbers . . . . . . . . . . . . . . . . . . . . . . . . . . . . . . . . . . . . . . . . . . . . . . . . . . . . . . . . 114 Working with Times and Dates . . . . . . . . . . . . . . . . . . . . . . . . . . . . . . . . . . . . . . . . . . . . . . . . . . 114 Summarizing Multiple Fields . . . . . . . . . . . . . . . . . . . . . . . . . . . . . . . . . . . . . . . . . . . . . . . . . . . . 115 Working with
Accessing the Expression Builder . . . . . . . . . . . . . . . . . . . . . . . . . . . . . . . . . . . . . . . . . . . . 119 Creating Expressions . . . . . . . . . . . . . . . . . . . . . . . . . . . . . . . . . . . . . . . . . . . . . . . . . . . . . . 119 Selecting Functions . . . . . . . . . . . . . . . . . . . . . . . . . . . . . . . . . . . . . . . . . . . . . . . . . . . . . . . 120 Selecting Fields, Parameters, and Global Variables . . . . . . . . . . . . . . . . . . . . . . . . . . . . . . . 121 Viewing or Selecting Values. . . . . . . . . . . . . . . . . . . . . . . . . . . . . . . . . . . . . . . . . . . . . . . . . 122 Checking CLEM Expressions . . . . . . . . . . . . . . . . . . . . . . . . . . . . . . . . . . . . . . . . . . . . . . . . 123
Find and Replace . . . . . . . . . . . . . . . . . . . . . . . . . . . . . . . . . . . . . . . . . . . . . . . . . . . . . . . . . . . . 123
CLEM Reference Overview . . . . . . . . . . . . . . . . . . . . . . . . . . . . . . . . . . . . . . . . . . . . . . . . . . . . . 127
CLEM Datatypes . . . . . . . . . . . . . . . . . . . . . . . . . . . . . . . . . . . . . . . . . . . . . . . . . . . . . . . . . . . . . 127
Integers . . . . . . . . . . . . . . . . . . . . . . . . . . . . . . . . . . . . . . . . . . . . . . . . . . . . . . . . . . . . . . . . 128
Reals . . . . . . . . . . . . . . . . . . . . . . . . . . . . . . . . . . . . . . . . . . . . . . . . . . . . . . . . . . . . . . . . . . 128
Characters . . . . . . . . . . . . . . . . . . . . . . . . . . . . . . . . . . . . . . . . . . . . . . . . . . . . . . . . . . . . . 128
Strings. . . . . . . . . . . . . . . . . . . . . . . . . . . . . . . . . . . . . . . . . . . . . . . . . . . . . . . . . . . . . . . . . 129
Lists. . . . . . . . . . . . . . . . . . . . . . . . . . . . . . . . . . . . . . . . . . . . . . . . . . . . . . . . . . . . . . . . . . . 129
Fields. . . . . . . . . . . . . . . . . . . . . . . . . . . . . . . . . . . . . . . . . . . . . . . . . . . . . . . . . . . . . . . . . . 129
Dates. . . . . . . . . . . . . . . . . . . . . . . . . . . . . . . . . . . . . . . . . . . . . . . . . . . . . . . . . . . . . . . . . . 129
Time . . . . . . . . . . . . . . . . . . . . . . . . . . . . . . . . . . . . . . . . . . . . . . . . . . . . . . . . . . . . . . . . . . 130
CLEM Operators . . . . . . . . . . . . . . . . . . . . . . . . . . . . . . . . . . . . . . . . . . . . . . . . . . . . . . . . . . . . . 131
Functions Reference. . . . . . . . . . . . . . . . . . . . . . . . . . . . . . . . . . . . . . . . . . . . . . . . . . . . . . . . . . 133
Conventions in Function Descriptions . . . . . . . . . . . . . . . . . . . . . . . . . . . . . . . . . . . . . . . . . 133
Information Functions . . . . . . . . . . . . . . . . . . . . . . . . . . . . . . . . . . . . . . . . . . . . . . . . . . . . . 134
Conversion Functions . . . . . . . . . . . . . . . . . . . . . . . . . . . . . . . . . . . . . . . . . . . . . . . . . . . . . 135
Comparison Functions . . . . . . . . . . . . . . . . . . . . . . . . . . . . . . . . . . . . . . . . . . . . . . . . . . . . . 135
vi
Logical Functions. . . . . . . . . . . . . . . . . . . . . . . . . . . . . . . . . . . . . . . . . . . . . . . . . . . . . . . . . 137
Numeric Functions . . . . . . . . . . . . . . . . . . . . . . . . . . . . . . . . . . . . . . . . . . . . . . . . . . . . . . . 138
Trigonometric Functions . . . . . . . . . . . . . . . . . . . . . . . . . . . . . . . . . . . . . . . . . . . . . . . . . . . 139
Probability Functions . . . . . . . . . . . . . . . . . . . . . . . . . . . . . . . . . . . . . . . . . . . . . . . . . . . . . . 139
Bitwise Integer Operations . . . . . . . . . . . . . . . . . . . . . . . . . . . . . . . . . . . . . . . . . . . . . . . . . 140
Random Functions . . . . . . . . . . . . . . . . . . . . . . . . . . . . . . . . . . . . . . . . . . . . . . . . . . . . . . . . 141
String Functions. . . . . . . . . . . . . . . . . . . . . . . . . . . . . . . . . . . . . . . . . . . . . . . . . . . . . . . . . . 141
SoundEx Functions . . . . . . . . . . . . . . . . . . . . . . . . . . . . . . . . . . . . . . . . . . . . . . . . . . . . . . . 146
Date and Time Functions . . . . . . . . . . . . . . . . . . . . . . . . . . . . . . . . . . . . . . . . . . . . . . . . . . . 146
Sequence Functions . . . . . . . . . . . . . . . . . . . . . . . . . . . . . . . . . . . . . . . . . . . . . . . . . . . . . . 150
Global Functions . . . . . . . . . . . . . . . . . . . . . . . . . . . . . . . . . . . . . . . . . . . . . . . . . . . . . . . . . 155
Functions Handling Blanks and Null Values . . . . . . . . . . . . . . . . . . . . . . . . . . . . . . . . . . . . . 156
Special Fields . . . . . . . . . . . . . . . . . . . . . . . . . . . . . . . . . . . . . . . . . . . . . . . . . . . . . . . . . . . 157
About the IBM SPSS Collaboration and Deployment Services Repository . . . . . . . . . . . . . . . . . . 158 Storing and Deploying Repository Objects . . . . . . . . . . . . . . . . . . . . . . . . . . . . . . . . . . . . . . . . . 160 Connecting to the Repository . . . . . . . . . . . . . . . . . . . . . . . . . . . . . . . . . . . . . . . . . . . . . . . . . . . 161 Entering Credentials for the Repository . . . . . . . . . . . . . . . . . . . . . . . . . . . . . . . . . . . . . . . . 162 Browsing the Repository Contents . . . . . . . . . . . . . . . . . . . . . . . . . . . . . . . . . . . . . . . . . . . . . . . 162 Storing Objects in the Repository . . . . . . . . . . . . . . . . . . . . . . . . . . . . . . . . . . . . . . . . . . . . . . . . 164 Setting Object Properties . . . . . . . . . . . . . . . . . . . . . . . . . . . . . . . . . . . . . . . . . . . . . . . . . . . 164 Storing Streams . . . . . . . . . . . . . . . . . . . . . . . . . . . . . . . . . . . . . . . . . . . . . . . . . . . . . . . . . . 170 Storing Projects . . . . . . . . . . . . . . . . . . . . . . . . . . . . . . . . . . . . . . . . . . . . . . . . . . . . . . . . . . 170 Storing Nodes . . . . . . . . . . . . . . . . . . . . . . . . . . . . . . . . . . . . . . . . . . . . . . . . . . . . . . . . . . . 171 Storing Output Objects. . . . . . . . . . . . . . . . . . . . . . . . . . . . . . . . . . . . . . . . . . . . . . . . . . . . . 171 Storing Models and Model Palettes . . . . . . . . . . . . . . . . . . . . . . . . . . . . . . . . . . . . . . . . . . . 172 Retrieving Objects from the Repository . . . . . . . . . . . . . . . . . . . . . . . . . . . . . . . . . . . . . . . . . . . . 172 Choosing an Object to Retrieve . . . . . . . . . . . . . . . . . . . . . . . . . . . . . . . . . . . . . . . . . . . . . . 173 Selecting an Object Version . . . . . . . . . . . . . . . . . . . . . . . . . . . . . . . . . . . . . . . . . . . . . . . . . 174 Searching for Objects in the Repository . . . . . . . . . . . . . . . . . . . . . . . . . . . . . . . . . . . . . . . . . . . 175 Modifying Repository Objects . . . . . . . . . . . . . . . . . . . . . . . . . . . . . . . . . . . . . . . . . . . . . . . . . . . 177 Creating, Renaming, and Deleting Folders . . . . . . . . . . . . . . . . . . . . . . . . . . . . . . . . . . . . . . 177 Locking and Unlocking Repository Objects. . . . . . . . . . . . . . . . . . . . . . . . . . . . . . . . . . . . . . 177 Deleting Repository Objects . . . . . . . . . . . . . . . . . . . . . . . . . . . . . . . . . . . . . . . . . . . . . . . . . 178 Managing Properties of Repository Objects . . . . . . . . . . . . . . . . . . . . . . . . . . . . . . . . . . . . . . . . 179 Viewing Folder Properties . . . . . . . . . . . . . . . . . . . . . . . . . . . . . . . . . . . . . . . . . . . . . . . . . . 179 Viewing and Editing Object Properties . . . . . . . . . . . . . . . . . . . . . . . . . . . . . . . . . . . . . . . . . 180 Managing Object Version Labels . . . . . . . . . . . . . . . . . . . . . . . . . . . . . . . . . . . . . . . . . . . . . 183
vii
Deploying Streams . . . . . . . . . . . . . . . . . . . . . . . . . . . . . . . . . . . . . . . . . . . . . . . . . . . . . . . . . . . 184
Stream Deployment Options. . . . . . . . . . . . . . . . . . . . . . . . . . . . . . . . . . . . . . . . . . . . . . . . . 185
The Scoring Branch. . . . . . . . . . . . . . . . . . . . . . . . . . . . . . . . . . . . . . . . . . . . . . . . . . . . . . . 188
About Exporting to External Applications . . . . . . . . . . . . . . . . . . . . . . . . . . . . . . . . . . . . . . . . . . 195 Opening a Stream in IBM SPSS Modeler Advantage . . . . . . . . . . . . . . . . . . . . . . . . . . . . . . . . . . 195 Importing and Exporting Models as PMML . . . . . . . . . . . . . . . . . . . . . . . . . . . . . . . . . . . . . . . . . 196 Model Types Supporting PMML . . . . . . . . . . . . . . . . . . . . . . . . . . . . . . . . . . . . . . . . . . . . . . 198
Introduction to Projects . . . . . . . . . . . . . . . . . . . . . . . . . . . . . . . . . . . . . . . . . . . . . . . . . . . . . . . 200
Customizing IBM SPSS Modeler Options . . . . . . . . . . . . . . . . . . . . . . . . . . . . . . . . . . . . . . . . . . 215 Setting IBM SPSS Modeler Options . . . . . . . . . . . . . . . . . . . . . . . . . . . . . . . . . . . . . . . . . . . . . . 215 System Options . . . . . . . . . . . . . . . . . . . . . . . . . . . . . . . . . . . . . . . . . . . . . . . . . . . . . . . . . . 215 Setting Default Directories. . . . . . . . . . . . . . . . . . . . . . . . . . . . . . . . . . . . . . . . . . . . . . . . . . 216 Setting User Options . . . . . . . . . . . . . . . . . . . . . . . . . . . . . . . . . . . . . . . . . . . . . . . . . . . . . . 217 Setting User Information . . . . . . . . . . . . . . . . . . . . . . . . . . . . . . . . . . . . . . . . . . . . . . . . . . . 222
viii
Customizing the Nodes Palette . . . . . . . . . . . . . . . . . . . . . . . . . . . . . . . . . . . . . . . . . . . . . . . . . . 223 Customizing the Palette Manager . . . . . . . . . . . . . . . . . . . . . . . . . . . . . . . . . . . . . . . . . . . . 223 Changing a Palette Tab View . . . . . . . . . . . . . . . . . . . . . . . . . . . . . . . . . . . . . . . . . . . . . . . . 228 CEMI Node Management . . . . . . . . . . . . . . . . . . . . . . . . . . . . . . . . . . . . . . . . . . . . . . . . . . . . . . 229
Order of Nodes . . . . . . . . . . . . . . . . . . . . . . . . . . . . . . . . . . . . . . . . . . . . . . . . . . . . . . . . . . . . . . 230
Node Caches . . . . . . . . . . . . . . . . . . . . . . . . . . . . . . . . . . . . . . . . . . . . . . . . . . . . . . . . . . . . . . . 231
Performance: Process Nodes . . . . . . . . . . . . . . . . . . . . . . . . . . . . . . . . . . . . . . . . . . . . . . . . . . . 233
Performance: Modeling Nodes . . . . . . . . . . . . . . . . . . . . . . . . . . . . . . . . . . . . . . . . . . . . . . . . . . 234
Performance: CLEM Expressions . . . . . . . . . . . . . . . . . . . . . . . . . . . . . . . . . . . . . . . . . . . . . . . . 234
Appendices
Overview of Accessibility in IBM SPSS Modeler . . . . . . . . . . . . . . . . . . . . . . . . . . . . . . . . . . . . . 236 Types of Accessibility Support . . . . . . . . . . . . . . . . . . . . . . . . . . . . . . . . . . . . . . . . . . . . . . . . . . 236 Accessibility for the Visually Impaired . . . . . . . . . . . . . . . . . . . . . . . . . . . . . . . . . . . . . . . . . 236 Accessibility for Blind Users . . . . . . . . . . . . . . . . . . . . . . . . . . . . . . . . . . . . . . . . . . . . . . . . 237 Keyboard Accessibility . . . . . . . . . . . . . . . . . . . . . . . . . . . . . . . . . . . . . . . . . . . . . . . . . . . . 238 Using a Screen Reader . . . . . . . . . . . . . . . . . . . . . . . . . . . . . . . . . . . . . . . . . . . . . . . . . . . . 245 Tips for Use . . . . . . . . . . . . . . . . . . . . . . . . . . . . . . . . . . . . . . . . . . . . . . . . . . . . . . . . . . . . . . . . 246 Interference with Other Software . . . . . . . . . . . . . . . . . . . . . . . . . . . . . . . . . . . . . . . . . . . . 247 JAWS and Java . . . . . . . . . . . . . . . . . . . . . . . . . . . . . . . . . . . . . . . . . . . . . . . . . . . . . . . . . . 247 Using Graphs in IBM SPSS Modeler . . . . . . . . . . . . . . . . . . . . . . . . . . . . . . . . . . . . . . . . . . 247
ix
x
Chapter
1
About IBM SPSS Modeler
IBM?? SPSS?? Modeler is a set of data mining tools that enable you to quickly develop predictive models using business expertise and deploy them into business operations to improve decision making. Designed around the
SPSS Modeler offers a variety of modeling methods taken from machine learning, arti???cial intelligence, and statistics. The methods available on the Modeling palette allow you to derive new information from your data and to develop predictive models. Each method has certain strengths and is best suited for particular types of problems.
SPSS Modeler can be purchased as a standalone product, or used as a client in combination with SPSS Modeler Server. A number of additional options are also available, as summarized in the following sections. For more information, see http://www.ibm.com/software/analytics/spss/products/modeler/.
IBM SPSS Modeler Products
The IBM?? SPSS?? Modeler family of products and associated software comprises the following.
???IBM SPSS Modeler
???IBM SPSS Modeler Server
???IBM SPSS Modeler Administration Console
???IBM SPSS Modeler Batch
???IBM SPSS Modeler Solution Publisher
???IBM SPSS Modeler Server adapters for IBM SPSS Collaboration and Deployment Services
IBM SPSS Modeler
SPSS Modeler is a functionally complete version of the product that you install and run on your personal computer. You can run SPSS Modeler in local mode as a standalone product, or use it in distributed mode along with IBM?? SPSS?? Modeler Server for improved performance on large data sets.
With SPSS Modeler, you can build accurate predictive models quickly and intuitively, without programming. Using the unique visual interface, you can easily visualize the data mining process. With the support of the advanced analytics embedded in the product, you can discover previously hidden patterns and trends in your data. You can model outcomes and understand the factors that in???uence them, enabling you to take advantage of business opportunities and mitigate risks.
SPSS Modeler is available in two editions: SPSS Modeler Professional and SPSS Modeler Premium. For more information, see the topic IBM SPSS Modeler Editions on p. 3.

2
Chapter 1
IBM SPSS Modeler Server
SPSS Modeler uses a client/server architecture to distribute requests for
SPSS Modeler Server is a
In this way, SPSS Modeler Server provides superior performance on large data sets because
IBM SPSS Modeler Administration Console
The Modeler Administration Console is a graphical application for managing many of the SPSS Modeler Server con???guration options, which are also con???gurable by means of an options ???le. The application provides a console user interface to monitor and con???gure your SPSS Modeler Server installations, and is available
The application can be installed only on Windows computers; however, it can administer a server installed on any supported platform.
IBM SPSS Modeler Batch
While data mining is usually an interactive process, it is also possible to run SPSS Modeler from a command line, without the need for the graphical user interface. For example, you might have
IBM SPSS Modeler Solution Publisher
SPSS Modeler Solution Publisher is a tool that enables you to create a packaged version of an SPSS Modeler stream that can be run by an external runtime engine or embedded in an external application. In this way, you can publish and deploy complete SPSS Modeler streams for use in environments that do not have SPSS Modeler installed. SPSS Modeler Solution Publisher is distributed as part of the IBM SPSS Collaboration and Deployment Services - Scoring service, for which a separate license is required. With this license, you receive SPSS Modeler Solution Publisher Runtime, which enables you to execute the published streams.
IBM SPSS Modeler Server Adapters for IBM SPSS Collaboration and Deployment Services
A number of adapters for IBM?? SPSS?? Collaboration and Deployment Services are available that enable SPSS Modeler and SPSS Modeler Server to interact with an IBM SPSS Collaboration and Deployment Services repository. In this way, an SPSS Modeler stream deployed to the repository

3
About IBM SPSS Modeler
can be shared by multiple users, or accessed from the
IBM SPSS Modeler Editions
SPSS Modeler is available in the following editions.
SPSS Modeler Professional
SPSS Modeler Professional provides all the tools you need to work with most types of structured data, such as behaviors and interactions tracked in CRM systems, demographics, purchasing behavior and sales data.
SPSS Modeler Premium
SPSS Modeler Premium is a
IBM?? SPSS?? Modeler Entity Analytics adds a completely new dimension to IBM?? SPSS?? Modeler predictive analytics. Whereas predictive analytics attempts to predict future behavior from past data, entity analytics focuses on improving the coherence and consistency of current data by resolving identity con???icts within the records themselves. An identity can be that of an individual, an organization, an object, or any other entity for which ambiguity might exist. Identity resolution can be vital in a number of ???elds, including customer relationship management, fraud detection,
IBM SPSS Modeler Social Network Analysis transforms information about relationships into ???elds that characterize the social behavior of individuals and groups. Using data describing the relationships underlying social networks, IBM?? SPSS?? Modeler Social Network Analysis identi???es social leaders who in???uence the behavior of others in the network. In addition, you can determine which people are most affected by other network participants. By combining these results with other measures, you can create comprehensive pro???les of individuals on which to base your predictive models. Models that include this social information will perform better than models that do not.
IBM?? SPSS?? Modeler Text Analytics uses advanced linguistic technologies and Natural Language Processing (NLP) to rapidly process a large variety of unstructured text data, extract and organize the key concepts, and group these concepts into categories. Extracted concepts and categories can be combined with existing structured data, such as demographics, and applied to modeling using the full suite of SPSS Modeler data mining tools to yield better and more focused decisions.

4
Chapter 1
IBM SPSS Modeler Documentation
Documentation in online help format is available from the Help menu of SPSS Modeler. This includes documentation for SPSS Modeler, SPSS Modeler Server, and SPSS Modeler Solution Publisher, as well as the Applications Guide and other supporting materials.
Complete documentation for each product (including installation instructions) is available in PDF format under the \Documentation folder on each product DVD. Installation documents can also be downloaded from the web at
Documentation in both formats is also available from the SPSS Modeler Information Center at http://publib.boulder.ibm.com/infocenter/spssmodl/v15r0m0/.
SPSS Modeler Professional Documentation
The SPSS Modeler Professional documentation suite (excluding installation instructions) is as follows.
???IBM SPSS Modeler User???s Guide. General introduction to using SPSS Modeler, including how to build data streams, handle missing values, build CLEM expressions, work with projects and reports, and package streams for deployment to IBM SPSS Collaboration and Deployment Services, Predictive Applications, or IBM SPSS Modeler Advantage.
???IBM SPSS Modeler Source, Process, and Output Nodes. Descriptions of all the nodes used to read, process, and output data in different formats. Effectively this means all nodes other than modeling nodes.
???IBM SPSS Modeler Modeling Nodes. Descriptions of all the nodes used to create data mining models. IBM?? SPSS?? Modeler offers a variety of modeling methods taken from machine learning, arti???cial intelligence, and statistics.
???IBM SPSS Modeler Algorithms Guide. Descriptions of the mathematical foundations of the modeling methods used in SPSS Modeler. This guide is available in PDF format only.
???IBM SPSS Modeler Applications Guide. The examples in this guide provide brief, targeted introductions to speci???c modeling methods and techniques. An online version of this guide is also available from the Help menu. For more information, see the topic Application Examples on p. 5.
???IBM SPSS Modeler Scripting and Automation. Information on automating the system through scripting, including the properties that can be used to manipulate nodes and streams.
???IBM SPSS Modeler Deployment Guide. Information on running SPSS Modeler streams and scenarios as steps in processing jobs under IBM?? SPSS?? Collaboration and Deployment Services Deployment Manager.
???IBM SPSS Modeler CLEF Developer???s Guide. CLEF provides the ability to integrate
???IBM SPSS Modeler
???IBM SPSS Modeler Server Administration and Performance Guide. Information on how to
con???gure and administer IBM?? SPSS?? Modeler Server.

5
About IBM SPSS Modeler
???IBM SPSS Modeler Administration Console User Guide. Information on installing and using the console user interface for monitoring and con???guring SPSS Modeler Server. The console is implemented as a
???IBM SPSS Modeler Solution Publisher Guide. SPSS Modeler Solution Publisher is an
???IBM SPSS Modeler
???IBM SPSS Modeler Batch User???s Guide. Complete guide to using IBM SPSS Modeler in batch mode, including details of batch mode execution and
SPSS Modeler Premium Documentation
The SPSS Modeler Premium documentation suite (excluding installation instructions) is as follows.
???IBM SPSS Modeler Entity Analytics User Guide. Information on using entity analytics with SPSS Modeler, covering repository installation and con???guration, entity analytics nodes, and administrative tasks.
???IBM SPSS Modeler Social Network Analysis User Guide. A guide to performing social network analysis with SPSS Modeler, including group analysis and diffusion analysis.
???SPSS Modeler Text Analytics User???s Guide. Information on using text analytics with SPSS Modeler, covering the text mining nodes, interactive workbench, templates, and other resources.
???IBM SPSS Modeler Text Analytics Administration Console User Guide. Information on installing and using the console user interface for monitoring and con???guring IBM?? SPSS?? Modeler Server for use with SPSS Modeler Text Analytics . The console is implemented as a
Application Examples
While the data mining tools in SPSS Modeler can help solve a wide variety of business and organizational problems, the application examples provide brief, targeted introductions to speci???c modeling methods and techniques. The data sets used here are much smaller than the enormous data stores managed by some data miners, but the concepts and methods involved should be scalable to
You can access the examples by clicking Application Examples on the Help menu in SPSS Modeler. The data ???les and sample streams are installed in the Demos folder under the product installation directory. For more information, see the topic Demos Folder on p. 6.
Database modeling examples. See the examples in the IBM SPSS Modeler
Scripting examples. See the examples in the IBM SPSS Modeler Scripting and Automation Guide.

6
Chapter 1
Demos Folder
The data ???les and sample streams used with the application examples are installed in the Demos folder under the product installation directory. This folder can also be accessed from the IBM SPSS Modeler 15 program group on the Windows Start menu, or by clicking Demos on the list of recent directories in the File Open dialog box.
Figure
Selecting the Demos folder from the list of

Chapter
2
New Features
New and Changed Features in IBM SPSS Modeler 15
From this release onwards, IBM?? SPSS?? Modeler has the following editions.
???IBM?? SPSS?? Modeler Professional is the new name for the existing SPSS Modeler product.
???IBM?? SPSS?? Modeler Premium is a
The new features for these editions are described in the following sections.
New features in IBM SPSS Modeler Professional
The IBM?? SPSS?? Modeler Professional edition adds the following features in this release.
GLMM modeling node. Generalized linear mixed models (GLMMs) extend the linear model so that: the target is linearly related to the factors and covariates via a speci???ed link function; the target can have a
Support for maps in the Graphboard node. The Graphboard node now includes support for a large number of map types. These include choropleths (where regions can be given different colors or patterns to indicate different values) and point overlay maps (where geospatial points are overlaid on the map).
IBM?? SPSS?? Modeler ships with several map ???les, but you can use the Map Conversion Utility to convert your existing map shape???les for use with the Graphboard Template Chooser.
Netezza Time Series and Generalized Linear nodes. Two new nodes are available for IBM?? Netezza?? Analytics
Netezza nodes enabled through Helper Applications. The Netezza Analytics database modeling nodes are now enabled in the same way as the other database modeling nodes.
Zooming in and out on the stream view. It is now possible to scale the entire stream view up or down from the standard size. This feature is particularly useful for gaining an overall view of a complex stream, or for minimizing the number of pages needed to print a stream. For more information, see the topic Changing the icon size for a stream in Chapter 3 on p. 24.

8
Chapter 2
Default settings for database connections. You can now specify default settings for SQL Server and Oracle database connections, as well as those already supported for IBM DB2 InfoSphere Warehouse.
Stream properties and optimization redesign. The Options tab on the Stream Properties dialog box has been redesigned to group the options into categories. The Optimization options have also moved from User Options to Stream Properties. For more information, see the topic Setting Options for Streams in Chapter 5 on p. 54.
Node execution timing. the nodes in a stream. Chapter 5 on p. 67.
You can now set an option to display individual execution times for For more information, see the topic Viewing Node Execution Times in
You can also set an option (time_ecode_execution_log) in the server con???guration ???le to record these execution times in the message log.
Stream parameters in SQL queries from Database source node. You can now include SPSS Modeler stream parameters in SQL queries that you enter in the Database source node.
Expression Builder supports
IBM Cognos BI node enhancements. The Cognos BI source node now supports importing Cognos list reports as well as data, and additionally supports the use of parameters and ???lters.
For the Cognos BI source and export nodes, SPSS Modeler now automatically detects the version of IBM Cognos BI in use.
Enhancements to Aggregate node. The Aggregate node now supports several new aggregation modes for aggregate ???elds: median, count, variance, and ???rst and third quartiles.
Merge node supports conditional merge. You can now perform input record merges that depend on satisfying a condition. You can specify the condition directly in the node, or build the condition using the Expression Builder.
Enhancements to
Table compression for database export. When exporting to a database, you can now specify table compression options for SQL Server and Oracle database connections, as well as those already supported for IBM DB2 InfoSphere Warehouse.
Bulk loading for database export. Additional help information is available for database bulk loading using an external loader program.

9
New Features
SQL generation enhancements. The Aggregate node now supports SQL generation for date, time, timestamp, and string data types, in addition to integer and real. With IBM Netezza databases, the Sample node supports SQL generation for simple and complex sampling, and the Binning node supports SQL generation for all binning methods except Tiles.
A new con???guration option, db_udf_enabled in options.cfg, causes the SQL generation option to generate UDF SQL by default.
New format for database connection in batch mode. The format for specifying a database connection in batch mode has changed to a single argument, to be consistent with the way it is speci???ed in scripting.
Enhancements to SPSS Statistics integration. On the Statistics Output node, additional procedures are available on the Syntax tab through the Select a dialog button. The Regression submenu now supports Partial Least Squares regression, and there is a new Forecasting submenu with the following options: Spectral Analysis, Sequence Charts, Autocorrelations, and
The Syntax tab of the Statistics Output node also has a new option to generate a Statistics File source node for importing the data that results from running a stream containing the node. This is useful where a procedure writes ???elds such as scores to the active dataset in addition to displaying output, as these ???elds would otherwise not be visible.
Deployed streams can now access IBM SPSS Collaboration and Deployment Services model
management features. When a stream is deployed to IBM SPSS Collaboration and Deployment Services as a stream, it can now use the same model management features as it could if deployed as a scenario. These features include evaluation, refresh, score, and champion/challenger.
Improved method of changing ODBC connection for SPSS Modeler stream and scenario job steps. For stream and scenario job steps in IBM SPSS Collaboration and Deployment Services, changes to an ODBC connection and related logon credentials apply to all related job steps. This means that you no longer have to change the job steps one by one.
Choice of execution branch in deployed streams. For stream job steps in IBM SPSS Collaboration and Deployment Services, if the stream contains branches you can now choose one or more stream branches to execute.

10
Chapter 2
New features in IBM SPSS Modeler Premium
IBM?? SPSS?? Modeler Premium is a
???SPSS Modeler Text Analytics
???IBM?? SPSS?? Modeler Entity Analytics
???IBM?? SPSS?? Modeler Social Network Analysis
SPSS Modeler Text Analytics uses advanced linguistic technologies and Natural Language Processing (NLP) to rapidly process a large variety of unstructured text data, extract and organize the key concepts, and group these concepts into categories. Extracted concepts and categories can be combined with existing structured data, such as demographics, and applied to modeling using the full suite of IBM?? SPSS?? Modeler data mining tools to yield better and more focused decisions.
IBM SPSS Modeler Entity Analytics adds a completely new dimension to SPSS Modeler predictive analytics. Whereas predictive analytics attempts to predict future behavior from past data, entity analytics focuses on improving the coherence and consistency of current data by resolving identity con???icts within the records themselves. An identity can be that of an individual, an organization, an object, or any other entity for which ambiguity might exist. Identity resolution can be vital in a number of ???elds, including customer relationship management, fraud detection,
IBM SPSS Modeler Social Network Analysis transforms information about relationships into ???elds that characterize the social behavior of individuals and groups. Using data describing the relationships underlying social networks, IBM SPSS Modeler Social Network Analysis identi???es social leaders who in???uence the behavior of others in the network. In addition, you can determine which people are most affected by other network participants. By combining these results with other measures, you can create comprehensive pro???les of individuals on which to base your predictive models. Models that include this social information will perform better than models that do not.
Note: SPSS Modeler Professional must be installed before installing any of the SPSS Modeler Premium features.
New Nodes in This Release
IBM SPSS Modeler Professional
A generalized linear mixed model (GLMM) extends the linear model so that the target can have a
11
New Features
The Netezza Time Series node analyzes time series data and can predict future behavior from past events.
The Netezza Generalized Linear model expands the linear regression model so that the dependent variable is related to the predictor variables by means of a speci???ed link function. Moreover, the model allows for the dependent variable to have a
IBM SPSS Modeler Premium
The EA Export node is a terminal node that reads entity data from a data source and exports the data to a repository for the purpose of entity resolution.
The Entity Analytics(EA) source node reads the resolved entities from the repository and passes this data to the stream for further processing, such as formatting into
a report.
The Streaming EA node compares new cases against the entity data in the repository.
The SNA Group Analysis node builds a model of a social network based on input data about the social groupings within the network. This technique identi???es links between the group members, and analyzes the interactions within the groups to produce key performance indicators (KPIs). The KPIs can be used for purposes such as churn prediction, anomaly detection, or group leader identi???cation.
The SNA Diffusion Analysis node models the ???ow of information from a group member to their social environment. A group member is assigned an initial weighting, which is propagated across the network as a gradually reducing ???gure. This process continues until each member of the network has been assigned a weighting relative to the original group member, according to the amount of information that has reached them. The individual member scores are then derived directly from these weightings. In this way, for example, a service provider could identify customers that are at a higher risk of churn according to their relationship with a recent churner.

Chapter
3
IBM SPSS Modeler Overview
Getting Started
As a data mining application, IBM?? SPSS?? Modeler offers a strategic approach to ???nding useful relationships in large data sets. In contrast to more traditional statistical methods, you do not necessarily need to know what you are looking for when you start. You can explore your data, ???tting different models and investigating different relationships, until you ???nd useful information.
Starting IBM SPSS Modeler
To start the application, click:
Start > [All] Programs > IBM SPSS Modeler15 > IBM SPSS Modeler15
The main window is displayed after a few seconds.
Figure
IBM SPSS Modeler main application window

13
IBM SPSS Modeler Overview
Launching from the Command Line
You can use the command line of your operating system to launch IBM?? SPSS?? Modeler as follows:
EOn a computer where IBM?? SPSS?? Modeler is installed, open a DOS, or
ETo launch the SPSS Modeler interface in interactive mode, type the modelerclient command followed by the required arguments; for example:
modelerclient
The available arguments (???ags) allow you to connect to a server, load streams, run scripts, or specify other parameters as needed.
Connecting to IBM SPSS Modeler Server
IBM?? SPSS?? Modeler can be run as a standalone application, or as a client connected to IBM?? SPSS?? Modeler Server directly or to an SPSS Modeler Server or server cluster through the Coordinator of Processes
Whenever you want to connect to a server, you can manually enter the server name to which you want to connect or select a name that you have previously de???ned. However, if you have IBM SPSS Collaboration and Deployment Services, you can search through a list of servers or server clusters from the Server Login dialog box. The ability to browse through the Statistics services running on a network is made available through the Coordinator of Processes.
Figure
Server Login dialog box

14
Chapter 3
To Connect to a Server
EOn the Tools menu, click Server Login. The Server Login dialog box opens. Alternatively,
EUsing the dialog box, specify options to connect to the local server computer or select a connection from the table.
???Click Add or Edit to add or edit a connection. For more information, see the topic Adding and Editing the IBM SPSS Modeler Server Connection on p. 14.
???Click Search to access a server or server cluster in the Coordinator of Processes. For more information, see the topic Searching for Servers in IBM SPSS Collaboration and Deployment Services on p. 16.
Server table. This table contains the set of de???ned server connections. The table displays the default connection, server name, description, and port number. You can manually add a new connection, as well as select or search for an existing connection. To set a particular server as the default connection, select the check box in the Default column in the table for the connection.
Default data path. Specify a path used for data on the server computer. Click the ellipsis button (...) to browse to the required location.
Set Credentials. Leave this box unchecked to enable the single
User ID. Enter the user name with which to log on to the server.
Password. Enter the password associated with the speci???ed user name.
Domain. Specify the domain used to log on to the server. A domain name is required only when the server computer is in a different Windows domain than the client computer.
EClick OK to complete the connection.
To Disconnect from a Server
EOn the Tools menu, click Server Login. The Server Login dialog box opens. Alternatively,
EIn the dialog box, select the Local Server and click OK.
Adding and Editing the IBM SPSS Modeler Server Connection
You can manually edit or add a server connection in the Server Login dialog box. By clicking Add, you can access an empty Add/Edit Server dialog box in which you can enter server connection details. By selecting an existing connection and clicking Edit in the Server Login dialog box, the Add/Edit Server dialog box opens with the details for that connection so that you can make any changes.

15
IBM SPSS Modeler Overview
Note: You cannot edit a server connection that was added from IBM?? SPSS?? Collaboration and Deployment Services, since the name, port, and other details are de???ned in IBM SPSS Collaboration and Deployment Services.
Figure
Server Login Add/Edit Server dialog box
To Add Server Connections
EOn the Tools menu, click Server Login. The Server Login dialog box opens.
EIn this dialog box, click Add. The Server Login Add/Edit Server dialog box opens.
EEnter the server connection details and click OK to save the connection and return to the Server Login dialog box.
???Server. Specify an available server or select one from the list. The server computer can be identi???ed by an alphanumeric name (for example, myserver) or an IP address assigned to the server computer (for example, 202.123.456.78).
???Port. Give the port number on which the server is listening. If the default does not work, ask your system administrator for the correct port number.
???Description. Enter an optional description for this server connection.
???Ensure secure connection (use SSL). Speci???es whether an SSL (Secure Sockets Layer) connection should be used. SSL is a commonly used protocol for securing data sent over a network. To use this feature, SSL must be enabled on the server hosting IBM?? SPSS?? Modeler Server. If necessary, contact your local administrator for details.
To Edit Server Connections
EOn the Tools menu, click Server Login. The Server Login dialog box opens.
EIn this dialog box, select the connection you want to edit and then click Edit. The Server Login Add/Edit Server dialog box opens.
EChange the server connection details and click OK to save the changes and return to the Server Login dialog box.

16
Chapter 3
Searching for Servers in IBM SPSS Collaboration and Deployment Services
Instead of entering a server connection manually, you can select a server or server cluster available on the network through the Coordinator of Processes, available in IBM?? SPSS?? Collaboration and Deployment Services. A server cluster is a group of servers from which the Coordinator of Processes determines the server best suited to respond to a processing request.
Although you can manually add servers in the Server Login dialog box, searching for available servers lets you connect to servers without requiring that you know the correct server name and port number. This information is automatically provided. However, you still need the correct logon information, such as username, domain, and password.
Note: If you do not have access to the Coordinator of Processes capability, you can still manually enter the server name to which you want to connect or select a name that you have previously de???ned. For more information, see the topic Adding and Editing the IBM SPSS Modeler Server Connection on p. 14.
Figure
Search for Servers dialog box
To search for servers and clusters
EOn the Tools menu, click Server Login. The Server Login dialog box opens.
EIn this dialog box, click Search to open the Search for Servers dialog box. If you are not logged on to IBM SPSS Collaboration and Deployment Services when you attempt to browse the Coordinator of Processes, you will be prompted to do so. For more information, see the topic Connecting to the Repository in Chapter 9 on p. 161.
ESelect the server or server cluster from the list.
EClick OK to close the dialog box and add this connection to the table in the Server Login dialog box.
Changing the Temp Directory
Some operations performed by IBM?? SPSS?? Modeler Server may require temporary ???les to be created. By default, IBM?? SPSS?? Modeler uses the system temporary directory to create temp ???les. You can alter the location of the temporary directory using the following steps.
E Create a new directory called spss and subdirectory called servertemp.

17
IBM SPSS Modeler Overview
EEdit options.cfg, located in the /con???g directory of your SPSS Modeler installation directory. Edit the temp_directory parameter in this ???le to read: temp_directory, "C:/spss/servertemp".
EAfter doing this, you must restart the SPSS Modeler Server service. You can do this by clicking the Services tab on your Windows Control Panel. Just stop the service and then start it to activate the changes you made. Restarting the machine will also restart the service.
All temp ???les will now be written to this new directory.
Note: The most common error when you are attempting to do this is to use the wrong type of slashes. Because of SPSS Modeler???s UNIX history, forward slashes are used.
Starting Multiple IBM SPSS Modeler Sessions
If you need to launch more than one IBM?? SPSS?? Modeler session at a time, you must make some changes to your IBM?? SPSS?? Modeler and Windows settings. For example, you may need to do this if you have two separate server licenses and want to run two streams against two different servers from the same client machine.
To enable multiple SPSS Modeler sessions:
E Click:
Start > [All] Programs > IBM SPSS Modeler15
EOn the IBM SPSS Modeler15 shortcut (the one with the icon),
EIn the Target text box, add
EIn Windows Explorer, select:
Tools > Folder Options...
EOn the File Types tab, select the SPSS Modeler Stream option and click Advanced.
EIn the Edit File Type dialog box, select Open with SPSS Modeler and click Edit.
EIn the Application used to perform action text box, add
IBM SPSS Modeler Interface at a Glance
At each point in the data mining process, IBM?? SPSS?? Modeler???s
of other applications.
Working with SPSS Modeler is a
???First, you read data into SPSS Modeler.
???Next, you run the data through a series of manipulations.
???Finally, you send the data to a destination.

18
Chapter 3
This sequence of operations is known as a data stream because the data ???ows record by record from the source through each manipulation and, ???nally, to the
Figure
A simple stream
IBM SPSS Modeler Stream Canvas
The stream canvas is the largest area of the IBM?? SPSS?? Modeler window and is where you will build and manipulate data streams.
Streams are created by drawing diagrams of data operations relevant to your business on the main canvas in the interface. Each operation is represented by an icon or node, and the nodes are linked together in a stream representing the ???ow of data through each operation.
You can work with multiple streams at one time in SPSS Modeler, either in the same stream canvas or by opening a new stream canvas. During a session, streams are stored in the Streams manager, at the upper right of the SPSS Modeler window.
Nodes Palette
Most of the data and modeling tools in IBM?? SPSS?? Modeler reside in the Nodes Palette, across the bottom of the window below the stream canvas.
For example, the Record Ops palette tab contains nodes that you can use to perform operations on the data records, such as selecting, merging, and appending.
To add nodes to the canvas,
Figure
Record Ops tab on the nodes palette
Each palette tab contains a collection of related nodes used for different phases of stream operations, such as:
???Sources. Nodes bring data into SPSS Modeler.
???Record Ops. Nodes perform operations on data records, such as selecting, merging, and appending.

19
IBM SPSS Modeler Overview
???Field Ops. Nodes perform operations on data ???elds, such as ???ltering, deriving new ???elds, and determining the measurement level for given ???elds.
???Graphs. Nodes graphically display data before and after modeling. Graphs include plots, histograms, web nodes, and evaluation charts.
???Modeling. Nodes use the modeling algorithms available in SPSS Modeler, such as neural nets, decision trees, clustering algorithms, and data sequencing.
???Database Modeling. Nodes use the modeling algorithms available in Microsoft SQL Server, IBM DB2, and Oracle databases.
???Output. Nodes produce a variety of output for data, charts, and model results that can be viewed in SPSS Modeler.
???Export. Nodes produce a variety of output that can be viewed in external applications, such as IBM?? SPSS?? Data Collection or Excel.
???SPSS Statistics. Nodes import data from, or export data to, IBM?? SPSS?? Statistics, as well as running SPSS Statistics procedures.
As you become more familiar with SPSS Modeler, you can customize the palette contents for your own use. For more information, see the topic Customizing the Nodes Palette in Chapter 12 on p. 223.
Located below the Nodes Palette, a report pane provides feedback on the progress of various operations, such as when data is being read into the data stream. Also located below the Nodes Palette, a status pane provides information on what the application is currently doing, as well as indications of when user feedback is required.
IBM SPSS Modeler Managers
At the top right of the window is the managers pane. This has three tabs, which are used to manage streams, output and models.
You can use the Streams tab to open, rename, save, and delete the streams created in a session.
Figure
Streams tab
The Outputs tab contains a variety of ???les, such as graphs and tables, produced by stream operations in IBM?? SPSS?? Modeler. You can display, save, rename, and close the tables, graphs, and reports listed on this tab.

20
Chapter 3
Figure
Outputs tab
The Models tab is the most powerful of the manager tabs. This tab contains all model nuggets, which contain the models generated in SPSS Modeler, for the current session. These models can be browsed directly from the Models tab or added to the stream in the canvas.
Figure
Models tab containing model nuggets
IBM SPSS Modeler Projects
On the lower right side of the window is the project pane, used to create and manage data mining projects (groups of ???les related to a data mining task). There are two ways to view projects you create in IBM?? SPSS??
The
21
IBM SPSS Modeler Overview
Figure
The Classes tab provides a way to organize your work in SPSS Modeler
Figure
Classes view
IBM SPSS Modeler Toolbar
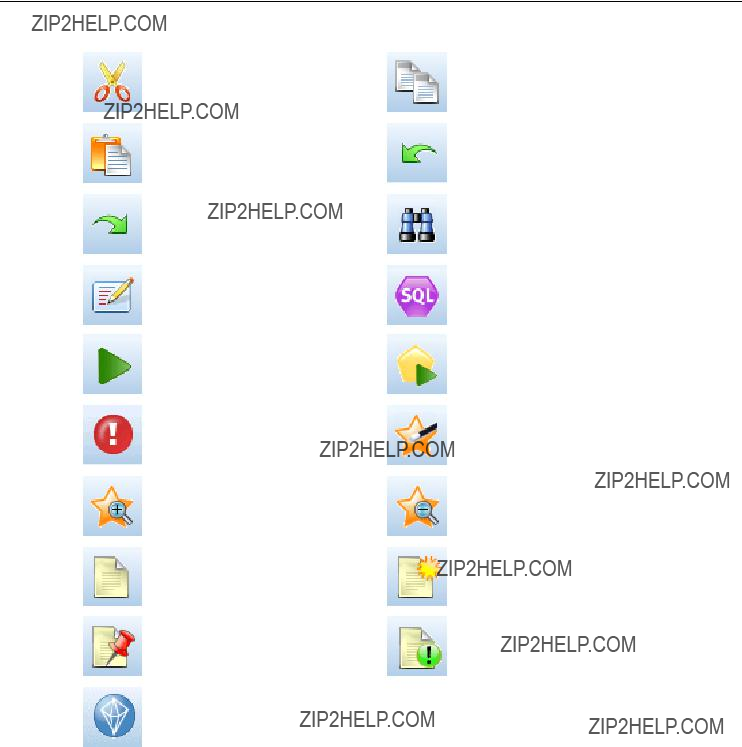
At the top of the IBM?? SPSS?? Modeler window, you will ???nd a toolbar of icons that provides a number of useful functions. Following are the toolbar buttons and their functions.
22
Chapter 3
Cut & move to clipboard
Paste selection
Redo
Edit stream properties
Run current stream
Stop stream (Active only while stream is running)
Zoom in (SuperNodes only)
No markup in stream
Hide stream markup (if any)
Open stream in IBM?? SPSS?? Modeler Advantage
Copy to clipboard
Undo last action
Search for nodes
Preview SQL generation
Run stream selection
Add SuperNode
Zoom out (SuperNodes only)
Insert comment
Show hidden stream markup
Stream markup consists of stream comments, model links, and scoring branch indications.
For more information on stream comments, see Adding Comments and Annotations to Nodes and Streams on p. 78.
For more information on scoring branch indications, see The Scoring Branch on p. 188.
Model links are described in the IBM SPSS Modeling Nodes guide.

23
IBM SPSS Modeler Overview
Customizing the Toolbar
You can change various aspects of the toolbar, such as:
???Whether it is displayed
???Whether the icons have tooltips available
???Whether it uses large or small icons
To turn the toolbar display on and off:
E On the main menu, click:
View > Toolbar > Display
To change the tooltip or icon size settings:
E On the main menu, click:
View > Toolbar > Customize
Click Show ToolTips or Large Buttons as required.
Customizing the IBM SPSS Modeler Window
Using the dividers between various portions of the IBM?? SPSS?? Modeler interface, you can resize or close tools to meet your preferences. For example, if you are working with a large stream, you can use the small arrows located on each divider to close the nodes palette, managers pane, and project pane. This maximizes the stream canvas, providing enough work space for large or multiple streams.
Alternatively, on the View menu, click Nodes Palette, Managers, or Project to turn the display of these items on or off.

24
Chapter 3
Figure
Maximized stream canvas
As an alternative to closing the nodes palette, and the managers and project panes, you can use the stream canvas as a scrollable page by moving vertically and horizontally with the scrollbars at the side and bottom of the SPSS Modeler window.
You can also control the display of screen markup, which consists of stream comments, model links, and scoring branch indications. To turn this display on or off, click:
View > Stream Markup
Changing the icon size for a stream
You can change the size of the stream icons in the following ways.
???Through a stream property setting
???Through a
???Using the keyboard
You can scale the entire stream view to one of a number of sizes between 8% and 200% of the standard icon size.

25
IBM SPSS Modeler Overview
Figure
Changing the icon size
To scale the entire stream (stream properties method)
E From the main menu, choose
Tools > Stream Properties > Options > Layout.
EChoose the size you want from the Icon Size menu.
EClick Apply to see the result.
EClick OK to save the change.
To scale the entire stream (menu method)
E
EChoose Icon Size and select the size you want.
To scale the entire stream (keyboard method)
EPress Ctrl +
EPress Ctrl + Shift + [+] on the main keyboard to zoom in to the next larger size.
This feature is particularly useful for gaining an overall view of a complex stream. You can also use it to minimize the number of pages needed to print a stream.

26
Chapter 3
Using the Mouse in IBM SPSS Modeler
The most common uses of the mouse in IBM?? SPSS?? Modeler include the following:
???
???
???
Using Shortcut Keys
Many visual programming operations in IBM?? SPSS?? Modeler have shortcut keys associated with them. For example, you can delete a node by clicking the node and pressing the Delete key on your keyboard. Likewise, you can quickly save a stream by pressing the S key while holding down the Ctrl key. Control commands like this one are indicated by a combination of Ctrl and another
There are a number of shortcut keys used in standard Windows operations, such as Ctrl+X to cut. These shortcuts are supported in SPSS Modeler along with the following
Note: In some cases, old shortcut keys used in SPSS Modeler con???ict with standard Windows shortcut keys. These old shortcuts are supported with the addition of the Alt key. For example, Ctrl+Alt+C can be used to toggle the cache on and off.
Table
Supported shortcut keys

27
IBM SPSS Modeler Overview
Table
Supported shortcuts for old hot keys
Printing
The following objects can be printed in IBM?? SPSS?? Modeler:
???Stream diagrams
???Graphs
???Tables
???Reports (from the Report node and Project Reports)
???Scripts (from the stream properties, Standalone Script, or SuperNode script dialog boxes)
???Models (Model browsers, dialog box tabs with current focus, tree viewers)
???Annotations (using the Annotations tab for output)
To print an object:
???To print without previewing, click the Print button on the toolbar.
???To set up the page before printing, select Page Setup from the File menu.
???To preview before printing, select Print Preview from the File menu.
???To view the standard print dialog box with options for selecting printers, and specifying appearance options, select Print from the File menu.
Automating IBM SPSS Modeler
Since advanced data mining can be a complex and sometimes lengthy process, IBM?? SPSS?? Modeler includes several types of coding and automation support.
???Control Language for Expression Manipulation (CLEM) is a language for analyzing and manipulating the data that ???ows along SPSS Modeler streams. Data miners use CLEM extensively in stream operations to perform tasks as simple as deriving pro???t from cost and

28
Chapter 3
revenue data or as complex as transforming web log data into a set of ???elds and records with usable information. For more information, see the topic About CLEM in Chapter 7 on p. 105.
???Scripting is a powerful tool for automating processes in the user interface. Scripts can perform the same kinds of actions that users perform with a mouse or a keyboard. You can set options for nodes and perform derivations using a subset of CLEM. You can also specify output and manipulate generated models.

Chapter
4
Understanding Data Mining
Data Mining Overview
Through a variety of techniques, data mining identi???es nuggets of information in bodies of data. Data mining extracts information in such a way that it can be used in areas such as decision support, prediction, forecasts, and estimation. Data is often voluminous but of low value and with little direct usefulness in its raw form. It is the hidden information in the data that has value.
In data mining, success comes from combining your (or your expert???s) knowledge of the data with advanced, active analysis techniques in which the computer identi???es the underlying relationships and features in the data. The process of data mining generates models from historical data that are later used for predictions, pattern detection, and more. The technique for building these models is called machine learning or modeling.
Modeling Techniques
IBM?? SPSS?? Modeler includes a number of
???Predictive modeling methods include decision trees, neural networks, and statistical models.
???Clustering models focus on identifying groups of similar records and labeling the records according to the group to which they belong. Clustering methods include Kohonen,
???Association rules associate a particular conclusion (such as the purchase of a particular product) with a set of conditions (the purchase of several other products).
???Screening models can be used to screen data to locate ???elds and records that are most likely to be of interest in modeling and identify outliers that may not ???t known patterns. Available methods include feature selection and anomaly detection.
Data Manipulation and Discovery
SPSS Modeler also includes many facilities that let you apply your expertise to the data:
???Data manipulation. Constructs new data items derived from existing ones and breaks down the data into meaningful subsets. Data from a variety of sources can be merged and ???ltered.
???Browsing and visualization. Displays aspects of the data using the Data Audit node to perform an initial audit including graphs and statistics. Advanced visualization includes interactive graphics, which can be exported for inclusion in project reports.
???Statistics. Con???rms suspected relationships between variables in the data. Statistics from IBM?? SPSS?? Statistics can also be used within SPSS Modeler.
???Hypothesis testing. Constructs models of how the data behaves and veri???es these models.

30
Chapter 4
Typically, you will use these facilities to identify a promising set of attributes in the data. These attributes can then be fed to the modeling techniques, which will attempt to identify underlying rules and relationships.
Typical Applications
Typical applications of data mining techniques include the following:
Direct mail. Determine which demographic groups have the highest response rate. Use this information to maximize the response to future mailings.
Credit scoring. Use an individual???s credit history to make credit decisions.
Human resources. Understand past hiring practices and create decision rules to streamline the hiring process.
Medical research. Create decision rules that suggest appropriate procedures based on medical evidence.
Market analysis. Determine which variables, such as geography, price, and customer characteristics, are associated with sales.
Quality control. Analyze data from product manufacturing and identify variables determining product defects.
Policy studies. Use survey data to formulate policy by applying decision rules to select the most important variables.
Health care. User surveys and clinical data can be combined to discover variables that contribute to health.
Terminology
The terms attribute, ???eld, and variable refer to a single data item common to all cases under consideration. A collection of attribute values that refers to a speci???c case is called a record, an example, or a case.
Assessing the Data
Data mining is not likely to be fruitful unless the data you want to use meets certain criteria. The following sections present some of the aspects of the data and its application that you should consider.
Ensure that the data is available
This may seem obvious, but be aware that although data might be available, it may not be in a form that can be used easily. IBM?? SPSS?? Modeler can import data from databases (through ODBC) or from ???les. The data, however, might be held in some other form on a machine that cannot be directly accessed. It will need to be downloaded or dumped in a suitable form before it can be used. It might be scattered among different databases and sources and need to be pulled
31
Understanding Data Mining
together. It may not even be online. If it exists only on paper, data entry will be required before you can begin data mining.
Check whether the data covers the relevant attributes
The object of data mining is to identify relevant attributes, so including this check may seem odd at ???rst. It is very useful, however, to look at what data is available and to try to identify the likely relevant factors that are not recorded. In trying to predict ice cream sales, for example, you may have a lot of information about retail outlets or sales history, but you may not have weather
and temperature information, which is likely to play a signi???cant role. Missing attributes do not necessarily mean that data mining will not produce useful results, but they can limit the accuracy of resulting predictions.
A quick way of assessing the situation is to perform a comprehensive audit of your data. Before moving on, consider attaching a Data Audit node to your data source and running it to generate a full report.
Beware of noisy data
Data often contains errors or may contain subjective, and therefore variable, judgments. These phenomena are collectively referred to as noise. Sometimes noise in data is normal. There may well be underlying rules, but they may not hold for 100% of the cases.
Typically, the more noise there is in data, the more dif???cult it is to get accurate results. However, SPSS Modeler???s
Ensure that there is sufficient data
In data mining, it is not necessarily the size of a data set that is important. The representativeness of the data set is far more signi???cant, together with its coverage of possible outcomes and combinations of variables.
Typically, the more attributes that are considered, the more records that will be needed to give representative coverage.
If the data is representative and there are general underlying rules, it may well be that a data sample of a few thousand (or even a few hundred) records will give equally good results as a
Seek out the experts on the data
In many cases, you will be working on your own data and will therefore be highly familiar with its content and meaning. However, if you are working on data for another department of your organization or for a client, it is highly desirable that you have access to experts who know the data. They can guide you in the identi???cation of relevant attributes and can help to interpret the results of data mining, distinguishing the true nuggets of information from ???fool???s gold,??? or artifacts caused by anomalies in the data sets.

32
Chapter 4
A Strategy for Data Mining
As with most business endeavors, data mining is much more effective if done in a planned, systematic way. Even with
???What substantive problem do you want to solve?
???What data sources are available, and what parts of the data are relevant to the current problem?
???What kind of preprocessing and data cleaning do you need to do before you start mining
the data?
???What data mining technique(s) will you use?
???How will you evaluate the results of the data mining analysis?
???How will you get the most out of the information you obtained from data mining?
The typical data mining process can become complicated very quickly. There is a lot to keep track
process model helps you answer the questions listed earlier in this section, and makes sure the important points are addressed. It serves as a data mining road map so that you will not lose your way as you dig into the complexities of your data.
The data mining process suggested for use with SPSS Modeler is the
The
The general

33
Understanding Data Mining
Figure
The six phases include:
???Business understanding. This is perhaps the most important phase of data mining. Business understanding includes determining business objectives, assessing the situation, determining data mining goals, and producing a project plan.
???Data understanding. Data provides the ???raw materials??? of data mining. This phase addresses the need to understand what your data resources are and the characteristics of those resources. It includes collecting initial data, describing data, exploring data, and verifying data quality. The Data Audit node available from the Output nodes palette is an indispensable tool for data understanding.
???Data preparation. After cataloging your data resources, you will need to prepare your data for mining. Preparations include selecting, cleaning, constructing, integrating, and formatting data.
???Modeling. This is, of course, the ???ashy part of data mining, where sophisticated analysis methods are used to extract information from the data. This phase involves selecting modeling techniques, generating test designs, and building and assessing models.
???Evaluation. Once you have chosen your models, you are ready to evaluate how the data mining results can help you to achieve your business objectives. Elements of this phase include evaluating results, reviewing the data mining process, and determining the next steps.
???Deployment. Now that you have invested all of this effort, it is time to reap the bene???ts. This phase focuses on integrating your new knowledge into your everyday business processes to solve your original business problem. This phase includes plan deployment, monitoring and maintenance, producing a ???nal report, and reviewing the project.
There are some key points in this process model. First, while there is a general tendency for the process to ???ow through the steps in the order outlined in the previous paragraphs, there are also a number of places where the phases in???uence each other in a nonlinear way. For example, data preparation usually precedes modeling. However, decisions made and information gathered during the modeling phase can often lead you to rethink parts of the data preparation phase, which can then present new modeling issues. The two phases feed back on each other until both phases

34
Chapter 4
have been resolved adequately. Similarly, the evaluation phase can lead you to reevaluate your original business understanding, and you may decide that you have been trying to answer the wrong question. At this point, you can revise your business understanding and proceed through the rest of the process again with a better target in mind.
The second key point is the iterative nature of data mining. You will rarely, if ever, simply plan a data mining project, complete it, and then pack up your data and go home. Data mining to address your customers??? demands is an ongoing endeavor. The knowledge gained from one cycle of data mining will almost invariably lead to new questions, new issues, and new opportunities to identify and meet your customers??? needs. Those new questions, issues, and opportunities can usually be addressed by mining your data once again. This process of mining and identifying new opportunities should become part of the way you think about your business and a cornerstone of your overall business strategy.
This introduction provides only a brief overview of the
???The
???The
Types of Models
IBM?? SPSS?? Modeler offers a variety of modeling methods taken from machine learning, arti???cial intelligence, and statistics. The methods available on the Modeling palette allow you to derive new information from your data and to develop predictive models. Each method has certain strengths and is best suited for particular types of problems.
The SPSS Modeler Applications Guide provides examples for many of these methods, along with a general introduction to the modeling process. This guide is available as an online tutorial, and also in PDF format. For more information, see the topic Application Examples in Chapter 1 on p. 5.
Modeling methods are divided into three categories:
???Classi???cation
???Association
???Segmentation
Classification Models
Classi???cation models use the values of one or more input ???elds to predict the value of one or more output, or target, ???elds. Some examples of these techniques are: decision trees (C&R Tree, QUEST, CHAID and C5.0 algorithms), regression (linear, logistic, generalized linear, and Cox regression algorithms), neural networks, support vector machines, and Bayesian networks.
Classi???cation models helps organizations to predict a known result, such as whether a customer will buy or leave or whether a transaction ???ts a known pattern of fraud. Modeling techniques include machine learning, rule induction, subgroup identi???cation, statistical methods, and multiple model generation.

35
Understanding Data Mining
Classi???cation nodes
The Auto Classi???er node creates and compares a number of different models for binary outcomes (yes or no, churn or do not churn, and so on), allowing you to choose the best approach for a given analysis. A number of modeling algorithms are supported, making it possible to select the methods you want to use, the speci???c options for each, and the criteria for comparing the results. The node generates a set of models based on the speci???ed options and ranks the best candidates according to the criteria you specify.
The Auto Numeric node estimates and compares models for continuous numeric range outcomes using a number of different methods. The node works in the same manner as the Auto Classi???er node, allowing you to choose the algorithms to use and to experiment with multiple combinations of options in a single modeling pass. Supported algorithms include neural networks, C&R Tree, CHAID, linear regression, generalized linear regression, and support vector machines (SVM). Models can be compared based on correlation, relative error, or number of variables used.
The Classi???cation and Regression (C&R) Tree node generates a decision tree that allows you to predict or classify future observations. The method uses recursive partitioning to split the training records into segments by minimizing the impurity at each step, where a node in the tree is considered ???pure??? if 100% of cases in the node fall into a speci???c category of the target ???eld. Target and input ???elds can be numeric ranges or categorical (nominal, ordinal, or ???ags); all splits are binary (only two subgroups).
The QUEST node provides a binary classi???cation method for building decision trees, designed to reduce the processing time required for large C&R Tree analyses while also reducing the tendency found in classi???cation tree methods to favor inputs that allow more splits. Input ???elds can be numeric ranges (continuous), but the target ???eld must be categorical. All splits are binary.
The CHAID node generates decision trees using
The C5.0 node builds either a decision tree or a rule set. The model works by splitting the sample based on the ???eld that provides the maximum information gain at each level. The target ???eld must be categorical. Multiple splits into more than two subgroups are allowed.
The Decision List node identi???es subgroups, or segments, that show a higher or lower likelihood of a given binary outcome relative to the overall population. For example, you might look for customers who are unlikely to churn or are most likely to respond favorably to a campaign. You can incorporate your business knowledge into the model by adding your own custom segments and previewing alternative models side by side to compare the results. Decision List models consist of a list of rules in which each rule has a condition and an outcome. Rules are applied in order, and the ???rst rule that matches determines the outcome.
Linear regression models predict a continuous target based on linear relationships between the target and one or more predictors.

36
Chapter 4
The PCA/Factor node provides powerful
combinations of the input ???elds that do the best job of capturing the variance in the entire set of ???elds, where the components are orthogonal (perpendicular) to each other. Factor analysis attempts to identify underlying factors that explain the pattern of correlations within a set of observed ???elds. For both approaches, the goal is to ???nd a small number of derived ???elds that effectively summarizes the information in the original set of ???elds.
The Feature Selection node screens input ???elds for removal based on a set of criteria (such as the percentage of missing values); it then ranks the importance of remaining inputs relative to a speci???ed target. For example, given a data set with hundreds of potential inputs, which are most likely to be useful in modeling patient outcomes?
Discriminant analysis makes more stringent assumptions than logistic regression but can be a valuable alternative or supplement to a logistic regression analysis when those assumptions are met.
Logistic regression is a statistical technique for classifying records based on values of input ???elds. It is analogous to linear regression but takes a categorical target ???eld instead of a numeric range.
The Generalized Linear model expands the general linear model so that the dependent variable is linearly related to the factors and covariates through a speci???ed link function. Moreover, the model allows for the dependent variable to have a
A generalized linear mixed model (GLMM) extends the linear model so that the target can have a
The Cox regression node enables you to build a survival model for
for given values of the input variables.
The Support Vector Machine (SVM) node enables you to classify data into one of two groups without over???tting. SVM works well with wide data sets, such as those with a very large number of input ???elds.
The Bayesian Network node enables you to build a probability model by combining observed and recorded evidence with

37
Understanding Data Mining
The
The Time Series node estimates exponential smoothing, univariate Autoregressive Integrated Moving Average (ARIMA), and multivariate ARIMA (or transfer function) models for time series data and produces forecasts of future performance. A Time Series node must always be preceded by a Time Intervals node.
The
Association Models
Association models ???nd patterns in your data where one or more entities (such as events, purchases, or attributes) are associated with one or more other entities. The models construct rule sets that de???ne these relationships. Here the ???elds within the data can act as both inputs and targets. You could ???nd these associations manually, but association rule algorithms do so much more quickly, and can explore more complex patterns. Apriori and Carma models are examples of the use of such algorithms. One other type of association model is a sequence detection model, which ???nds sequential patterns in
Association models are most useful when predicting multiple
Association nodes
The Apriori node extracts a set of rules from the data, pulling out the rules with the highest information content. Apriori offers ???ve different methods of selecting rules and uses a sophisticated indexing scheme to process large data sets ef???ciently. For large problems, Apriori is generally faster to train; it has no arbitrary limit on the number of rules that can be retained, and it can handle rules with up to 32

38
Chapter 4
preconditions. Apriori requires that input and output ???elds all be categorical but delivers better performance because it is optimized for this type of data.
The CARMA model extracts a set of rules from the data without requiring you to specify input or target ???elds. In contrast to Apriori the CARMA node offers build settings for rule support (support for both antecedent and consequent) rather than just antecedent support. This means that the rules generated can be used for a wider variety of
The Sequence node discovers association rules in sequential or
Segmentation Models
Segmentation models divide the data into segments, or clusters, of records that have similar patterns of input ???elds. As they are only interested in the input ???elds, segmentation models have no concept of output or target ???elds. Examples of segmentation models are Kohonen networks,
Segmentation models (also known as ???clustering models???) are useful in cases where the speci???c result is unknown (for example, when identifying new patterns of fraud, or when identifying groups of interest in your customer base). Clustering models focus on identifying groups of similar records and labeling the records according to the group to which they belong. This is done without the bene???t of prior knowledge about the groups and their characteristics, and it distinguishes clustering models from the other modeling techniques in that there is no prede???ned output or target ???eld for the model to predict. There are no right or wrong answers for these models. Their value is determined by their ability to capture interesting groupings in the data and provide useful descriptions of those groupings. Clustering models are often used to create clusters or segments that are then used as inputs in subsequent analyses (for example, by segmenting potential customers into homogeneous subgroups).
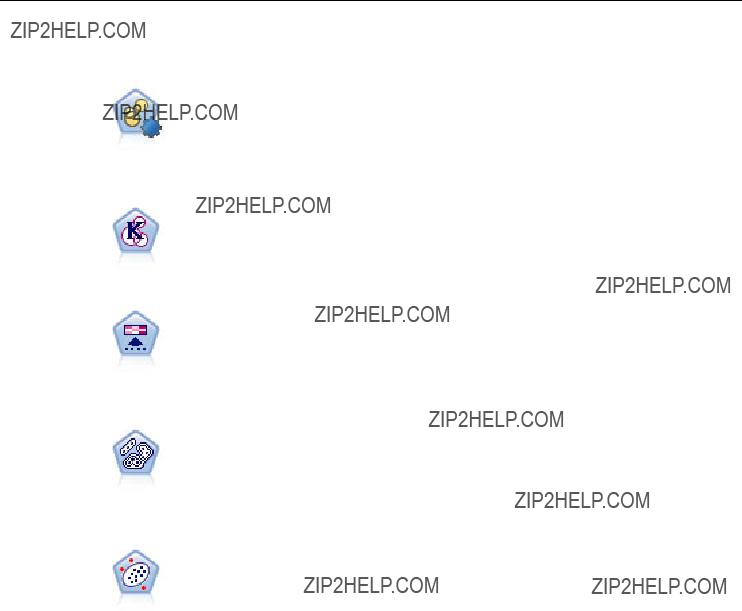
39
Understanding Data Mining
Segmentation nodes
The Auto Cluster node estimates and compares clustering models, which identify groups of records that have similar characteristics. The node works in the same manner as other automated modeling nodes, allowing you to experiment with multiple combinations of options in a single modeling pass. Models can be compared using basic measures with which to attempt to ???lter and rank the usefulness of the cluster models, and provide a measure based on the importance of particular ???elds.
The
The Kohonen node generates a type of neural network that can be used to cluster the data set into distinct groups. When the network is fully trained, records that are similar should be close together on the output map, while records that are different will be far apart. You can look at the number of observations captured by each unit in the model nugget to identify the strong units. This may give you a sense of the appropriate number of clusters.
The TwoStep node uses a
The Anomaly Detection node identi???es unusual cases, or outliers, that do not conform to patterns of ???normal??? data. With this node, it is possible to identify outliers even if they do not ???t any previously known patterns and even if you are not exactly sure what you are looking for.
SPSS Modeler supports integration with data mining and modeling tools that are available from database vendors, including Oracle Data Miner, IBM DB2 InfoSphere Warehouse, and Microsoft Analysis Services. You can build, score, and store models inside the
IBM SPSS Statistics Models
If you have a copy of IBM?? SPSS?? Statistics installed and licensed on your computer, you can access and run certain SPSS Statistics routines from within SPSS Modeler to build and score models.
Further Information
Detailed documentation on the modeling algorithms is also available. For more information, see the SPSS Modeler Algorithms Guide, available on the product DVD.

40
Chapter 4
Data Mining Examples
The best way to learn about data mining in practice is to start with an example. A number of application examples are available in the IBM?? SPSS?? Modeler Applications Guide, which provides brief, targeted introductions to speci???c modeling methods and techniques. For more information, see the topic Application Examples in Chapter 1 on p. 5.
Chapter
5
Building Streams
Data mining using IBM?? SPSS?? Modeler focuses on the process of running data through a series of nodes, referred to as a stream. This series of nodes represents operations to be performed on the data, while links between the nodes indicate the direction of data ???ow. Typically, you use a data stream to read data into SPSS Modeler, run it through a series of manipulations, and then send it to a destination, such as a table or a viewer.
For example, suppose that you want to open a data source, add a new ???eld, select records based on values in the new ???eld, and then display the results in a table. In this case, your data stream would consist of four nodes:
A Variable File node, which you set up to read the data from the data source.
A Derive node, which you use to add the new, calculated ???eld to the data set.
A Select node, which you use to set up selection criteria to exclude records from the data stream.
A Table node, which you use to display the results of your manipulations onscreen.
Building Data Streams
IBM?? SPSS?? Modeler???s unique interface lets you mine your data visually by working with diagrams of data streams. At the most basic level, you can build a data stream using the following steps:
???Add nodes to the stream canvas.
???Connect the nodes to form a stream.
???Specify any node or stream options.
???Run the stream.

42
Chapter 5
Figure
Completed stream on the stream canvas
This section contains more detailed information on working with nodes to create more complex data streams. It also discusses options and settings for nodes and streams. For
Working with Nodes
Nodes are used in IBM?? SPSS?? Modeler to help you explore data. Various nodes in the workspace represent different objects and actions. The palette at the bottom of the SPSS Modeler window contains all of the possible nodes used in stream building.
There are several types of nodes. Source nodes bring data into the stream, and are located on the Sources tab of the nodes palette. Process nodes perform operations on individual data records and ???elds, and can be found in the Record Ops and Field Ops tabs of the palette. Output nodes produce a variety of output for data, charts and model results, and are included on the Graphs, Output and Export tabs of the nodes palette. Modeling nodes use statistical algorithms to create model nuggets, and are located on the Modeling tab, and (if activated) the Database Modeling tab, of the nodes palette. For more information, see the topic Nodes Palette in Chapter 3 on p. 18.
You connect the nodes to form streams which, when run, let you visualize relationships and draw conclusions. Streams are like

43
Building Streams
A runnable node that processes stream data is known as a terminal node. A modeling or output node is a terminal node if it is located at the end of a stream or stream branch. You cannot connect further nodes to a terminal node.
Note: You can customize the Nodes palette. For more information, see the topic Customizing the Nodes Palette in Chapter 12 on p. 223.
Adding Nodes to a Stream
There are several ways to add nodes to a stream from the nodes palette:
???
???Drag and drop a node from the palette to the stream canvas.
???Click a node on the palette, and then click the stream canvas.
???Select an appropriate option from the Insert menu of IBM?? SPSS?? Modeler.
Once you have added a node to the stream canvas,
Removing Nodes
To remove a node from the data stream, click it and either press the Delete key, or
Connecting Nodes in a Stream
Nodes added to the stream canvas do not form a data stream until they have been connected. Connections between the nodes indicate the direction of the data as it ???ows from one operation to the next. There are a number of ways to connect nodes to form a stream:
To Add and Connect Nodes by
The simplest way to form a stream is to

44
Chapter 5
Figure
Stream created by
To Connect Nodes Using the Middle Mouse Button
On the stream canvas, you can click and drag from one node to another using the middle mouse button. (If your mouse does not have a middle button, you can simulate this by pressing the Alt key while dragging with the mouse from one node to another.)
Figure
Using the middle mouse button to connect nodes
To Manually Connect Nodes
If you do not have a middle mouse button and prefer to manually connect nodes, you can use the
E
EOn the menu, click Connect.
EA connection icon is displayed both on the start node and the cursor. Click a second node on the canvas to connect the two nodes.
Figure
Connecting nodes using the Connect option from the
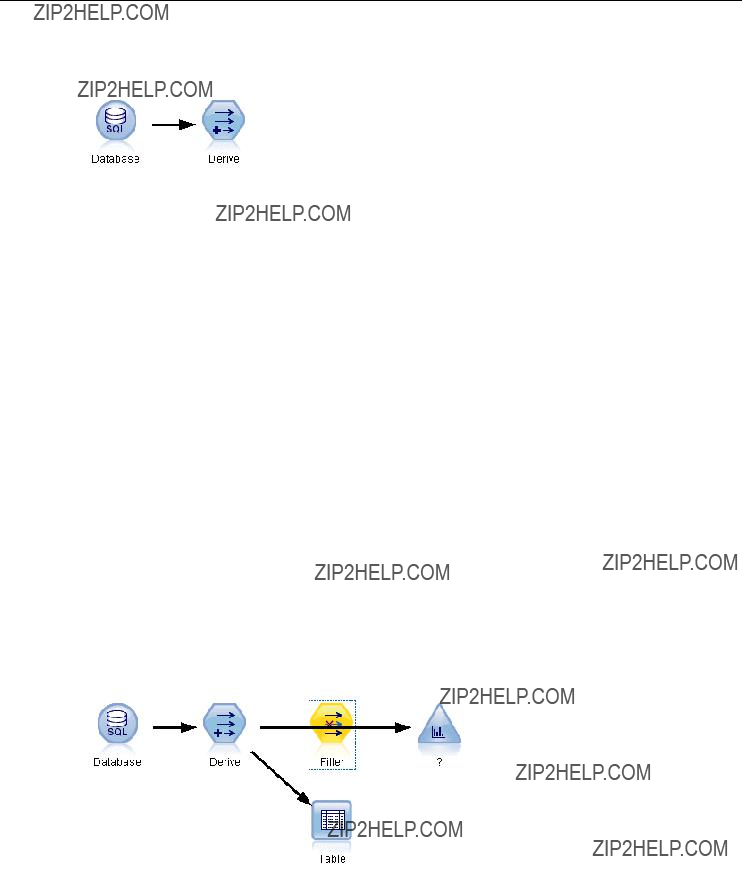
45
Building Streams
Figure
Connected nodes
When connecting nodes, there are several guidelines to follow. You will receive an error message if you attempt to make any of the following types of connections:
???A connection leading to a source node
???A connection leading from a terminal node
???A node having more than its maximum number of input connections
???Connecting two nodes that are already connected
???Circularity (data returns to a node from which it has already ???owed)
Bypassing Nodes in a Stream
When you bypass a node in the data stream, all of its input and output connections are replaced by connections that lead directly from its input nodes to its output nodes. If the node does not have both input and output connections, then all of its connections are deleted rather than rerouted.
For example, you might have a stream that derives a new ???eld, ???lters ???elds, and then explores the results in a histogram and table. If you want to also view the same graph and table for data before ???elds are ???ltered, you can add either new Histogram and Table nodes to the stream, or you can bypass the Filter node. When you bypass the Filter node, the connections to the graph and table pass directly from the Derive node. The Filter node is disconnected from the stream.
Figure
Bypassing a previously connected Filter node
To Bypass a Node
EOn the stream canvas, use the middle mouse button to
Note: You can undo this action clicking Undo on the Edit menu or by pressing Ctrl+Z.

46
Chapter 5
Disabling Nodes in a Stream
Process nodes with a single input within streams can be disabled, with the result that the node is ignored during running of the stream. This saves you from having to remove or bypass the node and means you can leave it connected to the remaining nodes. You can still open and edit the node settings; however, any changes will not take effect until you enable the node again.
For example, you might have a stream that ???lters several ???elds, and then builds models with the reduced data set. If you want to also build the same models without ???elds being ???ltered, to see if they improve the model results, you can disable the Filter node. When you disable the Filter node, the connections to the modeling nodes pass directly through from the Derive node to the Type node.
Figure
Disabled Filter node in a stream
To Disable a Node
EOn the stream canvas,
EClick Disable Node on the
Alternatively, you can click Node > Disable Node on the Edit menu. When you want to include the node back in the stream, click Enable Node in the same way.
Note: You can undo this action clicking Undo on the Edit menu or by pressing Ctrl+Z. You can undo this action clicking Undo on the Edit menu or by pressing Ctrl+Z.
Adding Nodes in Existing Connections
You can add a new node between two connected nodes by dragging the arrow that connects the two nodes.

47
Building Streams
Figure
Connecting a new node between two connected nodes
EWith the middle mouse button, click and drag the connection arrow into which you want to insert the node. Alternatively, you can hold down the Alt key while clicking and dragging to simulate a middle mouse button.
Figure
New stream
EDrag the connection to the node that you want to include and release the mouse button.
Note: You can remove new connections from the node and restore the original by bypassing the node.
Deleting Connections between Nodes
To delete the connection between two nodes:
E
EOn the menu, click Delete Connection.

48
Chapter 5
Figure
Deleting the connection between nodes in a stream
To delete all connections to and from a node, do one of the following:
???Select the node and press F3.
???Select the node, and on the main menu click:
Edit > Node > Disconnect
Setting Options for Nodes
Once you have created and connected nodes, there are several options for customizing nodes.

49
Building Streams
Figure
???Click Edit to open the dialog box for the selected node.
???Click Connect to manually connect one node to another.
???Click Disconnect to delete all links to and from the node.
???Click Rename and Annotate to open the Annotations tab of the editing dialog box.
???Click New Comment to add a comment related to the node. For more information, see the topic Adding Comments and Annotations to Nodes and Streams on p. 78.
???Click Disable Node to ???hide??? the node during processing. To make the node visible again for processing, click Enable Node. For more information, see the topic Disabling Nodes in a Stream on p. 46.
???Click Cut or Delete to remove the selected node(s) from the stream canvas. Note: Clicking Cut allows you to paste nodes, while Delete does not.
???Click Copy Node to make a copy of the node with no connections. This can be added to
a new or existing stream.
???Click Load Node to open a previously saved node and load its options into the currently selected node. Note: The nodes must be of identical types.
???Click Retrieve Node to retrieve a node from a connected IBM?? SPSS?? Collaboration and Deployment Services Repository.

50
Chapter 5
???Click Save Node to save the node???s details in a ???le. You can load node details only into another node of the same type.
???Click Store Node to store the selected node in a connected IBM SPSS Collaboration and Deployment Services Repository.
???Click Cache to expand the menu, with options for caching the selected node.
???Click Data Mapping to expand the menu, with options for mapping data to a new source or specifying mandatory ???elds.
???Click Create SuperNode to expand the menu, with options for creating a SuperNode in the current stream.
???Click Generate User Input Node to replace the selected node. Examples generated by this node will have the same ???elds as the current node.
???Click Run From Here to run all terminal nodes downstream from the selected node.
Caching Options for Nodes
To optimize stream running, you can set up a cache on any nonterminal node. When you set up a cache on a node, the cache is ???lled with the data that passes through the node the next time you run the data stream. From then on, the data is read from the cache (which is stored on disk in a temporary directory) rather than from the data source.
Caching is most useful following a
Note: Caching at source nodes, which simply stores a copy of the original data as it is read into IBM?? SPSS?? Modeler, will not improve performance in most circumstances.
Nodes with caching enabled are displayed with a small document icon at the top right corner. When the data is cached at the node, the document icon is green.
51
Building Streams
Figure
Caching at the Type node to store newly derived fields
To Enable a Cache
EOn the stream canvas,
EOn the caching submenu, click Enable.
EYou can turn the cache off by
Caching Nodes in a Database
For streams run in a database, data can be cached midstream to a temporary table in the database rather than the ???le system. When combined with SQL optimization, this may result in signi???cant gains in performance. For example, the output from a stream that merges multiple tables to create a data mining view may be cached and reused as needed. By automatically generating SQL for all downstream nodes, performance can be further improved.
When using database caching with strings longer than 255 characters, either ensure that there is a Type node upstream from the caching node and that the ???eld values are read, or set the string length by means of the default_sql_string_length parameter in the options.cfg ???le. Doing so ensures that the corresponding column in the temporary table is set to the correct width to accommodate the strings.
To take advantage of database caching, both SQL optimization and database caching must be enabled. Note that Server optimization settings override those on the Client. For more information, see the topic Setting optimization options for streams on p. 60.
With database caching enabled, simply

52
Chapter 5
Note: The following databases support temporary tables for the purpose of caching: DB2, Netezza, Oracle, SQL Server, and Teradata. Other databases will use a normal table for database caching. The SQL code can be customized for speci???c databases - contact Support for assistance.
To Flush a Cache
A white document icon on a node indicates that its cache is empty. When the cache is full, the document icon becomes solid green. If you want to replace the contents of the cache, you must ???rst ???ush the cache and then
EOn the stream canvas,
EOn the caching submenu, click Flush.
To Save a Cache
You can save the contents of a cache as an IBM?? SPSS?? Statistics data ???le (*.sav). You can then either reload the ???le as a cache, or you can set up a node that uses the cache ???le as its data source. You can also load a cache that you saved from another project.
EOn the stream canvas,
EOn the caching submenu, click Save Cache.
EIn the Save Cache dialog box, browse to the location where you want to save the cache ???le.
EEnter a name in the File Name text box.
EBe sure that *.sav is selected in the Files of Type list, and click Save.
To Load a Cache
If you have saved a cache ???le before removing it from the node, you can reload it.
EOn the stream canvas,
EOn the caching submenu, click Load Cache.
EIn the Load Cache dialog box, browse to the location of the cache ???le, select it, and click Load.
Previewing Data in Nodes
To ensure that data is being changed in the way you expect as you build a stream, you could run your data through a Table node at each signi???cant step. To save you from having to do this you can generate a preview from each node that displays a sample of the data that will be created, thereby reducing the time it takes to build each node.
For nodes upstream of a model nugget, the preview shows the input ???elds; for a model nugget or nodes downstream of the nugget (except terminal nodes), the preview shows input and generated ???elds.
The default number of rows displayed is 10; however, you can change this in the stream properties. For more information, see the topic Setting general options for streams on p. 55.

53
Building Streams
Figure
Data Preview from a model nugget
From the Generate menu, you can create several types of nodes.
Locking Nodes
To prevent other users from amending the settings of one or more nodes in a stream, you can encapsulate the node or nodes in a special type of node called a SuperNode, and then lock the SuperNode by applying password protection.
Working with Streams
Once you have connected source, process, and terminal nodes on the stream canvas, you have created a stream. As a collection of nodes, streams can be saved, annotated, and added to projects. You can also set numerous options for streams, such as optimization, date and time settings, parameters, and scripts. These properties are discussed in the topics that follow.
In IBM?? SPSS?? Modeler, you can use and modify more than one data stream in the same SPSS Modeler session. The right side of the main window contains the managers pane, which helps you to navigate the streams, outputs and models that are currently open. If you cannot see the managers pane, click Managers on the View menu, then click the Streams tab.
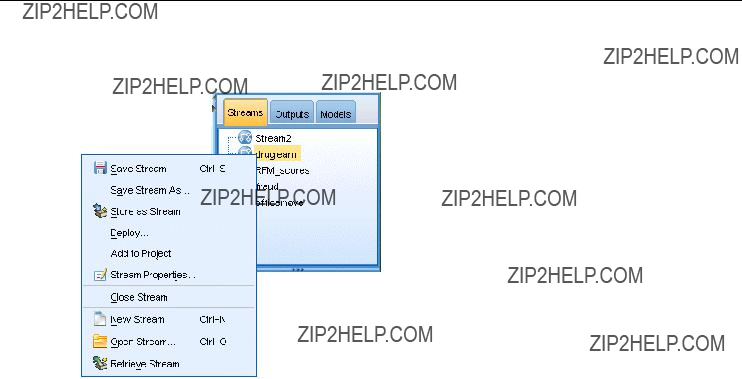
54
Chapter 5
Figure
Streams tab in the managers pane with
From this tab, you can:
???Access streams.
???Save streams.
???Save streams to the current project.
???Close streams.
???Open new streams.
???Store and retrieve streams from an IBM SPSS Collaboration and Deployment Services repository (if available at your site). For more information, see the topic About the IBM SPSS Collaboration and Deployment Services Repository in Chapter 9 on p. 158.
Setting Options for Streams
You can specify a number of options to apply to the current stream. You can also save these options as defaults to apply to all your streams. The options are as follows.
???General. Miscellaneous options such as symbols and text encoding to use in the stream. For more information, see the topic Setting general options for streams on p. 55.
???Date/Time. Options relating to the format of date and time expressions. For more information, see the topic Setting date and time options for streams on p. 57.
???Number formats. Options controlling the format of numeric expressions. For more information, see the topic Setting number format options for streams on p. 59.
???Optimization. Options for optimizing stream performance. For more information, see the topic Setting optimization options for streams on p. 60.

55
Building Streams
???Logging and status. Options controlling SQL logging and record status. For more information, see the topic Setting SQL logging and record status options for streams on p. 63.
???Layout. Options relating to the layout of the stream on the canvas. For more information, see the topic Setting layout options for streams on p. 64.
To Set Stream Options
EOn the File menu, click Stream Properties (or select the stream from the Streams tab in the managers pane,
EClick the Options tab.
Alternatively, on the Tools menu, click:
Stream Properties > Options
Setting general options for streams
The general options are a set of miscellaneous options that apply to various aspects of the current stream.

56
Chapter 5
Figure
Setting general options for a stream
Decimal symbol. Select either a comma (,) or a period (.) as a decimal separator.
Grouping symbol. For number display formats, select the symbol used to group values (for example, the comma in 3,000.00). Options include none, period, comma, space, and
Encoding. Specify the stream default method for text encoding. (Note: Applies to Var. File source node and Flat File export node only. No other nodes use this setting; most data ???les have embedded encoding information.) You can choose either the system default or
in Appendix B on p. 248.
Ruleset Evaluation. Determines how rule set models are evaluated. By default, rule sets use Voting to combine predictions from individual rules and determine the ???nal prediction. To ensure that rule sets use the ???rst hit rule by default, select First Hit. Note that this option does not apply to Decision List models, which always use the ???rst hit as de???ned by the algorithm.
57
Building Streams
Maximum number of rows to show in Data Preview. a preview of the data is requested for a node. For Data in Nodes on p. 52.
Specify the number of rows to be shown when more information, see the topic Previewing
Maximum members for nominal fields. Select to specify a maximum number of members for nominal (set) ???elds after which the data type of the ???eld becomes Typeless. This option is useful when working with large nominal ???elds. Note: When the measurement level of a ???eld is set to Typeless, its role is automatically set to None. This means that the ???elds are not available for modeling.
Limit set size for Kohonen, and
Note that, for compatibility, this option also applies to the old Neural Network node that was replaced in version 14 of IBM?? SPSS?? Modeler; some legacy streams may still contain this node.
Refresh source nodes on execution. Select to automatically refresh all source nodes when running the current stream. This action is analogous to clicking the Refresh button on a source node, except that this option automatically refreshes all source nodes (except User Input nodes) for the current stream.
Note: Selecting this option ???ushes the caches of downstream nodes even if the data has not changed. Flushing occurs only once per running of the stream, though, which means that you can still use downstream caches as temporary storage for a single running. For example, say that you have set a cache midstream after a complex derive operation and that you have several graphs and reports attached downstream of this Derive node. When running the stream, the cache at the Derive node will be ???ushed and re???lled but only for the ???rst graph or report. Subsequent terminal nodes will read data from the Derive node cache.
Display field and value labels in output. Displays ???eld and value labels in tables, charts, and other output. If labels do not exist, the ???eld names and data values will be displayed instead. Labels are turned off by default; however, you can toggle labels on an individual basis elsewhere in SPSS Modeler. You can also choose to display labels on the output window using a toggle button available on the toolbar.
Figure
Toolbar icon used to toggle field and value labels
Display execution times. Displays individual execution times for stream nodes on the Execution Times tab after the stream is run. For more information, see the topic Viewing Node Execution Times on p. 67.
Save As Default. The options speci???ed apply only to the current stream. Click this button to set these options as the default for all streams.
Setting date and time options for streams
These options specify the format to use for various date and time expressions in the current stream.

58
Chapter 5
Figure
Setting date and time options for a stream
Import date/time as. Select whether to use date/time storage for date/time ???elds or whether to import them as string variables.
Date format. Select a date format to be used for date storage ???elds or when strings are interpreted as dates by CLEM date functions.
Time format. Select a time format to be used for time storage ???elds or when strings are interpreted as times by CLEM time functions.
Rollover days/mins. For time formats, select whether negative time differences should be interpreted as referring to the previous day or hour.
Date baseline (1st Jan). Select the baseline years (always 1 January) to be used by CLEM date functions that work with a single date.

59
Building Streams
Save As Default. The options speci???ed apply only to the current stream. Click this button to set these options as the default for all streams.
Setting number format options for streams
These options specify the format to use for various numeric expressions in the current stream.
Figure
Setting number format options for a stream
Number display format. You can choose from standard (####.###), scienti???c (#.###E+##), or currency display formats ($###.##).

60
Chapter 5
Decimal places (standard, scientific, currency). For number display formats, speci???es the number of decimal places to be used when displaying or printing real numbers. This option is speci???ed separately for each display format.
Calculations in. Select Radians or Degrees as the unit of measurement to be used in trigonometric CLEM expressions. For more information, see the topic Trigonometric Functions in Chapter 8 on p. 139.
Save As Default. The options speci???ed apply only to the current stream. Click this button to set these options as the default for all streams.
Setting optimization options for streams
You can use the Optimization settings to optimize stream performance. Note that the performance and optimization settings on IBM?? SPSS?? Modeler Server (if used) override any equivalent settings in the client.
Note: Database modeling and SQL optimization require that SPSS Modeler Server connectivity be enabled on the IBM?? SPSS?? Modeler computer. With this setting enabled, you can access database algorithms, push back SQL directly from SPSS Modeler, and access SPSS Modeler Server. To verify the current license status, choose the following from the SPSS Modeler menu.
Help > About > Additional Details
If connectivity is enabled, you see the option Server Enablement in the License Status tab.
For more information, see the topic Connecting to IBM SPSS Modeler Server in Chapter 3 on p. 13.
61
Building Streams
Figure
Setting stream optimization options
Note: Whether SQL pushback and optimization are supported depends on the type of database in use. For the latest information on which databases and ODBC drivers are supported and tested for use with IBM?? SPSS?? Modeler 15, see the corporate Support site at http://www.ibm.com/support.
Enable stream rewriting. Select this option to enable stream rewriting in SPSS Modeler. Two types of rewriting are available, and you can select one or both. Stream rewriting reorders the nodes in a stream behind the scenes for more ef???cient operation, without altering stream semantics.
???Optimize SQL generation. This option enables nodes to be reordered within the stream so that more operations can be pushed back using SQL generation for execution in the database. When it ???nds a node that cannot be rendered into SQL, the optimizer will look ahead to see if there are any downstream nodes that can be rendered into SQL and safely moved in front of the problem node without affecting the stream semantics. Not only can the database perform operations more ef???ciently than SPSS Modeler, but such pushbacks act to reduce the size of the data set that is returned to SPSS Modeler for processing. This, in turn, can

62
Chapter 5
reduce network traf???c and speed stream operations. Note that the Generate SQL check box must be selected for SQL optimization to have any effect.
???Optimize syntax execution. This method of stream rewriting increases the ef???ciency of operations that incorporate more than one node containing IBM?? SPSS?? Statistics syntax. Optimization is achieved by combining the syntax commands into a single operation, instead of running each as a separate operation.
???Optimize other execution. This method of stream rewriting increases the ef???ciency of operations that cannot be delegated to the database. Optimization is achieved by reducing the amount of data in the stream as early as possible. While maintaining data integrity, the stream is rewritten to push operations closer to the data source, thus reducing data downstream for costly operations, such as joins.
Enable parallel processing. When running on a computer with multiple processors, this option allows the system to balance the load across those processors, which may result in faster performance. Use of multiple nodes or use of the following individual nodes may bene???t from parallel processing: C5.0, Merge (by key), Sort, Bin (rank and tile methods), and Aggregate (using one or more key ???elds).
Generate SQL. Select this option to enable SQL generation, allowing stream operations to be pushed back to the database by using SQL code to generate execution processes, which may improve performance. To further improve performance, Optimize SQL generation can also be selected to maximize the number of operations pushed back to the database. When operations for a node have been pushed back to the database, the node will be highlighted in purple when the stream is run.
???Database caching. For streams that generate SQL to be executed in the database, data can be cached midstream to a temporary table in the database rather than to the ???le system. When combined with SQL optimization, this may result in signi???cant gains in performance. For example, the output from a stream that merges multiple tables to create a data mining view may be cached and reused as needed. With database caching enabled, simply
???Use relaxed conversion. This option enables the conversion of data from either strings to numbers, or numbers to strings, if stored in a suitable format. For example, if the data is kept in the database as a string, but actually contains a meaningful number, the data can be converted for use when the pushback occurs.
Note: Due to minor differences in SQL implementation, streams run in a database may return slightly different results from those returned when run in SPSS Modeler. For similar reasons, these differences may also vary depending on the database vendor.
Save As Default. The options speci???ed apply only to the current stream. Click this button to set these options as the default for all streams.

63
Building Streams
Setting SQL logging and record status options for streams
These settings include various options controlling the display of SQL statements generated by the stream, and the display of the number of records processed by the stream.
Figure
Setting SQL logging and record status options for a stream
Display SQL in the messages log during stream execution. Speci???es whether SQL generated while
running the stream is passed to the message log.
Display SQL generation details in the messages log during stream preparation. During stream preview, speci???es whether a preview of the SQL that would be generated is passed to the messages log.
Display SQL. Speci???es whether any SQL that is displayed in the log should contain native SQL functions or standard ODBC functions of the form {fn FUNC(???)}, as generated by IBM?? SPSS?? Modeler. The former relies on ODBC driver functionality that may not be implemented. For example, this control would have no effect for SQL Server.

64
Chapter 5
Reformat SQL for improved readability. Speci???es whether SQL displayed in the log should be formatted for readability.
Show status for records. Speci???es when records should be reported as they arrive at terminal nodes. Specify a number that is used for updating the status every N records.
Save As Default. The options speci???ed apply only to the current stream. Click this button to set these options as the default for all streams.
Setting layout options for streams
These settings provide a number of options relating to the display and use of the stream canvas.
Figure
Setting display layout options for a stream
Minimum stream canvas width. Specify the minimum width of the stream canvas in pixels.
Minimum stream canvas height. Specify the minimum height of the stream canvas in pixels.

65
Building Streams
Stream scroll rate. Specify the scrolling rate for the stream canvas to control how quickly the stream canvas pane scrolls when a node is being dragged from one place to another on the canvas. Higher numbers specify a faster scroll rate.
Icon name maximum. Specify a limit in characters for the names of nodes on the stream canvas.
Icon size. Select an option to scale the entire stream view to one of a number of sizes between 8% and 200% of the standard icon size.
Grid cell size. Select a grid cell size from the list. This number is used for aligning nodes on the stream canvas using an invisible grid. The default grid cell size is 0.25.
Snap to Grid. Select to align icons to an invisible grid pattern (selected by default).
Generated icon placement. Choose where on the canvas to place icons for nodes generated from model nuggets. Default is top left.
Save As Default. The options speci???ed apply only to the current stream. Click this button to set these options as the default for all streams.
Viewing Stream Operation Messages
Messages regarding stream operations, such as running, optimization, and time elapsed for model building and evaluation, can easily be viewed using the Messages tab in the stream properties dialog box. Error messages are also reported in this table.
To View Stream Messages
EOn the File menu, click Stream Properties (or select the stream from the Streams tab in the managers pane,
EClick the Messages tab.
Alternatively, on the Tools menu, click:
Stream Properties > Messages
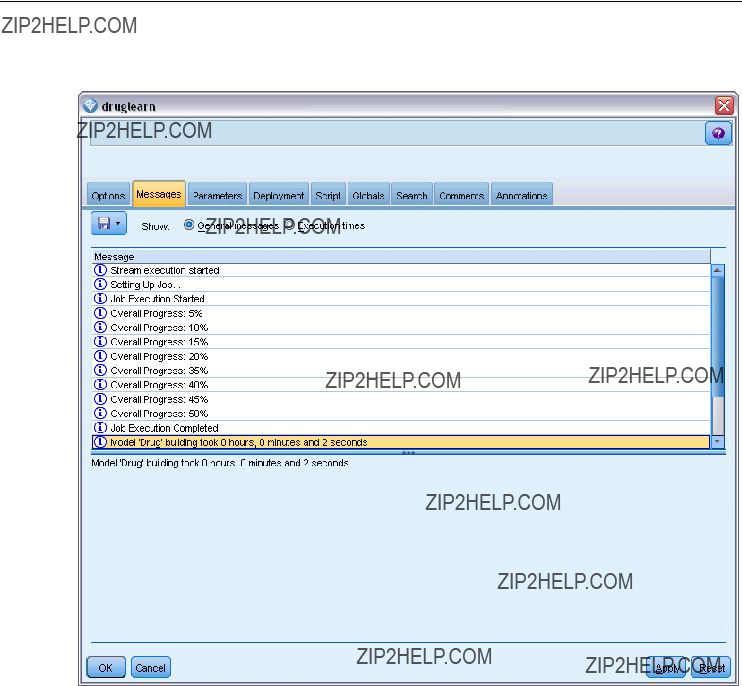
66
Chapter 5
Figure
Messages tab in stream properties dialog box
In addition to messages regarding stream operations, error messages are reported here. When stream running is terminated because of an error, this dialog box will open to the Messages tab with the error message visible. Additionally, the node with errors is highlighted in red on the stream canvas.

67
Building Streams
Figure
Stream running with error reported
If SQL optimization and logging options are enabled in the User Options dialog box, then information on generated SQL is also displayed. For more information, see the topic Setting optimization options for streams on p. 60.
You can save messages reported here for a stream by clicking Save Messages on the Save button
Viewing Node Execution Times
On the Messages tab you can also choose to display Execution Times, where you can see the individual execution times for all the nodes in the stream.
Note: For this feature to work, the Display execution times check box must be selected on the General setting of the Options tab.

68
Chapter 5
Figure
Viewing execution times for nodes in the stream
In the table of node execution times, the columns are as follows. Click a column heading to sort the entries into ascending or descending order (for example, to see which nodes have the longest execution times).
Terminal Node. The identi???er of the branch to which the node belongs. The identi???er is the name of the terminal node at the end of the branch.
Node Label. The name of the node to which the execution time refers.
Node Id. The unique identi???er of the node to which the execution time refers. This identi???er is generated by the system when the node is created.
Execution Time(s). The time in seconds taken to execute this node.
Setting Stream and Session Parameters
Parameters can be de???ned for use in CLEM expressions and in scripting. They are, in effect,
The scope of a parameter depends on where it is set:
???Stream parameters can be set in a stream script or in the stream properties dialog box, and they are available to all nodes in the stream. They are displayed on the Parameters list in the Expression Builder.
???Session parameters can be set in a

69
Building Streams
Parameters can also be set for SuperNodes, in which case they are visible only to nodes encapsulated within that SuperNode.
To Set Stream and Session Parameters through the User Interface
E To set stream parameters, on the main menu, click:
Tools > Stream Properties > Parameters
E To set session parameters, click Set Session Parameters on the Tools menu.
Figure
Setting parameters for the session
Prompt?. Check this box if you want the user to be prompted at runtime to enter a value for this parameter.
Name. Parameter names are listed here. You can create a new parameter by entering a name in this ???eld. For example, to create a parameter for the minimum temperature, you could type minvalue. Do not include the $P- pre???x that denotes a parameter in CLEM expressions. This name is also used for display in the CLEM Expression Builder.
Long name. Lists the descriptive name for each parameter created.
Storage. Select a storage type from the list. Storage indicates how the data values are stored in the parameter. For example, when working with values containing leading zeros that you want to preserve (such as 008), you should select String as the storage type. Otherwise, the zeros will be stripped from the value. Available storage types are string, integer, real, time, date, and timestamp. For date parameters, note that values must be speci???ed using ISO standard notation as shown in the next paragraph.
Value. Lists the current value for each parameter. Adjust the parameter as required. Note that for date parameters, values must be speci???ed in ISO standard notation (that is,
Type (optional). If you plan to deploy the stream to an external application, select a measurement level from the list. Otherwise, it is advisable to leave the Type column as is. If you want to specify value constraints for the parameter, such as upper and lower bounds for a numeric range, select Specify from the list.

70
Chapter 5
Note that long name, storage, and type options can be set for parameters through the user interface only. These options cannot be set using scripts.
Click the arrows at the right to move the selected parameter further up or down the list of available parameters. Use the delete button (marked with an X) to remove the selected parameter.
Specifying Runtime Prompts for Parameter Values
If you have streams where you might need to enter different values for the same parameter on different occasions, you can specify runtime prompts for one or more stream or session parameter values.
Figure
Runtime prompting for parameter values
Parameters. (Optional) Enter a value for the parameter, or leave the default value if there is one.
Turn off these prompts. Select this box if you do not want these prompts to be displayed when you run the stream. You can cause them to be redisplayed by selecting the Prompt? check box on the stream properties or session properties dialog box where the parameters were de???ned. For more information, see the topic Setting Stream and Session Parameters on p. 68.
Specifying Value Constraints for a Parameter Type
You can make value constraints for a parameter available during stream deployment to an external application that reads data modeling streams. This dialog box allows you to specify the values available to an external user running the stream. Depending on the data type, value constraints vary dynamically in the dialog box. The options shown here are identical to the options available for values from the Type node.
71
Building Streams
Figure
Specifying available values for a parameter
Type. Displays the currently selected measurement level. You can change this value to re???ect the way that you intend to use the parameter in IBM?? SPSS?? Modeler.
Storage. Displays the storage type if known. Storage types are unaffected by the measurement level (continuous, nominal or ???ag) that you choose for work in SPSS Modeler. You can alter the storage type on the main Parameters tab.
The bottom half of the dialog box dynamically changes depending on the measurement level selected in the Type ???eld.
Continuous Measurement Levels
Lower. Specify a lower limit for the parameter values.
Upper. Specify an upper limit for the parameter values.
Labels. You can specify labels for any value of a range ???eld. Click the Labels button to open a separate dialog box for specifying value labels.
Nominal Measurement Levels
Values. This option allows you to specify values for a parameter that will be used as a nominal ???eld. Values will not be coerced in the SPSS Modeler stream but will be used in a
Flag Measurement Levels
True. Specify a ???ag value for the parameter when the condition is met.
False. Specify a ???ag value for the parameter when the condition is not met.
Labels. You can specify labels for the values of a ???ag ???eld.
Stream Deployment Options
The Deployment tab of the stream properties dialog box enables you to specify options for deploying the stream as a scenario within IBM?? SPSS?? Collaboration and Deployment Services for the purposes of model refresh, automated job scheduling, or further use by IBM??

72
Chapter 5
Analytical Decision Management or Predictive Applications 5.x. All streams require a designated scoring branch before they can be deployed; additional requirements and options depend on the deployment type. For more information, see the topic Storing and Deploying Repository Objects in Chapter 9 on p. 160.
Viewing Global Values for Streams
Using the Globals tab in the stream properties dialog box, you can view the global values set for the current stream. Global values are created using a Set Globals node to determine statistics such as mean, sum, or standard deviation for selected ???elds.
Once the Set Globals node is run, these values are then available for a variety of uses in stream operations. For more information, see the topic Global Functions in Chapter 8 on p. 155.
To View Global Values for a Stream
EOn the File menu, click Stream Properties (or select the stream from the Streams tab in the managers pane,
EClick the Globals tab.
Alternatively, on the Tools menu, click:
Stream Properties > Globals
Figure
Viewing global values available for the stream
Globals available. Available globals are listed in this table. You cannot edit global values here, but you can clear all global values for a stream using the Clear All Values button to the right of the table.
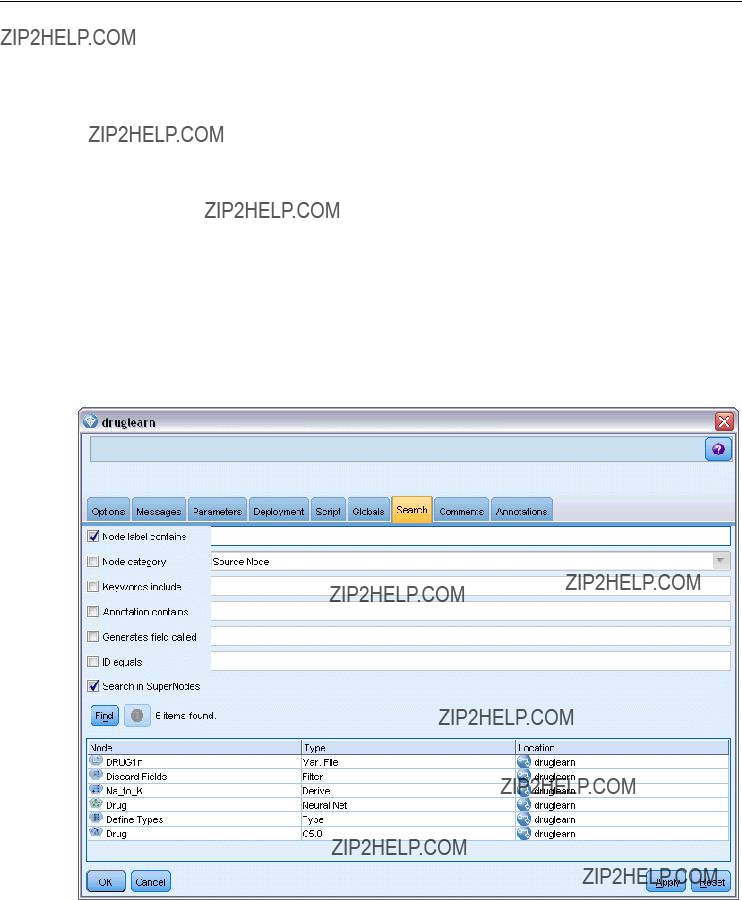
73
Building Streams
Searching for Nodes in a Stream
You can search for nodes in a stream by specifying a number of search criteria, such as node name, category and identi???er. This feature can be especially useful for complex streams containing a large number of nodes.
To Search for Nodes in a Stream
EOn the File menu, click Stream Properties (or select the stream from the Streams tab in the managers pane,
EClick the Search tab.
Alternatively, on the Tools menu, click:
Stream Properties > Search
Figure
Searching for nodes in a stream
You can specify more than one option to limit the search, except that searching by node ID (using the ???eld) excludes the other options.
Node label contains. Check this box and enter all or part of a node label to search for a particular node. Searches are not

74
Chapter 5
Node category. Check this box and click a category on the list to search for a particular type of node. Process Node means a node from the Record Ops or Field Ops tab of the nodes palette;
refers to a model nugget.
Keywords include. Check this box and enter one or more complete keywords to search for nodes having that text in the Keywords ???eld on the Annotations tab of the node dialog box. Keyword text that you enter must be an exact match. Separate multiple keywords with semicolons to search for alternatives (for example, entering proton;neutron will ???nd all nodes with either of these keywords. For more information, see the topic Annotations on p. 86.
Annotation contains. Check this box and enter one or more words to search for nodes that contain this text in the main text area on the Annotations tab of the node dialog box. Searches are not
Generates field called. Check this box and enter the name of a generated ???eld (for example,
ID equals. Check this box and enter a node ID to search for a particular node with that identi???er (selecting this option disables all the preceding options). Node IDs are assigned by the system when the node is created, and can be used to reference the node for the purposes of scripting or automation. Enter only one node ID, which must be an exact match. For more information, see the topic Annotations on p. 86.
Search in SuperNodes. This box is checked by default, meaning that the search is performed on nodes both inside and outside SuperNodes. Clear the box if you want to perform the search only on nodes outside SuperNodes, at the top level of the stream.
Find. When you have speci???ed all the options you want, click this button to start the search.
Nodes that match the speci???ed options are listed in the lower part of the dialog box. Select a node in the list to highlight it on the stream canvas.
Renaming Streams
Using the Annotations tab in the stream properties dialog box, you can add descriptive annotations for a stream and create a custom name for the stream. These options are useful especially
when generating reports for streams added to the project pane. For more information, see the topic Annotations on p. 86.
Stream Descriptions
For each stream that you create, IBM?? SPSS?? Modeler produces a stream description containing information on the contents of the stream. This can be useful if you are trying to see what a stream does but you do not have SPSS Modeler installed, for example when accessing a stream through IBM?? SPSS?? Collaboration and Deployment Services.

75
Building Streams
Figure
Opening section of stream description
The stream description is displayed in the form of an HTML document consisting of a number of sections.
General Stream Information
This section contains the stream name, together with details of when the stream was created and last saved.
Description and Comments
This section includes any:
???Stream annotations (see Annotations on p. 86)
???Comments not connected to speci???c nodes
???Comments connected to nodes in both the modeling and scoring branches of the stream
Scoring Information
This section contains information under various headings relating to the scoring branch of the stream.
???Comments. Includes comments linked only to nodes in the scoring branch.

76
Chapter 5
???Inputs. Lists the input ???elds together with their storage types (for example, string, integer, real and so on).
???Outputs. Lists the output ???elds, including the additional ???elds generated by the modeling node, together with their storage types.
???Parameters. Lists any parameters relating to the scoring branch of the stream and which can be viewed or edited each time the model is scored. These parameters are identi???ed when you click the Scoring Parameters button on the Deployment tab of the stream properties dialog box.
???Model Node. Shows the model name and type (for example, Neural Net, C&R Tree and so on). This is the model nugget selected for the Model node ???eld on the Deployment tab of the stream properties dialog box.
???Model Details. Shows details of the model nugget identi???ed under the previous heading. Where possible, predictor importance and evaluation charts for the model are included.
Modeling Information
Contains information relating to the modeling branch of the stream.
???Comments. Lists any comments or annotations that are connected to nodes in the modeling branch.
???Inputs. Lists the input ???elds together with their role in the modeling branch (in the form of the ???eld role value, for example, Input, Target, Split and so on).
???Parameters. Lists any parameters relating to the modeling branch of the stream and which can be viewed or edited each time the model is updated. These parameters are identi???ed when you click the Model Build Parameters button on the Deployment tab of the stream properties dialog box.
???Modeling node. Shows the name and type of the modeling node used to generate or update the model.
Previewing Stream Descriptions
You can view the contents of a stream description in a web browser by clicking an option on the stream properties dialog box. The contents of the description depend on the options you specify on the Deployment tab of the dialog box. For more information, see the topic Stream Deployment Options in Chapter 9 on p. 185.
To view a stream description:
E On the main IBM?? SPSS?? Modeler menu, click:
Tools > Stream Properties > Deployment
ESet the deployment type, the designated scoring node and any scoring parameters.
EIf the deployment type is Model Refresh, you can optionally select a:
???Modeling node and any model build parameters
???Model nugget on the scoring branch of the stream
EClick the Preview Stream Description button.

77
Building Streams
Exporting Stream Descriptions
You can export the contents of the stream description to an HTML ???le.
To export a stream description:
E On the main menu, click:
File > Export Stream Description
E Enter a name for the HTML ???le and click Save.
Running Streams
Once you have speci???ed the required options for streams and connected the required nodes, you can run the stream by running the data through nodes in the stream. There are several ways to run a stream within IBM?? SPSS?? Modeler. You can:
???Click Run on the Tools menu.
???Click one of the Run... buttons on the toolbar. These buttons allow you to run the entire stream or simply the selected terminal node. For more information, see the topic IBM SPSS Modeler Toolbar in Chapter 3 on p. 21.
???Run a single data stream by
???Run part of a data stream by
To halt the running of a stream in progress, you can click the red Stop button on the toolbar, or click Stop Execution on the Tools menu.
If any stream takes longer than three seconds to run, the Execution Feedback dialog box is displayed to indicate the progress.
Figure
Execution Feedback dialog box

78
Chapter 5
Some nodes have further displays giving additional information about stream execution. These are displayed by selecting the corresponding row in the dialog box. The ???rst row is selected automatically.
Working with Models
If a stream includes a modeling node (that is, one from the Modeling or Database Modeling tab of the nodes palette), a model nugget is created when the stream is run. A model nugget is a container for a model, that is, the set of rules, formulas or equations that enables you to generate predictions against your source data, and which lies at the heart of predictive analytics.
Figure
Model nugget
When you successfully run a modeling node, a corresponding model nugget is placed on the stream canvas, where it is represented by a gold
the predictions in a readable form.
Figure
Modeling and scoring branches in a stream
A typical modeling stream consists of two branches. The modeling branch contains the modeling node, together with the source and processing nodes that precede it. The scoring branch is created when you run the modeling node, and contains the model nugget and the terminal node or nodes that you use to view the predictions.
For more information, see the IBM?? SPSS?? Modeler Modeling Nodes guide.
Adding Comments and Annotations to Nodes and Streams
You may need to describe a stream to others in your organization. To help you do this, you can attach explanatory comments to streams, nodes and model nuggets.

79
Building Streams
Figure
Stream with comments added
Others can then view these comments
You can list all the comments for a stream or SuperNode, change the order of comments in the list, edit the comment text, and change the foreground or background color of a comment. For more information, see the topic Listing Stream Comments on p. 84.
You can also add notes in the form of text annotations to streams, nodes and nuggets by means of the Annotations tab of a stream properties dialog box, a node dialog box, or a model nugget window. These notes are visible only when the Annotations tab is open, except that stream annotations can also be shown as
Comments
Comments take the form of text boxes in which you can enter any amount of text, and you can add as many comments as you like. A comment can be freestanding (not attached to any stream objects), or it can be connected to one or more nodes or model nuggets in the stream. Freestanding comments are typically used to describe the overall purpose of the stream; connected comments describe the node or nugget to which they are attached. Nodes and nuggets can have more than one comment attached, and the stream can have any number of freestanding comments.
Note: You can also show stream annotations as
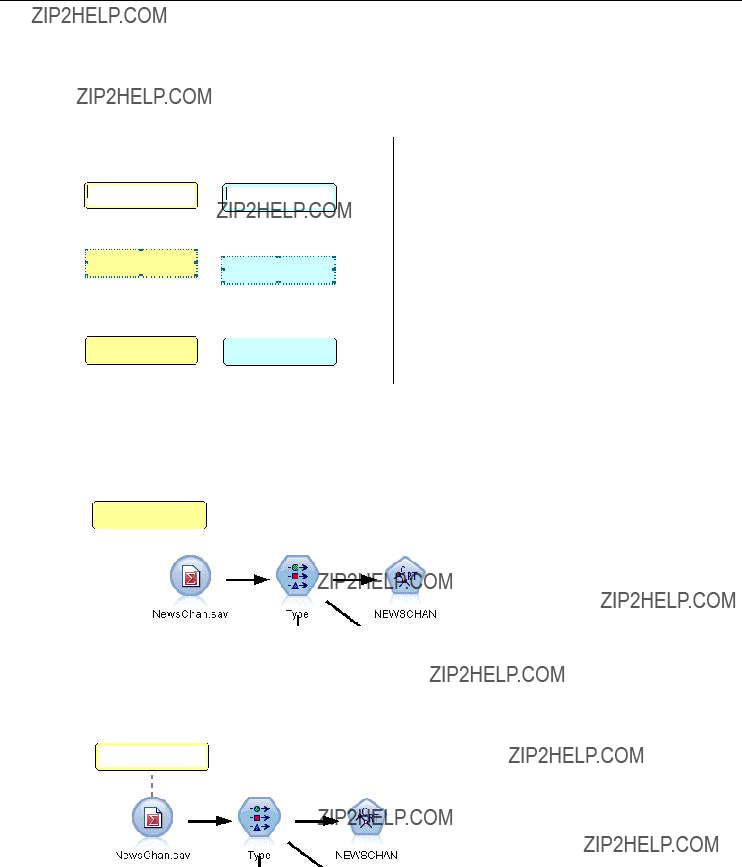
80
Chapter 5
The appearance of the text box changes to indicate the current mode of the comment (or annotation shown as a comment), as the following table shows.
Table
Comment and annotation text box modes
When you create a new freestanding comment, it is initially displayed in the top left corner of the stream canvas.
Figure
New freestanding comment
If you are attaching a comment to a node or nugget, the comment is initially displayed above the stream object to which it is attached.
Figure
New comment attached to node
The text box is colored white to show that text can be entered. When you have entered the text, you click outside the text box. The comment background changes to yellow to show that text entry is complete. The comment remains selected, allowing you to move, resize, or delete it.
81
Building Streams
Figure
Comment in edit mode
When you click again, the border changes to solid lines to show that editing is complete.
Figure
Completed comment
You can also attach comments to SuperNodes.
Operations Involving Comments
You can perform a number of operations on comments. You can:
???Add a freestanding comment
???Attach a comment to a node or nugget
???Edit a comment
???Resize a comment
???Move a comment
???Disconnect a comment
???Delete a comment
???Show or hide all comments for a stream
To add a freestanding comment
EEnsure that nothing is selected on the stream.
EDo one of the following:
??? On the main menu, click:
Insert > New Comment

82
Chapter 5
???
???Click the New Comment button in the toolbar.
EEnter the comment text (or paste in text from the clipboard).
EClick a node in the stream to save the comment.
To attach a comment to a node or nugget
ESelect one or more nodes or nuggets on the stream canvas.
EDo one of the following:
??? On the main menu, click:
Insert > New Comment
???
???Click the New Comment button in the toolbar.
EEnter the comment text.
EClick another node in the stream to save the comment. Alternatively, you can:
EInsert a freestanding comment (see previous section).
EDo one of the following:
???Select the comment, press F2, then select the node or nugget.
???Select the node or nugget, press F2, then select the comment.
???
To attach a comment to an additional node or nugget
If a comment is already attached to a node or nugget, or if it is currently at stream level, and you want to attach it to an additional node or nugget, do one of the following:
???Select the comment, press F2, then select the node or nugget.
???Select the node or nugget, press F2, then select the comment.
???
To edit an existing comment
EDo one of the following:
???
???Select the text box and press Enter.
???

83
Building Streams
EEdit the comment text. You can use standard Windows shortcut keys when editing, for example Ctrl+C to copy text. Other options during editing are listed in the
EClick outside the text box once to display the resizing controls, then again to complete the comment.
To resize a comment text box
ESelect the comment to display the resizing controls.
EClick and drag a control to resize the box.
EClick outside the text box to save the change.
To move an existing comment
If you want to move a comment but not its attached objects (if any), do one of the following:
???Move the mouse pointer over the comment, hold down the left mouse button, and drag the comment to the new position.
???Select the comment, hold down the Alt key, and move the comment using the arrow keys.
If you want to move a comment together with any nodes or nuggets to which the comment is attached:
ESelect all the objects you want to move.
EDo one of the following:
???Move the mouse pointer over one of the objects, hold down the left mouse button, and drag the objects to the new position.
???Select one of the objects, hold down the Alt key, and move the objects using the arrow keys.
To disconnect a comment from a node or nugget
ESelect one or more comments to be disconnected.
EDo one of the following:
???Press F3.
???
To delete a comment
ESelect one or more comments to be deleted.
EDo one of the following:
???Press the Delete key.
???
If the comment was attached to a node or nugget, the connection line is deleted as well.

84
Chapter 5
If the comment was originally a stream or SuperNode annotation that had been converted to a freestanding comment, the comment is deleted from the canvas but its text is retained on the Annotations tab for the stream or SuperNode.
To show or hide comments for a stream
E Do one of the following:
??? On the main menu, click:
View > Comments
??? Click the Show/hide comments button in the toolbar.
Listing Stream Comments
You can view a list of all the comments that have been made for a particular stream or SuperNode.
On this list, you can
???Change the order of comments
???Edit the comment text
???Change the foreground or background color of a comment
Listing Comments
To list the comments made for a stream, do one of the following:
??? On the main menu, click:
Tools > Stream Properties > Comments
???
???

85
Building Streams
Figure
Listing comments for a stream
Text. The text of the comment.
Links. The name of the node to which the comment is attached. If this ???eld is empty, the comment applies to the stream.
Positioning buttons. These move a selected comment up or down in the list.
Comment Colors. To change the foreground or background color of a comment, select the comment, select the Custom colors check box, then select a color from the Background or Foreground list (or both). Click Apply, then click the stream background, to see the effect of the change. Click OK
to save the change.
Converting Annotations to Comments
Annotations made to streams or SuperNodes can be converted into comments.
In the case of streams, the annotation is converted to a freestanding comment (that is, it is not attached to any nodes) on the stream canvas.
When a SuperNode annotation is converted to a comment, the comment is not attached to the SuperNode on the stream canvas, but is visible when you zoom in to the SuperNode.
To convert a stream annotation to a comment
EClick Stream Properties on the Tools menu. (Alternatively, you can

86
Chapter 5
EClick the Annotations tab.
ESelect the Show annotation as comment check box.
EClick OK.
To convert a SuperNode annotation to a comment
E
EClick the Annotations tab.
ESelect the Show annotation as comment check box.
EClick OK.
Annotations
Nodes, streams, and models can be annotated in a number of ways. You can add descriptive annotations and specify a custom name. These options are useful especially when generating reports for streams added to the project pane. For nodes and model nuggets, you can also add ToolTip text to help distinguish between similar nodes on the stream canvas.
Adding Annotations
Editing a node or model nugget opens a tabbed dialog box containing an Annotations tab used to set a variety of annotation options. You can also open the Annotations tab directly.
ETo annotate a node or nugget,
ETo annotate a stream, click Stream Properties on the Tools menu. (Alternatively, you can

87
Building Streams
Figure
Annotations tab options
Name. Select Custom to adjust the autogenerated name or to create a unique name for the node as displayed on the stream canvas.
Tooltip text. (For nodes and model nuggets only) Enter text used as a tooltip on the stream canvas. This is particularly useful when working with a large number of similar nodes.
Keywords. Specify keywords to be used in project reports and when searching for nodes in a stream, or tracking objects stored in the repository (see About the IBM SPSS Collaboration and Deployment Services Repository on p. 158). Multiple keywords can be separated by
The main text area can be used to enter lengthy annotations regarding the operations of the node or decisions made in the node. For example, when you are sharing and reusing streams, it is helpful to take notes on decisions such as discarding a ???eld with numerous blanks using a Filter node. Annotating the node stores this information with the node. You can also choose to include these annotations in a project report created from the project pane. For more information, see the topic Introduction to Projects in Chapter 11 on p. 200.

88
Chapter 5
Show annotation as comment. (For stream and SuperNode annotations only) Check this box to convert the annotation to a freestanding comment that will be visible on the stream canvas. For more information, see the topic Adding Comments and Annotations to Nodes and Streams on p. 78.
ID. Displays a unique ID that can be used to reference the node for the purpose of scripting or automation. This value is automatically generated when the node is created and will not change. Also note that to avoid confusion with the letter ???O???, zeros are not used in node IDs. Use the copy button at the right to copy and paste the ID into scripts or elsewhere as needed.
Saving Data Streams
After you have created a stream, you can save it for future reuse.
To Save a Stream
EOn the File menu, click Save Stream or Save Stream As.
EIn the Save dialog box, browse to the folder in which you want to save the stream ???le.
EEnter a name for the stream in the File Name text box.
ESelect Add to project if you would like to add the saved stream to the current project. Clicking Save stores the stream with the extension *.str in the speci???ed directory.
Automatic backup files. Each time a stream is saved, the previously saved version of the ???le is automatically preserved as a backup, with a hyphen appended to the ???lename (for example
Saving States
In addition to streams, you can save states, which include the currently displayed stream diagram and any model nuggets that you have created (listed on the Models tab in the managers pane).
To Save a State
E On the File menu, click:
State > Save State or Save State As
EIn the Save dialog box, browse to the folder in which you want to save the state ???le. Clicking Save stores the state with the extension *.cst in the speci???ed directory.
Saving Nodes
You can also save an individual node by

89
Building Streams
Saving Multiple Stream Objects
When you exit IBM?? SPSS?? Modeler with multiple unsaved objects, such as streams, projects, or model nuggets, you will be prompted to save before completely closing the software. If you choose to save items, a dialog box will open with options for saving each object.
Figure
Saving multiple objects
ESimply select the check boxes for the objects that you want to save.
EClick OK to save each object in the required location.
You will then be prompted with a standard Save dialog box for each object. After you have ???nished saving, the application will close as originally instructed.
Saving Output
Tables, graphs, and reports generated from IBM?? SPSS?? Modeler output nodes can be saved in output object (*.cou) format.
E When viewing the output you want to save, on the output window menus click:
File > Save
ESpecify a name and location for the output ???le.
EOptionally, select Add ???le to project in the Save dialog box to include the ???le in the current project. For more information, see the topic Introduction to Projects in Chapter 11 on p. 200.
Alternatively, you can

90
Chapter 5
Encrypting and Decrypting Information
When you save a stream, node, project, output ???le, or model nugget, you can encrypt it to prevent its unauthorized use. To do this, you select an extra option when saving, and add a password to the item being saved. This encryption can be set for any of the items that you save and adds extra security to them; it is not the same as the SSL encryption used if you are passing ???les between IBM?? SPSS?? Modeler and IBM?? SPSS?? Modeler Server.
When you try to open an encrypted item, you are prompted to enter the password. After you enter the correct password, the item is decrypted automatically and opens as usual.
To Encrypt an Item
EIn the Save dialog box, for the item to be encrypted, click Options. The Encryption Options dialog box opens.
Figure
Encryption options when saving a file
ESelect Encrypt this ???le.
EOptionally, for further security, select Mask password. This displays anything you enter as a series of dots.
EEnter the password. Warning: If you forget the password, the ???le or model cannot be opened.
EIf you selected Mask password,
EClick OK to return to the Save dialog box.
Note: If you save a copy of any
Loading Files
You can reload a number of saved objects in IBM?? SPSS?? Modeler:
???Streams (.str)
???States (.cst)
???Models (.gm)
91
Building Streams
???Models palette (.gen)
???Nodes (.nod)
???Output (.cou)
???Projects (.cpj)
Opening New Files
Streams can be loaded directly from the File menu.
E On the File menu, click Open Stream.
All other ???le types can be opened using the submenu items available on the File menu. For example, to load a model, on the File menu click:
Models > Open Model or Load Models Palette
Opening Recently Used Files
For quick loading of recently used ???les, you can use the options at the bottom of the File menu.
Figure
Opening recently used options from the File menu
Select Recent Streams, Recent Projects, or Recent States to expand a list of recently used ???les.
Mapping Data Streams
Using the mapping tool, you can connect a new data source to a preexisting stream. The mapping tool will not only set up the connection but it will also help you to specify how ???elds in the new source will replace those in the existing stream. Instead of
The data mapping tool allows you to join together two stream fragments and be sure that all of the (essential) ???eld names match up properly. In essence, mapping data results simply in the creation of a new Filter node, which matches up the appropriate ???elds by renaming them.
There are two equivalent ways to map data:
Select replacement node. This method starts with the node to be replaced. First, you

92
Chapter 5
Map to. This method starts with the node to be introduced to the stream. First,
You cannot map to Merge or Append nodes. Instead, you should simply connect the stream to the Merge node in the normal manner.
Figure
Selecting data mapping options
Data mapping is tightly integrated into stream building. If you try to connect to a node that already has a connection, you will be offered the option of replacing the connection or mapping to that node.
Mapping Data to a Template
To replace the data source for a template stream with a new source node bringing your own data into IBM?? SPSS?? Modeler, you should use the Select Replacement Node option from the Data Mapping
Step 1: Specify essential fields in the original source node. In order for stream operations to run properly, essential ???elds should be speci???ed. For more information, see the topic Specifying Essential Fields on p. 94.
Step 2: Add new data source to the stream canvas. Using one of the source nodes, bring in the
new replacement data.

93
Building Streams
Step 3: Replace the template source node. Using the Data Mapping option on the
Figure
Selecting a replacement source node
Step 4: Check mapped fields. In the dialog box that opens, check that the software is mapping ???elds properly from the replacement data source to the stream. Any unmapped essential ???elds are displayed in red. These ???elds are used in stream operations and must be replaced with a similar ???eld in the new data source in order for downstream operations to function properly. For more information, see the topic Examining Mapped Fields on p. 95.
After using the dialog box to ensure that all essential ???elds are properly mapped, the old data source is disconnected and the new data source is connected to the stream using a Filter node called Map. This Filter node directs the actual mapping of ???elds in the stream. An Unmap Filter node is also included on the stream canvas. The Unmap Filter node can be used to reverse ???eld name mapping by adding it to the stream. It will undo the mapped ???elds, but note that you will have to edit any downstream terminal nodes to reselect the ???elds and overlays.
Figure
New data source successfully mapped to the stream

94
Chapter 5
Mapping between Streams
Similar to connecting nodes, this method of data mapping does not require you to set essential ???elds beforehand. With this method, you simply connect from one stream to another using Map to from the Data Mapping
Figure
Mapping a stream from its Sort node to the Type node of another stream
To Map Data between Streams
E
EOn the menu, click:
Data Mapping > Map to
EUse the cursor to select a destination node on the target stream.
EIn the dialog box that opens, ensure that ???elds are properly matched and click OK.
Specifying Essential Fields
When mapping to an existing stream, essential ???elds will typically be speci???ed by the stream author. These essential ???elds indicate whether a particular ???eld is used in downstream operations. For example, the existing stream may build a model that uses a ???eld called Churn. In this stream, Churn is an essential ???eld because you could not build the model without it. Likewise, ???elds used in manipulation nodes, such as a Derive node, are necessary to derive the new ???eld. Explicitly setting such ???elds as essential helps to ensure that the proper ???elds in the new source node are mapped to them. If mandatory ???elds are not mapped, you will receive an error message. If you decide that certain manipulations or output nodes are unnecessary, you can delete the nodes from the stream and remove the appropriate ???elds from the Essential Fields list.

95
Building Streams
To Set Essential Fields
E
EOn the menu, click:
Data Mapping > Specify Essential Fields
Figure
Specifying essential fields
EUsing the Field Chooser, you can add or remove ???elds from the list. To open the Field Chooser, click the icon to the right of the ???elds list.
Examining Mapped Fields
Once you have selected the point at which one data stream or data source will be mapped to another, a dialog box opens for you to select ???elds for mapping or to ensure that the system default mapping is correct. If essential ???elds have been set for the stream or data source and they are unmatched, these ???elds are displayed in red. Any unmapped ???elds from the data source will pass through the Filter node unaltered, but note that you can map
Figure
Selecting fields for mapping
Original. Lists all ???elds in the template or existing

96
Chapter 5
Mapped. Lists the ???elds selected for mapping to template ???elds. These are the ???elds whose names may have to change to match the original ???elds used in stream operations. Click in the table cell for a ???eld to activate a list of available ???elds.
If you are unsure of which ???elds to map, it may be useful to examine the source data closely before mapping. For example, you can use the Types tab in the source node to review a summary of the source data.
Tips and Shortcuts
Work quickly and easily by familiarizing yourself with the following shortcuts and tips:
???Build streams quickly by
???Use key combinations to select downstream nodes. Press Ctrl+Q and Ctrl+W to toggle the selection of all nodes downstream.
???Use shortcut keys to connect and disconnect nodes. When a node is selected in the canvas, press F2 to begin a connection, press Tab to move to the required node, and press Shift+Spacebar to complete the connection. Press F3 to disconnect all inputs and outputs to the selected node.
???Customize the Nodes Palette tab with your favorite nodes. On the Tools menu, click Manage Palettes to open a dialog box for adding, removing, or moving the nodes shown on the Nodes Palette.
Figure
Palette Manager
???Rename nodes and add ToolTips. Each node dialog box includes an Annotations tab on which you can specify a custom name for nodes on the canvas as well as add ToolTips to help organize your stream. You can also include lengthy annotations to track progress, save process details, and denote any business decisions required or achieved.

97
Building Streams
Figure
ToolTip and custom node name
???Insert values automatically into a CLEM expression. Using the Expression Builder, accessible from a variety of dialog boxes (such as those for Derive and Filler nodes), you can automatically insert ???eld values into a CLEM expression. Click the values button on the Expression Builder to choose from existing ???eld values.
Figure
Values button
???Browse for files quickly. When browsing for ???les on an Open dialog box, use the File list (click the yellow diamond button) to access previously used directories as well as IBM?? SPSS?? Modeler default directories. Use the forward and back buttons to scroll through accessed directories.

98
Chapter 5
Figure
Selecting the Demos folder from the list of
???Minimize output window clutter. You can close and delete output quickly using the red X button at the top right corner of all output windows. This enables you to keep only promising or interesting results on the Outputs tab of the managers pane.
A full range of keyboard shortcuts is available for the software. For more information, see the topic Keyboard Accessibility in Appendix A on p. 238.
Did you know that you can...
???Drag and select a group of nodes on the stream canvas using your mouse.
???Copy and paste nodes from one stream to another.
???Access Help from every dialog box and output window.
???Get Help on

Chapter
6
Handling Missing Values
Overview of Missing Values
During the Data Preparation phase of data mining, you will often want to replace missing values in the data. Missing values are values in the data set that are unknown, uncollected, or incorrectly entered. Usually, such values are invalid for their ???elds. For example, the ???eld Sex should contain the values M and F. If you discover the values Y or Z in the ???eld, you can safely assume that such values are invalid and should therefore be interpreted as blanks. Likewise, a negative value for the ???eld Age is meaningless and should also be interpreted as a blank. Frequently, such obviously wrong values are purposely entered, or ???elds left blank, during a questionnaire to indicate a nonresponse. At times, you may want to examine these blanks more closely to determine whether a nonresponse, such as the refusal to give one???s age, is a factor in predicting a speci???c outcome.
Some modeling techniques handle missing data better than others. For example, C5.0 and Apriori cope well with values that are explicitly declared as ???missing??? in a Type node. Other modeling techniques have trouble dealing with missing values and experience longer training times, resulting in
There are several types of missing values recognized by IBM?? SPSS?? Modeler:
???Null or
???Empty strings and white space. Empty string values and white space (strings with no visible characters) are treated as distinct from null values. Empty strings are treated as equivalent to white space for most purposes. For example, if you select the option to treat white space as blanks in a source or Type node, this setting applies to empty strings as well.
???Blank or

100
Chapter 6
Figure
Specifying missing values for a continuous variable
Reading in mixed data. Note that when you are reading in ???elds with numeric storage (either integer, real, time, timestamp, or date), any
Reading empty strings from Oracle. When reading from or writing to an Oracle database, be aware that, unlike SPSS Modeler and unlike most other databases, Oracle treats and stores empty string values as equivalent to null values. This means that the same data extracted from an Oracle database may behave differently than when extracted from a ???le or another database, and the data may return different results.
Handling Missing Values
You should decide how to treat missing values in light of your business or domain knowledge. To ease training time and increase accuracy, you may want to remove blanks from your data set. On the other hand, the presence of blank values may lead to new business opportunities or additional insights. In choosing the best technique, you should consider the following aspects of your data:
???Size of the data set
???Number of ???elds containing blanks
???Amount of missing information
101
Handling Missing Values
In general terms, there are two approaches you can follow:
???You can exclude ???elds or records with missing values
???You can impute, replace, or coerce missing values using a variety of methods
Both of these approaches can be largely automated using the Data Audit node. For example, you can generate a Filter node that excludes ???elds with too many missing values to be useful in modeling, and generate a Supernode that imputes missing values for any or all of the ???elds that remain. This is where the real power of the audit comes in, allowing you not only to assess the current state of your data, but to take action based on the assessment.
Handling Records with Missing Values
If the majority of missing values is concentrated in a small number of records, you can just exclude those records. For example, a bank usually keeps detailed and complete records on its loan customers. If, however, the bank is less restrictive in approving loans for its own staff members, data gathered for staff loans is likely to have several blank ???elds. In such a case, there are two options for handling these missing values:
???You can use a Select node to remove the staff records.
???If the data set is large, you can discard all records with blanks.
Handling Fields with Missing Values
If the majority of missing values is concentrated in a small number of ???elds, you can address them at the ???eld level rather than at the record level. This approach also allows you to experiment with the relative importance of particular ???elds before deciding on an approach for handling missing values. If a ???eld is unimportant in modeling, it probably is not worth keeping, regardless of how many missing values it has.
For example, a market research company may collect data from a general questionnaire containing 50 questions. Two of the questions address age and political persuasion, information that many people are reluctant to give. In this case, Age and Political_persuasion have many missing values.
Field Measurement Level
In determining which method to use, you should also consider the measurement level of ???elds with missing values.
Numeric fields. For numeric ???eld types, such as Continuous, you should always eliminate any
Categorical fields. For categorical ???elds, such as Nominal and Flag, altering missing values is not necessary but will increase the accuracy of the model. For example, a model that uses the ???eld Sex will still function with meaningless values, such as Y and Z, but removing all values other than M and F will increase the accuracy of the model.

102
Chapter 6
Screening or Removing Fields
To screen out ???elds with too many missing values, you have several options:
???You can use a Data Audit node to ???lter ???elds based on quality.
???You can use a Feature Selection node to screen out ???elds with more than a speci???ed percentage of missing values and to rank ???elds based on importance relative to a speci???ed target.
???Instead of removing the ???elds, you can use a Type node to set the ???eld role to None. This will keep the ???elds in the data set but exclude them from the modeling processes.
Imputing or Filling Missing Values
In cases where there are only a few missing values, it may be useful to insert values to replace the blanks. You can do this from the Data Audit report, which allows you to specify options for speci???c ???elds as appropriate and then generate a SuperNode that imputes values using a number of methods. This is the most ???exible method, and it also allows you to specify handling for large numbers of ???elds in a single node.
The following methods are available for imputing missing values:
Fixed. Substitutes a ???xed value (either the ???eld mean, midpoint of the range, or a constant that you specify).
Random. Substitutes a random value based on a normal or uniform distribution.
Expression. Allows you to specify a custom expression. For example, you could replace values with a global variable created by the Set Globals node.
Algorithm. Substitutes a value predicted by a model based on the C&RT algorithm. For each ???eld imputed using this method, there will be a separate C&RT model, along with a Filler node that replaces blanks and nulls with the value predicted by the model. A Filter node is then used to remove the prediction ???elds generated by the model.
Alternatively, to coerce values for speci???c ???elds, you can use a Type node to ensure that the ???eld types cover only legal values and then set the Check column to Coerce for the ???elds whose blank values need replacing.
CLEM Functions for Missing Values
There are several functions used to handle missing values. The following functions are often used in Select and Filler nodes to discard or ???ll missing values:
???count_nulls(LIST)
???@BLANK(FIELD)
???@NULL(FIELD)
???undef

103
Handling Missing Values
The @ functions can be used in conjunction with the @FIELD function to identify the presence of blank or null values in one or more ???elds. The ???elds can simply be ???agged when blank or null values are present, or they can be ???lled with replacement values or used in a variety of other operations.
You can count nulls across a list of ???elds, as follows:
count_nulls(['cardtenure' 'card2tenure' 'card3tenure'])
When using any of the functions that accept a list of ???elds as input, the special functions @FIELDS_BETWEEN and @FIELDS_MATCHING can be used, as shown in the following example:
count_nulls(@FIELDS_MATCHING('card*'))
Figure
Using a Filler node to replace blank values with 0 in the selected field
You can use the undef function to ???ll ???elds with the
if not(Age > 17) or not(Age < 66) then undef else Age endif
This replaces anything that is not in the range with a

104
Chapter 6
Note on Discarding Records
When using a Select node to discard records, note that syntax uses
Drug = 'drugC' and not(@NULL(Drug))
Earlier versions of excluded null values in such situations.

Chapter
7
Building CLEM Expressions
About CLEM
The Control Language for Expression Manipulation (CLEM) is a powerful language for analyzing and manipulating the data that ???ows along IBM?? SPSS?? Modeler streams. Data miners use CLEM extensively in stream operations to perform tasks as simple as deriving pro???t from cost and revenue data or as complex as transforming web log data into a set of ???elds and records with usable information.
CLEM is used within SPSS Modeler to:
???Compare and evaluate conditions on record ???elds.
???Derive values for new ???elds.
???Derive new values for existing ???elds.
???Reason about the sequence of records.
???Insert data from records into reports.
Scripting. A subset of the CLEM language can also be used when scripting in the user interface. This allows you to perform many of the same data manipulations in an automated fashion.
CLEM expressions are indispensable for data preparation in SPSS Modeler and can be used in a wide range of

106
Chapter 7
Figure
Derive node creating a new field based on a formula
CLEM expressions can also be used for global search and replace operations. For example, the expression @NULL(@FIELD) can be used in a Filler node to replace

107
Building CLEM Expressions
Figure
Filler node replacing
More complex CLEM expressions can also be created. For example, you can derive new ???elds based on a conditional set of rules.
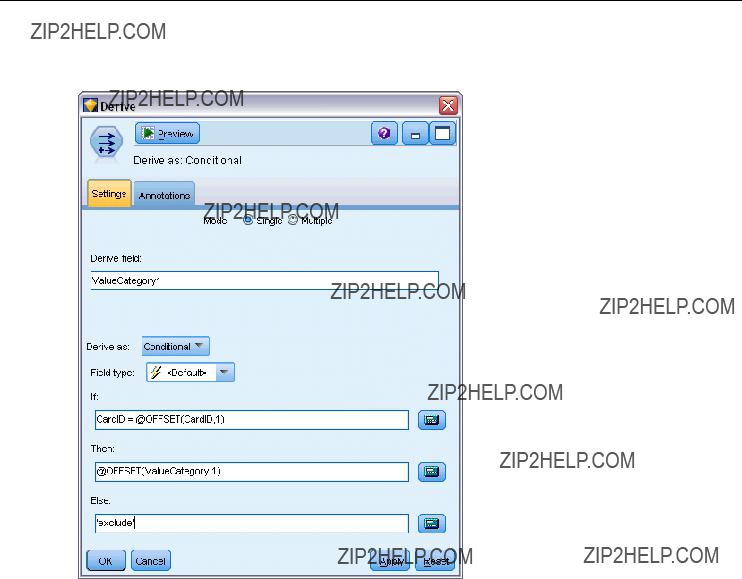
108
Chapter 7
Figure
Conditional Derive comparing values of one field to those of the field before it
CLEM Examples
To illustrate correct syntax as well as the types of expressions possible with CLEM, example expressions follow.
Simple Expressions
Formulas can be as simple as this one, which derives a new ???eld based on the values of the
???elds After and Before:
(After - Before) / Before * 100.0
Notice that ???eld names are unquoted when referring to the values of the ???eld.
Similarly, the following expression simply returns the log of each value for the ???eld salary.
log(salary)

109
Building CLEM Expressions
Complex Expressions
Expressions can also be lengthy and more complex. The following expression returns true if the value of two ???elds
Several functions, such as string functions, require you to enter several parameters using correct syntax. In the following example, the function subscrs is used to return the ???rst character of a produce_ID ???eld, indicating whether an item is organic, genetically modi???ed, or conventional. The results of an expression are described by
subscrs(1,produce_ID)
Similarly, the following expression is:
stripchar(`3`,`123`)
It is important to note that characters are always encapsulated within single backquotes.
Combining Functions in an Expression
Frequently, CLEM expressions consist of a combination of functions. The following function combines subscr and lowertoupper to return the ???rst character of produce_ID and convert it to upper case.
lowertoupper(subscr(1,produce_ID))
This same expression can be written in shorthand as:
lowertoupper(produce_ID(1))
Another commonly used combination of functions is:
locchar_back(`n`, (length(web_page)), web_page)
This expression locates the character `n` within the values of the ???eld web_page reading backward from the last character of the ???eld value. By including the length function as well, the expression dynamically calculates the length of the current value rather than using a static number, such as 7, which will be invalid for values with less than seven characters.
Special Functions
Numerous special functions (preceded with an @ symbol) are available. Commonly used functions include:
@BLANK('referrer ID')

110
Chapter 7
Frequently, special functions are used in combination, which is a commonly used method of ???agging blanks in more than one ???eld at a time.
Additional examples are discussed throughout the CLEM documentation. For more information, see the topic CLEM Reference Overview in Chapter 8 on p. 127.
Values and Data Types
CLEM expressions are similar to formulas constructed from values, ???eld names, operators, and functions. The simplest valid CLEM expression is a value or a ???eld name. Examples of valid values are:
3
1.79
'banana'
Examples of ???eld names are:
Product_ID
where Product is the name of a ???eld from a market basket data set,
???
???
???Real
???Date/time
It is also possible to use the following elements:
???Character
???Lists of
Character codes and lists do not usually occur as ???eld values. Typically, they are used as arguments of CLEM functions.
Quoting Rules
Although the software is ???exible when determining the ???elds, values, parameters, and strings used in a CLEM expression, the following general rules provide a list of ???best practices??? to use when creating expressions:
???
111
Building CLEM Expressions
???
???
???
Expressions and Conditions
CLEM expressions can return a result (used when deriving new
Weight * 2.2 Age + 1
Or, they can evaluate true or false (used when selecting on a
Drug = "drugA" Age < 16
not(PowerFlux) and Power > 2000
You can combine operators and functions arbitrarily in CLEM
sqrt(abs(Signal)) * max(T1, T2) + Baseline
Brackets and operator precedence determine the order in which the expression is evaluated. In this example, the order of evaluation is:
???abs(Signal) is evaluated, and sqrt is applied to its result.
???max(T1, T2) is evaluated.
???The two results are multiplied: x has higher precedence than +.
???Finally, Baseline is added to the result.
The descending order of precedence (that is, operations that are performed ???rst to operations that are performed last) is as follows:
???Function arguments
???Function calls
???xx
???x / mod div rem
???+ ???
???> < >= <= /== == = /=

112
Chapter 7
If you want to override precedence, or if you are in any doubt of the order of evaluation, you can use parentheses to make it
sqrt(abs(Signal)) * (max(T1, T2) + Baseline)
Stream, Session, and SuperNode Parameters
Parameters can be de???ned for use in CLEM expressions and in scripting. They are, in effect,
The scope of a parameter depends on where it is set:
???Stream parameters can be set in a stream script or in the stream properties dialog box, and they are available to all nodes in the stream. They are displayed on the Parameters list in the Expression Builder.
???Session parameters can be set in a
Parameters can also be set for SuperNodes, in which case they are visible only to nodes encapsulated within that SuperNode.
Using Parameters in CLEM Expressions
Parameters are represented in CLEM expressions by
Available parameters are easily viewed using the Expression Builder. To view current parameters:
EIn any dialog box accepting CLEM expressions, click the Expression Builder button.
EFrom the Fields list, select Parameters.
You can select parameters from the list for insertion into the CLEM expression. For more information, see the topic Selecting Fields, Parameters, and Global Variables on p. 121.
Working with Strings
There are a number of operations available for strings, including:
???Converting a string to upper case or lower
???Removing speci???ed characters, such as `ID_` or `$`, from a string

113
Building CLEM Expressions
???Determining the length (number of characters) for a string
???Checking the alphabetical ordering of string
???Removing leading or trailing white space from
???Extract the ???rst or last n characters from a
endstring(4, item)
???Matching a speci???c
job_title matches "*market*"
???Replacing all instances of a substring within a
Under Fill in ???elds:, select all ???elds where the character may occur. For the Replace: condition, select Always, and specify the following condition under Replace with:
replace('|',';',@FIELD)
???Deriving a ???ag ???eld based on the presence of a speci???c substring. For example, you could use a string function in a Derive node to generate a separate ???ag ???eld for each response with an expression such as:
hassubstring(museums,"museum_of_design")
For more information, see the topic String Functions in Chapter 8 on p. 141.
Handling Blanks and Missing Values
Replacing blanks or missing values is a common data preparation task for data miners. CLEM provides you with a number of tools to automate blank handling. The Filler node is the most common place to work with blanks; however, the following functions can be used in any node that accepts CLEM expressions:
???@BLANK(FIELD) can be used to determine records whose values are blank for a particular ???eld, such as Age.
???@NULL(FIELD) can be used to determine records whose values are

114
Chapter 7
Figure
Filler node replacing
For more information, see the topic Functions Handling Blanks and Null Values in Chapter 8 on p. 156.
Working with Numbers
Numerous standard operations on numeric values are available in IBM?? SPSS?? Modeler, such as:
???Calculating the sine of the speci???ed
???Calculating the natural log of numeric
???Calculating the sum of two
For more information, see the topic Numeric Functions in Chapter 8 on p. 138.
Working with Times and Dates
Time and date formats may vary depending on your data source and locale. The formats of date and time are speci???c to each stream and are set in the stream properties dialog box. The following examples are commonly used functions for working with date/time ???elds.

115
Building CLEM Expressions
Calculating Time Passed
You can easily calculate the time passed from a baseline date using a family of functions similar to the following one. This function returns the time in months from the baseline date to the date represented by the date string DATE as a real number. This is an approximate ???gure, based on a month of 30.0 days.
date_in_months(Date)
Comparing Date/Time Values
Values of date/time ???elds can be compared across records using functions similar to the following one. This function returns a value of true if the date string DATE1 represents a date prior to that represented by the date string DATE2. Otherwise, this function returns a value of 0.
date_before(Date1, Date2)
Calculating Differences
You can also calculate the difference between two times and two dates using functions, such as:
date_weeks_difference(Date1, Date2)
This function returns the time in weeks from the date represented by the date string DATE1 to the date represented by the date string DATE2 as a real number. This is based on a week of 7.0 days. If DATE2 is prior to DATE1, this function returns a negative number.
Today???s Date
The current date can be added to the data set using the function @TODAY. Today???s date is added as a string to the speci???ed ???eld or new ???eld using the date format selected in the stream properties dialog box. For more information, see the topic Date and Time Functions in Chapter 8 on p. 146.
Summarizing Multiple Fields
The CLEM language includes a number of functions that return summary statistics across multiple ???elds. These functions may be particularly useful in analyzing survey data, where multiple responses to a question may be stored in multiple ???elds. For more information, see the topic Working with
Comparison Functions
You can compare values across multiple ???elds using the min_n and max_n
max_n(['card1fee' 'card2fee''card3fee''card4fee'])

116
Chapter 7
You can also use a number of counting functions to obtain counts of values that meet speci???c criteria, even when those values are stored in multiple ???elds. For example, to count the number of cards that have been held for more than ???ve years:
count_greater_than(5, ['cardtenure' 'card2tenure' 'card3tenure'])
To count null values across the same set of ???elds:
count_nulls(['cardtenure' 'card2tenure' 'card3tenure'])
Note that this example counts the number of cards being held, not the number of people holding them. For more information, see the topic Comparison Functions in Chapter 8 on p. 135.
To count the number of times a speci???ed value occurs across multiple ???elds, you can use the count_equal function. The following example counts the number of ???elds in the list that contain the value Y.
count_equal("Y",[Answer1, Answer2, Answer3])
Given the following values for the ???elds in the list, the function returns the results for the value Y as shown.
Numeric Functions
You can obtain statistics across multiple ???elds using the sum_n, mean_n, and sdev_n
sum_n(['card1bal' 'card2bal''card3bal'])
mean_n(['card1bal' 'card2bal''card3bal'])
For more information, see the topic Numeric Functions in Chapter 8 on p. 138.
Generating Lists of Fields
When using any of the functions that accept a list of ???elds as input, the special functions
@FIELDS_BETWEEN(start, end) and @FIELDS_MATCHING(pattern) can be used as input. For example, assuming the order of ???elds is as shown in the sum_n example earlier, the following would be equivalent:
sum_n(@FIELDS_BETWEEN(card1bal, card3bal))
Alternatively, to count the number of null values across all ???elds beginning with ???card???:
count_nulls(@FIELDS_MATCHING('card*'))
For more information, see the topic Special Fields in Chapter 8 on p. 157.

117
Building CLEM Expressions
Working with
A number of comparison functions can be used to analyze
???value_at
???first_index / last_index
???first_non_null / last_non_null
???first_non_null_index / last_non_null_index
???min_index / max_index
For example, suppose a
recommendation, review, local supplier, other). In this case, you might determine the importance of price by deriving the index of the ???eld in which it was ???rst included:
first_index("price", [Reason1 Reason2 Reason3])
Similarly, suppose you have asked customers to rank three cars in order of likelihood to purchase and coded the responses in three separate ???elds, as follows:
In this case, you could determine the index of the ???eld for the car they like most (ranked #1, or the lowest rank) using the min_index function:
min_index(['car1' 'car2' 'car3'])
For more information, see the topic Comparison Functions in Chapter 8 on p. 135.
Referencing
The special @MULTI_RESPONSE_SET function can be used to reference all of the ???elds in a
max_index(@MULTI_RESPONSE_SET("car_rankings"))
The Expression Builder
You can type CLEM expressions manually or use the Expression Builder, which displays a complete list of CLEM functions and operators as well as data ???elds from the current stream, allowing you to quickly build expressions without memorizing the exact names of ???elds or

118
Chapter 7
functions. In addition, the Builder controls automatically add the proper quotes for ???elds and values, making it easier to create syntactically correct expressions.
Figure
Expression Builder dialog box
Note: The Expression Builder is not supported in scripting or parameter settings.

119
Building CLEM Expressions
Accessing the Expression Builder
The Expression Builder is available in all nodes where CLEM expressions are used, including Select, Balance, Derive, Filler, Analysis, Report, and Table nodes. You can open it by clicking the calculator button just to the right of the formula ???eld.
Figure
A variety of nodes with Expression Builder button
Creating Expressions
The Expression Builder provides not only complete lists of ???elds, functions, and operators but also access to data values if your data is instantiated.
To Create an Expression Using the Expression Builder
EType in the expression ???eld, using the function and ???eld lists as references. or
ESelect the required ???elds and functions from the scrolling lists.

120
Chapter 7
E
EUse the operand buttons in the center of the dialog box to insert the operations into the expression.
Selecting Functions
The function list displays all available CLEM functions and operators. Scroll to select a function from the list, or, for easier searching, use the
Figure
Functions
Most of these categories are described in the Reference section of the CLEM language description. For more information, see the topic Functions Reference in Chapter 8 on p. 133.
The other categories are as follows.
???General Functions contains a selection of some of the most
???Recently Used contains a list of CLEM functions used within the current session.
???@ Functions contains a list of all the special functions, which have their names preceded by an ???@??? sign.
???Database Functions. If the stream includes a database connection (by means of a Database source node), this selection lists the functions available from within that database, including
???Operators lists all the operators you can use when building expressions. Operators are also available from the buttons in the center of the dialog box.
???All Functions contains a complete list of available CLEM functions.
121
Building CLEM Expressions
After you have selected a group of functions,
Selecting Fields, Parameters, and Global Variables
The ???eld list displays all ???elds available at this point in the data stream. Scroll to select a ???eld from the list.
Figure
Expression Builder: Fields list
For more information, see the topic Stream, Session, and SuperNode Parameters on p. 112.
In addition to ???elds, you can also choose from the following items:
Recently used contains a list of ???elds,
Parameters. For more information, see the topic Stream, Session, and SuperNode Parameters on p. 112.
Global values. For more information, see the IBM SPSS Modeler Source, Process, and Output
Nodes guide.

122
Chapter 7
Viewing or Selecting Values
Field values can be viewed from a number of places in the system, including the Expression Builder, data audit reports, and when editing future values in a Time Intervals node. Note that data must be fully instantiated in a source or Type node to use this feature, so that storage, types, and values are known.
Figure
Fields list with values shown for selected field
ETo view values for a ???eld from the Expression Builder or a Time Intervals node, select the required ???eld and click the value picker button to open a dialog box listing values for the selected ???eld. You can then select a value and click Insert to paste the value into the current expression or list.
Figure
Value picker button
For ???ag and nominal ???elds, all de???ned values are listed. For continuous (numeric range) ???elds, the minimum and maximum values are displayed.

123
Building CLEM Expressions
Checking CLEM Expressions
Click Check in the Expression Builder (lower right corner) to validate the expression. Expressions that have not been checked are displayed in red. If errors are found, a message indicating the cause is displayed.
Figure
Invalid CLEM expression
The following items are checked:
???Correct quoting of values and ???eld names
???Correct usage of parameters and global variables
???Valid usage of operators
???Existence of referenced ???elds
???Existence and de???nition of referenced globals
If you encounter errors in syntax, try creating the expression using the lists and operator buttons rather than typing the expression manually. This method automatically adds the proper quotes for ???elds and values.
Find and Replace
The Find/Replace dialog box is available in places where you edit script or expression text, including the script editor, CLEM expression builder, or when de???ning a template in the Report node. When editing text in any of these areas, press

124
Chapter 7
Figure
Find/Replace dialog box
EWith the cursor in a text area, press Ctrl+F to access the Find/Replace dialog box.
EEnter the text you want to search for, or choose from the
EEnter the replacement text, if any.
EClick Find Next to start the search.
EClick Replace to replace the current selection, or Replace All to update all or selected instances.
EThe dialog box closes after each operation. Press F3 from any text area to repeat the last ???nd operation, or press Ctrl+F to access the dialog box again.
Search Options
Match case. Speci???es whether the ???nd operation is
Whole words only. Speci???es whether the ???nd operation matches text embedded within words. If selected, for example, a search on spider will not match spiderman or
Regular expressions. Speci???es whether regular expression syntax is used (see next section). When selected, the Whole words only option is disabled and its value is ignored.
Selected text only. Controls the scope of the search when using the Replace All option.
Regular Expression Syntax
Regular expressions allow you to search on special characters such as tabs or newline characters, classes or ranges of characters such as a through d, any digit or
Character Matches

126
Chapter 7

Chapter
8
CLEM Language Reference
CLEM Reference Overview
This section describes the Control Language for Expression Manipulation (CLEM), which is a powerful tool used to analyze and manipulate the data used in IBM?? SPSS?? Modeler streams. You can use CLEM within nodes to perform tasks ranging from evaluating conditions or deriving values to inserting data into reports. For more information, see the topic About CLEM in Chapter 7 on p. 105.
A subset of the CLEM language can also be used when you are scripting in the user interface. This allows you to perform many of the same data manipulations in an automated fashion.
CLEM expressions consist of values, ???eld names, operators, and functions. Using the correct syntax, you can create a wide variety of powerful data operations. For more information, see the topic CLEM Examples in Chapter 7 on p. 108.
CLEM Datatypes
CLEM datatypes can be made up of any of the following:
???Integers
???Reals
???Characters
???Strings
???Lists
???Fields
???Date/Time
Rules for Quoting
Although IBM?? SPSS?? Modeler is ???exible when you are determining the ???elds, values, parameters, and strings used in a CLEM expression, the following general rules provide a list of ???good practices??? to use in creating expressions:
???
???
as strings.
???
???

128
Chapter 8
For more information, see the topic Values and Data Types in Chapter 7 on p. 110. Additionally, these rules are covered in more detail in the following topics.
Integers
Integers are represented as a sequence of decimal digits. Optionally, you can place a minus sign
(???) before the integer to denote a negative
The CLEM language handles integers of arbitrary precision. The maximum integer size depends on your platform. If the values are too large to be displayed in an integer ???eld, changing the ???eld type to Real usually restores the value.
Reals
Real refers to a
Optionally, you can place a minus sign (???) before the real to denote a negative
Note: When referencing real numbers in CLEM expressions, a period must be used as the decimal separator, regardless of any settings for the current stream or locale. For example, specify
Na > 0.6
rather than
Na > 0,6
This applies even if a comma is selected as the decimal symbol in the stream properties dialog box and is consistent with the general guideline that code syntax should be independent of any speci???c locale or convention.
Characters
Characters (usually shown as CHAR) are typically used within a CLEM expression to perform tests on strings. For example, you can use the function isuppercode to determine whether the ???rst character of a string is upper case. The following CLEM expression uses a character to indicate that the test should be performed on the ???rst character of the string:
isuppercode(subscrs(1, "MyString"))
To express the code (in contrast to the location) of a particular character in a CLEM expression, use single backquotes of the form
Note: There is no CHAR storage type for a ???eld, so if a ???eld is derived or ???lled with an expression that results in a CHAR, then that result will be converted to a string.

129
CLEM Language Reference
Strings
Generally, you should enclose strings in double quotation marks. Examples of strings are "c35product2" and "referrerID". To indicate special characters in a string, use a
Lists
A list is an ordered sequence of elements, which may be of mixed type. Lists are enclosed in square brackets ([]). Examples of lists are [1 2 4 16] and ["abc" "def"]. Lists are not used as the value of IBM?? SPSS?? Modeler ???elds. They are used to provide arguments to functions, such as member and oneof.
Fields
Names in CLEM expressions that are not names of functions are assumed to be ???eld names. You can write these simply as Power, val27, state_flag, and so on, but if the name begins with a digit or includes
Note: Fields that are quoted but unde???ned in the data set will be misread as strings.
Dates
Date calculations are based on a ???baseline??? date, which is speci???ed in the stream properties dialog box. The default baseline date is 1 January 1900. For more information, see the topic Setting general options for streams in Chapter 5 on p. 55.
The CLEM language supports the following date formats.

130
Chapter 8
Time
The CLEM language supports the following time formats.
131
CLEM Language Reference
CLEM Operators
The following operators are available.

132
Chapter 8
Operator Precedence
Precedences determine the parsing of complex expressions, especially unbracketed expressions with more than one in???x operator. For example,
3 + 4 * 5
parses as 3 + (4 * 5) rather than (3 + 4) * 5 because the relative precedences dictate that * is to be parsed before +. Every operator in the CLEM language has a precedence value associated with it; the lower this value, the more important it is on the parsing list, meaning that it will be processed sooner than other operators with higher precedence values.

133
CLEM Language Reference
Functions Reference
The following CLEM functions are available for working with data in IBM?? SPSS?? Modeler. You can enter these functions as code in a variety of dialog boxes, such as Derive and Set To Flag nodes, or you can use the Expression Builder to create valid CLEM expressions without memorizing function lists or ???eld names.
Conventions in Function Descriptions
The following conventions are used throughout this guide when referring to items in a function.

134
Chapter 8
Functions in this guide are listed with the function in one column, the result type (integer, string, and so on) in another, and a description (where available) in a third column. For example, the following is the description of the rem function.
Details on usage conventions, such as how to list items or specify characters in a function, are described elsewhere. For more information, see the topic CLEM Datatypes on p. 127.
Information Functions
Information functions are used to gain insight into the values of a particular ???eld. They are typically used to derive ???ag ???elds. For example, you can use the @BLANK function to create a ???ag ???eld indicating records whose values are blank for the selected ???eld. Similarly, you can check the storage type for a ???eld using any of the storage type functions, such as is_string.

135
CLEM Language Reference
Conversion Functions
Conversion functions allow you to construct new ???elds and convert the storage type of existing ???les. For example, you can form new strings by joining strings together or by taking strings apart. To join two strings, use the operator ><. For example, if the ???eld Site has the value "BRAMLEY", then "xx" >< Site returns "xxBRAMLEY". The result of >< is always a string, even if the arguments are not strings. Thus, if ???eld V1 is 3 and ???eld V2 is 5, then V1 >< V2 returns "35" (a string, not a number).
Conversion functions (and any other functions that require a speci???c type of input, such as a date or time value) depend on the current formats speci???ed in the Stream Options dialog box. For example, if you want to convert a string ???eld with values Jan 2003, Feb 2003, and so on, select the matching date format MON YYYY as the default date format for the stream. For more information, see the topic Setting general options for streams in Chapter 5 on p. 55.
Comparison Functions
Comparison functions are used to compare ???eld values to each other or to a speci???ed string. For example, you can check strings for equality using =. An example of string equality veri???cation is: Class = "class 1".
For purposes of numeric comparison, greater means closer to positive in???nity, and lesser means closer to negative in???nity. That is, all negative numbers are less than any positive number.

136
Chapter 8

137
CLEM Language Reference
Logical Functions
CLEM expressions can be used to perform logical operations.

138
Chapter 8
Numeric Functions
CLEM contains a number of commonly used numeric functions.

139
CLEM Language Reference
Trigonometric Functions
All of the functions in this section either take an angle as an argument or return one as a result. In both cases, the units of the angle (radians or degrees) are controlled by the setting of the relevant stream option.
Probability Functions
Probability functions return probabilities based on various distributions, such as the probability that a value from Student???s t distribution will be less than a speci???c value.

140
Chapter 8
Bitwise Integer Operations
These functions enable integers to be manipulated as bit patterns representing
Note: Bitwise functions cannot be called from scripts.
141
CLEM Language Reference
Random Functions
The following functions are used to randomly select items or randomly generate numbers.
String Functions
In CLEM, you can perform the following operations with strings:
???Compare strings
???Create strings
???Access characters

142
Chapter 8
In CLEM, a string is any sequence of characters between matching double quotation marks ("string quotes"). Characters (CHAR) can be any single alphanumeric character. They are declared in CLEM expressions using single backquotes in the form of `<character>`, such as `z`, `A`, or `2`. Characters that are
Note. Comparisons between strings that do and do not use SQL pushback may generate different results where trailing spaces exist.

143
CLEM Language Reference

144
Chapter 8

145
CLEM Language Reference

146
Chapter 8
SoundEx Functions
SoundEx is a method used to ???nd strings when the sound is known but the precise spelling is not. Developed in 1918, it searches out words with similar sounds based on phonetic assumptions about how certain letters are pronounced. It can be used to search names in a database, for example, where spellings and pronunciations for similar names may vary. The basic SoundEx algorithm is documented in a number of sources and, despite known limitations (for example, leading letter combinations such as ph and f will not match even though they sound the same), is supported in some form by most databases.
Date and Time Functions
CLEM includes a family of functions for handling ???elds with datetime storage of string variables representing dates and times. The formats of date and time used are speci???c to each stream and are speci???ed in the stream properties dialog box. The date and time functions parse date and time strings according to the currently selected format.
When you specify a year in a date that uses only two digits (that is, the century is not speci???ed), IBM?? SPSS?? Modeler uses the default century that is speci???ed in the stream properties dialog box.

147
CLEM Language Reference
Note: Date and time functions cannot be called from scripts.

148
Chapter 8

150
Chapter 8
Converting Date and Time Values
Note that conversion functions (and any other functions that require a speci???c type of input, such as a date or time value) depend on the current formats speci???ed in the Stream Options dialog box. For example, if you have a ???eld named DATE that is stored as a string with values Jan 2003, Feb 2003, and so on, you could convert it to date storage as follows:
to_date(DATE)
For this conversion to work, select the matching date format MON YYYY as the default date format for the stream. For more information, see the topic Setting general options for streams in Chapter 5 on p. 55.
For an example that converts string values to dates using a Filler node, see the stream broadband_create_models.str, installed in the \Demos folder under the streams subfolder.
Dates stored as numbers. Note that DATE in the previous example is the name of a ???eld, while to_date is a CLEM function. If you have dates stored as numbers, you can convert them using the datetime_date function, where the number is interpreted as a number of seconds since the base date (or epoch).
datetime_date(DATE)
By converting a date to a number of seconds (and back), you can perform calculations such as computing the current date plus or minus a ???xed number of days, for example:
Sequence Functions
For some operations, the sequence of events is important. The application allows you to work with the following record sequences:
??? Sequences and time series
151
CLEM Language Reference
???Sequence functions
???Record indexing
???Averaging, summing, and comparing values
???Monitoring
???@SINCE
???Offset values
???Additional sequence facilities
For many applications, each record passing through a stream can be considered as an individual case, independent of all others. In such situations, the order of records is usually unimportant.
For some classes of problems, however, the record sequence is very important. These are typically time series situations, in which the sequence of records represents an ordered sequence of events or occurrences. Each record represents a snapshot at a particular instant in time; much of the richest information, however, might be contained not in instantaneous values but in the way in which such values are changing and behaving over time.
Of course, the relevant parameter may be something other than time. For example, the records could represent analyses performed at distances along a line, but the same principles would apply.
Sequence and special functions are immediately recognizable by the following characteristics:
???They are all pre???xed by @.
???Their names are given in upper case.
Sequence functions can refer to the record currently being processed by a node, the records that have already passed through a node, and even, in one case, records that have yet to pass through a node. Sequence functions can be mixed freely with other components of CLEM expressions, although some have restrictions on what can be used as their arguments.
Examples
You may ???nd it useful to know how long it has been since a certain event occurred or a condition was true. Use the function @SINCE to do
@SINCE(Income > Outgoings)
This function returns the offset of the last record where this condition was
Sometimes you may want to refer to a value of the current record in the expression used by @SINCE. You can do this using the function @THIS, which speci???es that a ???eld name always applies to the current record. To ???nd the offset of the last record that had a Concentration ???eld value more than twice that of the current record, you could use:
@SINCE(Concentration > 2 * @THIS(Concentration))
In some cases the condition given to @SINCE is true of the current record by
@SINCE(ID == @THIS(ID))

152
Chapter 8
For this reason, @SINCE does not evaluate its condition for the current record. Use a similar function, @SINCE0, if you want to evaluate the condition for the current record as well as previous ones; if the condition is true in the current record, @SINCE0 returns 0.
Note: @ functions cannot be called from scripts.

154
Chapter 8

155
CLEM Language Reference
Global Functions
The functions @MEAN,@SUM, @MIN, @MAX, and @SDEV work on, at most, all of the records read up to and including the current one. In some cases, however, it is useful to be able to work out how values in the current record compare with values seen in the entire data set. Using a Set Globals node to generate values across the entire data set, you can access these values in a CLEM expression using the global functions.
For example,
@GLOBAL_MAX(Age)
returns the highest value of Age in the data set, while the expression
(Value - @GLOBAL_MEAN(Value)) / @GLOBAL_SDEV(Value)
expresses the difference between this record???s Value and the global mean as a number of standard deviations. You can use global values only after they have been calculated by a Set Globals node. All current global values can be canceled by clicking thebutton on the Globals tab in the stream properties dialog box.
Note: @ functions cannot be called from scripts.

156
Chapter 8
Functions Handling Blanks and Null Values
Using CLEM, you can specify that certain values in a ???eld are to be regarded as ???blanks,??? or missing values. The following functions work with blanks.
Note: @ functions cannot be called from scripts.
Blank ???elds may be ??????lled in??? with the Filler node. In both Filler and Derive nodes (multiple mode only), the special CLEM function @FIELD refers to the current ???eld(s) being examined.

157
CLEM Language Reference
Special Fields
Special functions are used to denote the speci???c ???elds under examination, or to generate a list of ???elds as input. For example, when deriving multiple ???elds at once, you should use @FIELD to denote ???perform this derive action on the selected ???elds.??? Using the expression log(@FIELD) derives a new log ???eld for each selected ???eld.
Note: @ functions cannot be called from scripts.

Chapter
9
Using IBM SPSS Modeler with a Repository
About the IBM SPSS Collaboration and Deployment Services Repository
IBM?? SPSS?? Modeler can be used in conjunction with an IBM SPSS Collaboration and Deployment Services repository, enabling you to manage the life cycle of data mining models and related predictive objects, and enabling these objects to be used by enterprise applications, tools, and solutions. SPSS Modeler objects that can be shared in this way include streams, nodes, stream outputs, scenarios, projects, and models. Objects are stored in the central repository, from where they can be shared with other applications and tracked using extended versioning, metadata, and search capabilities.
Note: A separate license is required to access an IBM?? SPSS??
Collaboration and Deployment Services repository. For more information, see
http://www.ibm.com/software/analytics/spss/products/deployment/cds/
Before you can use SPSS Modeler with the repository, you need to install an adapter at the repository host. Without this adapter, you may see the following message when attempting to access repository objects from certain SPSS Modeler nodes or models:
The repository may need updating to support new node, model and output types.
For instructions on installing the adapter, see the SPSS Modeler Deployment Installation guide, available on the SPSS Modeler Deployment DVD. Details of how to access SPSS Modeler repository objects from IBM?? SPSS?? Collaboration and Deployment Services Deployment Manager are given in the SPSS Modeler Deployment Guide.
The following sections provide information on accessing the repository from within SPSS Modeler.

159
Using IBM SPSS Modeler with a Repository
Figure
Objects in the IBM SPSS Collaboration and Deployment Services Repository
Extensive Versioning and Search Support
The repository provides comprehensive object versioning and search capabilities. For example, suppose that you create a stream and store it in the repository where it can be shared with researchers from other divisions. If you later update the stream in SPSS Modeler, you can add the updated version to the repository without overwriting the previous version. All versions remain accessible and can be searched by name, label, ???elds used, or other attributes. You could, for example, search for all model versions that use net revenue as an input, or all models created by a particular author. (To do this with a traditional ???le system, you would have to save each version under a different ???lename, and the relationships between versions would be unknown to the software.)
Single
The single
???IBM SPSS Collaboration and Deployment Services must be con???gured to use a single
???The user must be logged in to a host that is compatible with the provider.

160
Chapter 9
For more information, see the topic Connecting to the Repository on p. 161.
Storing and Deploying Repository Objects
Streams created in IBM?? SPSS?? Modeler can be stored in the repository just as they are, as ???les with the extension .str. In this way, a single stream can be accessed by multiple users throughout the enterprise. For more information, see the topic Storing Objects in the Repository on p. 164.
It is also possible to deploy a stream in the repository. A deployed stream is stored as a ???le with additional metadata. A deployed stream can take full advantage of the
as new data becomes available. Alternatively, a set of streams can be deployed for Champion Challenger analysis, in which streams are compared to determine which one contains the most effective predictive model.
You can deploy a stream in one of two ways: as a stream (with the extension .str), or as a scenario (with the extension .scn). Deployment as a stream enables the stream to be used by the
For more information, see Stream Deployment Options on p. 185.
Requirements for Streams Deployed as Scenarios
???To ensure consistent access to enterprise data, streams deployed as scenarios must be accessed through the Enterprise View component of IBM?? SPSS?? Collaboration and Deployment Services. This means that in SPSS Modeler, there must be at least one Enterprise View source node within each designated scoring or modeling branch in the stream.
???To use the Enterprise View node, IBM SPSS Collaboration and Deployment Services
must be installed, con???gured and accessible from your site, with an Enterprise View, Application Views, and Data Provider De???nitions (DPDs) already de???ned. For more information, contact your local administrator, or see the corporate website at http://www.ibm.com/software/analytics/spss/products/deployment/cds/.
???A DPD is de???ned against a particular ODBC data source. To use a DPD from SPSS Modeler, you must have an ODBC data source de???ned on the SPSS Modeler server host that has the same name and that connects to the same data store as the one referenced in the DPD.
???In addition, the IBM?? SPSS?? Collaboration and Deployment Services Enterprise View Driver must be installed on each computer used to modify or run the stream. For Windows, simply install the driver on the computer where SPSS Modeler or SPSS Modeler Server is installed, and no further con???guration of the driver is needed. On UNIX, a reference to the pev.sh script must be added to the startup script. Contact your local administrator for details on installing the IBM SPSS Collaboration and Deployment Services Enterprise View Driver.
161
Using IBM SPSS Modeler with a Repository
Other Deployment Options
While IBM SPSS Collaboration and Deployment Services offers the most extensive features for managing enterprise content, a number of other mechanisms for deploying or exporting streams are also available, including:
???Export the stream and model for later use with IBM?? SPSS?? Modeler Solution Publisher Runtime.
???Export one or more models in PMML, an
Connecting to the Repository
E To connect to the repository, on the IBM?? SPSS?? Modeler main menu, click:
Tools > Repository > Options...
ESpecify login options as required.
Settings are speci???c to each site or installation. For speci???c port and other login details, contact your local system administrator.
Note: A separate license is required to access an IBM?? SPSS??
Collaboration and Deployment Services repository. For more information, see
http://www.ibm.com/software/analytics/spss/products/deployment/cds/
Figure
IBM SPSS Collaboration and Deployment Services Repository Login
Repository. The repository installation you want to access. Generally, this matches the name of the host server where the repository is installed. You can connect to only one repository at a time.
Port. The port used to host the connection, typically 8080 by default.
Set Credentials. Leave this box unchecked to enable the single

162
Chapter 9
Ensure secure connection. Speci???es whether a Secure Sockets Layer (SSL) connection should be used. SSL is a commonly used protocol for securing data sent over a network. To use this feature, SSL must be enabled on the server hosting the repository. If necessary, contact your local administrator for details.
Entering Credentials for the Repository
Figure
Entering IBM SPSS Collaboration and Deployment Services Repository credentials
User ID and password. Specify a valid user name and password for logging on. If necessary, contact your local administrator for more information.
Provider. Choose a security provider for authentication. The repository can be con???gured to use different security providers; if necessary, contact your local administrator for more information.
Remember repository and user ID. Saves the current settings as the default so that you do not have to reenter them each time you want to connect.
Browsing the Repository Contents
The repository allows you to browse stored content in a manner similar to Windows Explorer; you can also browse versions of each stored object.
ETo open the IBM?? SPSS?? Collaboration and Deployment Services Repository window, on the SPSS Modeler menus click:
Tools > Repository > Explore...
ESpecify connection settings to the repository if necessary. For more information, see the
topic Connecting to the Repository on p. 161. For speci???c port, password, and other connection details, contact your local system administrator.

163
Using IBM SPSS Modeler with a Repository
Figure
Browsing the IBM SPSS Collaboration and Deployment Services Repository contents
The explorer window initially displays a tree view of the folder hierarchy. Click a folder name to display its contents.
Objects that match the current selection or search criteria are listed in the right pane, with detailed information on the selected version displayed in the lower right pane. The attributes displayed apply to the most recent version.

164
Chapter 9
Storing Objects in the Repository
Figure
Storing a model
You can store streams, nodes, models, model palettes, projects, and output objects in the repository, from where they can be accessed by other users and applications.
Note: A separate license is required to access an IBM?? SPSS??
Collaboration and Deployment Services repository. For more information, see
http://www.ibm.com/software/analytics/spss/products/deployment/cds/
You can also publish stream output to the repository in a format that enables other users to view it over the Internet using the IBM?? SPSS?? Collaboration and Deployment Services Deployment Portal.
Setting Object Properties
When you store an object, the Repository: Store dialog box is displayed, enabling you to set the values of a number of properties for the object. You can:
???Choose the name and repository folder under which the object is to be stored
???Add information about the object such as the version label and other searchable properties
???Assign one or more classi???cation topics to the object
???Set security options for the object
The following sections describe the properties you can set.

165
Using IBM SPSS Modeler with a Repository
Choosing the Location for Storing Objects
Figure
Choosing the location for storing an object
Save in. Shows the current
File name. The name under which the object will be stored.
Store. Stores the object at the current location.
Adding Information About Stored Objects
All of the ???elds on this tab are optional.

166
Chapter 9
Figure
Adding information about the object
Author. The username of the user creating the object in the repository. By default, this shows the username used for the repository connection, but you can change this name here.
Version Label. Select a label from the list to indicate the object version, or click Add to create a new label. Avoid using the ???[??? character in the label. Ensure that no boxes are checked if you do not want to assign a label to this object version. For more information, see the topic Viewing and Editing Object Properties on p. 180.
Description. A description of the object. Users can search for objects by description (see note).
Keywords. One or more keywords that relate to the object and which can be used for search purposes (see note).
Expiration. A date after which the object is no longer visible to general users, although it can still be seen by its owner and by the repository administrator. To set an expiration date, select the Date option and enter the date, or choose one using the calendar button.
Store. Stores the object at the current location.
Note: Information in the Description and Keywords ???elds is treated as distinct from anything entered in SPSS Modeler on the Annotations tab of the object. A repository search by description or keyword does not return information from the Annotations tab. For more information, see the topic Searching for Objects in the Repository on p. 175.

167
Using IBM SPSS Modeler with a Repository
Assigning Topics to a Stored Object
Topics are a hierarchical classi???cation system for the content stored in the repository. You can choose from the available topics when storing objects, and users can also search for objects by topic. The list of available topics is set by repository users with the appropriate privileges (for more information, see the Deployment Manager User???s Guide).
Figure
Assigning topics to an object
To assign a topic to the object:
EClick the Add button.
EClick a topic name from the list of available topics.
EClick OK.
To remove a topic assignment:
ESelect the topic in the list of assigned topics.
EClick Delete.
Setting Security Options for Stored Objects
You can set or change a number of security options for a stored object. For one or more principals (that is, users or groups of users), you can:
???Assign access rights to the object
???Modify access rights to the object
???Remove access rights to the object

168
Chapter 9
Figure
Setting security options for an object
Principal. The repository username of the user or group who has access rights on this object.
Permissions. The access rights that this user or group has for the object.
Add. Enables you to add one or more users or groups to the list of those with access rights on this object. For more information, see the topic Adding a User to the Permissions List on p. 169.
Modify. Enables you to modify the access rights of the selected user or group for this object. Read access is granted by default. This option enables you to grant additional access rights, namely Owner, Write, Delete, and Modify Permissions.
Delete. Deletes the selected user or group from the permissions list for this object.

169
Using IBM SPSS Modeler with a Repository
Adding a User to the Permissions List
Figure
Adding a user to the permissions list for an object
Select provider. Choose a security provider for authentication. The repository can be con???gured to use different security providers; if necessary, contact your local administrator for more information.
Find. Enter the repository username of the user or group you want to add, and click Search to display that name in the user list. To add more than one username at a time, leave this ???eld blank and just click Search to display a list of all the repository usernames.
User list. Select one or more usernames from the list and click OK to add them to the permissions list.
Modifying Access Rights for an Object
Figure
Modifying access rights for an object
Owner. Select this option to give this user or group owner access rights to the object. The owner has full control over the object, including Delete and Modify access rights.

170
Chapter 9
Read. By default, a user or group that is not the object owner has only Read access rights to the object. Select the appropriate check boxes to add Write, Delete, and Modify Permissions access rights for this user or group.
Storing Streams
You can store a stream as a .str ???le in the repository, from where it can be accessed by other users.
Note: For information on deploying a stream, to take advantage of additional repository features, see Deploying Streams on p. 184.
To store the current stream:
E On the main menu, click:
File > Store > Store as Stream...
ESpecify connection settings to the repository if necessary. For more information, see the
topic Connecting to the Repository on p. 161. For speci???c port, password, and other connection details, contact your local system administrator.
EIn the Repository: Store dialog box, choose the folder where you want to store the object, specify any other information you want to record, and click the Store button. For more information, see the topic Setting Object Properties on p. 164.
Storing Projects
You can store a complete IBM?? SPSS?? Modeler project as a .cpj ???le in the repository so that it can be accessed by other users.
Because a project ???le is a container for other SPSS Modeler objects, you need to tell SPSS Modeler to store the project???s objects in the repository. You do this using a setting in the Project Properties dialog box. For more information, see the topic Setting Project Properties in Chapter 11 on p. 205.
Once you con???gure a project to store objects in the repository, whenever you add a new object to the project, SPSS Modeler automatically prompts you to store the object.
When you have ???nished your SPSS Modeler session, you must store a new version of the project ???le so that it remembers your additions. The project ???le automatically contains (and retrieves) the latest versions of its objects. If you did not add any objects to a project during an SPSS Modeler session, then you do not have to
To store a project
ESelect the project on the
File > Project > Store Project...
171
Using IBM SPSS Modeler with a Repository
ESpecify connection settings to the repository if necessary. For more information, see the
topic Connecting to the Repository on p. 161. For speci???c port, password, and other connection details, contact your local system administrator.
EIn the Repository: Store dialog box, choose the folder where you want to store the object, specify any other information you want to record, and click the Store button. For more information, see the topic Setting Object Properties on p. 164.
Storing Nodes
You can store an individual node de???nition from the current stream as a .nod ???le in the repository, from where it can be accessed by other users.
To store a node:
E
ESpecify connection settings to the repository if necessary. For more information, see the
topic Connecting to the Repository on p. 161. For speci???c port, password, and other connection details, contact your local system administrator.
EIn the Repository: Store dialog box, choose the folder where you want to store the object, specify any other information you want to record, and click the Store button. For more information, see the topic Setting Object Properties on p. 164.
Storing Output Objects
You can store an output object from the current stream as a .cou ???le in the repository, from where it can be accessed by other users.
To store an output object:
EClick the object on the Outputs tab of the managers pane in SPSS Modeler, and on the main menu click:
File > Outputs > Store Output...
EAlternatively,
ESpecify connection settings to the repository if necessary. For more information, see the
topic Connecting to the Repository on p. 161. For speci???c port, password, and other connection details, contact your local system administrator.
EIn the Repository: Store dialog box, choose the folder where you want to store the object, specify any other information you want to record, and click the Store button. For more information, see the topic Setting Object Properties on p. 164.

172
Chapter 9
Storing Models and Model Palettes
You can store an individual model as a .gm ???le in the repository, from where it can be accessed by other users. You can also store the complete contents of the Models palette as a .gen ???le in the repository.
Storing a model
E Click the object on the Models palette in SPSS Modeler, and on the main menu click:
File > Models > Store Model...
EAlternatively,
EContinue from ???Completing the storage procedure???.
Storing a Models palette
E
EOn the
EContinue from ???Completing the storage procedure???.
Completing the storage procedure
ESpecify connection settings to the repository if necessary. For more information, see the
topic Connecting to the Repository on p. 161. For speci???c port, password, and other connection details, contact your local system administrator.
EIn the Repository: Store dialog box, choose the folder where you want to store the object, specify any other information you want to record, and click the Store button. For more information, see the topic Setting Object Properties on p. 164.
Retrieving Objects from the Repository
You can retrieve streams, models, model palettes, nodes, projects, and output objects that have been stored in the repository.
Note: Besides using the menu options as described here, you can also retrieve streams, output objects, models and model palettes by
E To retrieve a stream, on the IBM?? SPSS?? Modeler main menu click:
File > Retrieve Stream...
ETo retrieve a model, model palette, project, or output object, on the SPSS Modeler main menu click:
File > Models > Retrieve Model...
or
File > Models > Retrieve Models Palette...

173
Using IBM SPSS Modeler with a Repository
or
File > Projects > Retrieve Project...
or
File > Outputs > Retrieve Output...
EAlternatively,
ETo retrieve a node, on the SPSS Modeler main menu click:
Insert > Node (or SuperNode) from Repository...
ESpecify connection settings to the repository if necessary. For more information, see the
topic Connecting to the Repository on p. 161. For speci???c port, password, and other connection details, contact your local system administrator.
EIn the Repository: Retrieve dialog box, browse to the object, select it and click the Retrieve button.
Choosing an Object to Retrieve
Figure
Retrieving an object from the IBM SPSS Collaboration and Deployment Services Repository

174
Chapter 9
Look in. Shows the folder hierarchy for the current folder. To navigate to a different folder, select one from this list to navigate there directly, or navigate using the object list below this ???eld.
Up Folder button. Navigates to one level above the current folder in the hierarchy.
New Folder button. Creates a new folder at the current level in the hierarchy.
File name. The repository ???le name of the selected object. To retrieve that object, click Retrieve.
Files of type. The type of object that you have chosen to retrieve. Only objects of this type, together with folders, are shown in the object list. To display objects of a different type for retrieval, select the object type from the list.
Open as locked. By default, when an object is retrieved, it is locked in the repository so that others cannot update it. If you do not want the object to be locked on retrieval, uncheck this box.
Description, Keywords. If additional details about the object were de???ned when the object was stored, those details are displayed here. For more information, see the topic Adding Information About Stored Objects on p. 165.
Version. To retrieve a version of the object other than the latest, click this button. Detailed information for all versions is displayed, allowing you to choose the version you want.
Selecting an Object Version
Figure
Selecting a version of an object
To select a speci???c version of a repository object.
E(Optional) Sort the list by version, label, size, creation date or creating user, by

175
Using IBM SPSS Modeler with a Repository
ESelect the object version you want to work with.
EClick Continue.
Searching for Objects in the Repository
You can search for objects by name, folder, type, label, date, or other criteria.
Searching by Name
To search for objects by name:
E On the IBM?? SPSS?? Modeler main menu click:
Tools > Repository > Explore...
ESpecify connection settings to the repository if necessary. For more information, see the
topic Connecting to the Repository on p. 161. For speci???c port, password, and other connection details, contact your local system administrator.
EClick the Search tab.
EIn the Search for objects named ???eld, specify the name of the object you want to ???nd.
Figure
Searching for objects by name
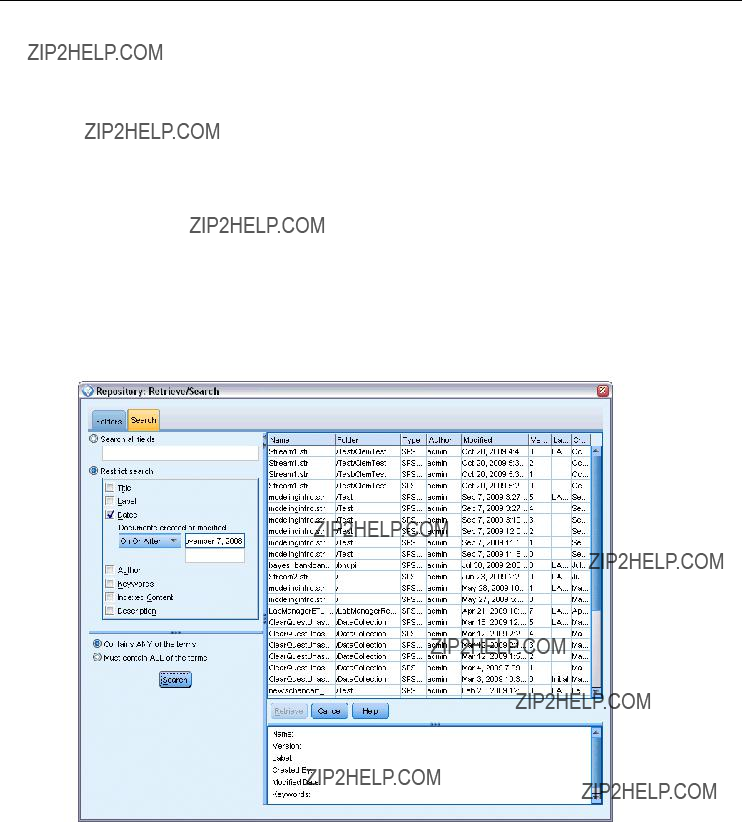
176
Chapter 9
When searching for objects by name, an asterisk (*) can be used as a wildcard character to match any string of characters, and a question mark (?) matches any single character. For example, *cluster* matches all objects that include the string cluster anywhere in the name. The search string m0?_* matches M01_cluster.str and M02_cluster.str but not M01a_cluster.str. Searches are not case sensitive (cluster matches Cluster matches CLUSTER).
Note: If the number of objects is large, searches may take a few moments.
Searching by Other Criteria
You can perform a search based on title, label, dates, author, keywords, indexed content, or description. Only objects that match all speci???ed search criteria will be found. For example, you could locate all streams containing one or more clustering models that also have a speci???c label applied, and which were modi???ed after a speci???c date.
Figure
Searching for streams containing a specific type of model
Object Types. You can restrict the search to models, streams, outputs, nodes, SuperNodes, projects, model palettes, scenarios, or other types of objects.
???Models. You can search for models by category (classi???cation, approximation, clustering, etc.) or by a speci???c modeling algorithm, such as Kohonen.
You can also search by ???elds
???Streams. For streams, you can restrict the search by ???elds used, or model type (either category or algorithm) contained in the stream.

177
Using IBM SPSS Modeler with a Repository
Topics. You can search on models associated with speci???c topics from a list set by repository users with the appropriate privileges (for more information, see the Deployment Manager User???s Guide). To obtain the list, check this box, then click the Add Topics button that is displayed, select one or more topics from the list and click OK.
Label. Restricts the search to speci???c object version labels.
Dates. You can specify a creation or modi???cation date and search on objects before, after, or between the speci???ed date range.
Author. Restricts the search to objects created by a speci???c user.
Keywords. Search on speci???c keywords. In SPSS Modeler, keywords are speci???ed on the Annotation tab for a stream, model, or output object.
Description. Search on speci???c terms in the description ???eld. In SPSS Modeler, the description is speci???ed on the Annotation tab for a stream, model, or output object. Multiple search phrases can be separated by
Modifying Repository Objects
You can modify existing objects in the repository directly from SPSS Modeler. You can:
???Create, rename, or delete folders
???Lock or unlock objects
???Delete objects
Creating, Renaming, and Deleting Folders
E To perform operations on folders in the repository, on the SPSS Modeler main menu click:
Tools > Repository > Explore...
ESpecify connection settings to the repository if necessary. For more information, see the
topic Connecting to the Repository on p. 161. For speci???c port, password, and other connection details, contact your local system administrator.
EEnsure that the Folders tab is active.
ETo create a new folder,
ETo rename a folder,
ETo delete a folder,
Locking and Unlocking Repository Objects
You can lock an object to prevent other users from updating any of its existing versions or creating new versions. A locked object is indicated by a padlock symbol over the object icon.

178
Chapter 9
Figure
Locked object
To lock an object
EIn the repository explorer window,
EClick Lock.
To unlock an object
EIn the repository explorer window,
EClick Unlock.
Deleting Repository Objects
Before deleting an object from the repository, you must decide if you want to delete all versions of the object, or just a particular version.
To Delete All Versions of an Object
EIn the repository explorer window,
EClick Delete Objects.
To Delete the Most Recent Version of an Object
EIn the repository explorer window,
EClick Delete.
To Delete a Previous Version of an Object
EIn the repository explorer window,
EClick Delete Versions.
E Select the version(s) to delete and click OK.

179
Using IBM SPSS Modeler with a Repository
Figure
Select versions to delete
Managing Properties of Repository Objects
You can control various object properties from SPSS Modeler. You can:
???View the properties of a folder
???View and edit the properties of an object
???Create, apply and delete version labels for an object
Viewing Folder Properties
To view properties for any folder in the repository window,
Folder Properties.
General tab
Figure
Folder properties

180
Chapter 9
Displays the folder name, creation, and modi???cation dates.
Permissions tab
Speci???es read and write permissions for the folder. All users and groups with access to the parent folder are listed. Permissions follow a hierarchy. For example, if you do not have read permission, you cannot have write permission. If you do not have write permission, you cannot have delete permission.
Figure
Folder properties
Users And Groups. Lists the repository users and groups that have at least Read access to this folder. Select the Write and Delete check boxes to add those access rights for this folder to a particular user or group. Click the Add Users/Groups icon on the right side of the Permissions tab to assign access to additional users and groups. The list of available users and groups is controlled by the administrator.
Cascade Permissions. Choose an option to control how changes made to the current folder are applied to its child folders, if any.
???Cascade all permissions. Cascades permission settings from the current folder to all child and descendant folders. This is a quick way to set permissions for several folders at once. Set permissions as required for the parent folder, and then cascade as required.
???Cascade changes only. Cascades only changes made since the last time changes were applied. For example, if a new group has been added and you want to give it access to all folders under the Sales branch, you can give the group access to the root Sales folder and cascade the change to all subfolders. All other permissions to existing subfolders remain as before.
???Do not cascade. Any changes made apply to the current folder only and do not cascade
to child folders.
Viewing and Editing Object Properties
In the Object Properties dialog box you can view and edit properties. Although some properties cannot be changed, you can always update an object by adding a new version.
181
Using IBM SPSS Modeler with a Repository
EIn the repository window,
EClick Object Properties.
Figure
Object properties
General Tab
Name. The name of the object as viewed in the repository.
Created on. Date the object (not the version) was created.
Last modified. Date the most recent version was modi???ed.
Author. The user???s login name.
Description. By default, this contains the description speci???ed on the object???s Annotation tab in SPSS Modeler.
Linked topics. The repository allows models and related objects to be organized by topics if required. The list of available topics is set by repository users with the appropriate privileges (for more information, see the Deployment Manager User???s Guide).
Keywords. You specify keywords on the Annotation tab for a stream, model, or output object. Multiple keywords should be separated by spaces, up to a maximum of 255 characters. (If keywords contain spaces, use quotation marks to separate them.)
Versions Tab
Objects stored in the repository may have multiple versions. The Versions tab displays information about each version.

182
Chapter 9
Figure
Version properties
The following properties can be speci???ed or modi???ed for speci???c versions of a stored object:
Version. Unique identi???er for the version generated based on the time when the version was stored.
Label. Current label for the version, if any. Unlike the version identi???er, labels can be moved from one version of an object to another.
The ???le size, creation date, and author are also displayed for each version.
icon at the top right of the Versions tab to de???ne, apply or For more information, see the topic Managing Object Version
Permissions Tab
The Permissions tab lets you set read and write permissions for the object. All users and groups with access to the current object are listed. Permissions follow a hierarchy. For example, if you do not have read permission, you cannot have write permission. If you do not have write permission, you cannot have delete permission.

183
Using IBM SPSS Modeler with a Repository
Figure
Object access rights
Users And Groups. Lists the repository users and groups that have at least Read access to this object. Select the Write and Delete check boxes to add those access rights for this object to a particular user or group. Click the Add Users/Groups icon on the right side of the Permissions tab to assign access to additional users and groups. The list of available users and groups is controlled by the administrator.
Managing Object Version Labels
The Edit Version Labels dialog box enables you to:
???Apply labels to the selected object
???Remove labels from the selected object
???De???ne a new label and apply it to the object
To apply labels to the object
ESelect one or more labels in the Available Labels list.
EClick the
EClick OK.
To remove labels from the object
ESelect one or more labels in the Applied Labels list.
EClick the
EClick OK.

184
Chapter 9
To define a new label and apply it to the object
EType the label name in the New Label ???eld.
EClick the
EClick OK.
Deploying Streams
To enable a stream to be used with the
Whether a stream is deployed as a stream (.str ???le) or as a scenario (.scn ???le), the object can take full advantage of the
To deploy the current stream (File menu method)
E On the main menu, click:
File > Store > Deploy
EChoose the deployment type and complete the rest of the dialog box as necessary.
EClick Deploy as stream to deploy the stream for use with IBM SPSS Modeler Advantage or IBM SPSS Collaboration and Deployment Services. Click Deploy as scenario to deploy the stream for use with IBM SPSS Collaboration and Deployment Services or Predictive Applications version 5.
EClick Store. For more information, click Help.
EContinue from ???Completing the deployment process???.
To deploy the current stream (Tools menu method)
EOn the main menu, click:
Tools > Stream Properties > Deployment
EChoose the deployment type, complete the rest of the Deployment tab as necessary, and click Store. For more information, see the topic Stream Deployment Options on p. 185.
Completing the deployment process
ESpecify connection settings to the repository if necessary. For more information, see the
topic Connecting to the Repository on p. 161. For speci???c port, password, and other connection details, contact your local system administrator.

185
Using IBM SPSS Modeler with a Repository
Figure
Storing a stream in the repository
EIn the Repository: Store dialog box, choose the folder where you want to store the object, specify any other information you want to record, and click the Store button. For more information, see the topic Setting Object Properties on p. 164.
Stream Deployment Options
The Deployment tab in the Stream Options dialog box allows you to specify options for deploying the stream. You can deploy either as a stream or as a scenario.
When you deploy as a stream, you can open and modify the stream in the
Deploying as a scenario stores the stream in the repository as a ???le with the extension .scn. Doing so also enables a stream to be used by Predictive Applications version 5.
Whether you deploy as a stream or as a scenario, you can take advantage of the additional functionality available with IBM?? SPSS?? Collaboration and Deployment Services, such as
From the Deployment tab, you can also preview the stream description that IBM?? SPSS?? Modeler creates for the stream. For more information, see the topic Stream Descriptions in Chapter 5 on p. 74.
Note: To ensure consistent access to enterprise data, a stream that is deployed as a scenario must access its source data through IBM?? SPSS?? Collaboration and Deployment Services Enterprise View, so in such a case the stream must include at least one Enterprise View source node within each designated scoring or modeling branch as applicable.
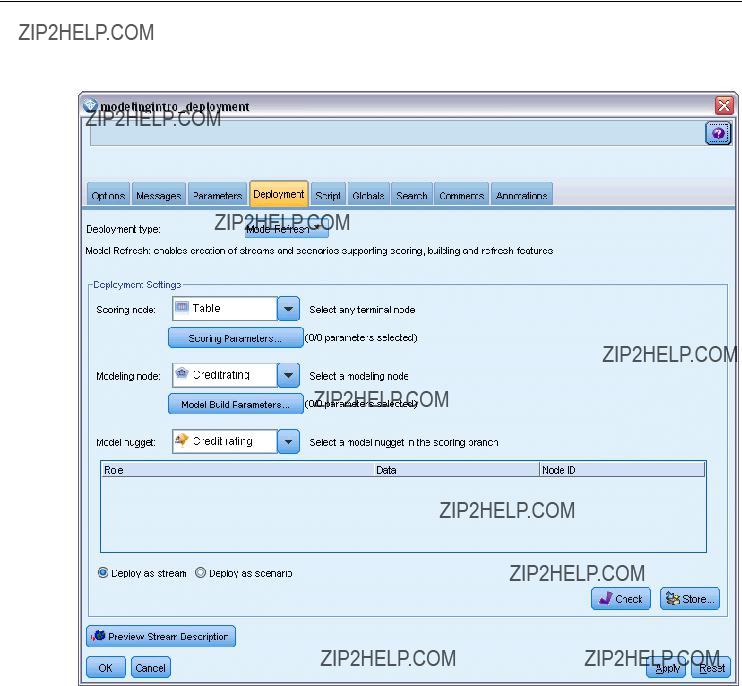
186
Chapter 9
Figure
Stream Deployment options
Deployment type. Choose how you want to deploy the stream. All streams require a designated scoring node before they can be deployed; additional requirements and options depend on the deployment type.
???<none>. The stream will not be deployed to the repository. All options are disabled except
stream description preview.
???Scoring Only. The stream is deployed to the repository when you click the Store button. Data
can be scored using the node that you designate in the Scoring node ???eld.
???Model Refresh. Same as for Scoring Only but in addition, the model can be updated in the
repository using the objects that you designate in the Modeling node and Model nugget ???elds. Note: Automatic model refresh is not supported by default in IBM SPSS Collaboration and Deployment Services, so you must choose this deployment type if you want to use this feature when running a stream from the repository. For more information, see the topic Model Refresh on p. 190.

187
Using IBM SPSS Modeler with a Repository
Scoring node. Select a graph, output or export node to identify the stream branch to be used for scoring the data. While the stream can actually contain any number of valid branches, models, and terminal nodes, one and only one scoring branch must be designated for purposes of deployment. This is the most basic requirement to deploy any stream.
Scoring Parameters. Allows you to specify parameters that can be modi???ed when the scoring branch is run. For more information, see the topic Scoring and Modeling Parameters on p. 188.
Modeling node. For model refresh, speci???es the modeling node used to regenerate or update the model in the repository. Must be a modeling node of the same type as that speci???ed for Model nugget.
Model Build Parameters. Allows you to specify parameters that can be modi???ed when the modeling node is run. For more information, see the topic Scoring and Modeling Parameters on p. 188.
Model nugget. For model refresh, speci???es the model nugget that will be updated or regenerated each time the stream is updated in the repository (typically as part of a scheduled job). The model must be located on the scoring branch. While multiple models may exist on the scoring branch, only one can be designated. Note that when the stream is initially created this may effectively be a placeholder model that is updated or regenerated as new data is available.
Deploy as stream. Click this option if you want to use the stream with IBM SPSS Modeler Advantage or IBM SPSS Collaboration and Deployment Services (and see note following).
Deploy as scenario. Click this option if you want to use the stream with IBM SPSS Collaboration and Deployment Services or Predictive Applications version 5 (and see note following).
Check. Click this button to check whether this is a valid stream for deployment. All streams must have a designated scoring node before they can be deployed. If you are deploying as a scenario, the stream must also contain a valid Enterprise View source node. Error messages are displayed if these conditions are not satis???ed.
Store. Deploys the stream if it is valid. If not, an error message is displayed. Click the Fix button, correct the error and try again.
Preview Stream Description. Enables you to view the contents of the stream description that SPSS Modeler creates for the stream. For more information, see the topic Stream Descriptions in Chapter 5 on p. 74.
Note: (Deploy as stream or scenario) Multiple Enterprise View nodes can be used within the modeling branch. If so, using a single data connection for all Enterprise View nodes within the branch is preferable in most cases, and is required for Champion Challenger analysis.
???If Champion Challenger support is not required, different Enterprise View connections can be used within the same branch, as long as the connections vary by data provider de???nition (DPD) only.
???These limitations apply within a given branch only. Between the scoring and model building branches, different Enterprise View connections can be used without such restrictions.

188
Chapter 9
Scoring and Modeling Parameters
When deploying a stream to IBM SPSS Collaboration and Deployment Services, you can choose which parameters can be viewed or edited each time the model is updated or scored. For example, you might specify maximum and minimum values, or some other value that may be subject to change each time a job is run.
Figure
Scoring Parameters dialog box
ETo make a parameter visible so it can be viewed or edited after the stream is deployed, select it from the list in the dialog box.
The list of available parameters is de???ned on the Parameters tab in the stream properties dialog box. For more information, see the topic Setting Stream and Session Parameters in Chapter 5 on p. 68.
The Scoring Branch
If you are deploying a stream, one branch of the stream must be designated as the scoring branch (that is, the one containing the scoring node). When you designate a branch as the scoring branch, that branch is highlighted on the stream canvas, as is the model link to the nugget on the scoring branch. This visual representation is particularly useful in complex streams with multiple branches, where the scoring branch might not be immediately obvious.
Note: Only one stream branch can be designated as the scoring branch.

189
Using IBM SPSS Modeler with a Repository
Figure
Stream with scoring branch highlighted
If the stream already had a scoring branch de???ned, the
You can show or hide the scoring branch indication by means of the Show/hide stream markup toolbar button.
Figure
Show/hide stream markup toolbar button
Identifying the Scoring Branch for Deployment
You can designate the scoring branch either from the
To designate a branch as the scoring branch
EConnect the model nugget to a terminal node (a processing or output node downstream from the nugget).
E
EOn the menu, click Use as Scoring Branch.

190
Chapter 9
To designate a branch as the scoring branch (Tools menu)
EConnect the model nugget to a terminal node (a processing or output node downstream from the nugget).
EOn the main menu, click:
Tools > Stream Properties > Deployment
EOn the Deployment type list, click Scoring Only or Model Refresh as required. For more information, see the topic Stream Deployment Options on p. 185.
EClick the Scoring node ???eld and select a terminal node from the list.
EClick OK.
Model Refresh
Model refresh is the process of rebuilding an existing model in a stream using newer data. The stream itself does not change in the repository. For example, the algorithm type and
Only one model nugget in a stream can be set to
If you turn off the ???refresh model??? status of a nugget, this is equivalent to setting the deployment type of the stream to Scoring Only, and the Deployment tab of the stream properties dialog box is updated accordingly. You can turn this status on and off by means of the
option on the
Removing the model link of a nugget on the scoring branch also removes the ???refresh model??? status of the nugget. You can undo removal of the model link by means of the Edit menu or the toolbar; doing so also reinstates the ???refresh model??? status of the nugget.
How the Refresh Model is Selected
As well as the scoring branch, the link to the refresh model is also highlighted in the stream. The model nugget chosen as the refresh model, and therefore the link that is highlighted, depends on how many nuggets are in the stream.
191
Using IBM SPSS Modeler with a Repository
Single Model in Stream
Figure
Scoring branch with single model in the stream
If a single linked model nugget is on the scoring branch when it is identi???ed as such, that nugget becomes the refresh model for the stream.
Multiple Models in Stream
If there is more than one linked nugget in the stream, the refresh model is chosen as follows.
If a model nugget has been de???ned in the Deployment tab of the stream properties dialog box and is also in the stream, then that nugget becomes the refresh model.
If no nugget has been de???ned in the Deployment tab, or if one has been de???ned but is not on the scoring branch, then the nugget closest to the terminal node becomes the refresh model.
To illustrate this, suppose that you have the following stream.

192
Chapter 9
Figure
Scoring branch with more than one model in the stream
You
Figure
Scoring branch highlighted with multiple models and refresh link
However, you decide that you want to use the other model nugget in the stream as the refresh model, so from its menu, you set its model link to be used as the refresh link.
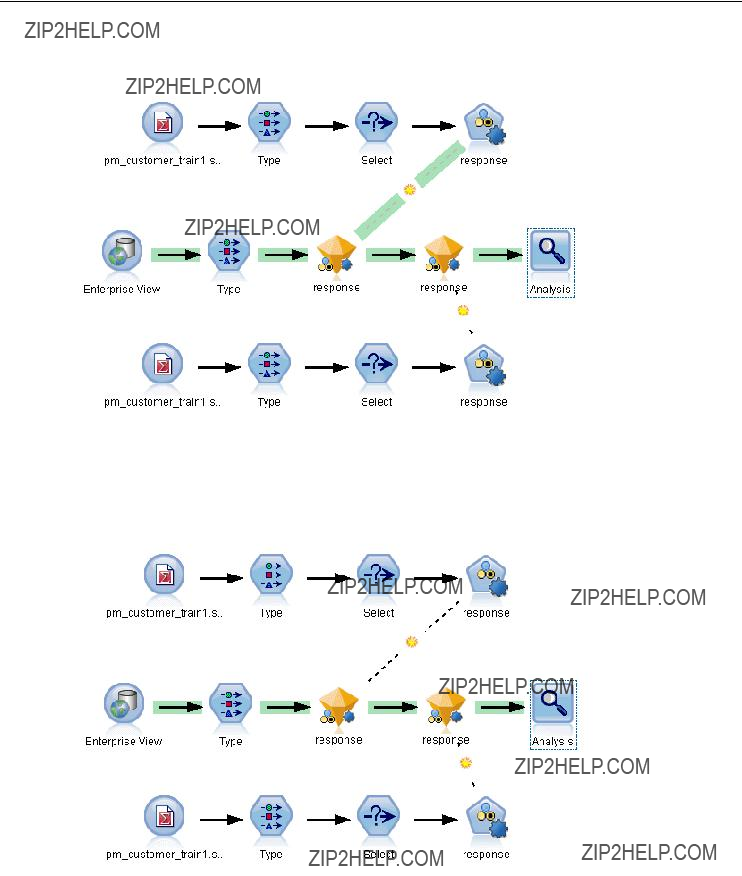
193
Using IBM SPSS Modeler with a Repository
Figure
Scoring branch with refresh link switched to first model nugget
If you subsequently deselect both model links as refresh links, only the scoring branch is highlighted, not the links. The deployment type is set to Scoring Only.
Figure
Scoring branch with multiple models and no refresh links
Note: You can choose to set one of the links to Replace status, but not the other one. In this case, the model nugget chosen as the refresh model is the one that has a refresh link and which is closest to the terminal node when the scoring branch is designated.

194
Chapter 9
No Models in Stream
If there are no models in the stream, or only models with no model links, the deployment type is set to Scoring Only.
Checking a Scoring Branch for Errors
When you designate the scoring branch, it is checked for errors, such as not having an Enterprise View node in the stream when deploying as a scenario.
Figure
Scoring branch with errors
If an error is found, the scoring branch is highlighted in the scoring branch error color, and an error message is displayed. You can set the error color by means of a Custom Color option. For more information, see the topic Setting Display Options in Chapter 12 on p. 220.
If an error is found, proceed as follows:
ECorrect the error according to the contents of the error message.
EDo one of the following:
???
???On the main menu, click:
Tools > Stream Properties > Deployment
and click Check.
E If necessary, repeat this process until no errors are found.

Chapter
10
Exporting to External Applications
About Exporting to External Applications
IBM?? SPSS?? Modeler provides a number of mechanisms to export the entire data mining process to external applications, so that the work you do to prepare data and build models can be used to your advantage outside of SPSS Modeler as well.
The previous section showed how you can deploy streams to an IBM SPSS Collaboration and Deployment Services repository to take advantage of its
???IBM?? SPSS?? Modeler Advantage
???Predictive Applications 5.0 applications
???Applications that can import and export ???les in PMML format
For more information about using streams with IBM SPSS Modeler Advantage, see Opening a Stream in IBM SPSS Modeler Advantage on p. 195.
To export a stream for use with Predictive Applications 5.0, follow the instructions for deploying as a scenario. For more information, see the topic Deploying Streams in Chapter 9 on p. 184.
For information on exporting and importing models as PMML ???les, making it possible to share models with any other applications that support this format, see Importing and Exporting Models as PMML on p. 196.
Note: The Predictive Applications product has been superseded by IBM?? Analytical Decision Management. Support for Predictive Applications will be withdrawn in a future release of SPSS Modeler.
Opening a Stream in IBM SPSS Modeler Advantage
IBM?? SPSS?? Modeler streams can be used in conjunction with the
To open a stream in IBM SPSS Modeler Advantage:
EDeploy the stream in the IBM?? SPSS?? Collaboration and Deployment Services repository, being sure to click the Deploy as stream option. For more information, see the topic Deploying Streams in Chapter 9 on p. 184.
EClick the Open in IBM SPSS Modeler Advantage toolbar button, or from the main menu click:
File > Open in IBM SPSS Modeler Advantage

196
Chapter 10
ESpecify connection settings to the repository if necessary. For more information, see the
topic Connecting to the Repository in Chapter 9 on p. 161. For speci???c port, password, and other connection details, contact your local system administrator.
Note: The repository server must also have the IBM SPSS Modeler Advantage software installed.
EIn the Repository: Store dialog box, choose the folder where you want to store the object, specify any other information you want to record, and click the Store button. For more information, see the topic Setting Object Properties in Chapter 9 on p. 164.
Doing so launches IBM SPSS Modeler Advantage with the stream already open. The stream is closed in SPSS Modeler.
Importing and Exporting Models as PMML
PMML, or predictive model markup language, is an XML format for describing data mining and statistical models, including inputs to the models, transformations used to prepare data for data mining, and the parameters that de???ne the models themselves. IBM?? SPSS?? Modeler can import and export PMML, making it possible to share models with other applications that support this format, such as IBM?? SPSS?? Statistics.
For more information about PMML, see the Data Mining Group website (http://www.dmg.org).
To Export a Model
PMML export is supported for most of the model types generated in SPSS Modeler. For more information, see the topic Model Types Supporting PMML on p. 198.
E
EOn the menu, click Export PMML.
Figure
Exporting a model in PMML format

197
Exporting to External Applications
E In the Export (or Save) dialog box, specify a target directory and a unique name for the model.
Note: You can change options for PMML export in the User Options dialog box. On the main menu, click:
Tools > Options > User Options
and click the PMML tab.
For more information, see the topic Setting PMML Export Options in Chapter 12 on p. 221.
To Import a Model Saved as PMML
Models exported as PMML from SPSS Modeler or another application can be imported into the models palette. For more information, see the topic Model Types Supporting PMML on p. 198.
E In the models palette,
Figure
Importing a model in PMML format
ESelect the ???le to import and specify options for variable labels as required.
EClick Open.

198
Chapter 10
Figure
Selecting the XML file for a model saved using PMML
Use variable labels if present in model. The PMML may specify both variable names and variable labels (such as Referrer ID for RefID) for variables in the data dictionary. Select this option to use variable labels if they are present in the originally exported PMML.
If you have selected the variable label option but there are no variable labels in the PMML, the variable names are used as normal.
Model Types Supporting PMML
PMML Export
SPSS Modeler models. The following models created in IBM?? SPSS?? Modeler can be exported as PMML 4.0:
???C&R Tree
???QUEST
???CHAID
???Linear Regression

199
Exporting to External Applications
???Neural Net
???C5.0
???Logistic Regression
???Genlin
???SVM
???Bayes Net
???Apriori
???Carma
???
???Kohonen
???TwoStep
???KNN
???Statistics Model
The following model created in SPSS Modeler can be exported as PMML 3.2:
??? Decision List
Database native models. For models generated using
PMML Import
SPSS Modeler can import and score PMML models generated by current versions of all IBM?? SPSS?? Statistics products, including models exported from SPSS Modeler as well as model or transformation PMML generated by SPSS Statistics 17.0 or later. Essentially, this means any PMML that the scoring engine can score, with the following exceptions:
???Apriori, CARMA, Anomaly Detection, and Sequence models cannot be imported.
???PMML models may not be browsed after importing into SPSS Modeler even though they can be used in scoring. (Note that this includes models that were exported from SPSS Modeler to begin with. To avoid this limitation, export the model as a generated model ???le [*.gm] rather than PMML.)
???IBM InfoSphere Warehouse models exported as PMML cannot be imported.
???Limited validation occurs on import, but full validation is performed on attempting to score the model. Thus it is possible for import to succeed but scoring to fail or produce incorrect results.

Chapter
11
Projects and Reports
Introduction to Projects
A project is a group of ???les related to a data mining task. Projects include data streams, graphs, generated models, reports, and anything else that you have created in IBM?? SPSS?? Modeler. At ???rst glance, it may seem that SPSS Modeler projects are simply a way to organize output, but they are actually capable of much more. Using projects, you can:
???Annotate each object in the project ???le.
???Use the
???Add
???Produce both comprehensive and simple update reports based on your annotations. These reports can be generated in HTML for easy publishing on your organization???s intranet.
Note: If the project pane is not visible in the SPSS Modeler window, click Project on the View menu.
Objects that you add to a project can be viewed in two ways: Classes view and
Figure
201
Projects and Reports
By supporting the
For example, the Business Understanding phase typically involves gathering requirements and meeting with colleagues to determine goals rather than working with data in SPSS Modeler. The project pane allows you to store your notes from such meetings in the Business Understanding folder for future reference and inclusion in reports.
Figure
The
on the Help menu.
Note: If the project pane is not visible in the window, click Project on the View menu.
Setting the Default Project Phase
Objects added to a project are added to a default phase of
To select which phase to use as your default:
EIn
EOn the menu, click Set as Default.
The default folder is displayed in bold type.

202
Chapter 11
Classes View
The Classes view in the project pane organizes your work in IBM?? SPSS?? Modeler categorically by the types of objects created. Saved objects can be added to any of the following categories:
???Streams
???Nodes
???Models
???Tables, graphs, reports
???Other
Figure
Classes view
Adding objects to the Classes view also adds them to the default phase folder in the
Note: If the project pane is not visible in the window, click Project on the View menu.
Building a Project
A project is essentially a ???le containing references to all of the ???les that you associate with the project. This means that project items are saved both individually and as a reference in the project ???le (.cpj). Because of this referential structure, note the following:
???Project items must ???rst be saved individually before being added to a project. If an item is unsaved, you will be prompted to save it before adding it to the current project.
???Objects that are updated individually, such as streams, are also updated in the project ???le.
???Manually moving or deleting objects (such as streams, nodes, and output objects) from the ???le system will render links in the project ???le invalid.
Creating a New Project
New projects are easy to create in the IBM?? SPSS?? Modeler window. You can either start building one, if none is open, or you can close an existing project and start from scratch.

203
Projects and Reports
E On the main menu, click:
File > Project > New Project...
Adding to a Project
Once you have created or opened a project, you can add objects, such as data streams, nodes, and reports, using several methods.
Adding Objects from the Managers
Using the managers in the upper right corner of the IBM?? SPSS?? Modeler window, you can add streams or output.
ESelect an object, such as a table or a stream, from one of the manager tabs.
E
If the object has been previously saved, it will automatically be added to the appropriate objects folder (in Classes view) or to the default phase folder (in
EAlternatively, you can drag and drop objects from the managers to the project pane.
Note: You may be asked to save the object ???rst. When saving, be sure that Add ???le to project is selected in the Save dialog box. This will automatically add the object to the project after you save it.
Figure
Adding items to a project

204
Chapter 11
Adding Nodes from the Canvas
You can add individual nodes from the stream canvas by using the Save dialog box.
ESelect a node on the canvas.
E
Edit > Node > Save Node...
EIn the Save dialog box, select Add ???le to project.
ECreate a name for the node and click Save.
This saves the ???le and adds it to the project. Nodes are added to the Nodes folder in Classes view and to the default phase folder in
Adding External Files
You can add a wide variety of
To add external files to a project:
EDrag ???les from the desktop to the project. or
E
EOn the menu, click Add to Folder.
ESelect a ???le in the dialog box and click Open.
This will add a reference to the selected object inside SPSS Modeler projects.
Transferring Projects to the IBM SPSS Collaboration and Deployment Services Repository
You can transfer an entire project, including all component ???les, to the IBM?? SPSS?? Collaboration and Deployment Services Repository in one step. Any objects that are already in the target location will not be moved. This feature also works in reverse: you can transfer entire projects from the IBM SPSS Collaboration and Deployment Services Repository to your local ???le system.
Note: A separate license is required to access an IBM?? SPSS??
Collaboration and Deployment Services repository. For more information, see
http://www.ibm.com/software/analytics/spss/products/deployment/cds/

205
Projects and Reports
Transferring a Project
Make sure that the project you want to transfer is open in the project pane.
To transfer a project:
E
EIf prompted, log in to IBM SPSS Collaboration and Deployment Services Repository.
ESpecify the new location for the project and click OK.
Setting Project Properties
You can customize a project???s contents and documentation by using the project properties dialog box. To access project properties:
E
EClick the Project tab to specify basic project information.
Figure
Setting project properties
Created. Shows the project???s creation date (not editable).

206
Chapter 11
Summary. You can enter a summary for your data mining project that will be displayed in the project report.
Contents. Lists the type and number of components referenced by the project ???le (not editable).
Save unsaved object as. Speci???es whether unsaved objects should be saved to the local ???le system, or stored in the repository. For more information, see the topic About the IBM SPSS Collaboration and Deployment Services Repository in Chapter 9 on p. 158.
Update object references when loading project. Select this option to update the project???s references to its components. Note: The ???les added to a project are not saved in the project ???le itself. Rather, a reference to the ???les is stored in the project. This means that moving or deleting a ???le will remove that object from the project.
Annotating a Project
The project pane provides a number of ways to annotate your data mining efforts.
To annotate a project:
ESelect the project folder in either
E
EClick the Annotations tab.

207
Projects and Reports
Figure
Annotations tab in the project properties dialog box
E Enter keywords and text to describe the project.
Folder Properties and Annotations
Individual project folders (in both
To annotate a folder:
ESelect a folder in the project pane.
E
In

208
Chapter 11
Figure
Project folder with
Name. This area displays the name of the selected ???eld.
Tooltip text. Create custom ToolTips that will be displayed when you hover the mouse pointer over a project folder. This is useful in
Annotation field. Use this ???eld for more lengthy annotations that can be collated in the project report. The
Include in report. To include the annotation in reports, select Include in report.
Object Properties
You can view object properties and choose whether to include individual objects in the project report. To access object properties:
E
EOn the menu, click Object Properties.
Figure
Object properties dialog box
Name. This area lists the name of the saved object.
Path. This area lists the location of the saved object.
Include in report. Select this option to include the object details in a generated report.

209
Projects and Reports
Closing a Project
When you exit IBM?? SPSS?? Modeler or open a new project, the existing project ???le (.cpj) is closed.
Some ???les associated with the project (such as streams, nodes or graphs) may still be open. If you want to leave these ???les open, reply No to the message ... Do you want to save and close these ???les?
If you modify and save any associated ???les after the close of a project, these updated versions will be included in the project the next time you open it. To prevent this behavior, remove the ???le from the project or save it under a different ???lename.
Generating a Report
One of the most useful features of projects is the ability to generate reports based on the project items and annotations. This is a critical component of effective data mining, as discussed throughout the
in your organization.
Reports are often generated from project ???les several times during the data mining process for distribution to those involved in the project. The report culls information about the objects referenced from the project ???le as well as any annotations created. You can create reports based on either the Classes view or
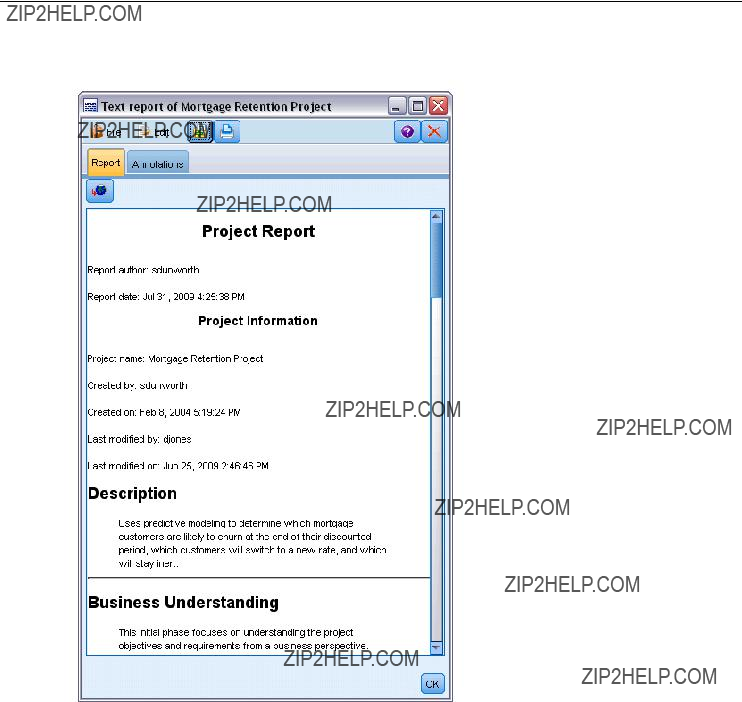
210
Chapter 11
Figure
Generated report window
To generate a report:
ESelect the project folder in either
E
ESpecify the report options and click Generate Report.
211
Projects and Reports
Figure
Selecting options for a report
The options in the report dialog box provide several ways to generate the type of report you need:
Output name. Specify the name of the output window if you choose to send the output of the report to the screen. You can specify a custom name or let IBM?? SPSS?? Modeler automatically name the window for you.
Output to screen. Select this option to generate and display the report in an output window. Note that you have the option to export the report to various ???le types from the output window.
Output to file. Select this option to generate and save the report as a ???le of the type speci???ed in the File type list.
Filename. Specify a ???lename for the generated Modeler \bin directory. Use the ellipsis button
report. Files are saved by default to the SPSS to specify a different location.

212
Chapter 11
File type. Available ???le types are:
???HTML document. The report is saved as a single HTML ???le. If your report contains graphs, they are saved as PNG ???les and are referenced by the HTML ???le. When publishing your report on the Internet, make sure to upload both the HTML ???le and any images it references.
???Text document. The report is saved as a single text ???le. If your report contains graphs, only the ???lename and path references are included in the report.
???Microsoft Word document. The report is saved as a single document, with any graphs embedded directly into the document.
???Microsoft Excel document. The report is saved as a single spreadsheet, with any graphs embedded directly into the spreadsheet.
???Microsoft PowerPoint document. Each phase is shown on a new slide. Any graphs are embedded directly into the PowerPoint slides.
???Output object. When opened in SPSS Modeler, this ???le (.cou) is the same as the Output to screen option in the Report Format group.
Note: To export to a Microsoft Of???ce ???le, you must have the corresponding application installed.
Title. Specify a title for the report.
Report structure. Select either
Author. The default user name is displayed, but you can change it.
Report includes. Select a method for including objects in the report. Select all folders and objects to include all items added to the project ???le. You can also include items based on whether Include in Report is selected in the object properties. Alternatively, to check on unreported items, you can choose to include only items marked for exclusion (where Include in Report is not selected).
Select. This option allows you to provide project updates by selecting only recent items in the report. Alternatively, you can track older and perhaps unresolved issues by setting parameters for old items. Select all items to dismiss time as a parameter for the report.
Order by. You can select a combination of the following object characteristics to order them within a folder:
???Type. Group objects by type.
???Name. Organize objects alphabetically.
???Added date. Sort objects using the date they were added to the project.
Saving and Exporting Generated Reports
A report generated to the screen is displayed in a new output window. Any graphs included in the report are displayed as

213
Projects and Reports
The total number of nodes in each stream is listed within the report. The numbers are shown under the following headings, which use IBM?? SPSS?? Modeler terminology, not
???Data readers. Source nodes.
???Data writers. Export nodes.
???Model builders. Build, or Modeling, nodes.
???Model appliers. Generated models, also known as nuggets.
???Output builders. Graph or Output nodes.
???Other. Any other nodes related to the project. For example, those available on the Field Ops tab or Record Ops tab on the Nodes Palette.
To save a report:
EOn the File menu, click Save.
ESpecify a ???lename.
The report is saved as an output object.
To export a report:
EOn the File menu, click Export and the ???le type to which you want to export.
ESpecify a ???lename.
The report is saved in the format you chose. You can export to the following ???le types:
???HTML
???Text
???Microsoft Word
???Microsoft Excel
???Microsoft PowerPoint
Note: To export to a Microsoft Of???ce ???le, you must have the corresponding application installed.
Use the buttons at the top of the window to:
???Print the report.
???View the report as HTML in an external web browser.

214
Chapter 11
Figure
Report displayed in a web browser

Chapter
12
Customizing IBM SPSS Modeler
Customizing IBM SPSS Modeler Options
There are a number of operations you can perform to customize IBM?? SPSS?? Modeler to your needs. Primarily, this customization consists of setting speci???c user options such as memory allocation, default directories, and use of sound and color. You can also customize the Nodes palette located at the bottom of the SPSS Modeler window.
Setting IBM SPSS Modeler Options
There are several ways to customize and set options for IBM?? SPSS?? Modeler:
???Set system options, such as memory usage and locale, by clicking System Options on the
Tools > Options menu.
???Set user options, such as display fonts and colors, by clicking User Options on the Tools > Options menu.
???Specify the location of applications that work with SPSS Modeler by clicking Helper Applications on the Tools > Options menu.
???Specify the default directories used in SPSS Modeler by clicking Set Directory or Set Server Directory on the File menu.
You can also set options that apply to some or all of your streams. For more information, see the topic Setting Options for Streams in Chapter 5 on p. 54.
System Options
You can specify the preferred language or locale for IBM?? SPSS?? Modeler by clicking System Options on the Tools > Options menu. Here you can also set the maximum memory usage for SPSS Modeler. Note that changes made in this dialog box will not take effect until you restart SPSS Modeler.

216
Chapter 12
Figure
System Options dialog box
Maximum memory. Select to impose a limit in megabytes on SPSS Modeler???s memory usage. On some platforms, SPSS Modeler limits its process size to reduce the toll on computers with limited resources or heavy loads. If you are dealing with large amounts of data, this may cause an ???out of memory??? error. You can ease memory load by specifying a new threshold.
Use system locale. This option is selected by default and set to English (United States). Deselect to specify another language from the list of available languages and locales.
Managing Memory
In addition to the Maximum memory setting speci???ed in the System Options dialog box, there are several ways you can optimize memory usage:
???Set up a cache on any nonterminal node so that the data is read from the cache rather than retrieved from the data source when you run the data stream. This will help decrease the memory load for large data sets. For more information, see the topic Caching Options for Nodes in Chapter 5 on p. 50.
???Adjust the Maximum members for nominal ???elds option in the stream properties dialog box. This option speci???es a maximum number of members for nominal ???elds after which the measurement level of the ???eld becomes Typeless. For more information, see the topic Setting general options for streams in Chapter 5 on p. 55.
???Force IBM?? SPSS?? Modeler to free up memory by clicking in the lower right corner of the window where the memory that SPSS Modeler is using and the amount allocated are displayed (xxMB / xxMB). Clicking this region turns it a darker shade, after which memory allocation ???gures will drop. Once the region returns to its regular color, SPSS Modeler has freed up all the memory possible.
Setting Default Directories
You can specify the default directory used for ???le browsers and output by selecting Set Directory or
Set Server Directory from the File menu.
???Set Directory. You can use this option to set the working directory. The default working directory is based on the installation path of your version of IBM?? SPSS?? Modeler or from the command line path used to launch SPSS Modeler. In local mode, the working directory

217
Customizing IBM SPSS Modeler
is the path used for all
???Set Server Directory. The Set Server Directory option on the File menu is enabled whenever there is a remote server connection. Use this option to specify the default directory for
all server ???les and data ???les speci???ed for input or output. The default server directory is $CLEO/data, where $CLEO is the directory in which the Server version of SPSS Modeler is installed. Using the command line, you can also override this default by using the
Setting User Options
You can set general options for IBM?? SPSS?? Modeler by selecting User Options from the Tools > Options menu. These options apply to all streams used in SPSS Modeler.
The following types of options can be set by clicking the corresponding tab:
???Noti???cation options, such as model overwriting and error messages.
???Display options, such as graph and background colors.
???PMML export options used when exporting models to Predictive Model Markup Language (PMML).
???User or author information, such as your name, initials, and
To set
Setting Notification Options
Using the Noti???cations tab of the User Options dialog box, you can set various options regarding the occurrence and type of warnings and con???rmation windows in IBM?? SPSS?? Modeler. You can also specify the behavior of the Outputs and Models tabs in the managers pane when new output and models are generated.

218
Chapter 12
Figure
User Options dialog box, Notifications tab
Show stream execution feedback dialog. Select to display a dialog box that includes a progress indicator when a stream has been running for three seconds. The dialog box also includes details of the output objects created by the stream.
???Close dialog upon completion. By default, the dialog box closes when the stream ???nishes running. Clear this check box if you want the dialog box to remain visible when the stream ???nishes.
Warn when a node overwrites a file. Select to warn with an error message when node operations overwrite an existing ???le.
Warn when a node overwrites a database table. Select to warn with an error message when node operations overwrite an existing database table.
Sound Notifications
Use the list to specify whether sounds notify you when an event or error occurs. There are a number of sounds available. Use the Play (loudspeaker) button to play a selected sound. Use the ellipsis button to browse for and select a sound.
Note: The .wav ???les used to create sounds in SPSS Modeler are stored in the /media/sounds directory of your installation.
??? Mute all sounds. Select to turn off sound noti???cation for all events.

219
Customizing IBM SPSS Modeler
Visual Notifications
The options in this group are used to specify the behavior of the Outputs and Models tabs in the managers pane at the top right of the display when new items are generated. Selector
from the list to specify the behavior of the corresponding tab.
The following options are available for New Model:
Add model to stream. If selected (default), adds a new model to the stream, as well as to the Models tab, as soon as the model is built. In the stream, the model is shown with a link to the modeling node from which the model was created. If you uncheck this box, the model is added only to the Models tab.
Replace previous model. If selected (default), overwrites an existing model from this stream in the Models tab and on the stream canvas. If this box is unchecked, the model is added to the existing models on the tab and the canvas. Note that this setting is overridden by the model replacement setting on a model link.
The following options are available for New Output:
Warn when outputs exceed [n]. Select whether to display a warning when the number of items on the Outputs tab exceeds a prespeci???ed quantity. The default quantity is 20; however, you can change this if needed.
The following options are available in all cases:
Select tab. Choose whether to switch to the Outputs or Models tab when the corresponding object is generated while the stream runs.
???Select Always to switch to the corresponding tab in the managers pane.
???Select If generated by current stream to switch to the corresponding tab only for objects generated by the stream currently visible in the canvas.
???Select Never to restrict the software from switching to the corresponding tab to notify you of generated outputs or models.
Flash tab. Select whether to ???ash the Outputs or Models tab in the managers pane when new outputs or models have been generated.
???Select If not selected to ???ash the corresponding tab (if not already selected) whenever new objects are generated in the managers pane.
???Select Never to restrict the software from ???ashing the corresponding tab to notify you of generated objects.
Scroll palette to make visible (New Model only). Select whether to automatically scroll the Models tab in the managers pane to make the most recent model visible.
???Select Always to enable scrolling.
???Select If generated by current stream to scroll only for objects generated by the stream currently visible in the canvas.
???Select Never to restrict the software from automatically scrolling the Models tab.
Open window (New Output only). Select whether to automatically open an output window upon generation.

220
Chapter 12
???Select Always to always open a new output window.
???Select If generated by current stream to open a new window for output generated by the stream currently visible in the canvas.
???Select Never to restrict the software from automatically opening new windows for generated output.
Click Default Values to revert to the system default settings for this tab.
Setting Display Options
Using the Display tab of the User Options dialog box, you can set options for the display of fonts and colors in IBM?? SPSS?? Modeler.
Figure
User Options dialog box, Display tab
Show welcome dialog on startup. Select to cause the welcome dialog box to be displayed on startup. The welcome dialog box has options to launch the application examples tutorial, open a demonstration stream or an existing stream or project, or to create a new stream.
Show stream and SuperNode markups. If selected, causes markup (if any) on streams and SuperNodes to be displayed by default. Markup includes stream comments, model links and scoring branch highlighting.
221
Customizing IBM SPSS Modeler
Standard Fonts & Colors (effective on restart). Options in this control box are used to specify the SPSS Modeler screen design, color scheme, and the size of the fonts displayed. Options selected here do not take effect until you close and restart SPSS Modeler.
???Look and feel. Enables you to choose a standard color scheme and screen design. You can choose from
SPSS Standard (default), a design common across IBM SPSS products.
SPSS Classic, a design familiar to users of earlier versions of SPSS Modeler.
Windows, a Windows design that may be useful for increased contrast in the stream canvas and palettes.
???Default font size for nodes. Specify a font size to be used in the node palettes and for nodes displayed in the stream canvas.
Note: You can set the size of the node icons for a stream on the Layout pane of the Options tab of the stream properties dialog box. From the main menu, choose
Tools > Stream Properties > Options > Layout.
Custom Colors.This table lists the currently selected colors used for various display items. For each of the items listed in the table, you can change the current color by
Chart Category Color Order. This table lists the currently selected colors used for display in newly created graphs. The order of the colors re???ects the order in which they will be used in the chart. For example, if a nominal ???eld used as a color overlay contains four unique values, then only the ???rst four colors listed here will be used. For each of the items listed in the table, you can change the current color by
entry. Changes made here do not affect previously created graphs.
Click Default Values to revert to the system default settings for this tab.
Setting PMML Export Options
On the PMML tab, you can control how IBM?? SPSS?? Modeler exports models to Predictive Model Markup Language (PMML). For more information, see the topic Importing and Exporting Models as PMML in Chapter 10 on p. 196.

222
Chapter 12
Figure
User Options dialog box, PMML tab
Export PMML. Here you can con???gure variations of PMML that work best with your target application.
???Select With extensions to allow PMML extensions for special cases where there is no standard PMML equivalent. Note that in most cases this will produce the same result as standard PMML.
???Select As standard PMML... to export PMML that adheres as closely as possible to the PMML standard.
Standard PMML Options. When the As standard PMML... option is selected, you can choose one of two valid ways to export linear and logistic regression models:
???As PMML <GeneralRegression> models
???As PMML <Regression> models
For more information on PMML, see the Data Mining Group website at www.dmg.org.
Setting User Information
User/Author Information. Information you enter here can be displayed on the Annotations tab of nodes and other objects that you create.

223
Customizing IBM SPSS Modeler
Customizing the Nodes Palette
Streams are built using nodes. The Nodes Palette at the bottom of the IBM?? SPSS?? Modeler window contains all of the nodes it is possible to use in stream building. For more information, see the topic Nodes Palette in Chapter 3 on p. 18.
You can reorganize the Nodes Palette in two ways:
???Customize the Palette Manager. For more information, see the topic Customizing the Palette Manager on p. 223.
???Change how palette tabs that contain subpalettes are displayed on the Nodes Palette. For more information, see the topic Creating a Subpalette on p. 227.
Figure
Record Ops tab on the Nodes Palette
Customizing the Palette Manager
The Palette Manager can be customized to accommodate your usage of IBM?? SPSS?? Modeler. For example, if you frequently analyze
The Palette Manager enables you to carry out various tasks:
???Control which palette tabs are shown on the Nodes Palette below the stream canvas.
???Change the order in which palette tabs are shown on the Nodes Palette.
???Create and edit your own palette tabs and any associated subpalettes.
???Edit the default node selections on your Favorites tab.
To access the Palette Manager:
E On the Tools menu, click Manage Palettes.

224
Chapter 12
Figure
Palette Manager showing the tabs displayed on the Nodes Palette
Palette Name. Each available palette tab, whether shown on the Nodes Palette or not, is listed. This includes any palette tabs that you have created. For more information, see the topic Creating a Palette Tab on p. 225.
No. of nodes. The number of nodes displayed on each palette tab. A high number here means you may ???nd it more convenient to create subpalettes to divide up the nodes on the tab. For more information, see the topic Creating a Subpalette on p. 227.
Shown?. Select this ???eld to display the palette tab on the Nodes Palette. For more information, see the topic Displaying Palette Tabs on the Nodes Palette on p. 225.
Sub Palettes. To select subpalettes for display on a palette tab, highlight the required Palette Name and click this button to display the Sub Palettes dialog box. For more information, see the topic Creating a Subpalette on p. 227.
Restore Defaults. To completely remove all changes and additions you have made to the palettes and subpalettes and return to the default palette settings, click this button.
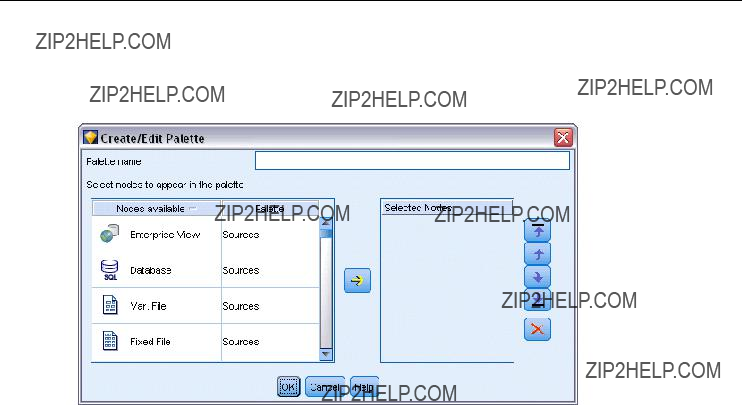
225
Customizing IBM SPSS Modeler
Creating a Palette Tab
Figure
Palette tab creation on the Create/Edit Palette dialog box
To create a custom palette tab:
EFrom the Tools menu, open the Palette Manager.
ETo the right of the Shown? column, click the Add Palette button; the Create/Edit Palette dialog box is displayed.
EType in a unique Palette name.
EIn the Nodes available area, select the node to be added to the palette tab.
EClick the Add Node
After you have added all of the required nodes, you can change the order in which they are displayed on the palette tab:
EUse the simple arrow buttons to move a node up or down one row.
EUse the
ETo remove a node from a palette, highlight the node and click the Delete button to the right of the Selected nodes area.
Displaying Palette Tabs on the Nodes Palette
There may be options available within IBM?? SPSS?? Modeler that you never use; in this case, you can use the Palette Manager to hide the tabs containing these nodes.

226
Chapter 12
Figure
Palette Manager showing the tabs displayed on the Nodes Palette
To select which tabs are to be shown on the Nodes Palette:
EFrom the Tools menu, open the Palette Manager.
EUsing the check boxes in the Shown? column, select whether to include or hide each palette tab.
To permanently remove a palette tab from the Nodes Palette, highlight the node and click the Delete button to the right of the Shown? column. Once deleted, a palette tab cannot be recovered.
Note: You cannot delete the default palette tabs supplied with SPSS Modeler, except for the Favorites tab.
Changing the display order on the Nodes Palette
After you have selected which palette tabs you want to display, you can change the order in which they are displayed on the Nodes Palette:
EUse the simple arrow buttons to move a palette tab up or down one row. Moving them up moves them to the left of the Nodes Palette, and vice versa.
EUse the
Displaying Subpalettes on a Palette Tab
In the same way that you can control which palette tabs are displayed on the Nodes Palette, you can control which subpalettes are available from their parent palette tab.

227
Customizing IBM SPSS Modeler
Figure
Subpalettes available for the Modeling Palette tab
To select subpalettes for display on a palette tab:
EFrom the Tools menu, open the Palette Manager.
ESelect the palette that you require.
EClick the Sub Palettes button; the Sub Palettes dialog box is displayed.
EUsing the check boxes in the Shown? column, select whether to include each subpalette on the palette tab. The All subpalette is always shown and cannot be deleted.
ETo permanently remove a subpalette from the palette tab, highlight the subpalette and click the Delete button to the right of the Shown? column.
Note: You cannot delete the default subpalettes supplied with the Modeling palette tab.
Changing the display order on the Palette Tab
After you have selected which subpalettes you want to display, you can change the order in which they are displayed on the parent palette tab:
EUse the simple arrow buttons to move a subpalette up or down one row.
EUse the
The subpalettes you create are displayed on the Nodes Palette when you select their parent palette tab. For more information, see the topic Changing a Palette Tab View on p. 228.
Creating a Subpalette
Because you can add any existing node to the custom palette tabs that you create, it is possible that you will select more nodes than can be easily displayed on screen without scrolling. To prevent having to scroll, you can create subpalettes into which you place the nodes you chose for

228
Chapter 12
the palette tab. For example, if you created a palette tab that contains the nodes you use most frequently for creating your streams, you could create four subpalettes that break the selections down by source node, ???eld operations, modeling, and output.
Note: You can only select subpalette nodes from those added to the parent palette tab.
Figure
Subpalette creation on the Create/Edit Sub Palette dialog box
To create a subpalette:
EFrom the Tools menu, open the Palette Manager.
ESelect the palette to which you want to add subpalettes.
EClick the Sub Palettes button; the Sub Palettes dialog box is displayed.
ETo the right of the Shown? column, click the Add Sub Palette button; the Create/Edit Sub Palette dialog box is displayed.
EType in a unique Sub palette name.
EIn the Nodes available area, select the node to be added to the subpalette.
EClick the Add Node
EWhen you have added the required nodes, click OK to return to the Sub Palettes dialog box.
The subpalettes you create are displayed on the Nodes Palette when you select their parent palette tab. For more information, see the topic Changing a Palette Tab View on p. 228.
Changing a Palette Tab View
Due to the large number of nodes available in IBM?? SPSS?? Modeler, they may not all be visible on smaller screens without scrolling to the left or right of the Nodes Palette; this is especially noticeable on the Modeling palette tab. To reduce the need to scroll, you can choose to display only the nodes contained in a subpalette (where available). For more information, see the topic Creating a Subpalette on p. 227.

229
Customizing IBM SPSS Modeler
To change the nodes shown on a palette tab, select the palette tab and then, from the menu on the left, select to display either all nodes, or just those in a speci???c subpalette.
Figure
Modeling palette tab showing the Classification subpalette
CEMI Node Management
CEMI is now deprecated and has been replaced by CLEF, which offers a much more ???exible and

Chapter
13
Performance Considerations for Streams and Nodes
You can design your streams to maximize performance by arranging the nodes in the most ef???cient con???guration, by enabling node caches when appropriate, and by paying attention to other considerations as detailed in this section.
Aside from the considerations discussed here, additional and more substantial performance improvements can typically be gained by making effective use of your database, particularly through SQL optimization.
Order of Nodes
Even when you are not using SQL optimization, the order of nodes in a stream can affect performance. The general goal is to minimize downstream processing; therefore, when you have nodes that reduce the amount of data, place them near the beginning of the stream. IBM?? SPSS?? Modeler Server can apply some reordering rules automatically during compilation to bring forward certain nodes when it can be proven safe to do so. (This feature is enabled by default. Check with your system administrator to make sure it is enabled in your installation.)
When using SQL optimization, you want to maximize its availability and ef???ciency. Since optimization halts when the stream contains an operation that cannot be performed in the database, it is best to group
The following operations can be done in most databases. Try to group them at the beginning of the stream:
???Merge by key (join)
???Select
???Aggregate
???Sort
???Sample
???Append
???Distinct operations in include mode, in which all ???elds are selected
???Filler operations
???Basic derive operations using standard arithmetic or string manipulation (depending on which operations are supported by the database)
???
231
Performance Considerations for Streams and Nodes
The following operations cannot be performed in most databases. They should be placed in the stream after the operations in the preceding list:
???Operations on any nondatabase data, such as ???at ???les
???Merge by order
???Balance
???Distinct operations in discard mode or where only a subset of ???elds are selected as distinct
???Any operation that requires accessing data from records other than the one being processed
???State and count ???eld derivations
???History node operations
???Operations involving ???@???
???
???Model construction, application, and analysis
Note: Decision trees, rulesets, linear regression, and
???Data output to anywhere other than the same database that is processing the data
Node Caches
To optimize stream running, you can set up a cache on any nonterminal node. When you set up a cache on a node, the cache is ???lled with the data that passes through the node the next time you run the data stream. From then on, the data is read from the cache (which is stored on disk in a temporary directory) rather than from the data source.
Caching is most useful following a
Note: Caching at source nodes, which simply stores a copy of the original data as it is read into IBM?? SPSS?? Modeler, will not improve performance in most circumstances.
Nodes with caching enabled are displayed with a small document icon at the top right corner. When the data is cached at the node, the document icon is green.

232
Chapter 13
Figure
Caching at the Type node to store newly derived fields
To Enable a Cache
EOn the stream canvas,
EOn the caching submenu, click Enable.
EYou can turn the cache off by
Caching Nodes in a Database
For streams run in a database, data can be cached midstream to a temporary table in the database rather than the ???le system. When combined with SQL optimization, this may result in signi???cant gains in performance. For example, the output from a stream that merges multiple tables to create a data mining view may be cached and reused as needed. By automatically generating SQL for all downstream nodes, performance can be further improved.
When using database caching with strings longer than 255 characters, either ensure that there is a Type node upstream from the caching node and that the ???eld values are read, or set the string length by means of the default_sql_string_length parameter in the options.cfg ???le. Doing so ensures that the corresponding column in the temporary table is set to the correct width to accommodate the strings.
To take advantage of database caching, both SQL optimization and database caching must be enabled. Note that Server optimization settings override those on the Client. For more information, see the topic Setting optimization options for streams in Chapter 5 on p. 60.
With database caching enabled, simply

233
Performance Considerations for Streams and Nodes
Note: The following databases support temporary tables for the purpose of caching: DB2, Netezza, Oracle, SQL Server, and Teradata. Other databases will use a normal table for database caching. The SQL code can be customized for speci???c databases - contact Support for assistance.
Performance: Process Nodes
Sort. The Sort node must read the entire input data set before it can be sorted. The data is stored in memory up to some limit, and the excess is spilled to disk. The sorting algorithm is a combination algorithm: data is read into memory up to the limit and sorted using a fast hybrid
The overall running time of the algorithm is on the order of N*log(N), where N is the number of records. Sorting in memory is faster than merging from disk, so the actual running time can be reduced by allocating more memory to the sort. The algorithm allocates to itself a fraction of physical RAM controlled by the IBM?? SPSS?? Modeler Server con???guration option Memory usage multiplier. To increase the memory used for sorting, provide more physical RAM or increase this value. Note that when the proportion of memory used exceeds the working set of the process so that part of the memory is paged to disk, performance degrades because the
Binning. The Binning node reads the entire input data set to compute the bin boundaries, before it allocates records to bins. The data set is cached while the boundaries are computed; then it is rescanned for allocation. When the binning method is
Generating a Derive node based on generated bins will improve performance in subsequent passes. Derive operations are much faster than binning.
Merge by Key (Join). The Merge node, when the merge method is keys (equivalent to a database join), sorts each of its input data sets by the key ???elds. This part of the procedure has a running time of M*N*log(N), where M is the number of inputs and N is the number of records in the largest input; it requires suf???cient disk space to store all of its input data sets plus a second copy of the largest data set. The running time of the merge itself is proportional to the size of the output data set, which depends on the frequency of matching keys. In the worst case, where the output is the Cartesian product of the inputs, the running time may approach NM. This is
this node using the Optimization tab.

234
Chapter 13
Aggregate. When the Keys are contiguous option is not set, this node reads (but does not store) its entire input data set before it produces any aggregated output. In the more extreme situations, where the size of the aggregated data reaches a limit (determined by the SPSS Modeler Server con???guration option Memory usage multiplier), the remainder of the data set is sorted and processed as if the Keys are contiguous option were set. When this option is set, no data is stored because the aggregated output records are produced as the input data is read.
Distinct. The Distinct node stores all of the unique key ???elds in the input data set; in cases where all ???elds are key ???elds and all records are unique it stores the entire data set. By default the Distinct node sorts the data on the key ???elds and then selects (or discards) the ???rst distinct record from each group. For smaller data sets with a low number of distinct keys, or those that have been
Type. In some instances, the Type node caches the input data when reading values; the cache is used for downstream processing. The cache requires suf???cient disk space to store the entire data set but speeds up processing.
Evaluation. The Evaluation node must sort the input data to compute tiles. The sort is repeated for each model evaluated because the scores and consequent record order are different in each case. The running time is M*N*log(N), where M is the number of models and N is the number of records.
Performance: Modeling Nodes
Neural Net and Kohonen. Neural network training algorithms (including the Kohonen algorithm) make many passes over the training data. The data is stored in memory up to a limit, and the excess is spilled to disk. Accessing the training data from disk is expensive because the access method is random, which can lead to excessive disk activity. You can disable the use of disk storage for these algorithms, forcing all data to be stored in memory, by selecting the Optimize for speed option on the Model tab of the node???s dialog box. Note that if the amount of memory required to store the data is greater than the working set of the server process, part of it will be paged to disk and performance will suffer accordingly.
When Optimize for memory is enabled, a percentage of physical RAM is allocated to the algorithm according to the value of the IBM?? SPSS?? Modeler Server con???guration option Modeling memory limit percentage. To use more memory for training neural networks, either provide more RAM or increase the value of this option, but note that setting the value too high will cause paging.
The running time of the neural network algorithms depends on the required level of accuracy. You can control the running time by setting a stopping condition in the node???s dialog box.
Performance: CLEM Expressions
CLEM sequence functions (???@ functions???) that look back into the data stream must store enough of the data to satisfy the longest

235
Performance Considerations for Streams and Nodes
offset value is not a literal integer; for example, @OFFSET(Sales, Month). The offset value is the ???eld name Month, whose value is unknown until executed. The server must save all values of the Sales ???eld to ensure accurate results. Where an upper bound is known, you should provide it as an additional argument; for example, @OFFSET(Sales, Month, 12). This operation instructs the server to store no more than the 12 most recent values of Sales. Sequence functions, bounded or otherwise, almost always inhibit SQL generation.

Appendix
A
Accessibility in IBM SPSS Modeler
Overview of Accessibility in IBM SPSS Modeler
This release offers greatly enhanced accessibility for all users, as well as speci???c support for users with visual and other functional impairments. This section describes the features and methods of working using accessibility enhancements, such as screen readers and keyboard shortcuts.
Types of Accessibility Support
Whether you have a visual impairment or are dependent on the keyboard for manipulation, there is a wide variety of alternative methods for using this data mining toolkit. For example, you can build streams, specify options, and read output, all without using the mouse. Available keyboard shortcuts are listed in the topics that follow. Additionally, IBM?? SPSS?? Modeler provides extensive support for screen readers, such as JAWS for Windows. You can also optimize the color scheme to provide additional contrast. These types of support are discussed in the following topics.
Accessibility for the Visually Impaired
There are a number of properties you can specify in IBM?? SPSS?? Modeler that will enhance your ability to use the software.
Display Options
You can select colors for the display of graphs. You can also choose to use your speci???c Windows settings for the software itself. This may help to increase visual contrast.
ETo set display options, on the Tools menu, click User Options.
EClick the Display tab. The options on this tab include the software color scheme, chart colors, and font sizes for nodes.
Use of Sounds for Notification
By turning on or off sounds, you can control the way you are alerted to particular operations in the software. For example, you can activate sounds for events such as node creation and deletion
or the generation of new output or models.
ETo set noti???cation options, on the Tools menu, click User Options.
EClick the Noti???cations tab.

237
Accessibility in IBM SPSS Modeler
Controlling the Automatic Launching of New Windows
The Noti???cations tab on the User Options dialog box is also used to control whether newly generated output, such as tables and charts, are launched in a separate window. It may be easier for you to disable this option and open an output window only when required.
ETo set these options, on the Tools menu, click User Options.
EClick the Noti???cations tab.
EIn the dialog box, select New Output from the list in the Visual Noti???cations group.
EUnder Open Window, select Never.
Node Size
Nodes can be displayed using either a standard or small size. You may want to adjust these sizes to ???t your needs.
ETo set node size options, on the File menu, click Stream Properties.
EClick the Layout tab.
EFrom the Icon Size list, select Standard.
Accessibility for Blind Users
Support for blind users is predominately dependent on the use of a screen reader, such as JAWS for Windows. To optimize the use of a screen reader with IBM?? SPSS?? Modeler, you can specify a number of settings.
Display Options
Screen readers tend to perform better when the visual contrast is greater on the screen. If you already have a
ETo set display options, on the Tools menu, click User Options.
EClick the Display tab.
Use of Sounds for Notification
By turning on or off sounds, you can control the way you are alerted to particular operations in the software. For example, you can activate sounds for events such as node creation and deletion
or the generation of new output or models.
ETo set noti???cation options, on the Tools menu, click User Options.
EClick the Noti???cations tab.

238
Appendix A
Controlling the Automatic Launching of New Windows
The Noti???cations tab on the User Options dialog box is also used to control whether newly generated output is launched in a separate window. It may be easier for you to disable this option and open an output window as needed.
ETo set these options, on the Tools menu, click User Options.
EClick the Noti???cations tab.
EIn the dialog box, select New Output from the list in the Visual Noti???cations group.
EUnder Open Window, select Never.
Keyboard Accessibility
The product???s functionality is accessible from the keyboard. At the most basic level, you can press Alt plus the appropriate key to activate window menus (such as Alt+F to access the File menu) or press the Tab key to scroll through dialog box controls. However, there are special issues related to each of the product???s main windows and helpful hints for navigating dialog boxes.
This section will cover the highlights of keyboard accessibility, from opening a stream to using node dialog boxes to working with output. Additionally, lists of keyboard shortcuts are provided for even more ef???cient navigation.
Shortcuts for Navigating the Main Window
You do most of your data mining work in the main window of IBM?? SPSS?? Modeler. The main area is called the stream canvas and is used to build and run data streams. The bottom part of the window contains the node palettes, which contain all available nodes. The palettes are organized on tabs corresponding to the type of data mining operation for each group of nodes. For example, nodes used to bring data into SPSS Modeler are grouped on the Sources tab, and nodes used to derive, ???lter, or type ???elds are grouped on the Field Ops tab (short for Field Operations).
The right side of the window contains several tools for managing streams, output, and projects. The top half on the right contains the managers and has three tabs that are used to manage streams, output, and generated models. You can access these objects by selecting the tab and an object from the list. The bottom half on the right contains the project pane, which allows you to organize your work into projects. There are two tabs in this area re???ecting two different views of a project. The Classes view sorts project objects by type, while the
Following is a table of shortcuts used to move within the main SPSS Modeler window and build streams. Shortcuts for dialog boxes and output are listed in the topics that follow. Note that these shortcut keys are available only from the main window.
Main Window Shortcuts

239
Accessibility in IBM SPSS Modeler
Node and Stream Shortcuts

240
Appendix A
A number of standard shortcut keys are also used in SPSS Modeler, such as Ctrl+C to copy. For more information, see the topic Using Shortcut Keys in Chapter 3 on p. 26.
Shortcuts for Dialog Boxes and Tables
Several shortcut and screen reader keys are helpful when you are working with dialog boxes, tables, and tables in dialog boxes. A complete list of special keyboard and screen reader shortcuts follows.
Dialog Box and Expression Builder Shortcuts
Table Shortcuts
Table shortcuts are used for output tables as well as table controls in dialog boxes for nodes such as Type, Filter, and Merge. Typically, you will use the Tab key to move between table cells and Ctrl+Tab to leave the table control. Note: Occasionally, a screen reader may not immediately begin reading the contents of a cell. Pressing the arrow keys once or twice will reset the software and start the speech.

242
Appendix A
Shortcuts for Comments
When working with
Shortcuts for Cluster Viewer and Model Viewer
Shortcut keys are available for navigating around the Cluster Viewer and Model Viewer windows.
General - Cluster Viewer and Model Viewer

243
Accessibility in IBM SPSS Modeler
Cluster Viewer only
The Cluster Viewer has a Clusters view that contains a
EPress Tab repeatedly until the View button is selected.
EPress Down Arrow twice to select Clusters.
From here you can select an individual cell within the grid:
EPress Tab repeatedly until you arrive at the last icon in the visualization toolbar.
Figure
Show Visualization Tree icon
EPress Tab once more, then Spacebar, then an arrow key. The following keyboard shortcuts are now available:
Shortcut Keys Example: Building Streams
To make the
EStart SPSS Modeler. When IBM?? SPSS?? Modeler ???rst starts, focus is on the Favorites tab of the node palette.
ECtrl+Down Arrow. Moves focus from the tab itself to the body of the tab.
ERight Arrow. Moves focus to the Variable File node.

244
Appendix A
ESpacebar. Selects the Variable File node.
ECtrl+Enter. Adds the Variable File node to the stream canvas. This key combination also keeps selection on the Variable File node so that the next node added will be connected to it.
ETab. Moves focus back to the node palette.
ERight Arrow 4 times. Moves to the Derive node.
ESpacebar. Selects the Derive node.
EAlt+Enter. Adds the Derive node to the canvas and moves selection to the Derive node. This node is now ready to be connected to the next added node.
ETab. Moves focus back to the node palette.
ERight Arrow 5 times. Moves focus to the Histogram node in the palette.
ESpacebar. Selects the Histogram node.
EEnter. Adds the node to the stream and moves focus to the stream canvas.
Continue with the next example, or save the stream if you want to try the next example at a later time.
Shortcut Keys Example: Editing Nodes
In this example, you will use the stream built in the earlier example. The stream consists of a Variable File node, a Derive node, and a Histogram node. The instructions begin with focus on the third node in the stream, the Histogram node.
ECtrl+Left Arrow 2 times. Moves focus back to the Variable File node.
EEnter. Opens the Variable File dialog box. Tab through to the File ???eld and type a text ???le path and name to select that ???le. Press Ctrl+Tab to navigate to the lower part of the dialog box, tab through to the OK button and press Enter to close the dialog box.
ECtrl+Right Arrow. Gives focus to the second node, a Derive node.
EEnter. Opens the Derive node dialog box. Tab through to select ???elds and specify derive conditions. Press Ctrl+Tab to navigate to the OK button and press Enter to close the dialog box.
ECtrl+Right Arrow. Gives focus to the third node, a Histogram node.
EEnter. Opens the Histogram node dialog box. Tab through to select ???elds and specify graph options. For
At this point, you can add additional nodes or run the current stream. Keep in mind the following tips when you are building streams:
???When manually connecting nodes, use F2 to create the start point of a connection, tab to move to the end point, then use Shift+Spacebar to ???nalize the connection.

245
Accessibility in IBM SPSS Modeler
???Use F3 to destroy all connections for a selected node in the canvas.
???Once you have created a stream, use Ctrl+E to run the current stream.
A complete list of shortcut keys is available. For more information, see the topic Shortcuts for Navigating the Main Window on p. 238.
Using a Screen Reader
A number of screen readers are available on the market. IBM?? SPSS?? Modeler is con???gured to support JAWS for Windows using the Java Access Bridge, which is installed along with SPSS Modeler. If you have JAWS installed, simply launch JAWS before launching SPSS Modeler
to use this product.
Due to the nature of SPSS Modeler???s unique graphical representation of the data mining process, charts and graphs are optimally used visually. It is possible, however, for you to understand and make decisions based on output and models viewed textually using a screen reader.
Note: With
Using the IBM SPSS Modeler Dictionary File
An SPSS Modeler dictionary ???le (Awt.JDF) is available for inclusion with JAWS. To use this ???le:
ENavigate to the /accessibility subdirectory of your SPSS Modeler installation and copy the dictionary ???le (Awt.JDF).
ECopy it to the directory with your JAWS scripts.
You may already have a ???le named Awt.JDF on your machine if you have other JAVA applications running. In this case, you may not be able to use this dictionary ???le without manually editing the dictionary ???le.
Using a Screen Reader with HTML Output
When viewing output displayed as HTML within IBM?? SPSS?? Modeler using a screen reader, you may encounter some dif???culties. A number of types of output are affected, including:
???Output viewed on the Advanced tab for Regression, Logistic Regression, and Factor/PCA nodes
???Report node output
In each of these windows or dialog boxes, there is a tool on the toolbar that can be used to launch the output into your default browser, which provides standard screen reader support. You can then use the screen reader to convey the output information.

246
Appendix A
Accessibility in the Interactive Tree Window
The standard display of a decision tree model in the Interactive Tree window may cause problems for screen readers. To access an accessible version, on the Interactive Tree menus click:
View > Accessible Window
This displays a view similar to the standard tree map, but one which JAWS can read correctly. You can move up, down, right, or left using the standard arrow keys. As you navigate the accessible window, the focus in the Interactive Tree window moves accordingly. Use the Spacebar to change the selection, or use Ctrl+Spacebar to extend the current selection.
Tips for Use
There are several tips for making the IBM?? SPSS?? Modeler environment more accessible to you. The following are general hints when working in SPSS Modeler.
???Exiting extended text boxes. Use Ctrl+Tab to exit extended text boxes. Note: Ctrl+Tab is also used to exit table controls.
???Using the Tab key rather than arrow keys. When selecting options for a dialog box, use the Tab key to move between option buttons. The arrow keys will not work in this context.
???
???Execution status. When you are running a stream on a large database, JAWS can lag behind in reading the stream status to you. Press the Ctrl key periodically to update the status reporting.
???Using the node palettes. When you ???rst enter a tab of the node palettes, JAWS will sometimes read ???groupbox??? instead of the name of the node. In this case, you can use Ctrl+Right Arrow and then Ctrl+Left Arrow to reset the screen reader and hear the node name.
???Reading menus. Occasionally, when you are ???rst opening a menu, JAWS may not read the ???rst menu item. If you suspect that this may have happened, use the Down Arrow and then the Up Arrow to hear the ???rst item in the menu.
???Cascaded menus. JAWS does not read the ???rst level of a cascaded menu. If you hear a break in speaking while moving through a menu, press the Right Arrow key to hear the child menu items.
Additionally, if you have IBM?? SPSS?? Modeler Text Analytics installed, the following tips can make the interactive workbench interface more accessible to you.
???Entering dialog boxes. You may need to press the Tab key to put the focus on the ???rst control upon entering a dialog box.
???Exiting extended text boxes. Use Ctrl+Tab to exit extended text boxes and move to the next control. Note: Ctrl+Tab is also used to exit table controls.

247
Accessibility in IBM SPSS Modeler
???Typing the first letter to find element in tree list. When looking for an element in the categories pane, extracted results pane, or library tree, you can type the ???rst letter of the element when the pane has the focus. This will select the next occurrence of an element beginning with the letter you entered.
???
Additional tips for use are discussed at length in the following topics.
Interference with Other Software
When testing IBM?? SPSS?? Modeler with screen readers, such as JAWS, our development team discovered that the use of a Systems Management Server (SMS) within your organization may interfere with JAWS??? ability to read
JAWS and Java
Different versions of JAWS provide varying levels of support for
Using Graphs in IBM SPSS Modeler
Visual displays of information, such as histograms, evaluation charts, multiplots, and scatterplots, are dif???cult to interpret with a screen reader. Please note, however, that web graphs and distributions can be viewed using the textual summary available from the output window.

Appendix
B
Unicode Support
Unicode Support in IBM SPSS Modeler
IBM?? SPSS?? Modeler is fully
???SPSS Modeler stores Unicode data internally and can read and write
???SPSS Modeler can read and write
???Statistics, SAS, and text data ???les stored in the
???IBM?? SPSS?? Modeler Solution Publisher images are
About Unicode
The goal of the Unicode standard is to provide a consistent way to encode multilingual text so that it can be easily shared across borders, locales, and applications. The Unicode Standard, now at version 4.0.1, de???nes a character set that is a superset of all of the character sets in common use in the world today and assigns to each character a unique name and code point. The characters and their code points are identical to those of the Universal Character Set (UCS) de???ned by

Appendix
C
Notices
This information was developed for products and services offered worldwide.
IBM may not offer the products, services, or features discussed in this document in other countries. Consult your local IBM representative for information on the products and services currently available in your area. Any reference to an IBM product, program, or service is not intended to state or imply that only that IBM product, program, or service may be used. Any functionally equivalent product, program, or service that does not infringe any IBM intellectual property right may be used instead. However, it is the user???s responsibility to evaluate and verify the operation of any
IBM may have patents or pending patent applications covering subject matter described in this document. The furnishing of this document does not grant you any license to these patents. You can send license inquiries, in writing, to:
IBM Director of Licensing, IBM Corporation, North Castle Drive, Armonk, NY
For license inquiries regarding
Intellectual Property Licensing, Legal and Intellectual Property Law, IBM Japan Ltd.,
The following paragraph does not apply to the United Kingdom or any other country where such provisions are inconsistent with local law: INTERNATIONAL BUSINESS MACHINES
PROVIDES THIS PUBLICATION ???AS IS??? WITHOUT WARRANTY OF ANY KIND,
EITHER EXPRESS OR IMPLIED, INCLUDING, BUT NOT LIMITED TO, THE IMPLIED
WARRANTIES OF
This information could include technical inaccuracies or typographical errors. Changes are periodically made to the information herein; these changes will be incorporated in new editions of the publication. IBM may make improvements and/or changes in the product(s) and/or the program(s) described in this publication at any time without notice.
Any references in this information to
IBM may use or distribute any of the information you supply in any way it believes appropriate without incurring any obligation to you.
Licensees of this program who wish to have information about it for the purpose of enabling: (i) the exchange of information between independently created programs and other programs (including this one) and (ii) the mutual use of the information which has been exchanged, should contact:
IBM Software Group, Attention: Licensing, 233 S. Wacker Dr., Chicago, IL 60606, USA.

250
Appendix C
Such information may be available, subject to appropriate terms and conditions, including in some cases, payment of a fee.
The licensed program described in this document and all licensed material available for it are provided by IBM under terms of the IBM Customer Agreement, IBM International Program License Agreement or any equivalent agreement between us.
Any performance data contained herein was determined in a controlled environment. Therefore, the results obtained in other operating environments may vary signi???cantly. Some measurements may have been made on
Information concerning
All statements regarding IBM???s future direction or intent are subject to change or withdrawal without notice, and represent goals and objectives only.
This information contains examples of data and reports used in daily business operations. To illustrate them as completely as possible, the examples include the names of individuals,
companies, brands, and products. All of these names are ???ctitious and any similarity to the names and addresses used by an actual business enterprise is entirely coincidental.
If you are viewing this information softcopy, the photographs and color illustrations may not appear.
Trademarks
IBM, the IBM logo, ibm.com, and SPSS are trademarks of IBM Corporation, registered in many jurisdictions worldwide. A current list of IBM trademarks is available on the Web at http://www.ibm.com/legal/copytrade.shtml.
Intel, Intel logo, Intel Inside, Intel Inside logo, Intel Centrino, Intel Centrino logo, Celeron, Intel Xeon, Intel SpeedStep, Itanium, and Pentium are trademarks or registered trademarks of Intel Corporation or its subsidiaries in the United States and other countries.
Linux is a registered trademark of Linus Torvalds in the United States, other countries, or both.
Microsoft, Windows, Windows NT, and the Windows logo are trademarks of Microsoft Corporation in the United States, other countries, or both.
UNIX is a registered trademark of The Open Group in the United States and other countries.
Java and all
Other product and service names might be trademarks of IBM or other companies.
251
Notices

Index
508 compliance, 236
abs function, 138 accessibility, 236, 247
example,
features in IBM SPSS Modeler, 236 tips in IBM SPSS Modeler, 246
adding
to a project, 202
adding IBM SPSS Modeler Server connections, 14, 16 Aggregate node
performance, 234 allbut???rst function, 141 allbutlast function, 141 alphabefore function, 141 and operator, 137 annotating
annotations
converting to comments, 85 folder, 207
project, 206 application examples, 4 applications, 30
applications of data mining, 30 arccos function, 139
arccosh function, 139 arcsin function, 139 arcsinh function, 139 arctan function, 139 arctan2 function, 139 arctanh function, 139 attribute, 29 automation, 105
backslash character in CLEM expressions, 129 backup stream ???les
restoring, 88 Binning node
performance, 233 bitwise functions, 140
@BLANK function, 102, 134, 156 blank handling
CLEM functions, 156 blanks,
branches, modeling and scoring, 78,
loading, 90
cache
enabling, 50, 216, 231 ???ushing, 52, 57
options for nodes, 50, 231
?? Copyright IBM Corporation 1994, 2012.
saving, 52
setting up a cache, 48 cache ???le node
loading, 90 canvas, 18 case, 29
cdf_chisq function, 139 cdf_f function, 139 cdf_normal function, 139 cdf_t function, 139
Champion Challenger analysis, 160, 185 characters,
charts
saving output, 89
checking CLEM expressions, 123
probability functions, 139 classes , 20, 200, 202 CLEM, 117
building expressions, 119 checking expressions, 123 datatypes,
CLEM expressions
???nding and replacing text, 123 parameters, 68, 112 performance, 234
CLEM functions bitwise, 140
blanks and nulls, 156 comparison, 135 conversion, 135 datetime, 146 global, 155 information, 134
list of available, 133 logical, 137 missing values, 102 numeric, 138 probability, 139 random, 141 sequence, 150, 152
special functions, 157 string, 141 trigonometric, 139
client
default directory, 216 colors
setting, 220 comma, 56 command line
starting IBM SPSS Modeler, 13
252

253
Index
comments
keyboard shortcuts, 242 listing all in a stream, 84 on nodes and streams, 78
comparison functions, 135 concatenating strings, 135 conditions, 111 connections
server cluster, 16
to IBM SPSS Collaboration and Deployment Services Repository,
to IBM SPSS Modeler Server,
conversion functions, 135 Coordinator of Processes, 16 COP, 16
copy, 21
cos function, 139 cosh function, 139
count_equal function, 115, 135 count_greater_than function, 115, 135 count_less_than function, 115, 135 count_non_nulls function, 135 count_not_equal function, 115, 135 count_nulls function, 102, 115, 135 count_substring function, 141
projects view, 201
subpalette creation, 227 cut, 21
data
preview, 52 data audit node
use in exploration, 29 Data Audit node
use in data mining, 31 data mapping tool,
application examples, 40 strategy, 32
data streams building, 41
data types, 110
in parameters, 70 database
functions, 120
date formats, 58,
date_days_difference, 146 date_in_days, 146 date_in_months, 146 date_in_weeks, 146
date_in_years, 146 date_months_difference, 146 date_weeks_difference, 146 date_years_difference, 146 @TODAY function, 146
date_before function, 135 date/time values, 114 dates
converting, 150 manipulating, 150
datetime functions datetime_date, 146 datetime_day, 146 datetime_day_name, 146 datetime_day_short_name, 146 datetime_hour, 146 datetime_in_seconds, 146 datetime_minute, 146 datetime_month, 146 datetime_month_name, 146
datetime_month_short_name, 146 datetime_now datetime_second, 146 datetime_time, 146 datetime_timestamp, 146 datetime_weekday , 146 datetime_year, 146
datetime_date function, 135 decimal places
display formats, 59 decimal symbol
number display formats, 56 decision trees
accessibility, 246 default
project phase, 201 degrees
measurements units, 60 deploying scenarios, 185 deployment, 160 deployment options
scenarios, 185 deployment type, 185 dictionary ???le, 245 DIFF function, 152
@DIFF function, 150, 152 directory
default, 216 disable nodes , 46, 48 display formats
currency, 59 decimal places, 59 grouping symbol, 59 numbers, 59 scienti???c, 59
Distinct node performance, 234
distribution functions, 139

254
Index
div function, 138 documentation, 4 domain name (Windows)
IBM SPSS Modeler Server, 13 DTD, 197
enable nodes , 46 encoding, 56, 248 endstring function, 141 Enterprise View node, 185 equals operator, 135
error messages, 65 essential ???elds, 91, 94 Evaluation node
performance, 234 examples
Applications Guide, 4 overview, 5
execution times, viewing, 67 exponential function, 138 exporting
PMML, 196, 198 stream descriptions, 77
Expression Builder, 240 accessing, 119
???nding and replacing text, 123 overview, 117
f distribution
probability functions, 139 factor, 245
Feature Selection node missing values, 101
@FIELD function, 102, 157 ???elds, 29, 127, 129
in CLEM expressions, 121 viewing values, 122
@FIELDS_BETWEEN function, 102, 115, 157 @FIELDS_MATCHING function, 102, 115, 157 ???ller node
missing values, 102 ???nding text, 123
???rst_index function, 117, 135 ???rst_non_null function, 117, 135 ???rst_non_null_index function, 117, 135
folders, IBM SPSS Collaboration and Deployment Services Repository, 177, 179
fonts, 220
fracof function, 138
functions,
database, 120 examples, 108 @FIELD, 117, 157 @GLOBAL_MAX, 155
@GLOBAL_MEAN, 155 @GLOBAL_MIN, 155 @GLOBAL_SDEV, 155 @GLOBAL_SUM, 155 handling missing values, 102 in CLEM expressions, 120 @PARTITION, 157 @PREDICTED, 117, 157 @TARGET, 117, 157
generated models palette, 19 global functions, 155
global values
in CLEM expressions, 121 graphs
adding to projects, 202 saving output, 89
greater than operator, 135 grouping symbol
number display formats, 56
hasendstring function, 141 hasmidstring function, 141 hasstartstring function, 141 hassubstring function, 141 hints
general usage, 96 host name
IBM SPSS Modeler Server,
HTML output screen reader, 245
IBM InfoSphere Warehouse (ISW) PMML export, 198
IBM SPSS Collaboration and Deployment Services, 160 IBM SPSS Collaboration and Deployment Services
Enterprise View, 160, 185
IBM SPSS Collaboration and Deployment Services Repository, 158, 160
browsing, 162 connecting to,
deleting objects and versions, 178 folders, 177, 179
locking and unlocking objects, 177 object properties, 180
retrieving objects, 172 searching in, 175 single
transferring projects to, 204 IBM SPSS Modeler, 1, 17
accessibility features, 236 documentation, 4
getting started, 12

255
options, 215 overview, 12, 215
running from command line, 13 tips and shortcuts, 96
IBM SPSS Modeler Advantage, 160, 184 IBM SPSS Modeler Server
domain name (Windows), 13 host name,
password, 13
port number,
IBM SPSS Statistics models, 39 icons
setting options, 24, 64 if, then, else functions, 137 importing
PMML,
integer_bitcount function, 140 integer_leastbit function, 140 integer_length function, 140 integers,
Interactive Tree window accessibility, 246
intof function, 138 introduction, 127
IBM SPSS Modeler, 12, 215 is_date function, 134 is_datetime function, 134 is_integer function, 134 is_number function, 134 is_real function, 134
is_string function, 134 is_time function, 134 is_timestamp function, 134 isalphacode function, 141 isendstring function, 141 islowercode function, 141 ismidstring function, 141 isnumbercode function, 141 isstartstring function, 141 issubstring function, 141 issubstring_count function, 141 issubstring_lim function, 141 isuppercode function, 141
Java, 247
JAWS, 236, 245, 247
keyboard shortcuts, 238, 240, 242 keywords
annotating nodes, 86
Index
knowledge discovery, 29 Kohonen node
large sets, 57 performance, 234
labels displaying, 57 value, 197 variable, 197
labels, IBM SPSS Collaboration and Deployment Services Repository object, 183
language options, 215
last_index function, 117, 135 LAST_NON_BLANK function, 152 @LAST_NON_BLANK function, 150, 152, 156 last_non_null function, 117, 135 last_non_null_index function, 117, 135
legal notices, 249 length function, 141 less than operator, 135 linear regression
export as PMML, 222
listing all comments for a stream, 84 lists, 127, 129
locale options, 215
locchar function, 141 locchar_back function, 141
locking IBM SPSS Collaboration and Deployment Services Repository objects, 177
locking nodes , 53 log ???les
displaying generated SQL, 63 log function, 138
log10 function, 138
logging in to IBM SPSS Modeler Server, 13 logical functions, 137
logistic regression, 245 export as PMML, 222
lowertoupper function, 141
machine learning, 29 main window, 18 managers, 19 mandatory ???elds, 95 mapping data, 94 mapping ???elds, 91 matches function, 141 max function, 135 MAX function, 152
@MAX function, 150, 152 max_index function, 117, 135 max_n function, 115, 135

256
Index
MEAN function, 150, 152 @MEAN function, 150, 152 mean_n function, 115, 138 member function, 135 memory
managing,
performance, 233 messages
displaying generated SQL, 63 middle mouse button
simulating, 26, 43 min function, 135 MIN function, 152
@MIN function, 150, 152 min_index function, 117, 135 min_n function, 115, 135 minimizing, 23
missing values,
mod function, 138 model nuggets, 78 model refresh, 185 modeling
branch, 78 modeling nodes, 34, 42
modeling palette tab customization, 228 performance, 234
models, 78
adding to projects, 202 exporting, 221 refreshing, 190 replacing, 219
storing in the IBM SPSS Collaboration and Deployment Services Repository, 172
models palette, 172 mouse
using in IBM SPSS Modeler, 26, 43 @MULTI_RESPONSE_SET function, 117, 157 multiple IBM SPSS Modeler sessions, 17
in CLEM expressions, 117
in CLEM expressions, 117
in CLEM expressions, 117, 121
naming nodes and streams, 86 navigating
keyboard shortcuts, 238 negate function, 138 neural net node
large sets, 57
Neural Net node performance, 234
new features, 7, 10 node caching
enabling, 50, 231 node names, 86
node palette selection, 225 nodes, 12
adding, 43, 46
adding comments to, 78 adding to projects,
custom subpalette creation, 227 data preview, 52
deleting, 43
deleting connections, 47 disabling, 46, 48 disabling in a stream, 46 displaying on palette, 225 duplicating, 48
editing, 48 enabling, 46 execution times, 67 introduction, 42 loading, 90 locking, 53
order of, 230
palette tab customization, 228 performance,
searching for, 73 setting options, 48
storing in the IBM SPSS Collaboration and Deployment Services Repository, 171
noisy data, 31 normal distribution
probability functions, 139 not equal operator, 135
not operator, 137 noti???cations
setting options, 217 nuggets, 78
de???ned, 20
@NULL function, 102, 134, 156 nulls, 99, 113
number display formats, 59 numbers, 114, 128 numeric functions, 138
object properties, IBM SPSS Collaboration and Deployment Services Repository, 180

257
objects properties, 208
OFFSET function, 152 @OFFSET function, 150, 152
performance considerations, 234 oneof function, 141
opening models, 90 nodes, 90 output, 90 projects, 202 states, 90 streams, 90
operator precedence, 131 operators
in CLEM expressions, 120 joining strings, 135
display, 220
for IBM SPSS Modeler, 215 PMML, 221
stream properties,
or operator, 137 output, 19 output ???les
saving, 89 output nodes, 42 output objects
storing in the IBM SPSS Collaboration and Deployment Services Repository, 171
palette tab customization, 228 palettes, 18
customizing, 223 parallel processing
enabling, 60 parameters
in CLEM expressions, 121 model building, 188 runtime prompts, 70 scoring, 188
session, 68, 70, 112 stream, 68, 70, 112 type, 70
using in scenarios, 188 @PARTITION_FIELD function, 157 password
IBM SPSS Modeler Server, 13 paste, 21
performance
CLEM expressions, 234 node caching, 50, 231 of modeling nodes, 234 of process nodes, 233
period, 56
Index
pi function, 139
PMML
export options, 221 exporting models, 196, 198 importing models,
PMML models
linear regression, 222 logistic regression, 222
port number
IBM SPSS Modeler Server,
precedence, 131 @PREDICTED function, 157 Predictive Applications, 185 preview
streams, 24, 48 probability functions, 139 process nodes, 42
performance, 233 projects, 20, 200
adding objects, 203 annotating, 206 building, 202 Classes view, 202 closing, 209 creating new, 202
in the IBM SPSS Collaboration and Deployment Services Repository, 204
object properties, 208 setting a default folder, 201 setting properties, 205
storing in the IBM SPSS Collaboration and Deployment Services Repository, 170
prompts, runtime, 70 properties
for data streams, 54 project folder, 207 report phases, 209
purple nodes, 60 pushbacks, 60
Quality node
missing values, 101
radians
measurements units, 60 random function, 141 random0 function, 141 reals,
records, 29
missing values, 101

258
Index
refresh
source nodes, 57 refreshing models, 190 regression, 245
rem function, 138 renaming
replace function, 141 replacing models, 219 replacing text, 123 replicate function, 141 reports
adding to projects, 202 generating, 209 saving output, 89 setting properties, 209
resizing, 23
retrieving objects from the IBM SPSS Collaboration and Deployment Services Repository, 172
rollover days, 58 round function, 138 rule sets
evaluating, 56 running streams, 77
SAS ???les encoding, 248
saving
multiple objects, 89 nodes, 88
output objects, 89 states, 88 streams, 88
scaling streams to view, 24 scenarios, 184
de???ned, 160 deployment options, 185
scienti???c notation display format, 59
scoring
branch, 78,
example,
???nding and replacing text, 123 scrolling
setting options, 64 SDEV function, 152 @SDEV function, 150, 152 sdev_n function, 115, 138 searching
for nodes in a stream, 73 searching COP for connections, 16
searching for objects in the IBM SPSS Collaboration and Deployment Services Repository, 175
sequence functions, 150, 152
server
adding connections, 14 default directory, 216 logging in, 13
searching COP for servers, 16 session parameters, 68, 70, 112 set command, 68, 112
sets, 57 shortcuts
general usage, 96 keyboard, 26, 238, 240, 242
sign function, 138 sin function, 139 SINCE function, 152
@SINCE function, 150, 152 single
single
sinh function, 139 skipchar function, 141 skipchar_back function, 141 Sort node
performance, 233 soundex function, 146
soundex_difference function, 146 source nodes, 42
data mapping, 92 refreshing, 57
spaces
removing from strings, 112, 141 special characters
removing from strings, 112 special functions, 157
SPSS Modeler Server, 2 SQL generation, 60
sqrt function, 138 startstring function, 141 startup dialog box, 220 states
loading, 90 saving, 88 Statistics ???les
encoding, 248 Statistics models, 39 stop execution, 21
storing objects in the IBM SPSS Collaboration and Deployment Services Repository, 164
stream, 18 stream canvas
settings, 64
stream default encoding, 56 stream descriptions, 74, 77 stream names, 86
stream parameters, 68, 70, 112

259
Index
stream rewriting enabling, 60
streams, 12
adding comments, 78 adding nodes, 43, 46 adding to projects,
backup ???les, 88 building, 41 bypassing nodes, 45 connecting nodes, 43
deployment options, 185 disabling nodes, 46 loading, 90
options,
scaling to view, 24
storing in the IBM SPSS Collaboration and Deployment Services Repository, 170
viewing execution times, 67 string functions, 141
strings, 127, 129
manipulating in CLEM expressions, 112 matching, 112
replacing, 112 stripchar function, 141 strmember function, 141 subpalette
creation, 227
displaying on palette tab, 226 removing from palette tab, 226
subscrs function, 141 substring function, 141 substring_between function, 141 SUM function, 152
@SUM function, 150, 152 sum_n function, 115, 138 SuperNode
parameters, 68, 112 system
options, 215
t distribution
probability functions, 139 tables, 240
adding to projects, 202 saving output, 89
tan function, 139 tanh function, 139
@TARGET function, 157 temp directory, 16 template ???elds, 95 templates, 92
terminal nodes, 42
testbit function, 140 @TESTING_PARTITION function, 157 text data ???les
encoding, 248 text encoding, 56 THIS function, 152
@THIS function, 150, 152
time and date functions,
converting , 150
time formats, 58,
time_hours_difference, 146 time_in_hours, 146 time_in_mins, 146 time_in_secs, 146 time_mins_difference, 146 time_secs_difference, 146
time_before function, 135 tips
for accessibility, 246 general usage, 96
to_date function, 135, 146 to_dateline function, 146 to_datetime function, 135 to_integer function, 135 to_number function, 135 to_real function, 135 to_string function, 135 to_time function, 135, 146
to_timestamp function, 135, 146 @TODAY function, 146 toolbar, 21
ToolTips
annotating nodes, 86 trademarks, 250
@TRAINING_PARTITION function, 157
typical applications, 30 trigonometric functions, 139 trim function, 141 trim_start function, 141 trimend function, 141
Type node
missing values, 102 performance, 234 typical applications, 30
Unicode support, 248 unicode_char function, 141 unicode_value function, 141
unlocking IBM SPSS Collaboration and Deployment Services Repository objects, 177
unmapping ???elds, 91

260
Index
uppertolower function, 141 user ID
IBM SPSS Modeler Server, 13 user options, 217
@VALIDATION_PARTITION function, 157 value_at function, 117, 135
values, 110
adding to CLEM expressions, 122 viewing from a data audit, 122
variables, 29
version labels, IBM SPSS Collaboration and Deployment Services Repository object, 183
visual programming, 17
warnings, 65
setting options, 217 welcome dialog box, 220 white space
removing from strings, 112, 141
zooming, 21