The washing machine will not switch on.
The wash cycle does not begin.
The washing machines fails to fill with water.
The machine continuously fills and drains water.
The machine does not drain or spin.
The washing machine vibrates too much during the spin cycle.
The washing machine leaks.
The icons corresponding to the ???Phase in progress??? flash rapidly at the same time as the ON/OFF indicator light.
???The plug has not been inserted into the electrical socket, or it has not been inserted far enough to make contact.
???There is no power in the house.
???The porthole door has not been shut properly.
???The START/PAUSE button has not been pressed.
???The water tap has not been turned on.
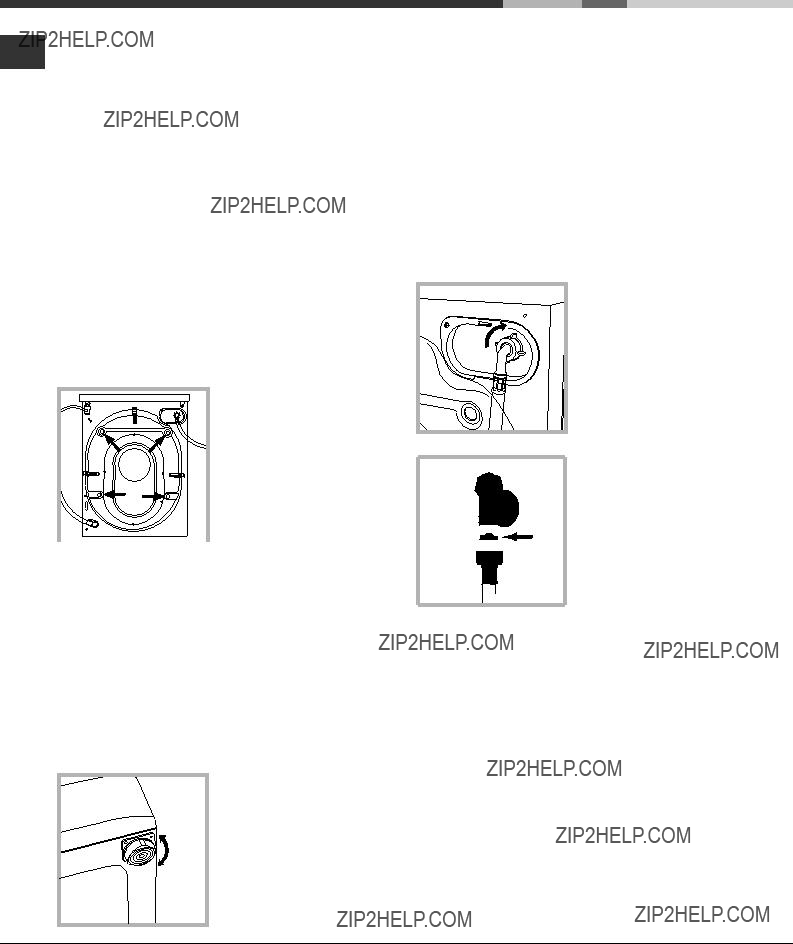
???The water inlet hose is not connected to the tap.
???The hose is kinked.
???The water tap has not been turned on.
???There is no water in the house.
???The water pressure is insufficient.
???The START/PAUSE button has not been pressed.
???The end of the outlet hose has not been fitted at a height between 65 and 100 cm from the floor (see ???Installation???).
???The free end of the hose is underwater (see ???Installation???).
???If If the dwelling is on one of the upper floors of a building, there may be problems relating to water drainage, causing the washing machine to load and drain water continuously. Special anti-draining valves are available in shops and help to avoid this inconvenience.
???The water drainage systemis not fitted with a breather pipe.
???The programme does not include a draining phase: some programmes require manual draining (see ???Programmes and options???).
???The ???Reduced Creases??? option is enabled: to complete the programme, press the START/PAUSE button (see ???Programmes and options???).
???The outlet hose is bent (see ???Installation???).
???The drainage duct is clogged.
???The drum was not unlocked properly when the appliance was installed
(see ???Installation???).
???The washing machine is not level (see ???Installation???).
???The washing machine is trapped between cabinets and a wall (see ???Installation???).
???The load is not balanced properly (see ???Description of the machine???).
???The water inlet hose is not screwed on to the tap correctly (see ???Installation???).
???The detergent dispenser drawer is blocked (for instructions on how to clean it, see ???Care and maintenance???).
???The outlet hose has not been secured properly (see ???Installation???).
???Switch off the machine and unplug the appliance; wait for approximately 1 minute then switch it on again.
If the problem persists, contact Assistance.
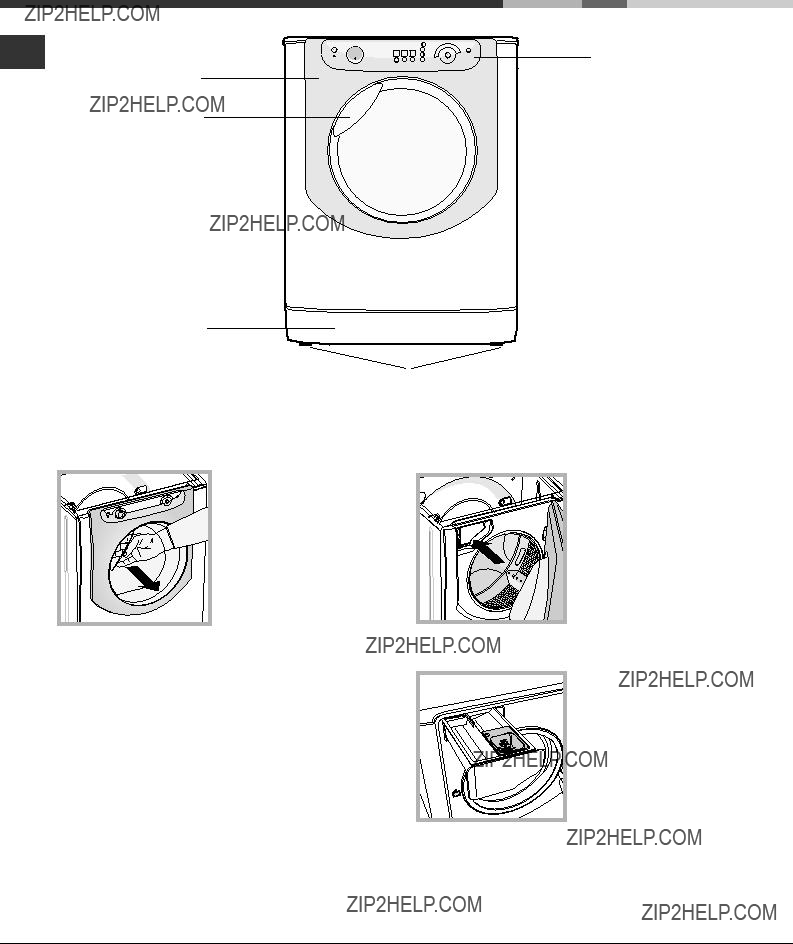
 has been removed, and will not interfere with the operation of the machine.
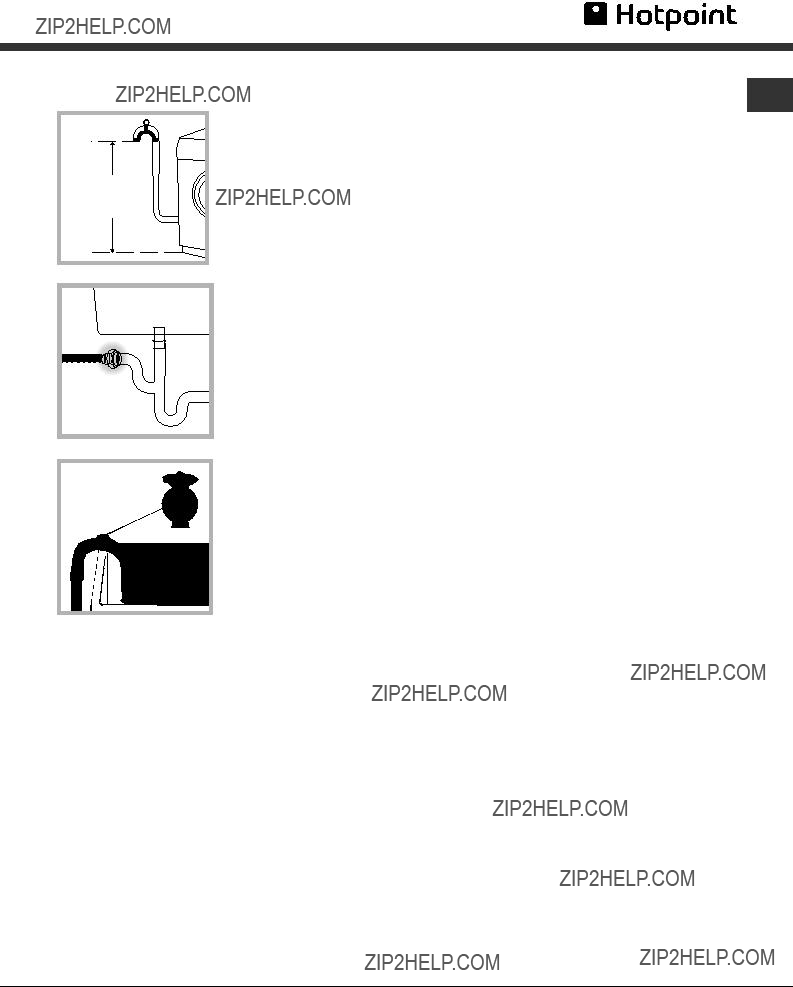

 compartment for additives: for fabric softener or other liquid washing additives. Do not exceed the maximum level indicated by the grille, and dilute concentrated fabric softeners.
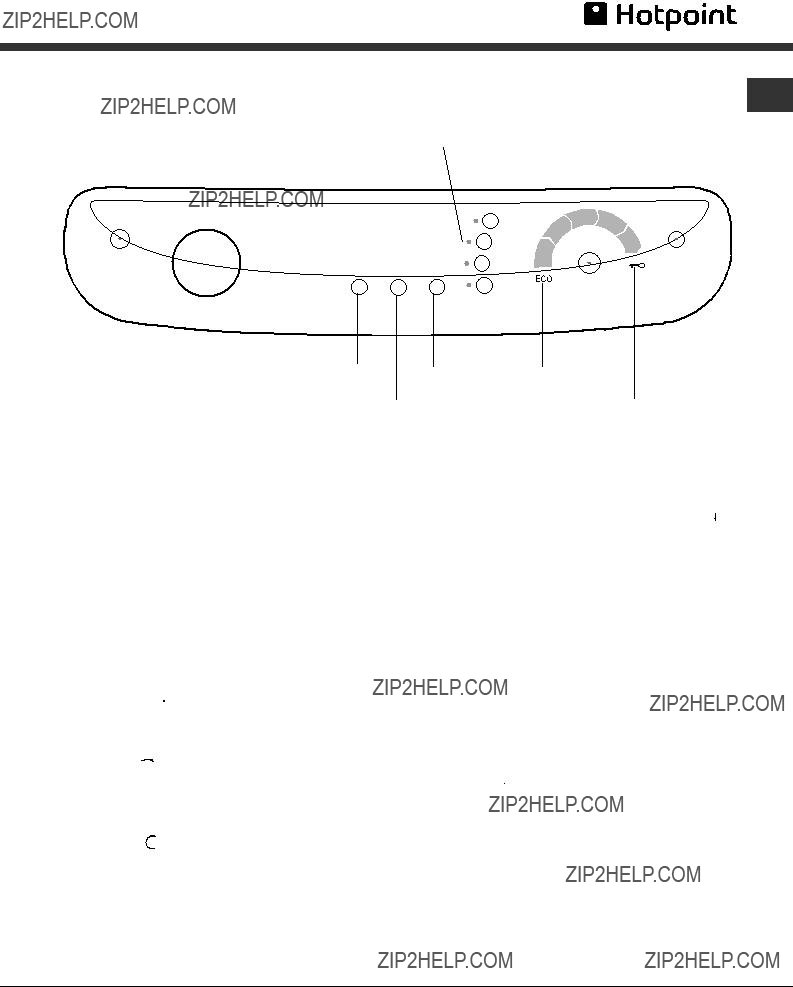
 : press the button briefly to switch the machine on or off. The green indicator light shows that the machine is switched on. To switch the washing machine off during a wash cycle, press and hold the button for approximately 2 seconds; pressing the button quickly or accidentally will not switch the machine off.
 button: press this button to adjust the temperature; the value will be identified by the display above (see ???Running a wash cycle???).
 button: press this button to adjust the spin value or to exclude this part of the programme; the value will be identified by the display above (see ???Running a wash cycle???).
 button: press to set a delayed start time for the selected programme; the delay time will be identified by the display above (see ???Running a wash cycle???).
 - Rinse
  - Spin
  - Pumpout
  ). The text
 lights up when the cycle has finished.
 indicator light is off, the porthole door may be opened.
 indicator light: this indicates that the porthole door is locked. To open the door, pause the wash cycle (see following page).
 button and indicator light: this is used to enable or disable the ???Child lock??? function, by pressing the button for approximately 2 seconds. When the indicator light is illuminated, the control panel is locked. This avoids accidental changes being made to the wash cycles, especially where children are at home.
 icon lights up when the electricity saving reaches at least 10% (this can be achieved by adjusting the wash cycle settings).
 button. All the indicator lights will illuminate for 1 second, after which the light corresponding to
 button will remain lit constantly, while the START/PAUSE indicator light will flash slowly.
 Modify the temperature and/or the spin speed. The machine automatically selects the temperature and the maximum spin speed for
 button, the tempe- rature can be progressively reduced or even set to cold wash (

 ). By pressing the
  button, the spin speed can be progressively reduced or even

 ). If the buttons are pressed again the maximum values are restored.

 is displayed.
 Modify the cycle caracteristics.
 indicator light switches off it is possible to open the door. Press the START/ PAUSE button again to restart the programme from the point at which it was interrupted.
 button. The cycle will be stopped and the machine will switch off.
 Mini Load
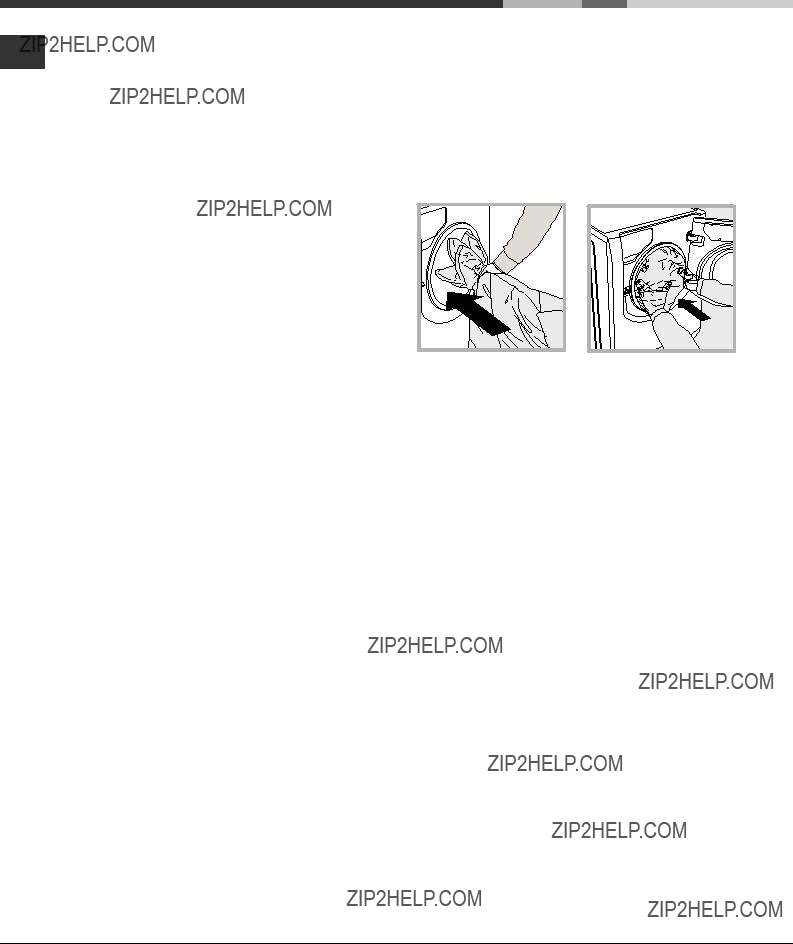
 (max. 2 kg). The ???Wool??? programme therefore offers you complete peace of mind when washing all woollen garments, with great performance guaranteed every time.


 ??? Recycling & Disposal Information