General safety
???This appliance was designed for domestic use only.
???This appliance is not intended for use by persons (including children) with reduced physical, sensory or mental capabilities, or lack of experience and
knowledge, unless they have been given supervision or instruction concerning use of the appliance by a person responsible for their safety.
Children should be supervised to ensure that they do not play with the appliance.
-Do not dry unwashed items in the tumble dryer.
-Items that have been soiled with substances such
as cooking oil, acetone, alcohol, petrol, kerosene, spot removers, turpentine, waxes and wax removers should be washed in hot water with an extra amount of detergent before being dried in the tumble dryer.
-Items such as foam rubber (latex foam), shower caps, waterproof textiles, rubber backed articles and clothes or pillows fitted with foam rubber pads should not be dried in the tumble dryer.
-Fabric softeners, or similar products, should be used as specified by the fabric softener instructions.
-The final part of a tumble dryer cycle occurs without heat (cool down cycle) to ensure that the items are left at a temperature that ensures that the items will not be damaged.
WARNING: Never stop a tumble dryer before the end of the drying cycle unless all items are quickly removed and spread out so that the heat is dissipated.
???Do not touch the machine when barefoot or with wet or damp hands or feet.
???Do not pull on the power supply cable when unplugging the appliance from the electricity socket. Hold the plug and pull.
???Do not touch the drained water as it may reach extremely high temperatures.
???Never force the porthole door. This could damage the safety lock mechanism designed to prevent accidental opening.
???If the appliance breaks down, do not under any circumstances access the internal mechanisms in an attempt to repair it yourself.
???Always keep children well away from the appliance while it is operating.
???If it must be moved, proceed with the help of two or three people and handle it with the utmost care. Never try to do this alone, because the appliance is very heavy.
???Before loading laundry into the washer dryer, make sure the drum is empty.
???During the drying phase, the door tends to get quite hot.
???Do not use the appliance to dry clothes that have been washed with flammable solvents (e.g. trichlorethylene).
Disposal
???Disposing of the packaging materials: observe local regulations so that the packaging may be re-used.
???The European Directive 2002/96/EC relating to Waste Electrical and Electronic Equipment (WEEE) states that household appliances should not be disposed of using the normal solid urban waste cycle. Exhausted appliances should be collected separately in order to optimise the cost of re-using and recycling the materials inside the machine, while preventing potential damage to the atmosphere and to public health. The crossed-out dustbin is marked on all products to remind the owner of their obligations regarding separated waste collection. For more information relating to the correct disposal of household appliances, owners should contact their local authorities or appliance dealer.
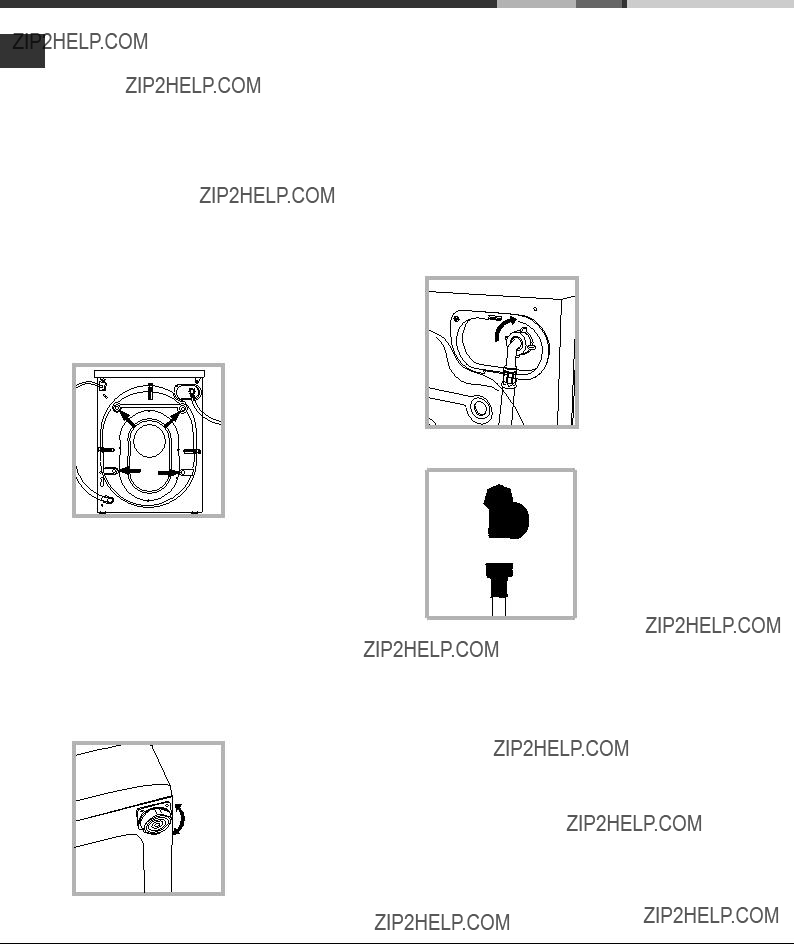
Opening the porthole door manually
In the event that it is not possible to open the porthole door due to a powercut, and if you wish to remove the laundry, proceed as follows:
1. remove the plug from the
electrical socket.
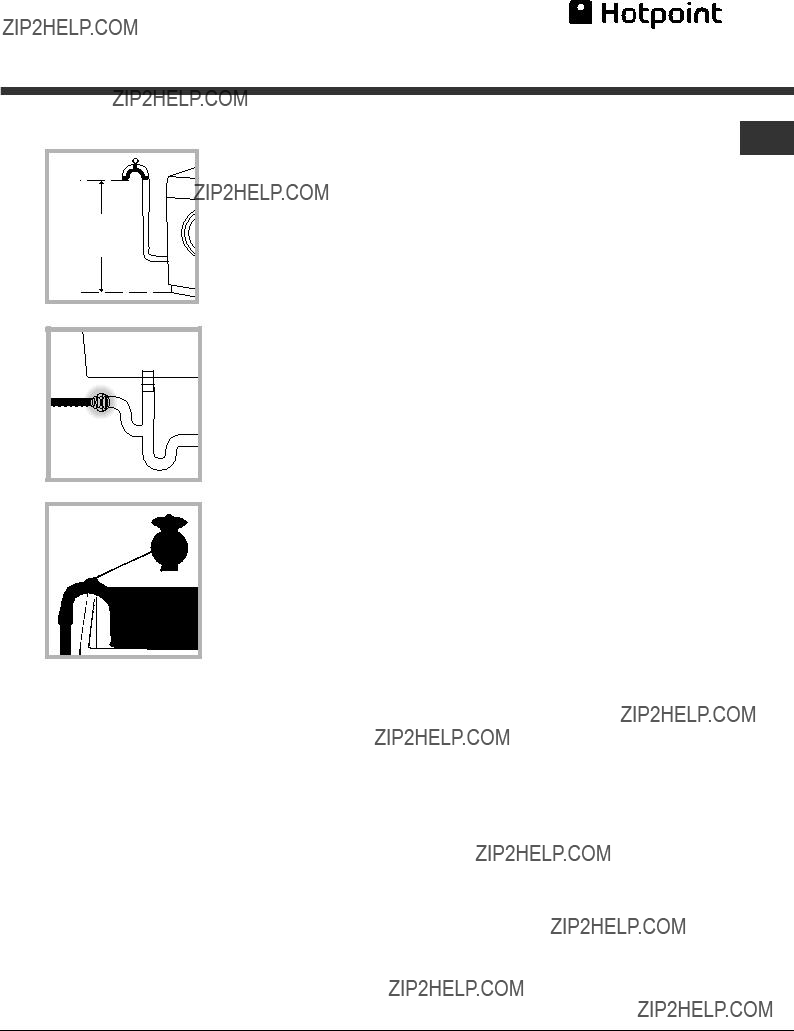
2. make sure the water level
inside the machine is lower than the door opening; if
it is not, remove excess water using the drain hose,
collecting it in a bucket as indicated in the figure.
3. remove the cover panel on the lower front part of
the washing machine (see overleaf).
4. pull outwards using the tab as indicated in the figure, until the plastic tie-rod is freed from its stop position; pull downwards until you hear a ???click???, which indicates that the door is now unlocked.
5. open the door; if this is still not possible repeat the procedure.
6. reposition the panel, making sure the hooks are securely in place before you push it onto the appliance.

 washing additives compartment
 button briefly and wait for the machine to start up again.
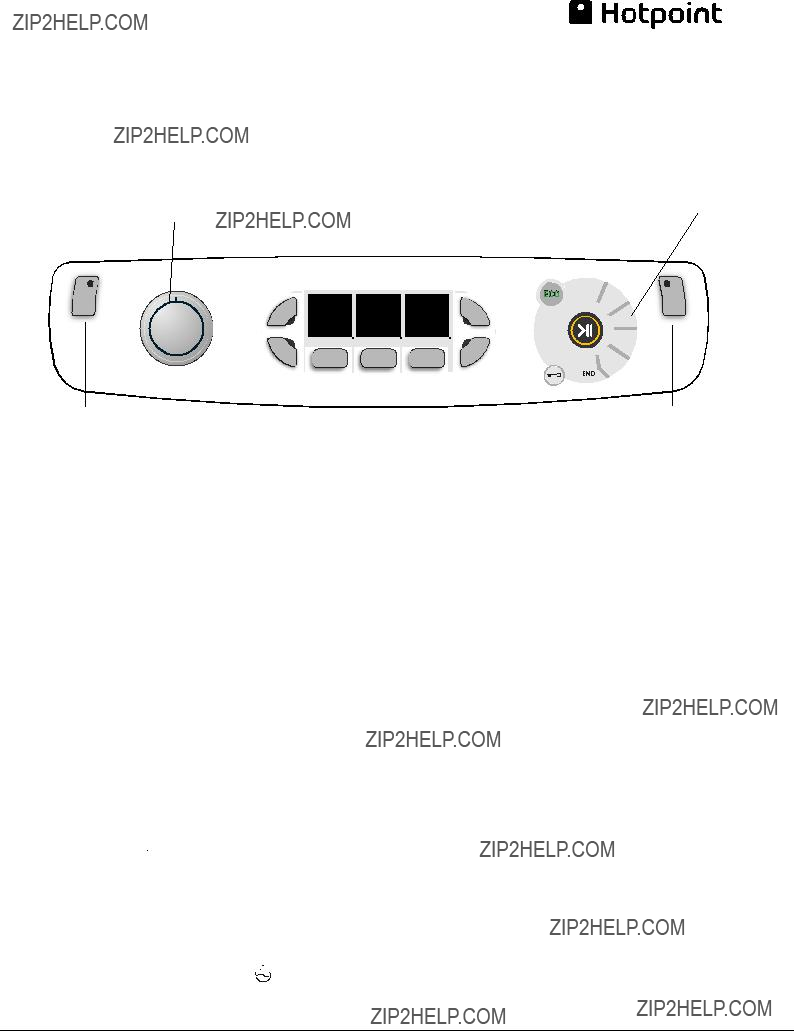
 ON/OFF indicator light: press this briefly to switch the machine on or off. The green indicator light indicates that the machine is switched on. To switch off the washer dryer during the wash cycle, press and hold the button for approximately 3 seconds; if the button is pressed briefly or accidentally the machine will not switch off. If the machine is switched off during a wash cycle, this wash cycle will be cancelled.
 button: press to modify or exclude the temperature setting; the value selected will appear on the display above
  : press to decrease or exclude drying; the selected drying level or time will appear on the display
  button: press to set a DELAY TIMER for the selected wash cycle; the set delay time will appear on the display above
  ??? Spin/Drain
  ??? Drain
  ).
).

 lights up when the cycle is complete.
 indicator light is switched off, the door may be opened. To start the wash cycle from the point at which it was interrupted, press the button again.
 indicator light: indicates that the porthole door is locked. To open the door, pause the wash cycle (see ???
 button with indicator light: to activate or deactivate the CHILD LOCK, press and hold the button for approximately 2 seconds. when the indicator light

 icon lights up when, after altering the washing parameters, an energy saving of at least 10% is made. Furthermore, before the machine enters ???Standby??? mode, the icon will light up for a few
 button. All the indicator lights will illuminate for 1 second; the
 button will then remain lit in a fixed manner and the START/PAUSE indicator light will flash slowly.
 Modify the temperature.
 button, until the cold wash ???
 ??? setting is reached. If these buttons are pressed again, the maximum values are restored.
 Setting the drying cycle

 ). If these buttons are pressed again, the maximum values are restored.
 -
- -
-
 )
) .
. Set a DELAY TIMER.
 symbol flashes.
 symbol and the cycle duration will appear on the display. Press the button once to display the selected delay time. To remove the DELAY TIMER option, press the button until the display shows the text OFF; the
  symbol will disappear.


 Modify the cycle settings.

 indicator light is switched off you may open the door. Press the START/PAUSE button again to restart the wash cycle from the point at which it was interrupted.
 button until the cycle stops and the machine switches off.
 with a temperature of 60??C.
 with a temperature of 40??C.
 with a temperature of 40??C.


 Steam Hygiene


 ???.
???. ,
,  ,
,  ,
,  ,
,  ,
,  ,
,  ,
,  ,
,  .
. Slow Spin


 .
. ,
, 


 ,
,  ,
,  ,
,  ,
,  ,
,  ,
,  .
. Time Saver


 ,
,  ,
,  ,
,  ,
,  .
. Eco Option


 ???. The garments will be damp once the cycle is completed, so we recommend hanging them to dry. The ???

 ??? programme makes ironing easier. Moreover, with the ???Steam Perfume??? laundry balls, your favourite perfume can be added to your laundry. Place a few drops of perfume on the sponge contained inside the laundry ball, close it and insert it into the drum together with the laundry. Then launch the specific programme ???


 ???. At the end of the cycle, garments will be relaxed and fragrant.
 wash cycle to remove
 wash cycle to wash all silk garments. We recommend the use of special detergent which has been designed to wash delicate clothes. Curtains: use the ???Silk???
  wash cycle. Fold curtains and place them in a pillow case or mesh bag.
 on the label. The ???Wool??? wash cycle can be used
 (Silk) and helps to prevent the formation of creases.
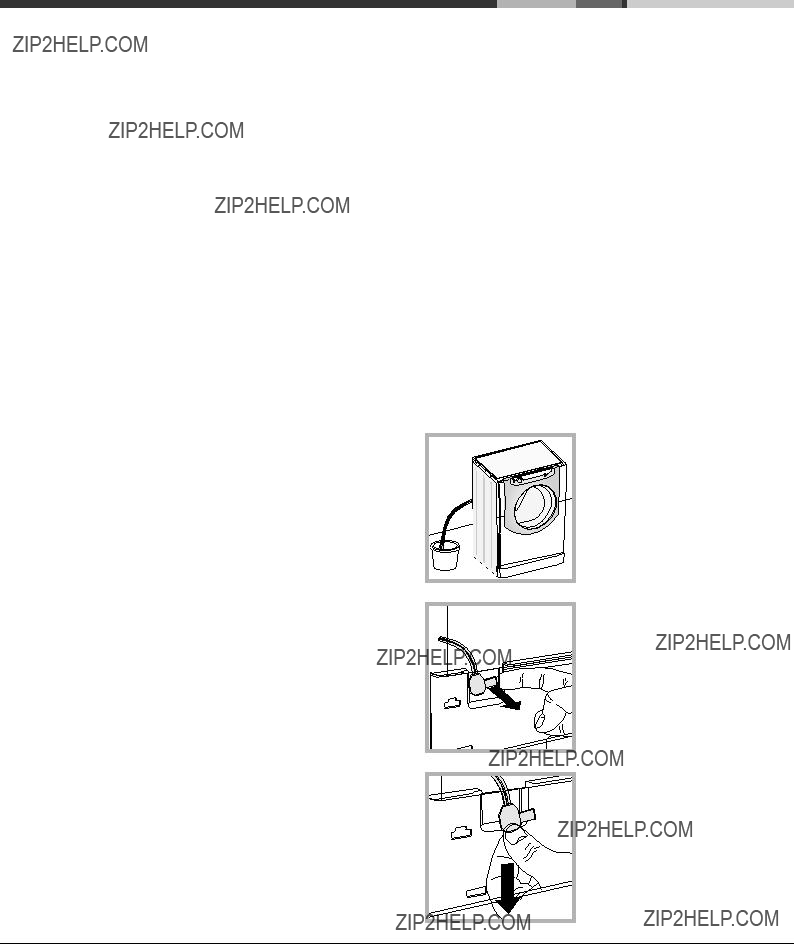


 ??? position


 Recycling & Disposal Information