OPERATOR???S MANUAL
ELECTRIC LAWN MOWER
18 in. ??? UT13118
20 in. ??? UT13120
Your lawn mower has been engineered and manufactured to our high standard for dependability, ease of operation, and operator safety. Properly cared for, it will give you years of rugged, trouble-free performance.
WARNING: To reduce the risk of injury, the user must read and understand the operator???s manual before using this product.
Thank you for your purchase.
SAVE THIS MANUAL FOR FUTURE REFERENCE
This product has many features for making its use more pleasant and enjoyable. Safety, performance, and dependability have been given top priority in the design of this product making it easy to maintain and operate.
Page 2
SYMBOLS
Some of the following symbols may be used on this product. Please study them and learn their meaning. Proper interpretation of these symbols will allow you to operate the product better and safer.
Page 5
SYMBOLS
The following signal words and meanings are intended to explain the levels of risk associated with this product.
SERVICE
Servicing requires extreme care and knowledge and should be performed only by a qualified service technician. For service we suggest you return the product to your nearest
AUTHORIZED SERVICE CENTER for repair. When servic- ing, use only identical replacement parts.
WARNING:
To avoid serious personal injury, do not attempt to use this product until you read thoroughly and understand com- pletely the operator???s manual. If you do not understand the warnings and instructions in the operator???s manual, do not use this product. Call Homelite customer service for assistance.
 WARNING:
The operation of any power tool can result in foreign objects being thrown into your eyes, which can re- sult in severe eye damage. Before beginning power tool operation, always wear safety goggles or safety glasses with side shields and, when needed, a full face shield. We recommend Wide Vision Safety Mask for use over eyeglasses or standard safety glasses with side shields. Always use eye protection which is marked to comply with ANSI Z87.1.
SAVE THESE INSTRUCTIONS
Page 6
CORD
RETAINER


 GRASS CATCHER
  (MODEL UT13120 ONLY)
HEIGHT ADJUSTMENT
LEVER
MOTOR/BLADE
CONTROL ASSEMBLY
Fig. 2
Page 8

KNOW YOUR LAWN MOWER
See Figure 2.
The safe use of this product requires an understanding of the information on the product and in this operator???s manual as well as a knowledge of the project you are attempting. Before use of this product, familiarize yourself with all oper- ating features and safety rules.
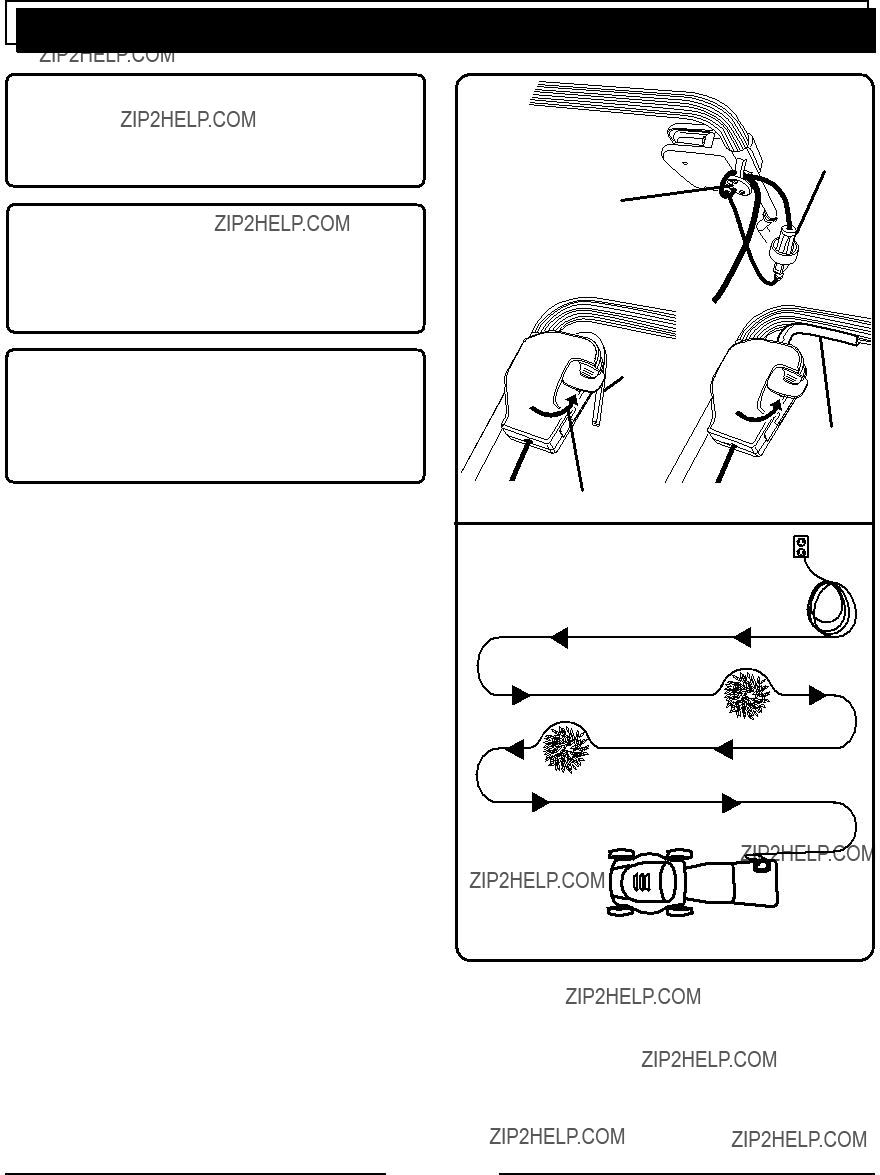
CORD RETAINER
A convenient cord retainer helps keep the extension cord connection secure during mower operation.
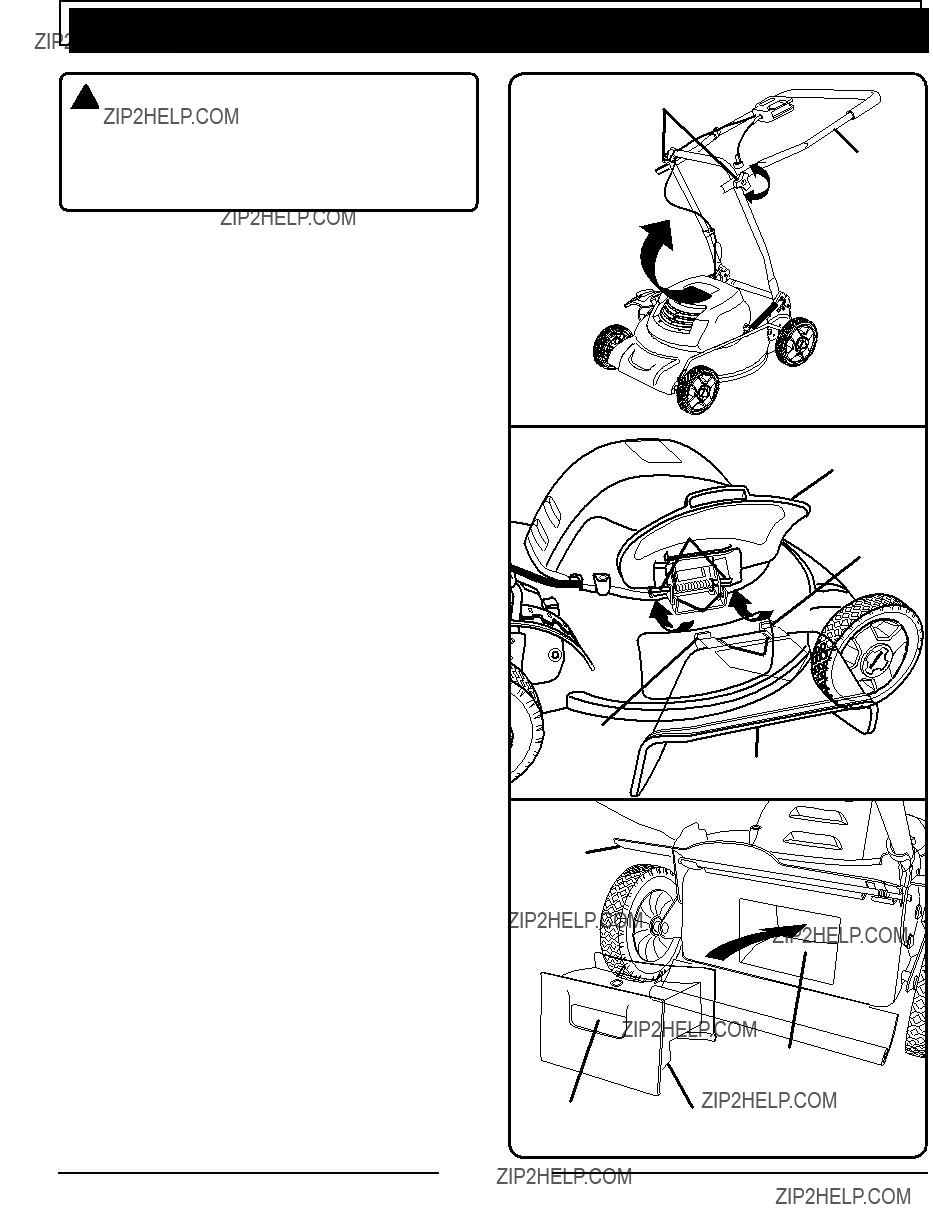
GRASS CATCHER (MODEL UT13120 ONLY)
The grass catcher prevents grass clippings being strewn across your lawn as you mow.
MOTOR/BLADE CONTROL ASSEMBLY
The motor/blade control, located on the upper handle of the mower, engages and disengages the motor and blade.
MULCHING PLUG (MODEL UT13120 ONLY)
Your mower is equipped with a mulching plug that cuts and recuts the grass for finer clippings.
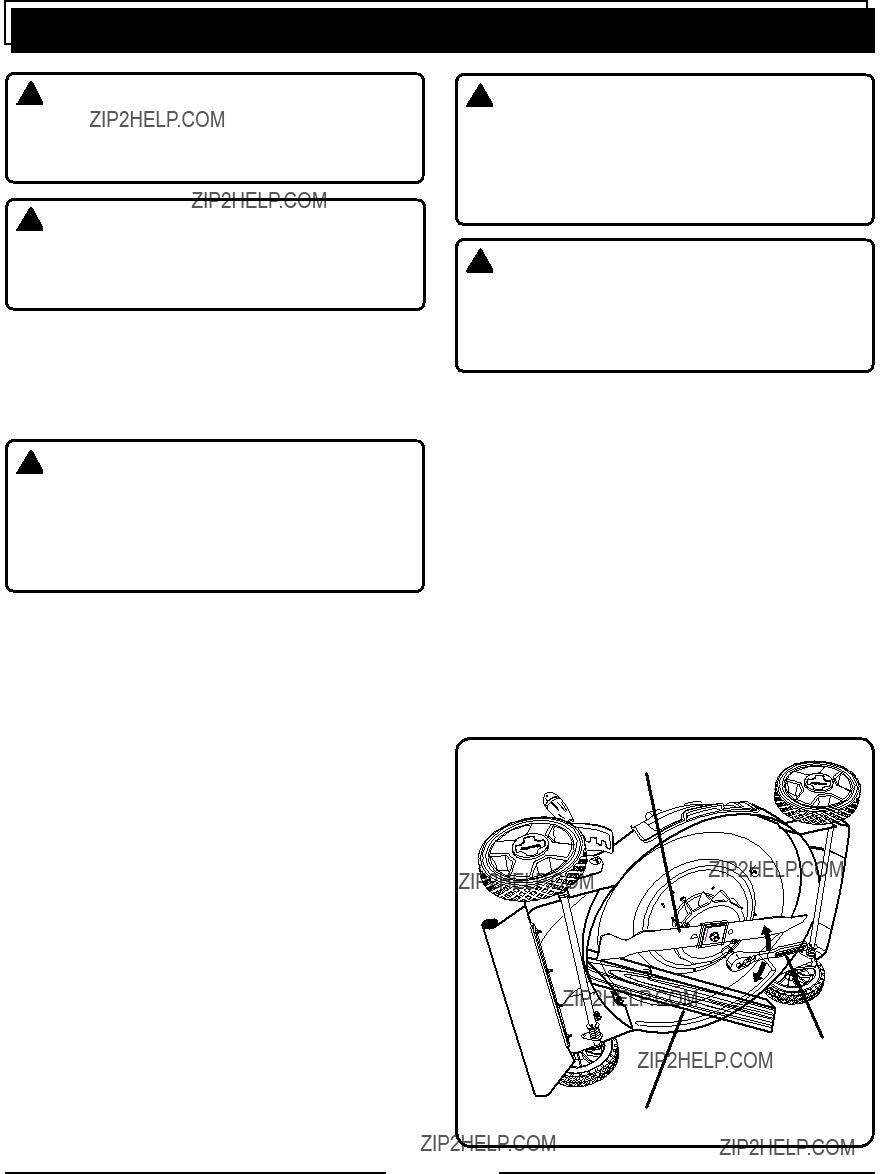
SIDE DISCHARGE DEFLECTOR
Use the side discharge deflector on your mower when the grass is too high to mulch or when side discharging is preferred. The grass clippings produced when using the side discharge deflector are noticeably larger than those produced when using the mulching plug.
HEIGHT ADJUSTMENT LEVER
The height adjustment lever provides cutting height adjustments.
ASSEMBLY
UNPACKING
This product requires assembly.
???Carefully remove the product and any accessories from the box. Make sure that all items listed in the packing list are included.
???Inspect the product carefully to make sure no breakage or damage occurred during shipping.
???Do not discard the packing material until you have care- fully inspected and satisfactorily operated the product.
???If any parts are damaged or missing, please call 1-866-457-5888 for assistance.
PACKING LIST
Mower
Side Discharge Deflector
Mulching Plug (Model UT13120 only)
Grass Catcher (Model UT13120 only)
Operator???s Manual
WARNING:
If any parts are damaged or missing do not operate this product until the parts are replaced. Failure to heed this warning so could result in serious personal injury.
 WARNING:
Do not attempt to modify this product or create acces- sories not recommended for use with this product. Any such alteration or modification is misuse and could result in a hazardous condition leading to possible serious personal injury.
WARNING:
Do not connect to power supply until assembly is complete. Failure to comply could result in accidental starting and possible serious personal injury.
TROUBLESHOOTING
CALL US FIRST
For any questions about operating or maintaining your product, call the Homelite?? Help Line!
Your product has been fully tested prior to shipment to ensure your complete satisfaction.
Page 17
WARRANTY
LIMITED WARRANTY FOR CORDED ELECTRIC MODELS.
This product is manufactured for the Great States Corporation lawn mower company under license from Homelite Consumer Products, Inc. Great States Corporation, Shelbyville, Indiana, has been making lawn mowers for over 100 years and it warrants to the original owner that each new product and service part is free from defects in material and workmanship and agrees to repair or replace under this warranty any defective product or part from the original date of purchase for two (2) years except for the conditions and circumstances listed below.
THIS WARRANTY IS NOT TRANSFERABLE AND DOES NOT COVER:
?????? Products sold damaged or incomplete, sold ???as is???, sold reconditioned, or used as rental equipment.
???Delivery, installation, or normal adjustments explained in the operator???s manual.
???Damage or liability caused by shipping, improper handling, improper installation, incorrect voltage or improper wiring, improper maintenance, improper modification, or the use of accessories and/or attachments not specifically recommended.
???Repairs necessary because of operator abuse or negligence, or the failure to install, operate, maintain, and store the product according to the instructions in the operator???s manual.
???Damage caused by cold, heat, rain, excessive humidity, corrosive environments and materials, or other contaminants.
???Expendable items that become worn during normal use.
???Cosmetic defects that do not interfere with tool functionality.
???Freight costs from customer to vendor.
???Repair and transportation costs of products or parts determined not to be defective.
???ANY INCIDENTAL, INDIRECT, OR CONSEQUENTIAL LOSS, DAMAGE, OR EXPENSE THAT MAY RESULT FROM ANY DEFECT, FAILURE, OR MALFUNCTION OF THE PRODUCT. Some states do not allow the exclusion or limitation on how long an implied warranty lasts, so the above limitations may not apply to you.
???ANY NON-RESIDENTIAL USE OR COMMERCIAL USE VOIDS ALL WARRANTIES.
CALL US FIRST !!
Call us first with questions about operating or maintaining your lawn mower at 1-866-457-5888 between 7:30 a.m. ??? 4:30 p.m. Eastern Standard Time, or send emails to homelite@reelin.com.
Page 20
OPERATOR???S MANUAL
ELECTRIC LAWN MOWER
18 in. ??? UT13118
20 in. ??? UT13120
SERVICE
For parts or service, contact your nearest Homelite authorized service dealer. Be sure to provide all relevant information when you call or visit. For the location of the authorized service dealer nearest you, please call 1-866-457-5888 or visit us online at www.homelite.com.
REPAIR PARTS
The model number of this tool is found on a plate or label attached to the housing. Please record the serial number in the space provided below.
MODEL NUMBER ___________________
SERIAL NUMBER ___________________
HOMELITE CONSUMER PRODUCTS, INC.
1428 Pearman Dairy Road
Anderson, SC 29625
Phone 1-866-457-5888 www.homelite.com
987000-034
11-8-06 (REV:00)


 LOWER
LOWER HE
HE
 WARNING:
 WARNING:
 WARNING:


 WHEEL AXLE
 UPPER
UPPER

 MOUNTING


