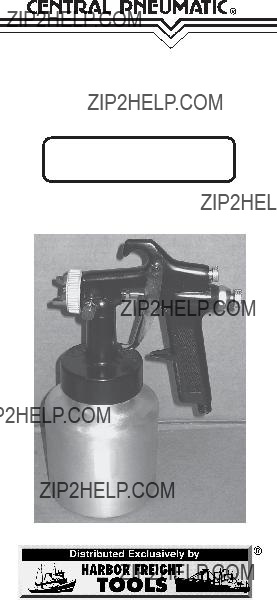
LVLP Spray Gun

92841

ASSEMBLY AND OPERATING INSTRUCTIONS

3491 Mission Oaks Blvd., Camarillo, CA 93011

Visit our Web site at http://www.harborfreight.com

Copyright ?? 2005 by Harbor Freight Tools??. All rights reserved. No portion of this manual or any artwork contained herein may be reproduced in any shape or form without the express written consent of Harbor Freight Tools.

For technical questions and replacement parts, please call 1-800-444-3353

Specifications

NOTE: This is a LVLP (Low Volume Low Pressure) spray gun.

Save This Manual

You will need the manual for the safety warnings and precautions, assembly instructions, operating and maintenance procedures, parts list and diagram. Keep your invoice with this manual. Write the invoice number on the inside of the front cover. Keep the manual and invoice in a safe and dry place for future reference.

Safety Warnings and Precautions

WARNING: When using tool, basic safety precautions should always be fol- lowed to reduce the risk of personal injury and damage to equipment.

Read all instructions before using this tool!

1.Keep work area clean. Cluttered areas invite injuries.

2.Observe work area conditions. Do not use this sprayer in damp or wet locations. Don???t expose to rain. Keep work area well lit. Do not use electrically powered compressors in the presence of flammable gases or liquids.

3.Keep children away. Children must never be allowed in the work area. Do not let them handle air lines, machines, tools, or extension cords.

4.Store idle equipment. When not in use, tools must be stored in a dry location to inhibit rust. Always lock up tools and keep out of reach of children.

5.Use the right tool for the job. Do not attempt to force a small tool or attachment to do the work of a larger industrial tool. There are certain applications for which this tool was designed. It will do the job better and more safely at the rate for which it was intended. Do not modify this tool and do not use this tool for a purpose for which it was not intended.

REV 04/05

6.Dress properly. Protective, electrically non-conductive clothes and non-skid footwear are recommended when working. Wear restrictive hair covering to contain long hair.

7.Use eye protection. Always wear ANSI approved impact safety goggles. Wear an ANSI approved dust mask and respirator when working around paint spray, chemical dusts and mists.

8.Do not overreach. Keep proper footing and balance at all times. Do not reach over or across running machines.

9.Maintain tools with care. Keep tools maintained and clean for better and safer performance.Follow instructions for lubricating and changing accessories. Inspect tool cords periodically and, if damaged, have them repaired by a qualified technician. The handle must be kept clean, dry, and free from oil and grease at all times.

10.Disconnect power. Disconnect tool from air supply when not in use.

11.Remove adjusting keys and wrenches. Check that keys and adjusting wrenches are removed from the tool or machine work surface before plugging it in.

12.Stay alert. Watch what you are doing, use common sense. Do not operate any tool when you are tired.

13.Check for damaged parts. Before using any tool, any part that appears damaged should be carefully checked to determine that it will operate properly and perform its intended function. Check for alignment and binding of moving parts; any broken parts or mounting fixtures; and any other condition that may affect proper operation. Any part that is damaged should be properly repaired or replaced by a qualified technician. Do not use the tool if the trigger does not operate properly.

14.Replacement parts and accessories. When servicing, use only identical replacement parts. Use of any other parts will void the warranty. Only use accessories intended for use with this tool. Approved accessories are available from Harbor Freight Tools.

15.Do not operate tool if under the influence of alcohol or drugs. Read warning labels on prescriptions to determine if your judgment or reflexes are impaired while taking drugs. If there is any doubt, do not operate the tool.

16.WARNING: The brass components of this product contain lead,a chemical known to the State of California to cause birth defects (or other reproductive harm). (California Health & Safety code ?? 25249.5, et seq.)

17.Maintenance. For your safety, service and maintenance should be performed regularly by a qualified technician.

Special Warnings About Paint Sprayers

Warning: The warnings, cautions, and instructions discussed in this instruc- tion manual cannot cover all possible conditions and situations that may oc- cur. It must be understood by the operator that common sense and caution are factors which cannot be built into this product, but must be supplied by the operator.

Unpacking

When unpacking, check to make sure the following parts are included.

LVLP Spray Gun

Paint Cup

If any parts are missing or broken, please call Harbor Freight Tools at the number on the cover of this manual.

REV 04/05

Spray

Gun

Assembly

First, prepare your air supply.

1.This tool operates within a pressure range of 20 - 45 psi, and consumes 5.5 CFM of air at 45 psi. Provide yourself with a compressed air supply which will meet these requirements. Air compressors and related supplies are available from Harbor Freight Tools.

2.For best results, arrange your compressed air supply to include a filter and regulator as indicated in the schematic diagram above. The addition of quick connect air valves, reel and other features will enhance

your air supply.

3.Attach your air hose (not supplied) to the Spray Gun at the Nipple (36), at the base of the handle. At your option, you may first attach a quick connect valve (not supplied) to the Nipple (36) to attach with your air hose.

4.Attach the Paint Cup (35) to Reservoir Cap (32) on the bottom of the Spray Gun, as shown in the photo.

Trigger (26)

Reservoir Cap

(32)

Nipple (36)

Paint Cup (35)

REV 04/05

Operation

1.Prepare the work piece to be painted according to paint manufacturer???s directions. Prepare your paint mixture according to paint manufacturer???s directions. NOTE: In most cases, paint must be thinned for proper spraying. Be sure to use a thinner recommended by the paint manufacturer.

2.Fill the Paint Cup (35) no more than 2/3 full with your paint mixture. Screw the Reservoir into the Reservoir Cap (32) being sure the Reservoir Seal (33) is in place.

3.Turn on your air compressor, and adjust the regulator to the recommended pressure (20 - 45 PSI).

4.IMPORTANT: Before applying paint to your work piece, test spray a piece of scrap material. In most cases both the paint mixture and spray pattern will have to be adjusted for best results.

5.To spray, squeeze the Trigger (26), as you move the Sprayer past the work material. Release the Trigger (26) at the end of each pass. Repeat until you have proper paint coverage of the work piece.

6.When you have completed painting your project, disconnect the Sprayer from its air pressure source and immediately clean following the directions in the Maintenance section on page 8.

Painting Tips

Successful spray painting is a skill which requires knowledge of your equipment, familiarity with your paint materials and experience. Differences in paints, work materials and environmental conditions make every painting task unique. For best results, practice with your painting mixture on a scrap piece before beginning to paint your work material.

It is critical that the surface be properly prepared before painting. It will be difficult to achieve a satisfactory painted surface if the original surface is dirty, rough or wet.

Paint Mixture:

Each paint mixture will vary. You may use solvent or water based paints. Each of these causes a different paint viscosity, and has a different flow rate and drying time. High viscosity is thick, like syrup. Low viscosity is thin, like water.

The purpose of the solvent is to make the paint liquid so it can be applied. Once applied, the solvent evaporates, leaving the pigment and its binders in place. The solvent is also used as a clean up medium. Paint mixtures which are to be sprayed are generally less viscous (thinner) than mixtures which are to be applied with a brush. Thus you will most often have to add extra solvent to a paint which is to be sprayed.

When paint is sprayed, it is broken into tiny droplets, then blown by high- pressure air onto the surface. During this spraying process, the surface of each paint droplet will begin to dry. When it hits the work material, the droplet must liquefy again, and mix with the droplets hitting alongside it. Ideally, these droplets will mix evenly forming a smooth surface.

If the paint mixture is too thick, the droplets will not form a smooth layer, and the resulting surface can be described as ???pebbly??? or ???orange peel???. If the paint mixture is too thin, the paint will run, forming long drips before they are thick enough to form a satisfactory coat. Vertical surfaces are more prone to ???run??? than horizontal surfaces due to the effect of gravity.

Applying the Paint:

In most cases, it is best to move the paint spray from side to side, over- lapping the previous paint. In this way you will gradually build up the paint layer without leaving any obvious edges.

To paint in this way, the spray pattern should be set to vertical.

It is important to prevent excess paint at the beginning and end of each stroke. Holding the sprayer away from the work piece, squeeze the trigger to start the spray. Then move the spray gun in to within 14-16 inches of the work piece. Move the sprayer smoothly across the work piece, keeping a consistent distance. At the end of each stroke, pull the sprayer away from the work piece as you release the trigger.

As you work, carefully observe the way the paint accumulates on the work surface. It is more important to maintain a good paint surface than to form an opaque (thick) paint coat.You can always apply a second coat to get the coverage you want. If the surface is ruined, however, you will have to start over with surface preparation.

If the surface does not smooth out in a few seconds after applying the paint, your paint mixture is probably too thick. Thin your paint slightly and test on a piece of scrap material. If the paint goes on very thin and threatens to run, stop spraying immediately. Add more paint to your mixture to thicken the paint. Test on a piece of scrap material before resuming work.
HOW TO ADJUST PAINT FLOW AND AIR PRESSURE

To adjust the spray pattern, loosen the Nozzle Lock Ring (1) by turning it counterclockwise, then rotate the Air Nozzle (2), then retighten the Nozzle Lock Ring (1). For a vertical spray pattern, the ???ears??? of the Air Nozzle (2) should be horizontal. For a horizontal pattern, the ???ears??? should be vertical. In other words, the position of the Air Nozzle and the spray pattern are opposite.

Further adjustment of the spray pattern may be made by adjusting the Spray Control Knob (27).

To control the amount of paint mixture being sprayed, adjust the Fluid Valve Control Knob (23). Turning the Knob clock- wise will reduce the amount of paint, turning it counterclockwise will increase the amount of paint available.

To control the amount of air pressure passing through the Sprayer, adjust the Air Control Knob (12). Turning the Knob clockwise will reduce the air pressure, and turning it counterclockwise will increase the air pressure. CAUTION: Do not overtighten the Knob, as this will cut off the air supply, and may damage the Air Control Seal (10).

Spray

Control

Knob (27)

Air

Control

Knob (12)

Fluid

Control

Knob (23)

Maintenance

After each use, thoroughly clean the spray gun.

1.Empty the Paint Reservoir of paint, and wipe it out with a clean rag.

2.Fill the Paint Reservoir about half way with the solvent which is appropriate for the paint you have sprayed.

3.Spray the solvent into an appropriate receptacle for proper disposal. Continue to spray until paint in the interior of the Spray Gun is ejected and the solvent spray is clear.

4.Using a clean rag wetted with solvent, wipe off the Spray Gun to remove paint from the exterior.

5.Store your paint sprayer in a clean dry place.

Troubleshooting

Parts List

PLEASE READ THE FOLLOWING CAREFULLY

THE MANUFACTURER AND/OR DISTRIBUTOR HAS PROVIDED THE PARTS DIAGRAM IN

THIS MANUAL AS A REFERENCE TOOL ONLY. NEITHER THE MANUFACTURER NOR

DISTRIBUTOR MAKES ANY REPRESENTATION OR WARRANTY OF ANY KIND TO THE

BUYER THAT HE OR SHE IS QUALIFIED TO MAKE ANY REPAIRS TO THE PRODUCT OR

THAT HE OR SHE IS QUALIFIED TO REPLACE ANY PARTS OF THE PRODUCT. IN FACT,

THE MANUFACTURER AND/OR DISTRIBUTOR EXPRESSLY STATES THAT ALL REPAIRS

AND PARTS REPLACEMENTS SHOULD BE UNDERTAKEN BY CERTIFIED AND LICENSED

TECHNICIANS AND NOT BY THE BUYER.THE BUYER ASSUMES ALL RISK AND LIABILITY

ARISING OUT OF HIS OR HER REPAIRS TOTHE ORIGINAL PRODUCT OR REPLACEMENT

PARTS THERETO, OR ARISING OUT OF HIS OR HER INSTALLATION OF REPLACEMENT

PARTS THERETO.

Assembly Drawing

NOTE: Some parts are listed and shown for illustration purposes only and are not available individually as replacement parts.