5.Do not cut or re-wire any part of the Off Road Light.
6.Light for off road use exclusively. Make certain to follow all local DMV (Depart- ment of Motor Vehicles) laws regarding vehicles and lighting systems.
7.If it is necessary to drill any holes in your vehicle, be sure to read and adhere to the manual of the drill you are using. When drilling holes, beware of any hidden electrical lines or cables. Make sure you do not damage or weaken the structural integrity of the vehicle.
8.Maintain labels and nameplates on the tool. These carry important information. If unreadable or missing, contact Harbor Freight Tools for a replacement.
9.The brass components of this product contain lead, a chemical known to the State of California to cause birth defects (or other reproductive harm). (Cali- fornia Health & Safety code ?? 25249.5,et seq.)
10.Light becomes extremely hot during use. DO NOT touch or wash the Light for at least 10 minutes after use.
NOTE: When it becomes necessary to replace the Halogen Bulb in this 6??? Off Road Light, be sure to NEVER touch the glass of the Bulb with your fingers. The oil from your skin can cause more heat to be accumulated wherever the bulb is touched and this may reduce the life of the bulb. Always use a rag, or wear work gloves when replacing Halogen Bulbs. If the bulb is accidentally touched, clean it with rubbing alcohol and allow it to dry thoroughly before installing or using.
Unpacking
When unpacking, check to make sure that the item is intact and undamaged. If any parts are missing or broken, please call Harbor Freight Tools at the number shown on the cover of this manual as soon as possible. NOTE: No wires other than the attached pigtail wires are included with this Light.
Assembly Instructions
NOTE: For additional information regarding the parts listed in the following pages, refer to the Assembly Diagram near the end of this manual.
Tools needed are: Needle-nose pliers, wire cutter, small adjustable wrench and electric drill (all not included).
WARNING: Make sure the vehicle engine is off and the negative battery ter- minal is disconnected before beginning installation.
Turn vehicle engine off and disconnect battery.

 ??
??
 WARNING!

 Nut & Washer (8)
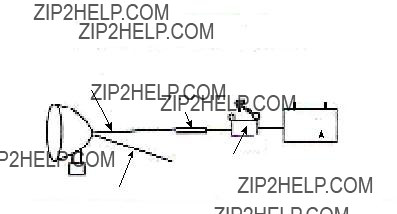


 4
4 8
8
 warranty